How to Build a Reclaimed Wood Sliding Barn Door
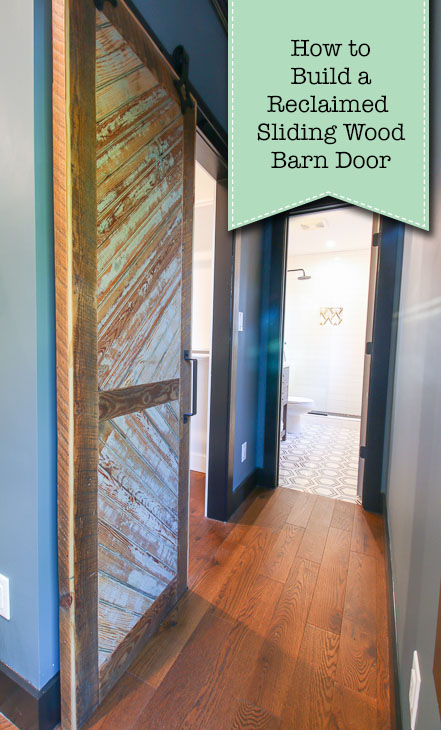
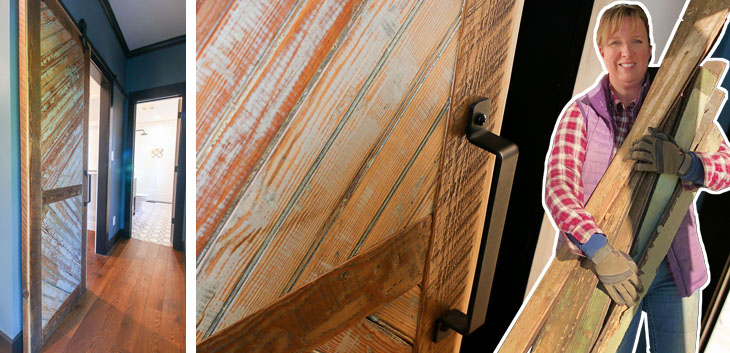
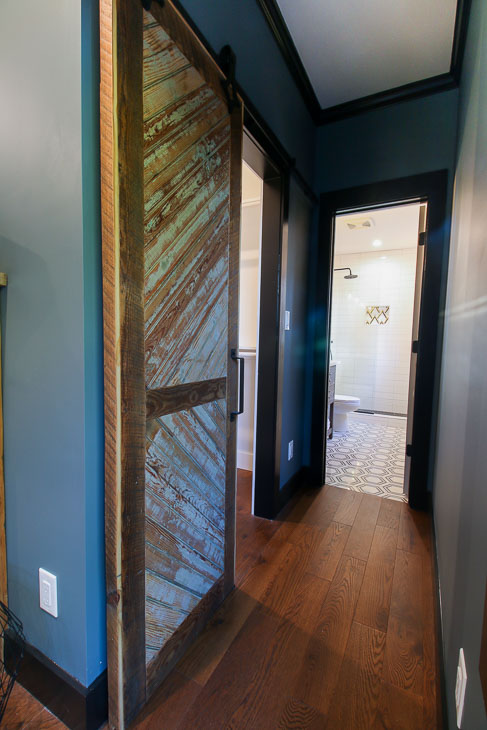
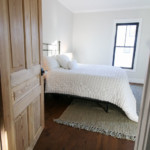
Earlier this week when I showed you the master bedroom in the Saving Etta house, you probably noticed the sliding barn door. I am in love with that door and especially excited that I was able to salvage the old beadboard and repurpose it as cladding on the barn door. Now it’s time to show you How to Build a Reclaimed Wood Sliding Barn Door. Let’s get building!
Notes about Materials:
To build your custom barn door you’re going to need to purchase a 4×8 sheet of plywood. The plywood will offer strength and rigidity and will add some thickness to the barn door. You don’t need to buy the finish grade plywood, instead purchase the cheapest plywood you can find because it will be covered up. One side will get a sheet of masonite bead board, and the other will be clad with the reclaimed lumber. And the sides will get trimmed out to hide the layers. So, as long as your plywood isn’t warped, it won’t matter how it looks. For my door I used 3/4″ plywood, but it was heavy. You may want to use 1/2″ plywood instead, but be sure to check the thickness requirements for your barn door track and hardware. This will ultimately dictate your width and weight!
Stripping Paint and Lead Paint Warning:
When you are using reclaimed wood, always test any paint with an instant lead check swab. Or treat it like it is lead paint. Because of the age of the bead board, I’m pretty sure my wood had lead paint. Before stripping lead paint, you definitely need to wear a dust mask or respirator and gloves. Eye protection is a good idea. And since my HEPA vacuum is loud, I wear hearing protection too.
Put down a plastic sheet under your work area and onto the floor. Make sure the sheet extends enough in each direction to catch any wayward paint chips.
The one thing you never want to do with lead paint is create airborne particles. This means you never want to dry sand it or use power tools to remove the paint. In the video, I’ll show you how I prefer to remove lead paint. In the past, I have used a chemical stripper like CitriStrip (although, the CitriStrip has a lot fewer chemicals than other strippers, it still makes a gooey mess). Instead, I found this ProScraper tool on Amazon and thanks to the recommendation of my friend at The Craftsman’s Blog, this is my new go to tool for paint stripping.
To use the ProScraper, clamp your wood to the table top. Use the ProScraper tool attached to a HEPA vacuum hose. While the vacuum is on, use firm pressure and pull the ProScraper towards you. It will take several passes to remove all the paint. Especially if your wood is old like mine and has over 100 years of paint layers on it.
After you finish scraping, be sure to vacuum up any paint chips and dust around your work area. Use a disposable damp rag to clean off the wood and remove any remaining dust.
When you are finished, place the damp rag and any other disposables into the center of the plastic sheet. Carefully gather the plastic sheet in towards its center. Deposit the plastic sheet and trash in a sealed plastic trash bag. Clean your work area to remove any remaining paint dust.
Tools & Materials:
(I’ve included affiliate links for your convenience. I earn a small percentage from a purchase using these links. There is no additional cost to you. You can read more about affiliate links here.)
- 4×8 sheet of plywood
- 4×8 sheet of masonite bead board
- Reclaimed bead board, siding, or other lumber
- ProScraper (paint scraper that attaches to vacuum cleaner)
- HEPA Shop Vac
- Makita Sliding Compound Miter Saw
- DeWalt Cordless Track Saw
- DeWalt Palm Sander
- Porter-Cable Cordless Brad Nailer
- Brad nails for nailer
- Gorilla Glue Construction Adhesive
- Caulk Gun
- RZ Dust Mask
- Rubber Gloves
- Plastic Sheeting
- General Finishes Flat Top Coat
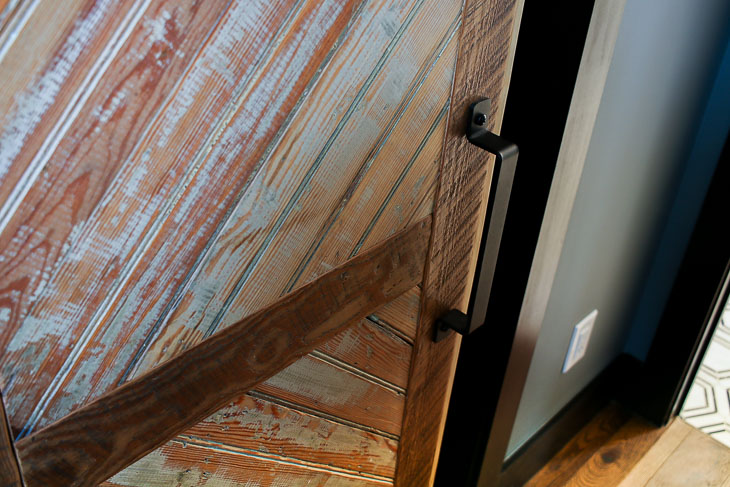
- Barn Door Hardware
- Barn Door Handle
In case you are curious, these are the other tools in my workshop
Video Tutorial:
Feel free to watch the full tutorial for making this reclaimed wood barn door below in the video tutorial.
Don’t forget to subscribe to my YouTube Channel for more DIY video tutorials and tips.

Instructions:
Time to cut your materials. Measure and mark the size of your door on the plywood and masonite beadboard sheet. (Be sure to add two inches to your door opening so the barn door will cover the opening.)
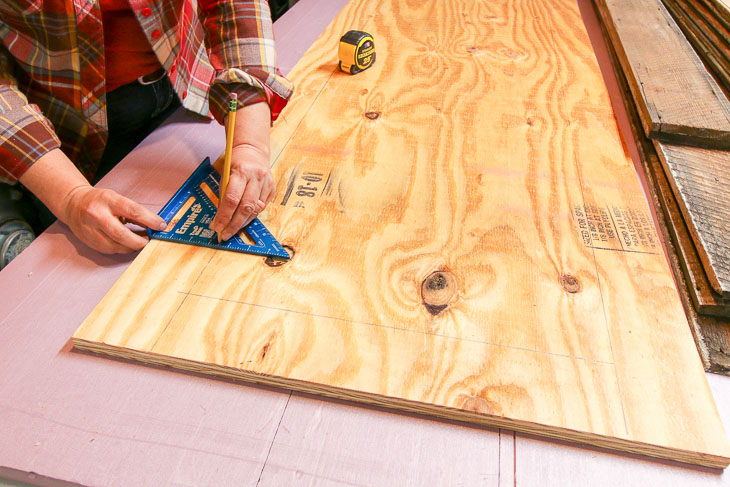
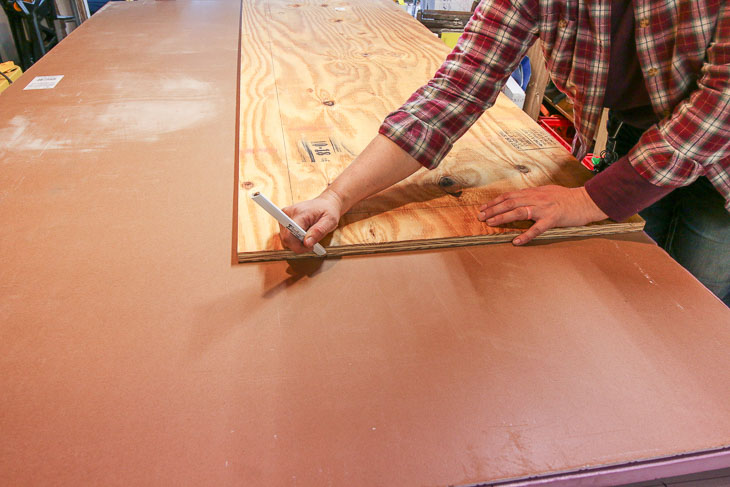
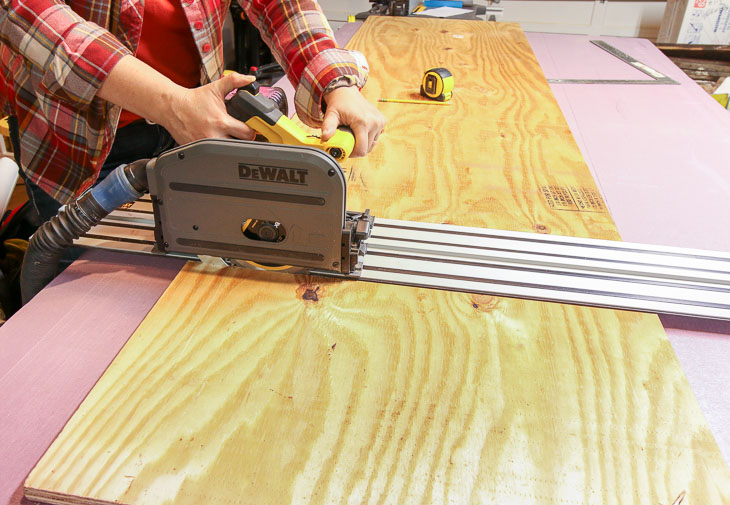
Cut your wood with a circular saw, or if you have one, use a track saw! I’ve found this battery-powered track saw by DeWalt to be invaluable for cutting down large sheets. Because it runs on batteries I can even bring it with me to the store and cut the materials in the parking lot if necessary!
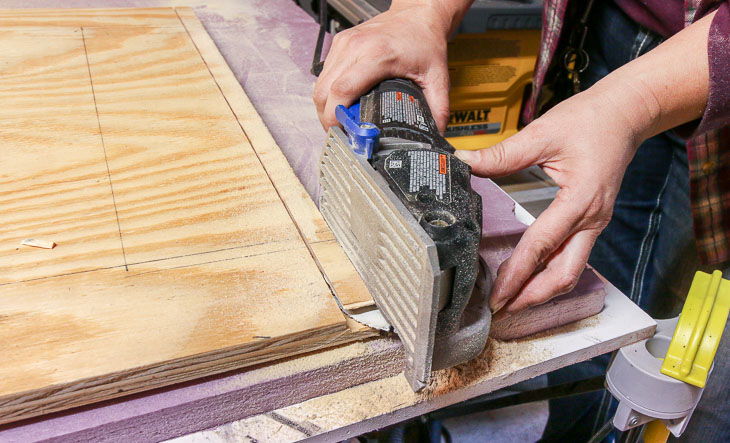
The hanging hardware for my barn door has a small bar that mounts on the floor. I needed to cut a groove into the bottom of my door to accept the bar and keep it from swinging back and forth when opening or closing.
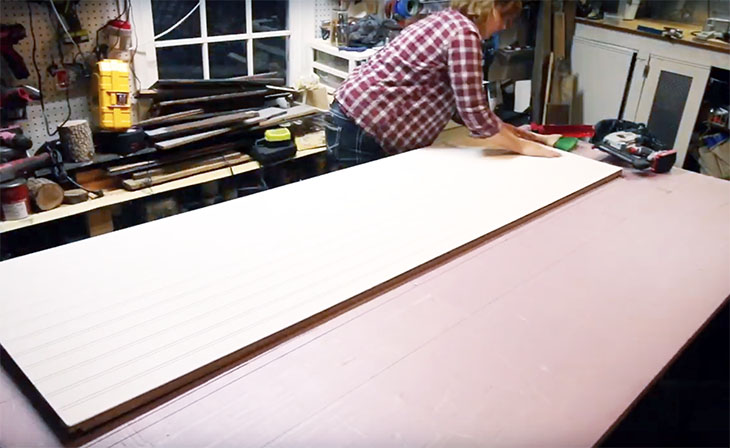
Add a fair amount of construction adhesive to one side of your plywood door. Then lay the masonite beadboard sheet onto the plywood and press firmly into the glue. Drive a few brad nails into the masonite to keep it in place as the glue cures.
Flip your door over and start laying out the border design. Did you know these are the back sides of the beadboard? So pretty!
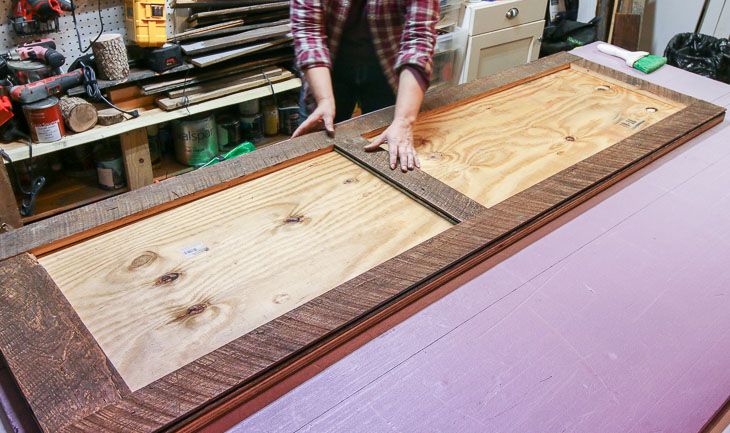
Apply construction adhesive under the border pieces and set them in place. Then add some brad nails to hold it until the glue cures.
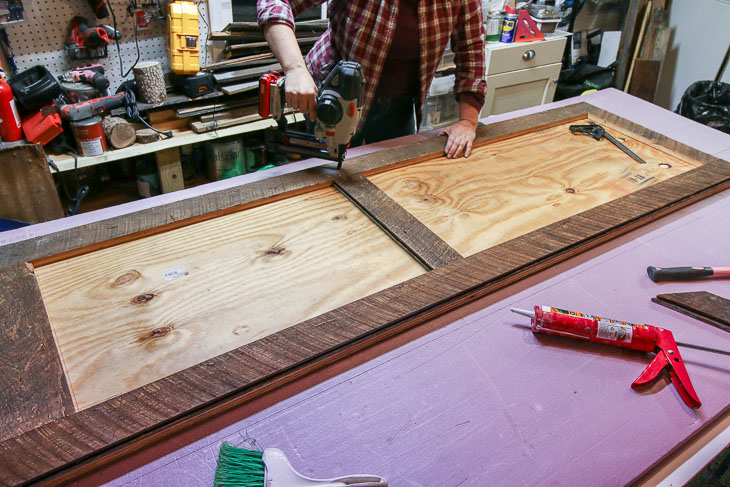
I decided to sand the border pieces to remove any rough edges and splinters, but made sure not to sand too much or I’d lose the dark weathered look.
To cut the interior beadboard pieces, cut one end of the boards at a 45˚ angle. Then set them into the border frame. Using a ruler and pencil, mark where to cut the other side.
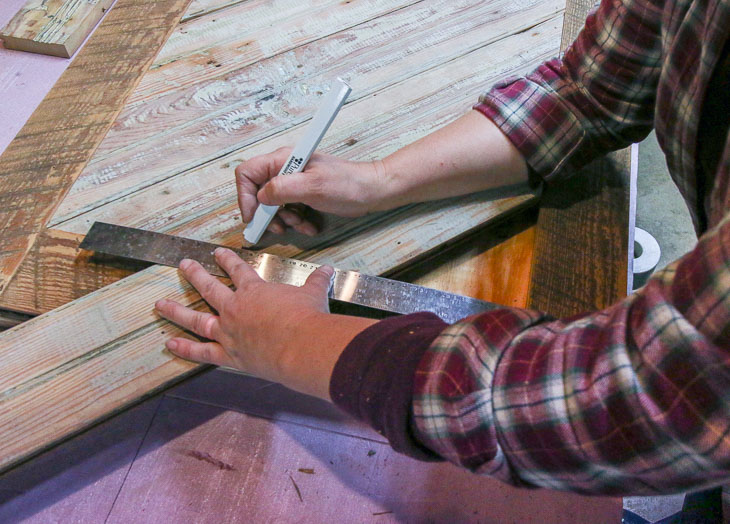
Test the fit of your bead board. Continue marking and cutting all the bead board pieces. Make sure they all fit before moving on.
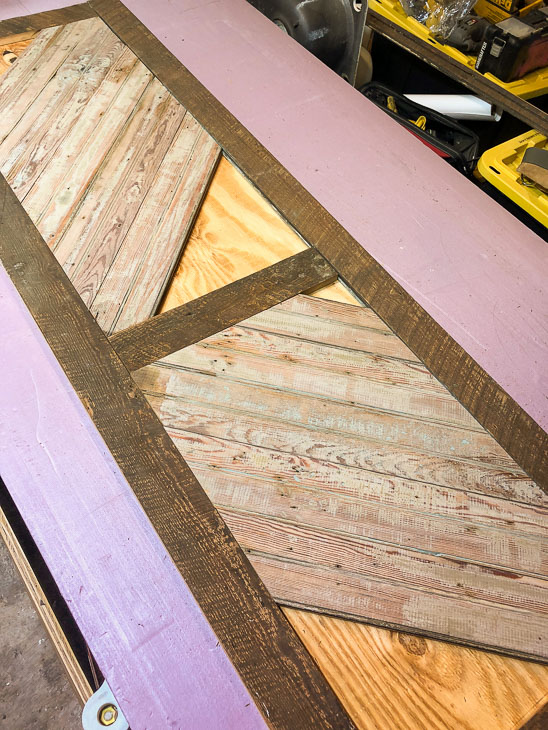
Secure all the interior pieces with construction adhesive and brad nails. You might find your last piece isn’t as wide as your boards, cut this piece on a band saw or jig saw if necessary and fit in place.
To hide the plywood, rip pieces of bead board or use flat trim to finish the edges of your door.

Use a polycrylic or water-based top coat to seal the door (and prevent exposure to any lead paint left on the door). I prefer the General Finishes High Performance Flat top coat. What I like about it is it has no sheen. The top coat protects the wood while letting the beauty of the grain show, and there’s no shine to detract from the wood.
And now onto the reveal!

I purchased the Barn Door Hardware and Barn Door Handle from Amazon and was very happy with the quality.
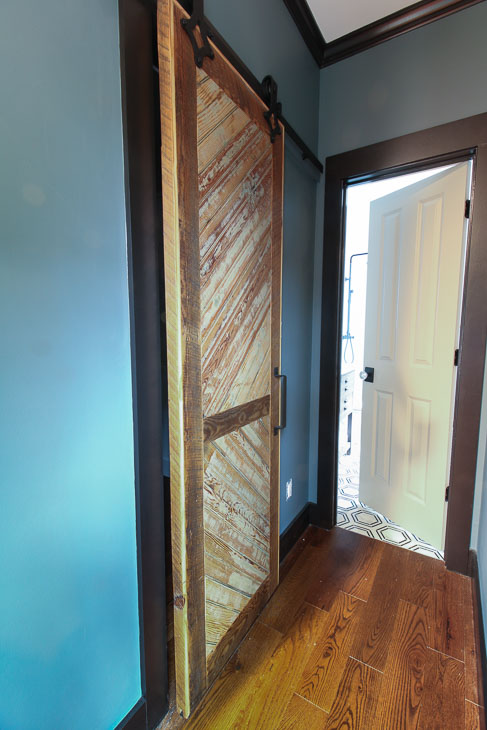
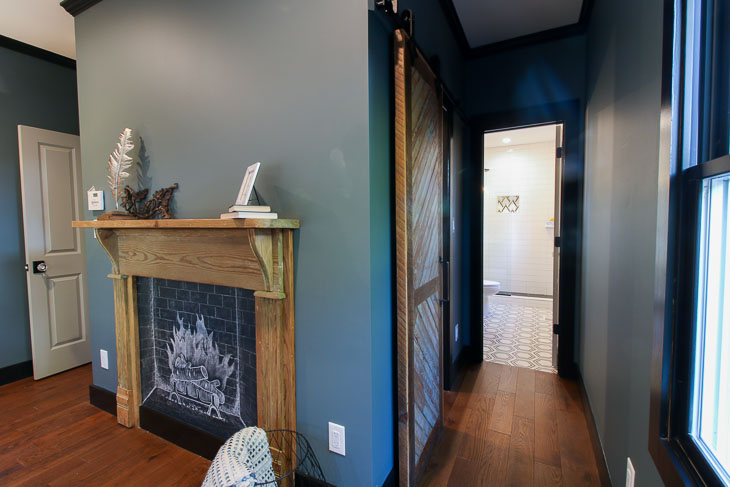
What do you think? Do you like how I reused the beadboard? I hope the door lives for decades in the Saving Etta home.
![]()
I have a question. Do you have to use the masonite bead board sheet? I ask because it won’t be seen on the other side of the door so why use it? Can I skip the masonite or does it serve a purpose? Thanks!
You do see it on the inside of the walk in closet when the door is closed.