cut out tray title

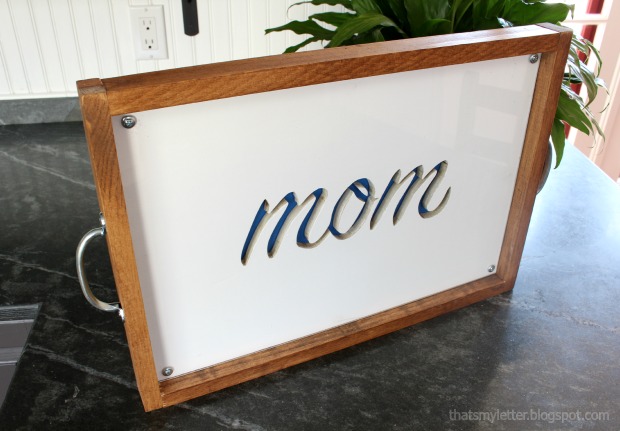
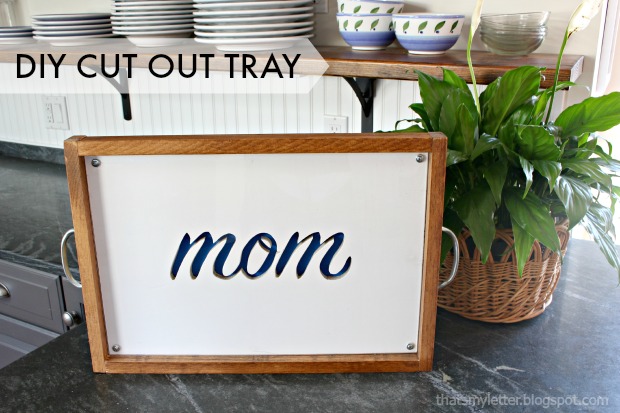
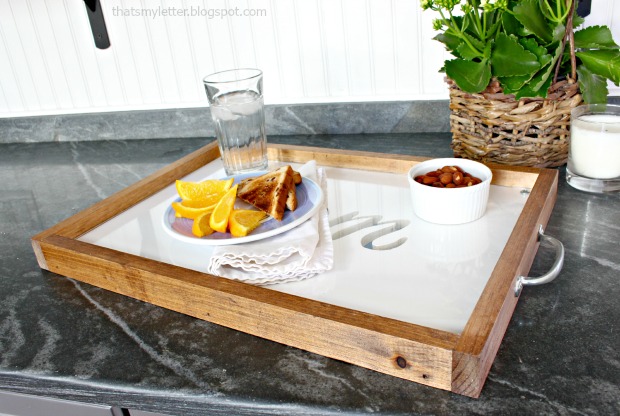
Happy Wednesday Pretty Handy readers.  Jaime here from That’s My Letter to share a DIY project that makes a great anytime gift or (an even better idea) for Mother’s Day.  I’ll show you how to make this wood cut out tray which you can personalize with any name or shape.

The wood cut out makes for an unexpected design element.  I painted bright blue behind the cut out, but any contrasting color will look great.

cut out tray 3

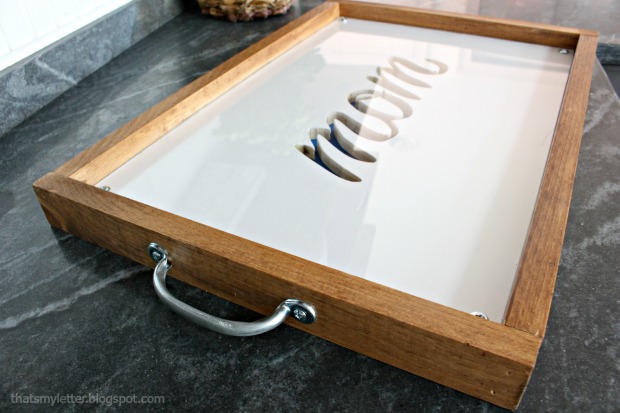
Plexiglass installed over the wood cut out provides a solid flat surface.  The plexiglass also adds a bit of shine and fancy!

cut out tray 2

Below are the step-by-step instructions to make this tray.
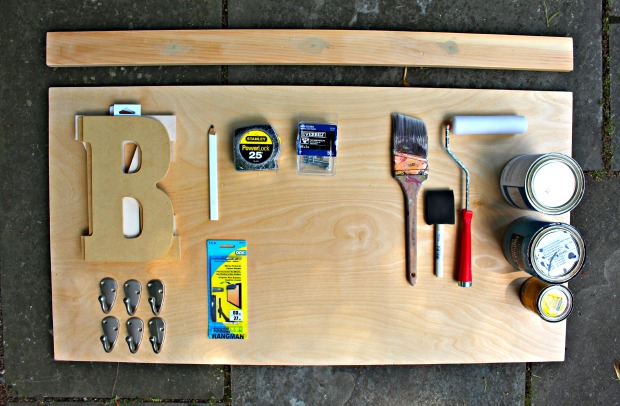
Materials:

cut out tray supplies

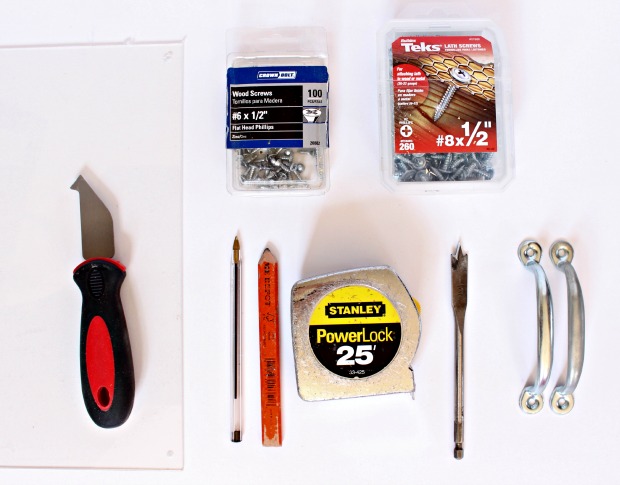
  • 1/2″ plywood 18″ x 12″
  • 1/4″ plywood 18″ x 12″
  • 1 sheet plexiglass (18″ x 24″ –  makes 2 trays)
  • 1 – 1″ x 2″ x 6′ pine board (cut 2 @ 18″ length and 2 @ 13 1/2″ length)
  • white paint
  • blue paint
  • stain
  • 2 handles
  • 1/2″ wood screws
  • 1/2″ lath screws
  • plexi/glass cutter
  • jig saw
  • sandpaper
  • ballpoint pen
  • measuring tape & pencil
  • drill, bits & 1/2″ spade bit

Instructions:

cut out tray step 1

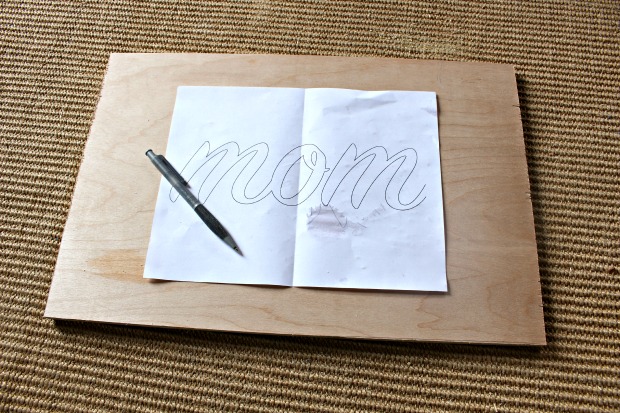
Step 1: Print out your name or word.  (I used Sign Painter – housescript font at 475 point.  Any font will do as long as it’s thick enough to cut out.)

cut out tray step 2

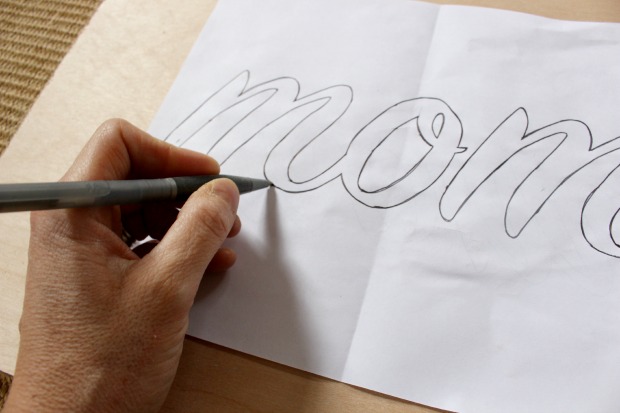
Step 2: Center the printout on the 1/2″ plywood and trace around letters with a ballpoint pen.  Use heavy pressure to create an indent in the wood. Read more

Mosaic Tile Coasters | Pretty Handy Girl

Mosaic Tile Coasters | Pretty Handy Girl

Want an easy and inexpensive gift idea to give out as a hostess gift for those upcoming holiday parties? How about Mosaic Tile Coasters? They are quick and easy to make. Last month, for my Lowe’s Creative Idea I created a unique lamp shade with mosaic glass tile. I had some leftover sheets and decided to make these coasters with the leftovers. Follow along to learn how to make another great Lowe’s Creative Idea.

Materials:

Mosaic Tile Coasters | Pretty Handy Girl

Instructions:

Begin by cutting your mosaic tile sheet into coaster size squares.

Mosaic Tile Coasters | Pretty Handy Girl

Trim off any excess mesh. Read more

Rock n' Roll Birthday Party | Pretty Handy Girl

Rock n' Roll Birthday Party | Pretty Handy Girl

My goodness, I have an eight year old! Time has flown by and my little baby is one handsome rocker wanna be. He loves anything rock n’ roll and can be found in his room with headphones on listening to Red Hot Chili Peppers, The White Stripes and Weezer.

For his birthday, he wanted to have a Rock n’ Roll birthday party. This was a simple party to pull off and only required a few purchases upfront. I even took a short cut and ordered cupcakes from our local grocery store bakery.

Rock n' Roll Birthday Party | Pretty Handy Girl

Upon arrival, each child received a personalized backstage pass.

The passes were made using black vertical badge holder with lanyards and washi tape.

Rock n' Roll Birthday Party | Pretty Handy Girl

I printed the passes on neon card stock. Feel free to download my PDF to make Backstage Passes for your party.

Backstage passes for Rock n' Roll Birthday Party | Pretty Handy Girl

If you wanted to get extra glitzy with the lanyards, you could purchase these Rhinestone Bedazzled Lanyards: Read more

personalized wall shelf

Happy Wednesday Pretty Handy Readers!  Today’s project is a DIY personalized wall shelf and I’ll show you how to make it.  I’m Jaime from That’s My Letter, a fellow DIY blogger who builds, paints and sews.  I made this wall shelf as a gift for Bryce’s birthday, it makes a great statement AND it’s useful too!

personalized wall shelf 1

Just a bit of painting and assembly to make this awesome, personalized wall shelf.  And of course you can adjust the paint colors to fit your scheme.  Bryce happens to have navy painted walls in his bedroom so I know this wall shelf will really pop once hung in his space.

personalized wall shelf 2

The stained wood shelf adds just a touch of warmth and coordinates well with the hardwood floors.  For a deeper shelf, use a wider board. I used a 1×3 but you could use a 1×4 or larger.

Materials:
(Amazon affiliate links included)

personalized wall shelf supplies

  • 1/2″ or 3/4″ plywood cut to desired size (approx. 2′ x 4′)
  • scrap piece of 1/2″ plywood approx. 4″ x 36″
  • 1×3 pine board cut to width of plywood
  • 9″ MDF Pre-cut letters
  • Single robe hooks
  • French cleat kit
  • paint, roller & brush
  • stain & foam brush
  • sandpaper
  • tape measure
  • pencil
  • wood glue
  • 2″ wood screws
  • 3/4″ wood screws
  • drill & bits
  • nailer & finish nails

Instructions:

Before beginning, layout your letters onto plywood and cut the plywood to size based on the length of the name.

Step 1: Apply stain to the 1×3 shelf piece on all sides using a foam brush. Wipe off the excess.  Set the shelf aside and let it dry.

personalized wall shelf step 1

Step 2: Paint your letters.  Paint your plywood back (not shown).

personalized wall shelf step 2

Step 3: Distress the edges of the letters using sandpaper. Read more

Sew Easy Anthropologie Cloth Napkin Gift Bags | Pretty Handy Girl

Sew Easy Anthropologie Cloth Napkin Gift Bags | Pretty Handy Girl

When I want to give a small gift as a thank you or to make someone’s day I like to dress it up by presenting the gift in a little fabric drawstring pouch. These cloth napkin gift bags are “sew” easy to make and they cost about 1/3 the cost of the cloth napkin! Gather a few simple supplies and your sewing supplies and join me.

Materials:

  • Cloth napkin
  • Thread
  • Baker’s string or thin ribbon
  • Seam ripper
  • Scissors
  • Safety pin
  • Chopstick, paint brush or other stick type object

Instructions:

Fold the cloth napkin into fourths. Cut along the folds to yield four squares.

Sew Easy Anthropologie Cloth Napkin Gift Bags | Pretty Handy Girl

Fold the napkin fabric in half right sides together. Read more