Wood Cut Out Tray
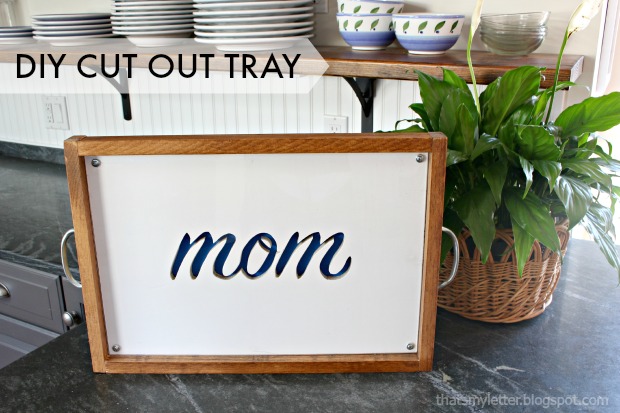
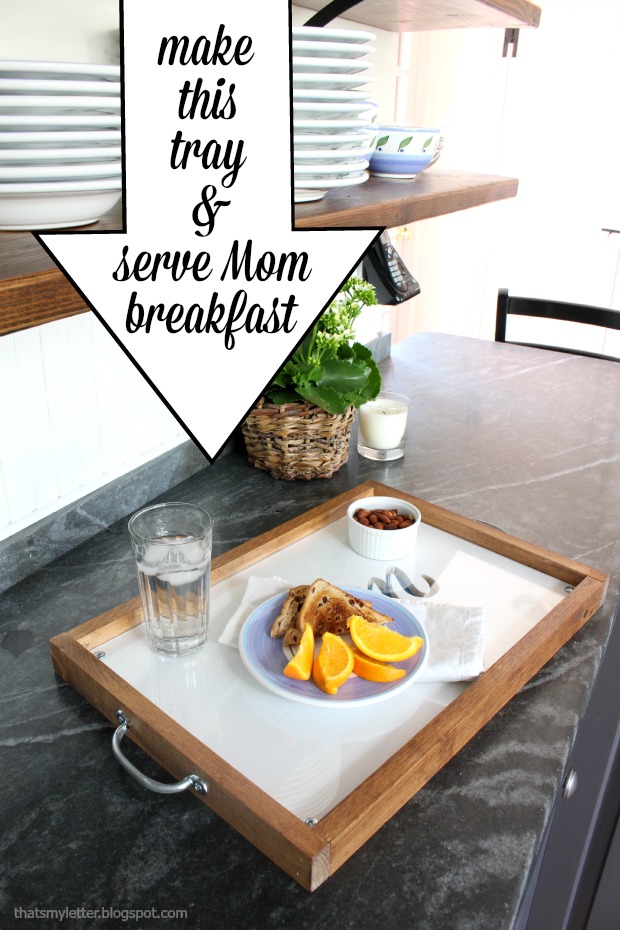
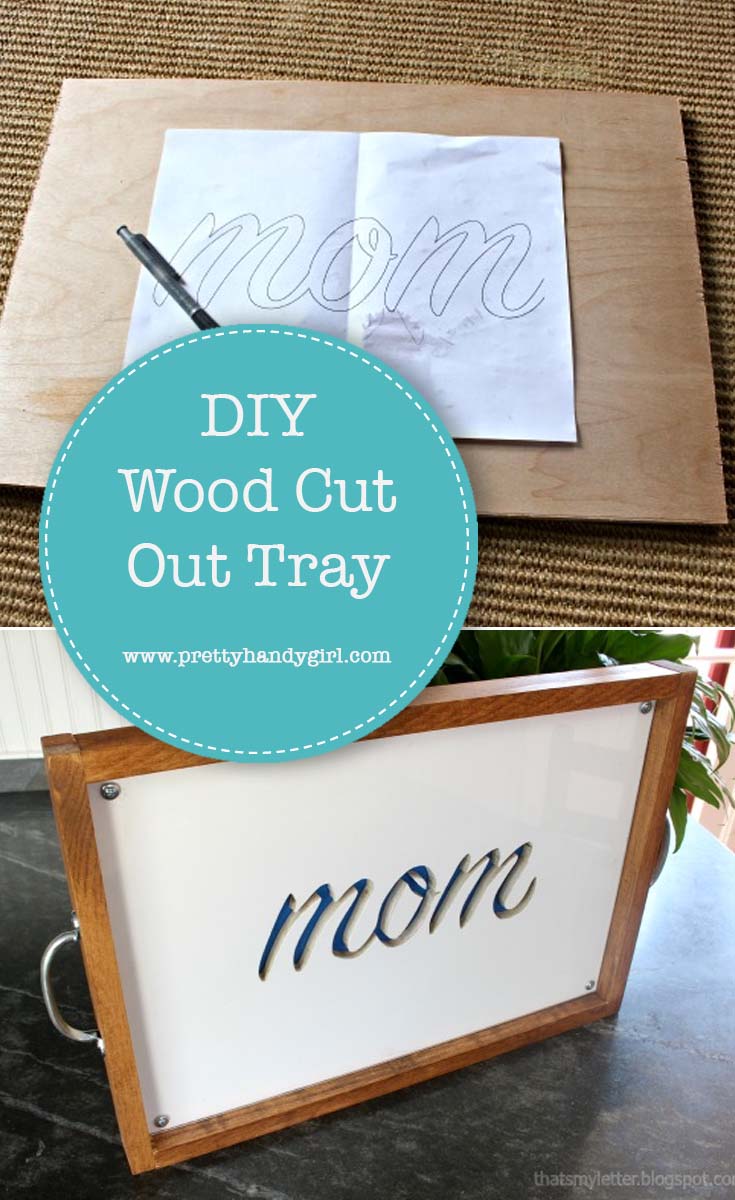
Happy Wednesday Pretty Handy readers. Jaime here from That’s My Letter to share a DIY project that makes a great anytime gift or (an even better idea) for Mother’s Day. I’ll show you how to make this wood cut out tray which you can personalize with any name or shape.
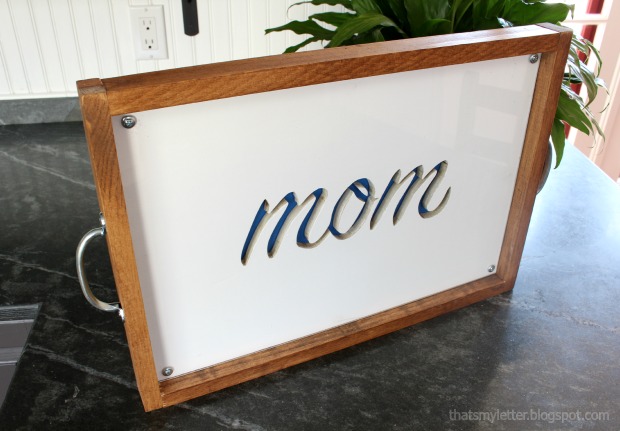
The wood cut out makes for an unexpected design element. I painted bright blue behind the cut out, but any contrasting color will look great.
Plexiglass installed over the wood cut out provides a solid flat surface. The plexiglass also adds a bit of shine and fancy!
Below are the step-by-step instructions to make this tray.
Materials:
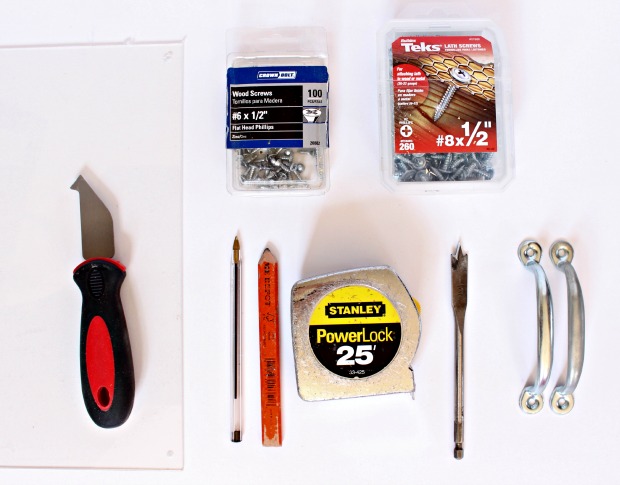
- 1/2″ plywood 18″ x 12″
- 1/4″ plywood 18″ x 12″
- 1 sheet plexiglass (18″ x 24″ – makes 2 trays)
- 1 – 1″ x 2″ x 6′ pine board (cut 2 @ 18″ length and 2 @ 13 1/2″ length)
- white paint
- blue paint
- stain
- 2 handles
- 1/2″ wood screws
- 1/2″ lath screws
- plexi/glass cutter
- jig saw
- sandpaper
- ballpoint pen
- measuring tape & pencil
- drill, bits & 1/2″ spade bit
Instructions:
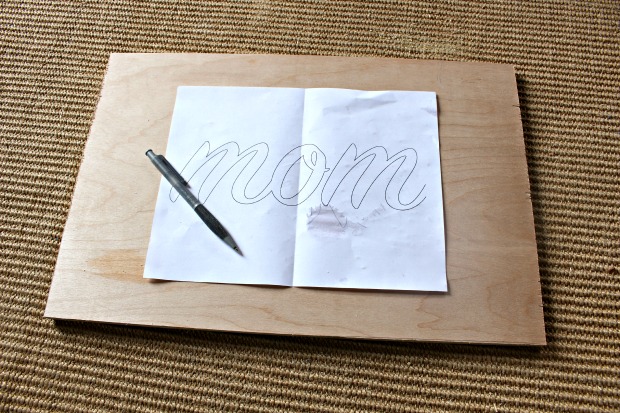
Step 1: Print out your name or word. (I used Sign Painter – housescript font at 475 point. Any font will do as long as it’s thick enough to cut out.)
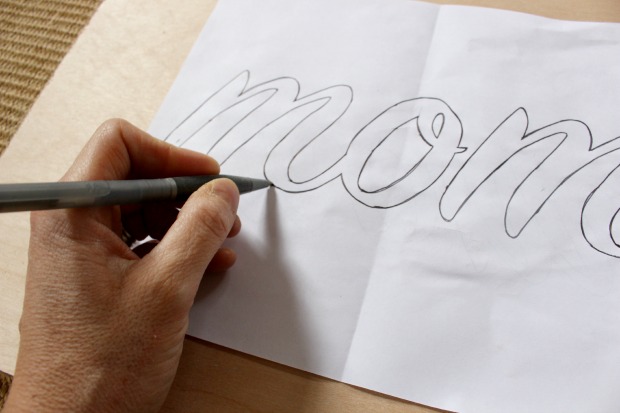
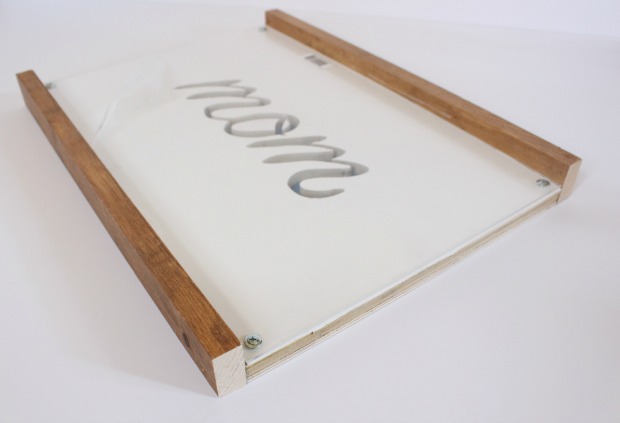
Step 2: Center the printout on the 1/2″ plywood and trace around letters with a ballpoint pen. Use heavy pressure to create an indent in the wood.

The pressure from the pen leaves an indentation. Trace over this with pencil so you can see it better when cutting with the jig saw.
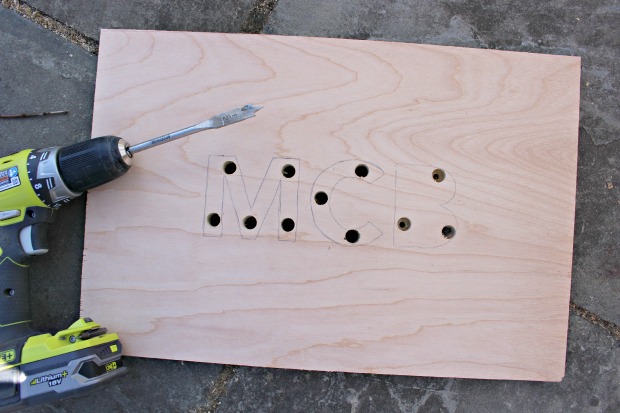
Step 3: Drill a few 1/2″ holes inside the letters. This will give you a place to insert the jig saw blade.

Step 4: Cut out the letters with a jig saw. Go slow and steady (but not too slow or you’ll scorch the wood). Sand any rough spots. Paint the top surface only with two coats of white paint.
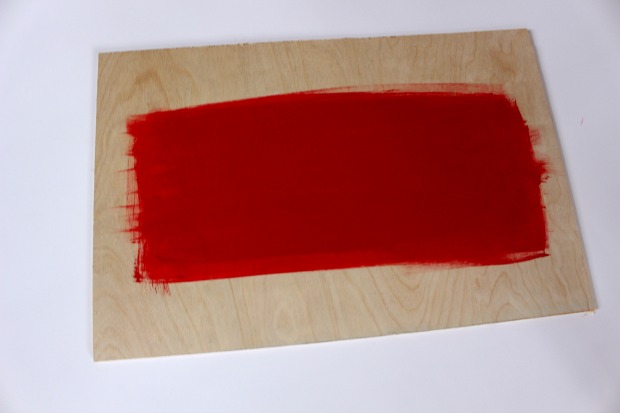
Step 5: Paint the 1/4″ plywood your desired color. (You really only need paint where the letters will show through.)
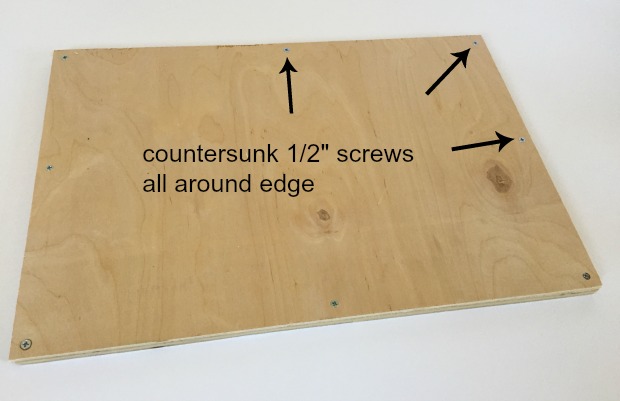
Step 6: Attach the 1/4″ painted plywood to the underside of 1/2″ cut out plywood using countersunk 1/2″ screws from the back. Be sure to bury the screw heads into the plywood so they won’t scratch any surface.
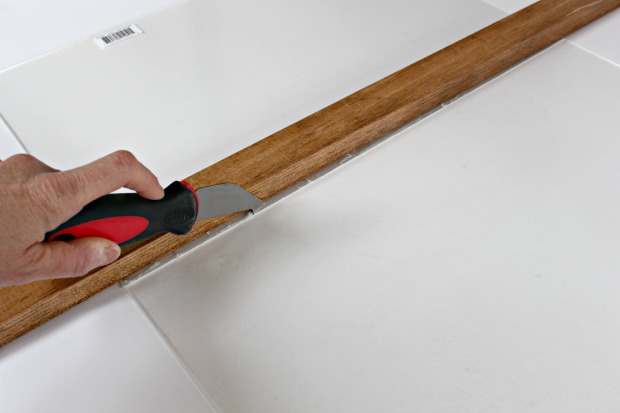
Step 7: Cut plexiglass to size (one 18″ x 24″ piece cut in half makes two 18″ x 12″ pieces). Clamp a straight edge on the cut line and run a glass/plastic cutter through the plexiglass multiple times. (It took me about 20 passes before I was able to snap the two pieces apart.)
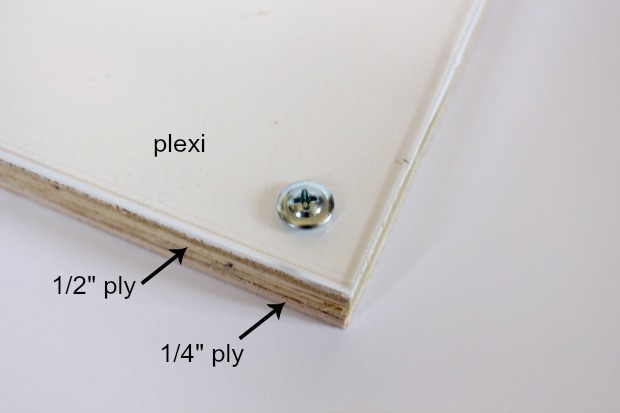
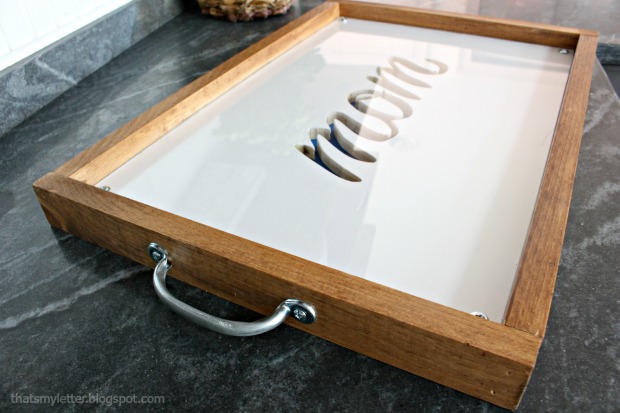
Step 8: Peel off one side of protective plastic from plexiglass and attach it to the top surface of the 1/2″ plywood using 1/2″ lath screws. Pre-drill first. I recommend using a hand screwdriver for the lath screws, you don’t want to crack the plexiglass.
Step 9: Attach tray edge long sides first using 1 1/4″ finish nails and glue. Repeat process for short sides.
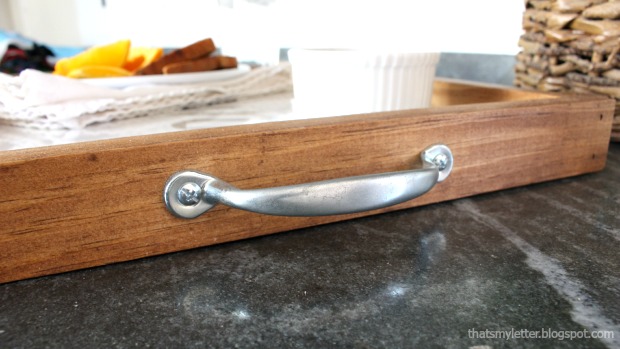
Step 10: Attach handles at the center of the short ends.
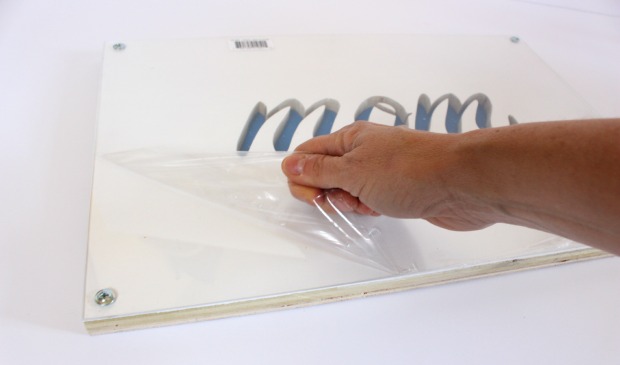
Step 11: Peel off top protective plastic from plexiglass.
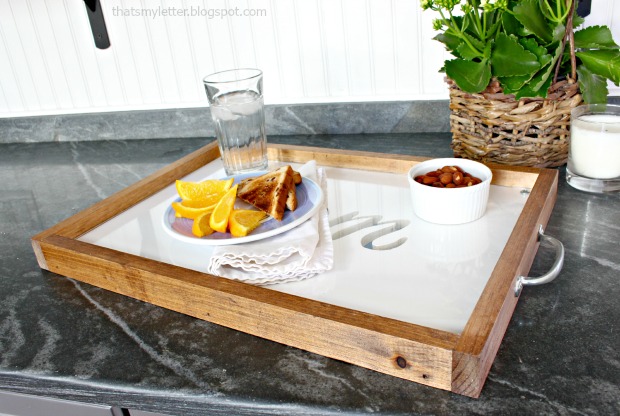
This is a fun DIY project that you can personalize to fit your purpose.
Happy tray making friends.

Pin for later!
What width of plexiglass did you use?
Hi Jamie,
I just found your tray. It looks great. I will try it as you have it at some point in the future. But for now, I think I will adapt it a bit. I was looking for a tray that I could mount pictures in for family members. I think your directions will be a great start.
Thank you.
Cindy
You are so clever! I love this idea, so classy and creative!!
Thanks Melissa.
This would actually be great for my mother-in-law! She loves serving desserts on trays like this. Plus this is an awesome idea because you could put whatever word or words you wanted – super customizable!
Exactly Jordan, any words, letters or shapes will work. It’s great jig saw practice and even better when you can give it as a gift!
Loving this tray! So perfect for mother’s day! Now to get my husband to make one for me 😉
Paige
http://thehappyflammily.com
Thanks Paige. And if your hubby doesn’t make it for you you can always make it for yourself!