Tag Archive for: diy

How to Tile a Small Table Top

How to Tile a Small Table Top

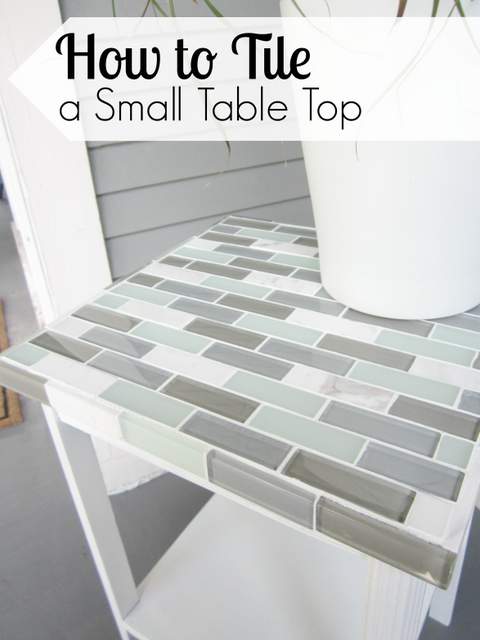
Hello and happy summer pretty handy readers. It’s Jessica from Decor Adventures. With the weather getting warmer, I’m completing lots of outdoor projects these days. One DIY adventure I’ve never actually tackled is tiling, but I’ve always wanted to. Today I’m going to show you how to tile a small table top. It’s easier than you think and is perfect for the outdoors too.

Tile a Small Table Top Materials:
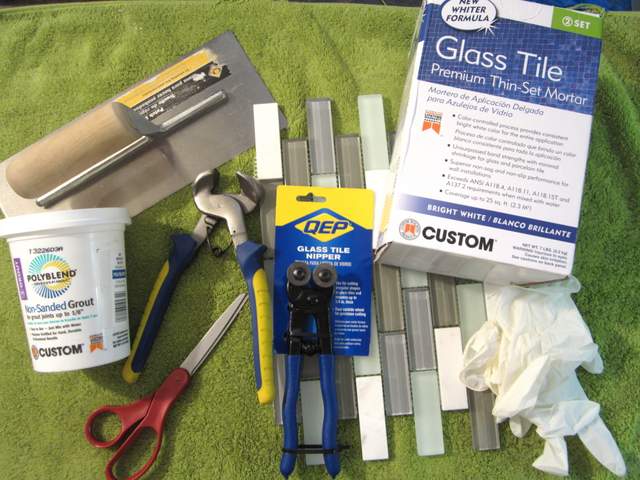
How to Tile a Small Table Top

  • Small table
  • Tile adhesive (also called mortar or thinset)
  • Tile (enough to cover the top of the table)
  • Notched trowel
  • Rubber float
  • Grout
  • Grout sponge
  • Tile cutters
  • A bucket
  • Paint for the table (optional)
  • Water
  • Plastic gloves
  • Eye protection


Tile a Small Table Top Instructions

First, prepare your table. The small table I’m using was the one we used for my pet parrot when I was little! His name was Woodstock, and no he didn’t talk. I guess my mom taught me and my sister to talk instead :-). The table had sentimental value, so I knew I wanted to create something special with it.

Read more

how to stain an old basket

I admit it, I’m a basket addict!

Baskets are one of the best ways to organize and accessorize your home but they can be very expensive when purchased new. Thrift stores are a great source of affordable baskets but they are often out-of-fashion colors and can have missing or broken pieces. Today I’m going to show you how to take those old, thrift store baskets and make them a beautiful accent piece for your home.

Materials:

  • super glue
  • hand broom
  • stain
  • paintbrush

Instructions:

The first step in fixing up an old basket is to clean out any dirt or debris using a hand broom. Be thorough on both the interior and exterior.

before old thrifted basket staining

Next inspect your basket for any broken pieces. Use super glue to repair any areas that may need it. Read more

coffee stirrer keychain

Hello Pretty Handy Girl readers, Jaime from That’s My Letter back again to share a fun craft project.  Today we’re making DIY wood keychains using coffee stirrer sticks.

If you love coffee just as much as I do, what could be better than a nifty craft made from coffee stirrers!

coffee stirrer keychains 1

The pattern possibilites are endless, stripes, diagonal, rainbow, chevron and on and on.  And what a great gift or favor idea for a party – you could paint them to match the party color scheme.

coffee stirrer keychain sticks

I may or may not have borrowed a few wood coffee stirrer sticks from my local coffee shop with a green and white logo.  Of course, I let my daughter do the dirty work but you only need about 5 sticks for one keychain.  Or more appropriately you can purchase coffee stirrer sticks or thin wood craft sticks from most craft and hobby shops.

coffee stirrer keychains 3

The painted coffee stirrer sticks are sealed with clear gloss varnish which gives a super hard finish that will hold up to everyday wear and tear while protecting the wood and paint.

Try one and I guarantee you’ll be hooked — then you’ll be making different styles and versions for everyone you know in a school or team color scheme ;-).

coffee stirrer keychain 4Materials:

coffee stirrer keychain supplies

  • 5 wood coffee stirrer sticks
  • acrylic craft paint
  • small paint brush
  • basswood (purchase one stick at 36″ l x 3/32″ thick x 2″w)
  • super glue (gel version is best)
  • scissors
  • rubber bands
  • clear gloss varnish (Americana DuraClear or similar)
  • sandpaper
  • clear gloss polyurethane spray (optional)
  • drill & small drill bit
  • keychain hardware


Instructions:

coffee stirrer keychain step 1

Step 1: Paint wood coffee stirrer sticks desired colors using acrylic craft paint.  Paint the edges too but not the back. Read more

wall chalkboard

Chalkboards are popping up everywhere (like Brittany’s DIY chalkboard calendar from last week) and you can easily make one, but how about upping the usefulness by making a chalkboard WITH a chalk ledge?  Jaime here from That’s My Letter to show you how easy it is to add a chalk ledge to your chalkboard.

chalkboard with ledge

You definitely need a place to put all that chalk (or chalk markers like we prefer).  This chalk ledge protudes a minimal  1 3/4″ from the wall but still has space enough to hold lots of chalk.

chalkboard with ledge 5

I also attached a galvanized pail for more chalk markers.

chalkboard with ledge 1

wall chalkboard 1

I installed this chalkboard near our back door mudroom area.  Unfortunately the key pad for our alarm system is nearly smack in the middle of that wall.  I simply cut out a square in my plywood using a jig saw to accommodate the key pad.  My kids love their new chalkboard and somehow the key pad isn’t quite so obvious once they start drawing around it.

chalkboard with ledge 2

Supplies:

  • 1/2″ plywood (cut to desired size)
  • 1×2 pine board (cut to length of plywood)
  • 1 3/8″ x 1/4″ thick flat trim moulding (cut to length of plywood)
  • black chalkboard paint
  • blue painters tape
  • stain
  • polyurethane
  • foam brushes
  • drill
  • Kreg pocket hole jig (not necessary but definitely easier if you have one)
  • 1″ pocket hole screws
  • wood glue
  • 3/4″ trim nails
  • countersink bit
  • 2 1/2″ toggle bolts
  • 5/8″ spade bit (check toggle bolt requirements)
  • pencil
  • level

Instructions:

Step 1: Cut your plywood to size, using your Kreg pocket hole jig make pocket holes every 8″ along bottom edge of plywood (on back side). (I used the portable base with automaxx clamp here, much easier that slipping a large piece of plywood into the jig.) Read more

Anyone else detest cleaning their homes? {Major hand raised over here!} I don’t like to clean, but what I really dislike is paying those exorbitant prices to purchase store bought cleaners. Did you know that you can make your own cleaning products using ingredients that cost pennies compared to a bottle of cleanser!

For example, baby oil makes an excellent stainless steel sink shiner (who knew!)

Read more