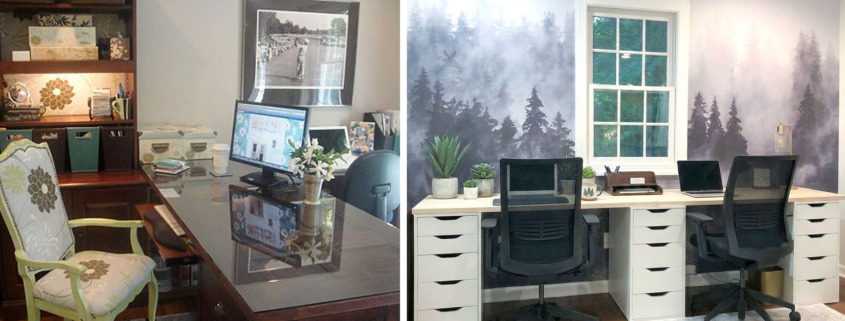
I’ve been busy updating our 1978 dutch colonial house and I can’t wait to share all the updates, but today I’m here to show you how we added a window to the side of our existing house.
A Desire to Add a Window to Our House

Do you have a room in your house that you wish you had a window in? Whether it be for natural light or to be have a better view, I get it! Our home office was always one of the darkest rooms in our house. It didn’t help that there were only two windows on a north facing wall and that was it for natural light. For some reason, most of the houses in our neighborhood do not have side facing windows. No, we don’t live in a new community where you can barely drive a truck between you and your neighbor’s house. Our houses are on wooded 1/2 – 1 acre lots with a decent amount of space between houses. But, we don’t have windows on the sides of the house! Strange, I know. Maybe in the 1970’s they didn’t add windows on the side of houses? Anyway, I want to share how I added a window to our house where there wasn’t one before.

Being a licensed general contractor, I knew that adding a window to the side of our house wasn’t super difficult as home improvement projects go. Yes, I’d have to frame the opening and remove some of the siding, but as projects go, this one was not super difficult. The hardest step in adding a new window was deciding how big of a window to install. (If this is your first time framing or installing a new window, you might want to seek the help of a professional contractor.)

Back Story on Our Home Office

If you’ve been around for a while (a decade or more) you may remember that this home office has been a constant struggle for me. I’ve been trying to lighten up this room since we moved into the house.

When we moved in, this room had dark orange mottled walls. There were zero ceiling lights, only a switch that controlled the wall outlets. Obviously this didn’t bother the two little boys who just liked to spin on our office chairs. I can’t believe those two monkeys are now in college and over six feet tall now! WHAT?!!!

Attempts to Lighten Up the Dark Office
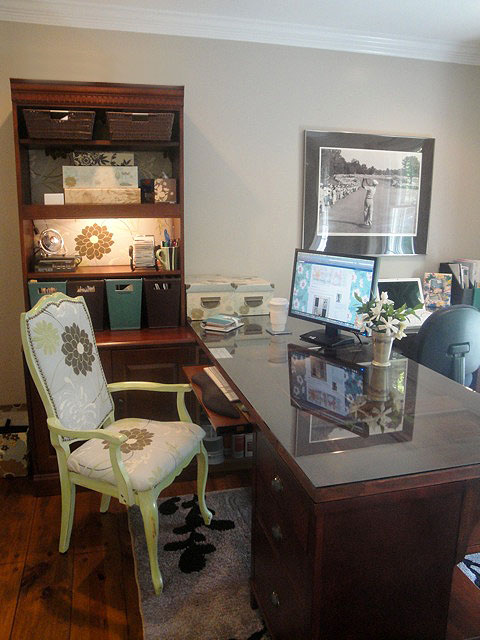
For the first makeover we scraped the ceilings and repainted the entire room a lighter color. I had my electrician add four can lights, and a center ceiling mounted light. This helped brighten the space up a lot at night.

But, the room still felt darker than the rest of the house, especially on overcast days. After several years, I added a cheery rug and put fabric into the back of the shelving unit. Can you tell I was really trying to find budget solutions? On a sunny day, the light wasn’t too bad, especially in the winter when the tree outside the window had no leaves.
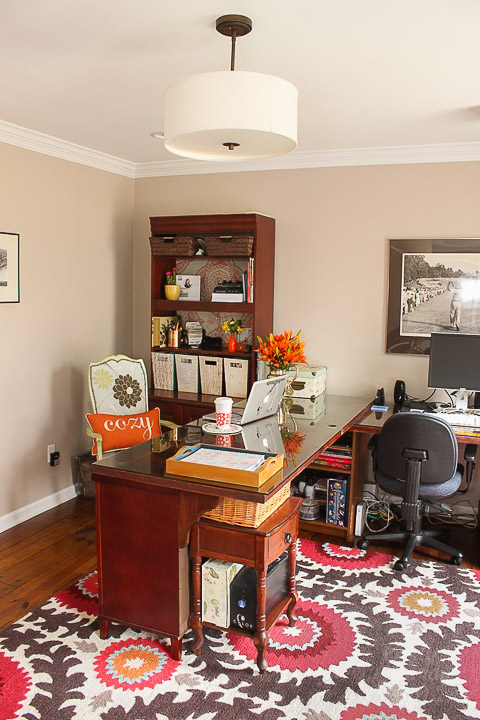
But, ultimately no amount of updates were going to make up for the lack of natural light coming in the windows. The answer was to add a window on the west side of our house. The bonus of adding a window, meant we got to look out the window and see our veggies growing in my new raised garden beds with arched trellis (now with downloadable build plans!) And admire the shed I built.

Before running out to order your new window, you need to consider a number of factors. 

Ordering Your New Window:

Believe it or not, there are a lot of decisions you need to make when ordering a new window.

Location of Your New Window

First, you need to decide where the window will be installed on the outside of your home. Are there windows on a second floor or adjacent to the new window? If so, you may want to line it up with your existing windows and make sure it doesn’t stand out from the others. Make sure your new window won’t interfere with exterior features like pipes, electrical conduit, gas appliances, etc. If you have any questions, it’s a good idea to discuss adding a new window with a licensed general contractor in your area. Also, be aware there are a lot of building codes that pertain to windows. And they will vary by your geographical location and the room the window is being installed in.

Type of Window to Order:

When you’re ordering a new window for the exterior wall, you’ll want to order a new construction window that has a nailing flange. The opposite type of window would be a replacement (or insert) window made to fit inside an existing window frame. By the way, DON’T EVER put replacement windows in your house without reading this article.

Note: We have a wood framed house with exterior siding. If you have a brick house, adding a new window is going to involve brick work and a different style of window.
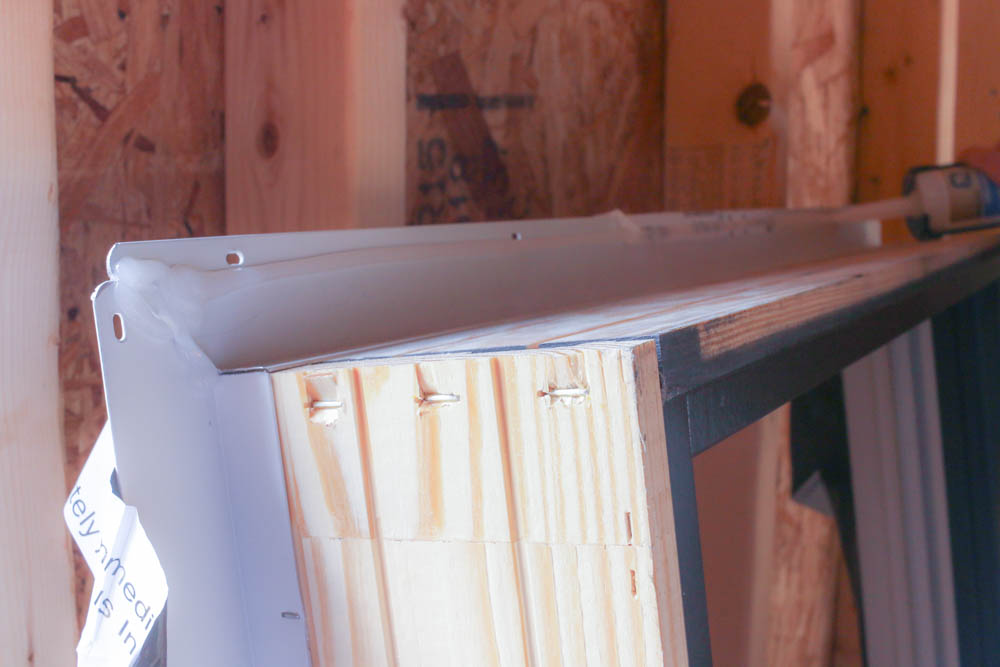
Luckily, I already knew the window manufacturer and model I wanted for our house. You may remember when I was working on the Saving Etta house, I chose beautiful Plygem Mira windows for the new windows. They have the look of historic windows with simulated divided light grille profiles, but with modern features such as double-pane glass with argon gas between the layers. Low-E coating on the glass helps deflect heat in the summer and keeps warmed air inside during the winter. Plus, wood interior parts and extruded aluminum features on the exterior provide better durability.

Disclaimer: Plygem has been a long time sponsor of this website, and they agreed to work with me on installing a new window into our home office.

What Size Window Do I Order?

From the inside, look at existing windows in your room and try to match the width and style of the existing windows. Ideally, you want all the tops of windows to be even in the room. If the window will be the same functional style as the other windows (i.e. double hung windows or casement windows), you will probably want them to be the same width.
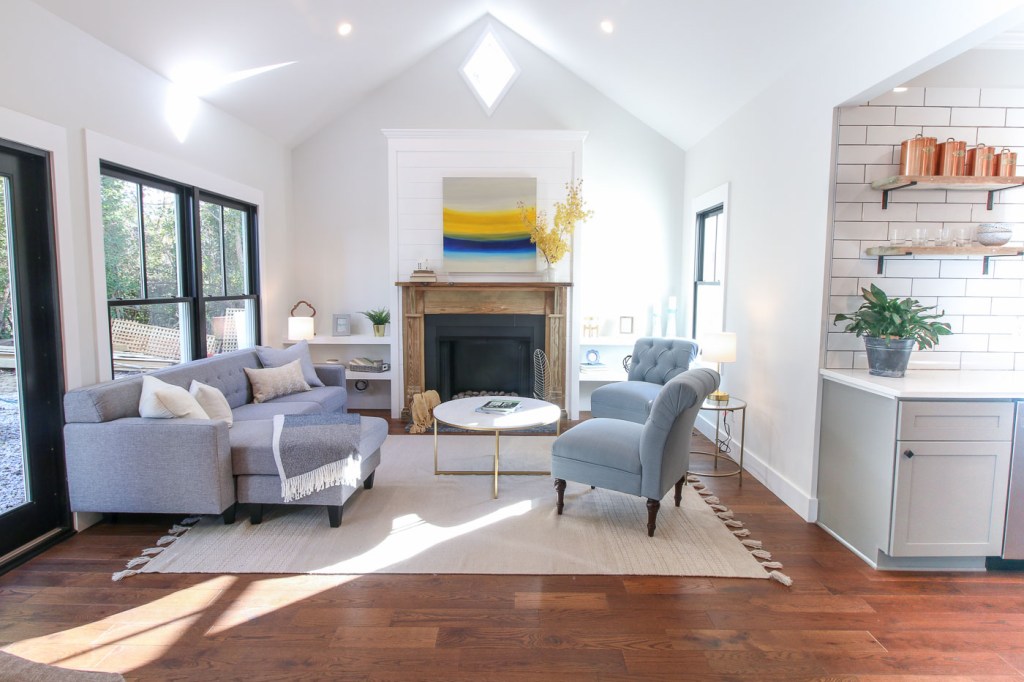
Next, ask yourself if you have a desk, bed, cabinet, or furniture that needs be in front of that window? If so, you may want a window that’s bottom is located higher on the wall. For our home, I used the existing windows as a guide for the width and style for the new window.
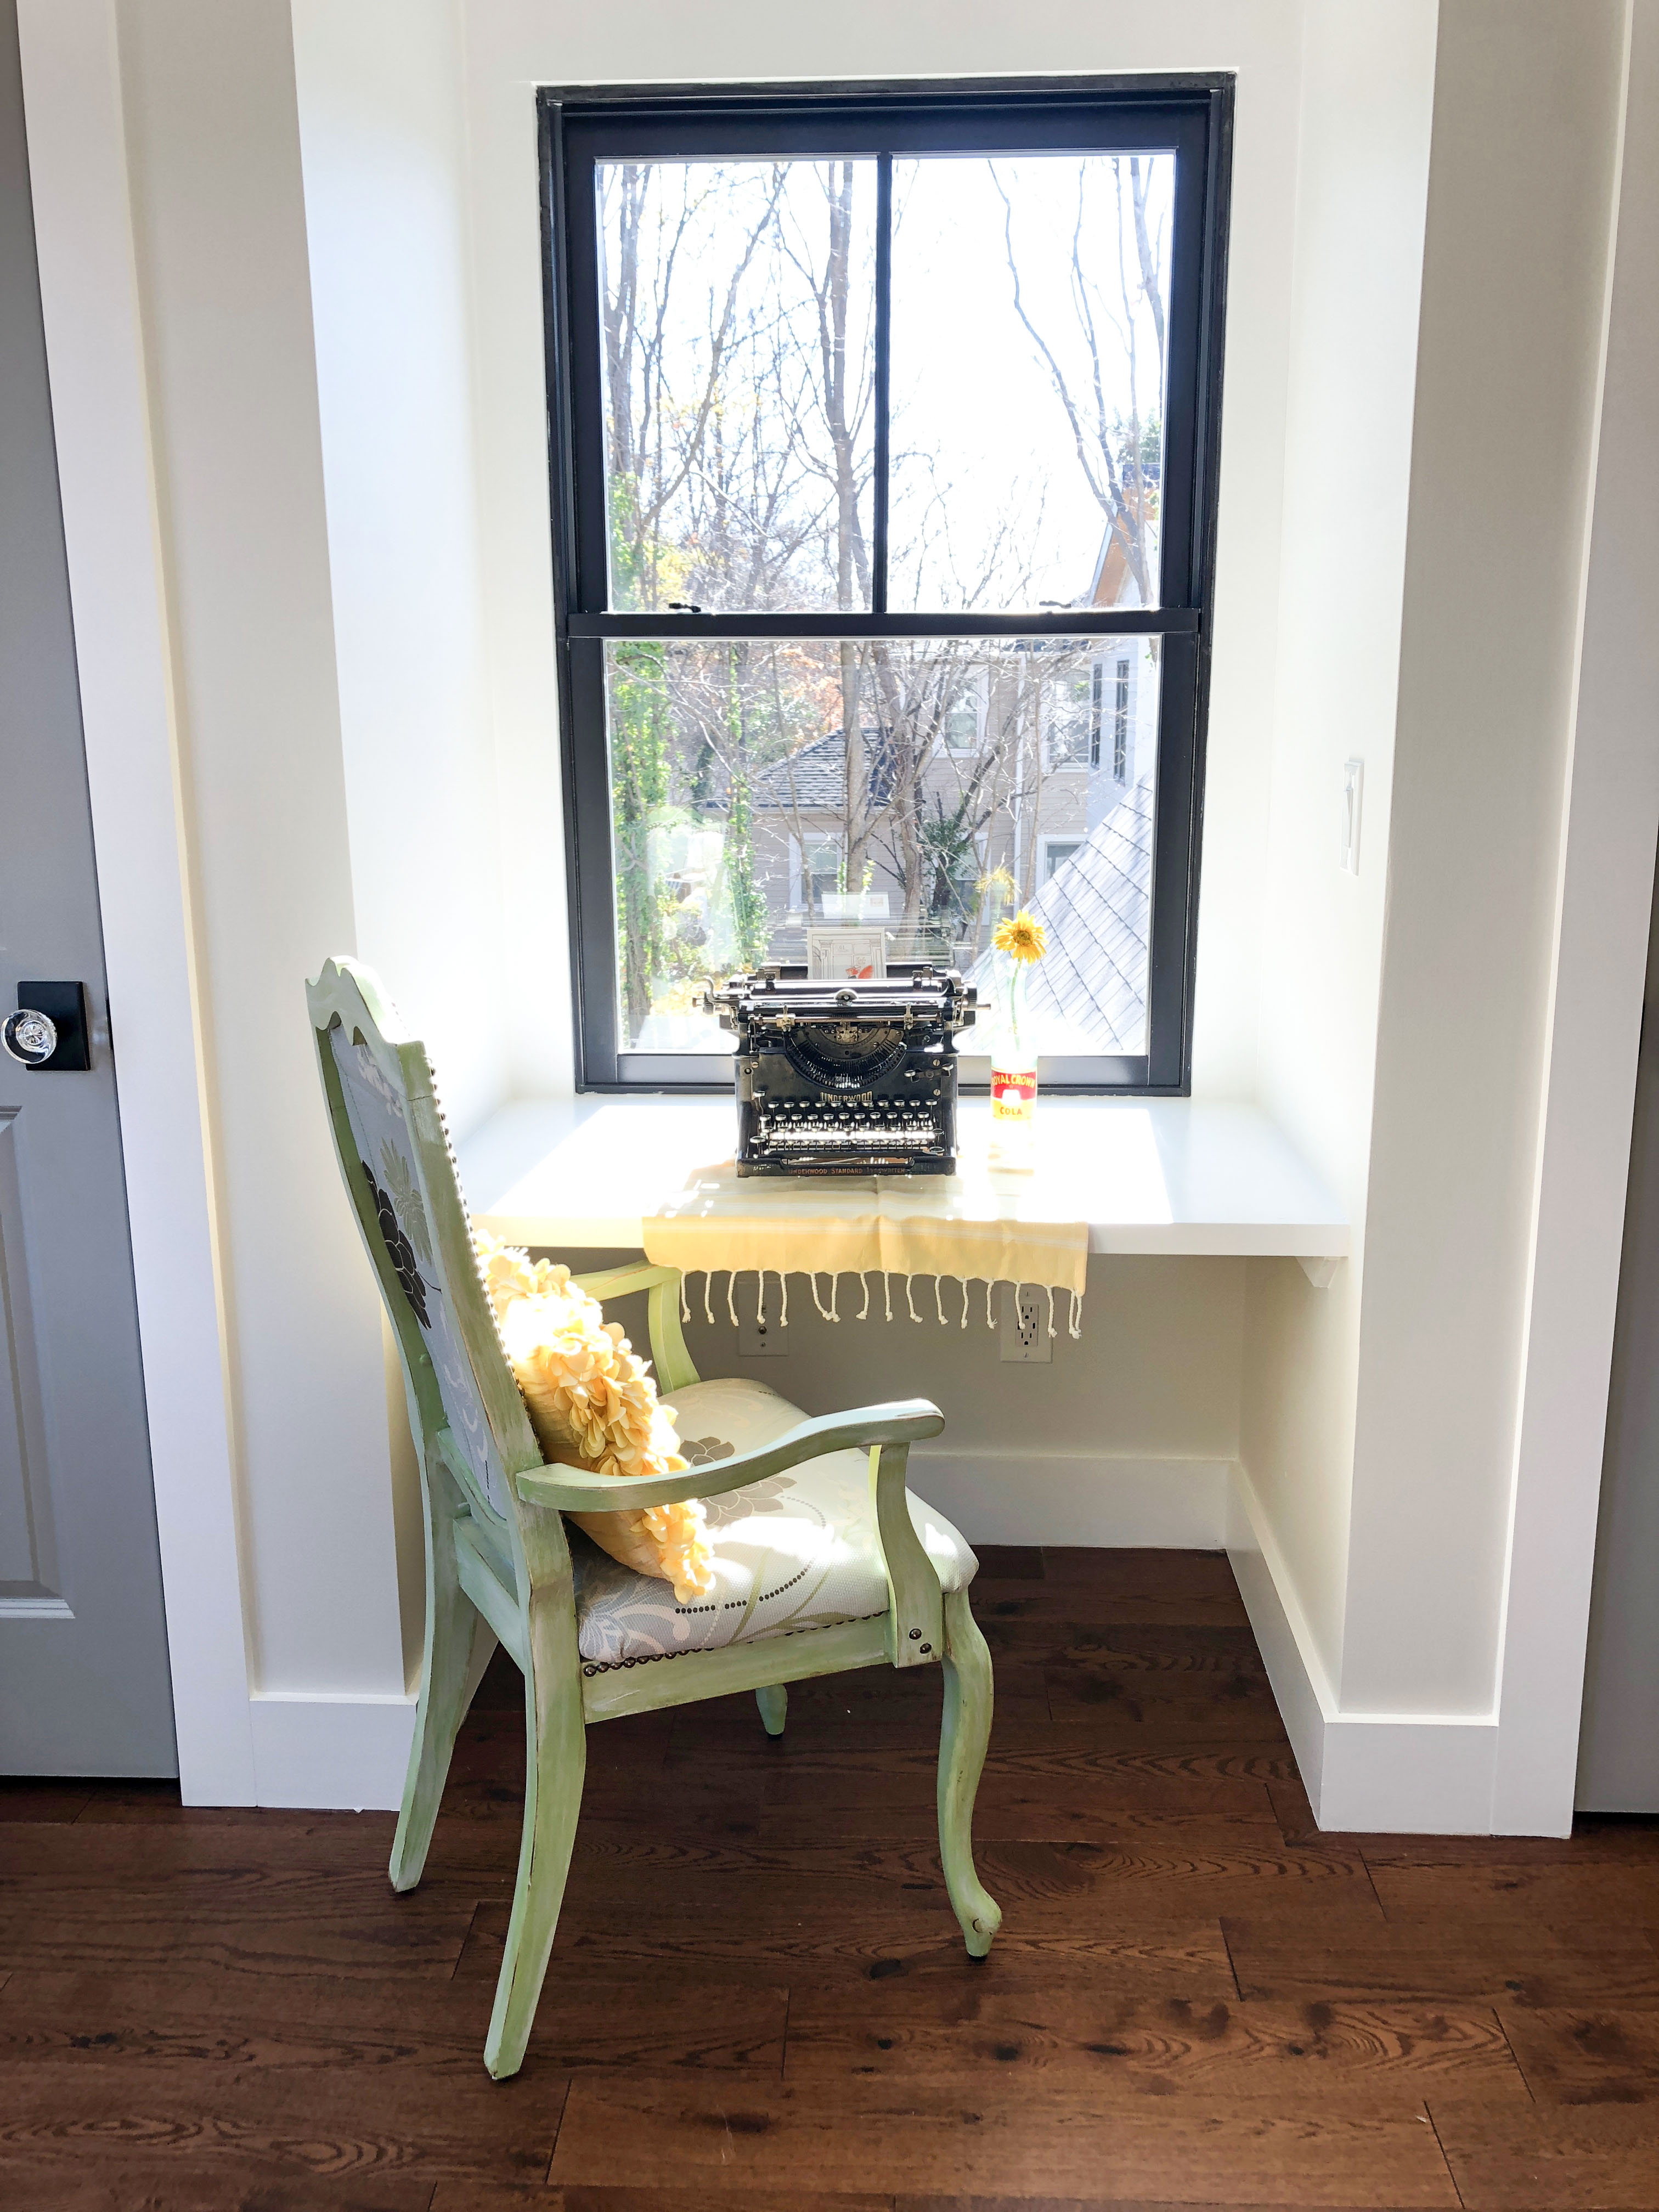
Next you need to know the thickness of your wall framing before ordering. Standard construction in the US is either 2×4 framing or 2×6.

How will the window open?

Determine how you want the window to function.

  • Double hung (allows the top of the window to lower for more air flow)
  • Single hung (only the bottom sash opens)
  • Non-opening (picture or decorative window)
  • Casement opening (a window that swings open from the side)
  • Sliding Window (like a double hung window by on it’s side)
  • Awning (a window that angles out from the bottom.)
  • Tilt-In for easy cleaning (an option on some newer windows for easy maintenance)

Glass Privacy Concerns:

Is your window in a bathroom or near a street where you will need privacy? If so, order a window with enclosed blinds, textured, or obscure glass. Or have a plan for adding window treatments or a frosted film (like I added in the Saving Etta bathroom).
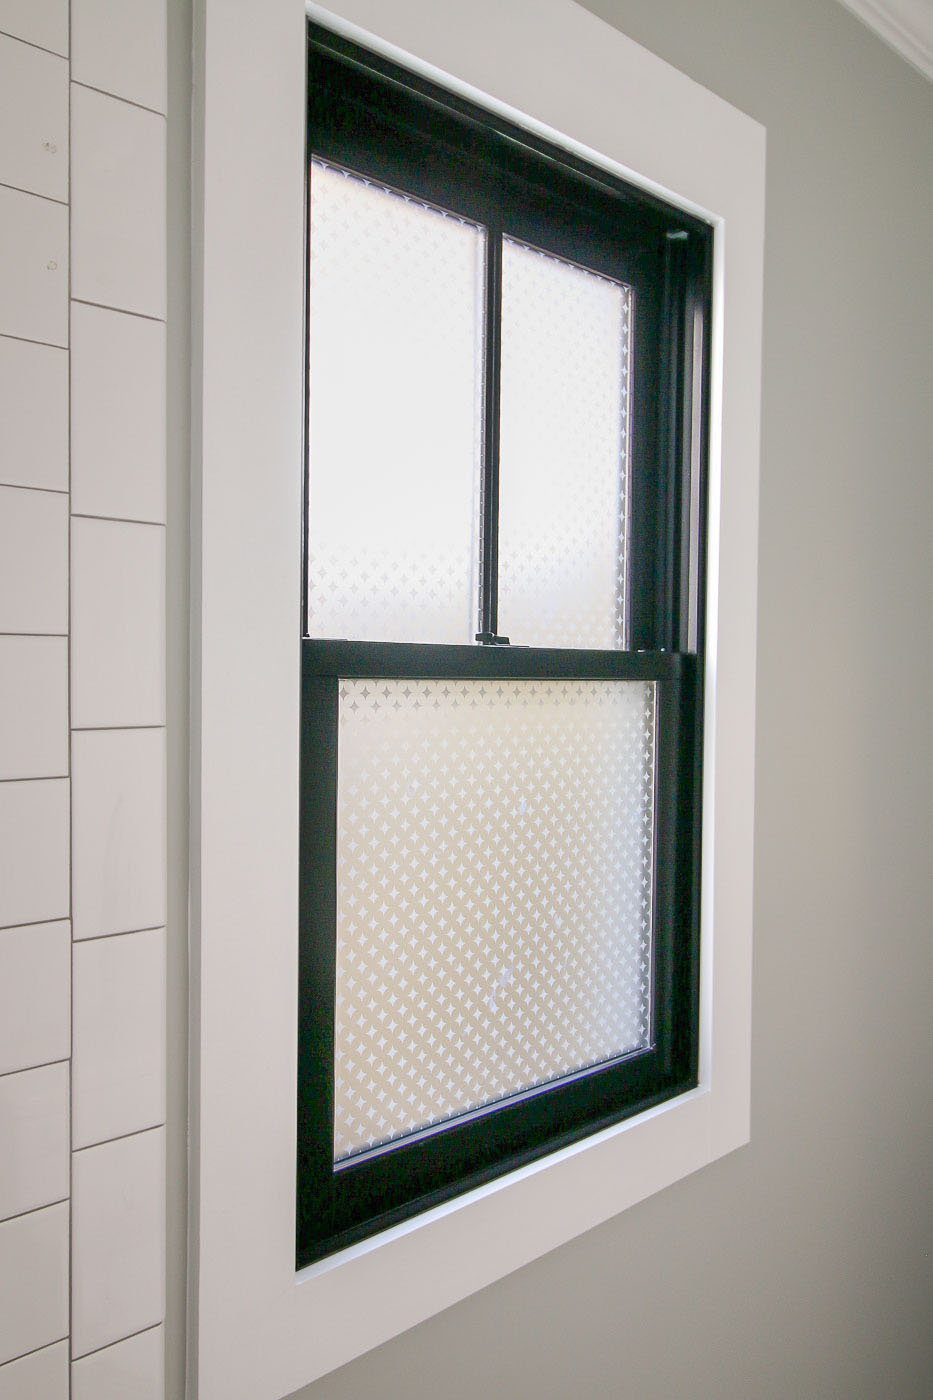
Finally, be aware of any building codes to address?

  • Does the window meet egress standards for a bedroom?
  • Is the window in a location that requires tempered glass?
  • How far is the window from the ground? (Does it need to have a safety stop?)
  • Do you need a permit to replace your windows?

Do you want screens for your window?

Oh how could you forget screens? In the south I don’t think this is even a question, it’s a necessity.

Preparing to Add a Window to the House

I began talking to my siding contractor about adding a window to our home office. We’ve worked together on many projects and he trusts me to do some of the work ahead of time. We agreed on a time frame and work distribution (I’d cut into the sheetrock and reframe inside the wall for the window opening. He would prep from the outside and perform a professional window installation from the exterior.
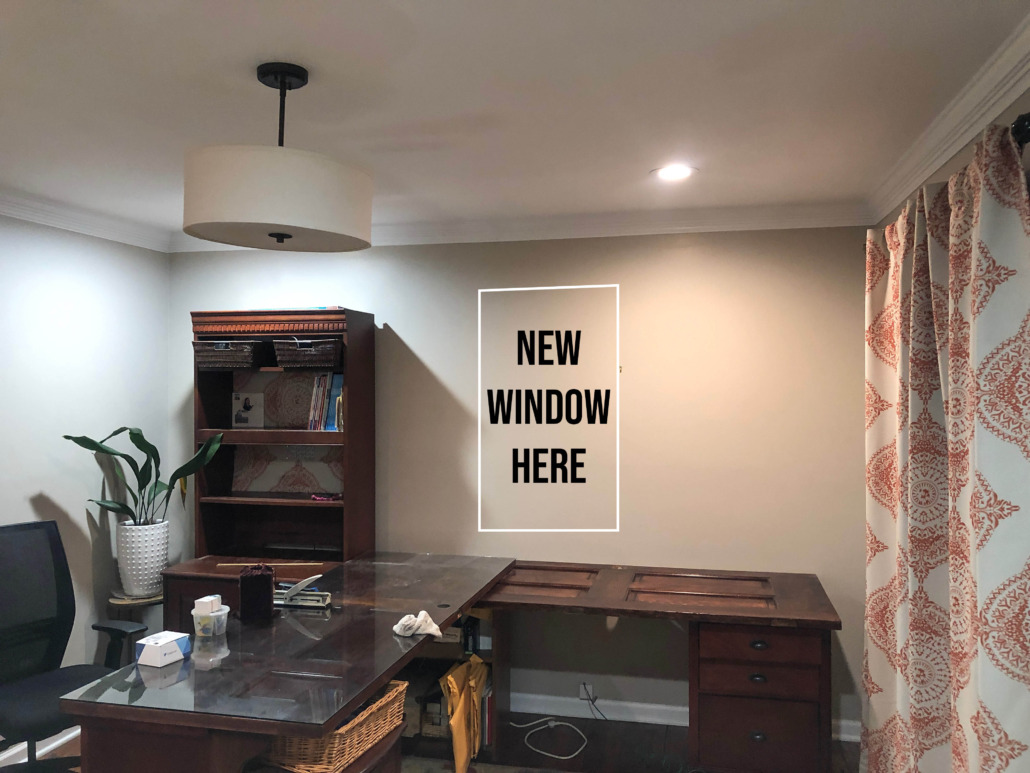
Before you do any work, be sure to move any furniture, rugs, art, and protect anything that has to stay with plastic.

To prep for the window, I chose to tarp off half of the office because I knew I’d be making a big dusty mess and this way I could leave the furniture in the other half of the room outside the work zone.

Cut out window – I began by cutting into the drywall around where the window opening would go. Using my oscillating tool, I was able to cut a neat section of drywall and save it for patching later. This will be the first peek you’ve had into your walls. Look for any utility lines that need to be relocated. If you have plumbing, mechanical, or electrical lines that need to be moved, hire a licensed professional to give you advice and an estimate.

Framing for a New Window

Once the wall is opened (and any utility lines moved), you can then assess framing needs – determine which studs needed to be moved and how much further open you need to make the window opening to accommodate the rough opening (usually specified by the window manufacturer. Be sure to brace your wall if it’s not on a gable end (or is a load bearing wall.)

Framing for a window requires at least two jack studs, two king studs, and a header. Depending on the width of your window, you may need more jack and king studs, and you may need a larger header to carry the load. It’s best to check with a general contractor or structural engineers to recommend your framing needs.

Ideally your rough opening should be an inch wider than the window. Your window manufacturer should have information for all the dimensions of your new window including the rough opening. Plygem has a great table for the Mira window specifications on their website.
Installing a New Window on an Old House

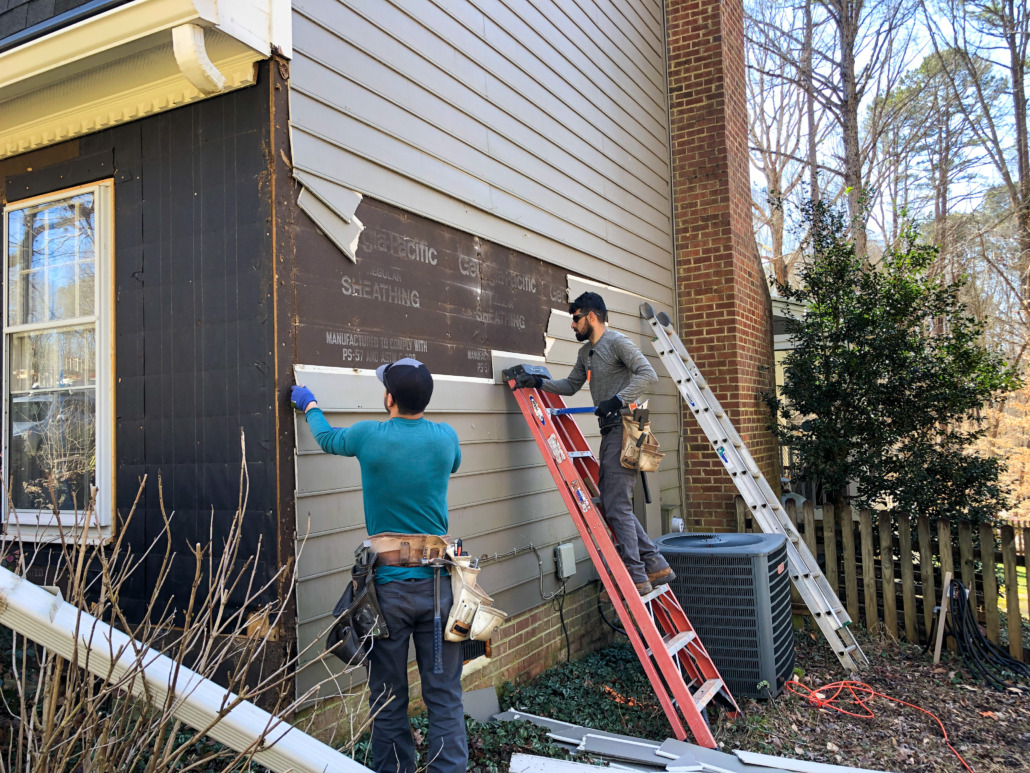
Finally the day came for my siding contractor to install the window. He began by pulling off the siding from the side of the house. We were originally going to cut just around the opening, but the siding was in poor shape and not installed correctly, so we decided to remove it and re-side the house after installing the window.

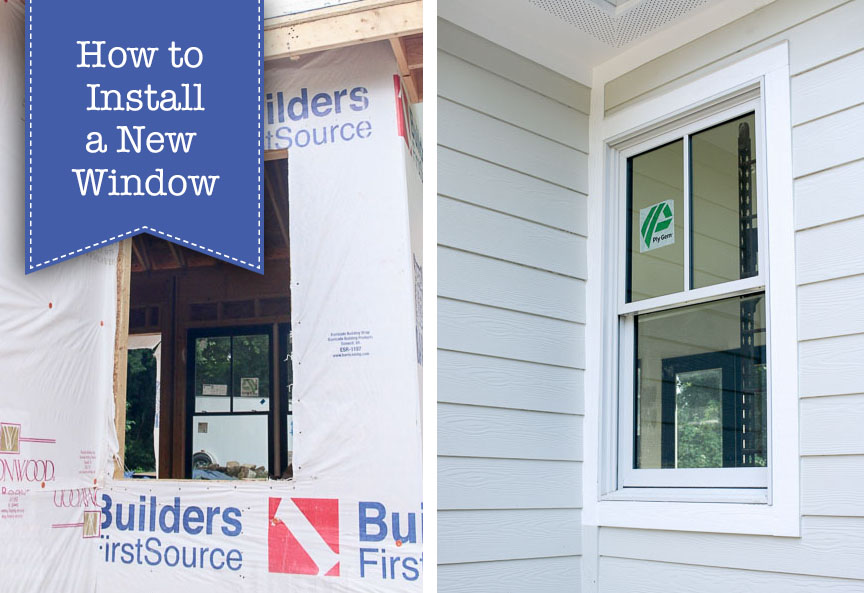
Proper installation of a new window into an existing wall is important for energy efficiency and maintaining operation of your new window. I have a very detailed tutorial with photos you can read to learn how to properly install, flash, and finish the window installation from the exterior.
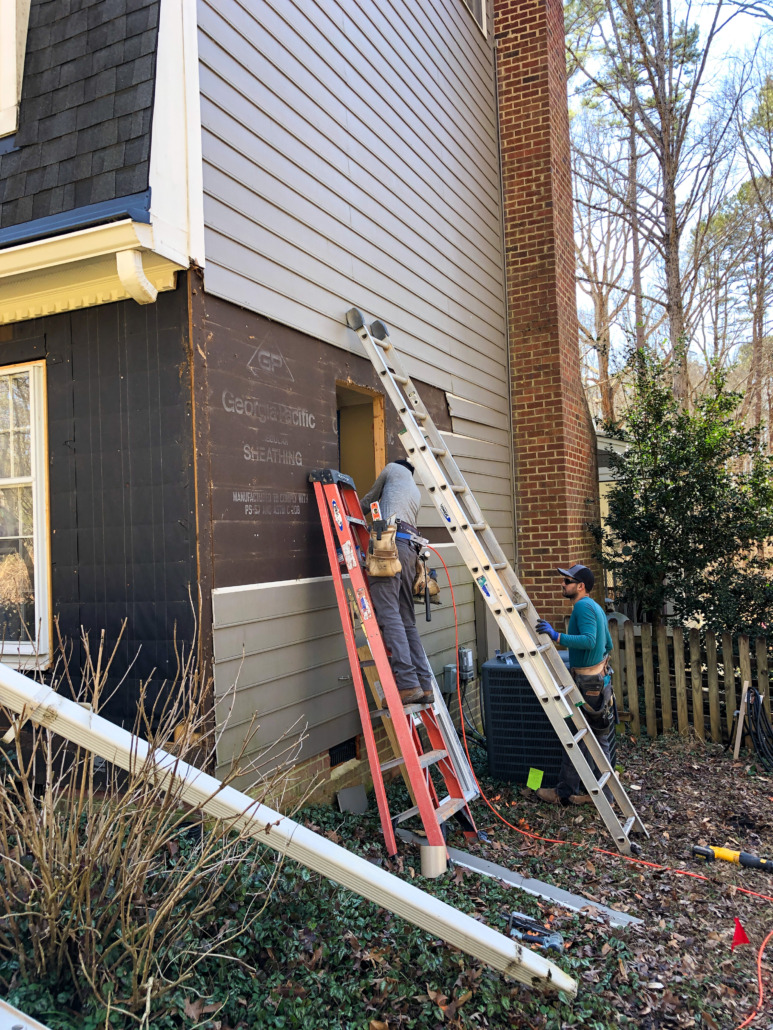
How to Install a New Window


Insulating a New Window

After the window was installed I left the siding guys to their work installing the new siding and trim outside while I focused on the inside portion of this installation.

Did you know that a new window is only as energy efficient as the installation and insulation around it? If you don’t add spray foam insulation between the rough opening and the window, you’ll get horrible drafts. In fact, you may want to peel off the trim around your existing windows and see if your windows have insulation around them.

I put the batt insulation back into the stud bays and used expanding spray foam insulation between the new window and the rough opening.
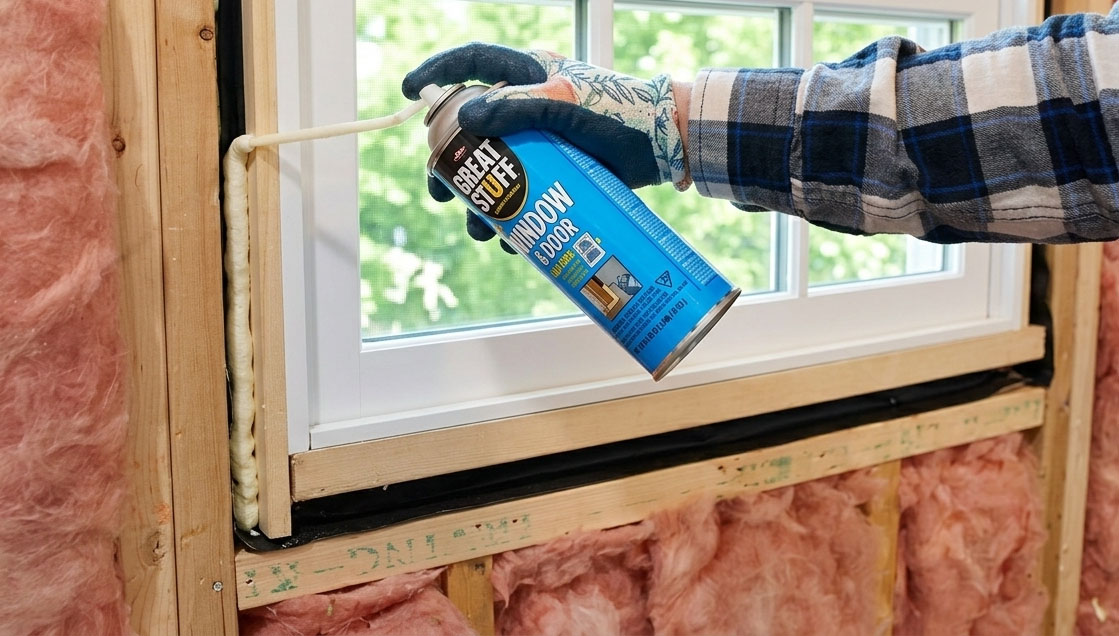
adding spray foam insulation around window frame

Before replacing the drywall, I decided to add a few outlets under the window (where there was only one before) since this would be a long work surface area and we’d need access to power in different locations.

Drywall and Other Finishes

Then I patched the wall with new drywall and finished the seams over the next few days. I’ve learned that good drywall finishing requires patience and several days of mudding and sanding. You can’t rush drywall finishing!
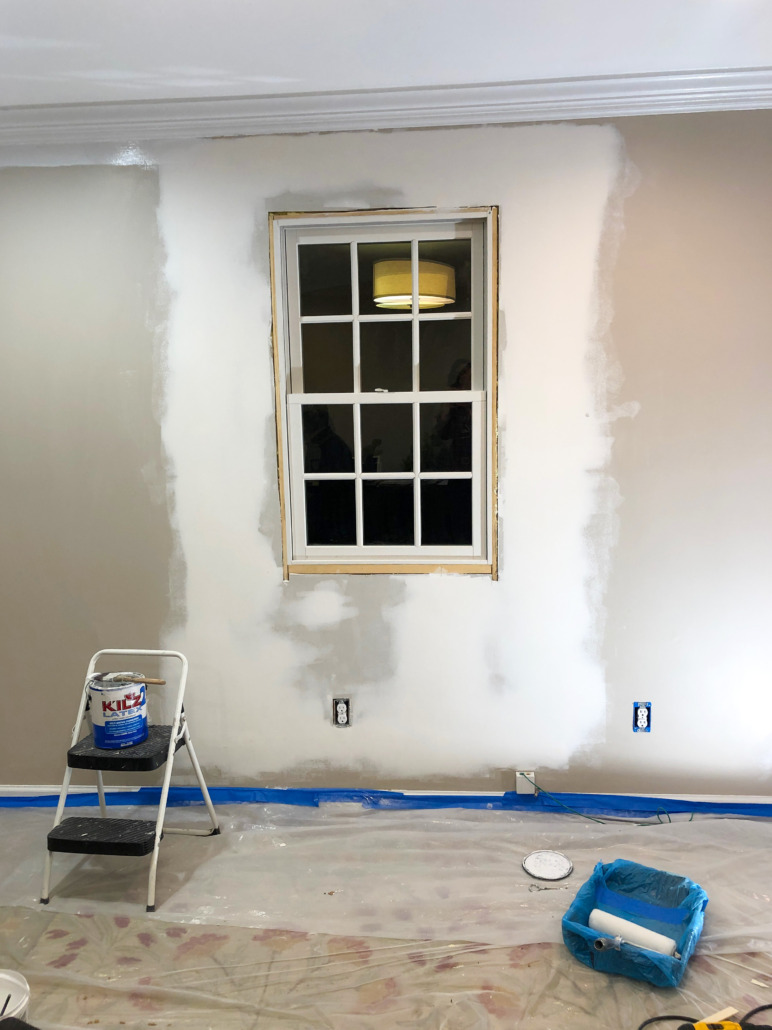
Next step was to add the window trim. I have a tutorial to help you add window casing. Here’s a tutorial for adding decorative header window casing.

How to Install Window Trim & Casing

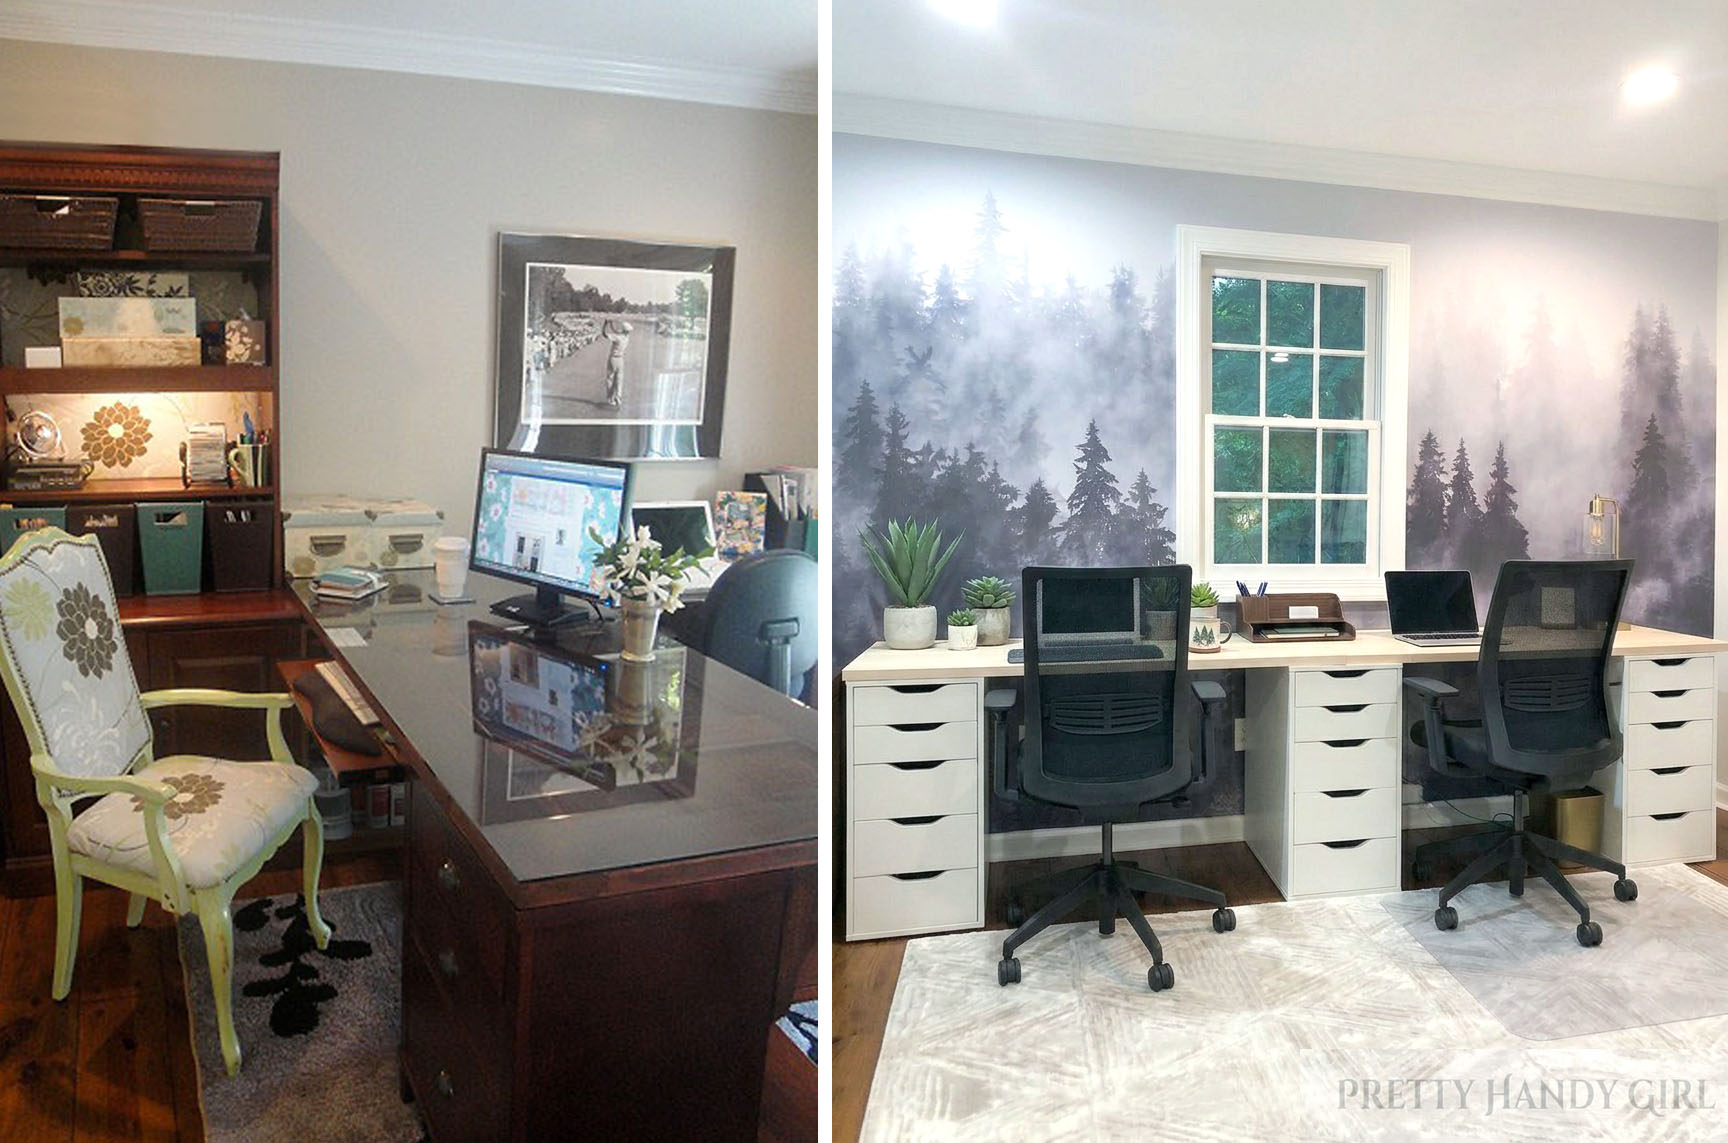
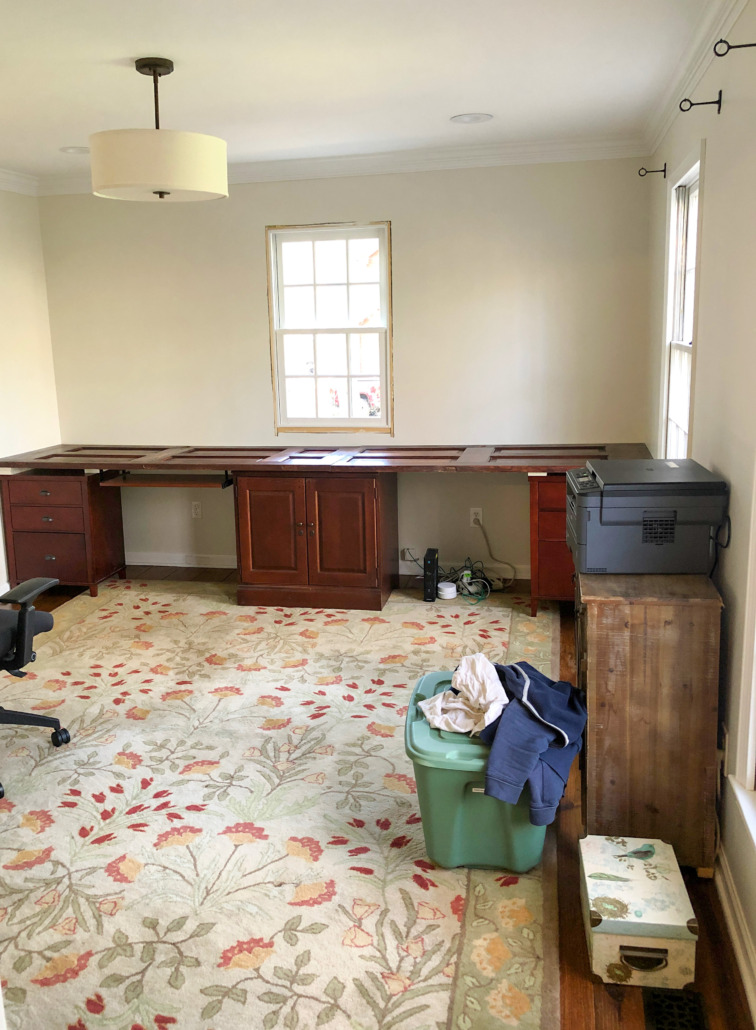
As a reminder, here’s the room before the window.
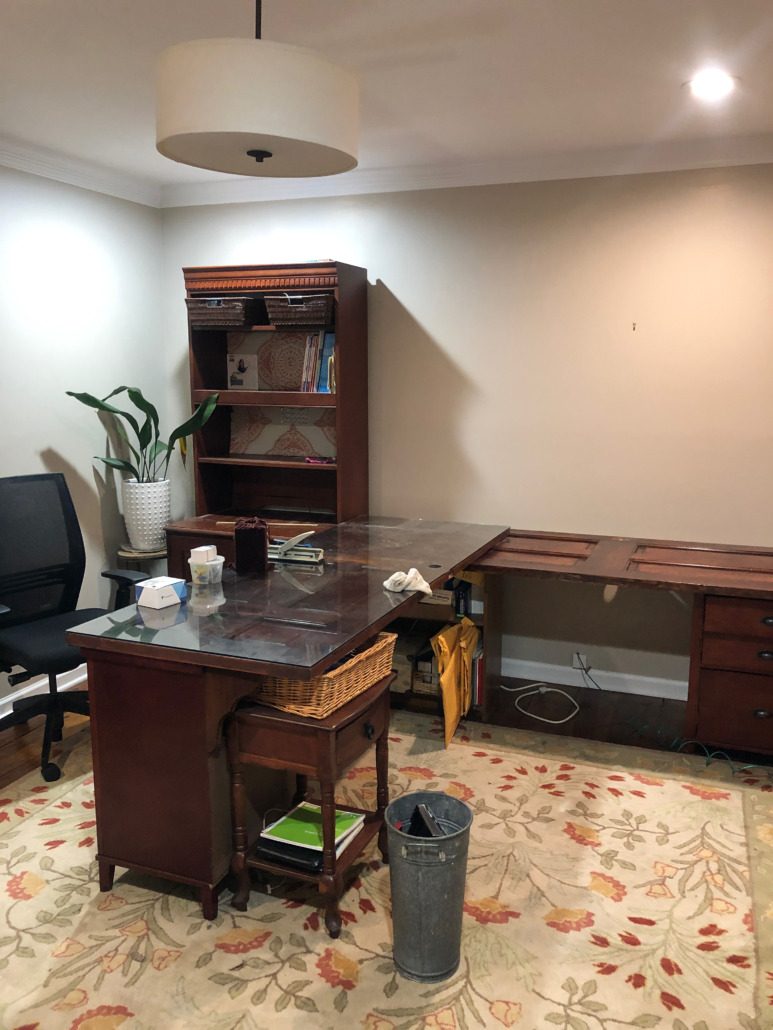
And here it is after:
We still have some work to do on this space, but already I love how much natural light comes into the home office now.
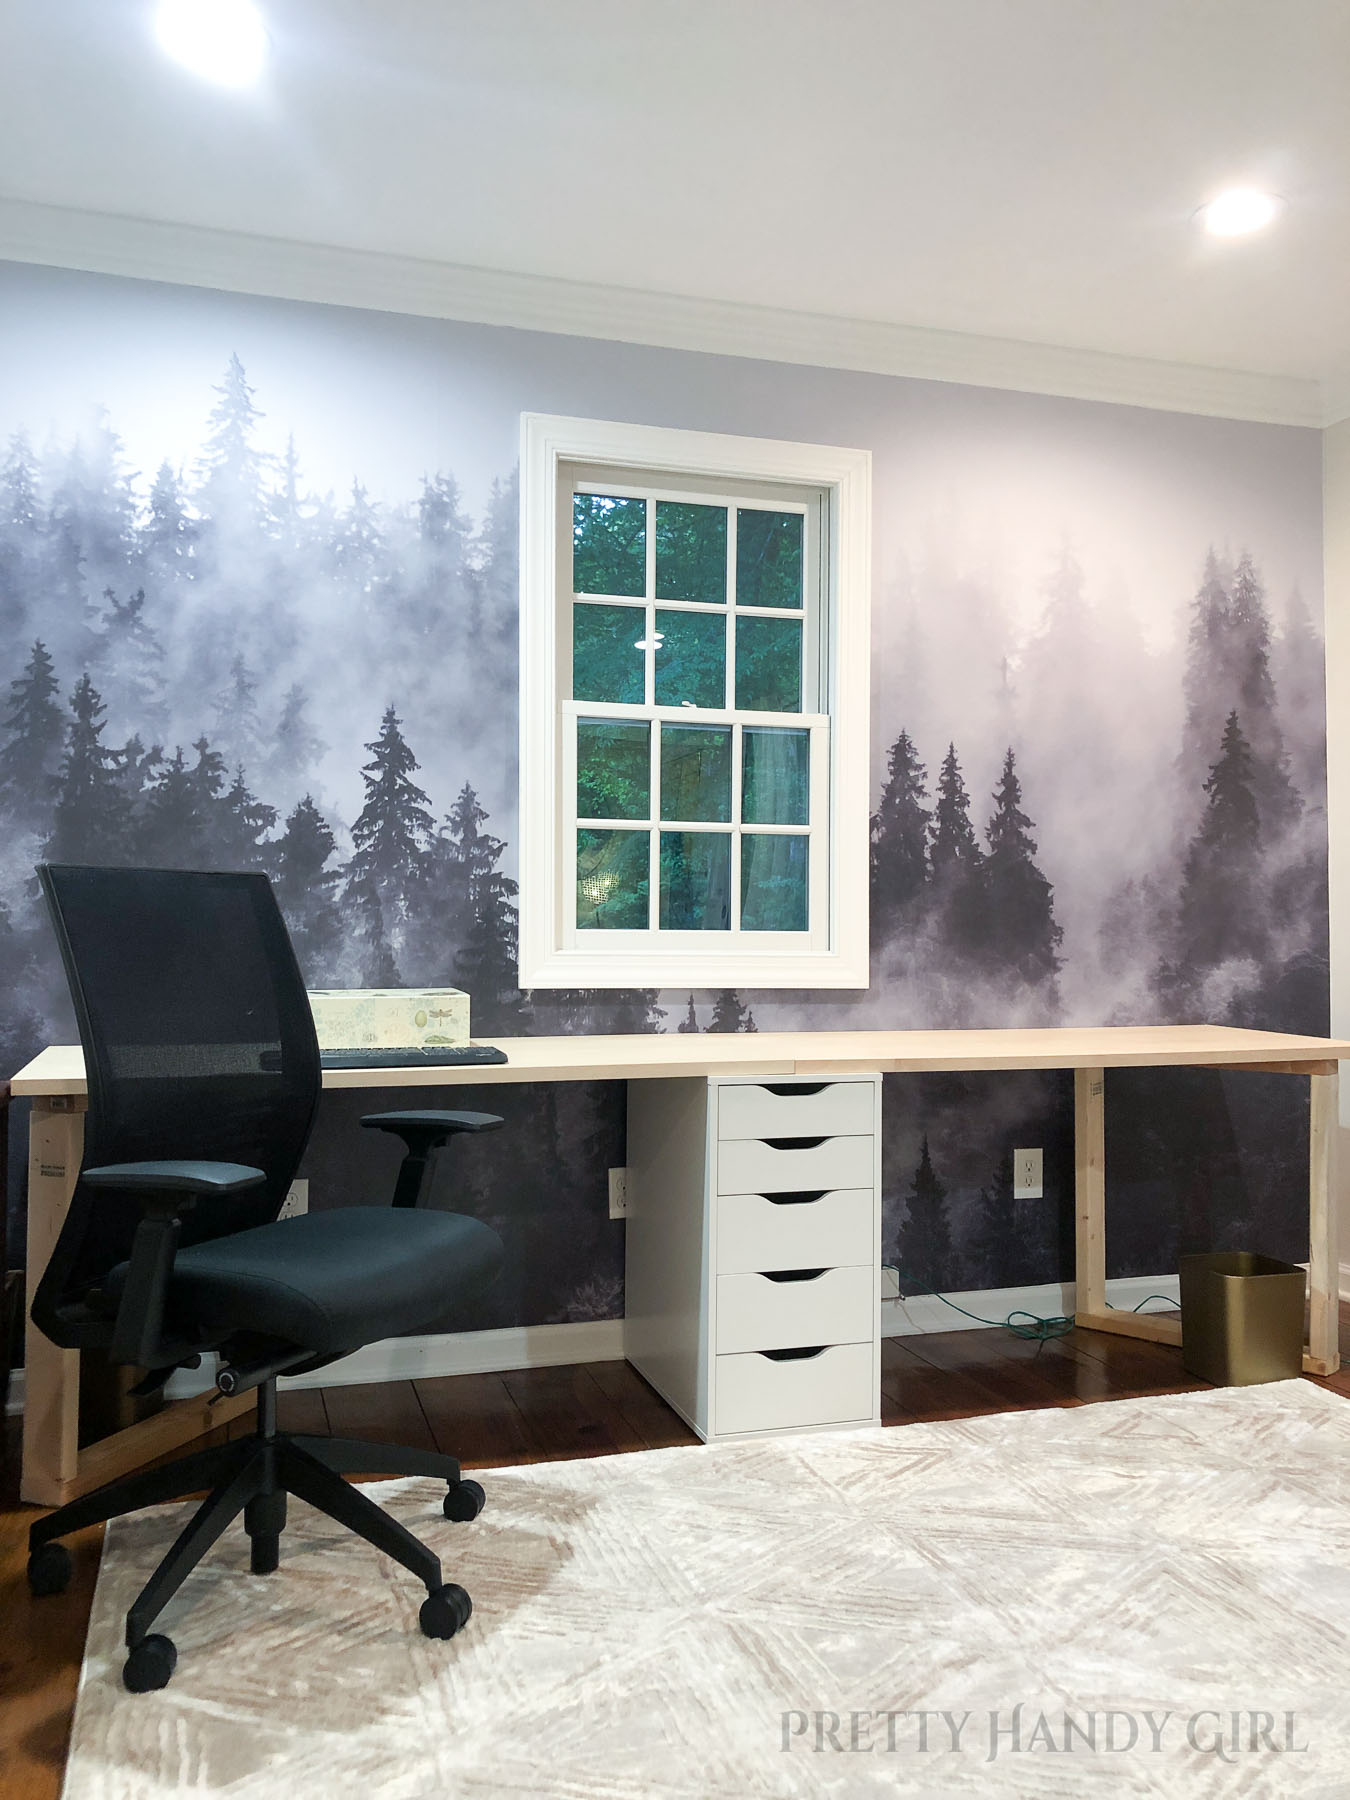
We opted to install a wall mural on this wall and I’m in love with it. The before and after of this wall makes my heart sing.

What do you think? A lot more light, right? Do you have a dark room in your home that could use another window?

signature

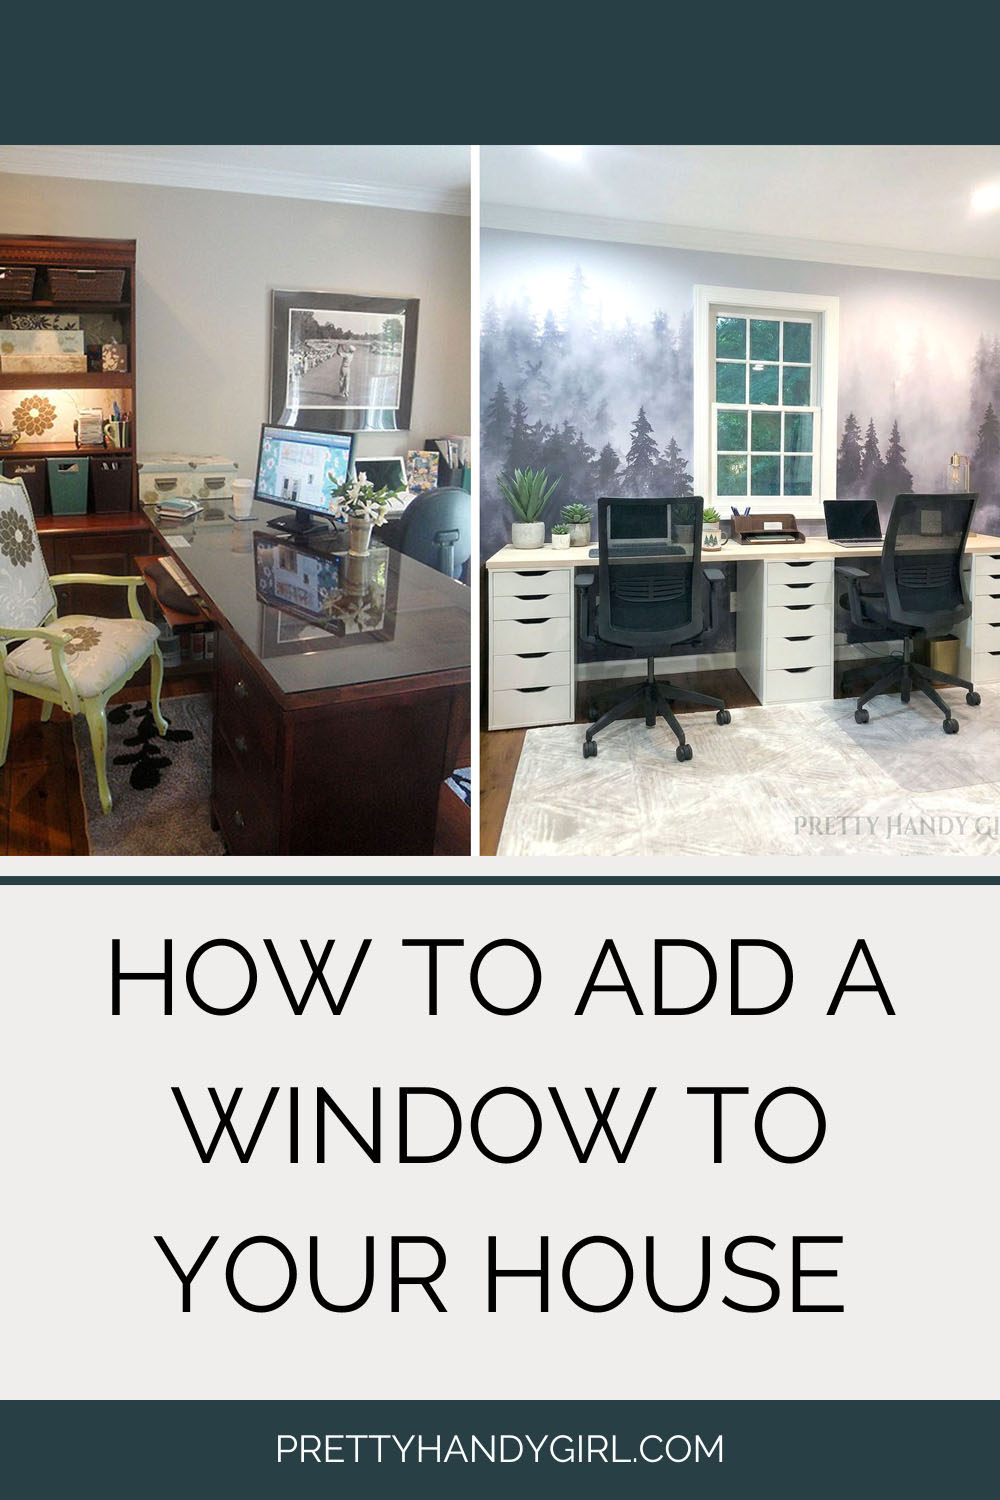
Share this post with someone by pinning this image:
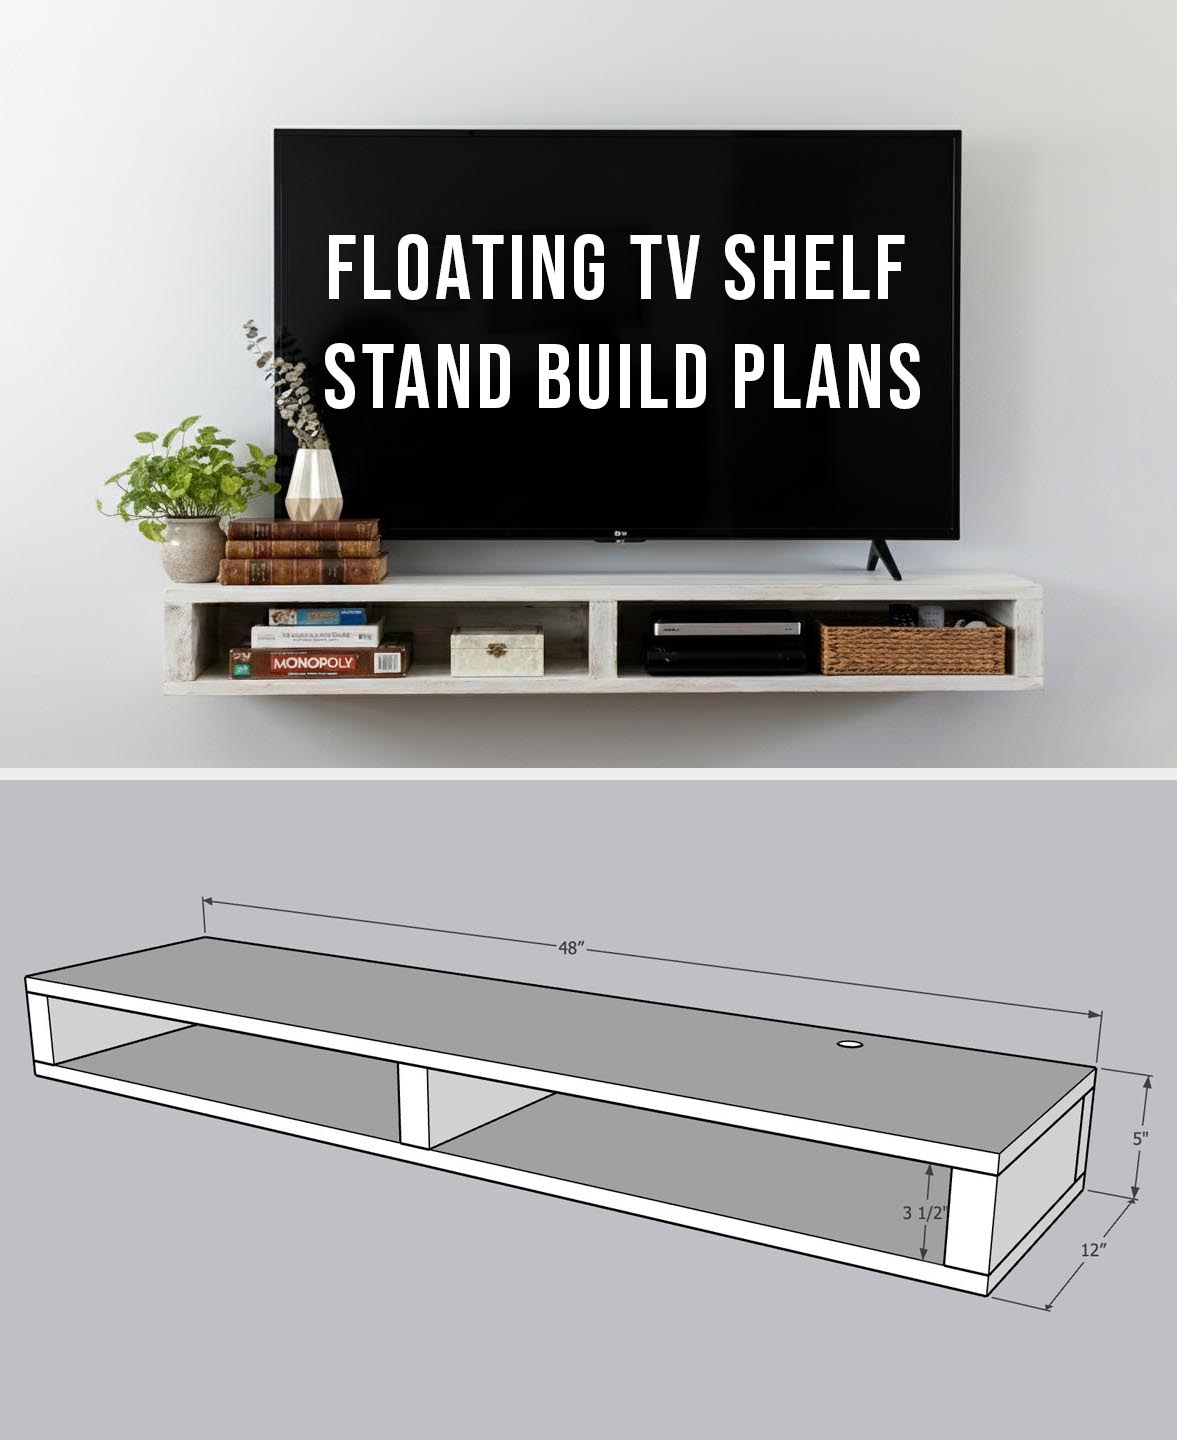
How to Build a Floating TV Shelf

Hello all! I have a fantastic DIY project today that will help you with storage, organization, and will free up floor space.

Recently my son moved into his first college apartment and as you would expect in a first apartment, space is at a premium. My son wanted to mount his TV on the wall and also have storage for games and his components. To solve both issues I came up with a floating TV shelf stand that would maximize his storage but also be perfect in small rooms (depending if he wanted it in the bedroom, living room, family room, or other spot.)

There are many tv stand designs we could have bought, but he wanted a floating look and something that went with his modern apartment vibe. Together we talked about several design options, but ultimately decided to build this simple DIY project together.

After building and finishing the floating shelf in my workshop, we transported it to his college town for installation. It was pretty straightforward, but we had to finish the build by drilling holes for cable management once we got to his apartment (and could see the size of the plugs.) Once it was hung, he fished the wires for the TV and components through the holes we made and plugged it into the wall. Then we filled the shelf with games and gaming components.

I’m so excited to share these simple DIY plans to build a floating TV Shelf stand. The plans I have will instruct you to build a floating shelf 48 inches wide, 5 inches tall, by 12 inches deep.  

Measure your TV base before beginning. Feel free to enlarge the width of your floating tv stand. It’s not recommended to increase the depth of your shelf by more than an inch or two. Making your shelf deeper than 12 inches can cause your shelf to sag or not be as sturdy on the front edge.

This shelf is very easy to build and doesn’t require any special tools.  You can have it completed in a couple hours and hung on the wall in about five minutes.

So are you ready to learn How to Build Your Own Floating TV Shelf? Start by downloading the plans here.

First you’ll need a few building materials and the right tools. I’ve listed them below for your convenience.

Floating TV Shelf Materials:

(I’ve included affiliate links for your convenience. I earn a small percentage from a purchase using these links. There is no additional cost to you. You can read more about affiliate links here.)

Floating TV Shelf Cut List:

  • (1) 1 ½” x 3 ½” x 48″ (back of TV shelf frame)
  • (3) 1 ½” x 3 ½” x 10½” (TV shelf supports)
  • (2) ¾” x 12″ x 48″ (top and bottom of shelf)

Floating TV Shelf Instructions:

You’ll find the simple detailed plans for this structurally sound tv display shelf here.

DIY floating TV Shelf Stand Drawing

A Note about Measurements:

Depending on how tall you want your shelf, you can either use a 2″x 4″ (which would make the opening in your shelf 3 Â½” tall).  Or you can use a 2″x 6″ (which would make the opening 5 Â½” tall).  If you have a table saw, you can rip whatever size board to the custom height you want.  (For this build, I ripped a 2″x 6″ down to 4″ wide for my frame.)

Once you determine the width you want, cut a piece at 48″ long.  Then, cut your three pieces at 10 Â½” long.

Installation Instructions:

It’s crucial that you install your shelf to wall studs for a secure installation. For this tutorial I am assuming you are mounting your floating shelf on a wood construction wall with drywall. If you have another wall type, you may need other use strong anchors (masonry anchors or other) to secure your shelf.

Find the location you want your shelf to hang using my easy solutions to finding a wall stud without a stud finder.

Use a level to make sure the shelf is level. Locate at least 2 studs (3 is better) behind the shelf and use structural screws at least 4″ long to attach through the back of the shelf into the studs. And that’s it. You’re done!

This shelf frees up space below for more storage or to keep a minimal and modern look in your home.

signature

Pin this tutorial to share the DIY inspiration:


Welcome to the next level in low maintenance gardening! If you came here from my raised garden bed tutorial, let’s make your new home garden even more amazing by installing a sub-irrigated planter system. Don’t let the name fool you, sub-irrigation is a fancy term, but it’s easy to create.

What are Sub-Irrigation Planters?

Sub-irrigation (sometimes called SIP system) garden beds are a type of raised bed that waters plants from the bottom up, rather than the top down. This method helps maintain consistent soil moisture and can be more water-efficient than traditional watering techniques. In short, SIP planters are a self-watering container.

Key Features:

  • Water Reservoir: At the bottom of the bed, there’s a built-in reservoir that holds it’s own water source (I used a pond liner and perforated drainage pipes)
  • Wicking System: Above the reservoir, garden soil specifically for sub-irrigation (more on this mixture later) draws water up via capillary action to the plant roots. This results in a healthier vegetable garden.
  • Overflow Drain: Ensures excess water drains out, preventing over-saturation, too much water, and root rot.
  • Fill Tube or Pipe: Used to add water directly into the reservoir without disturbing the soil when it hasn’t rained for a while.

Benefits:

  • Water Conservation: Less water is lost to evaporation.
  • Even Moisture Levels: Plants receive a steady supply of water, reducing stress.
  • Low Maintenance: Less frequent watering is needed (going on vacation? No problem, it waters itself.)
  • Improved Root Health: Encourages deeper root growth, improved plant health, and prevents surface drying.
  • Conserves Water: Great for areas with restrictions on water usage or for severe drought conditions
  • Save Money: No need to incur the extra cost of buying soaker hoses, drip irrigation, or timers.

Ready to learn how to make your own sub-irrigation planter bed like the one above? (Note: your garden bed doesn’t have to be as elaborate, you can add it to a standard raised garden bed. I’ll show you how.)

How to Install a Sub-Irrigation System in Your Raised Garden Bed

To learn how to build a sub-irrigation garden bed, you’ll want to watch my video before proceeding. You can fast forward to minute 8:00 if you wish to see the sub-irrigation portion of the video.

To create a water-tight planter, use a fish-safe pond liner to line inside of each bed. Then measure and cut lengths of perforated drain pipes to fit in the bottom of the garden bed.

To cap off the drainage pipes, I used some weed barrier (landscape fabric) and taped it to the ends using flashing tape. This will hopefully keep the dirt from getting into the pipes. (For additional protection, you might want to lay weed cloth on top of the pipes before filling with garden soil.)

Now you’ll want to add a fill tube to fill the reservoir of the garden with water (during dry spells or to simply top off the garden). A 2 inch PVC pipe is installed vertically into one of the drainage pipes. Then use a funnel or cut off plastic bottle with the neck pointing into the pipe for a fill spout. To secure the funnel, tape or silicone seal around the neck of the funnel and the pipe.

Once your garden bed is filled with soil, only the funnel should be visible above the garden surface.

In addition to a fill tube, a drainage hole (overflow hole), drain tube, or overflow pipe is also needed.

This will prevent your garden bed from flooding (in the case of too much rain). The overflow tube is installed in the top of the drainage pipe and sends excess water out of the planter on each end. You can view how this works in my YouTube video. Seal around the overflow tube where it goes through the pond liner with silicone sealant. Wait for it to cure before exposing to water.

Now it’s time to add the garden soil mixture specifically for a sub-irrigation bed.

Raised Bed Garden Mix for Sub-Irrigation Gardens

To grow plants and vegetables in a sub-irrigation garden bed, you need a specific mixture of growing medium. It’s important to have a mixture of soil that is light and airy (nothing too heavy or dense). The mixture I used keeps the soil from getting too compact but also feeds the vegetables and fruits with nutrients. Perlite or vermiculite is a common ingredient in potting mix soil that facilitates drainage and aeration. Here’s the garden soil mixture I use for my sub-irrigation beds:

You can mix the soil ahead of time in a wheelbarrow, on a tarp, or mix it in the bed with a hoe and rake (take care not to puncture the pond liner). After adding the soil, mix in any fertilizer you want depending on what will be grown in your garden.

Now that your garden bed is filled with soil, it’s time to plant you vegetables or flowers! Get ready for those baby plants to take off and grow in your new sub-irrigation garden bed.

Visually you’d never know my garden is a sub-irrigation garden! It will be our little secret, okay? Then again, you may want to brag to all the neighbors about how you rarely have to water your garden.

Now all you have to do is decide what type of plants you’re going to grow in your new raised garden bed!

Happy gardening.

signature

The build plans to create your own raised garden bed with arched trellis can be found here or head to Etsy to purchase the plans.

Pin this image to save it:

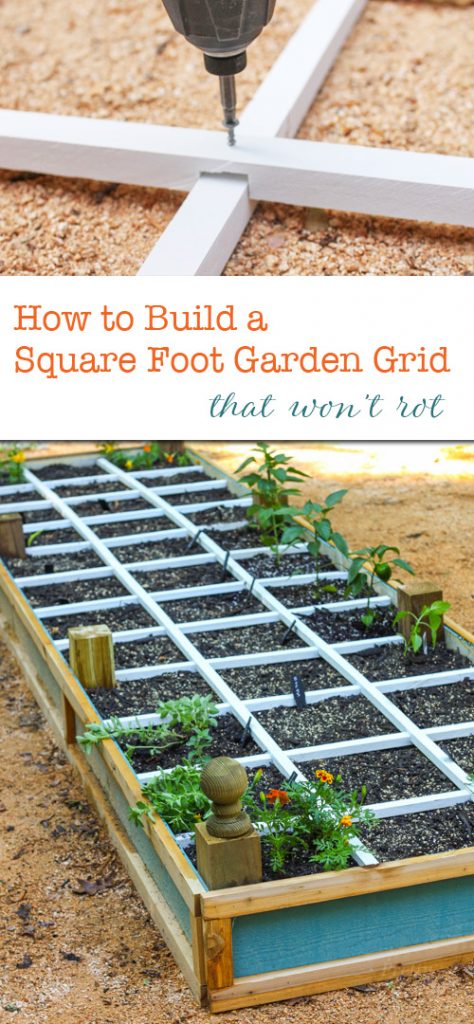
If you liked this article, you can see how I made a never rot square foot garden grid here.

How to Build a Square Foot Gardening Grid that Won't Rot | Pretty Handy Girl

Gardening is a passion of mine and I’ve built several garden beds in my life. But, I’ve always dreamed of building a vegetable garden that could keep the deer, rabbits, and other critters out. I also wanted garden trellises that my climbing plants wouldn’t outgrow. Finally, I wished for a garden that could survive without being watered for a week or more while we were on vacation. If you follow me on Instagram, you saw the process of building this bed unfold two years ago, it’s taken me a while, but I finally have a new DIY for you!

Introducing the Ultimate Raised Garden Bed with Arched Trellis and Sub-Irrigation!

How to Build a Raised Garden Bed with Arched Trellis

After sharing the garden bed build on my social media channels, I got many requests for the plans. I put it off for a while because I knew creating them would take a big chunk of time to create, but I think you all are worth the effort. By popular request, I drew up the plans in SketchUp and wrote a complete step-by-step tutorial to build this beautiful garden structure filled with diagrams to help you build one for yourself.

Raised Garden Bed Size:

The build plans I created call for a footprint of 11’6″ x 12’3″, but you can customize the gardens to fit your space requirements. If you do make changes, don’t forget to leave room to walk around the full exterior of the gardens. Also allow room for the gates to be opened and closed. The trellis frame height when built according to the plans is 7′ tall. You can customize any part of this build to fit your needs, though I would not recommend making the beds any wider as it will be hard to reach more than three feet across to harvest your veggies or flowers. But, if you have extremely long arms, you do what you want.

Full Plans for a Raised Garden Bed with Arch Trellis:

My full plans to build the raised garden beds with arched trellis are available to purchase here. I also made a video showing how I built the garden bed and installed a sub-irrigation system in them. The link to this video can be found here or you’ll find it embedded below.

I recommend downloading the plans and then watch the video completely before ordering materials since I offer some alternative materials and building construction (especially for the side panels).

Now, let’s talk over some details about building this raised garden bed before you get started.

Measurements:

A few notes about measurements. If you’re building your raised garden beds on flat ground, great! This will be a lot easier. If your raised bed is on a sloped section of land, you may want to make one of your beds taller to accommodate the slope. I wouldn’t recommend making one bed shorter, unless you are going to skip the sub-irrigation feature. On the flip side, more height means more dirt and materials are needed to fill the bed. Plus, more lumber and panels will be needed to clad the sides. Just be aware of this when budgeting.

I highly recommend watching the video before beginning this tutorial. It will illustrate how I prepped and built my garden beds on a gently sloped site.

Additionally, you may want to measure first and cut based on your measurements versus the measurements in my plans. Especially when you are cutting the lumber for the cross pieces on the arched trellis, the cap of the posts, and the gates. Wood can shrink, swell, twist, and bow, which can lead to changes in dimension.

You may also want to modify the heights of the shorter 4×4 posts. I find I can access my garden fairly well, but I do have to duck under the 2×4 cap on these posts. Just be aware if you make these posts taller, you will need to buy additional lumber to accommodate for the excess.

Tools:

(I’ve included affiliate links for your convenience. I earn a small percentage from a purchase using these links. There is no additional cost to you. You can read more about affiliate links here.)

*These tools aren’t necessary, but will make your build easier.

Please note, you should have a basic knowledge for using a circular saw, drill, and impact driver before beginning this build. If you want to learn how to use these tools, I have a complete guide to using power tools here. Always use safety equipment when working with power tools. I’m not responsible for any injuries incurred during this build.

Supply List:

A full supply list is available with the downloadable build plans, but basically you’ll need to compile these materials for the build:

Prepping the Area:

Again, watch my video to see how to prep your planter bed areas. This will help you prep your garden site to allow for proper drainage, building, and planting.

Step 1: Select your location for your raised planter beds. Try to choose a garden space that is already leveled.

Step 2: Clear any vegetation and level the area for each bed (3′ x 12′  each with a 5′ section in between the beds.) If you have a severe slope, you may need to use retaining wall blocks or pavers to build up a low spot.

Step 3: To extend the life of the garden beds and prevent rotting, scrape away 1-2 inches of dirt. Backfill the area with drainage rock and tamp to level the rock.

Step 4: Lay landscape fabric (weed barrier) on top of the rocks to prevent weeds from growing and to protect the pond liner if you are creating a sub-irrigation bed.

Step 5: If you have a slope, you may want to consider building the lower planter bed taller so the tops of the beds are level. The best way to figure out the height differential is to lay a straight 2×4 on the ground from one bed to the other. Set a level on top of the 2×4 and use blocks or bricks to raise the lower end until the bubble shows a perfect level. Measure the lift under the raised end. This is the amount you will add to the upright pieces of the garden bed sides. For example, if you have to raise one end of the 2×4 with the level on it 5 inches, your new upright 2×4’s will now need to be 5 inches taller to be level with the bed on the higher ground.

Side Panel Materials for Garden Beds:

Let’s discuss some other options for cladding and closing in the garden bed sides. Feel free to customize the panels for your style (and visual interest) using some of the materials mentioned below. You’ll want to choose the best materials for longevity (non-rusting, non-deteriorating, and sturdy).

Side Panel Materials: You can use metal roofing material as I did. You can also use decking material (composite or pressure treated lumber*) on the inside or outside of the garden bed frame. There are also a variety of PVC materials you could use. Just be sure to select a material that is weather resistant and will not rot or disintegrate over time. I put together a Photoshop rendering of some different side panel materials for your convenience.

*There is some controversy about using pressure-treated lumber for vegetable gardens because of the potential for the chemicals to leach into the food. Do your own research. To protect chemicals from leaching, you can seal the interior of the bed with exterior paint, stain, or sealant. You can also line your bed with a liner.

alternate raised garden bed materials. - PVC panel, siding, and corrugated metal roofing material

Step-by-Step Instructions:

If you’re ready to build this raised garden bed with arched trellis, you can purchase and download the step-by-step tutorial here. I’ve spent a lot of time designing and building the beds and worked out all the kinks so you don’t have to. I know you’ll find the tutorial extremely helpful for building your raised garden beds. You can also break the plans down into smaller sections if you only want to build one of the beds.

Watering Your Garden with Sub-Irrigation Garden Beds

You can water your garden, use drip irrigation, or to learn how to make your garden bed self-watering with sub-irrigation, you’ll want to refer to this tutorial on How to Make a Sub-Irrigation Garden.

To learn what type of garden soil mixture you’ll need for your sub-irrigation vegetable garden, reference this information in the article with all the details about a sub-irrigation garden.

Good luck to you as you proceed with your raised planter beds, once you’re done you’ll have a thriving garden bed. All you have to do is decide what types of plants you want to grow in it. I’d love to see your finished garden beds, please email me some photos (or tag me on Instagram) so I can gush over your garden.

Pin this image to save it:

This image has an empty alt attribute; its file name is pin-raised-garden-bed-arched-trellis-plans-2-687x1030.jpg

If you liked this tutorial, I think you’ll love this one too:

How to Compost - Magnificent Garden Soil| Pretty Handy Girl

How to Create Nutrient Rich Soil for Your Garden & Plants

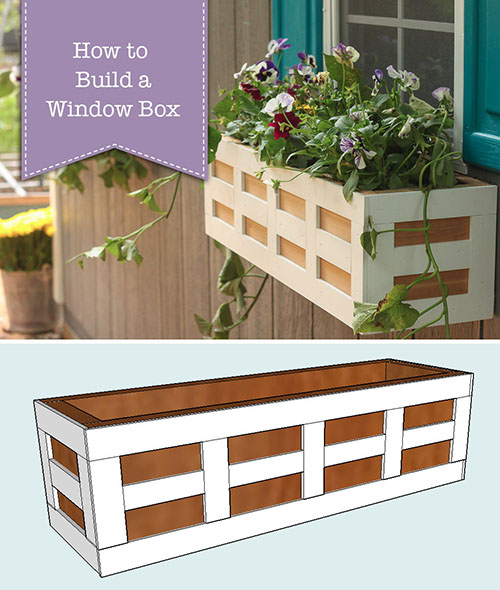
Learn how to build charming lattice window boxes to boost your curb appeal. This easy DIY guide uses simple materials with beautiful results!

How to Build Window Boxes | Pretty Handy Girl

Window boxes have always been on my “want to do” list for my house. But, I put it off because I didn’t want to build seven for our house.

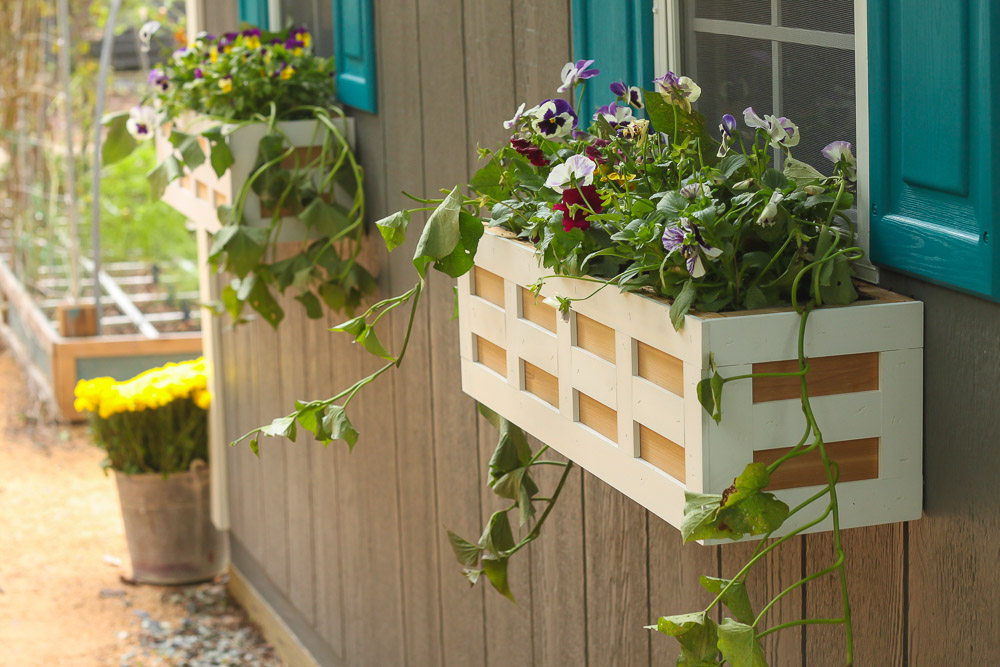
When I built the shed, I knew I could dress it up with two flower window boxes.

Today I’ll show you how to Build Lattice Window Boxes to give your shed or house that beautiful cottage touch and improve the curb appeal.

How to Build Lattice Window Boxes

If you have a house that needs a little charm and character, adding window boxes is an easy way to add architectural style and curb appeal to your outdoor spaces.

But why settle for standard sizes of off-the-shelf window boxes when you can make your own window boxes that have beautiful lattice details in the size that you need!

Plus, you dictate the size of your rectangular planter, which gives them that custom look.

DIY Lattice Window Boxes with flowers

Stick around and learn how to build custom window boxes today and dress up your windows tomorrow.

Materials:

materials to build window boxes

The variety of materials listed below are for one window box. (I’ve included affiliate links for your convenience. I earn a small percentage from a purchase using these links. There is no additional cost to you. You can read more about affiliate links here.)

Cut List:

(*A note about window box sizing: The measurements below are the ones I used for my shed window boxes. I’d suggest measuring your own windows first and add at least 2″ beyond each side of your window frame to get custom sizes. I added 3″ to each side of my window boxes.)

  • 2 – 1 x 7 ½” x 26″
  • 2 – 1 x 7 ½” x 6″
  • 1 – 1 x 6″ x 24″ (you’ll need to rip one of the 7 ½ boards to 6″ wide)

Instructions:

Lay out your wood pieces on a flat surface.

pieces of cedar board cut for window box construction

Apply wood glue to the perimeter of the bottom piece (shown in center above.)

apply wood glue to edges of window box wood

Set the front, back and side pieces in place.

window box construction diagram

Clamp the pieces around the base to form your box shape. Use 1½” finish nails to secure the front and back pieces to the sides and the base.

For more strength, wood screws will be added next.

clamp window box pieces and nail the front and back to the sides

Pre-drill three holes into the bottom and two holes into the sides using 1/8″ drill bit.

Then drive screws into the pre-drilled holes to add additional support to the window box construction.

Repeat for the opposite side.

pre-drill and drive screws into front and back of window box

Flip the window box over and drill 7/8″ holes into the bottom of the window box for drainage.

Flip the window box over and drill drainage holes

Time to dress up your plain Jane box. Measure and cut the vinyl pieces to fit around the perimeter of each panel.

I suggest making the horizontal pieces full length. Then cut the vertical pieces to fit.

mark lattice piece lengths on window box

Nail lattice pieces in place with 3/4″ finish nails.

add lattice pieces to window boxes to dress them up

Measure and cut vertical lattice pieces for the box. Space the pieces evenly and secure to the front and two sides of your window box with finish nails.

add vertical lattice pieces

For more detail cut and secure horizontal pieces to the centers of each framed square.

add horizontal lattice pieces

Fill the nail holes with caulk.

fill nail holes with exterior siding and trim caulk

To keep potting soil from pouring out of the holes, staple weed fabric inside the window boxes.

staple weed block fabric inside window box to retain soil

Easy installation

Your window box is complete and can now be hung. Drill and secure your window box into studs or wood supports with exterior wood screws.

completed window box diagram

Fill with potting soil and flowers and enjoy your gorgeous garden decor.

cottage style window box diy

Water your plants regularly as they will dry out faster in window boxes.

Enjoy the instant charm and character you just added to your windows with an elegant window box that you built yourself!

These wood window boxes provide an elegant touch, with a beautiful design aesthetic, similar to iron window boxes without the expense.

two window boxes on shed windows - easy diy

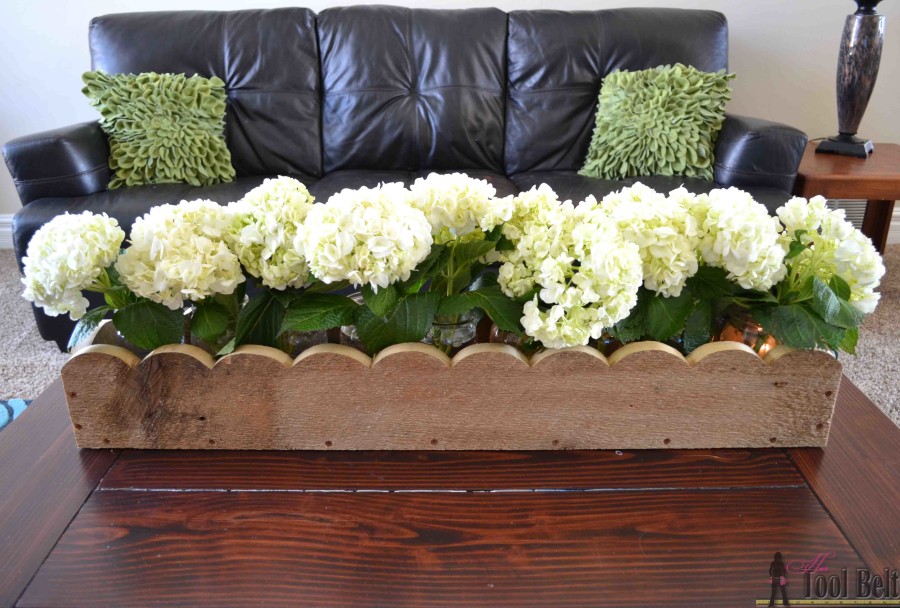
I hope you liked this easy DIY project! If you like this project, you’ll love this easy scalloped centerpiece tutorial:

How to Build Lattice Window Boxes

Scalloped Box Centerpiece

Have a Happy Spring Y’all!

PHGFancySign

Pin for Later:

lattice window box with pansies