
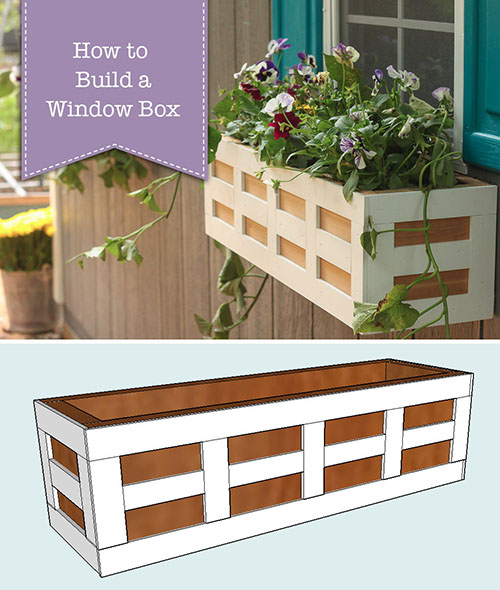
How to Build Lattice Window Boxes
Learn how to build charming lattice window boxes to boost your curb appeal. This easy DIY guide uses simple materials with beautiful results!
Window boxes have always been on my “want to do” list for my house. But, I put it off because I didn’t want to build seven for our house.
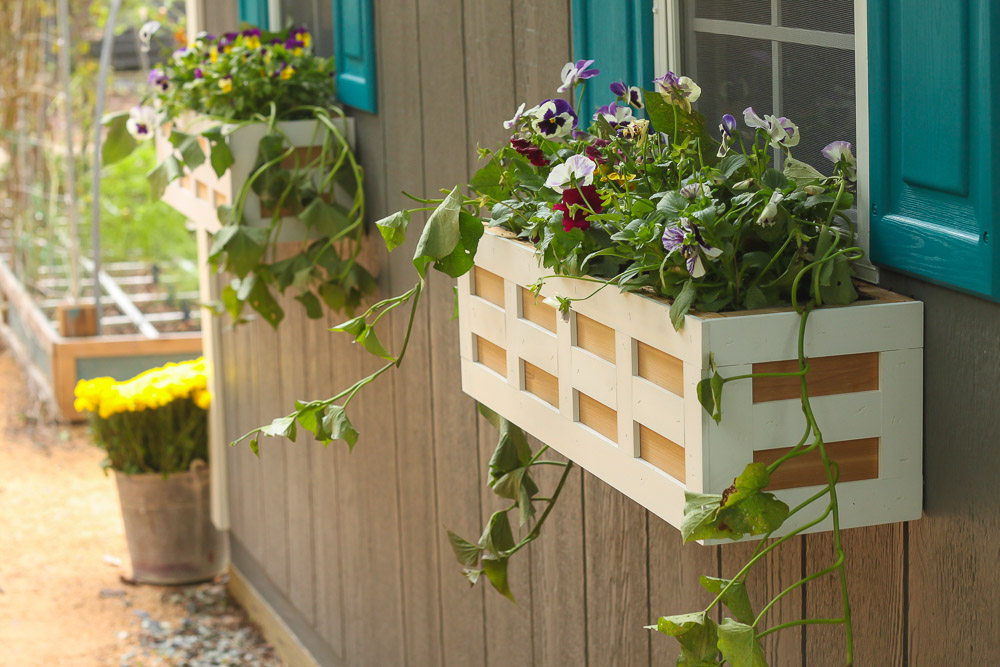
When I built the shed, I knew I could dress it up with two flower window boxes.
Today I’ll show you how to Build Lattice Window Boxes to give your shed or house that beautiful cottage touch and improve the curb appeal.
How to Build Lattice Window Boxes
If you have a house that needs a little charm and character, adding window boxes is an easy way to add architectural style and curb appeal to your outdoor spaces.
But why settle for standard sizes of off-the-shelf window boxes when you can make your own window boxes that have beautiful lattice details in the size that you need!
Plus, you dictate the size of your rectangular planter, which gives them that custom look.
Stick around and learn how to build custom window boxes today and dress up your windows tomorrow.
Materials:

The variety of materials listed below are for one window box. (I’ve included affiliate links for your convenience. I earn a small percentage from a purchase using these links. There is no additional cost to you. You can read more about affiliate links here.)
- 1″ x 8″ x 8′ (7 ½” actual width) cedar planks
- 2 – 1 ½” x 10′ white vinyl strips (in window and door trim aisle)
- Tape measure
- Pencil
- Drill
- 7/8″ spade drill bit
- 1/8″ drill bit
- 2″ exterior wood screws
- Nailgun
- 1.5″ finish nails
- ¾” finish nails
- Wood glue
- White Window & Door Caulk
- Caulk gun
- Clamp
- Safety glasses
- Hearing protection
- Staple gun with staples
- Weed block fabric – can also use watersave’ liner
Cut List:
(*A note about window box sizing: The measurements below are the ones I used for my shed window boxes. I’d suggest measuring your own windows first and add at least 2″ beyond each side of your window frame to get custom sizes. I added 3″ to each side of my window boxes.)
- 2 – 1 x 7 ½” x 26″
- 2 – 1 x 7 ½” x 6″
- 1 – 1 x 6″ x 24″ (you’ll need to rip one of the 7 ½ boards to 6″ wide)
Instructions:
Lay out your wood pieces on a flat surface.

Apply wood glue to the perimeter of the bottom piece (shown in center above.)

Set the front, back and side pieces in place.

Clamp the pieces around the base to form your box shape. Use 1½” finish nails to secure the front and back pieces to the sides and the base.
For more strength, wood screws will be added next.

Pre-drill three holes into the bottom and two holes into the sides using 1/8″ drill bit.
Then drive screws into the pre-drilled holes to add additional support to the window box construction.
Repeat for the opposite side.

Flip the window box over and drill 7/8″ holes into the bottom of the window box for drainage.

Time to dress up your plain Jane box. Measure and cut the vinyl pieces to fit around the perimeter of each panel.
I suggest making the horizontal pieces full length. Then cut the vertical pieces to fit.

Nail lattice pieces in place with 3/4″ finish nails.

Measure and cut vertical lattice pieces for the box. Space the pieces evenly and secure to the front and two sides of your window box with finish nails.

For more detail cut and secure horizontal pieces to the centers of each framed square.

Fill the nail holes with caulk.

To keep potting soil from pouring out of the holes, staple weed fabric inside the window boxes.

Easy installation
Your window box is complete and can now be hung. Drill and secure your window box into studs or wood supports with exterior wood screws.

Fill with potting soil and flowers and enjoy your gorgeous garden decor.

Water your plants regularly as they will dry out faster in window boxes.
Enjoy the instant charm and character you just added to your windows with an elegant window box that you built yourself!
These wood window boxes provide an elegant touch, with a beautiful design aesthetic, similar to iron window boxes without the expense.

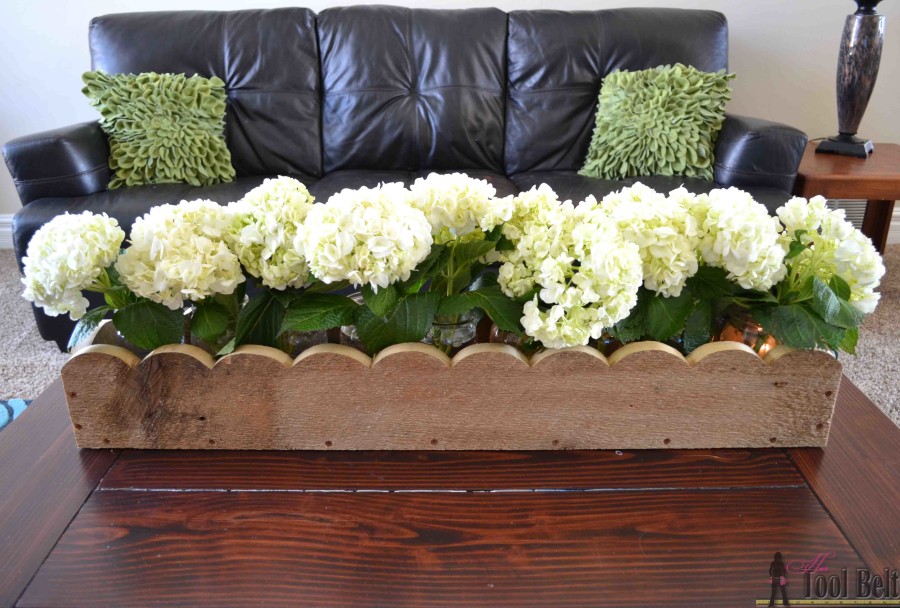
I hope you liked this easy DIY project! If you like this project, you’ll love this easy scalloped centerpiece tutorial:
Have a Happy Spring Y’all!

Pin for Later:


Thanks for this posting and useful links! Going to try to make this myself
This is so beautiful!
Nice job! Looking so lovely!
Hi Pretty Handy Girl, wow I have just run across your website and it’s so cool. Your projects are well thought out and I love how you love the smell of coffee and saw dust in the morning. I have a tree cutting business and saw dust and coffee absolutely go together. Try some beef jerky with your coffee. I worked at a meat shop when I was a teenager and the only thing we had that was ready to eat in the place was beef jerky with lots of black pepper on it. I used to eat a peice with my coffee in the morning and really got used to it. I make it at home now and take it with me to work. Hey keep up the great blog. I can’t wait to see what you come up with next!