How to Install a Wall Sconce | Pretty Handy Girl

How to Install a Wall Sconce | Pretty Handy Girl

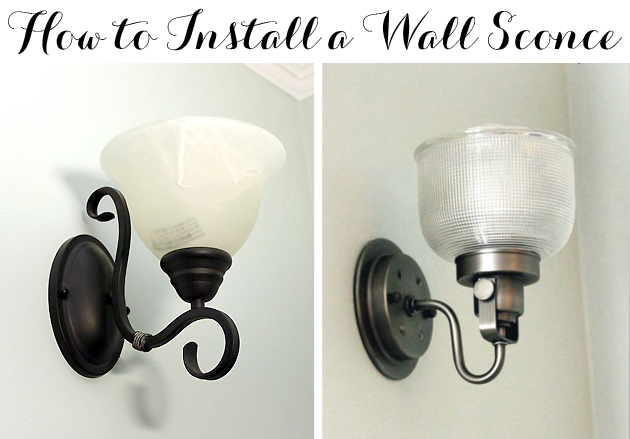
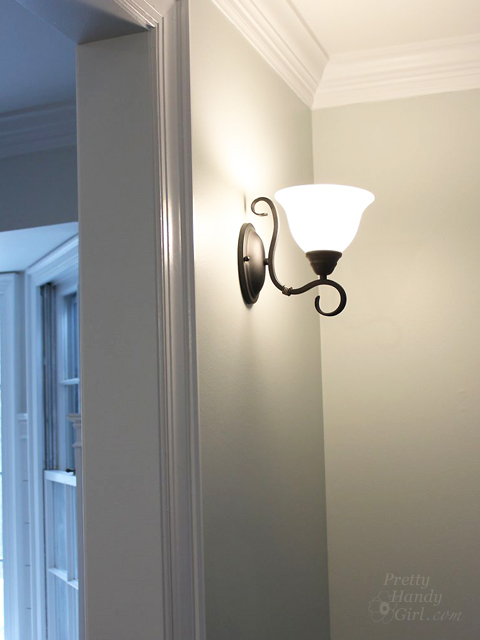
Do your wall sconces annoy you? Are they stuck in the 90’s, 80’s, or worse yet the 70’s? When I picked out these sconces several years ago, they were the only ones I could find that I thought were okay. But, with a living room makeover in the works, I decided to upgrade them for a more modern pair.

How to Install a Wall Sconce | Pretty Handy Girl

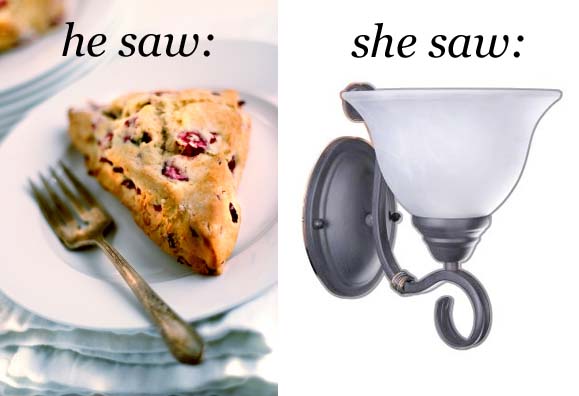
It’s time to learn how to install a wall sconce. Of if you are like Pretty Handsome Guy, I’m going to teach you how to install new “light fixtures that hang on the walls” (lest you think I was talking about a breakfast treat.)

scone

Whatever you call it, you can definitely do this. Ready?

Install a Wall Sconce Light Fixture Materials:

  • Screwdrivers (flat head and phillips head)
  • Light fixture

Optional: wire cutters/wire strippers

Install a Wall Sconce Light Fixture Instructions:

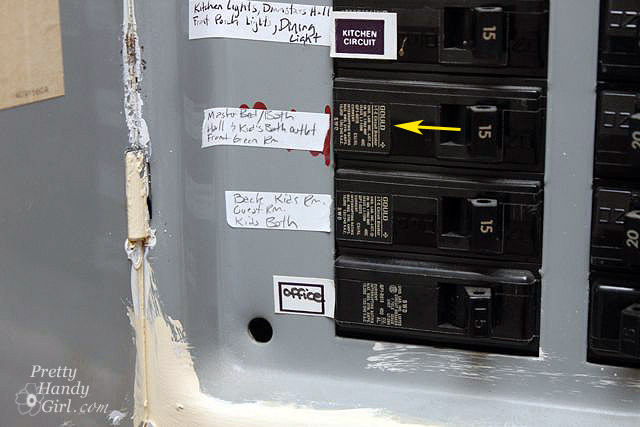
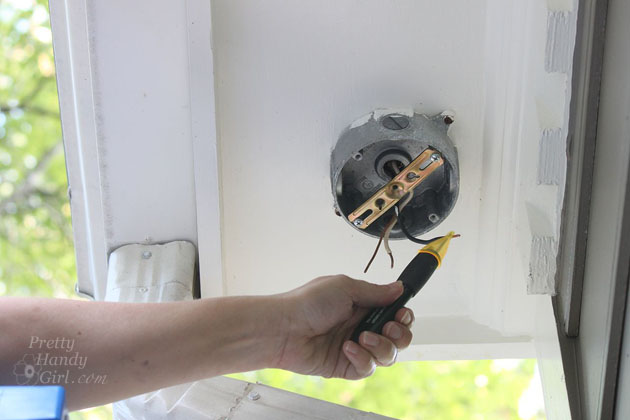
Turn on the lights you will be working on. Shut off the power to your light(s) at your circuit breaker. Check the lights to verify that the power has been turned off.

How to Install a Wall Sconce | Pretty Handy Girl

Removing the Current Light Fixture:

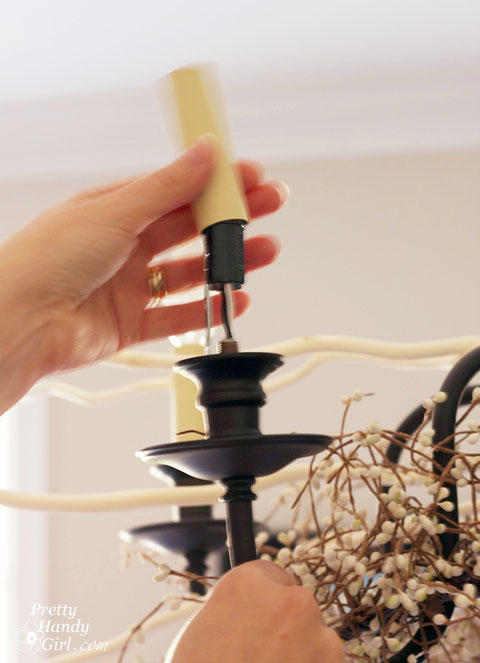
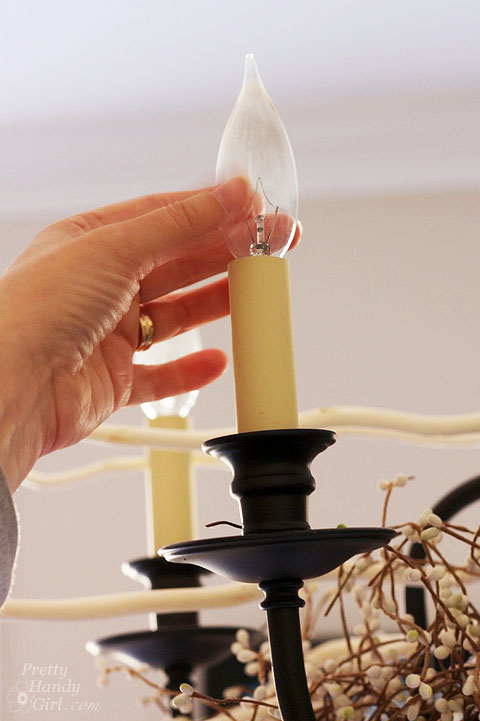
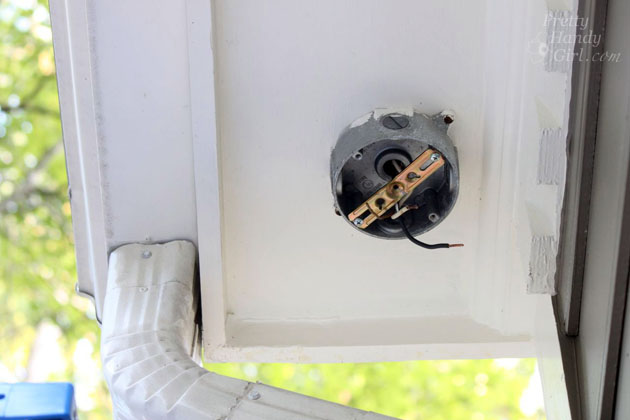
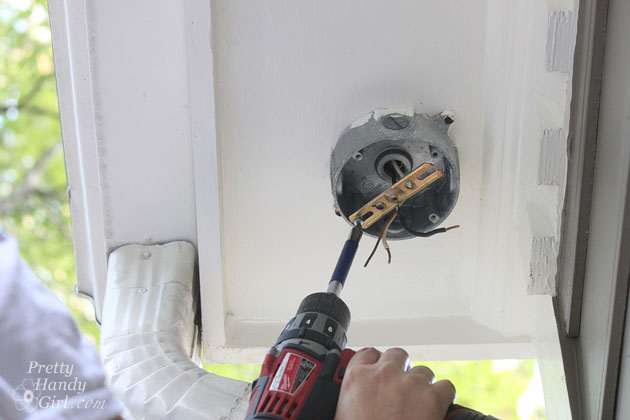
Remove the light bulb and glass shade. Unscrew the mounting nuts from the face of your light fixture.

How to Install a Wall Sconce | Pretty Handy Girl

Lift the light fixture off the mounting bracket and let it hang (or get a friend to help hold the fixture if it’s heavy.) Read more

Painted Chandelier Sleeves | Pretty Handy Girl

Painted Chandelier Sleeves | Pretty Handy Girl

When you were perusing my holiday tablescape post did you see my fancy copper chandelier sleeves? My chandelier was looking a bit dingy with the aged yellowing sleeves. I decided to spray paint them copper for a new look.

To update chandelier sleeves, you can paint them any color you like.

Simply remove the light bulbs.

Painted Chandelier Sleeves | Pretty Handy Girl

Lift the sleeves off.

Painted Chandelier Sleeves | Pretty Handy Girl

Wash the sleeves off and dry them.

Painted Chandelier Sleeves | Pretty Handy Girl

Then pick your favorite spray paint color and spray paint them. I used Rust-Oleum High Heat Ultra Enamel Spray – Aged Copper to paint mine.

Painted Chandelier Sleeves | Pretty Handy Girl

That update was so easy, I might spray paint them again in a year. I’m thinking light blue or silver next time. What do you think?

PHGFancySign


Pin for later!

See how Pretty Handy Girl updated her dingy, aged yellow chandelier sleeves with copper spray paint! | Lighting DIY | Pretty Handy Girl #prettyhandygirl #DIY #lightingDIY #chandelierDIY

12 Ways to Burglar Proof Your Home

Thanksgiving is next week and it’s the biggest traveling holiday of the year. Taking steps to burglar proof your home can put your mind at ease as you travel and keep your home and valuables safe.

The experts at Allstate have offered 12 Ways to Burglar Proof Your Home for the holidays. Of course, these tips will keep your home safe 365 days of the year!

1. Change the locks  Remember to change all the locks when you move into a new house. You’ll never know who had access to the keys before you moved in. If you lose the keys to your house, you should also replace all the locks for the maximum home security.

Changing_out_brass_door_knob

2. Invest in an Alarm – There are many companies that will install and monitor a home alarm system for a very little monthly fee, however sometimes you do not need an additional monthly expense. If an alarm company is not an option for you, you can visit your local hardware store to invest in home alarms that take seconds to install. They will make very loud and obnoxious sounds if the doors or windows are open. This is a very inexpensive option but can be a large deterrent from theft. Read more

How to Install an Exterior Security Light | Pretty Handy Girl

How to Install an Exterior Security Light | Pretty Handy Girl

Nothing deters a thief like a well lit area. But truth be told, I needed this light to illuminate the path when taking out the trash. There is nothing like walking out the door with the trash in your hands after dark and realizing that you forgot to turn on the exterior light. I should mention that our neighborhood is popular with the copperheads. Need I say more?

Installing any light fixture is a relatively easy DIY project, and installing an exterior light is no exception if you have a junction box or light already installed.

Materials:

Optional: Drill

Required Safety Instruction: 
Turn off the power to the light fixture you are working on. I highly recommend turning on the light you will be working on, then shut off the circuit at your circuit breaker and check to see that the light has gone out. Also note that just because the light fixture power is turned off, it doesn’t necessarily mean that other outlets or lights in the same area are on the same circuit. Always check for the presence of power before you work on it.

flip_circuit_breaker

If you have an existing light fixture remove it before installing the new fixture.  For this tutorial, we’re starting with a bare junction box:

How to Install an Exterior Security Light | Pretty Handy Girl

Test the black or hot wire with the voltage tester to be certain the power is turned off.

How to Install an Exterior Security Light | Pretty Handy Girl

Remove the existing mounting bracket if there is one installed.

How to Install an Exterior Security Light | Pretty Handy Girl Read more

Make Your Own Mosaic Tile Lampshade | Pretty Handy Girl

Make Your Own Mosaic Tile Lampshade | Pretty Handy Girl

Want to make a lamp shade that will bring some style and bling to your home? All you need are a few mosaic tile sheets, a lamp shade top piece, and some thread. In no time you’ll have a beautiful Mosaic Tile Lamp Shade!

Materials:

(I’ve included affiliate links for your convenience. I earn a small percentage from a purchase using these links. There is no additional cost to you. You can read more about affiliate links here.)

Instructions:

Cut up the lamp shade to expose the top ring.

Make Your Own Mosaic Tile Lampshade | Pretty Handy Girl

This is what you should be left with:

Make Your Own Mosaic Tile Lampshade | Pretty Handy Girl

Lay out your mosaic tile sheets. Cut the mesh to the height you desire for your lamp shade. The lamp shade I created was small, therefore I only needed a 6 inch height to cover the lamp bulb.

Make Your Own Mosaic Tile Lampshade | Pretty Handy Girl

Lay two sheets of the tiles side by side and stitch the two sheets together at the seam from the mesh side.

Make Your Own Mosaic Tile Lampshade | Pretty Handy Girl

Wrap the tile sheet around the lamp shade top ring and trim the excess tiles off.

Make Your Own Mosaic Tile Lampshade | Pretty Handy Girl

Stitch the open ends together. I found it easiest to slip a paper towel roll into the center to support all the tiles while stitching it.

Make Your Own Mosaic Tile Lampshade | Pretty Handy Girl

Stitch the lamp shade ring to the top of the mosaic tile tube. Loop the thread through the tile mesh and the lamp shade ring around the entire circumference.

Make Your Own Mosaic Tile Lampshade | Pretty Handy Girl

Your lamp shade should look something like this:

Make Your Own Mosaic Tile Lampshade | Pretty Handy Girl

Attach your lamp shade to the lamp and admire!

Make Your Own Mosaic Tile Lampshade | Pretty Handy Girl

Lights out…

Make Your Own Mosaic Tile Lampshade | Pretty Handy Girl

…and lights on. I love the shadows cast by the tile lampshade.

Make Your Own Mosaic Tile Lampshade | Pretty Handy Girl

Enjoy a unique and beautiful lamp shade in your home. The mosaic tile lamp shade adds a touch of class and bling to our mudroom.

Make Your Own Mosaic Tile Lampshade | Pretty Handy Girl

page_break_2

Want more creative lighting ideas?  Subscribe to the Lowe’s Creative Ideas magazine:

Fall14-Blogger-Subscribe-Banner-392x140

Or view more creative ideas from the Lowe’s Creative Idea bloggers !

There’s also a magazine app so you can have inspiration on the go! And, don’t forget to follow Lowe’s on Pinterest or on Instagram!

PHGFancySignDisclosure: As a #LowesCreator, I was provided with a Lowe’s gift card to purchase supplies for this post. I was not told what to write. All ideas and words are my own.