Install a ReadyMade Mirror Frame on Door | Pretty Handy Girl

Install a ReadyMade Mirror Frame on Door | Pretty Handy Girl

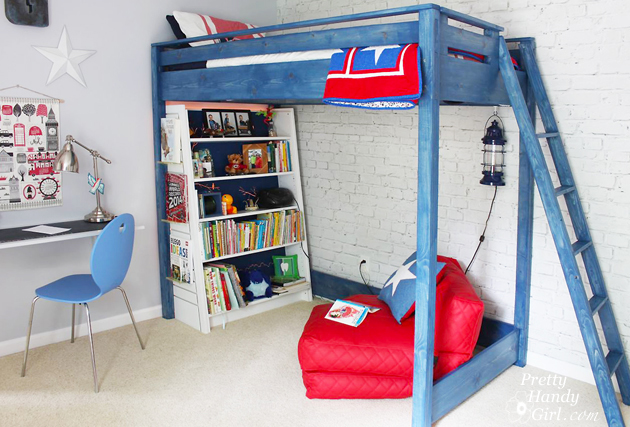
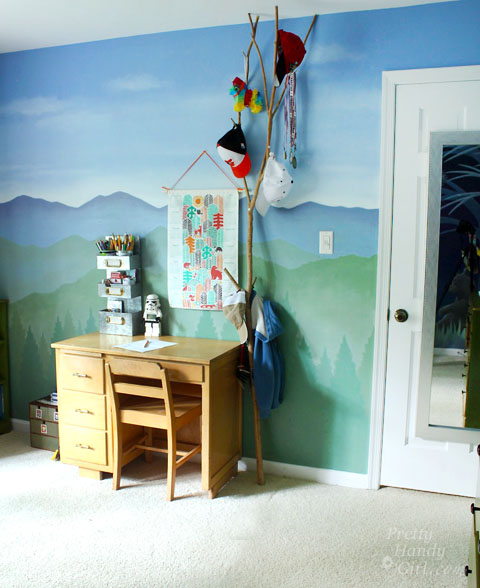
You guys, I can’t believe I have a middle schooler. I know, I know, I’ve been having a pity party for myself for two weeks. But, I’m finally coming to terms with it. This past week, I helped Handy Boy #1 de-clutter his room and carve out a space for him to do his homework (without being interrupted by his younger brother.) We moved his furniture around and actually had a lot of fun talking and working together.

Install a ReadyMade Mirror Frame on Door | Pretty Handy Girl

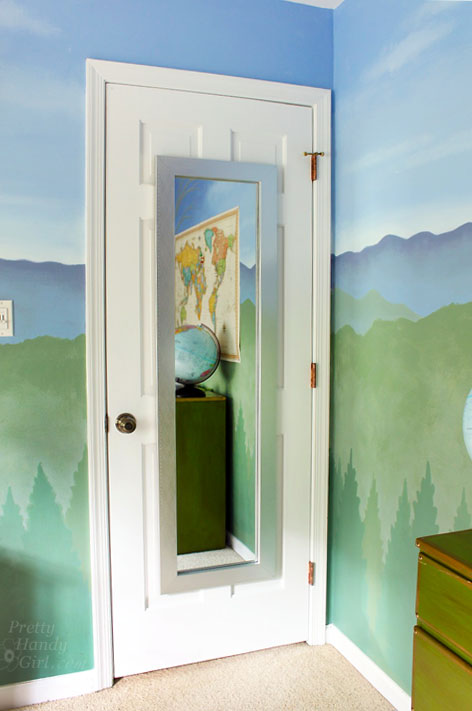
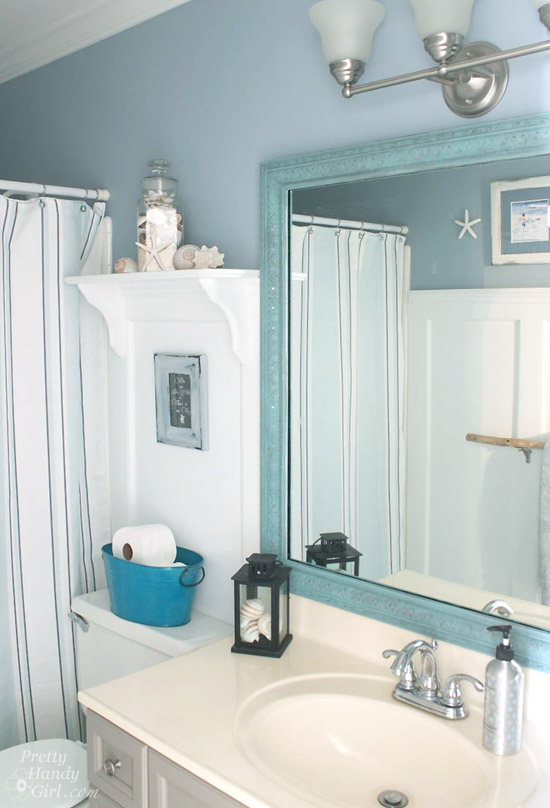
I also installed a mirror on his door. Although he’s not obsessed with how he looks or dresses yet, I know that time is coming soon. Instead of putting up a cheapy plastic-framed mirror, I worked with MirrorMate to test out their new READYFrame kit. You may remember when I ordered a custom MirrorMate frame for that ugly and naked mirror in my sons’ bathroom. It still looks great today (although I painted it blue for a new look.)

Seaside Theme Bathroom Refresh #LowesCreator | Pretty Handy Girl

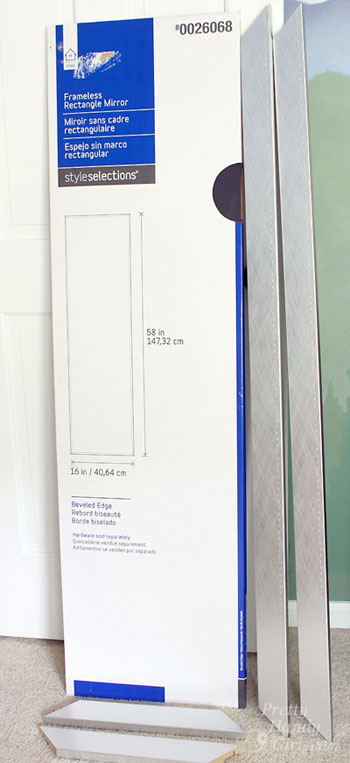
MirrorMate now sells pre-made frames that fit several of the standard sized mirrors you can buy at Lowe’s, IKEA or HomeDepot. I chose the Essex Crosshatch Silver and the tall 16″ x 58″ mirror from Lowe’s.

I didn’t need to purchase any hanging hardware because MirrorMate ships it with your frame.

Install a ReadyMade Mirror Frame on Door | Pretty Handy Girl

Want to see how easy it was to hang and dress up the mirror? I’ll give you a hint, it was easy and it looks beautiful!

Materials:

(I’ve included affiliate links for your convenience. I earn a small percentage from a purchase using these links. There is no additional cost to you. You can read more about affiliate links here.)

Install a ReadyMade Mirror Frame on Door | Pretty Handy Girl

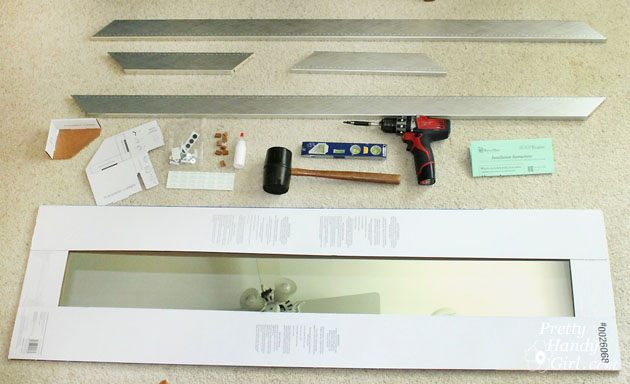
  • MirrorMateREADYFrame
  • Screwdriver (or drill with phillips head bit)
  • Rubber mallet (or hammer)
  • Tape measure
  • Pencil
  • Level
  • Wet wipe
  • Heavy book or weight
  • Thumbtack or pin
  • Rubbing alcohol
  • Cotton ball or rag
  • A helper

Assembling the Frame:

Open up the READYFrame box and remove the frame connectors from the packaging.

Install a ReadyMade Mirror Frame on Door | Pretty Handy Girl

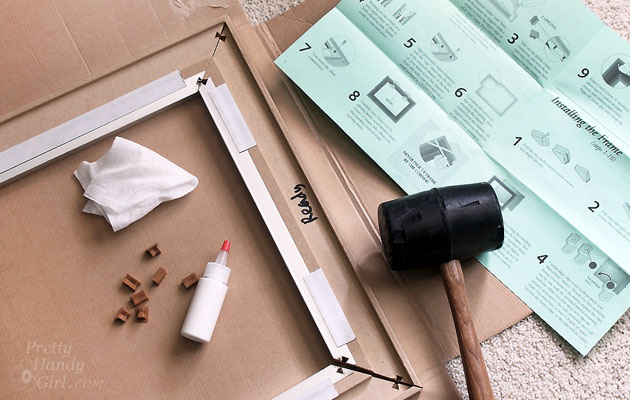
Remove the top from the glue and peel off the seal. Poke a thumbtack in the glue bottle to create a hole in the nozzle. Apply glue to the edges of theREADYFrame. Read more


kids scooters title

Looking for a quick and easy DIY kids toy you can make at home?  Let’s make kids scooters!  Hello Pretty Handy Readers I’m Jaime from That’s My Letter here to share how to make these DIY Kids Scooters using scrap wood and a few hardware bits.

kids scooter action

My 9 year old daughter is here giving the scooter a whirl and she fits fine but it’s really my 7 year old boy who loves the scooters.  (Unfortunately, I don’t have a picture of him on a scooter, but you’ll have to trust me.)  I would say this DIY toy is aimed at kids 8 and younger as they especially love pushing each other on the scooters!

kids scooter detail

If you happen to have a piece of 2×12 scrap wood lying around then this project was made for you.  The chunky 1 1/2″ thick material is solid and sturdy and can be painted any color you choose.

kids scooters 1

Materials:

  • 1 – 2×12 @ 11 1/4″ (must be a square, measure your 2×12 first, some are 11 1/8″w)
  • 4 rotating casters (2″ wheels)
  • 2 handles
  • jigsaw
  • sandpaper
  • drill
  • 1 1/4″ self tapping screws
  • measuring tape &  pencil
  • curved object (small paint can)
  • paint


kids scooter sketch

Instructions: Read more

DIY Marble Toss Game | Pretty Handy Girl

This summer, parents are busy trying to keep their children busy with quality games and toys. Any seasoned parent knows that those electronic noise-maker toys have no place in a sane household. With this in mind, my friend Stefanie from Brooklyn Limestone has started a summer long series called “Die Ugly Toys Die.”

Die Ugly Toys Die

Every Thursday she’ll feature another DIY toy or game that you can make for your children. It’s time to get back to the basics and send those annoying and ugly toys off a cliff.

My tutorial for creating a DIY Marble Toss Game is starting the series today.

Click here to find the instructions to build your own. Then watch your kids have hours of fun challenging each other in a tossing game.

DIY Marble Toss Game | Pretty Handy Girl

Be sure to check over at Brooklyn Limestone every Thursday for a new DIY toy or game.

PHGFancySign

PB Knock Off Monogrammed Bulletin Board

edited-0510

Hey everyone!  If you remember, last month, I shared with you how I updated my boys’ desk in our den with a wood plank desktop.  The den is just about ready for the big reveal and now I’m just working on adding little details.  This includes these fun personalized bulletin boards I made for each of my boys.  I was searching for desk organization ideas one day and saw these personalized pinboards on Pottery Barn Kids.  I knew they would be perfect for my boys and that I could knock them off pretty easily.  I made two of these pinboards, but my supply list will be for one pinboard.

Materials:

  • 12″ x 12″ wrapped canvas (mine was 3/4″ thick)
  • 12″ adhesive backed cork sheet
  • Adhesive vinyl
  • Transfer paper
  • Die-cutting machine
  • Acrylic aint
  • 2 – 1″ foam paintbrushes
  • 1″ x 2″ x 6′ pine board
  • Wood stain
  • Sander w/ 220 grit sandpaper
  • Miter saw
  • Brad nailer
  • 1″ Brad nails
  • 24″ Bar clamps
  • Hot glue gun

Instructions:

Start by designing your stencil.  To make it look just like the PB Kids version, use the Varsity font.  (FYI, the letters are all capitalized, but when you use the shift key or CAPS lock, it will add the outline.)

Knockoff Personalized Pinboard

Cut your design out on the 12 x 12″ sheet of vinyl and weed the negative pieces out.  Remember that this is a stencil, so make sure to weed out the correct parts of your design.  Place your transfer paper over the design and use a scraping tool or a credit card to get out any air bubbles.

edited-7687

Peel the backing off of your vinyl and very carefully center it onto your cork sheet.  Use the scraping tool or credit card again to firmly adhere the vinyl to the cork sheet.  Carefully peel the transfer paper off. Stencil your design using the acrylic paint and foam brush. Read more

How to Turn a Bunk Bed into a Loft Bed

How to Turn a Bunk Bed into a Loft Bed | Pretty Handy Girl

Remember when I built a loft bed for my younger son? No sooner had I made his bed, when my oldest son was begging me to build him a loft bed too. Instead of starting from scratch, I was able to turn his bunk bed into a loft bed in a few simple steps.

How to Turn a Bunk Bed into a Loft Bed

Materials:

  • 2″ wood screws
  • 1 – 1″x 4″x 8′ board
  • Saw
  • Drill with philips head bit
  • Pencil

Instructions:

Remove the mattresses and bedding.

You will need to remove the bunky board (or slats) and the front side rail from the lower bunk.

How to Turn a Bunk Bed into a Loft Bed | Pretty Handy Girl

This will leave you with a loft frame.

How to Turn a Bunk Bed into a Loft Bed | Pretty Handy Girl

But, the bed will be wobbly until you add a diagonal support. Hold the 8′ board up at an angle against the back of the bed. Use the pencil to mark the angle and excess to cut off the ends. Read more