But first, I’d like to announce the winners of the Valspar paint samples:
Congrats to Bonnie, Lynda, Marion, Cathleen, Joanne, Colleen, Amy H., Nicole, Becky V. and Nancy B!
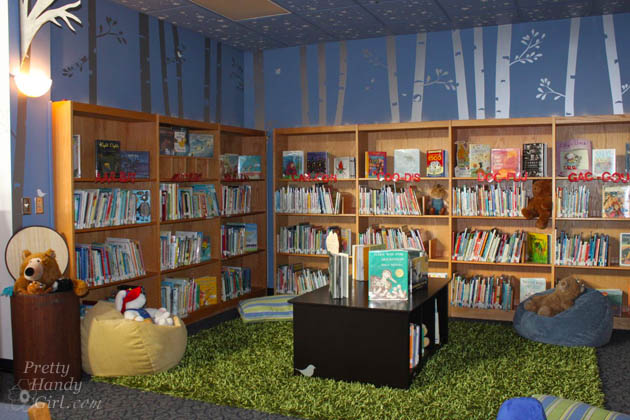
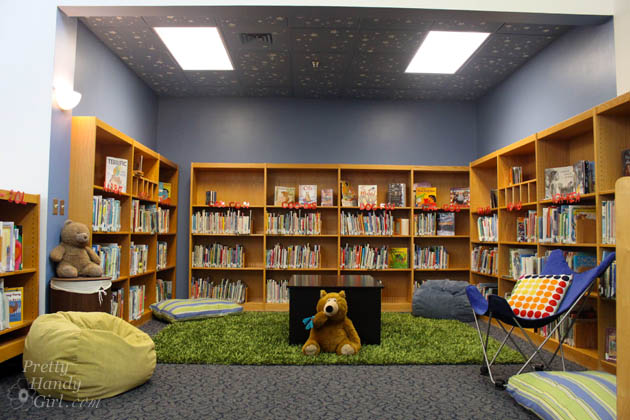
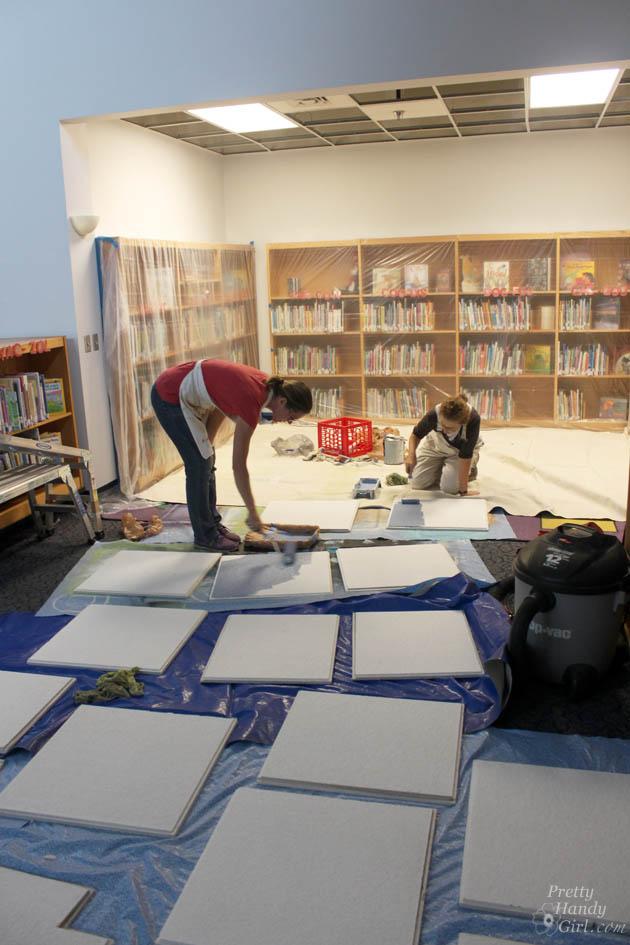
To quickly review, we painted the walls and ceiling tiles using Valspar Montpelier Wedgewood. Then we stenciled stars on the ceiling. After installing the ceiling tiles the library looked like this. Better, but still a bit ho-hum.
I had much bigger plans and was far from finished. I called in some expert help from my friend Leen the Graphics Queen and her husband. They cut and installed all the silver trees and birds. We had an absolute blast working together. There were several birds leftover, so Leen played hide and seek by putting a few birds elsewhere in the library. The kids (and I) had fun trying to find them over the next few days. Read more
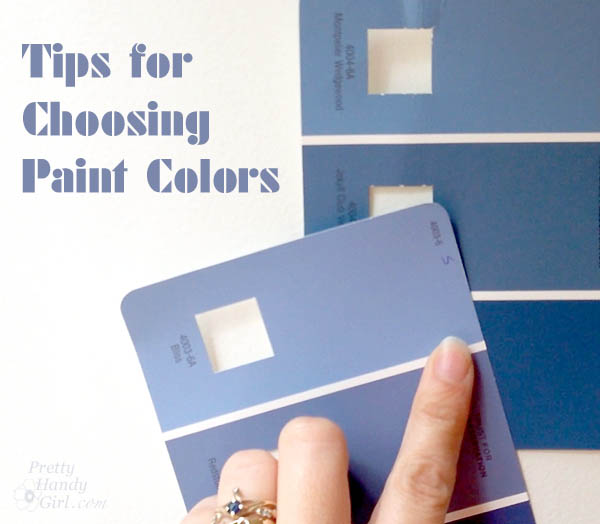
Choosing paint colors can be a daunting task. Looking at small paint chips at your local Lowe’s Home Improvement store can be a bit overwhelming. Especially because there are so many colors to choose from! (That can be a good thing too ;-).)
Luckily I have two tips to help you choose the paint color that’s right for you:
1. Use Valspar paint. Finding a paint color you love is easier with Valspar. If you don’t love the first color you choose, you can have another on them. It’s as easy as, love your color, or change your color. That’s the Valspar Love Your Color Guarantee. And it certainly helps alleviate the stress of choosing the right paint color for your room.
2. Create larger paint chips. Looking at tiny paint chips won’t help you conceptualize that color over the entire wall. Making large paint swatches using foam board and sample paints is easy and can save you time when choosing the ideal paint color. I put together this short video to show you how we selected the final color for the school library.
I knew if I could create big paint chips and let the librarian live with the large chips for a few days, she’d be better prepared to make a final decision. As you saw, she was much more comfortable choosing this way.
The winning color was Montpelier Wedgewood by Valspar. And, luckily after we began painting, we all fell in love with the color she chose.
Here’s how we tackled painting the school library (acoustic ceiling tiles and all!):
Before removing the ceiling tiles, we created a map of the tiles on a sheet of paper and numbered each square. Then we marked the number on the back of each tile as we took them down (team work really helped with this task.) Why the map and numbering? It made it easier when it came time to re-install them (especially if some were cut to fit.)
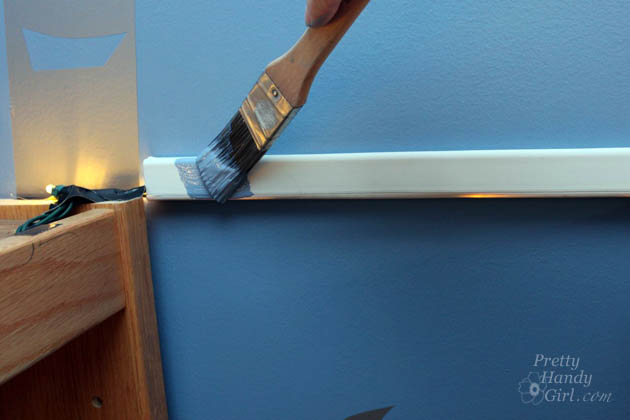
After removing the ceiling tiles, they were all wiped down with a wet rag. Then we used a medium nap roller to paint all the tiles. A paint brush was used to paint the sides as well. Then they were left to dry.
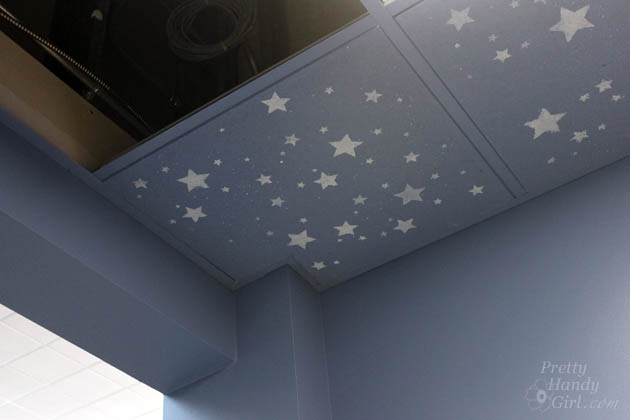
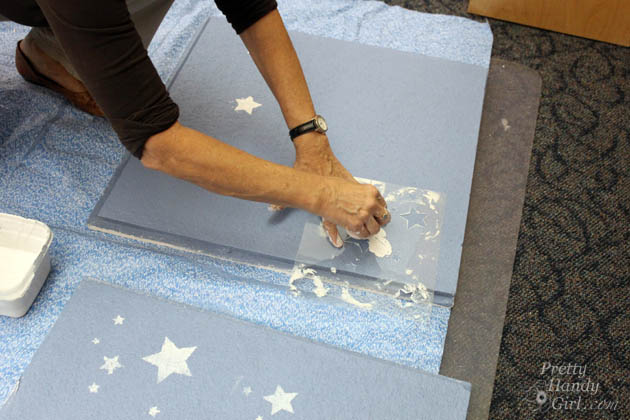
Meanwhile, I mixed a sample of white paint (mixed with some shimmering craft paint) to stencil the stars. I created a star stencil using my Silhouette cutter and a sheet of acetate, but you can also cut one by hand with an x-acto knife.
Luckily we had loads of volunteers to help stencil oodles of stars. Parents and children alike all chipped in to help.
By the end, I was seeing stars. LOL.
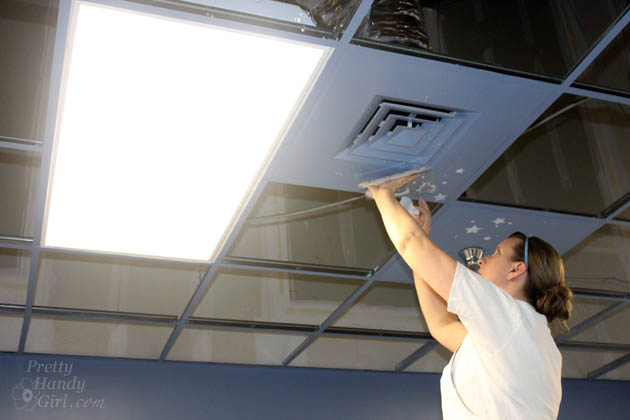
The ceiling tile grid had to be painted with a paint brush. This is where I was really glad that we bought the Valspar Paint & Primer in one paint. It definitely saved this project from being a literal pain in the neck.
The two tiles we couldn’t remove were painted and stenciled in place.
After the paint was completely dry, we returned them to their appropriate location. Thank goodness for the map!
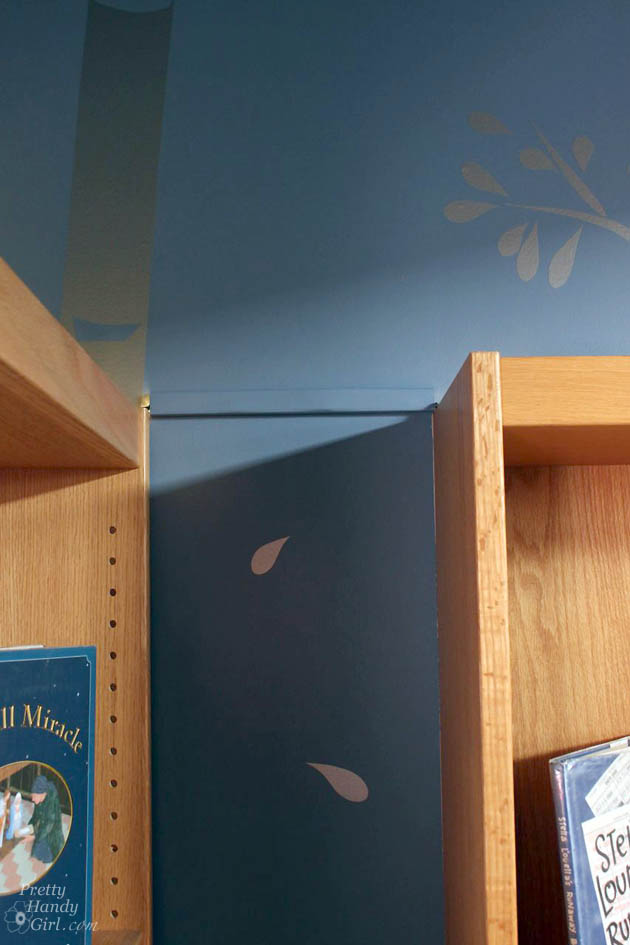
I put a fun surprise on top of all the bookcases, but I wanted to hide the cords. It was as simple as purchasing some adhesive cord covers at Lowe’s and painting them the same color as the wall.
See, much less noticeable now! Oooooo, sneak peek!
Next week I’ll show you how we added the final surprise elements to the library. In the meantime, is there a room you’ve been putting off painting? What do you think about choosing paint colors now that you know these tips. Ready to choose your color?
Disclosure: This is a sponsored post for Valspar Paint. I was compensated for my time writing this post. Valspar was also kind enough to donate the paint for the school library project. All ideas and words are my own.
(I’ve included affiliate links for your convenience. I earn a small percentage from a purchase using these links. There is no additional cost to you. You can read more about affiliate links here.)
https://prettyhandygirl.com/wp-content/uploads/2013/12/install-ceiling-panels.jpg420630Brittany Baileyhttps://prettyhandygirl.com/wp-content/uploads/2021/07/PHG-logo-tagline-2020-1030x211-R.jpgBrittany Bailey2013-12-10 07:00:002021-08-09 19:37:10Tips for Choosing Paint Colors in the School Library
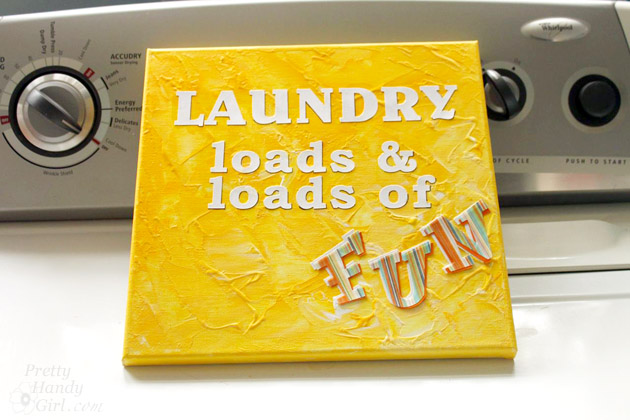
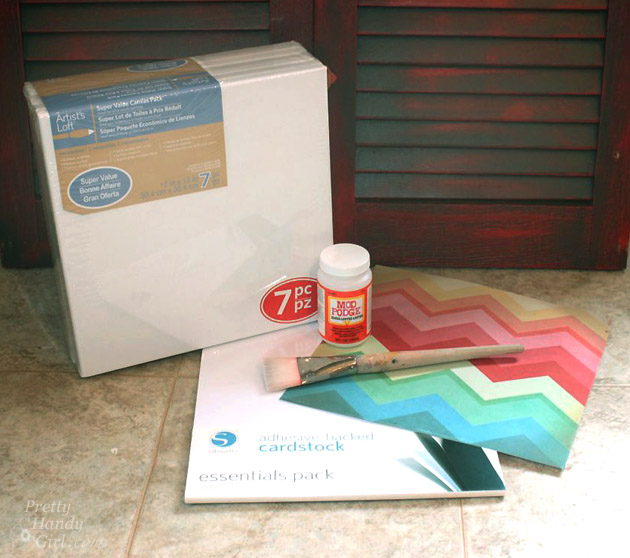
Happy Thanksgiving! I hope you get your fill of food and family time today. I need to give a big congrats to the Silhouette Portrait Giveaway winner, Kelly Crumpler Kelly! Woo Hoo, you’ll be making all your gifts with the Silhouette Portrait this year, won’t you Kelly?! Speaking of making your own gifts, I’m on a bit of a DIY art kick lately. I think creating your own art is creative, frugal and fun! Today I have a tutorial for creating this laundry quote canvas art, but frankly you can use your own favorite quote! Or create personalized name art for one of the kids on your gift list! The easiest way to create quote artwork is using a Silhouette craft cutter to cut your letters out. You can use the Silhouette for so much more than you ever imagined. I use mine a lot for cutting letters like I did for the laundry sign.
Today we’ll focus on the tutorial for creating your own quote canvas art! (I’ve included affiliate links for your convenience. I earn a small percentage from a purchase using these links. There is no additional cost to you. You can read more about affiliate links here.)
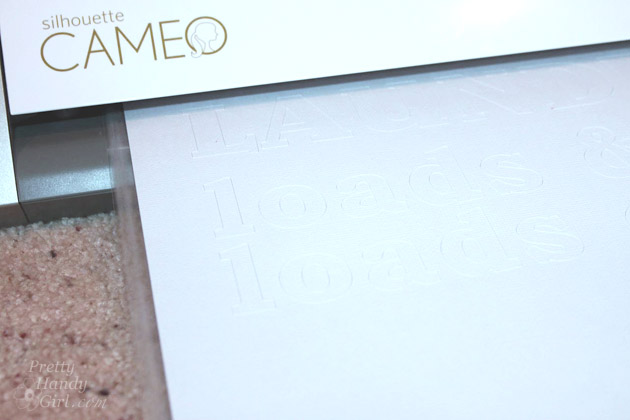
Type out your quote in the Silhouette studio software. Send the art to cut on adhesive backed cardstock using your Silhouette.
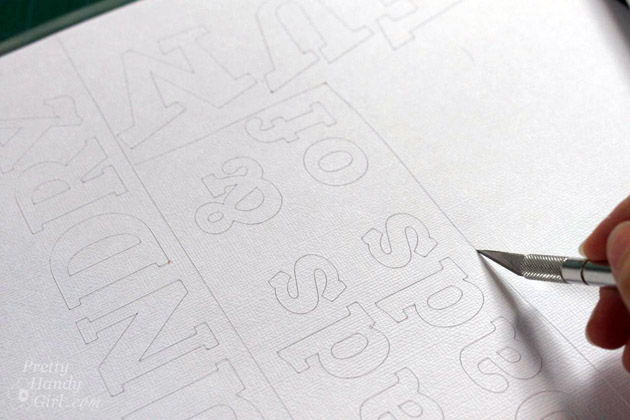
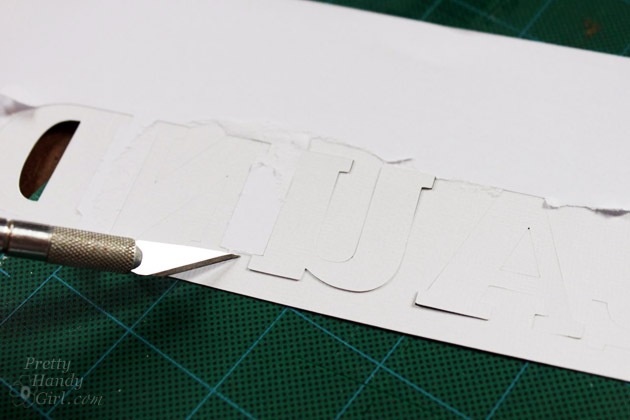
Separate the phrase into sections by scoring around them with an x-acto knife.
Flip the cardstock over and remove the backing on just the letters (if you can keep the rest of the backing in tact it will help with positioning.)
I had big plans to show you how to make your own DIY canvas art using scrapbook paper as the background. Everything was moving along swimmingly after I adhered the scrapbook paper to the canvas using mod podge. But, I neglected to let it dry (too impatient) and this happened. Whomp wah…craft fail!
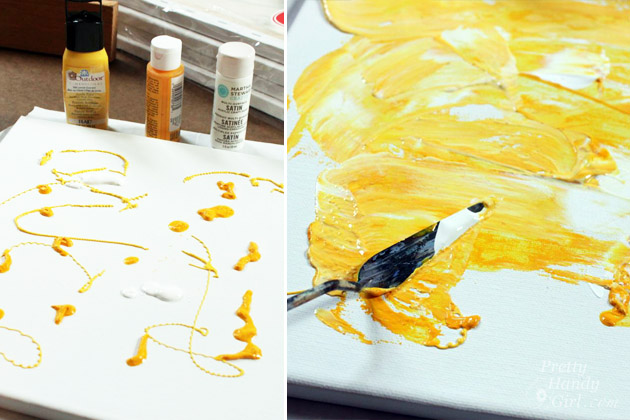
But, I wasn’t about to be deterred. So, I created a fun painted background instead. Drizzle paint onto the canvas. Use a palette knife to spread the paint. Be careful not to overly mix the paint. Streaks in the paint give it texture, dimension and interest.
Let the painting thoroughly dry! (Must have patience.)
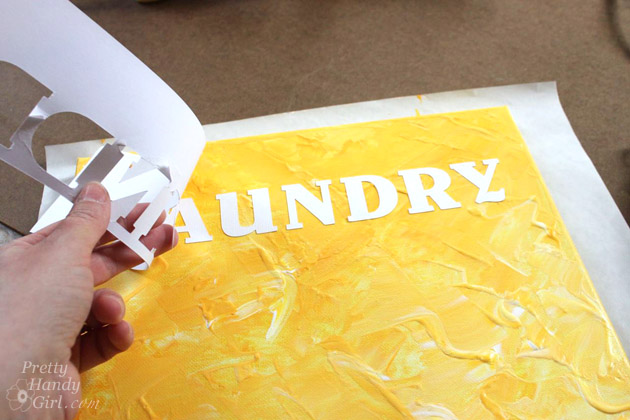
Carefully lay your words onto the canvas one section at a time.
Press the letters in place and gently peel up the backing.
Repeat for the rest of your quote.
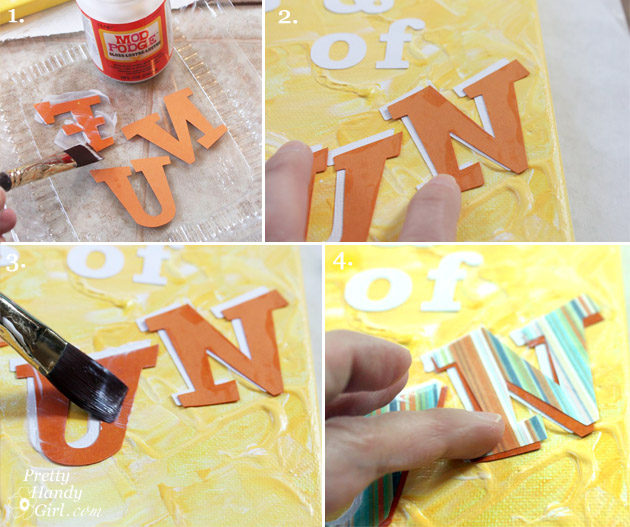
Here’s the FUN part! I used my Silhouette CAMEO to cut out the word “FUN” in orange card stock and striped scrapbook paper. Then I layered the word FUN to make it stand out. Creating a layered word: 1. Apply a thin coat of mod podge to the back of the orange letters. 2. Lay them slightly offset onto the white letters.
3. Apply more mod podge on top of the yellow letters. 4. Press the striped letters into the wet mod podge, offsetting them from the orange letters. Seal all the letters by brushing mod podge over the letters.
To create a shadow, use the fine tipped permanent marker to underline the right and bottom sections of each letter.
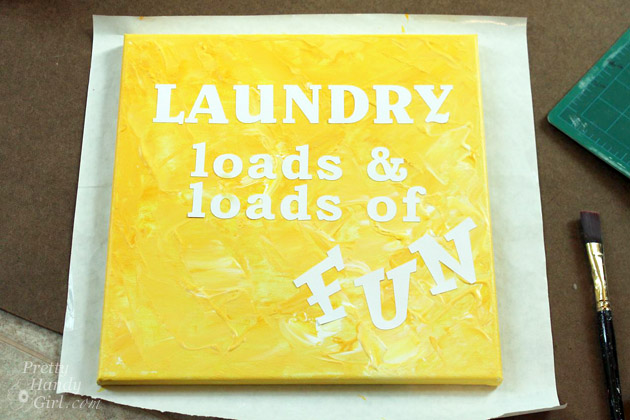
And, that’s it! Loads & loads of FUN don’t you think?!
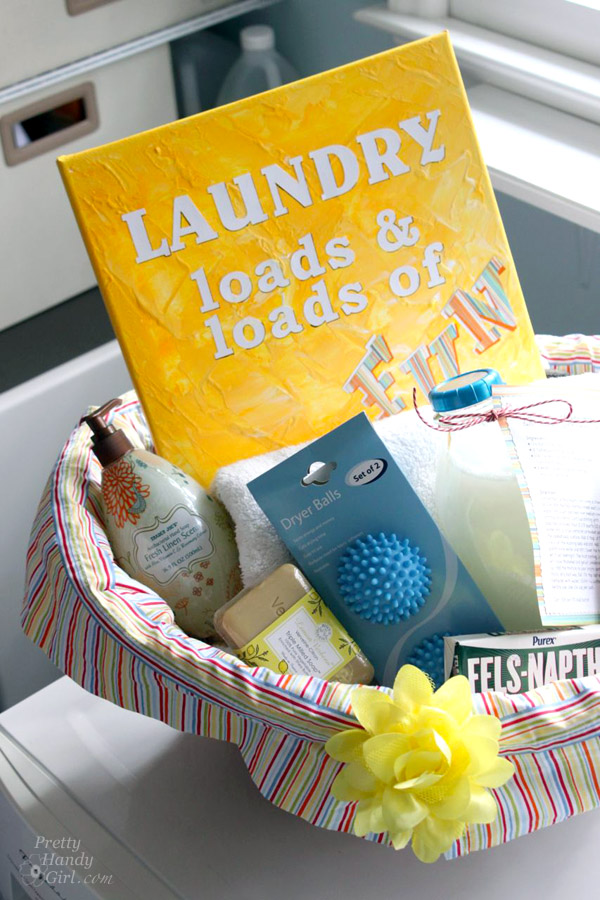
I created this artwork to be included in the laundry themed gift basket, but how fun would it be to create personalized art with a child’s name layered like I did with the word “FUN.”
https://prettyhandygirl.com/wp-content/uploads/2013/11/laundry-quote-canvas-art.jpg420630Brittany Baileyhttps://prettyhandygirl.com/wp-content/uploads/2021/07/PHG-logo-tagline-2020-1030x211-R.jpgBrittany Bailey2013-11-28 00:05:002017-09-02 00:05:06Canvas Art with Loads of Fun Laundry Quote
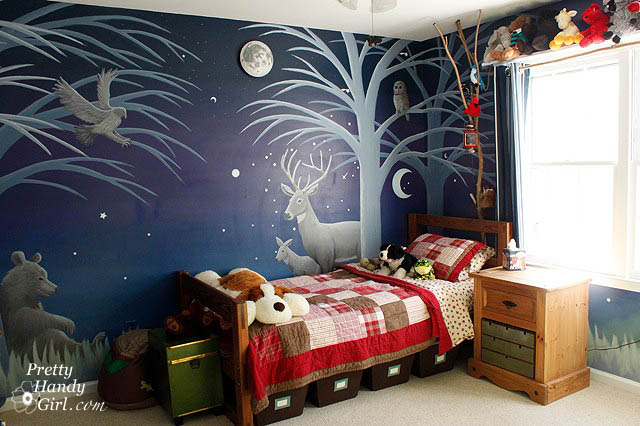
Today we are going to talk about our Camping Themed Boy’s Room, But first, I have been having the best time meeting most of my favorite bloggers at Blissdom.
Dear sweet Home & DIY bloggers, y’all really rock!
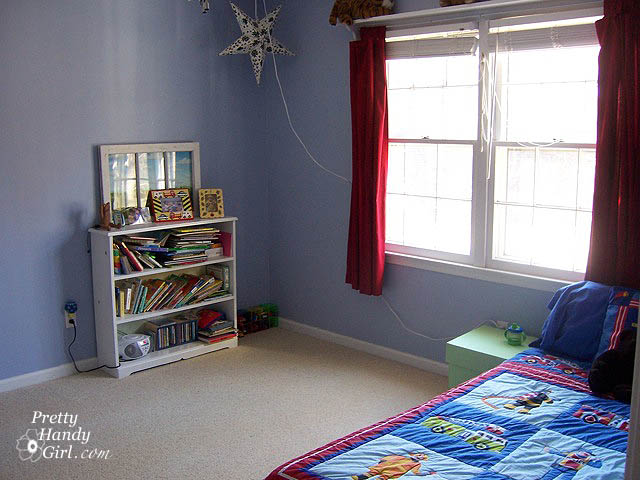
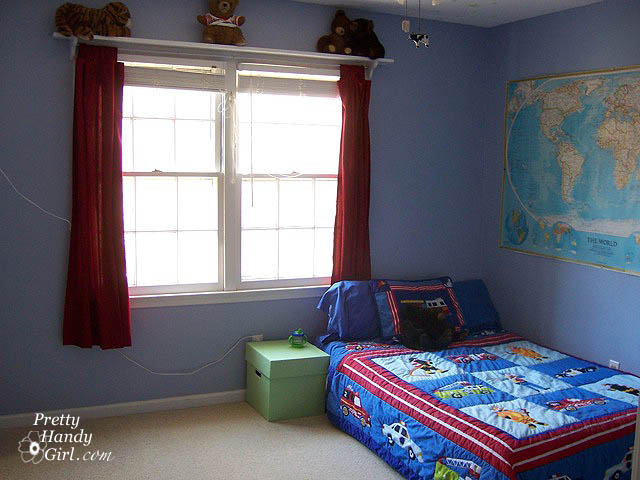
While I am here, I figured you might love a good before and after. Here is my son’s bedroom shortly after we moved into our home.
Pretty boring, huh? Poor guy didn’t even have a bed frame. But, frankly, it let me sleep better at night knowing he wouldn’t roll out of bed.
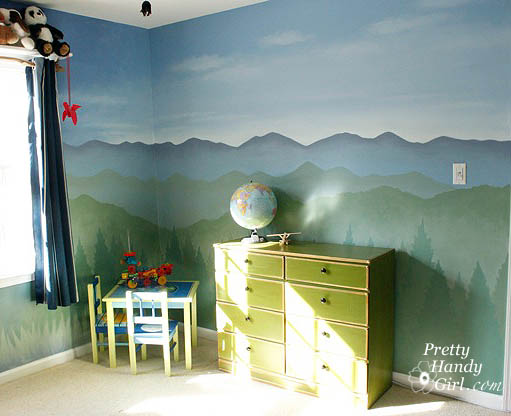
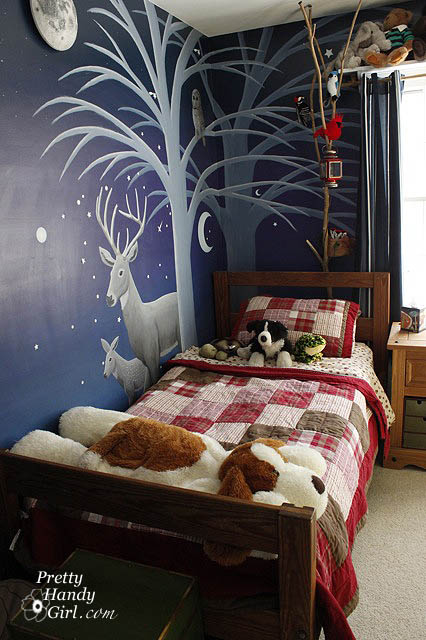
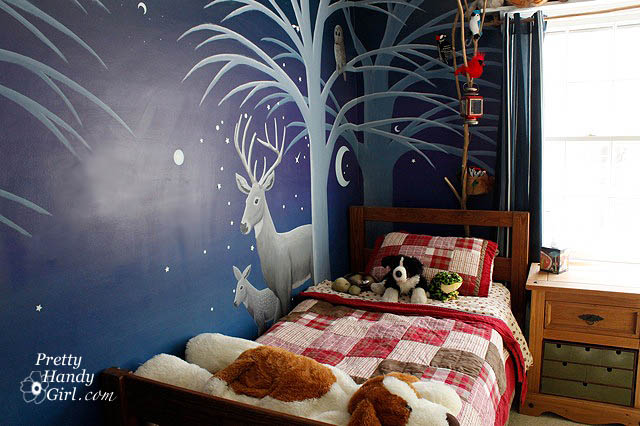
Two plus years later, we moved beyond the rolling out of bed phase AND something divine happened. I met a “real” mural artist and it was like finding a clone of myself! I promptly hired my clone to help me paint a mural in my son’s room.
A beautiful woodland and mountain theme!
Tom Barber (mural artist in Raleigh, NC) painted most of the background and I painted the animals (because wildlife illustration was my major in college.)
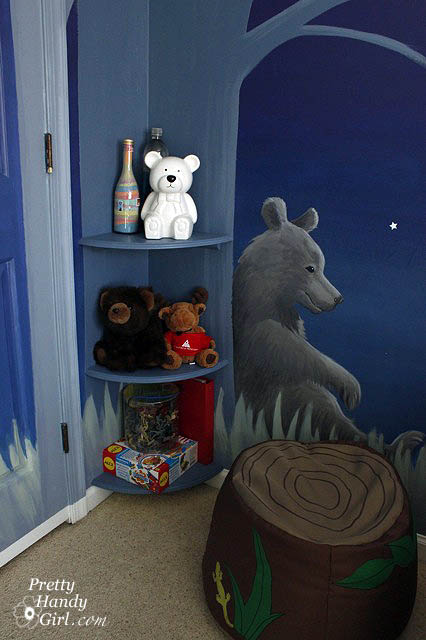
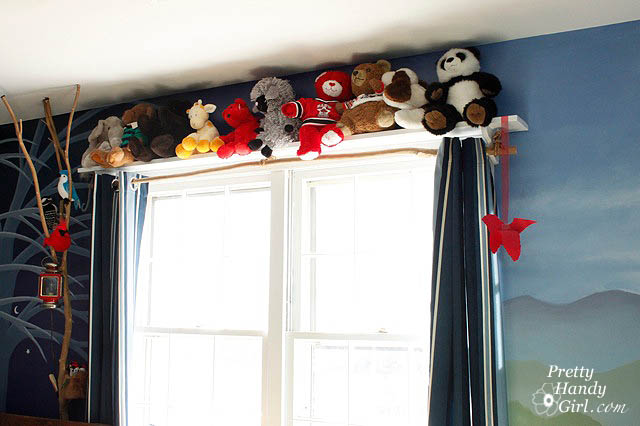
I bought some corner rounded shelves at Home Depot and installed them in the corner where Tom painted a big tree.
A perfect spot to curl up with a good book.
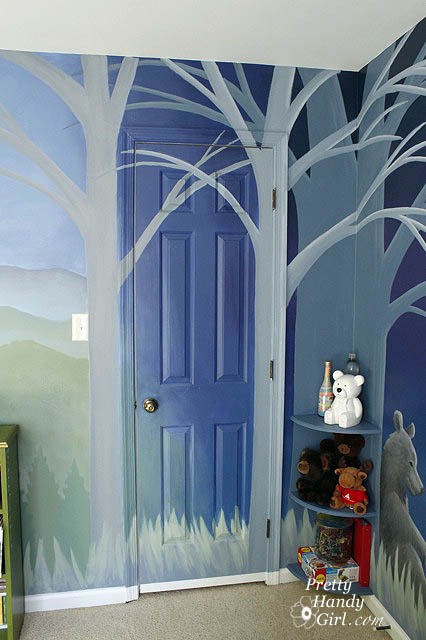
The closet is my son’s super secret hideaway.
When you open the door you are met by a tent.
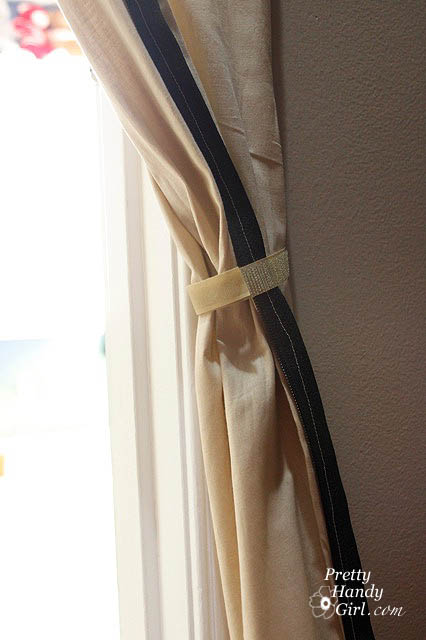
Pretty Handsome Son can either close it up or secure the tent flaps on the sides with the velcro tie backs.
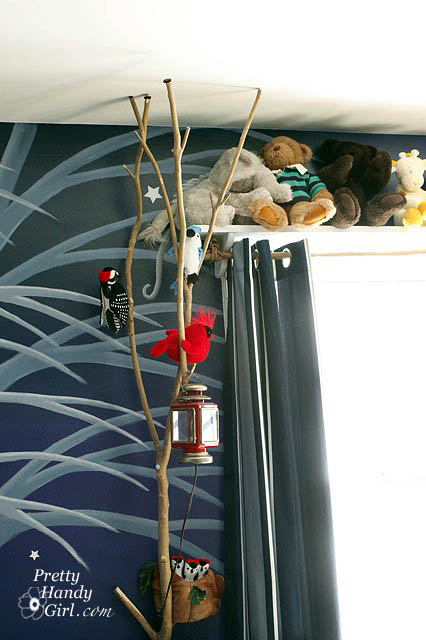
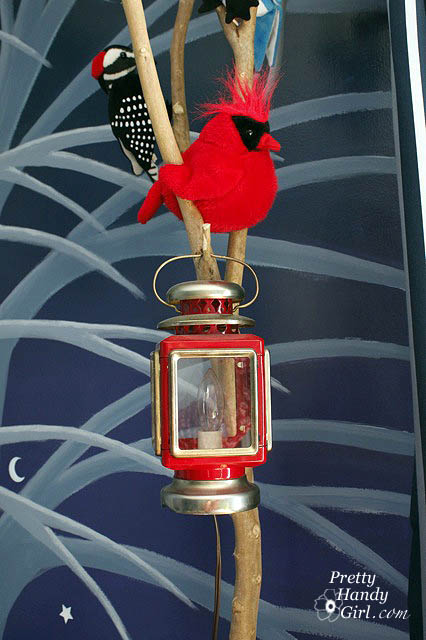
The tree is made from some crepe myrtle branches that we had to trim from our trees out front.
The lantern in the tree was an old oil lantern. I drilled a hole in the bottom and inserted a candelabra light kit. It is the perfect amount of light for him to read stories by.
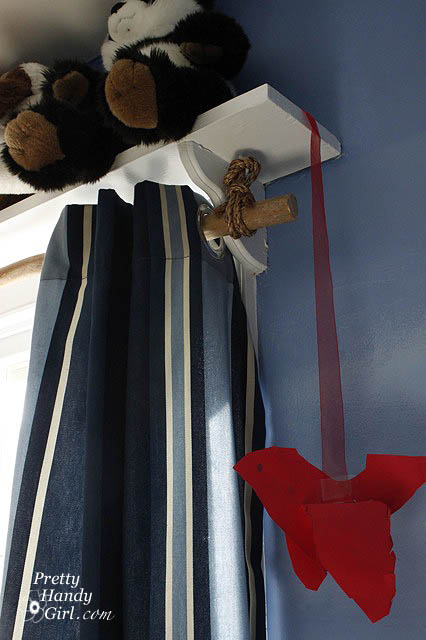
I used a larger branch for the curtain rod. And tied the rod to the shelf with some rope knots.
And I had to add this adorable bird that my son made in preschool. No kids room is complete without his or her artwork.
He sleeps soundly under the light up moon on the wall.
The bookshelf was re-painted and I mod podged old US Geological Survey maps onto the back.
I wish I had a room like this when I was a child. Heck, when he outgrows it (which I hope he never does), I’ll move into his Camping Themed Boy’s Room!