Installing a Wall Mount Flat Screen TV + Hiding Cords | PrettyHandyGirl

Installing a Wall Mount Flat Screen TV + Hiding Cords | PrettyHandyGirl

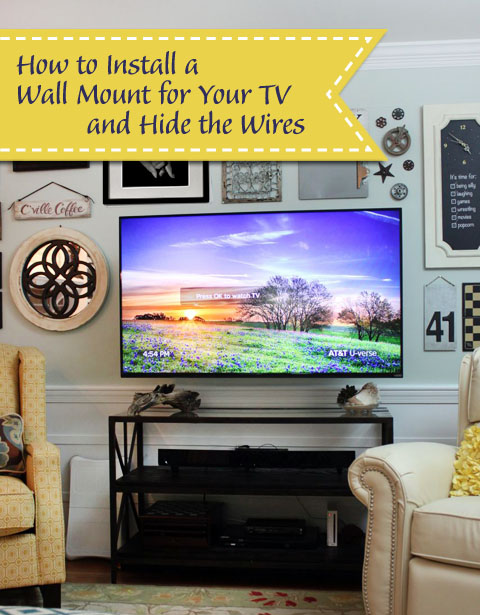
Do you have a flat screen TV? Do you have children? Wish you could mount your TV on the wall for space and safety? Or have you already mounted your TV, but the wires are visible and hang below your screen? GASP—not the dreaded visible wires syndrome!

Installing a Wall Mount Flat Screen TV + Hiding Cords | PrettyHandyGirl

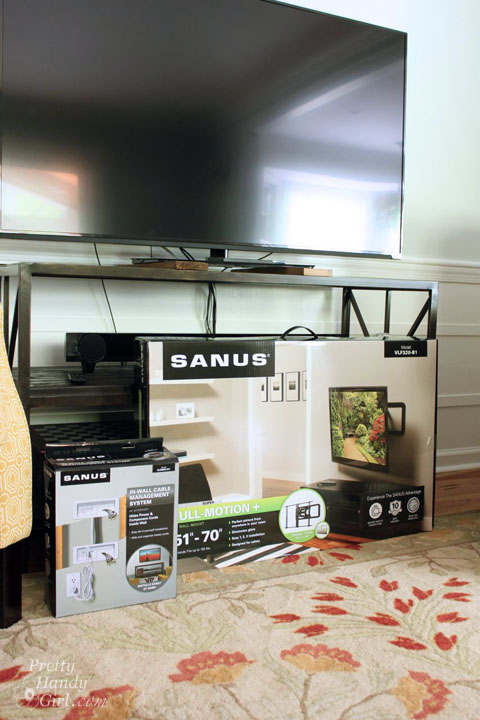
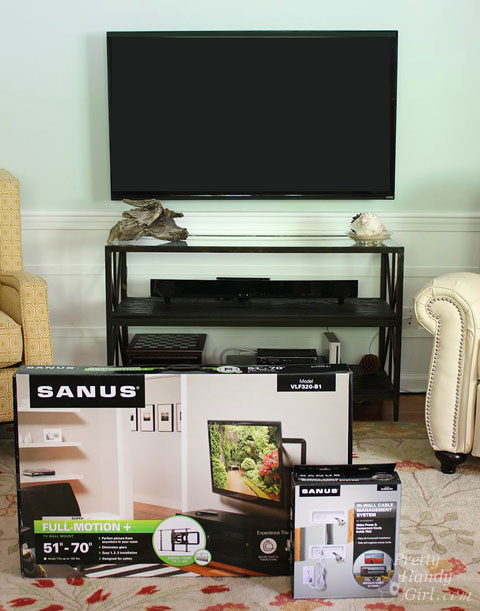
Today I have a tutorial to show you How to Install a Wall Mount for your TV AND How to Hide those Unsightly Wires in a cable management system. SANUS sent me their Full-Motion TV Wall Mount and In-Wall Cable Management to use for this tutorial. Before you start thinking that you can’t do this, or that you have to hire an electrician to run power behind the TV, you don’t! And this is a very easy DIY project! The SANUS In-Wall Cable Management System is the coolest product. It allows you to hook up to an existing outlet elsewhere (within 60″ horizontally from your TV)! (Per FTC regulations, you should know that this is a sponsored post for SANUS, but I approached them after researching TV mounts and cable management systems. )

Genevieve Gorder has some good information about why you want to use a SANUS mount in this short video:

Why did I want to use the SANUS mount? Here’s just a few reasons:

Installing a Wall Mount Flat Screen TV + Hiding Cords | PrettyHandyGirl

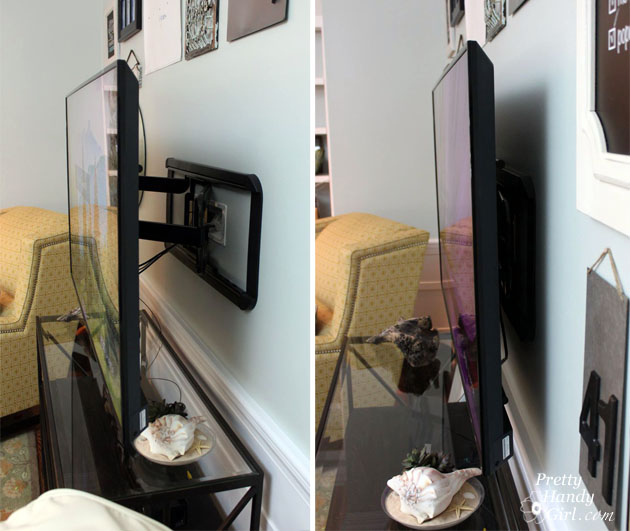
You can pull your screen out from the wall or press it back to just a few inches away. (The arms extend a full 20″. Further than shown, because our cables are too short to fully extend.)

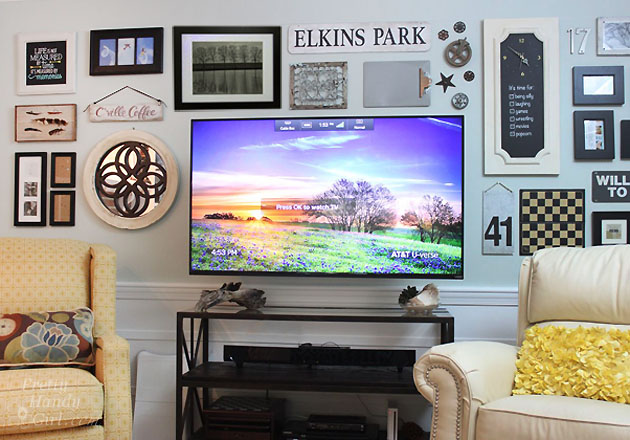
The power cord plugs into an ultra low profile in wall cable system. All wires are hidden behind the TV.

Installing a Wall Mount Flat Screen TV + Hiding Cords | PrettyHandyGirl

The TV can also extend and swivel from left to right. This allows us to be able to watch TV from the adjacent room! Which means the kids can eat pizza AND watch a movie because they can safely sit at the kitchen table and view the movie in the living room. Score one for Mom!  No more pizza stains on the rug or sofa.

Installing a Wall Mount Flat Screen TV + Hiding Cords | PrettyHandyGirl

Ready to learn how you can easily mount your flat-screen TV on the wall AND hide the wires? Let’s get to it! Read more

How to Clean a Stinky Bathroom as if a Magazine Photographer was coming | Pretty Handy Girl

Seaside Theme Bathroom Refresh #LowesCreator | Pretty Handy Girl

I AM SO EXCITED! Remember when I was slaving away on our kitchen on my hands and knees?

PHG_sanding_floors

While I was in the trenches of DIY, one thing kept me going steady (besides the extra doses of Advil.) It was the dream of having our home featured in a magazine. Well, that dream became reality this week! If you happen to be in the magazine section of a store near you, you might see this:

Do It Yourself Magazine Spring 2015

Do It Yourself is one of my favorite publications because they feature beautiful homes and projects that were created by the homeowner. They Did It Themselves! Plus, the magazine shows you how to complete the same projects yourself! I am super honored that they wanted to photograph my home and some of my DIY projects for this issue.

But, I have to tell you, I was very nervous before the photo shoot. I had visions of the editor and photographer walking in my home and walking back out in disgust. As the date drew closer, I was frantically checking last minute fixes and DIY projects off my list:

master bedroom:
build king sized bed
paint ombré effect on master bedroom walls
paint knotty pine dresser
paint vanity
create button pendant light
add legs to nightstand

foyer:
hack an ugly IKEA dresser
hang mirror

boys’ bathroom:
paint mirror frame
paint vanity
re-caulk board & batten
clean, clean, clean
figure out how to get rid of the urine smell! YIKES!!!

Any of you who have boys know that they have poor aim! No matter how clean I get their bathroom it still has a slight urine odor. Please, please tell me that I’m not the only one with this problem.

Do or Do Not...There is No Try - Yoda Quote

Funny story: I created this little piece of art that hangs on the wall over the toilet in the boys’ bathroom. I thought the kids would love it because they are big Star Wars fans. I also wanted them to think about this sage advice everyday when they wake up. Handsome Guy thought it was my attempt to get the kids to improve their aim. #Headsmack

Anyway, back to the urine odor. I would be mortified if the photographer and editor walked into that bathroom and got a whiff of pee. I set forth with only a few cleaning supplies to try to eliminate the odor (because “Do or Do Not…There is No Try.)

How to Clean a Stinky Boys’ Bathroom (as if a Magazine Photographer was Coming!)

How to Clean a Stinky Bathroom as if a Magazine Photographer was coming | Pretty Handy Girl

Supplies:

(I’ve included affiliate links for your convenience. I earn a small percentage from a purchase using these links. There is no additional cost to you. You can read more about affiliate links here.)

Let’s get busy! Read more

3-DIY-book-giveaway

I love being able to peruse real bound books! Browsing through blogs and online is fine, but there is no substitute for the printed word in a book.

Lucky for you, I’ve reviewed three new home, garden and design books that I think you’ll love!

The first is Decorating for Real Life by Wendy Hyde (blogger at The Shabby Nest)

decorating-for-real-life-page

Blogger Wendy Hyde began writing her blog, The Shabby Nest in 2008. She has taken her online world of decorating and design knowledge and has created a book full of magazine worthy homes. The photos may seem unachievable at first, but she breaks each room down to help you get the same look in your own home. She holds your hand and points out what makes the room work design-wise. This 208 page hardcover book is full with color photos of almost every room in a typical family home. At the end, Wendy printed several pages of grid paper and typical furniture items to help you design your own room layout.

PostBreakblueThe second book is Cultivating Garden Style by Rochelle Greayer

cultivating-garden-style-page

Rochelle takes us into a diverse world of beautiful and inspiring gardens. Her book is filled with ideas and tips to create landscaping that reflects your style, your home or your dreams. This hardcover book has over 300 pages filled with twenty three unique garden styles and step-by-step DIY projects to complete your outdoor space. Whether you like modern, Asian, Cottage or any other style, you’re sure to find inspiration in Cultivating Garden Style.

PostBreakblue

Last but certainly not least is DIY Wood Pallet Projects: 35 Rustic Modern Upcycling Ideas to Personalize Your Space by Karah Bunde (blogger at The Space Between Blog)

DIY-Wood_pallet_projects-page

Karah takes her popular blog theme of upcycling and decorating using shipping pallets from the online world and into the pages of this book. She created 35 new projects using shipping pallets and gives you the step-by-step tutorial to complete each one. In the beginning of the book she discussed everything you need to know about the safety of wood pallets and how to harvest the wood from them. The rest is full of tutorials using pallet wood that will definitely be easy on your wallet.

PostBreakblue

PHGFancySign

Starry Night Christmas Tree | Pretty Handy Girl

Starry Night Christmas Tree | Pretty Handy Girl

This year I might have taken the tree decorating a bit far. I couldn’t stop at just decorating the tree. No, I had to decorate up the walls around the tree and onto the ceiling. The tree is literally surrounded by a multitude of shimmery vinyl stars!

Starry Night Christmas Tree | Pretty Handy Girl

What do you think? Overkill? Or do you like the emphasis those stars place around the tree. If you like it, here is a link where you can purchase your own set of stars from Leen the Graphics Queen (affiliate link.)

Starry Night Christmas Tree | Pretty Handy Girl

My idea started when I was gazing at my favorite tree topper I bought at Target a few years ago. At night when the light is turned on, it casts a multitude of lit stars all over the ceiling and walls. I was thinking how sad it is that you can’t see all those stars in the day. I wanted a more permanent way to keep the stars on the wall and ceiling 24/7! That’s when I called my friend Leen the Graphics Queen on a whim. That girl is the sweetest thing. She put up with my crazy idea and promptly shipped me several sheets of stars in different colors to create my vision. Proof that she’s truly a wonderful friend, she sent me both a set of gold and silver stars for me to choose from. As you probably guessed, I used the gold stars.

Starry Night Christmas Tree | Pretty Handy Girl

Now, behold our blue, white and gold Christmas tree! The gold is the prefect touch of warmth against the cool white and blue color palette.

Starry Night Christmas Tree | Pretty Handy Girl

The feather boas and icicles were from Michael’s last year. The larger aqua blue embroidered ornament balls and silver tree skirt are from Lowe’s (yeah—I know—Lowe’s the Home Improvement store!) The rest of the ornaments I’ve had for a while.

Starry Night Christmas Tree | Pretty Handy Girl

At night when the tree is lit, you can see that I wrapped the tree with several strands of white and blue mini-lights.

Starry Night Christmas Tree | Pretty Handy Girl

The British horse bridal medallions were a gift from a dear friend a few years ago. They have made the rounds in my home decor, but this year I added them to the Christmas tree.

Starry Night Christmas Tree | Pretty Handy Girl

Starry Night Christmas Tree | Pretty Handy Girl

What do you think? Do you like my idea of surrounding our tree with its own constellation of stars?

Starry Night Christmas Tree | Pretty Handy Girl

You don’t have to use them on the ceiling. You can use them to decorate your desk, your door, holiday gifts, your refrigerator, your kids (okay maybe not them) or anywhere you want to decorate for the holidays! Best of all, when you are ready to remove them they peel off and leave no damage behind.

Starry Night Christmas Tree | Pretty Handy Girl

Happy Decorating!

PHGFancySign

Disclosure:

Some affiliate links appear in this post, if you click on them I earn a small percentage from the purchase. You are not charged any more.

Here’s the scoop, I wasn’t paid for this post. Leen is a good friend of mine and I love her graphic vinyl. I approached her about using her graphic stars. Yes, she sent them to me for free, but she’s a sweetheart like that. Leen and her husband run a small shop near the coast of North Carolina. They are the type of business that you want to support around the holidays and the rest of the year. I’d tell you more about how wonderful they are and how they are raising four wonderful children, but then it would sound like I’m gushing. So, hey, just know that I wasn’t paid and I want to see Leen succeed ;-)! 


Pin for later!

Installling Brick Mural Wallpaper | Pretty Handy Girl

Tips for Installing Brick Wallpaper Mural | Pretty Handy Girl

Today I can’t wait to show you how to easily add dimensional interest to a focal wall in your home. Installing a Brick Wall Mural is definitely a DIY project you can tackle if you have a friend or two to help you. When Wallpaper Direct contacted me to offer to let me try some of their products, I was still a bit wary (having stripped my fair share of wallpaper.) But, then I stumbled upon the white brick wallpaper and saw how cool it looked. I decided to give it a try and let them send me a wallpaper mural specifically for my son’s bedroom. But, let’s back up. Remember last week when I admitted to being a procrastinator? Well, this is what I started with:

Back Camera Back Camera

After staring at Nickelodeon green for 6 years, my son and I decided it would be calming to paint the walls a soothing gray. And, I thought it would be really cool to create a loft look by installing a giant wall mural of white brick. (Note: The large mural panels has since been discontinued, but you can purchase white brick wallpaper that looks very similar and may actually be easier to install by yourself.)

I ordered the mural and it arrived safely to our house in a few days. I quickly organized a few friends who had installed wallpaper to help me.

Installling Brick Mural Wallpaper | Pretty Handy Girl

To install a wallpaper mural, you’ll need a few tools.

(I’ve included affiliate links for your convenience. I earn a small percentage from a purchase using these links. There is no additional cost to you. You can read more about affiliate links here.)

Materials:

Prep Work:

Before wallpapering your wall, clean it with a mild cleanser (diluted TSP is wonderful, but you can use regular multi-purpose spray cleaner.) Patch any holes or imperfections with spackle (joint compound). After the compound has dried, lightly sand the wall. Read more