I’ve been keeping a secret from y’all and I just can’t live with it anymore. I have a miracle stain remover recipe that has time and again proven to work on some of the most stubborn stains. Plus, find out why we don’t need dryer sheets anymore!
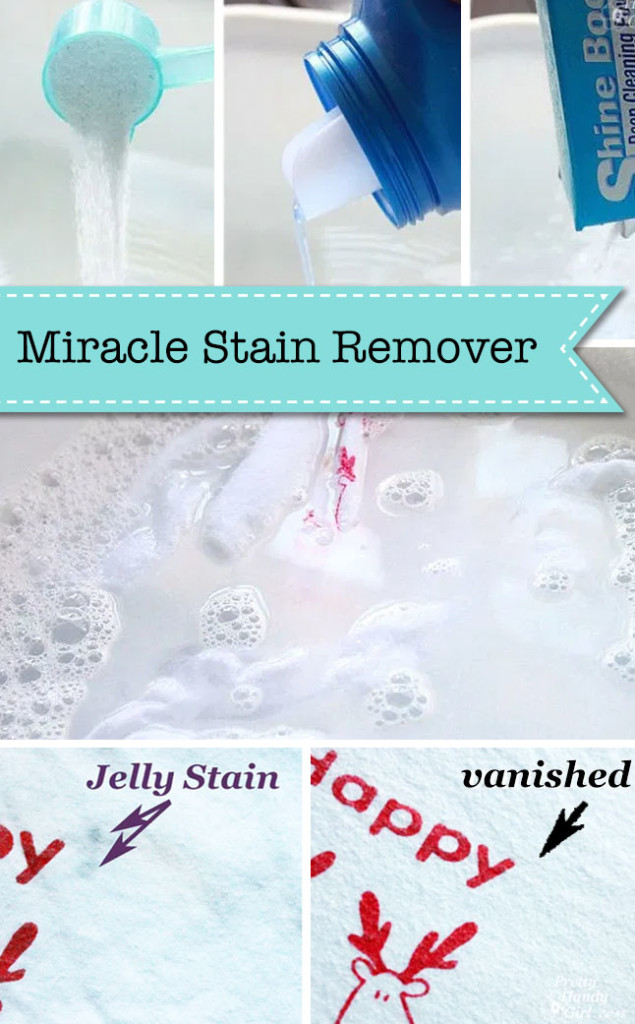
miracle stain remover

Miracle Stain Remover and a Healthier Alternative to Dryer Sheets

Recently, Pretty Handsome Guy came back from a business trip with a stained button-down shirt. It had wing sauce on it AND it had been allowed to settle for a few days AND he hadn’t pre-soaked it or used any stain remover. (Have I not taught him anything?! Sigh.) I thought for sure the shirt was a goner. But, I decided to put my miracle stain remover recipe to the test. Low and behold after 24 hours of soaking in the concoction, the stain was magically gone! No scrubbing, it was simply gone. Can I apply for a magic wand now?

I can’t lay claim to the recipe. I found it on our local “Mommy” message board back when I was a new mom. But, this recipe has worked on more stains than I can count.


I mixed up a batch today to try on one of my son’s shirts that got blueberry jelly on it. My mom tried to wash it to get the stain out, but it was still there after laundering. Normally once a stain goes through the dryer it is set in. But, that didn’t deter the me from trying my Miracle Stain Remover. Sit back and learn young Jedis (we watched Star Wars last week, so it is on my brain.)

Miracle Stain Remover…

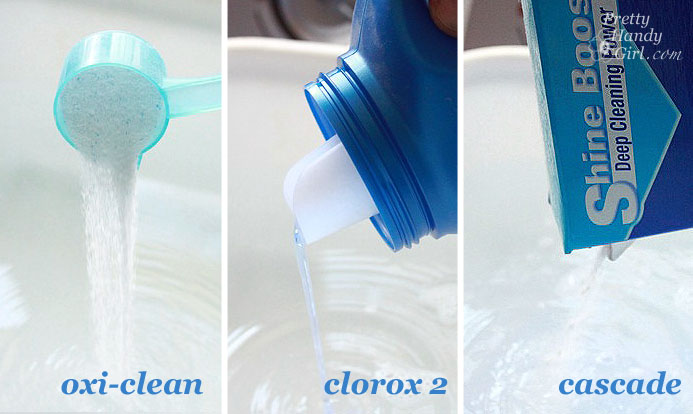
Ingredients:

(I’ve included affiliate links for your convenience. I earn a small percentage from a purchase using these links. There is no additional cost to you. You can read more about affiliate links here.)

Fill your basin with warm water then add the Oxi-clean, Clorox 2, and powdered Dish Detergent. Give it a swirl and mix until the powders dissolve and bubbles form.

Place the stained garment into the mixture, being sure the stain is submerged. After two hours you can take a peek! My stain was gone.

For tougher stains, let it soak overnight. Remove the clothing to behold the miracle! Normally I will throw the garment into the wash, but you could simply rinse and dry it.

And, this formula is also safe for colors as well!

Laundry Detergent…

In the spirit of sharing, I also have this recipe for Making Your Own Laundry Detergent for only $1.25 per year! I mean, have you seen the price of laundry detergent lately?! 200 oz. for “gulp” $35! Whereas the recipe I made yielded 250 oz. for….are you ready for this…$0.61! This is a 97% saving on detergent by making your own.

And the best news is that it is safe for HE washers. You only need 1/4 cup per load. Click Here to Get the Recipe for Making Your Own Laundry Detergent for $1.25 per year!

Drying clothes…

And since I’m talking laundry today, this post wouldn’t be complete without mentioning my secret weapon for drying clothes.

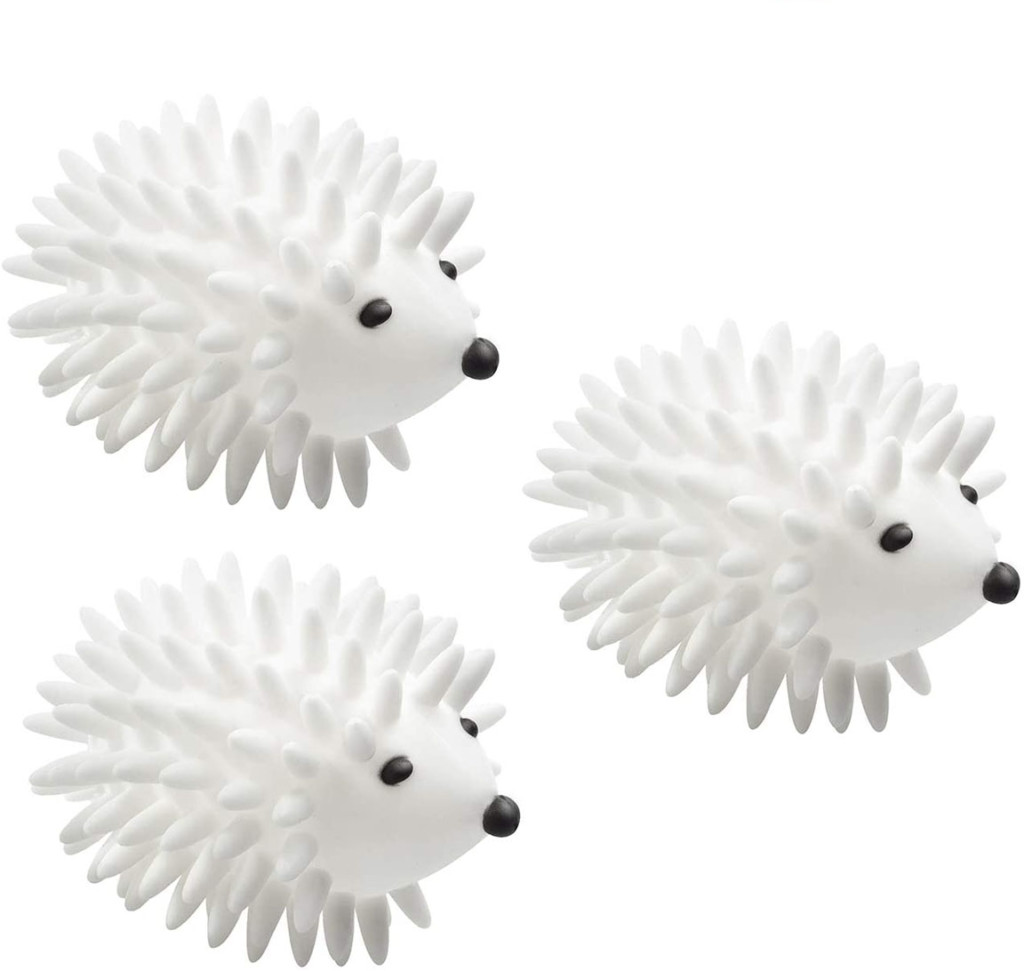
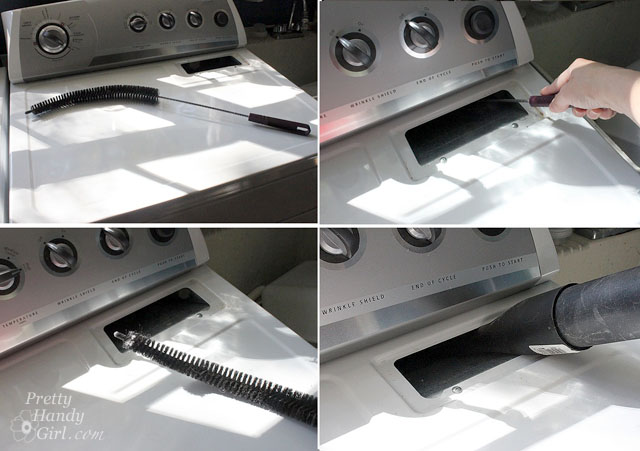
I use two of them! They may look like medieval torture devices or rabid animals, but these little hedgehog dryer balls have completely kicked our fabric softener sheets to the curb! I haven’t used dryer sheets in over 9 years now! At first I was concerned about static (the bane of my hair’s existence), but then a friend told me that you can eliminate static by not letting your clothes over dry. Simply shut off the dryer when your clothes are about 95% dry. Don’t let the dryer run and run and run until the clothes are piping hot and there isn’t a spot of dampness on them. Instead, let the moisture sensor (if you have one) do its job and it should shut off right before the clothes are dry. The waistbands in jeans or sweatpants may feel slightly damp, but everything else feels dry. And most importantly, pull out fleece, polyester, or synthetic clothes about halfway through the cycle.

The dryer balls (you should use two) work together to punch, separate, fluff, and dry your clothes. They also help keep wrinkles to a minimum, but I’m not afraid of a few wrinkles (see my no iron solution to wrinkles post.) The Dryer Balls cost less than $10, but the cost savings of not using dryer sheets is definitely worth it. Plus, you don’t have to stress about the chemicals that are in dryer sheets. These little wonder balls (I can’t believe I just typed that) last for a long time, but it’s good to have three in case one hedgehog loses a nose (it can happen.) I have been using mine for over nine years. They start to get darker on the nubs from dye in your clothing, but it doesn’t transfer and it doesn’t hurt their effectiveness.

I hope you found these laundry tips helpful. Please share with a friend!
miracle stain remover
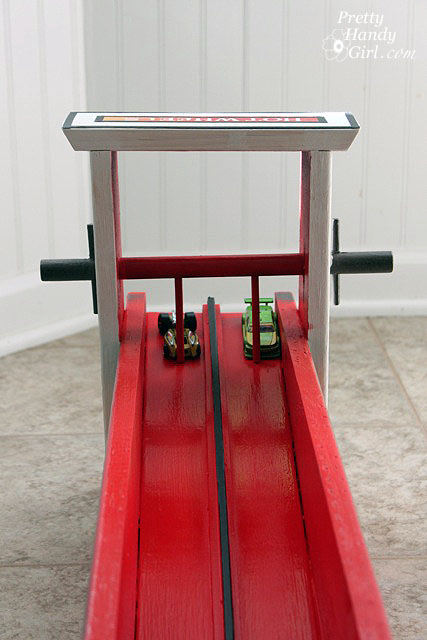
Matchbox Car Racing Ramp

Do you have a little free time over the Christmas break? How about taking some time to make a wooden racing track with your kiddos!

If you have boys, I’m sure you have Hot Wheels cars in your home. They go hand-in-hand. My boys play with their race cars for hours!

They have several of the plastic tracks. And even a curly-Q racing ramp. But, honestly they seem to play with my scrap pieces of wood more than the plastic tracks. Chances are, if you or your spouse build things, you will have all the scraps of wood on hand to make this racing ramp.

My 7 year old and I worked together on this project. (He was my design consultant and he also helped with some of the assembly.) But, imagine the surprise on a child’s face if you made this ramp as a holiday or birthday gift!

Materials:


  • 2 – 1 x 4 x 13″ boards (tower sides)
  • 1- 1 x 4 x 9″ board (tower roof)
  • 2 – 1 x 8 x 33″ boards (ramp sides)
  • 1 – 1 x 6 x 33″ board (ramp)
  • 1 – 3/4″ dowel rod (cut to 12″)
  • 1 – 1/8″ dowel rods
  • 1 – thin rectangular strip for a divider 33″ long
  • 1 5/8″ screws
  • 1″ finish nails
  • 2″  finish nails
  • Gorilla Glue
  • Sandpaper
  • Primer
  • Spray paint
  • ScotchBlue Painter’s Tape
  • X-acto knife
  • Clamps
  • Cordless drill
  • Handsaw or miter saw
  • 3/4″ spade bit
  • 1/8″ drill bit

Start by cutting all your boards to length. Grab the ramp board (1 x 6 x 33″) and cut one end of the ramp at a 30˚ angle.

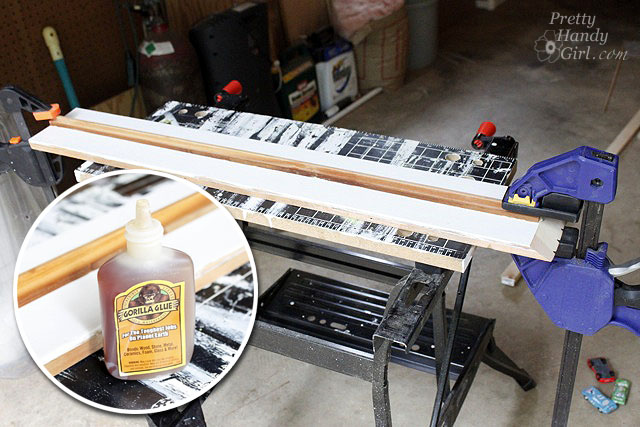
Glue the narrow strip onto the center of your ramp using a small amount of Gorilla Glue.

Clamp the strip and add a few 1″ finish nails to secure the strip.

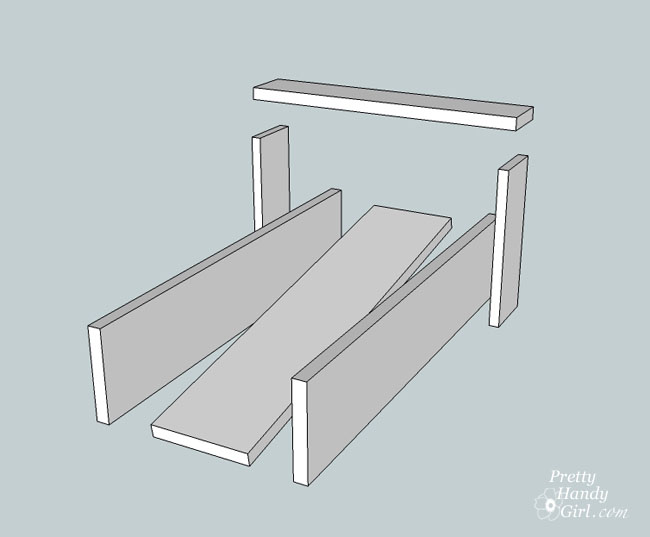
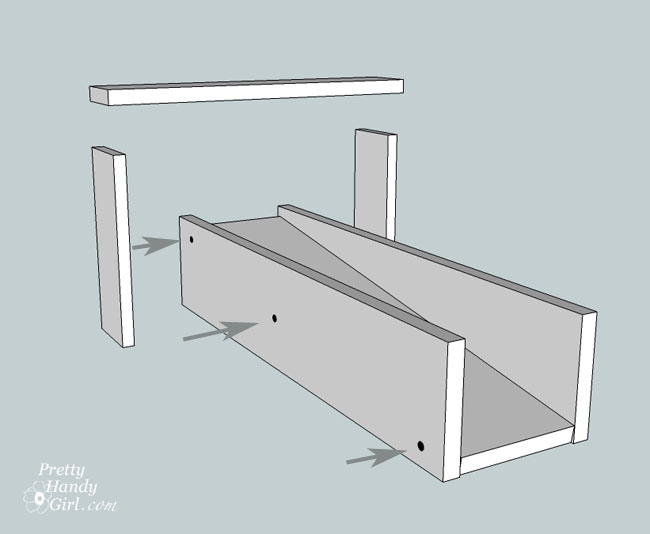
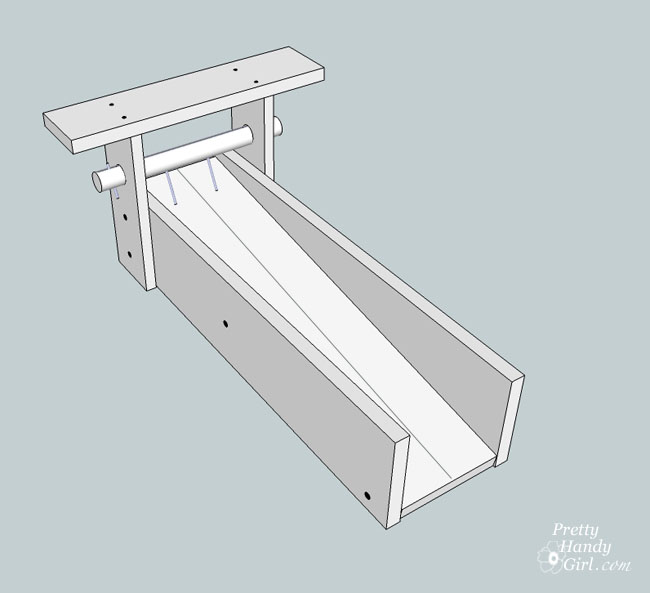
Set up your boards as shown. Tilt the ramp up at the back, the angled cut will rest on the floor (not shown.)

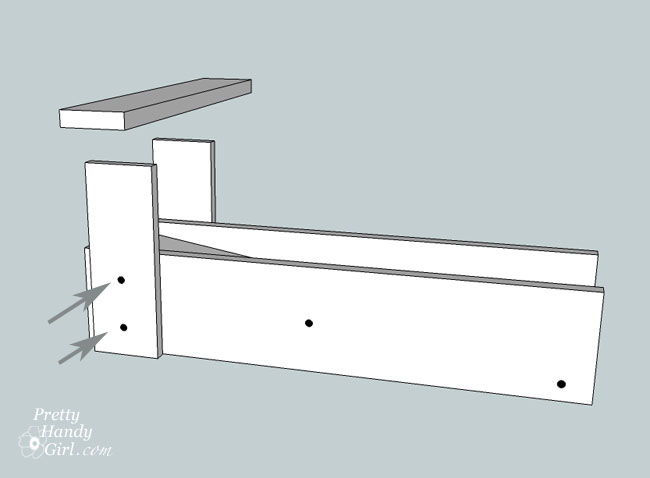
Drive a few screws through the side walls and into the ramp with your drill.

Line up the tower sides approximately 2″ from the back edge of the ramp walls. Then secure them in place with a few more screws.

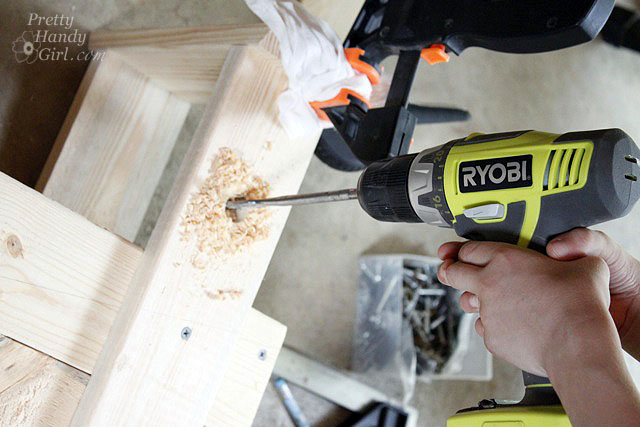
Drill a hole into each tower side large enough for the 3/4″ dowel rod to fit through.

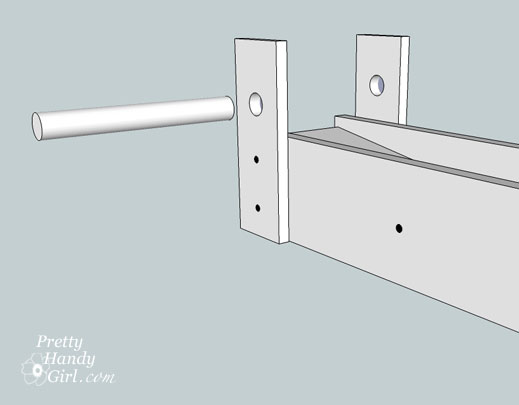
Slide the dowel rod through and center it on the ramp.

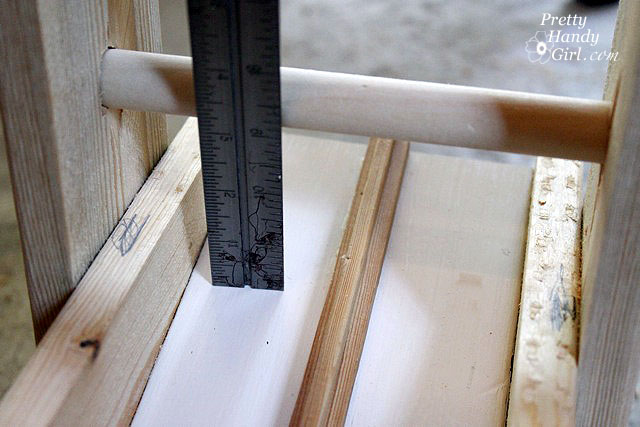
Mark the location of the center of the left and right tracks onto the dowel rod. Measure the distance between the dowel rod and the ramp. Use this measurement to cut 2 pieces of 1/8″ dowel rod 1/2″ longer than that measurement.

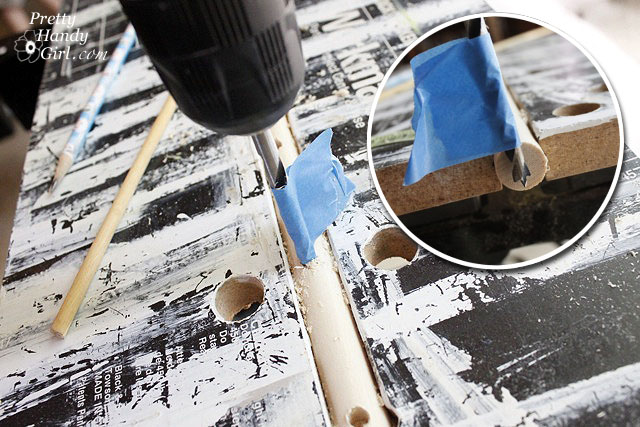
Remove the 3/4″ dowel rod. Drill holes 1/8″ wide halfway through the big dowel rod at the locations you marked for the centers of the tracks.) Wrap a piece of painter’s tape around the drill to indicate a depth 2/3 of the way through the 3/4″ dowel rod. Then don’t let the bit go further than the tape into the rod.

Mark the location where the dowel meets the outside of the tower wall.

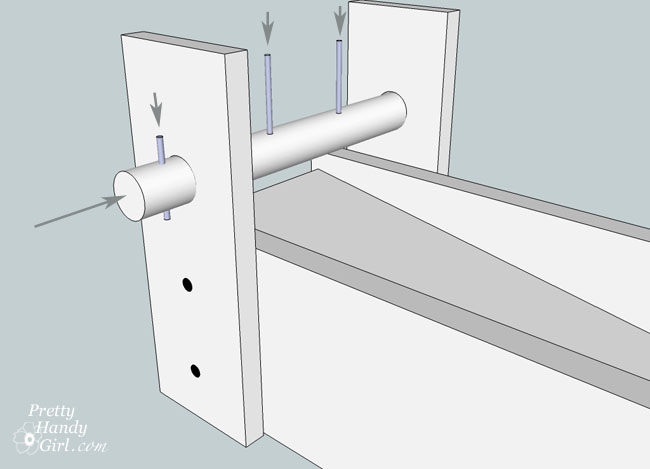
Drill a hole all the way through the large dowel rod. Insert the 3/4″ dowel rod through the holes in the tower walls. Glue the 1/8″ cut dowels into the halfway holes. Then cut and glue two more 1/8″ dowels to go through the 3/4″ dowel on the ouside of the tower walls. These will anchor the large dowel rod and keep it from slipping out of alignment.

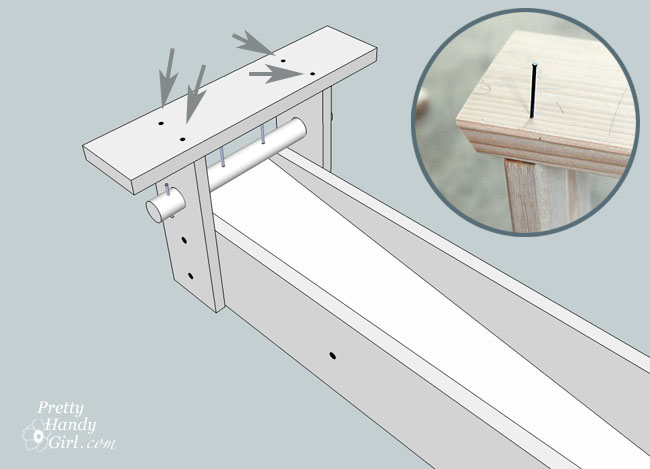
Nail finish nails through the tower roof and into the walls of the tower.


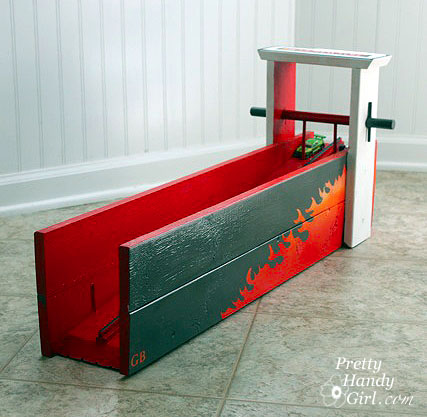
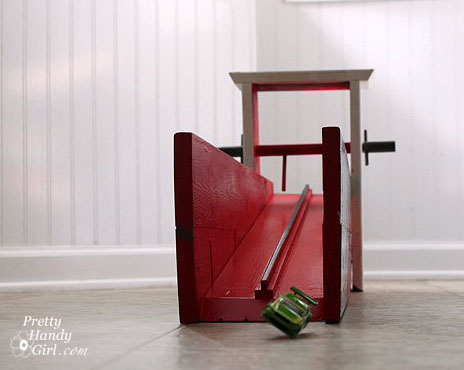
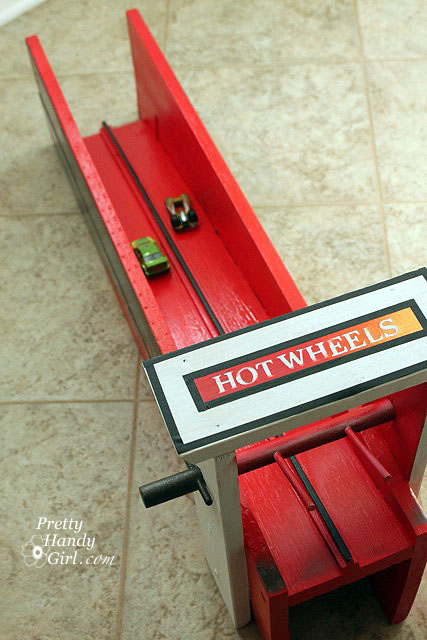
That completes the building portion of this tutorial. Hopefully your ramp resembles this one:


Now it is time to add some pizzazz! Ka-chow!

My design consultant demanded fiery red flames and black on his ramp. (And what he wants, he gets!)

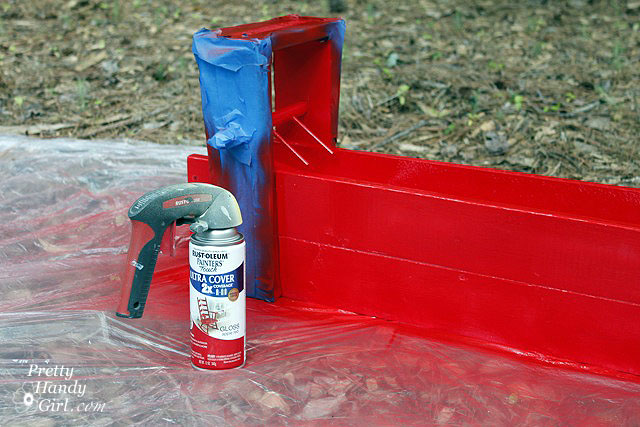
I lightly sanded the wood race track. Added a coat of primer and some red and yellow spray paint.

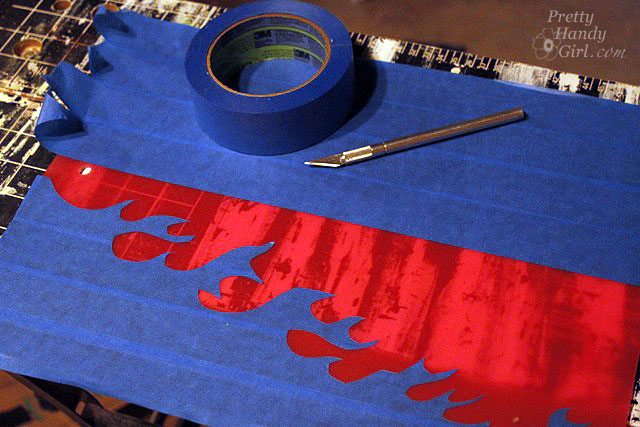
Then I cut out a flame design using ScotchBlue painter’s tape (4 pieces overlapping) and an x-acto knife on a cutting board.

I gently lifted the tape and adhered it to the side walls.

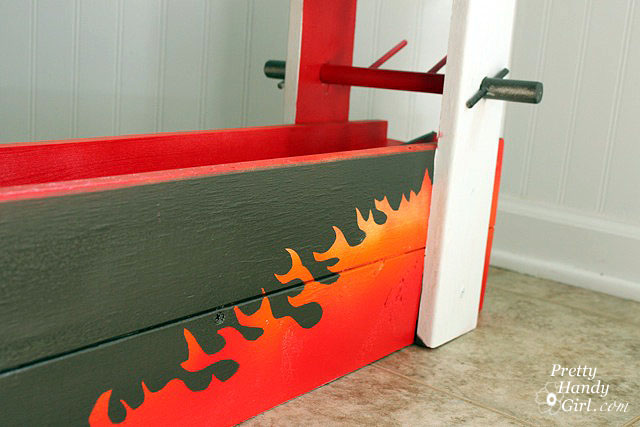
After a coat of metallic hammered metal spray paint, I removed the tape to reveal:

What do you think? Do I have a shot at a job on Orange County Choppers??!! The “logo” on the top was made by pressing letter stickers over the primer, then I taped off around the words and sprayed some red and yellow spray paint. The lines are made with black graphic adhesive lines.

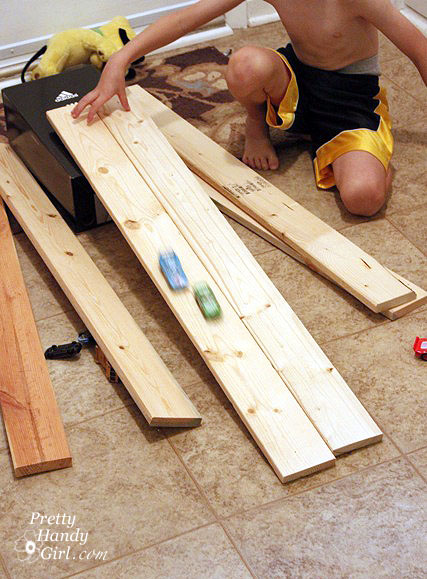
On your marks…get set…

and GO!


Nice two wheel stunt!

I hope you will make one of these for your little stunt driver.

Today I’ll teach you how to use a miter saw safely. We’ll learn the difference between a miter and a bevel cut. Plus, I’ll also show you the different features and functions of miter saws.

How to Use a Miter Saw

Hello and welcome to the very first Tool Tutorial Friday (a series of tool tutorials)! Come right in and have a seat. If you give me less than 10 minutes of your time, I will empower you with a new power tool skill! Today, I’m going to show you how to use one of my favorite power tools. Before I owned a miter saw, I used a hand saw and a cheap plastic miter box. But, they were really putting a cramp in my DIY style (if you know what I mean.)

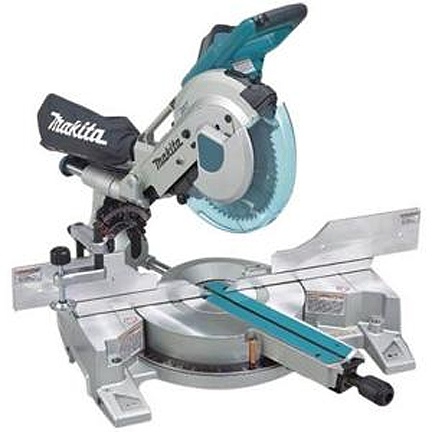
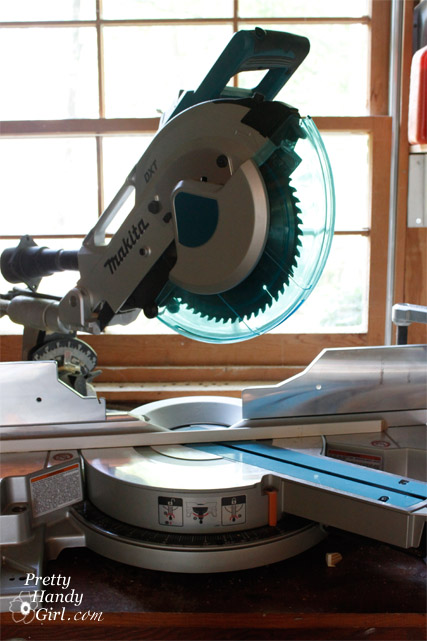
About two decades ago, my husband gifted me my Makita 10″ Sliding Compound Miter Saw. That’s right, I don’t ask for jewelry for big occasions, Pretty Handsome Guy knows to ask one thing before an upcoming holiday, “So Honey, what power tool do you want now?” It’s true, I’m a power tool junky.

Ready to learn how to use a miter saw? Okay, let’s get started…

Working with power tools can be dangerous, but your risks drastically eliminated if you give the tool some respect. Today I’ll show you how to use a miter saw safely.

About Miter Saws:

Miter saws come in many shapes, sizes, and colors. The size (usually from 7.25″ up to 12″) refers to the diameter of the blade on the saw. The larger the blade, the wider the material it can cut. However, if you purchase a “sliding” miter saw, you can cut several inches wider than your blade diameter (the specifications on the saw should tell you this cutting distance). Miter saws run anywhere from $80 up to $800 depending on the features and brand you choose.

Sliding Miter Saw:

I highly recommend a sliding miter saw if you can afford it. Being able to cut lumber a few inches wider means the difference between using your miter saw or having to break out the circular saw or table saw.

On a non-sliding miter saw, the saw head will not slide forward and back. Most of the entry-level models will cut a miter and a bevel. You may have heard miter saws without the ability to slide referred to as chop saws. They will work great for “chopping lumber” but without sliding, dual miters, and dual bevels, you will spend some time flipping the lumber to make your compound cuts.

Speaking of miters and bevels, let’s talk a little more about what is a miter and a bevel cut.

Type of Cuts:

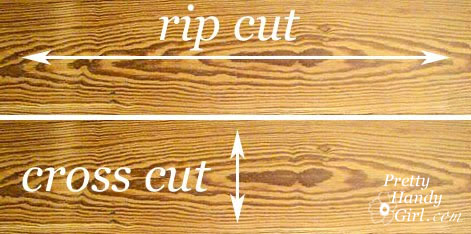
Miter saws are perfect for cross cuts, miter, and bevel cuts. Miter saws cannot make rip cuts. Rip cuts are easier cut on a table saw or track saw (or using a variety of other handheld saws.)

  • Rip – ripping a board is cutting with the grain along the length of a board. This is usually done with a table saw but can be done with a variety of handheld power saws and a straight edge.
  • Crosscut – a type of cut that is perpendicular to the grain or along the width of your board. Crosscuts are usually made with a miter saw or circular saw, but can also be made with a track saw, jigsaw, band saw, or hand saw. You can make crosscuts with a table saw, but you will need a crosscut sled to perform a crosscut cut safely.

Miter Cut:

A miter cut is made when you change the direction of your blade from straight ahead (90˚) by moving it from side to side. Think of pizza wedges. For example, in the image below, the saw is set up to cut a 45˚ miter, and no bevel because the blade is still straight up and down.

Bevel Cut: 

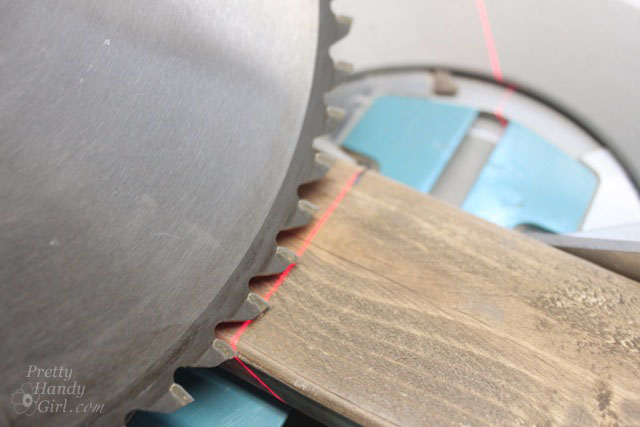
A bevel cut is made when you angle your blade tipping it to the left or right. As an example, in the picture below, I’m making a 45˚ bevel cut into the wood.

Compound Cut:

A compound cut happens when you make a miter and a bevel cut at the same time. Essentially you are cutting two angles simultaneously. This is particularly useful when you are cutting crown molding for a room.

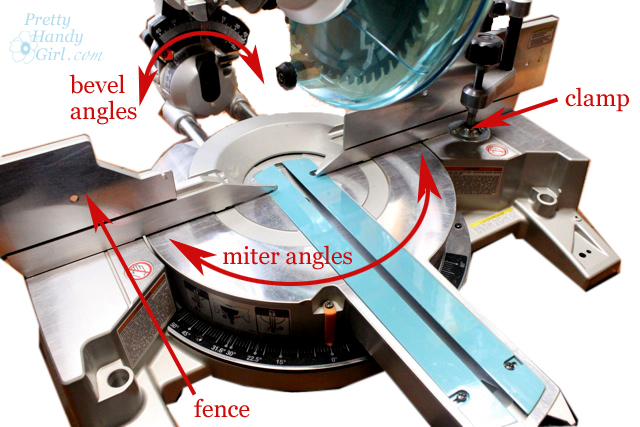
You can see in the diagram below how to set up your saw for bevel angles, miter angles, or both.


Safety Features and Operating a Miter Saw:

All modern miter saws have a trigger built into the handle. Most miter saws also have a safety button that you must push with your finger or thumb before you can squeeze the trigger. To start a straight downward cut, press the safety button, squeeze the trigger and wait for the saw to reach maximum rotation. Then slowly lower your saw into the board you are cutting. Never force the saw through the wood. Let the saw cut and then guide it downward. Once you have completed the cut release the trigger while the blade is in the wood. Let the saw come to a stop before lifting it out of the wood.

Most miter saws have a fence. The fence lets you rest the position your lumber against a straight edge. It keeps the wood steady and helps your miter saw cut true to the degree setting you have chosen.

Some miter saws have a detachable clamp. This is a nice option and helps keep your hands away from the blade during cuts. Let the clamp be your right-hand man (or left-hand man). If you don’t have a clamp on your saw, be sure to always position your hand as far away from the blade as possible. Do not attempt to make cuts where your hand is close to the blade. AND NEVER reach under the saw while it is rotating! Even when you have finished your cut, your hand is not safe until the blade has completely stopped.

Three Safety Tips for Using a Miter Saw:

  • Blade down until it stops! You should always end your cut and release the trigger while the blade is down and in the lumber. Let the blade come to a stop before raising the blade.
  • Always make sure the lumber is supported on both sides. And never clamp both sides of your lumber. One side should be free so as not to pinch the blade during the cut.
  • Never cut small pieces of wood where your fingers are too close to the blade. If you absolutely must cut a tiny piece, clamp or attach it to a larger piece of lumber.

Making a Safe Sliding Cut:

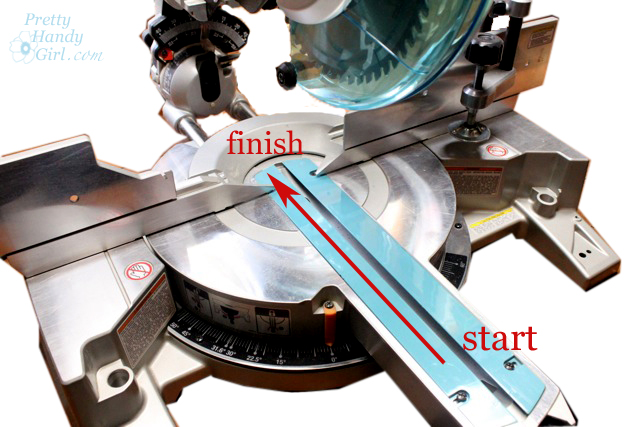
When using a sliding miter saw, there is a proper way to make a sliding cut (used to cut wider boards):

  1. Make sure your saw is positioned fully on your workbench. Test the blade in its full reach toward you to make sure it won’t tip as you lower the blade.
  2. Put your lumber up against the fence and clamp it on one side (if you can).
  3. Before you start the blade, pull the saw toward you until the blade is directly over the board’s edge closest to you.
  4. Squeeze the trigger to start the saw and wait for it to reach peak rotation speed. Then lower the blade down into the wood.
  5. While the blade is still rotating, slide the saw back and away from you as your blade cuts through the rest of the wood (see photo below.)
  6. Once the blade has finished cutting through the wood, release the trigger and let the blade stop before raising the blade.

I created a video, so you can see how to safely use a miter saw. Before you watch the video — a few necessary words of caution:

DISCLAIMER

The viewer assumes all responsibility and liability associated with the hazards of woodworking. Pretty Handy Girl is not responsible for any errors or omissions that may be present in this tutorial. She also assumes no liability for any action or inaction of a viewer.

Please use extreme caution when using power tools. Read your tool manual thoroughly and wear protective safety gear. Take your time familiarizing yourself with a tool before using it. (If you are missing the manual, you can easily find it online by going to the manufacturer’s website or google your saw’s make and model + manual.)

Update: Please recognize that I have tried to put together a basic miter saw usage tutorial to get you started. I have tried my best to show the safest way to use a miter saw. Two safety revisions I want you to be aware of:

  1. You should wear appropriate Personal Protective Equipment when using a miter saw. (Ear protection, eye protection, and a dust mask.) I should have been wearing a mask.
  2. When I first learned to use a miter saw, no one told me to keep the blade down until it came to a stop. This is now standard practice when I work.

And now, let’s get you more familiar with using a miter saw!

I hope you have been empowered to use a miter saw! Go on and give your miter saw a try if you own one. If you decide to buy a new miter saw, I recommend buying a reputable brand with a decent amount of features. I have a lot more information about how to buy quality tools and save money on tools in this article.

These workshops were meant to be interactive, so don’t be shy! Ask questions, leave comments, and let me know you are learning something new.

“It’s a Party and I’ll Paint if I Want to…Paint if I Want to… Paint if I Want To…You Would Paint Too if you had Scotch Bluuuueee!”
I think I’m going to call 3M ScotchBlue right now and suggest this as their new jingle. Kind of catchy isn’t it?!

Check out my project tutorial on revamping an old cabinet door below.

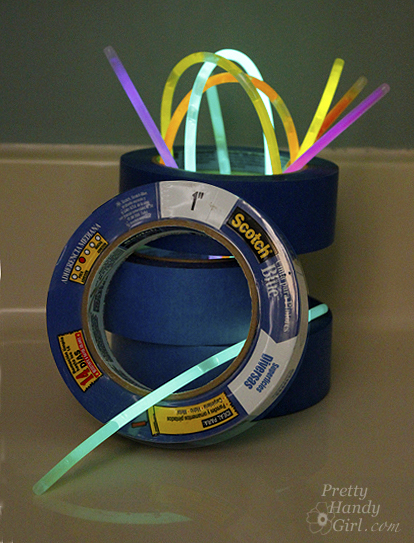
Go ahead, grab your paint and brushes — and don’t forget a roll of ScotchBlue painter’s tape!

I have been using ScotchBlue painter’s tape for a while and I really like it. I am not being paid to say this (even though they did send me a few free rolls of painter’s tape.) You’d know I like ScotchBlue tape if you have read the backlit bookcase post, painting the bamboo rug post and the painting like a pro post (where I share some tips for using ScotchBlue Painter’s Tape!)

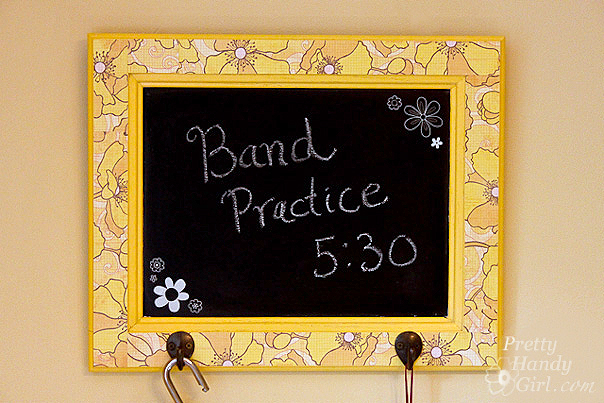
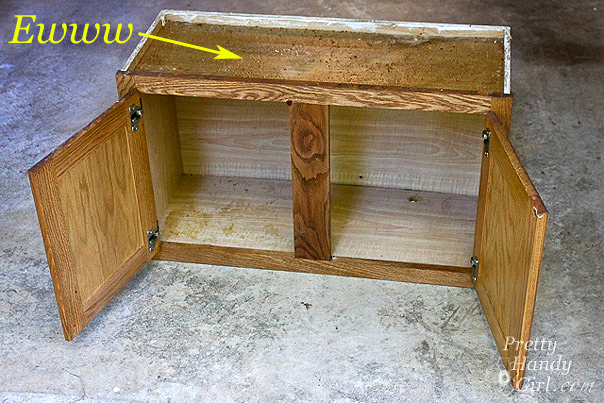
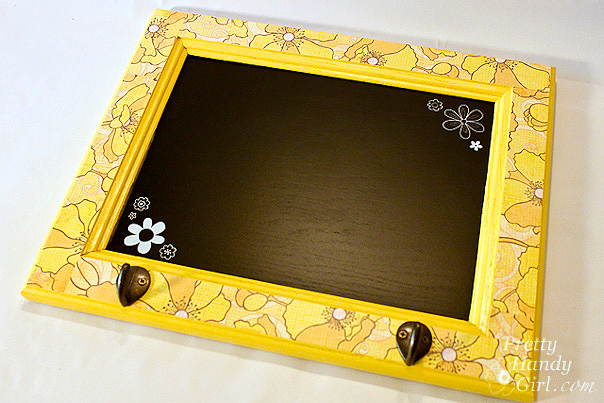
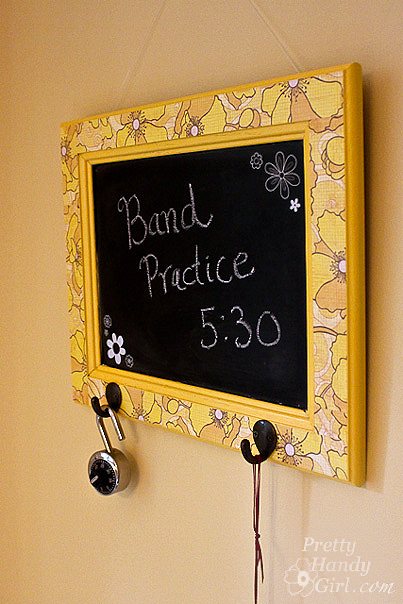
But, enough looking back, I want to share with you how to make something out of a disgustingly filthy grease covered discarded cabinet door. So, let’s hop to it! While building my mudroom bench, I took off the doors and kept them in the hopes of being able to use them another day. I’m working on a new bench for my Habitat ReStore demonstration, so I have more cabinet doors now! I devised a plan to reuse the doors in a creative way, a way that would be fun and yet help us keep track of our comings and goings. Meet my cabinet door turned into a chalkboard message board with hooks:

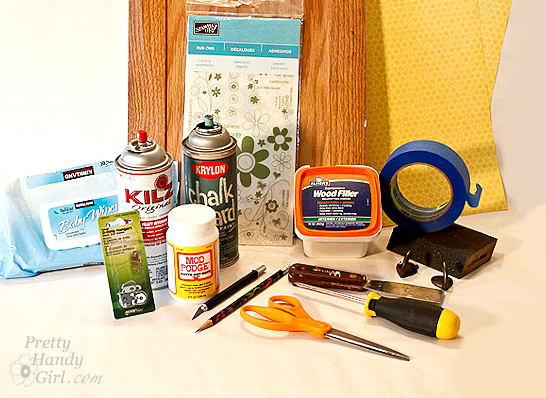
Materials:

(I’ve included affiliate links for your convenience. I earn a small percentage from a purchase using these links. There is no additional cost to you. You can read more about affiliate links here.)

Instructions:

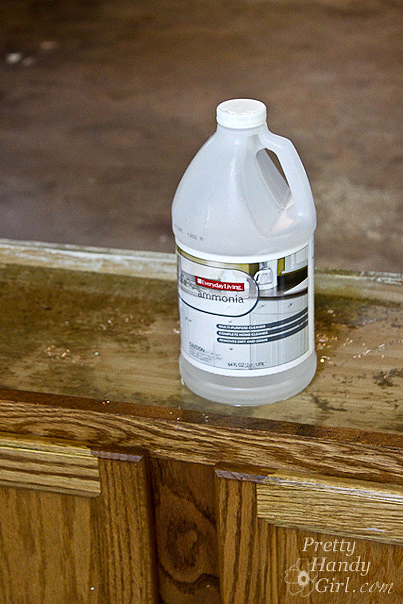
Clean the doors! If you have a cabinet that has finished it’s first life as a kitchen cabinet, and has so much grease on it that you could grease a pig…well, you need to clean it off. I experimented with several different techniques (GooGone, Dawn Detergent, Shakelee DeGreaser Spray, and Ammonia), but the one that worked best was inexpensive ammonia mixed with hot water.


I saturated the cabinet with the ammonia mixture. Let it sit for a few minutes and voila! The grease came off like butter (no pun intended.)


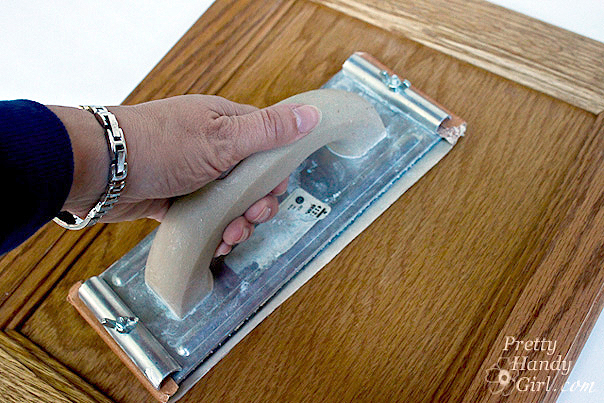
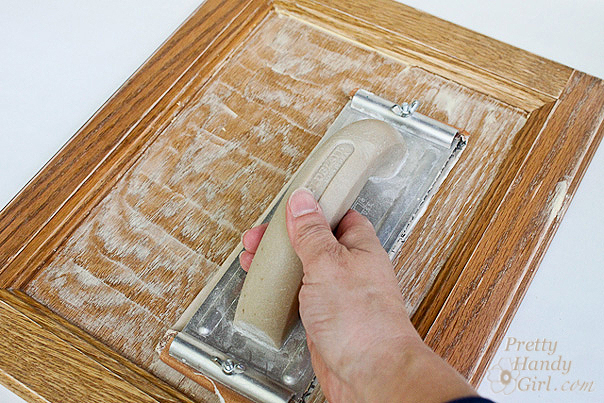
Dry the cabinets and gently sand all the surfaces to rough them up slightly. (Don’t rough ’em up too much boys, we need him to be alive. LOL! Spoken like a true Western character.)


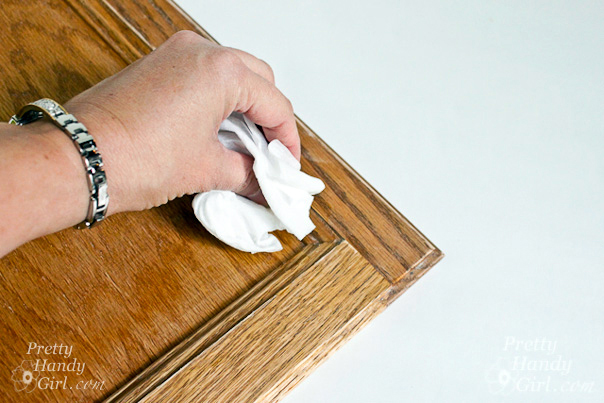
Wipe off the door thoroughly with a damp baby wipe.


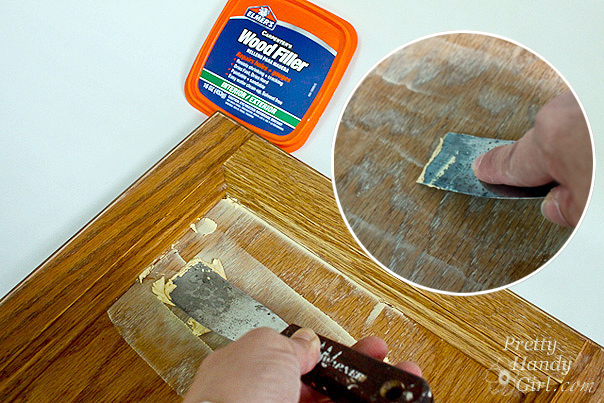
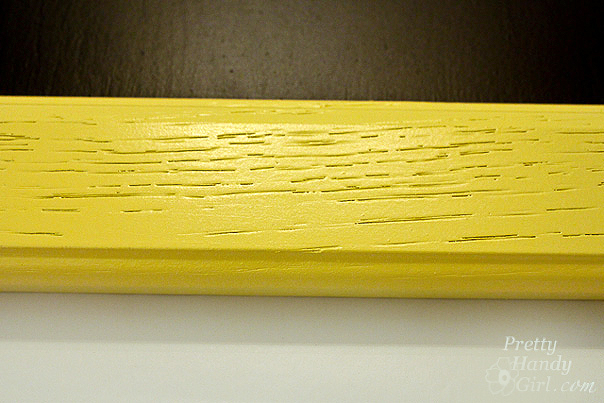
Use wood putty to fill in the wood grain on the middle panel of the cabinet. (You could also fill in the cracks on the frame of the cabinet too, but I have other plans for the frame.)


Let the putty dry for about 10 minutes. Sand the panel until it is smooth.


Wipe off the cabinet door again. Be sure to get all the sawdust off.

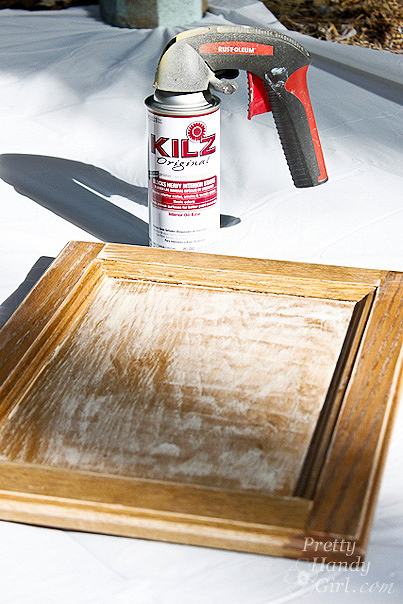
Spray your cabinet door with spray primer. One coat should be enough to cover the door. It helps to elevate the cabinet with a block or two underneath so it doesn’t stick to your drop cloth.


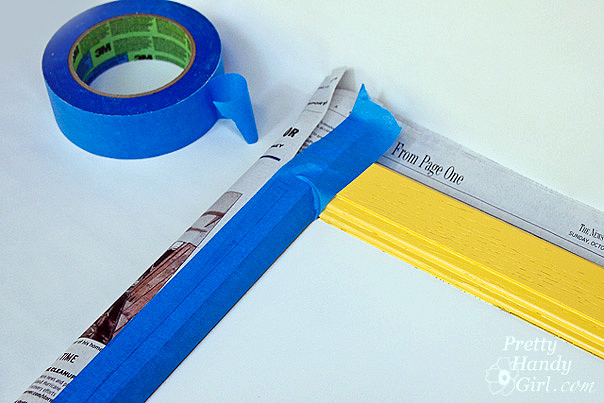
Mask off the middle of your door with newspaper and ScotchBlue Painter’s Tape. Press the edges down firmly by running a finger along the edge. (If your cabinet door is very textured, you can seal the edges by brushing matte medium where the tape meets the door.


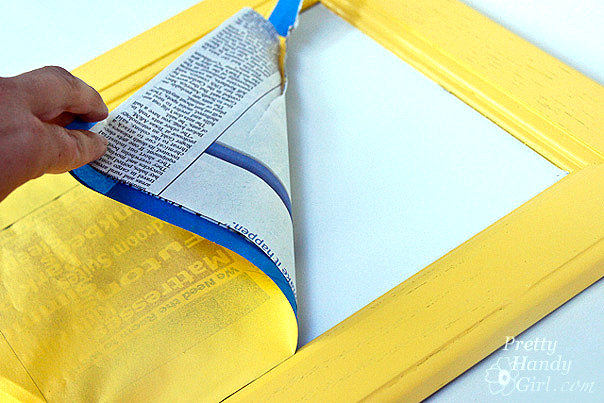
Spray the frame with 2 even coats of the summer squash yellow color (allowing the paint to dry between coats.)


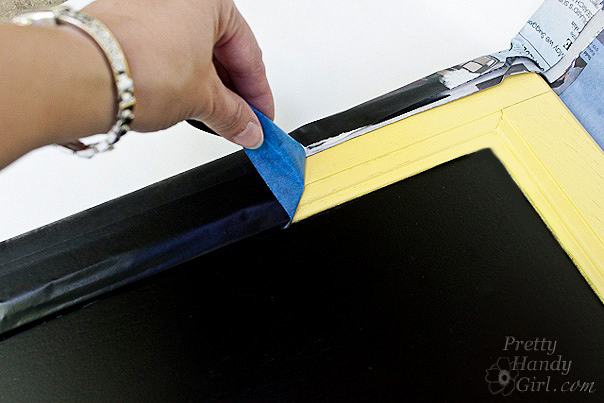
Remove the mask, now ooo and aaaa over that clean edge! Give the paint about an hour to cure before the next step.


Wrap newspaper around the back of the cabinet door and fold the edges up. Use ScotchBlue painter’s tape to tape the edges of the frame off (cover all the yellow with tape or newspaper.)


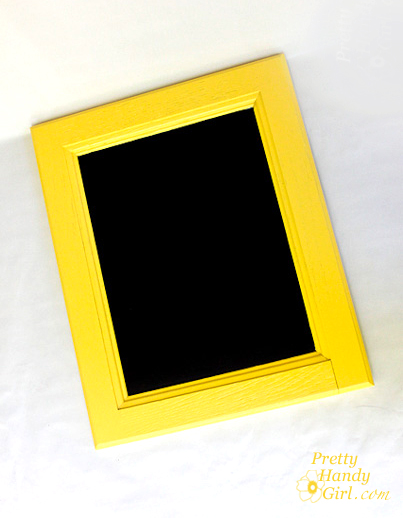
Spray the inside panel with 2-3 even coats of the chalkboard paint. Let it dry throughly before you remove the tape and newspaper mask.


It is starting to look rather purrrrdy, ya think?! Feel free to stop here and say that you are done…


…or if you are a perfectionist (like me), you will want to cover the woodgrain on the frame with scrapbook paper.


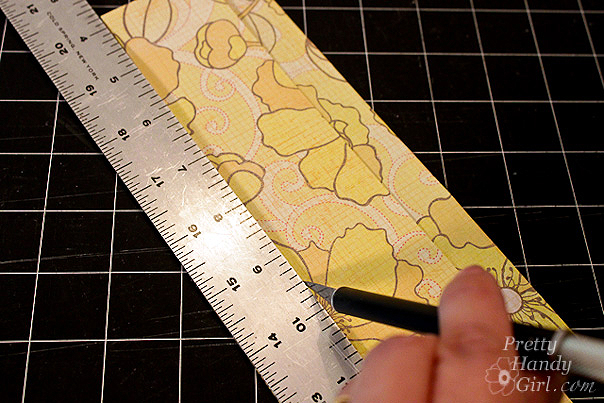
Simply measure your border and cut scrapbook sheets to that width. It is okay if your sheets aren’t long enough to fit on one length, you can tile them.


Brush one layer of mod podge onto the frame then lay the scrapbook paper on top of the mod podge. Press out all the air bubbles. Let the mod podge/paper dry for a few minutes.


Then brush 1-2 coats of the mod podge on top of the scrapbook paper borders to seal the paper.


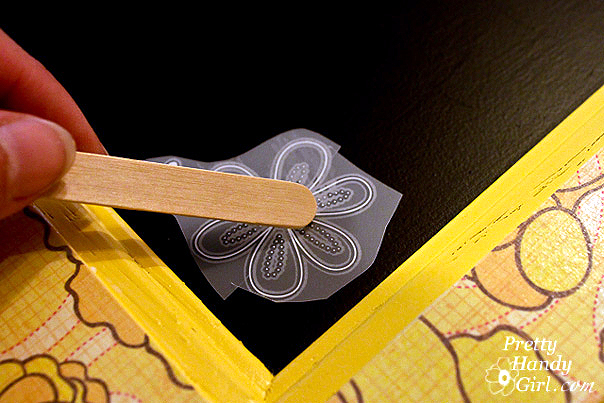
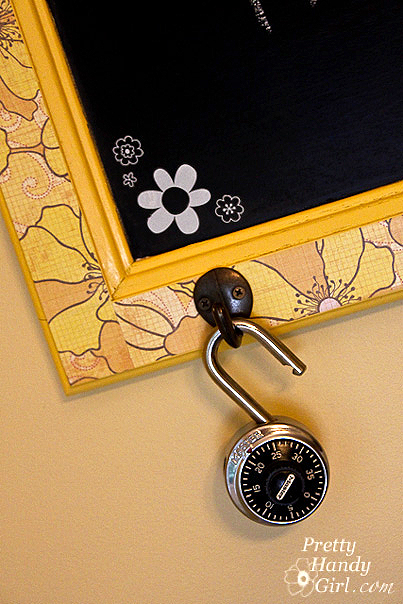
If you want to embellish your chalkboard frame, you can rub on transfer decals (or paint some decorations using white acrylic paint.)


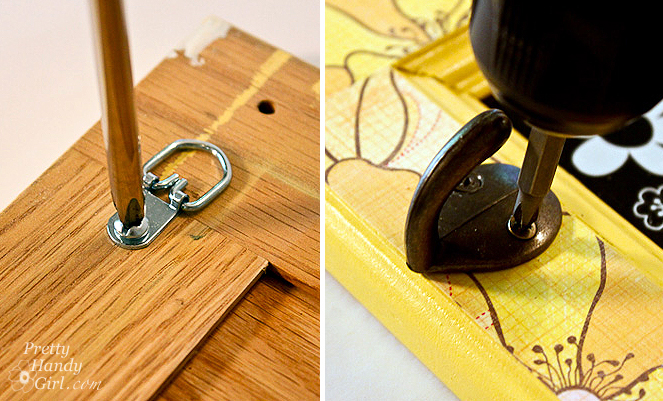
To make your chalkboard frame more functional, add 2 D-rings on either side of the back for hanging purposes. Then add some garment hooks to the front.


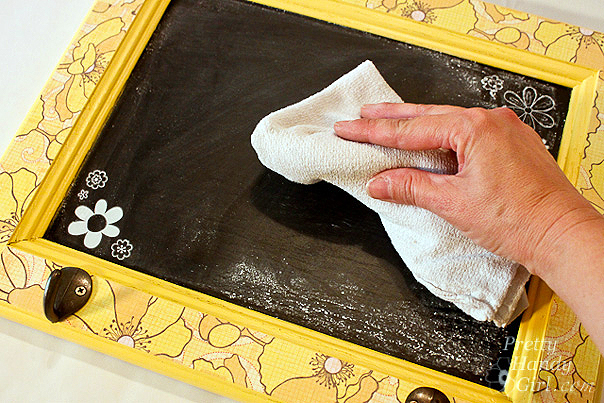
Don’t forget to season your chalkboard. (I prefer Old Bay seasoning…just kidding! I always wanted to say that.) Rub a piece of chalk on its side all over the surface and then wipe it off with a dry rag.


And that concludes the tutorial. Don’t you think the results are sweet! Especially because it is made from something that would have otherwise been discarded.


I envision a wall with several of these chalkboard frames lined up, one per family member. That way a message can be written to each person. I guess I better get busy and make 3 more.


I love how the hooks add additional storage! Be sure to use two picture hangers (one for each D-ring hook.) If you have good eyesight you might have noticed my fishing line that is hanging the cabinet above. This was for photography purposes only. Unless you want your frame to rip the drywall and land on the floor the first time your child wants to hang something heavy on the hooks, do as I say, not as I do.


Awww, isn’t she just a perfect little slice of sunshine on a blank wall? She makes me happy.


You made it through another one of my insanely long tutorials! Congrats!


Disclaimer: I was one of the bloggers chosen to host a ScotchBlue Painting Party. I was not paid or compensated for this post. I was sent a few rolls of ScotchBlue painter’s tape, but I honestly can’t remember if it was 2 or 3 or 5 because they promptly got added to the collection of ScotchBlue tapes I already own.

Board & Batten moulding is very popular right now. And why not? It is easy to work with and looks great (after it is painted)! If you remember, I used board and batten in my  my son’s closet turned reading nook last year.

I decided to create a similar look in the boys’ bathroom. Only this time I wanted to round the edges of the battens for more visual interest. I’m warning you now, this tutorial is a bit photo intensive. But, how else would I give you a step-by-step tutorial?

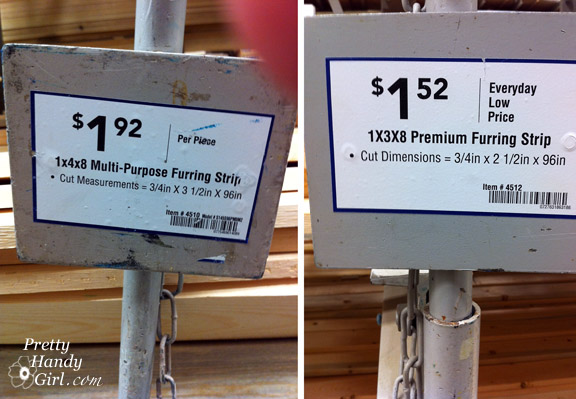
I started by purchasing my lumber at Lowe’s. Did you know you can buy cheap furring strips for your battens? It will save you money. Especially if you don’t mind sifting through the stacks to find the straighter boards and sanding the face of your boards after cutting them. I bought 1x4x8 boards for the battens. And 1x3x8 boards for the upper ledge. I also purchased quarter round moulding and decorative moulding for underneath the upper ledge.

Removing Baseboard Tiles:

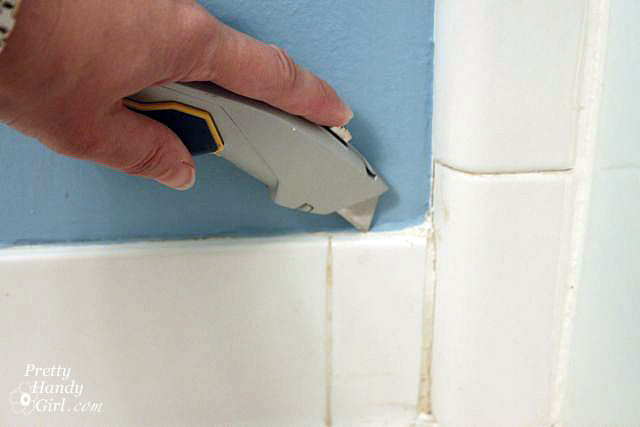
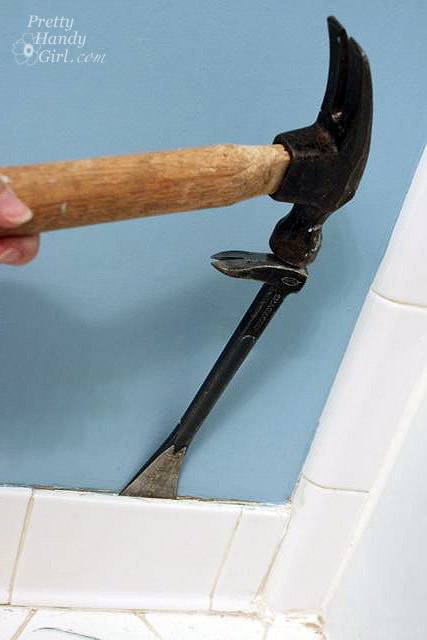
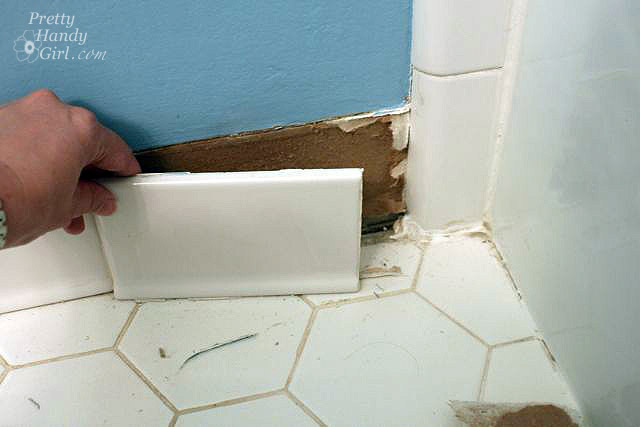
The bathroom had baseboard tiles that had to be removed. I grabbed a few tools and made quick work of removing them. The ear muffs and safety glasses were definitely a must!

Score the edges of the tile with a utility knife.

Hammer a flat pry bar behind the tiles.

Remove each tile one at a time.


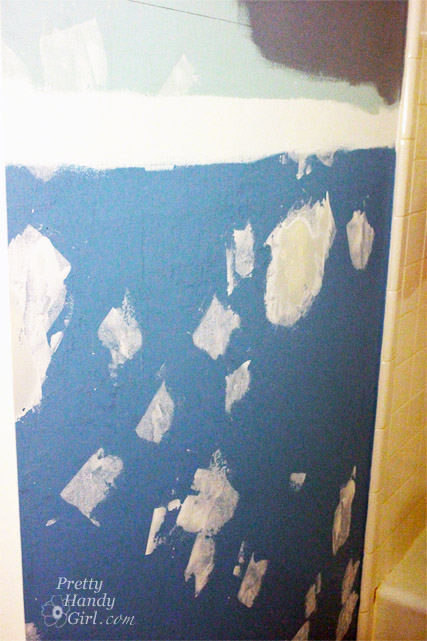
Take some time to patch any holes that are in your wall. You can view a tutorial on patching drywall HERE. I needed my walls to be as smooth as possible since I wasn’t going to add board behind the battens.

Installing Board and Batten Moulding:

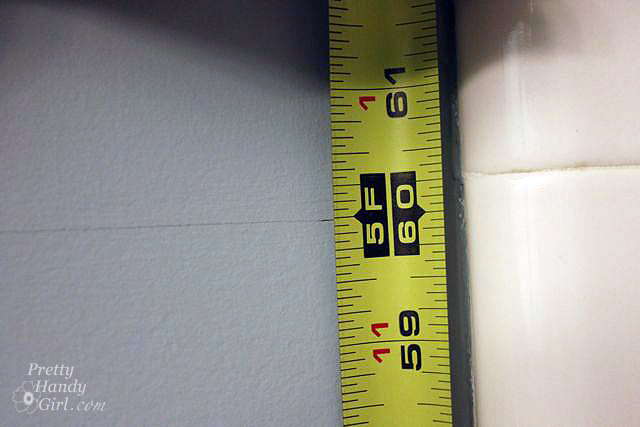
Mark the height where you want the top of your moulding to be. I used 5′ as the height, but then ended up lining up the bottom of my boards on the 5′ mark. So, for the 8′ ceiling room, the top of my moulding was at 65″. Use a level mark as a guide line across the width of your room.

Next measure the widths of the sections that your horizontal boards will be attached to.

Cut your boards to size.

Test fit your boards.

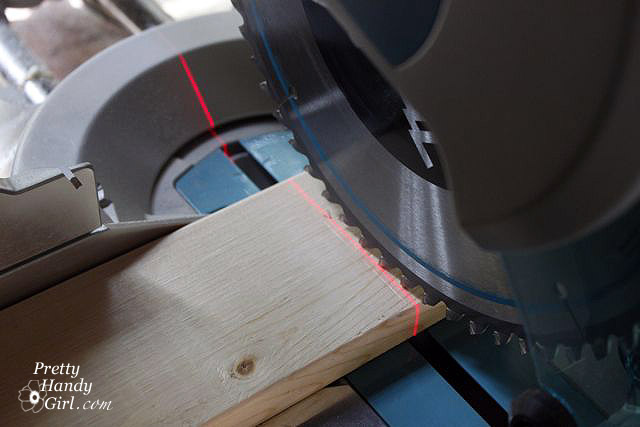
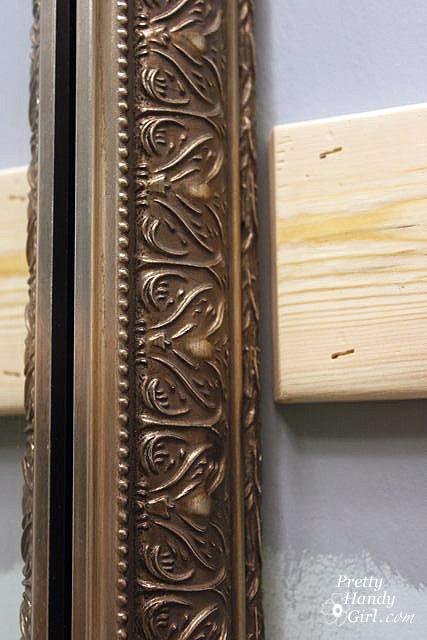
I cut the board that butted up to my mirror at a 30 degree bevel.

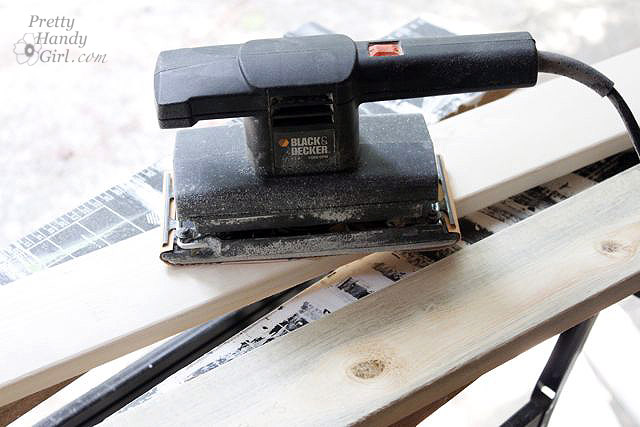
Once you have cut all the boards and they fit. Sand down the face and edges.

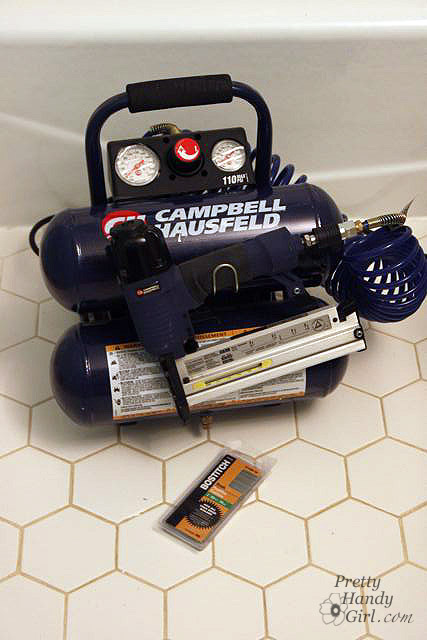
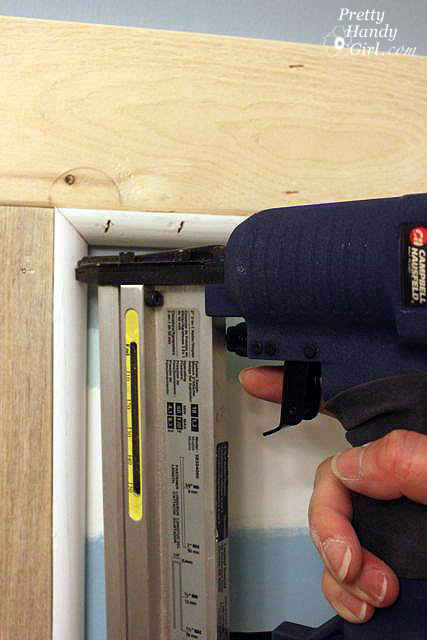
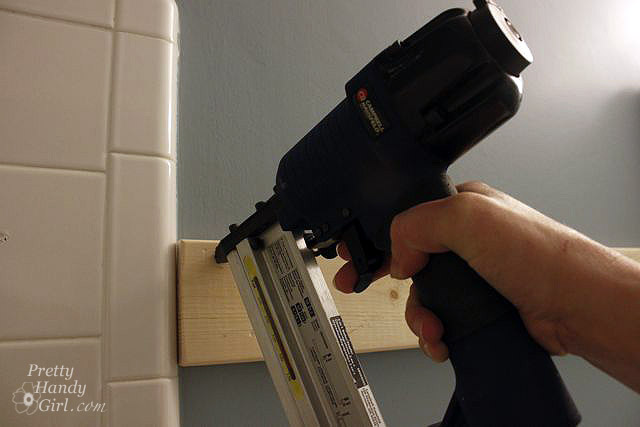
A nail gun and compressor are not a necessity, but they do make the job a lot easier! Otherwise, you will be doing a lot of hammering and nailing while holding boards in place.

I used the compressor at 110psi, which worked well for the 1″ pine boards. I used 2″ nails for the boards and battens and 1.5″ nails for the quarter round.

Be sure to wear your safety gear. The compressor is LOUD and no need to risk your eyesight. I know, you are jealous of how attractive I look in my safety gear (not!)

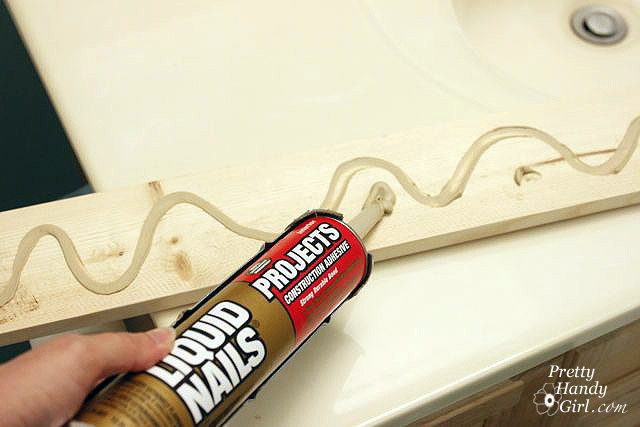
For the horizontal top boards, I added some construction adhesive. This is not 100% necessary unless you have monkeys for children. And I do, so the extra adhesive seemed like a good idea.

Press the board onto the wall.

Shoot several 2″ nails into the moulding to hold it in place. Be sure to angle your nails to make it more secure.

That board shouldn’t go anywhere now!


Repeat the same steps for the baseboard boards (minus the construction adhesive.)

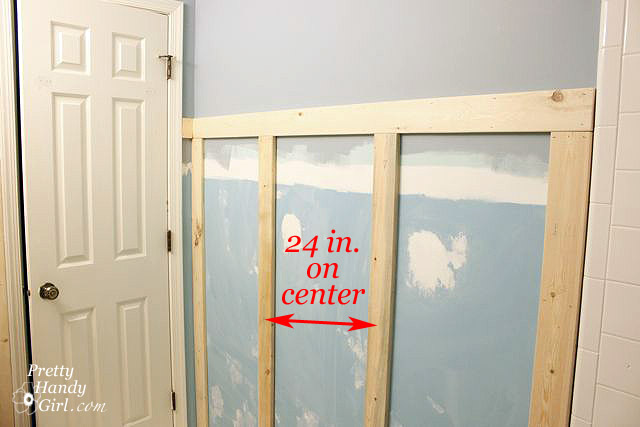
Next, measure the vertical distance between the top and baseboard battens. Be sure to measure at the exact location that a vertical batten will go. I’m sure your heights will vary.

Cut all your vertical boards and sand them down.

When you are figuring out the spacing, be sure to take into account if you will be adding a towel bar or other fixtures to the wall. My old towel bar was 24″ wide, so I made sure to space the battens to accommodate the towel bar.

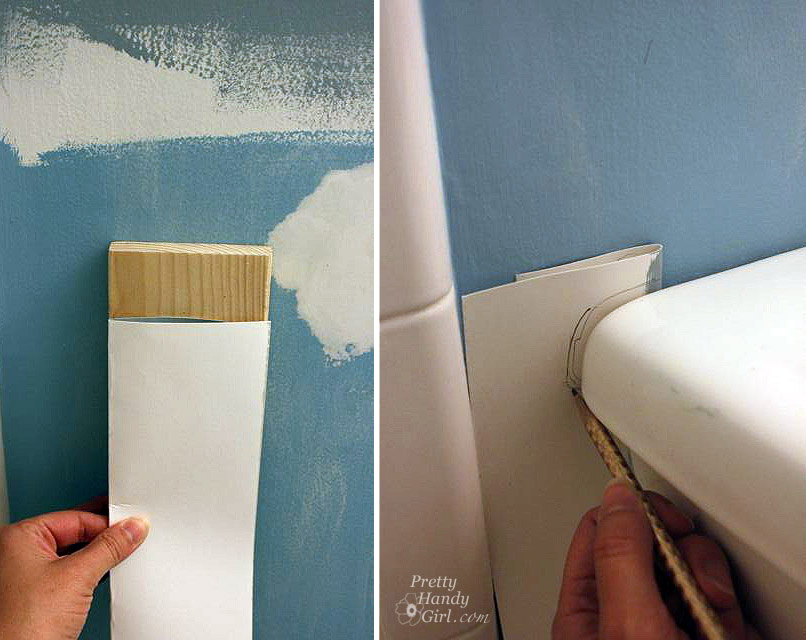
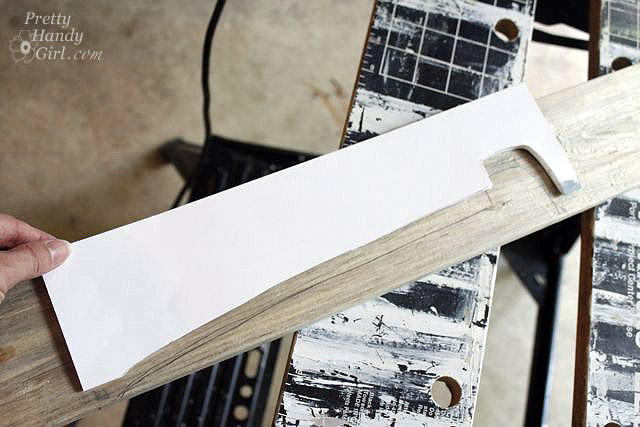
While installing the battens you may run into a few inconveniences. Like, a toilet or something that can’t be moved. To deal with the toilet, I cut a piece of cardstock the same width as my batten. Then I slid it behind the toilet and scribed around the edge of the toilet.

Then I cut along my line and transferred the line to my batten.


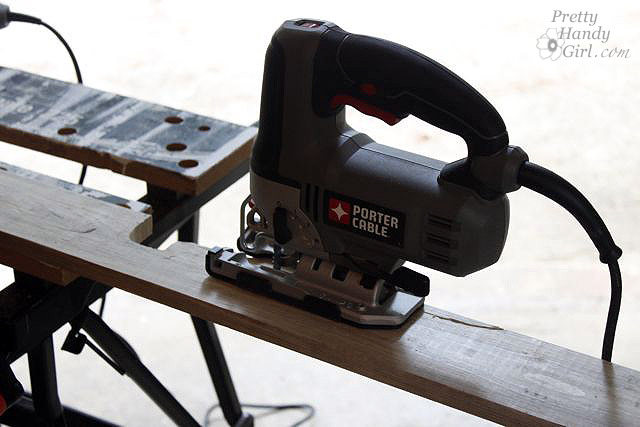
Use a jigsaw to cut out the scribed profile (I tried to use my Dremel Trio to cut out the small section, but it failed miserably. I think the Trio is best used for thin stock like the back of a bookcase.)


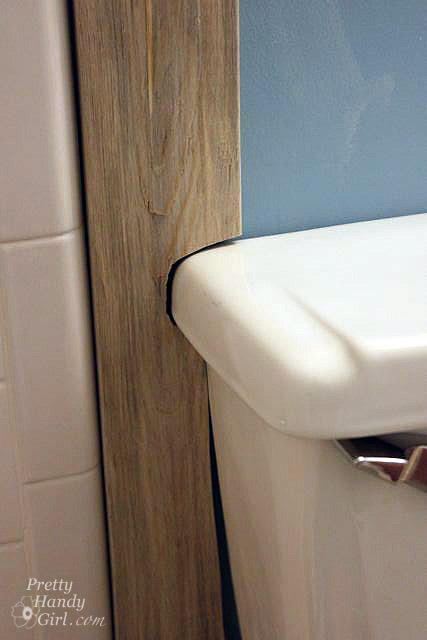
Then you can install your batten around the “inconvenient” object.

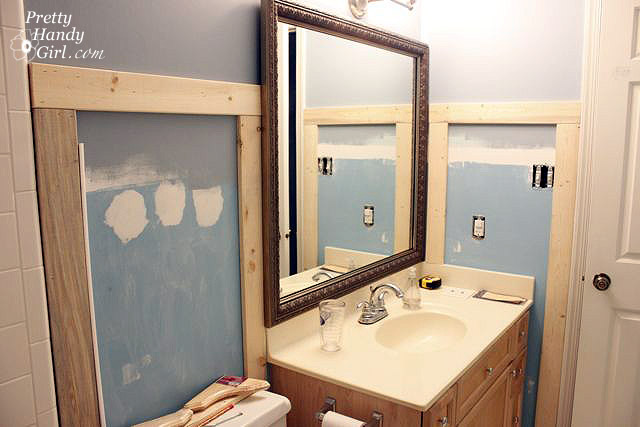
By now your room should resemble something like this:

Installing Quarter Round Moulding:

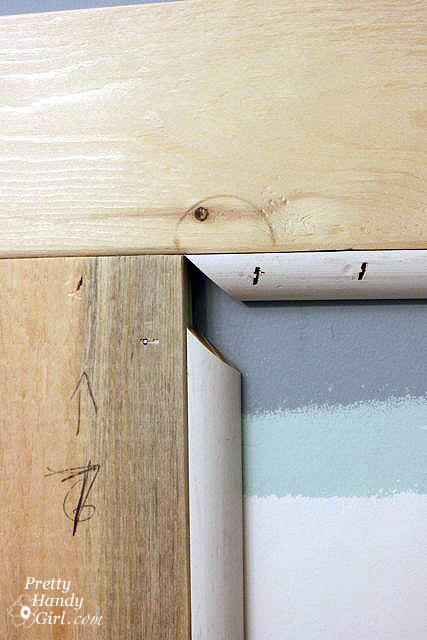
Now comes the step that requires a little more precision. Cutting the quarter round moulding can be a little tricky, but don’t fear I know you can handle it. Remember the old carpenter’s adage, “Measure twice, cut once.”

Well, I admit it, I forgot! Ugh. Even I can make mistakes, so don’t be afraid to mess up once in a while. We all learn from our mistakes:

You will need to meaure the width and heights of the rectangle between your battens. Be precise for better accuracy and less caulk later!

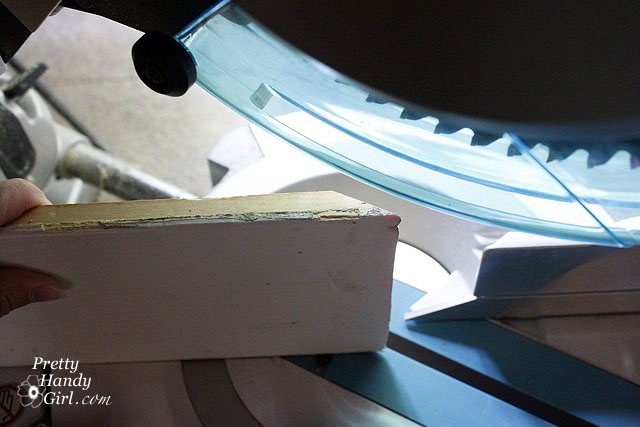
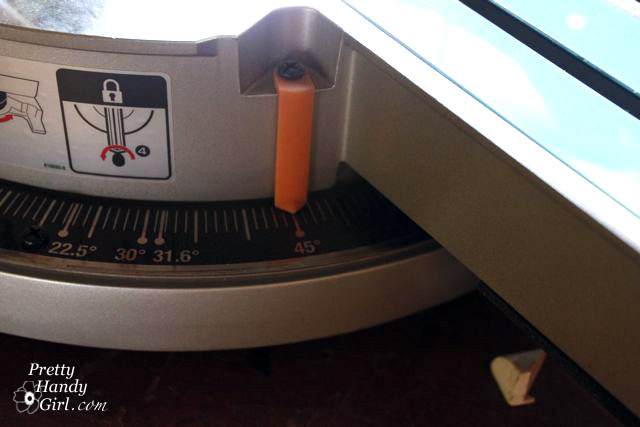
Set your miter saw at a 45 degree angle.


This is what it should look like. The saw should be straight up and down at a 90 degree angle from the saw stand (in other words, no bevel cut).


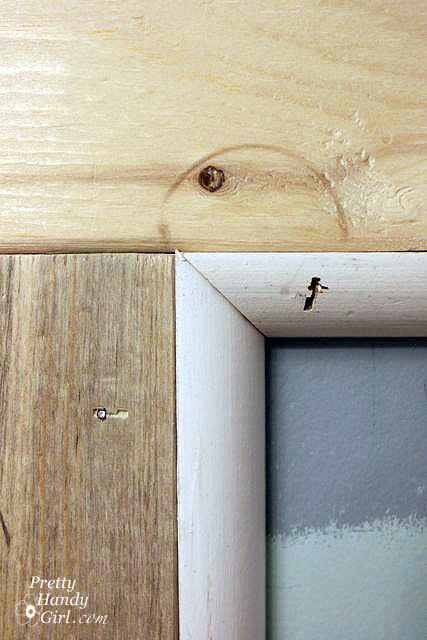
Cut your quarter round so that the longest point on the moulding equals the measurement you took from the rectangle. You may have to face the “round” edge in towards the fence for some cuts. And it might take a few cuts to figure out the angles. But, I know you can do it. Once you have all your quarter round cut and dry fit, you can proceed with the install.

Remember those “inconvenient” objects. End your quarter round right before the toilet.

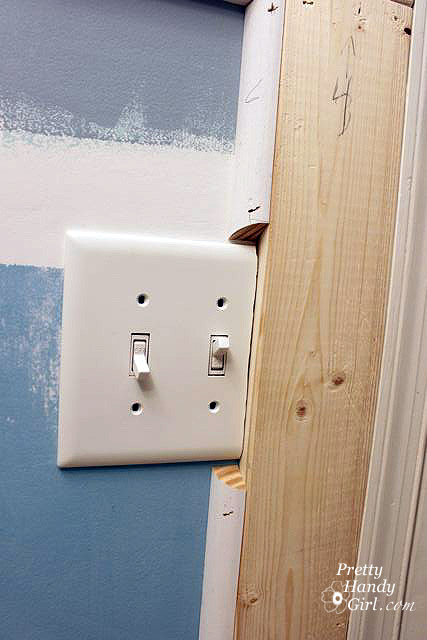
Add a 30 degree angle when butting up to objects like light switch covers and outlets.

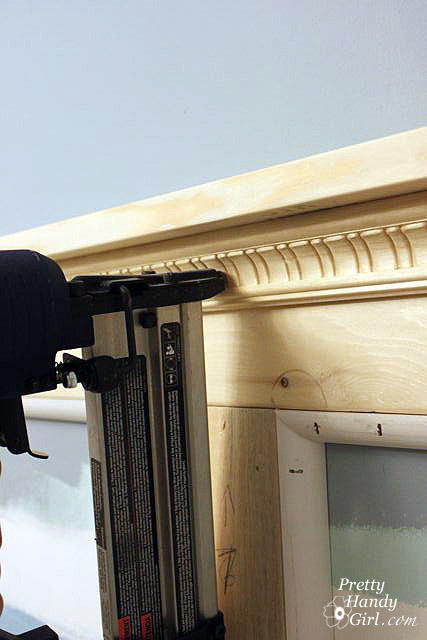
Load the 1.5″ trim nails into your nail gun. Aim your nail gun into the quarter round at an angle so the nail ends up going through the quarter round and into the battens.


Hey, you are about 80% of the way done with installing the moulding!

Installing the top ledge and decorative trim moulding:

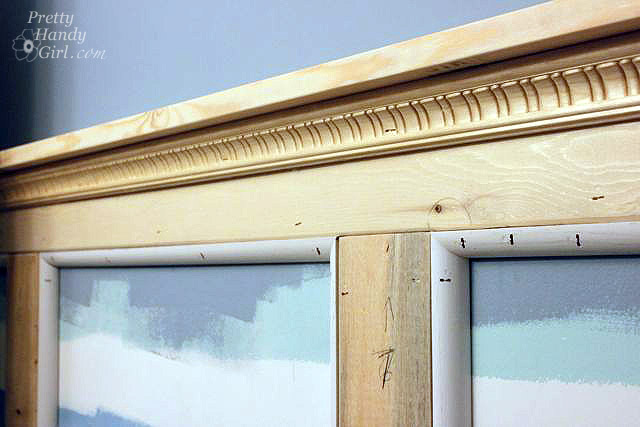
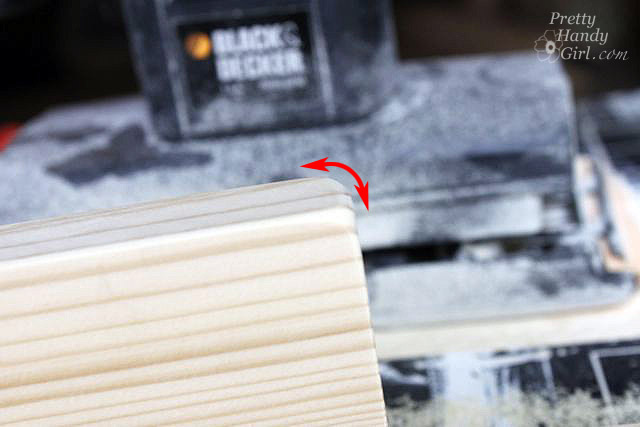
Cut the top ledges to size and sand them down. It is a good idea to round any exposed corners with the sander. This will undoubtedly prevent future dents to the head.

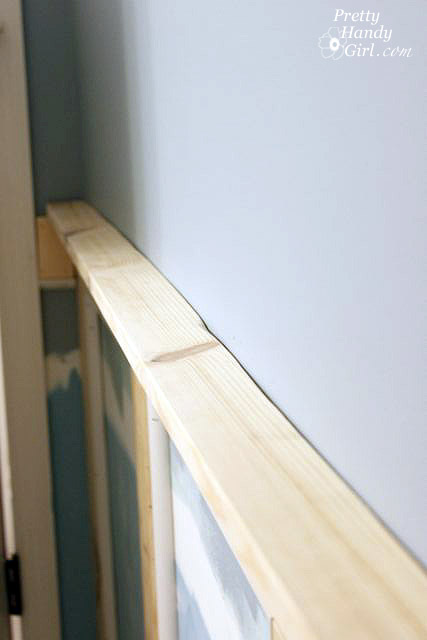
Lay the ledge boards on top of the upper battens. If your walls are uneven, your ledge will likely look like this.

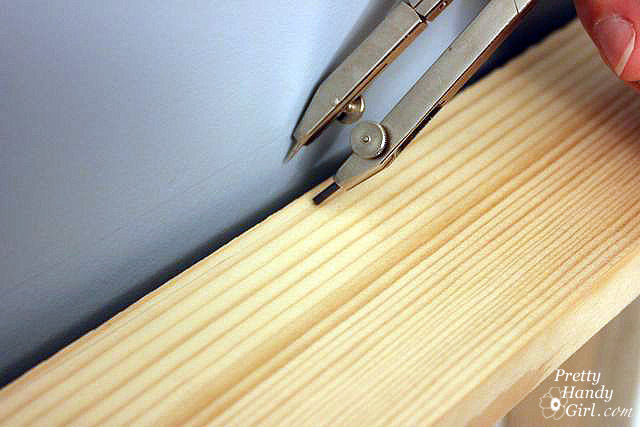
No biggie. Grab your grade school compass. And set the two arms to the width of the widest gap. Then drag your compass along the ledge and the wall.
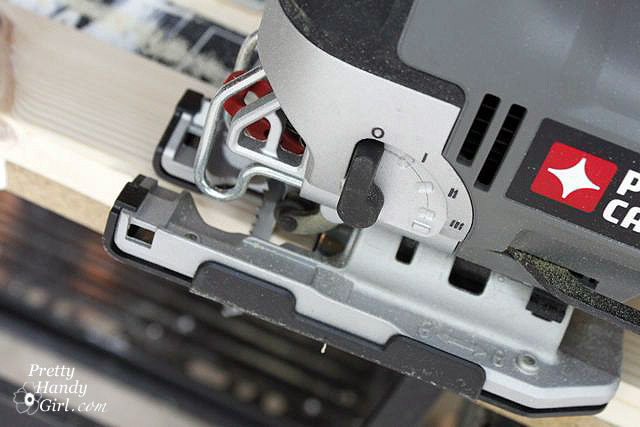
Get out your trusty jigsaw again and cut off that scribed line (have I told you how much I love my Porter Cable Jigsaw?! It pays to buy good quality power tools.)

Ahhh, much better. Any smaller gaps will be filled in with caulk later.

Nail the ledge into the batten below it. You can use construction glue for extra stability. (Yes, it is monkey protection for us.)

My favorite part of the moulding project is adding a little extra “bling”. I chose this decorative moulding to sit below the ledge and to give it extra support (again I have monkeys!)

Don’t forget to cut a 30 degree angle wherever you cut a batten at that angle.

Nail the decorative moulding onto the batten just below the ledge.

Now doesn’t that look beautiful?!

Fixing a few nail problems:

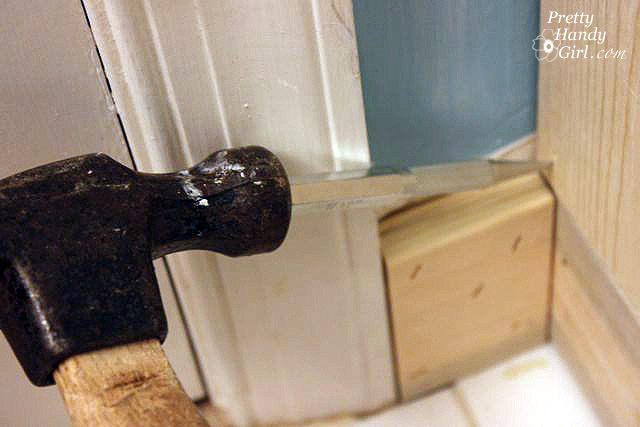
Remember how I said I make mistakes too? Well, here are two easy mistakes to fix when using a nail gun. When the nail doesn’t go all the way in (this usually happens if you don’t keep pressure on the gun when you squeeze the trigger), simply use a hammer and a nail set to hammer it into the wood.

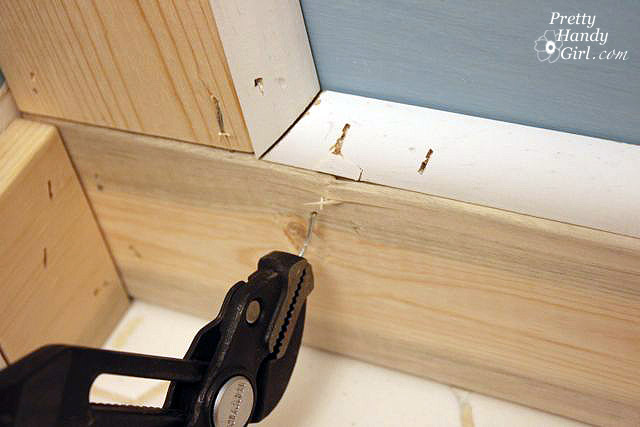
Occasionally a nail may hit something when entering and end up popping out. Grab the end of the nail and pull it all the way through the wood. You may take some wood with it, but you can patch it with wood putty.


I’ll be back to show you how to caulk and paint this beautiful moulding! And then the final reveal of my Boys’ Fishy to Fabulous Bathroom! Finally, a bonus post on creating a branch towel bar.


Photobucket” border=”0″ alt=”Photobucket”>