Removing a door’s hardware (knobs, latch assembly, hinges) is really a piece of cake if you know what you are doing.

There are several reasons you might need to remove a door from its hinges:

  1. The lock is broken and you can’t open the door.
  2. You want to replace your door.
  3. You want to replace the hinges.
  4. Your six year old was warned that if he slams his door one more time he will lose the door (true story).
  5. You want to repaint the door.

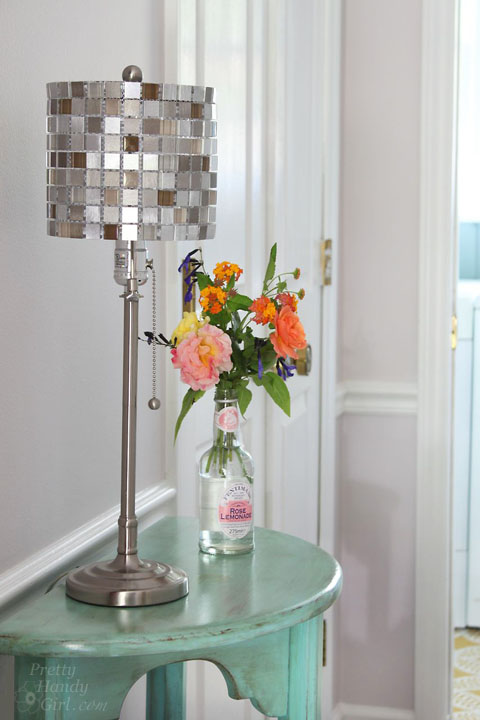
When I decided to give my downstairs half bathroom a makeover, I knew I needed to paint the door as well. The easiest way to repaint a door is to remove it from the hinges, remove all the hardware, and lay it flat on sawhorses and paint horizontally.

Before I show you how to paint the door, I will share with you how to remove the door, hinges, and the door knobs (or locksets if it has a key hole). How to remove the locksets is a helpful skill to learn should you wish to replace your door knobs, deadbolts or locksets.

Letting you in on a little secret: Speaking of replacing locksets, did you know that if your house has several different locks you can have them rekeyed to just one key as long as they are all the same brand? When we moved into our home we had three different locks (2 Schlage and 1 Kwikset) and keys to only ONE lock! Arrggghhhh!  Unfortunately, I didn’t have the keys for either Schlage locks.) But, I really wanted to change the locks for the whole house. When I got a quote from a locksmith, I nearly passed out. $250 to get all our locks to match and to cut a few spare keys!

I thanked them and hung up. So, here is what I did. I bought one new Schlage lockset (handles and deadbolt set) for the Kwikset door. Then I took the locksets off the other two doors and brought them to a local locksmith (Busse’s Lock Service in Raleigh.) They were able to rekey both locks using my new Schlage key. The cost was under $50!

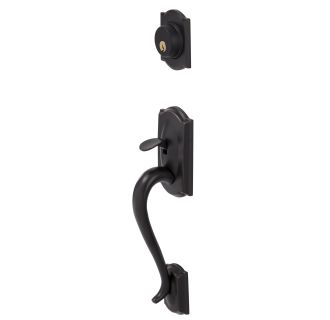
Photo courtesy of Handlesets.com

Later when the old lock on our front door broke, I ordered new ones from Handlesets.com (they sell all types of door hardware) and the customer service rep helped me enter the code from our master key when I placed the order. That way my new locks would match the rest of our house. Best of all they didn’t charge extra to for that service!

Sorry for the diversion, but I really wanted to let you in on that little secret.

Removing the Door Handles and Latch Assembly:

There are several types of door handles, you will need to inspect yours to determine how to remove it. Most door handles have screws on the interior side (for safety reasons, you definitely want them on the interior) that you unscrew to release the handles. Our door handles are a little different, but almost as easy to remove.

Insert a flat head screwdriver into the little slot on the side of the handle.

Pull the handle out and away from the door until it releases.

Unscrew the collar (also called a trim piece or escutcheon – yup, there is that word again!) that is up against the door until it comes off. You might need to use pliers to coax it free.

When it releases from the threads, remove the collar (ring, trim piece, escutcheon, WHATEVER.)

Gently pull the other handle off.

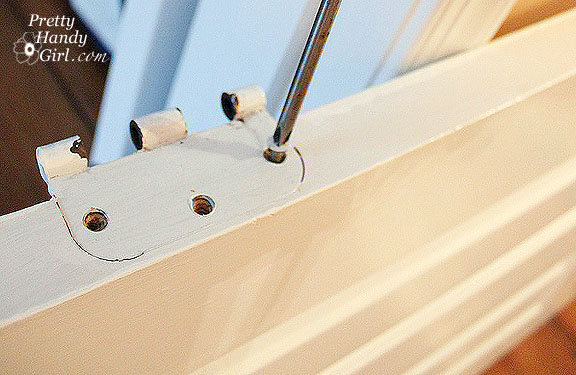
To remove the latch assembly, unscrew the two screws above and below the latch.

Gently pry the latch assembly out.

And remove it being sure to keep the screws with the latch.

Removing the hinges:

If you have the type of door hinges that the pin can be removed from, follow these instructions. If not, you will have to unscrew the hinges from your door (but don’t worry, I’ll show you how to do that in a minute.)

Removing the hinge pin is a snap. I use a flat head screwdriver and a hammer. Set the screwdriver just below the head of the pin and tap it lightly with the hammer until the screwdriver can fit below the head. If you can’t get the screwdriver under the head of the pin, insert the screwdriver into the bottom of the hinge and tap the bottom of the pin up slightly. Then angle the screwdriver end up and the handle down. Continue to tap on the screwdriver handle with the hammer until you can release the pin*.

*Oh, and before you remove all the pins, you may want to ask someone help hold the door while you remove the pins from the other hinges. Not that I’ve ever made that mistake (uh, okay, maybe I did.)

Remove the other two hinge pins and gently pull the door off the hinges.

Use a screwdriver or cordless drill with a screwdriver bit to remove the hinges from the door and door frame if you are painting the trim as well.

I ran into a few painted over screws that I couldn’t turn. Here is how to deal with those little buggers.

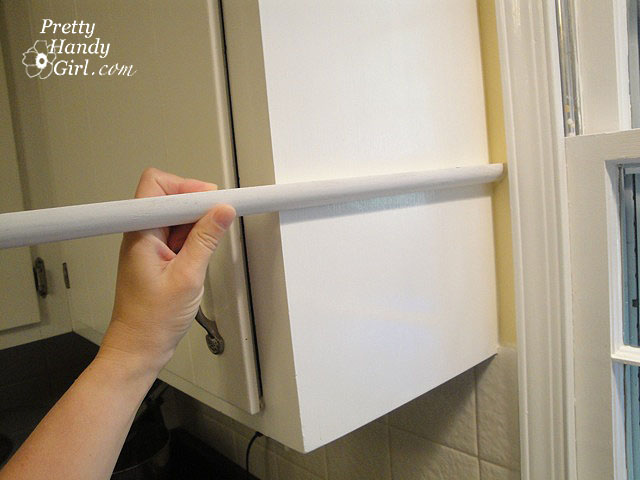
Lay your door on it’s side with the hinge facing up. Fit a screwdriver into the screw slots as best you can.

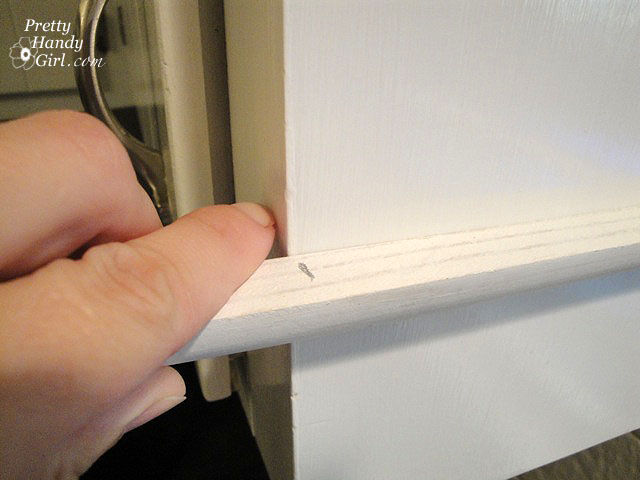
Then use a hammer to bang on the other end of the screwdriver.

This will either crack the paint or make enough of an indentation that you can turn the screw.

Be sure to keep all your hinges and screws in a separate bowl or bag.

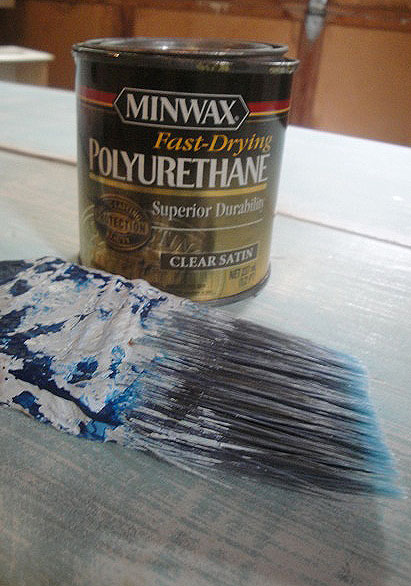
Now you are ready to paint your door or paint your hardware (Like Beckie at Infarrantly Creative did HERE) or both! More tutorials to come.

DIY Glass Window Shelves

I love african violets! They can be fickle, but once they have the right amount of light, and slightly damp soil, they will happily put on a show for you. My violets used to perch on the kitchen window sill, but occasionally they would take a suicidal nose dive into the sink. To save them from inevitable death one day, I installed two glass shelves over the sink.

DIY Glass Window Shelves

Would you like to install your own glass shelves between two kitchen cabinets? It is a relatively easy project, but does require two sets of hands for one step. The directions below will take you through the step-by-step process for installing 2 glass shelves.

DIY Glass Window Shelves Materials:

(I’ve included affiliate links for your convenience. I earn a small percentage from a purchase using these links. There is no additional cost to you. You can read more about affiliate links here.)

3/16 inch tempered glass
quarter round moulding
paint (to match your kitchen cabinets)
medium size paint brush
painters tape
hammer
level
drill w/ bits
finish nails 1.25″ long
nail set
wood putty or caulk
flat toothpick or wood shim

DIY Glass Window Shelves Instructions:

1. First measure your window width and subtracted 0.25″ from the measurement.) Then measure the depth of your kitchen cabinets to the window frame (or tile, whatever sticks out the furthest).

DIY Glass Window Shelves

Take those measurements to a glass manufacturer and have them cut two pieces of 3/16″ tempered glass. Make sure that the edges will be smooth. And, definitely ask for the tempered glass. (My shelves never broke, but I banged them occasionally while being overzealous about washing dishes.)

2. Using the measurement you took for the depth of your cabinets, cut 8 lengths of quarter round (four for each glass shelf you are hanging.)

DIY Glass Window Shelves

3. Prime and then paint the quarter round to match your cabinets.

4. Determine the height where you want your glass shelves to be. (I put each shelf at the same height as my window grill pieces.) Use a level and draw lines on your cabinet on one side of the window.

DIY Glass Window Shelves

5. Pre-drill three holes (the size of your finish nails) into your quarter round.

DIY Glass Window Shelves

6. Using a piece of painters tape, attach once piece of the quarter round to your cabinet. This is your shelf support piece, so make sure that the flat edge is facing up. Gently nail the finish nails through the predrilled holes and into the cabinet. Repeat this step for your other shelf support (on the same side.)

7. Rest one glass shelf on one piece of the installed quarter round. You will need an assistant to help hold the glass shelf up as you level it.

DIY Glass Window Shelves

8. Make a mark on the under side of your glass.

DIY Glass Window Shelves

9. Double check that the mark is level (from front to back), and line your next piece of quarter round below the line. Repeat steps 5 & 6 above until you have the four shelf supports installed.

10. Gently rest your glass shelves on the supports.

DIY Glass Window Shelves

11. Pre-drill holes in your four remaining quarter round strips.

12. Set wood shims (or toothpicks) on top of the glass shelves and up against the cabinets on both ends. Rest your quarter round strips on top of the shims. This should give you a slight space between the glass and the quarter round. Now, tape the quarter round pieces in place and REMOVE BOTH glass shelves and the shims.

DIY Glass Window Shelves

13. Nail your quarter round pieces in place. Use a nail set to countersink (set the nail below the wood surface) all your nails. Fill the nail holes with wood putty or caulk and touch it up with your paint.

14. When the paint has dried, slide in your shelves. The shelves should slide in easily and should not be tight.

DIY Glass Window Shelves

15. Put some plants or other accessories on your new shelves! And enjoy.

DIY Glass Window Shelves

Aging is so Distressing - Techniques for Antiquing Furniture

Well, despite the fact that I am starting to feel my age, this post will help you achieve that beautiful well worn, loved, aged and antique look on furniture and decor items. This is something you can do to new furniture or to give old furniture a new rustic look.

How to Age, Distress & Antique | Pretty Handy Girl
Aren’t these layers of paint, scratches and wear marks art to your eyes?

How to Age, Distress & Antique | Pretty Handy Girl
Nothing shows character like chipping paint and multiple revealed layers on metal.

How to Age, Distress & Antique | Pretty Handy Girl
Weathered paint worn thin and rubbed off give a table character!

How to Age, Distress & Antique | Pretty Handy Girl
Paint splotches on an old ladder beg to tell stories of the projects it has seen.

How to Age, Distress & Antique | Pretty Handy Girl

And you can’t forget rust, love that beautiful brown patina!

I have been experimenting with several techniques to add age to “newer” pieces of furniture. Here are a few ways to add some character through distressing. (This post contains affiliate links. To learn more read my disclosure page.) 

Distress Marks:

Achieving a worn look can be as easy as adding dings and scratches. This process can also be a great stress reliever! Grab some chains and let’s work out some of that pent up aggression!

Materials:

distress tools

Throwing a chain at wood gives you those elliptical dents. Dragging the sharp edges of a pry bar across wood will give it some deep grooves. Set a screw on its side and lightly hammer it into the wood. Finally a few random hammer marks here and there finish off the worn look.

How to Age, Distress & Antique | Pretty Handy Girl

This is the same technique I used on my mudroom bench.

Sanding through layers:

How to Age, Distress & Antique | Pretty Handy Girl

The easiest way to add some age to a piece of furniture is to expose layers of paint. Whether you paint a few contracting colors on yourself or you sand a pre-finished piece, sanding is one of my favorite ways to add age. A note of caution: Before you begin sanding, always check for the presence of lead paint. You can learn more about how to detect lead paint in this post.

Materials:

You’ll get the best results using 150 grit sand paper (but use whatever you have on hand). Attach it to your power sander and go to town on the furniture! Work in areas that would normally get a lot of use or abuse. Corners and edges of furniture usually take more abuse. Table center is a good place to show signs of worn paint. Be sure to move the sander around and be random rather than symmetrical.  A good example of a sanded finish can be seen on this Trashy Coffee Table.

How to Age, Distress & Antique | Pretty Handy Girl

A table that was previously painted white received a sea-inspired blue layer of paint on top of the white. (You could always add a third color if you want more colors showing through.) Sand through the layers of paint down to the bare wood in spots. The challenge with a new piece of wood is it lacks the deeper darker color tone of antique lumber. Unfortunately, when new wood is exposed,  it will look blonde and – well – brand spankin’ new.  Read on to learn how I solve this problem.

Faking Age with Stain:

I have a trick up my sleeve for creating those darker wood tones in seconds! Ready to learn my secret?

Materials:

To hide the look of new blonde wood, carefully paint some wood stain onto the bare wood spots.

How to Age, Distress & Antique | Pretty Handy Girl

Wipe off any excess immediately with a dry rag.

How to Age, Distress & Antique | Pretty Handy Girl

If you desire darker wood repeat painting and wiping off the excess.

How to Age, Distress & Antique | Pretty Handy Girl
My two favorite stains for aging are Minwax Red Mahogany and Minwax Early American, but any dark color stain would work just as well.

How to Age, Distress & Antique | Pretty Handy Girl

“Tea” Stains:

You can use the same dark stain to give your object a faux “tea stain”. This antique gold 80’s mirror is easily transformed with spray paint and some stain.

How to Age, Distress & Antique | Pretty Handy Girl

Materials:

If you use regular white spray paint, it will be difficult to “dirty” your object. Instead I like to use Rust Oleum Heirloom White which gives a soft antique white look. (FYI, I used Rust-Oleum Oil Rubbed Bronze for the inside decorative design.)

How to Age, Distress & Antique | Pretty Handy Girl
After the paint dries, hand sand some of the edges to expose the stained wood beneath.

Use a dry brush technique* to brush on the stain and wipe the excess off immediately. *Keep your brush dry by dipping in the stain and wipe off your brush on a rag before using it.

How to Age, Distress & Antique | Pretty Handy Girl

For the best results, use an old shaggy brush or rough up your chip brush. The rattier the brush the better because anywhere the stain lands is where it will remain.

How to Age, Distress & Antique | Pretty Handy Girl

The end results are pretty tea stains and peek-a-boo dark wood below.

How to Age, Distress & Antique | Pretty Handy Girl

A totally new look for that sad 80’s mirror. It fits in nicely on our living room gallery wall.

Tips for Creating a Gallery Wall | Pretty Handy Girl
Glazing:

Do the permanency of stains scare you? Have no fear, one of the more forgiving ways to give your object an antique tone is to use a glaze.

Materials:

Glazes add depth and dimension to furniture that has a detailed profile. Glazes can be used on everything from kitchen cabinet doors to table legs and picture frames. But, don’t let that limit the places you can use glazes.

The table legs on my DIY Farmhouse Table have Van Dyke glaze on it that accentuates the rope turns.

Aging and Antiquing Furniture | Pretty Handy Girl

This dresser needed more than a coat of paint to give it an attractive new look. I added black glaze for pretty gray tones.

Facelift for a Knotty Pine Dresser | Pretty Handy Girl

Simply brush on the glaze (again use a ratty almost dry brush.) Push more glaze into the gouges and crevices to show off the details.

Aging and Antiquing Furniture | Pretty Handy Girl

Wipe off any excess with a clean dry rag.

Aging and Antiquing Furniture | Pretty Handy Girl

The glaze stays wet for longer than the wood stains. It can be wiped off immediately if you make a mistake. Once you like the look, let the glaze dry to permanence.

Side_across_coffee_table

When working with black glaze, use the same technique of wiping on and blotting off. The black glaze gives you more gray tones and gave this picture frame a dirty distressed look:

How to Age, Distress & Antique | Pretty Handy Girl

It may take a while to build up the glazing. But, you end up with a really nice final product.


Spattering:

Another technique I like is adding paint or stain spatters. This is easy to do, but if you aren’t wearing protective clothing you might give yourself some freckles.

How to Age, Distress & Antique | Pretty Handy Girl

Materials:

Dip a foam brushTechniques for Antiquing Furniture into the stain and wipe off any excess. Then gently tap the brush on a stick or handle of something sturdy. (A large screwdriver or other solid object works well.) This time I don’t wipe the stain off. Let it dry a little then dab up any excess.

How to Age, Distress & Antique | Pretty Handy Girl

With these techniques, you can take a plain painted side table from this:

How to Age, Distress & Antique | Pretty Handy Girl

To a more sophisticated antiqued older sister:

Make Your Own Mosaic Tile Lampshade | Pretty Handy Girl

How to Age, Distress & Antique | Pretty Handy Girl

Protective Coating:

Once you have achieved the antiqued look you like, be sure to put a protective coating over your furniture. I prefer using Minwax Oil-Based Polyurethane. This adds the perfect age to furniture. (If you use new oil-based poly, it will yellow in a few years time.) If you don’t like the yellowing effect, stick to Minwax Satin PolycrylicTechniques for Antiquing Furniture.

How to Age, Distress & Antique | Pretty Handy Girl

You can also use a good quality furniture wax for a satin finish. Or use an antiquing waxTechniques for Antiquing Furniture to really give it an old appearance.

Make Your Own Street Sign | Pretty Handy Girl

Now, don’t be distressed, grab some sandpaper and a brush and give your furniture an age boost!

How to Age, Distress & Antique | Pretty Handy Girl
Yard Sale spice rack turned rustic! Chalkboard lids tutorial here.

Watch a live tutorial to see how I accomplished an aged paint look on this trough. And be sure to subscribe to my YouTube channel to get notifications when a new video is uploaded.

Now that you have some aging and distressing techniques under your belt, you can push your skills by trying your hand at some more complicated techniques! Like creating a faux wood texture on surfaces following this tutorial.

Faux Weathered Gray Wood Grain Tutorial | Pretty Handy Girl

How to Age, Distress & Antique | Pretty Handy Girl

As a follow up to this post, I divulged my top secret recipe for making new wood look old!

Make New Wood Look Old - Aging Wood FAST!

And how to get the true chippy paint look:

Techniques for Antiquing Furniture

You may also want to check out my gallery of rustic and distressed projects!

How to Age, Distress & Antique | Pretty Handy Girl

Sign Up to Receive More Painting Tutorials in Your Email:


Or follow me on TwitterFacebook, Instagram, or Pinterest so you can be the first to know what I’m working on next!

diy bench from cabinets

Welcome! If you are a friend, you know that all our friends and family enter through our mudroom. This door is the closest to our driveway. Only the door-to-door salesmen go to our front door (heh, heh, heh!)

Come on in! This blackboard, mirror and memory board used to be a discarded window.
Make one of your own! Tutorial here.


This is my pride and joy! My mudroom bench and coat rack. Yes, I made it myself.
And no, I didn’t have any help from my husband. I am the handywoman of our home.


I’ll give you a little background about how this bench came to be. I really loved having a mudroom to begin with. But, the piles of shoes and coats that accumulated behind the door were making me nuts! Who knew that a flip flop could double as a door stop, not allowing me to enter my own house!

My son tried to help out by piling all the shoes on top of the coat rack. Better, right?!


Sure, I could have hopped over to Pottery Barn and bought a mudroom bench and shelf, but I balked at the price tag. So, I continued to ponder a solution. I dreamed of having a perfect storage solution to streamline my mornings of getting two little boys out the door to preschool. A bench to perch the kids on while putting on their shoes. (A task I know someday I will miss doing, but for now I can’t wait for them to learn to tie their own shoes.)  Everyone’s socks and shoes would be at hand but not in the way. And a place for every jacket, book bag, and hat. The final product was beyond my dreams. I love it more than any other piece of furniture in my house. It is my sanity saver!

My dreams began to form when I stumbled across some kitchen wall cabinets on clearance at Lowe’s. These are the short cabinets that mount over your fridge. They were marked down to $45 each.

The wheels in my brain began to turn. I started to see how I could use these cabinets to solve our shoe dilemma.

I bought some lumber. I also had some salvage pieces that had been collecting dust in our attic. An old door with recessed panels, four ornate old coffee table legs, and some shelf brackets from a yard sale.

After a few days of distressing and staining boards, cutting lumber, rounding some edges, hammering, nailing, driving screws and sweating, this is what I ended up with!

Chain throwing and hammer marks add a distressed look to new wood.

Decorative shelf brackets add nice character to the back rest.

Salvage coffee table legs add that much needed detail.

The finished bench (the only time it was ever empty.)

diy bench from cabinets
Loaded with shoes and with the salvage door on top as a coat rack. A mudroom bench with shoe storage and a clear floor! My sanity has returned.

If you are intrigued as to how I constructed this bench – keep reading. If not, thanks for stopping by. I hope you will come back again soon. And, the tutorial for the coat rack is here!


Building the Shoe Storage Bench (the Tutorial)

I have to apologize up front for not having the usual step-by-step tutorial for this bench. But, I built it pre-blogging days when I didn’t have to stop and start after every step to take a photograph. I hope you’ll forgive me. And now the abbreviated tutorial:

Here is the bench flipped on its back to show you the base construction:

I built the base frame by nailing 2x4s together.

Added a 1×4 board (toe kick) to hide the cheap 2×4’s. Then finish nailed the toe kick to the base frame.

Now the upright view to show you the bench construction:

I attached the two wall cabinets to the base frame with screws.

Added a 1″ thick pine board cut to size to fit between the two cabinets. This board also hides the base frame.

Used two 1×4 pine boards with rounded top corners for the back rest.

Mounted decorative coffee table legs by driving a screw down through the bench seat.

From the back, the bench looks like this (not pretty, but no one sees it.):

You can see the two wall cabinets from the back side.

Another view of the two 1×4 back rest boards.

Shelf brackets were used to mount the back rest to the bench seat.

Screwed 2×2 cleats to back of cabinets, then attached the bench seat by driving a screw down through the seat and into cleats.

Now to show you how the pieces were attached, the close up below is a view of the shelf bracket and corner section:


This corner shows how I used screws and nails to attach the parts (definitely ignore my sloppy nailing skills. I’m still working on perfection y’all.)

Base cabinets had particle board construction, so I added veneer end caps.

Close up of end cap veneer with base moulding profile cut out.

Read more about scribing and cutting a profile here.


Then I added L brackets inside the cabinets to support a shelf.

Add the shelf and you’ve got double the shoe storage.

Hmmm, but if you have shoes, you need to have sock storage as well. I purchased one magazine basket at Target.

And filled it with our socks. Old baby wipe containers are used to divide the socks for each of my sons.


And voila, I have an efficient sock storage spot.

Here is the final result loaded with socks, shoes and coats! The coat rack is made from an old door, antique hooks, and yard sale shelves.
Coat rack tutorial is here!

Not bad for about $200 in materials! I love my mudroom bench and get oodles of compliments on it.

See y’all later.

Sharing this organizational project with:

If you liked this tutorial you might want to follow me on some more DIY adventures, complete with step-by-step tutorials!

Or follow me on TwitterFacebook, or Pinterest so you can be the first to know what I’m working on next!

Painting Brick Fireplace

This is the first in a five part series on renovating our living room:

1. Faux painting brick over a previously painted white brick fireplace (this post)
2. Lightening up a room in 5 steps
3. Painting decorative graphics on a wall
4. Preparing to Install Antique Heart Pine Floors (and living to tell about it!)
5. Installing Heart Pine Floors and the Final Reveal

I know the trend lately is to paint fireplace brick white. Especially if the brick is an ugly bright red or some other ugly color. I’m pretty sure that is why our fireplace was painted in the first place.

Painting Brick Fireplace
Before Shot

Painting Brick Fireplace

But, the fact that our fireplace, mantle and the built-in bookshelves on both sides of our fireplace are white, made for an overwhelming amount of white on that one wall. I thought about painting the mantle, but only briefly. I really wanted the warmth and contrast of bricks to set off all the white in our living room.

I stumbled across a few websites showing painted brick here and here. Then I thought, “If someone can do it, then there is a 95% chance that I can do it too!”

I wasn’t sure how it would turn out, but in the end I am amazed by how real it looks. And, how easy it was to do! The true test came when I fooled the builder of our house (he has lived on our street for over 30 years) into thinking I had stripped the paint off the bricks! Sweet success.

This is a relatively easy project. It took several hours, but can be done in sections.

Painting Brick Fireplace Materials Needed:

TSP cleaner
Scrub brush for use with TSP cleaner
Drop cloth
Newspapers
Painters Tape
Paint Roller and Tray
Stiff 2″ paint brush
Car wash sponge or large 6″ x 3″ sized sponge
Spray bottle with water
7 paper plates
Rags for clean Up
Acrylic Paint (see below for colors)

Before you do anything, buy some TSP (tri-sodium phosphate) cleaner at the hardware store and follow the directions to clean your brick. Be forewarned that you may actually like the color of your bricks once they are clean and dry! If you still hate the color, proceed…

After working up a test board by playing with several color combinations, I chose a warm brown brick color. I also tweaked my mortar color before painting it on my fireplace.

Painting Brick Fireplace

I covered the mantle and bookcases by taping newspapers to them. Then, covered the floor with a drop cloth.

I mixed up a small container of my mortar color. I used some leftover latex satin taupe paint from our other house and added some black and a little dark brown to achieve the perfect mortar color.

My color looks like this warm gray cement color:

Painting Brick Fireplace

I painted all the mortar areas between the bricks with a 2″ paint brush.

Painting Brick Fireplace

As the mortar color dried, I mixed up a bucket of my base color for the bricks. Then poured it into a paint tray.

Painting Brick Fireplace

Then, I laid out my seven paper plates and filled the first one with a deep chocolate oops paint (Valspar Latex Eggshell Chestnut).

And poured a half dollar size of the following colors onto the other plates (one color per plate).

Painting Brick Fireplace

I used a paint roller to roll the base color onto small 3′ x 3′ sections of my fireplace. (Don’t worry if the paint doesn’t soak into all the grooves. Some of the white showing through made my bricks look old and rustic.)

While the base color was still wet, I covered my sponge with the Chestnut color. Then dipped the sponge into one or two of the brick tint colors. I sponged one brick at a time using the same color tints sporadically around the wall. Keeping the brick colors varied and random make them look real!

Painting Brick Fireplace

When the sponge needed to be reloaded with paint, I began with the chestnut color first, then added one or two new color tints to the sponge. You will have to refill the paper plates as you use up the paint.

I kept working in small sections, to be able to work while the base color was still wet (use the spray bottle of water to lightly wet the bricks if it dries too quick).

Painting Brick Fireplace

The best part was that if I didn’t like a color, I could go back over it and try a different tint. Notice how I randomly dispersed the darker brown bricks. This is key to having a realistic look.

Painting Brick Fireplace

On the hearth I had to press more gently with the sponge since the mortar lines on our hearth were almost level with the bricks. I kept a wet rag near by to wipe up any wandering brick paint.

Painting Brick Fireplace
Close up picture of the bricks.
Notice how the white specks showing through really make the bricks
look like they are re-claimed and rustic.
Painting Brick Fireplace
After Picture
Painting Brick Fireplace
Daylight picture after decorated for the holidays.
I can’t believe what a huge difference painting the bricks made in our living room. It warmed up the space and actually made our fireplace recede into the room. Let’s take one more look at the before and after:
Painting Brick Fireplace
Side note: The latex and acrylic paint has held up great (even after several fires using our gas logs.)  If you need to paint the bricks inside the firebox, you will need to use paint that is heat tolerant.

And for those wondering how long this took. Including the prep work (cleaning, taping, mixing colors) it took about 5 hours total. Not too bad since I’m a night owl and could watch DIY network while painting!

Be careful not to put anything heavy on the hearth for a few weeks while the paint hardens.

Next up in the series: 5 Ways to Lighten up a Dark Room. 
Followed by: Painting Decorative Graphics on Your Wall.
And I saved the best for last (coming soon): Installing Antique Reclaimed Heart Pine Flooring