how to stain an old basket

I admit it, I’m a basket addict!

Baskets are one of the best ways to organize and accessorize your home but they can be very expensive when purchased new. Thrift stores are a great source of affordable baskets but they are often out-of-fashion colors and can have missing or broken pieces. Today I’m going to show you how to take those old, thrift store baskets and make them a beautiful accent piece for your home.

Materials:

  • super glue
  • hand broom
  • stain
  • paintbrush

Instructions:

The first step in fixing up an old basket is to clean out any dirt or debris using a hand broom. Be thorough on both the interior and exterior.

before old thrifted basket staining

Next inspect your basket for any broken pieces. Use super glue to repair any areas that may need it. Read more

Easy! How to Install a New Showerhead | Pretty Handy Girl

Easy! How to Install a New Showerhead | Pretty Handy Girl

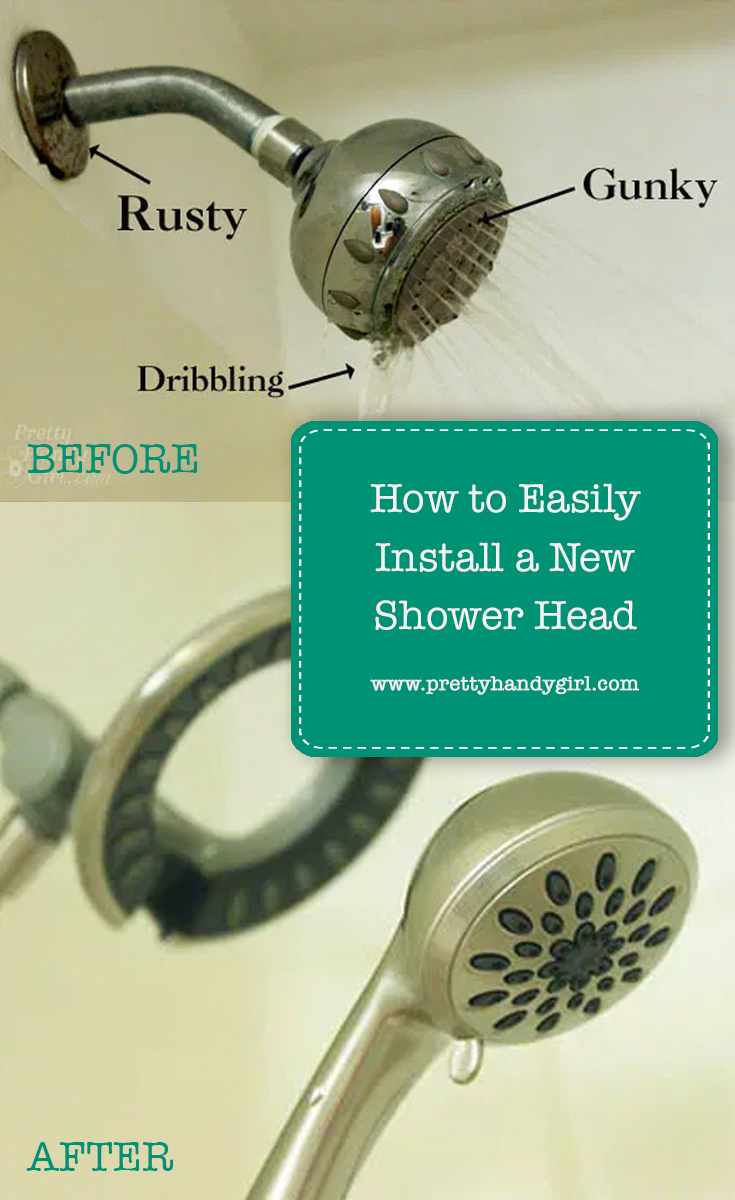
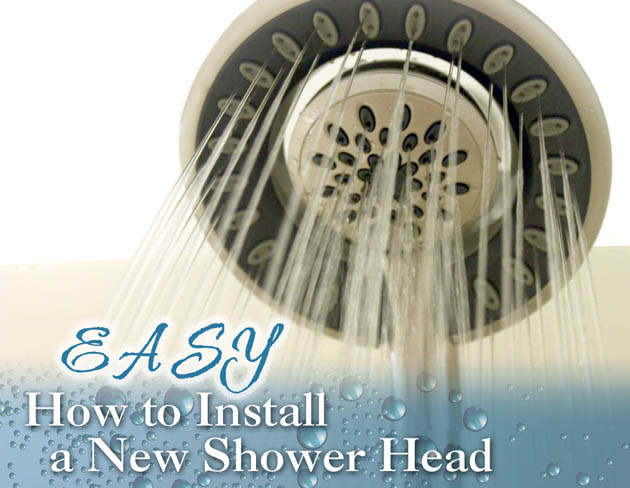
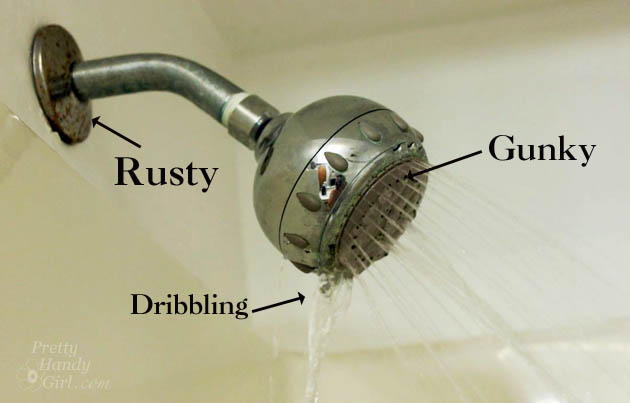
Raise your hand if you have a sad excuse for a shower head! Is it drippy, rusty or clogged? If you answered yes to any of those questions, I’m about to show you why there is no excuse for you being able to install a new shower head yourself! It’s super easy.

Easy! How to Install a New Showerhead | Pretty Handy Girl

Materials:

(I’ve included affiliate links for your convenience. I earn a small percentage from a purchase using these links. There is no additional cost to you. You can read more about affiliate links here.)

Easy! How to Install a New Showerhead | Pretty Handy Girl

Easy! How to Install a New Showerhead | Pretty Handy Girl

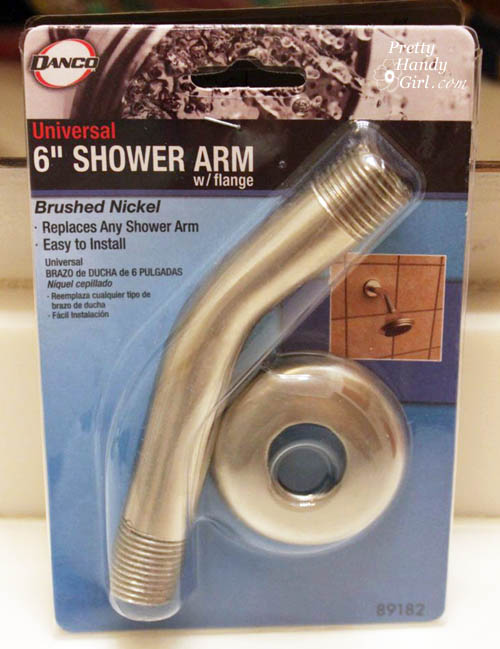
  • Optional: Shower arm & flange, rag to protect new shower arm

Instructions:

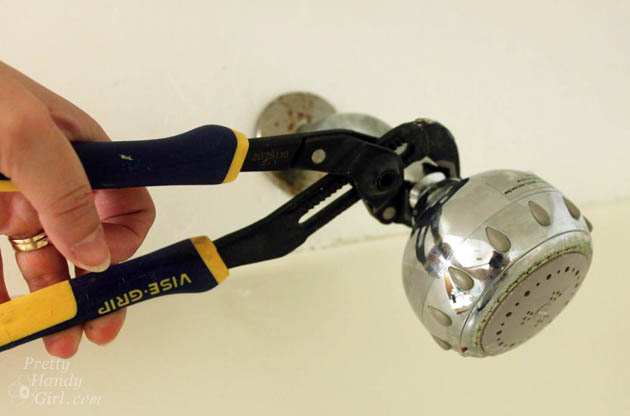
1. Remove the old shower head by unscrewing it from the pipe arm. Use pliers to help get it started.

Easy! How to Install a New Showerhead | Pretty Handy Girl

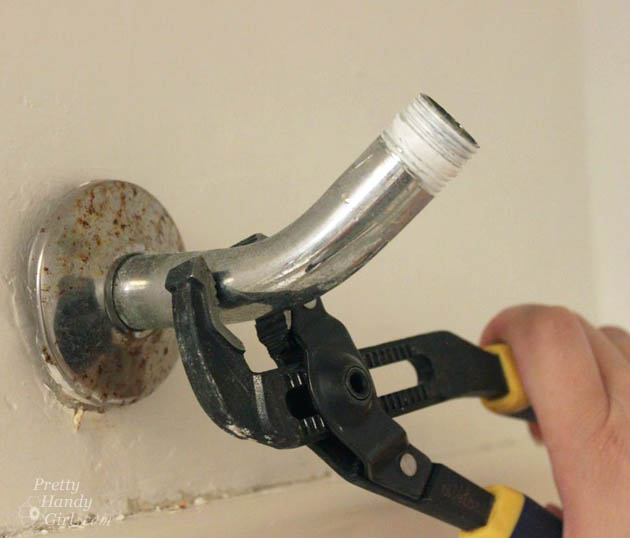
2. Unscrew the old shower arm if it is rusty or won’t match the new shower head. Remove that rusty flange (now is the time to do it! Don’t put it off any longer.)

unscreEasy! How to Install a New Showerhead | Pretty Handy Girlw-old-shower-arm

3. Replace the old shower arm with new one by screwing it into the plumbing pipe in the wall. Then slide the new flange over the arm.

Easy! How to Install a New Showerhead | Pretty Handy Girl

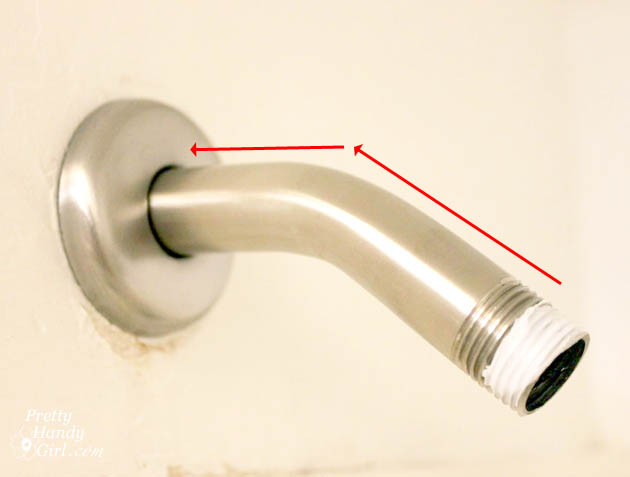
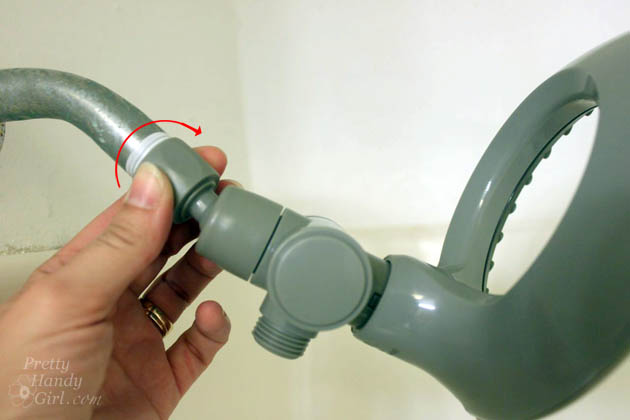
Wrap the end of the shower arm with plumber’s tape (wrap it clockwise to keep it from bunching up when you attach the new shower head.)

Easy! How to Install a New Showerhead | Pretty Handy Girl

4. Screw the new shower head onto the end of the shower arm. Hand tighten the head. Then put the rag over the spot base of the shower head and use the pliers to tighten it 1/4 turn.

Easy! How to Install a New Showerhead | Pretty Handy Girl

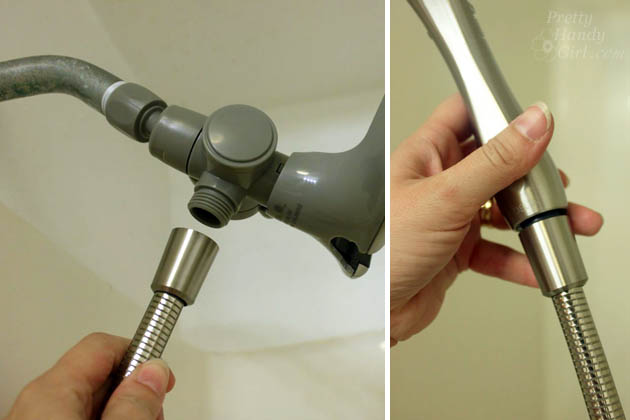
5. If your shower head has an extension hose, attach that at this time by screwing it onto the shower head and attaching the other end to the body sprayer.

Easy! How to Install a New Showerhead | Pretty Handy Girl

Turn on the water and test the spray! Beautiful! No drips or clogs? If you have some leaks anywhere, give an extra 1/4 to 1/2 turn to tighten it the shower head or hose.

I installed the Delta In2ition shower head in the Topsail Beach Condo we renovated. I’ve been intrigued by this shower head and after trying it out, I love it!!!

Easy! How to Install a New Showerhead | Pretty Handy Girl

Because who wouldn’t love a shower head that sprays from the top even when you want a body spray too?

The interior head is fully removable and nests back into the outer ring when done body spraying.

Easy! How to Install a New Showerhead | Pretty Handy Girl        

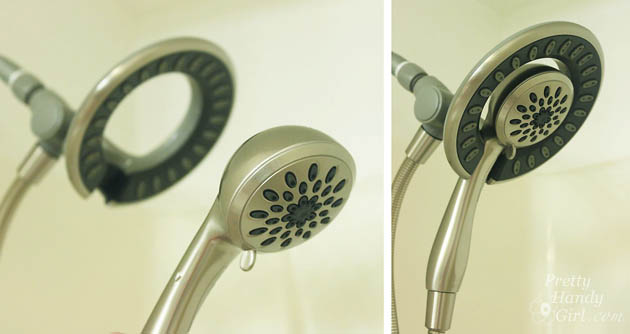
The only initial drawback I found was getting used to setting the body sprayer back into the ring. Once I realized you have to push it in and down firmly, there was no problem.

Wasn’t that easy? Go on and replace your shower head today if you’ve been putting it off!

PHGFancySign

Disclosure: No disclosure necessary. I wasn’t paid or provided with the Delta In2ition shower head. My stepmom paid for it to be installed in the beach condo. I chose this shower head because I wanted to try it out.  


Pin for later!

How to Easily Install a New Shower Head

Unique Wine Rack

Unique Wine Rack

Hi everyone! It’s Jessica from Décor Adventures, back again and ready to show you a furniture makeover project I’m just in love with. This isn’t just any furniture makeover. This is how to turn an old dresser into a rack to hold your favorite reds and whites – wine that is!

One of my favorite things to do is redo furniture. Chairs, mirrors, tables, dressers, you name it. A while back I found this dresser at a thrift shop for only $10 and took it home only to find the drawers didn’t work well at all. I had an idea to ditch the two large drawers and turn this piece into a wine rack. If it doesn’t work for clothes, why not make it work for wine! Here is how to make your own unique wine rack from a dresser.

Materials
Many of these materials are based on how I painted the dresser and how we cut the shelves. We cut them ourselves with a table saw, but if you don’t have one, you can have them cut at the home improvement store or use a circular saw.

  • Dresser with a few drawers removed

Paint:

  • primer, paint, stain, paint brush and roller;
  • Furniture wax or sealant/polycrylic (or whatever you might want to use to finish the dresser)

Racks/Shelves:

  • Two 2’x4’ sheets of ½” MDF
  • Two pieces of quarter round to finish fronts of shelves;
  • Several feet of ½” square wood dowels {they come in 36” pieces}

Tools:

  • Table saw {unless you have the shelves cut to size at the home improvement store};
  • Nail gun
  • nails
  • air compressor
  • Random orbital sander {Optional if you distress the dresser}
  • Miter saw or hand saw

Supplies:

  • Wood glue;
  • 220-300 Sand block or sand paper.

Instructions
These instructions will be in a three sections, so you can easily see how this project comes together. First you will paint or stain your dresser, {or maybe you love it as is and will leave it}, second you will prepare the shelves and put them together to create the wine racks, and last you’ll put the whole dresser together.

Preparing the Dresser
This was a piece I bought at a thrift store and it was already painted but I had to fix it up. The back was not painted and didn’t look very pretty so I ended up painting that too. You can see in this picture how wonky the bottom large drawers were.

Dresser Before Read more

wall chalkboard

Chalkboards are popping up everywhere (like Brittany’s DIY chalkboard calendar from last week) and you can easily make one, but how about upping the usefulness by making a chalkboard WITH a chalk ledge?  Jaime here from That’s My Letter to show you how easy it is to add a chalk ledge to your chalkboard.

chalkboard with ledge

You definitely need a place to put all that chalk (or chalk markers like we prefer).  This chalk ledge protudes a minimal  1 3/4″ from the wall but still has space enough to hold lots of chalk.

chalkboard with ledge 5

I also attached a galvanized pail for more chalk markers.

chalkboard with ledge 1

wall chalkboard 1

I installed this chalkboard near our back door mudroom area.  Unfortunately the key pad for our alarm system is nearly smack in the middle of that wall.  I simply cut out a square in my plywood using a jig saw to accommodate the key pad.  My kids love their new chalkboard and somehow the key pad isn’t quite so obvious once they start drawing around it.

chalkboard with ledge 2

Supplies:

  • 1/2″ plywood (cut to desired size)
  • 1×2 pine board (cut to length of plywood)
  • 1 3/8″ x 1/4″ thick flat trim moulding (cut to length of plywood)
  • black chalkboard paint
  • blue painters tape
  • stain
  • polyurethane
  • foam brushes
  • drill
  • Kreg pocket hole jig (not necessary but definitely easier if you have one)
  • 1″ pocket hole screws
  • wood glue
  • 3/4″ trim nails
  • countersink bit
  • 2 1/2″ toggle bolts
  • 5/8″ spade bit (check toggle bolt requirements)
  • pencil
  • level

Instructions:

Step 1: Cut your plywood to size, using your Kreg pocket hole jig make pocket holes every 8″ along bottom edge of plywood (on back side). (I used the portable base with automaxx clamp here, much easier that slipping a large piece of plywood into the jig.) Read more

Reusable monthly menu board with magnetic meals - perpetual menu board

Reusable monthly menu board with magnetic meals - perpetual menu board

We were recently in North Carolina visiting with Matt’s family.  While we were there I took the time to visit an old dear friend of mine.  This girl has known me for years!  In fact I just realized it’s been 21 years since I first met her.  Needless to say it’s important to catch up with friends like this whenever you get a chance. While visiting her, I noticed she had an adorable menu board in her kitchen where she keeps track of all of her meals for the month.  Since “What’s for dinner?” is one of Matt’s favorite things to ask me, I knew I had to make one of these menu boards.

Materials:

  • 12×12 Frame
  • Clear Plastic Calendar Page
  • Scrapbook Paper
  • Magnets
  • Dry Erase Marker(s)
  • Printer Paper or Card Stock
  • Printer
  • Laminator or contact paper
  • Sheet Metal
  • Magnetic Paint
  • Tin Snips
  • Safety Glasses
  • Gloves

Instructions:

Start by measuring the inside of the frame.  (In my case that measurement was 12″ by 12″.)  Using a marker, mark a dot 12″ down from the edge onto your sheet metal.  Repeat this on the opposite side.

Reusable monthly menu board with magnetic meals - perpetual menu board

Use a straight edge (or carpenters square) lined up on the dots and draw a line.  This will be where you make your cut.

Read more