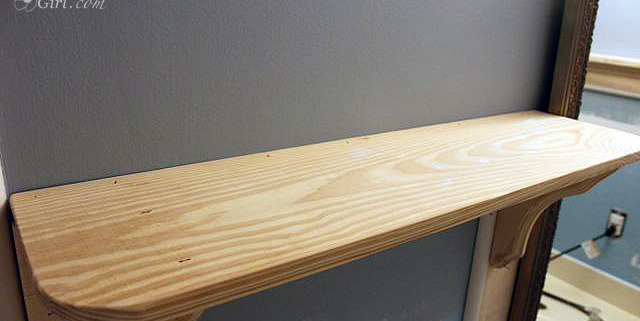
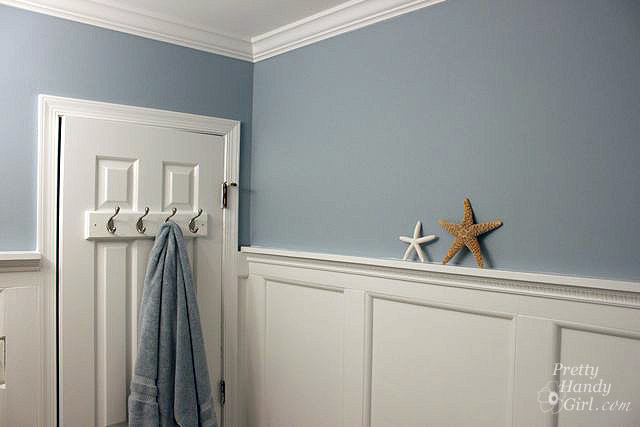
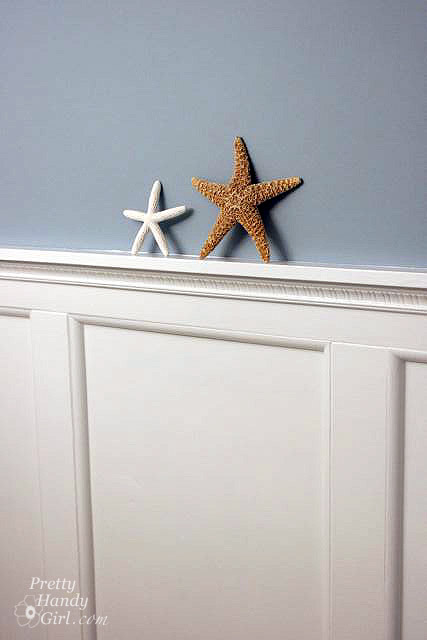
Thank you for all the kind comments about my boys’ bathroom. One of my favorite changes in the room was the addition of the built-in decorative shelf. It was fairly easy to build and install. I used a router to give the shelf a decorative edge, but it isn’t necessary if you don’t have a router (or are afraid to use one.)

Materials:

  • 1x 8″ Pine board (cut to length for your shelf)
  • 2 Wooden shelf brackets (with included mounting screw)
  • Sandpaper
  • Construction adhesive
  • Finish nails or nailgun
  • Hammer
  • Primer
  • Paint
  • Brush
  • Router and bit (optional)

Instructions:

Cut your shelf board down to size. If you want to add some pizzazz, use a router to give your shelf a decorative edge.

Sand any rough edges down with sandpaper.

Set the shelf aside and get the shelf brackets. Line up the top of the shelf bracket with the top of the board and batten moulding.

Insert the mounting screw into your shelf bracket and press it into the board and batten where you wish to install the shelf.

Remove the screw and drive it into the board and batten where you left the mark. Slip the bracket over the screw. Adjust the depth of the screw until the bracket fits snug against the board and batten.

Squeeze some construction glue onto the back of the bracket and then slip it back onto the screw. Insert two finish nails through the bracket and into the board to further secure the bracket.

Repeat the installation steps for the other bracket. Lay the shelf on top to check the fit. Little gaps are okay because you can always caulk them later.

Remove the shelf. Squeeze a bead of construction glue on top of the board and then reposition the shelf on top of the board and shelf brackets.

Nail finish nails through the top of the shelf and into the board and the top of the shelf brackets.

Your shelf is now attached.

If you want, you can add decorative moulding underneath your shelf at the top of the board. I cut the edge of the decorative moulding at a 30 degree angle.

The moulding was cut at a straight 90 degree angle between the two brackets.

Caulk, prime and paint your shelf. Then wait about 3 days before resting anything on the shelf to avoid it sticking to the newly painted shelf.

But, then you need to put some pretties on that shelf and admire your handywork!

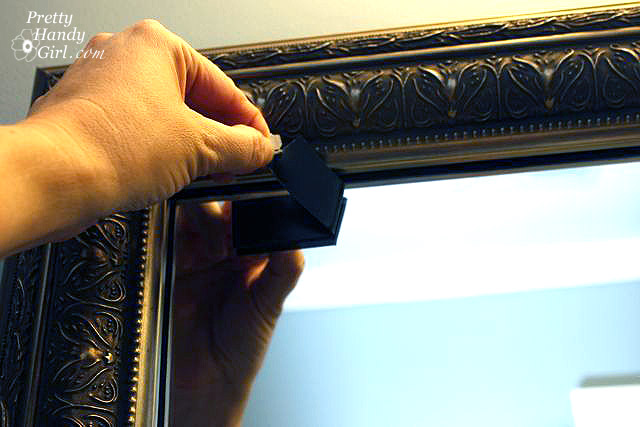
And now the moment that you have all been waiting for! We have a winner of the MirrorMate giveaway! I really wish I had more than one. But, don’t forget you can still get a 10% discount. Simply use: PHGBlog at checkout. Hurry because it expires on Sept. 27th 2011.

Let’s give a big “Congratulations!” to Diana C. who was chosen at random to win the MirrorMate frame credit!


Diana said: “What a great and easy way to update a bathroom mirror! I liked MirrorMate on FB … and my favorite frame is the simple, yet elegant look of the Chelsea Espresso frame!” Nice choice Diana, I hope you send me before and after pictures of your mirror.

Ta ta for now, I’ll be back soon with another fabulous giveaway!


When I last showed you my boy’s bathroom, it looked like this:

Nemo and Dory would have enjoyed life living in the kids’ bathroom. But, alas, I was serenaded by a beautiful new mirror (actually a new MirrorMate frame.) And so I set to work helping this bathroom grow up.

Here is that beautiful temptress, Ms. Gramercy Martini. Isn’t she lovely.

With curves and details like that, I had to build board and batten moulding that would match her beauty.

And, what bathroom couldn’t use a sweet spot to display some beautiful flowers? I really like this built in shelf, it was really easy to construct it.

The wall color is Blue Slate by Benjamin Moore. And I used the new bath & spa Aura paint which has a matte finish! I have yet to clean it yet, but I’ll let you know how it does.

These two starfish friends are happy to perch on the 3″ deep moulding ledge. Yes, I expect them to make a suicidal dive one day, but my boys haven’t bothered them yet.


Finding just the “right” shower curtain was a little challenging. I would have loved to put in a floral or feminine curtain, but I have to respect that there are two little men that will be using this bathroom 95% of the time.

I am sooo glad I ditched the hollywood strip light for these beauties:


Just a close up view of the battens where they meet the floor. Now wouldn’t that have looked weird if I had left the baseboard tiles there?


Here is a better view of the vanity, new light fixture and the MirrorMate frame.

I have one more project for the empty wall. I took down the old chrome towel bar, but I have a fantastic idea for a new one. You’ll just have to wait and see what I came up with. In the meantime, the hooks on the door work well for hanging towels up.

So, go ahead let me know what you think! Do you miss the Nemo room? Or are you loving the grown up beach retreat? And am I crazy for making this bathroom look this good for my 5 & 7 year old boys? By the way, Pretty Handsome Son #1 tried to convince me that the bathroom would look better with black and pink stripes! I am seriously going to have to paint his closet like that because he has been asking for the same color scheme for 2 years now!

Do you have an ugly builder’s mirror? I’m betting about 85% of you do. The other 10% were lucky to buy a home that has a beautifully framed mirror. And the remaining 5% either made or bought a new mirror with a frame! When I was first introduced to MirrorMate on Kate’s blog, I could barely contain my excitement. There was finally a fix for the ugly builder’s mirror in my kids’ bathroom {happy dancing}! I could finally say adieu to the stained, rusted and chipped behemoth in the bath and yet I wasn’t adding anything to the landfill in the process!

Bethany, who works for MirrorMate, helped me pick out the perfect frame for our bathroom. And shipped it as soon as the frame was available. Unfortunately, the frame arrived right before I left to surprise my sister in Ca. Then I came home and got deathly ill. So, the poor frame sat in our garage for a month. As soon as I started feeling better I jumped right into the bathroom makeover project. I have to tell you, the makeover was inspired by the beautiful MirrorMate frame. I just couldn’t put that beautiful frame into the fishy bathroom. It just would look like the grown up in a child’s playground.

Putting the frame together and framing the mirror was a piece of cake. Here is how we did it:

1. Unpack the MirrorMate and accompanying supplies.

2. Spread the frame and pieces out. Use wax paper (or old cereal bags) under the corners to protect your work surface from the glue.

3. Glue each corner.

4. Insert the small connector pegs into the slots at the corners. You might need a hammer to lightly tap them in.

5. Wipe off any excess glue with a damp rag (or baby wipe).

6. For added strength and to hold the frame while it dried, I chose to “clamp” my frame by typing rope around it. This was not a necessary step, but I think it helps insure a tight joint, so I did it.

Please tell me that I’m not the only one who started singing. “Spiderman, spiderman, does whatever a spider can, spins a web…”


While the frame is drying, assemble the cardboard guides for the MirrorMate installation.

Add the double stick tape to the back as shown in the directions:

After allowing the frame to dry for an hour, get your DIY partner to help you move the frame. You must be careful not to lift or carry the frame by the corners or it could come apart. I left the rope on it until we moved it into the bathroom (just to be safe.)

Clean your glass with rubbing alcohol (especially where the frame will adhere to the mirror.)

Put up with your handsome assistant insisting on reading the directions (even though you already did and are anxious to move along.)

Have your assistant hold up the frame and then have fun telling him to move it to the left. No, wait a little to the right. Well, maybe back to the left. {Hee, hee.}

Level the frame.

Insert the corner guides directly into the top two corners. Be sure the guide is touching the frame’s inner edges.

Remove the frame and then peel off the tape backing.

Then lift the frame back up with the help of your assistant. Align the frame onto the corner guides and press firmly onto the glass. You only have one shot at this, so go slow.

Remove the corner guides and the glue strips from the mirror.

Now stand back and admire your newly framed mirror! GORGEOUS, don’t you think? And the installation was a snap (or should I say a stick. LOL!)

No one will ever know that you are hiding a dirty stained, chipped and rusty secret underneath!


One final look at the finished product and a sneak peek at the finished bathroom. I’ll be sharing with you the board and batten tutorial soon.


One final note: I have to warn you, DO NOT put painters tape on your mirror or you will be crying the blues like I was.

I immediately contacted Bethany to see if she could send me some touch up paint. I can’t even tell you how helpful she was and when she reported that it was actually hot press leaf on the frame and not paint, I figured I’d be doing some creative treatment on the side. But, instead, she insisted on sending a new frame immediately (which arrived 2 days later!) MirrorMate has the best customer service and she told me “We want our customers to be happy with their purchase, even if that means sending a new frame.” Wow, now that is a company I want to do business with!


Disclaimer:

I was sent a complimentary MirrorMate frame for a product review. I can honestly say that this post reflects my opinions and I was not swayed to write a positive post. Nor was I paid to write this post. For more information you can read my disclosure statement.

I had the opportunity to meet Leen the Graphics Queen last week when she, her husband and her two sweet boys were in town. We met at Monkey Joe’s (an inflatable playground) and our boys had a fun and energetic afternoon playing together. If you haven’t heard of Leen, she is widely known in the decorating blog circles as the go-to gal for wall decals and vinyl. She helped Layla & Kevin install an ENTIRE wall of words for a beach cottage makeover.

Beautiful, don’t you think?!

I asked Leen to make me a custom quote for our bedroom wall, the one where I had agonized over what phrase to put. After months of thinking about quotes, one came to me and I knew it was the quote for us. You see Pretty Handy Guy and I are HUGE Dave Matthews Band fans, and this lyric has special meaning to us:

Leen sent me a few samples of vinyl colors to help me decide. I fell in love with the silver vinyl which changes color depending on the lighting and where you are standing in the room (as shown above.)

If you’ve never installed vinyl before, it isn’t terribly difficult, but it does help to know a few tricks of the trade. Here is how I learned to install vinyl (back in the days when I worked for the sign and banner company):

Materials:

(I’ve included affiliate links for your convenience. I earn a small percentage from a purchase using these links. There is no additional cost to you. You can read more about affiliate links here.)

Installing a Wall Quote:

Start by hanging your vinyl (front, lettering, backing and all) on the wall using painter’s tape to hold it. Adjust the location until you like where the decal will rest.

Set a level up against the bottom of the middle line of text. Adjust the placement of your decal until the type is level.

Draw a level horizontal line across the paper and let the line extend slightly onto the wall. Make a vertical line that is plumb (level up and down) and be sure to extend your line slightly off the paper and onto the wall.

You should now have intersecting lines that run vertical and horizontal on your wall graphic and four small tick marks extending onto the wall.

Remove your wall quote and lay it on a flat surface. Begin to remove the opaque shiny backing paper (it may have a grid or lettering on it.)  Your decal should stick to the clear semi-transparent sticky sheet that was on top of the quote. If some letters come up, simply lay the paper back down and rub it firmly with the gift card and try again.

Continue peeling off the backing paper.

Be careful not to touch any of the lettering (or they can stick to your fingers and won’t remain in proper placement.)

You are now looking at your lettering in reverse on a sticky sheet. Good job, the hard part is over. Well, almost over.

Carefully pick up your quote and turn it so the sticky side faces your wall. Line up your lines with the tick marks still on the wall being VERY CAREFUL not to rest the sticky paper onto the wall. (If it accidentally sticks, carefully pull it off being sure that the letters come off with the sticky paper.)

When all four tick marks are lined up with your horizontal and vertical lines, gently press your decal down. Starting from the center, rub your hand from the center out to the edges to adhere the quote and the sticky paper to your wall.

Lightly spray water all over the sticky paper. This will loosen the sticky paper and release the vinyl decal.

Use your gift card to burnish (sign shop lingo) the letters onto the wall. Use firm pressure and be sure to rub all the letters with the card.

Carefully begin to peel the sticky paper off the wall. If the letters start to peel off with the paper, lay the paper back down over that letter and rub your finger on top of the paper to press the letter back onto the wall.

When the paper backing has been removed. Erase your tick marks.

Now stand back and admire your new wall quote!

Thank you Leen for helping me complete my bedroom makeover! I LOVE IT!

Take a few minute to browse through some of Leen the Graphics Queen‘s beautiful decals in her website.

Some of my favorites are:

Home Decor Accents

Trees and Flowers


For the past six weeks I’ve been taking the Simplify101 workshop: Organizing101. Aby has been a great instructor, and it has motivated me to take back my home!

A few of the projects I’ve completed are:

Bathroom Vanity Drawers

Underneath the Kitchen Sink

Hall Coat Closet

AND…

…Duh, du, duuuunnnn. Our linen closet:

This abyss is 5 feet deep with no light…I wasn’t sure what I’d find in there. Did I just see E.T. hiding in that closet?

Per Aby’s instructions, I emptied the entire closet.

Uh huh, all that stuff was in that one closet! I told you it was an abyss. Check out that tail in the upper right hand corner, Pretty Handy Dog is coming to the rescue.

Wow, look at all that room. I can store…two little boys? Does this photo remind anyone else of Hansel and Gretel?

Once I had the closet emptied, I cleaned the shelves with some Shaklee Basic H2 cleaner (still liking this stuff!)

Now comes the fun part! I got to pretty up those ugly painted shelves with decorative contact paper (found at Target.)

When I worked for a sign and banner shop (oh about 22 years ago), I learned how to lay down vinyl without bubbles and wrinkles. The same method works well for contact paper as well.

Materials:


  • Contact paper
  • Scissors
  • X-acto knife
  • Staple gun
  • Safety Goggles


Instructions:

Begin by laying the contact paper on the shelf.

Cut it about 2 inches longer than the front of the shelf.

Flip the contact paper over and peel back about 3-4 inches and fold the backing down.

Now turn the contact paper back over so the adhesive is facing down. Line the paper up with the back edge and the wall. And press it down with your finger.

Gently pull the backing off the contact paper a few inches at a time.

At the same time press your hand in the middle of the paper and smooth the paper from the center to the outside edges. The goal is to push any air pockets out to the edge.

Pull the backing out a few more inches and use your hand to smooth forward and towards the sides again.

Repeat until the backing is completely removed.

If you need to, cut a notch out of the contact paper around the shelf supports.

Then fold the paper underneath the shelf.

Tack the paper in with the staple gun, one or two staples should hold it. Be very careful that the staple gun is shooting into the wood and not towards your face. In fact, Meri-K would tell you that you should be wearing eye protection while using a staple gun.

I chose to label the edges of my shelves (so Pretty Handsome Guy would obey the new closet organization rules!) I used some decorative baskets and bins to hold other odds and ends.

At the last minute I decided to add a plug-in style under-the-counter florescent light beside the door frame. I can’t tell you how wonderful it is to have a light in this closet now! No more boogie men hiding in there.

And they all lived happily ever after with their newly organized linen closet.

Check back bright and early Saturday morning. I have an important announcement for y’all! Get those noise makers, party hats and confetti ready. It’s PARTY TIME!