IMG_2642

Today, I have another special guest for you. Kim from Sand & Sisal is here to share with us some tips for using plants to decorate and improve our homes.

And the best news is that you don’t need a green thumb to care for many of these. She breaks down each plant’s water and light needs.

If you haven’t been to Kim’s blog, you need to surf on over there right now (get it? Sand & Sisal, Surf?! Ha, ha, I’m so witty. One of my favorite projects she has tackled was renovating her 1949 Bathroom.
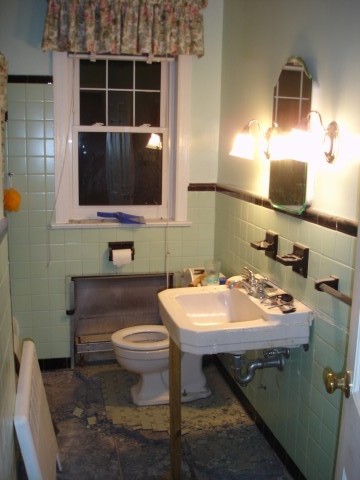
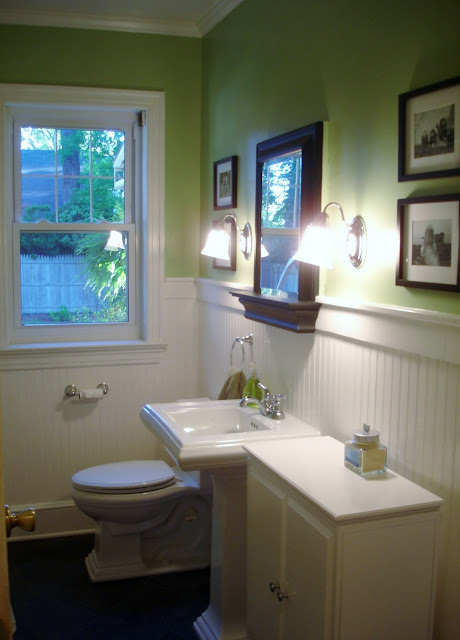
Bathroom After

Amazing transformation isn’t it?! Okay, now everyone kick back, and enjoy a guest post from my friend Kim at Sand & Sisal.

Hello everyone! I’m Kim from Sand & Sisal, and I’m so glad to be guest posting for Brittany’s “Fall in Love with Your Home” series today. Brittany and I are southern girls and actually live only a few hours away from each other, but we met through blogging and were Twitter friends. I was thrilled to meet her face to face at the Blissdom 2011 Conference held at Opryland in Nashville, TN.

PHC & SS

The Opryland Hotel has 9 acres of lush indoor gardens and even though there was snow outside the tropical foliage and flowers brought a touch of paradise that melted any vacationer’s wintery chill. Below are some pictures I took in their gorgeous Conservatory.

IMG_2402 IMG_2421 IMG_2408
IMG_2417 IMG_2394

Springtime (thankfully) is approaching fast here in the South, but you can have a taste of spring by bringing a bit of the tropics indoors! One of my favorite plants to have around the house, and had also covered Opryland’s gardens, is the Peace Lily. Its lush green foliage, beautiful white blooms, and low maintenance make the Peace Lily a household favorite.

IMG_2642

The Peace Lily requires low light and should be watered to keep soil moist but allow the soil to dry out between watering. The Peace Lily is one of the top 10 plants that clean the air in your home. They are known to reduce formaldehyde and carbon monoxide levels.

Do you have an empty corner that just needs something? I have several! The Majesty Palm, another “clean air plant” is what you need!

majesty palm

Majesty palms thrive on bright light and minimal water but I have found they do quite well in moderate light. I have several that are all on the north side of my home. Water these palms once a week but make sure they are not sitting in water or they will yellow and drop dead quickly.

Need a pop of color? The Flamingo Flower comes in red, pink, white, or lavender. It blooms year round and requires medium light with moist soil. I have found the Flamingo Flower to be an easy plant with a showy blooming performance.

flamingo flower

Another plant with bright, bold color is the Croton. Croton’s start out dark green but will develop bold color as they mature and are allowed to have bright light and cooler temperatures. So if your Croton is lacking in color, then move it to a bright window but don’t let it get overheated. It loves to be moist so this one requires watering at least once a week. The Croton is another top “clean air plant”.

croton plant

Plants not only help clean the oxygen in our homes but add a sense of tranquility and comfort to our indoor spaces. Choose an empty corner or a lonely tabletop and add lush plant, and I promise, you’ll smile, and maybe just breathe a bit better!

Kim

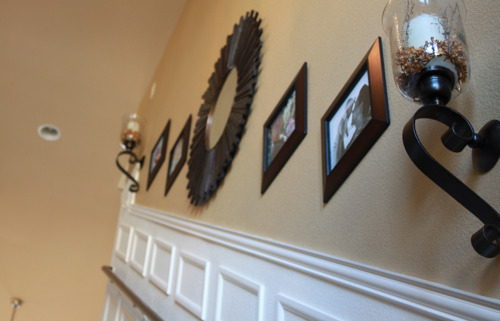
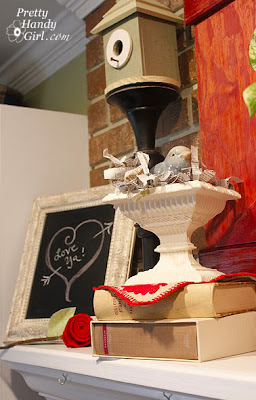
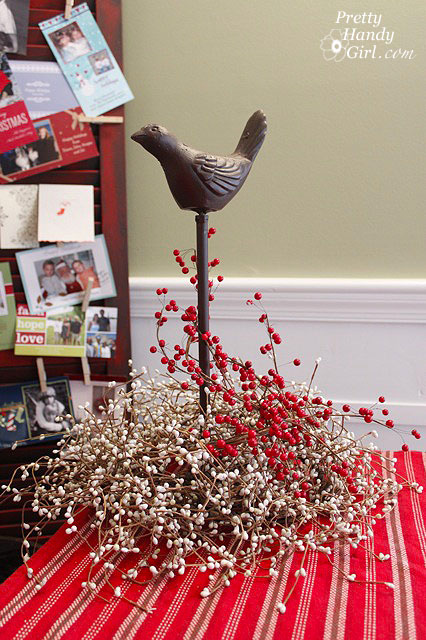
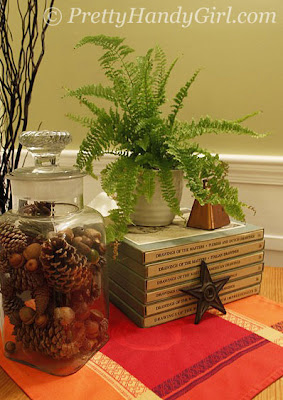
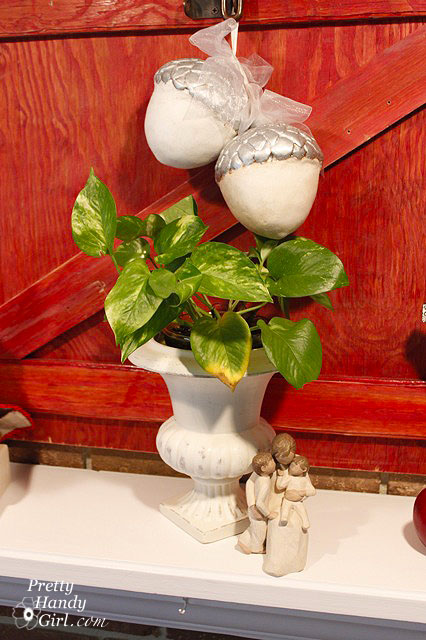
Thank you Kim! I love decorating with plants! They offer such life and texture to my vignettes.

After reading Kim’s post, I’m ready to try my thumb at a bigger species. So, I’m off to the nursery to buy one of those gorgeous majesty palms. I had not idea I could grow one of them in my home.

How about you? Do you have any plants you love to decorate with?

I hope you’ve enjoyed the posts on “Falling in Love with Your Home” in February. We’re in the home stretch (yes, pun intended) now. Today I have my roomie from Blissdom, Sandra from Sawdust and Paper Scraps. She and I love our power tools, and LOVE to build things. I think it would be a blast to work on a collaborative project one day. She’s definitely my soul sister.

Please welcome the lovely Sandra from Sawdust and Paper Scraps who is going to show you how to disguise an ugly view!

Good morning Pretty Handy Girl fans! I’m Sandra from Sawdust and Paper Scraps, here to share an easy and inexpensive project to transform and beautify a window with a less-than-stellar-view!

(Or a window where you want privacy without blinds or drapes like a bathroom or shower.)

We have a basement and even after I added casing, trim and paint to the inside of my window… it was still really unattractive- outside!

So I went to Lowe’s and bought a $14 roll of frosted glass vinyl window cling!
Before installing, I made sure my window was as clean as possible.  I had to clean AND scrape off some paint because SOMEONE was a little sloppy!  (uhem-me)

I installed it on one window by myself and it was something like a scene from an I Love Lucy rerun.  Vinyl flopping down over my head, sliding off one side while I was trying to smooth out the other…
Definitely easier to install with 2 people. But do-able with only one!

The instructions for the stuff I bought said to spray the window and the sticky side of the vinyl (with a liquid that you can purchase separately. But, you can also use a soapy water mixture in a spray bottle).  You have to peel off the backing which I did just a little at a time while person 2 sprayed and then stick it to the window.

After you put the vinyl on the window, use a utility knife to trim off the excess and a credit card or little squeegie to smooth out the wrinkles and push the extra liquid out from under the vinyl.  While it’s wet, you can pull it off and reposition it- so keep it all wet until you have it placed just right.  Then let it dry.  That’s it!

Easy.

I think it’s a big improvement for relatively little cost or effort.

This particular room is my daughter’s playroom so I also built some shutters,


a wall of storage,

and a playhouse. If you’re looking for another project to whip up!

But it all started with the window-well.

And a little vinyl cling!

Thanks for having me Brittany!  And thanks for letting me share with you all one thing I did to help me “Fall in Love with My HOME!”

Thank you Sandra! Great tutorial. I love how easy and quick that solution was. If you haven’t been to Sandra’s blog, you need to zoom over there now. She is the Queen of built-ins and decorative mouldings. Plus, she has just enough crafts to keep you creative!

Winter is almost over, and not a moment too soon! I have been hanging onto my Christmas cards and warm fuzzy pillows and throw (from Pier One). But, I have been feeling the Winter blues. So, I decided to make a quick change to the line up in our living room. (Hey, Pretty Handsome Guy, did you like how I used a football term?! ha, ha.)

By the way, speaking of Pretty Handsome Guy, today is his birthday! He’s the big 4-0! Woohoo! I have four months to tease him about being 40 until my counter ticks over too. Then I’ll have to shut up about it.

Okay, sorry for the diversion, back to the topic at hand, falling in love with your room by changing out pillows.

Couch Before – Christmas Pillows and Throw

Sometimes falling in love with a room again is simply a matter of changing out your fabrics or pillows, throws, place mats, runners, a rug, etc. (Especially if you have an old couch that you are hiding under a slipcover.)

I had a few minutes without the kids the other day and suddenly found myself at the back of Steinmart in the pillow section. Within 15 minutes I had grabbed several discounted pillows and was running for the register before I had to pick up Pretty Handsome Boy #2. (Anyone else been in that mad dash to the register using up EVERY single minute before it is time to reclaim your children? Yeah, I figured I was the only one.)

When I got home, I performed transformation magic on the two chairs and sofa in our living room.

Wingback Chair Before

Wing Back Chair After

Club Chair Before

Oh – you eagle eye you – Yes, I know you just saw that pillow in the wingback chair above. I just moved it. FREE transformation Baby!

Club Chair After

Couch Before

Couch After (Throw from Club Chair Before)

Couch After – Close Up Pillows

As you can see in the above picture, I FINALLY put away all my Christmas cards that were displayed on the shutters in the background. So, how about your home? Do you have a room that could benefit from just a few new fabrics? Try it, this is the quickest way to transform a room.
I hope you will check out some other ways to “Fall in Love with Your Home Series”. in February!

Today I want to welcome Emily from DecorChick! Isn’t she gorgeous! But, she’s not just attractive, she is brilliant! (And fun to hang with.)

decorechick picture

Why do I think she’s brilliant? Because she has one extra special, creative brain. Just look what she made out of a little lonely drawer!

drawer candle holder

I love her home and all the changes she’s made to it. Especially her staircase makeover! I’m jealous of her staircase because, I live in a two story home, and I spend A LOT of time going up and down the stairs. Every step I take on the stained carpet stairs with an ugly banister and spindles makes me long to live in Texas in Emily’s home. I have been wanting to give our staircase a makeover since we moved in. Sadly, I haven’t started it yet. But, I know when I do I will be more in love with my home because of it.

Emily has agreed to share her staircase moulding tutorial with you today. So, please give her a big welcoming hug.

Heeeeeeeeeeeres, Emily:

Hi everyone, I’m Emily from Decorchick. I’m so happy to be posting on Brittany’s blog today. I’ve always been a fan of Brittany and her blog, and I was fortunate and got to hang out with her at Blissdom and it was so much fun. Brittany is such a sweetheart, but I know you all know that already. 🙂

I finished a big project (with the help of my Dad) and transformed our staircase wall with lots of moulding. I couldn’t be happier with the results and I will be showing you the makeover today.

So, let’s take a look at the before photos.

staircase makeover before
staircase makeover

And now….the after!

staircase makeover after
staircase makeover after paneling

Ahhh, don’t you love wainscoting??

I was actually smart for once and painted the wall white before we added any boxes. I know, can you believe it? I actually followed my own advice. 🙂

staircase makeover painting

When you are trying to do wainscoting up a staircase, you are going to have odd angles and cuts. But this new little gadget my Dad introduced me to is so cool. You just set it on your angle, say for instance our staircase banister, and it tells you exactly what angle it’s sitting at.

staircase makeover tools
staircase makeover protractor

Pretty neat right? Oh, and those are my Dad’s hands. I don’t have man-hands and hairy wrists.

The angle of my staircase is 37 degrees, so the cuts were all made to compliment that.

For the moulding, I chose to use the foam stuff again. The pieces I bought were 7ft in length and cost $2.38 for each piece. I ended up buying 27 pieces. So that is $64.26 just for the moulding for the stair boxes.

First thing we did was cut all of the pieces for all 21 boxes.

staircase makeover supplies

Then we used this make-shift template so we could glue each piece together at the right angle, and on a flat surface.

staircase makeover angle cut

We glued 2 pieces at a time with hot glue, and let them cool.

Some pieces cooling…

staircase makeover glued pieces
staircase makeover resting supplies

And then we would glue a box together.

staircase makeover glued panels

And eventually got all of these.

staircase makeover finished panels

Then we put up the frames temporarily with double-sided tape to get the spacing correct, nailed them in with a nail gun, and added the chair rail. The rail is not an actual “chair rail” but is window casing trim. It is decorative like a chair rail and has a nice ledge to it.

staircase makeover panels installed
staircase makeover panel install

Then came a LOT of caulking and spackling of all of the boxes and chair rail, more painting, and then done! And please, if you need to cover nail holes, use spackle and not caulking. I already knew this but for some dumb reason I used caulk and ended up redoing it with spackle. Caulk does not sand well and it gets rubbery. With spackle, it sands down nicely and you can’t even see the holes. Just my little tip!

I’ll just show you all more after photos because I know that’s what you really care about. 🙂

staircase makeover finished
staircase makeover painted
staircase makeover decor
staircase makeover finished decor
staircase makeover panel closeup
staircase makeover finished diy project
staircase makeover project
staircase makeover diy

And here are a couple of night shots. P.S.- the sconces have flameless candles in them and they are on a timer, so they come on at the same time every day and stay on for 5 hours and turn off.

staircase makeover candles
staircase makeover candle decor
staircase makeover lighting
staircase makeover light decor
staircase makeover evening decor
staircase makeover

So what do you think? I think this is one of, if not, my favorite transformation so far. I think I always say that though. 🙂 This wall was always a challenge to decorate, so that’s why it’s been empty for 2 years now. I think having the wall more as an architectural feature was the way to go.

To see how the design of the staircase came about, you can read about that here. To see a more detailed how-to of the moulding boxes you can read that here.

Source list:

  • Starburst Mirror – Pier 1 for $69 (was on sale over half off! The original price was $149)
  • Candle Sconces – Hobby Lobby $30 each (with half off)
  • Flameless candles – Pier 1. I already had these candles but had to buy one more for about $14. Pier 1 flameless candles are my favorite because they glow from the bottom up, instead of just the top like a lot of others do.

Materials – $64.26 for moulding boxes, and approximately $20 for the chair rail.

Wall color – Baguette from Sherwin Williams — (But it’s soon changing to a different color)

I hope you enjoyed my staircase makeover, and thank you so much for having me Brittany!

Thanks Emily! I appreciate that you shared your tutorial with us. What do you guys think? Pretty fab, huh?! Well, you haven’t seen nothin’ yet.

Checkout her fabulous pantry! Seriously, I love her pantry (and her Dad who helped her build the custom carousels for her pantry. DecorChick Dad, can you adopt me please!!!)

See for yourself:

diy pantry makeover project
Pantry Makeover HERE.

I hope you will hop over to her blog and tell her I sent you. Enjoy your visit!

Stay tuned, we have a few more guest posters helping me with “Falling in Love with Your Home” February!

fall mantel with vignettes

I like to revitalize my love for a room by switching out the décor throughout the year. Decorating for the season gives the room a fresh look. Mantles are the ideal place to begin:

fall mantel with vignettesAutumn

 Christmas

Valentine’s Day

Springtime

But, if you don’t have a mantle, you can use any flat surface!

Side Table

Pedestal

Pie Safe Cabinet

Built-in Bookshelf

Recessed Window Seat

Here are six tips for creating successful vignettes:

1. Varied heights

Try to create a visual triangle. Have one tallest object, then a 2nd tallest and a shortest. I use books all the time to help elevate an object that might be at the same height as another object. Attractive wooden crates or boxes covered with cloth can work too.

2. Varied textures

Using a variety of textures creates visual interest. In the picture below I have a ceramic bird sitting on torn strips of newspaper in a plaster container on top of an embroidered linen and some books.

3. Color palette

Choosing a color palette of 3 colors or less is an easy way to create an appealing vignette. For my Valentine’s Day vignette I chose to work with primarily red and white with some black.

The next year, the color palette was red, aqua and white.

4. Odd numbered groupings

Vignettes and small groupings tend to look better when you use an odd number of objects.

For example, in the grouping above, I have assembled:

1. Birdhouse on a candlestick (visually they are one object)

2. Bird nest in pedestal (again visually counts as one)

3. Stack of books

4. Picture frame

5. Felted rose laying in front of the picture frame.

5. Varied Shapes and Scale

Vignettes work well if you can vary the shape and scale of your objects. Grouping many objects of the same size and shape will not give your eye enough to explore and study. Always take a step back from your vignette to make sure that your grouping has different shapes and sizes represented.

6. It’s Your Décor

This is the most important rule! Make sure you create something you like. Use your own objects. And if you love it, that is all that matters. It really doesn’t have to meet someone else’s criteria of perfection. I wrote a whole post on imperfect decorating HERE.

Happy Decorating!


Did you spy Christmas cards in the background? Sure, it is February, but I love them too much to take them down yet. If you’d like to read more “Fall in Love with Your Home” February posts, click on the button below to see a recap of this month’s theme: