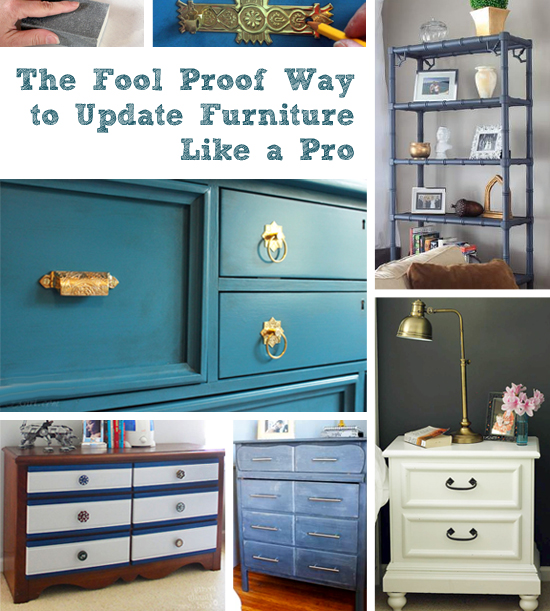
Hello friends! It’s Jessica from Decor Adventures, back this month with tips on The Fool Proof Way to Update Furniture Like a Pro! I have some tips to make your furniture finishes look like they were professionally done. Help you pick the best paint, primer and tools for the job. And finally a few quick and easy ways to update your furniture in minutes! If you’ve been craving updated furniture, but aren’t sure where to start, this is your chance.
Update Furniture Like a Pro Materials:
(Affiliate links.)
- Sanding paper and/or Sanding sponge
- Paper towels or rag
- Mild cleanser
- Elmer’s E848D12 Carpenter’s Wood Filler 1/2-Pint
- Putty knife
- Screw drivers
- Painter’s Tape
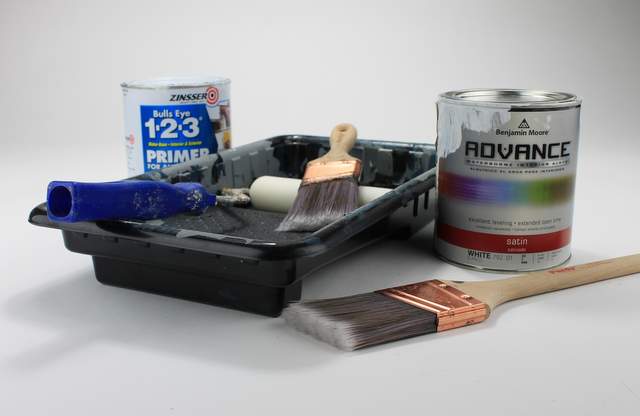
- Zinnser Primer
- Paint tray
- Good quality paint brushes
- Shortcut Angle paint brush
- HomeRight Finish Max Fine Finish Sprayer
- Foam Mini Roller with Handle
- Paint (see recommended paints below)
- Floetrol Paint Conditioner
- Polycrylic Protective Finish
Prepare Your Furniture the Right Way
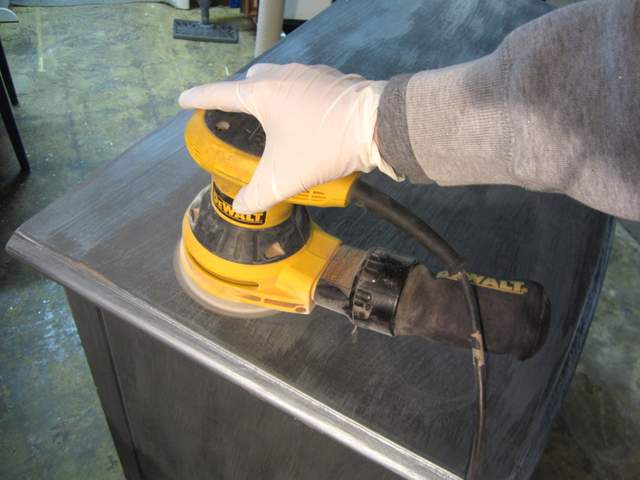
Proper preparation will make the whole project a success. First remove any hardware. Carefully look over your piece and fill any cracks or dents with wood putty.
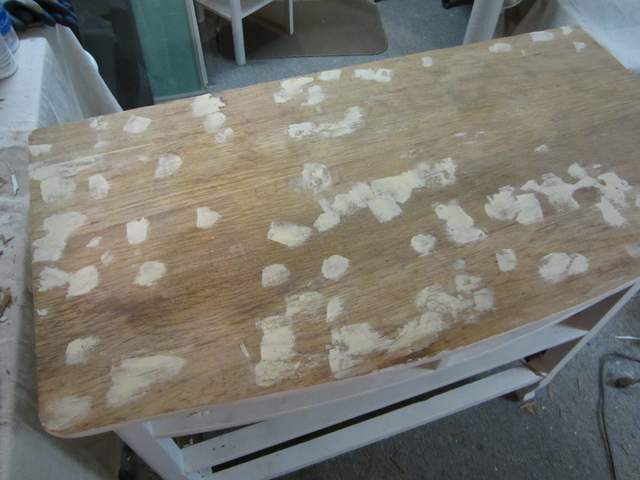
Sand the putty and the rest of the furniture until the finish is smooth.
If you didn’t have to use any wood putty, a light sanding with a sanding block will go a long way to helping your paint stick and give you a smoother finish. Remove any sawdust, dirt and debris from the piece with a tack cloth or vacuum. Finish cleaning off the furniture with a damp rag and mild cleanser. Allow your furniture piece to dry.