interior cedar shutters

Hello Pretty Handy friends, Jaime from That’s My Letter here today to share how to build functional interior cedar shutters using inexpensive AND readily available hardware.

I have been itching to build some cedar shutters for our living room for quite some time now.  I had two requirements: 1) they had to be completely functional to block out the hot summer sun (which also makes them great for privacy) and 2) use no fancy hardware.  I didn’t want to special order any shutter hardware and I like to build using readily available supplies.

interior cedar shutters partial open

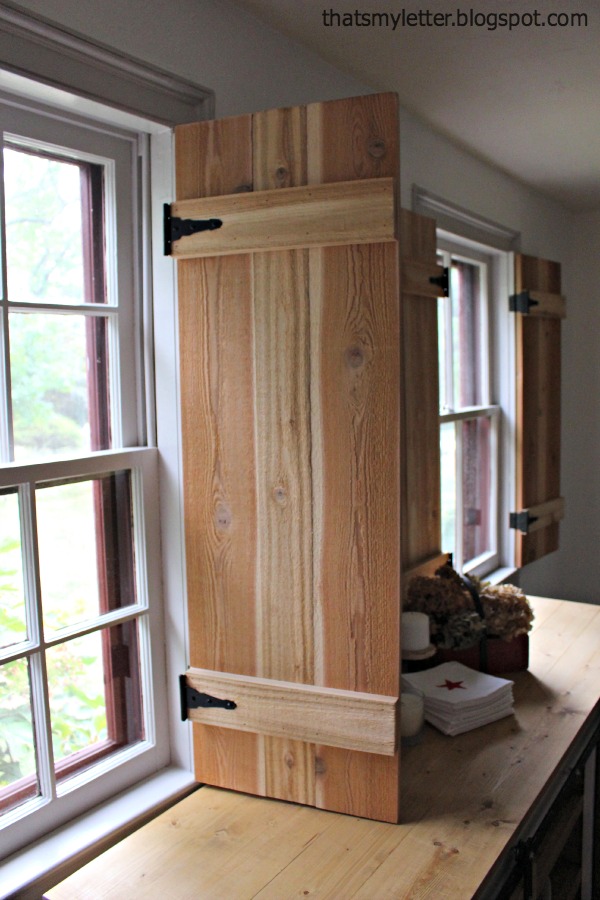
You can find the cedar planks and hardware at your local home improvement store.  Ready to learn how to build the shutters and install these beauties?

interior cedar shutters closed 1

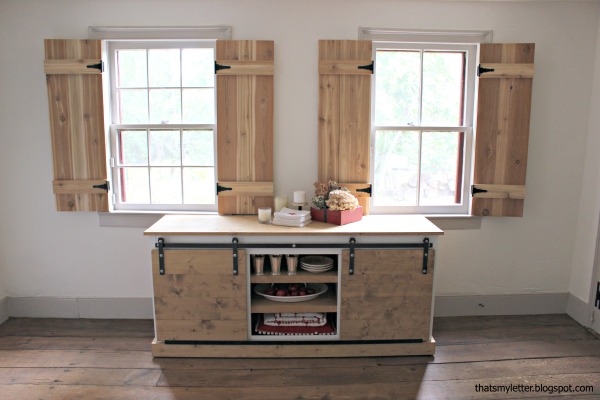
You can see just how much light the shutters will block out once closed.  I plan to keep the shutters open except during the extremely hot summer days.

interior cedar shutters front view

Interior cedar shutters make a great alternative window treatment if you’re not into fabric panels.  They truly are a statement piece (and hopefully distract from the fact that my windows don’t match!).  I also built the sliding door console last Spring, a link to all the details on that piece is in this post.
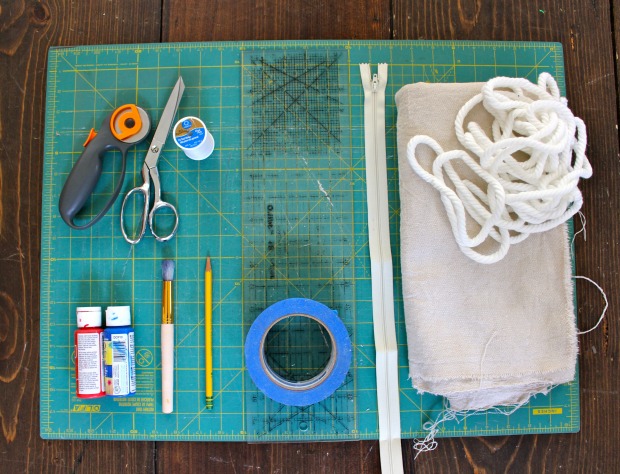
Materials:

  • cedar boards (1×6 and 1×4)
  • saw
  • nail gun
  • 1 1/4″ finish nails
  • 1×2 pine board
  • 2″ wood screws
  • drill & bits
  • pencil
  • measuring tape
  • wood putty
  • sandpaper
  • paint
  • hinges (pictured below) & screws

interior cedar shutters hardware

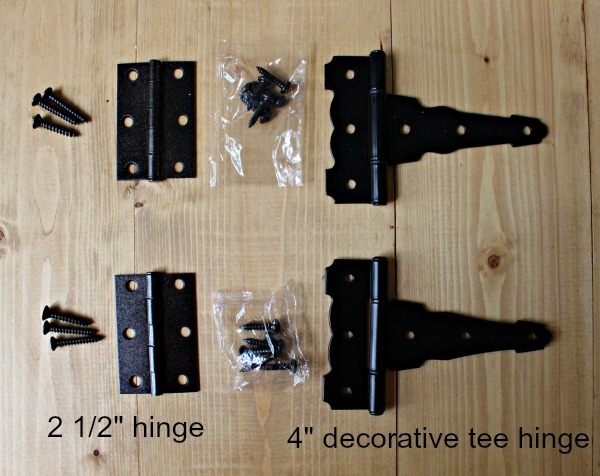
Hardware: (for one pair of shutters)

  • 2 – 2 1/2″ hinge (spray painted oil rubbed bronze) & 12 screws
  • 2 – 4″ decorative tee hinge & 12 screws
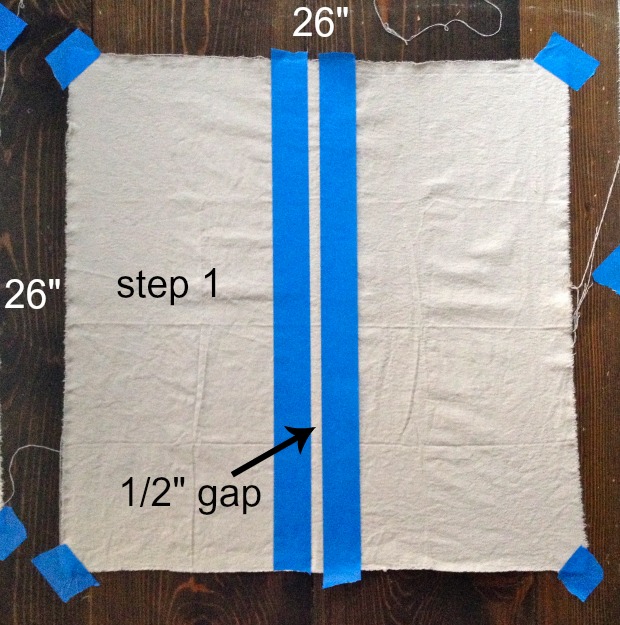
Instructions:

MEASURE YOUR INTERIOR WINDOW SPACE.  MEASURE IT AGAIN.  MEASURE IT AGAIN. The top of the window may vary from the bottom. Read more

DIY Industrial Charging Station

Have you ever been in need of an electrical outlet only to find that they’re hidden by furniture or in a hard to reach place?  How about that elusive time of day when you’re cell phone’s down to 1% and you have a handful of charging cables, but nothing to plug it into?  This seems to be a regular occurrence at The DIY Village, so we’ve finally solved these problems!  We created a DIY industrial USB charging station that has an accessible outlet; 2 usb ports capable of charging all of your devices; and even has a built-in accent light!  We think it would be the perfect addition to an office, your teenagers room, or even a college dorm room!  

DIY Industrial USB Charging Station Materials List:

(Contains some affiliate links)

DIY Industrial USB Charging Station Tool List

DIY Industrial USB Charging Station Instructions:

In order to make room for connectors and fittings that you’ll be using to build your Industrial Charging Station, you’ll need to remove (2) 1/2-inch and (1) 3/4-inch knockouts from the handy box.  (Set the handy box aside)

Handy-Box-Knockouts

The hardwired emergency light has screw-out plugs that give you installation options.

Emergency-Light-Base

Remove one of the side plugs from the light base and re-route the wiring through the opening. Read more

how to stamp with potatoes

Hey there! It’s Melissa from The Happier Homemaker back again with a fun and easy DIY tutorial you can even get the kiddos involved with! I’ve been noticing block printing coming up a lot in my home decor magazines and catalogs lately. Last week when I was prepping a little rainy day potato stamping activity for my 3 boys, I decided it may be time to try a little block printing DIY of my own.

Supplies:

  • Flour Sack Tea Towels
  • Large Raw Baking Potato
  • Knife
  • Craft Paint
  • Fabric Medium
  • Iron and Ironing Board

Instructions:

Cut your potato in half and use your knife to {carefully} cut your design.  Simple shapes work best for this type of stamping.

diy potato stamped towel

On a paper plate, or paint palette, mix your craft paint with fabric medium in a 2:1 ratio (or according to fabric medium instructions.) Read more

striped euro shams

Every DIYer loves a little drop cloth project right?  Jaime from That’s My Letter here to share how to make striped euro shams.

Using drop cloth and acrylic craft paint, I made these grain sack inspired shams to finish off our new poster bed.

striped euro shams 1

I added piping to finish the edges. It wasn’t too hard, and it was worth the extra effort.  Brittany has a great piping tutorial here or you could always leave off the piping if you choose.

05-CLX-digging-deep-striped-duvet-cover-0613-xln 1

I found my inspiration for these shams from a Country Living article in the June 2013 issue.  The master bedroom in the featured home had the perfect striped lumbar pillow and I knew I just had to have my own!

striped euro shams 3

Similar but different, these striped shams coordinate well with my Joseph’s Coat quilt.  Check out how easy it is to make your own shams:

Materials:

striped euro shams supplies

  • drop cloth (2 – 26″ x 26″ square piece per sham)
  • cotton cording (2 yards per sham)
  • 22″ zipper
  • painter’s tape
  • stencil paintbrush or stiff bristle brush
  • acrylic paint
  • pencil
  • clear quilting ruler
  • rotary cutter
  • self healing cutting mat
  • scissors
  • thread
  • sewing machine
  • iron & ironing board

Instructions:

striped euro shams step 1

Step 1: Measure your sham inserts and add 1″ to each side.  (My inserts measured 25″ x 25″ therefore I cut the drop cloth at 26″ x 26″.)  Tape the corners of the drop cloth to a hard surface.  Slide a piece of cardboard under the drop cloth to protect your surface. Mark a 1/2″ wide stripe at the center and secure painter’s tape down either side of gap. Read more

milk jug side table

Jaime here from That’s My Letter sharing a DIY repurpose project that works great outside or inside.

Take a vintage milk jug, add a pre cut circular wood top and you have a functional and stylish side table.  If you want to get fancy I’ll show you how to add the personalization too!

milk jug side table before after

I started this project with some crusty old milk jugs that really serve no purpose these days and after a little paint and adding a wood top we have a beautiful and useful piece of furniture.

milk jug side tables 1

Together the two milk jugs make a great pair on either side of our diy outdoor sofa but ‘S’ is not my last name, these milk jugs will be going to a friend’s home.

milk jug side table 3

The personalization is icing on the cake, if you have a steady hand you can add any letter in nearly any font you desire. Ready to get started? Read more