Need some help getting started on decluttering your home? This is an easy step-by-step guide with simple actionable steps to take. I’ll start you out with small steps and before you know it, you’ll be finished and loving your home again! Let’s work together taming the clutter!
Easy Step-by-Step Guide to Taming the Clutter
Okay, we’ve all seen an episode of Hoarders by now. The guy that hasn’t seen the carpet in his home in 5 years or the woman who saves everything! We see those extreme examples of clutter and can’t imagine how they can live like that.
You’ve also likely stumbled upon Marie Kondo and the KonMari method of organizing. Wherever you fall in the spectrum of hoarder vs. minimalist, you can likely benefit from this Easy Step-by-Step Guide to Taming Clutter.
Ask Yourself one Question:
Do you see clutter in your own home?
Are you so immune to that pile in the corner that you don’t see it anymore? Keep reading to find out why this small pile might not help your brain.
Visual Clutter:
I admit I have clutter. Not, the “OMG! Call Hoarders” type clutter. But, I do have small piles of things with no home. A few extra knick-knacks, some papers that need to be filed, or those horrid happy meal toys! This is an example of small visual clutter. It’s not “bite you on the nose” noticeable most of the time. Did you know even the smallest bits of clutter are noticed by your eyes, and your brain has to process it. This is why sometimes you stop seeing it. I call anything that sits out visual clutter.
In college, I used to have to clean my entire room before I could start on my illustration assignments. I do the same thing in our garage (which is cluttered now) before I can start on a new project.

You need the visual calmness of a clean room to be more creative and more productive. It helps focus your mind on the task you are doing.
This week, I want you to pick one room. Preferably the room you spend the most time in. Is it your kitchen or your home office? Whatever it is, this is the room that will make you happy when you are done. It is the room that will allow you to “Fall in Love with Your Home.”

Easy Step-by-Step Guide to Taming the Clutter:
I’m going to share with you a simple step-by-step guide to reducing clutter in your home. This process works in any area of your home.
Materials:
- Four Boxes (or laundry bins)
- Large Trash Bag
- Different Colored Sheets of Paper (if possible)
- Thick Marker
- Cleaning rags
- Windex or general cleaners
Step-by-Step Guide to Reducing Clutter:
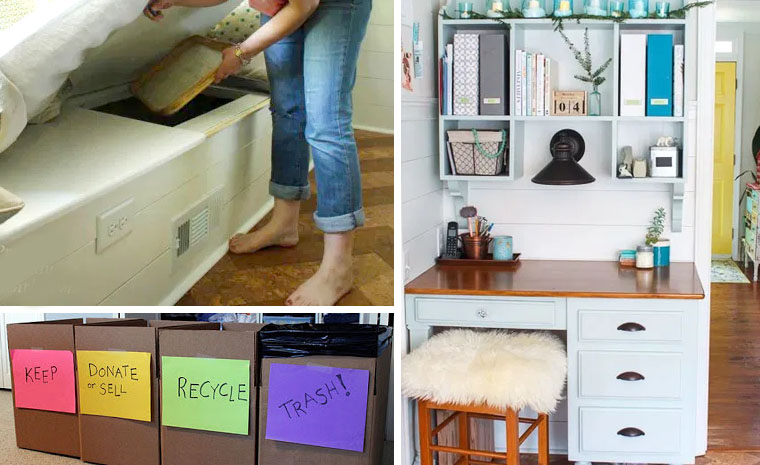
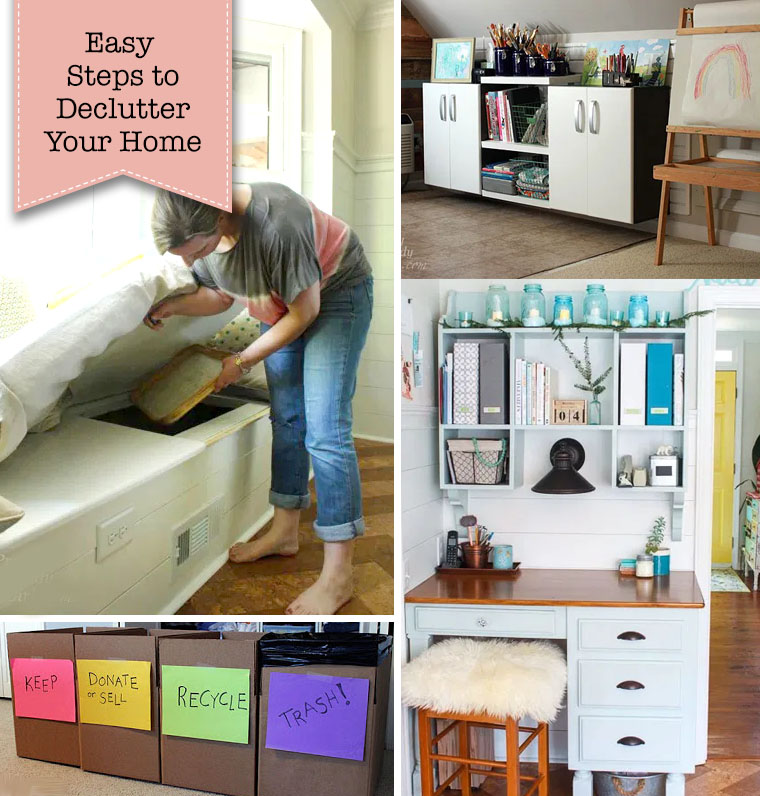
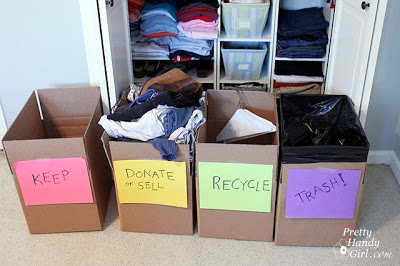
Begin by gathering your four boxes. If you are working in an area with larger items, you can set areas just outside the room instead of boxes.
Label each one with these labels:
- KEEP
- DONATE or SELL
- RECYCLE
- TRASH
I like to use a different color for each label so I don’t accidentally toss something in the wrong bin.
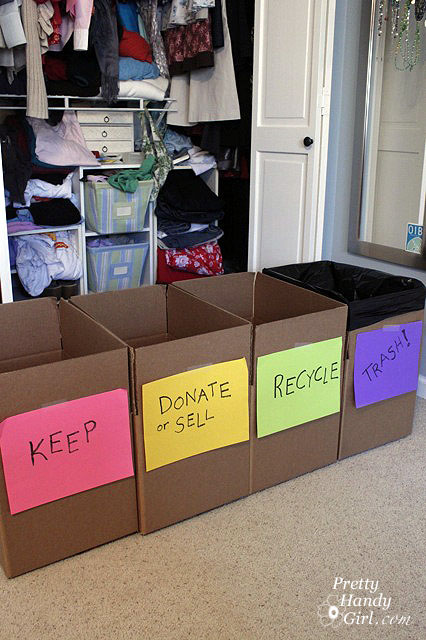
- KEEP – Things that don’t belong in that room or to be stored away somewhere else
- DONATE or SELL – Goodwill, Thrift store, or FreeCycle.org donation. Or sell by having a yardsale, on Craig’s List or Facebook Marketplace, eBay, or consignment shops.
- RECYCLE – paper, glass, cans, and other curbside recycling. Also, dry-cleaner hangers, plastic bags, or other items that can be re-used. (Old cloths or linens can be cut up for cleaning rags)
- TRASH – Anything worthless in value. I like to line the trash bin with a big plastic bag to make it easier to empty.
Where to Start:
Start in one area of the room. If you want to be systematic, start from one side and work clockwise around the room. Put things away or add them to the labeled box.
Once the zone is clear, clean off all the surfaces. Then move on to the next area in the room.
If you find yourself stuck ask yourself these questions:
- Have I used or worn it in the last 6 mos? 1 year?
- “Will this item help me create the home I want” – Peter Walsh
- Is this item irreplaceable?
- Do I need it?
- Okay, and finally if you like to KonMari, “Does it spark joy?”
If the answer to any of those questions is “No”, then say adieu to it now!
1 Year Box Rule:
If you still feel stuck, try the 1 year box rule:
Create another box and put anything you are undecided about inside. Seal it up and write a note on the box to assess it one year from today. Next year when you find that box in storage, get rid of it. Don’t even open it. If you didn’t miss the items inside then you don’t need them. Just donate it.
Get It Out of Your House!
When you have finished going through the whole room start removing the bins from the room. Empty the trash, dump the recycling in your recycling bin.
Do not leave the boxes in your home. Put items in your car to recycle or donate while you are running errands (dry cleaner hangers, grocery store plastic bags, packing peanuts to a local shipping store, batteries etc.)
The Keep Box:
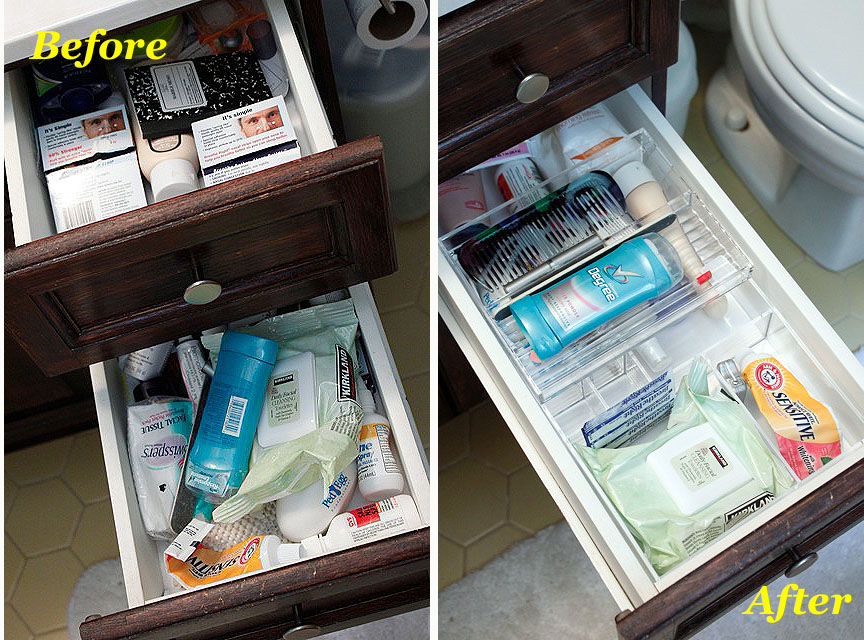
Assess the “KEEP” items and decide which ones can go back in that zone or need to go elsewhere. When you put them away, be sure to store them out of sight. Don’t allow items to become visual clutter. Here are some ideas for finding additional storage in your home.
Storage Ideas:
Maybe your home lacks enough closets or storage areas. I get it, some homes don’t have plenty of storage. If you don’t have an attic, basement, or storage spots I have some ideas for you!
- Pie Safe or armoire
- Cabinet
- Dresser
- Hutch
- Desk
- Bins
- Storage bench
- Shelving
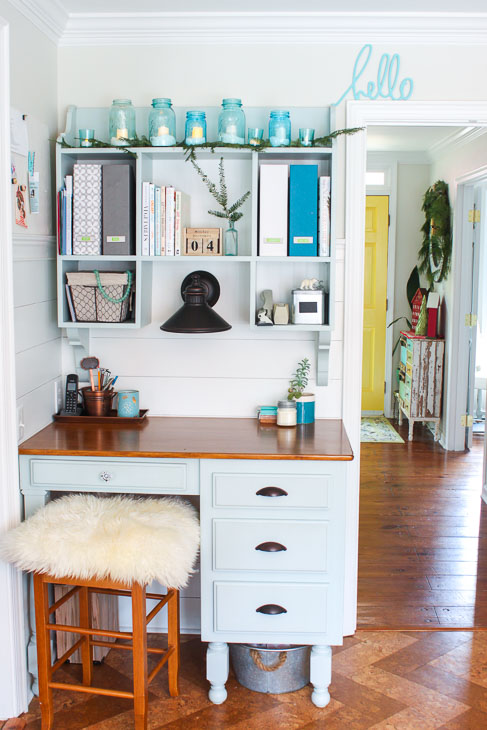
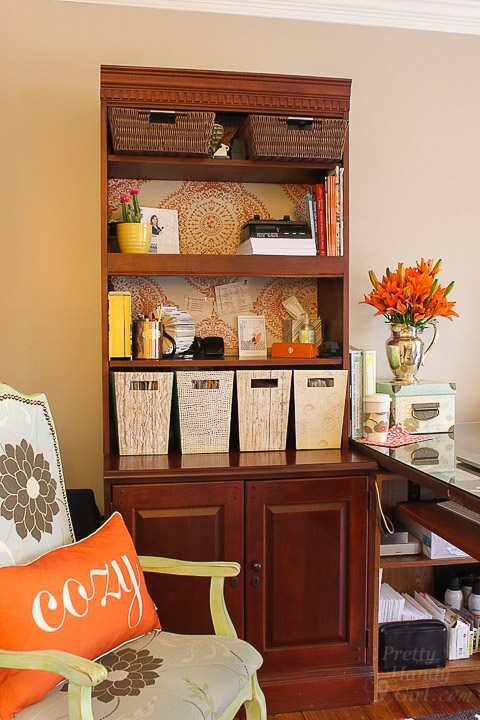
After our kitchen remodel, I bought an old desk from the Habitat ReStore and built a wall-mounted hutch over the desk. This area is my command center and it’s prefect for paying bills, storing papers, chargers and mail.
Before the command center, I used a pie safe in the corner of the kitchen.
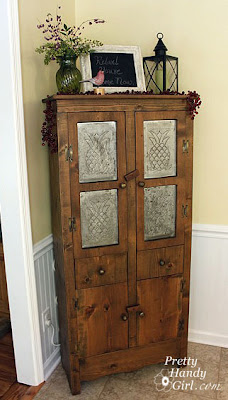

Although it is a small piece of furniture, there’s lots of storage inside.
Top Shelf:
- school papers
- school work
- kids artwork
- Workbooks
- Coloring Books
- Favorite Magazines
- Coupon Binder Sleeves
Next shelf:
- charging station (tutorial to come)
- Cell phones
- Cameras
- Battery chargers
- Walkie Talkies
- Recipe Box
Drawers:
- Left: Pretty Handsome Guy’s mail
- Rigth: Pretty Handy Girl’s mail
Bottom shelf:
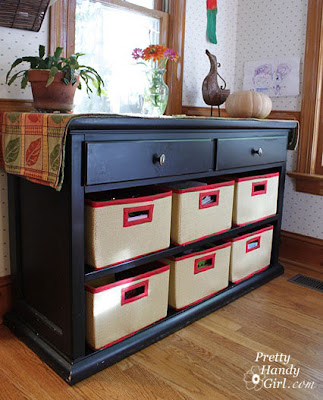
My friend Renee found a credenza from Craig’s List and she utilized this piece of furniture for mail and her daughter’s art supplies.
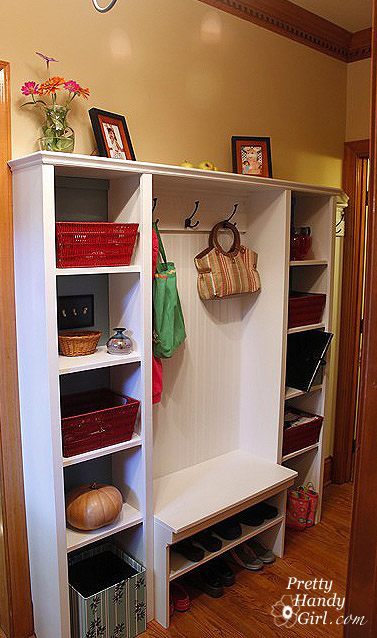
We also built a wall-mounted mudroom cubby and shoe storage bench in her small entryway from the garage.
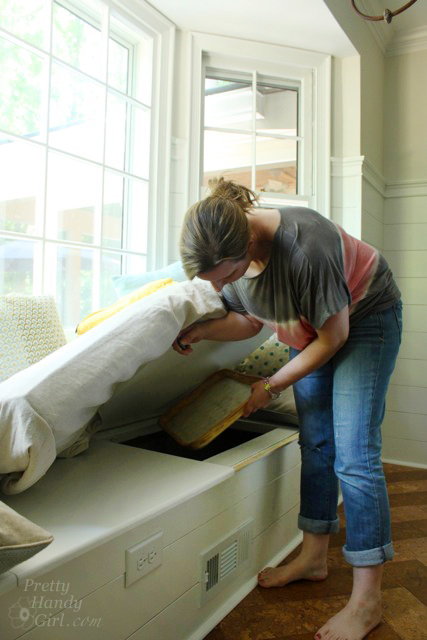
Build a built-in bench in a bay window and store linens, games, or large pots and appliances.
Shelving:
Any closet, corner, or nook in your house can store more if you build or purchase a set of shelves.
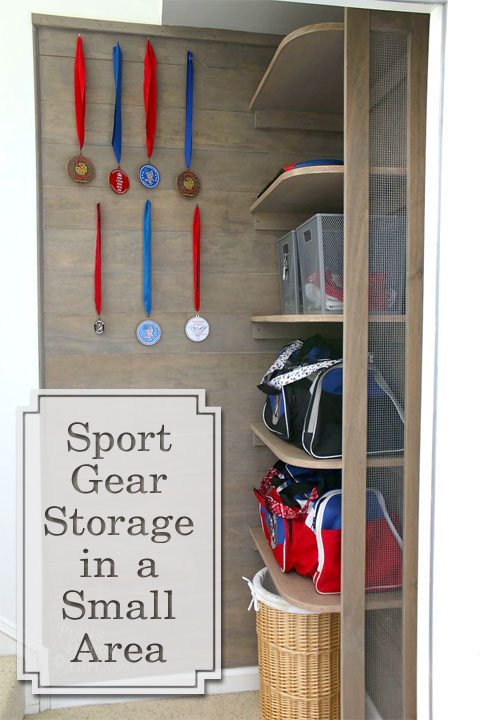
This sports gear storage area takes up only a small footprint, but it holds more equipment than a soccer team! See how I built these shelves in a small area at the bottom of our bonus room steps.
Garage Corral:
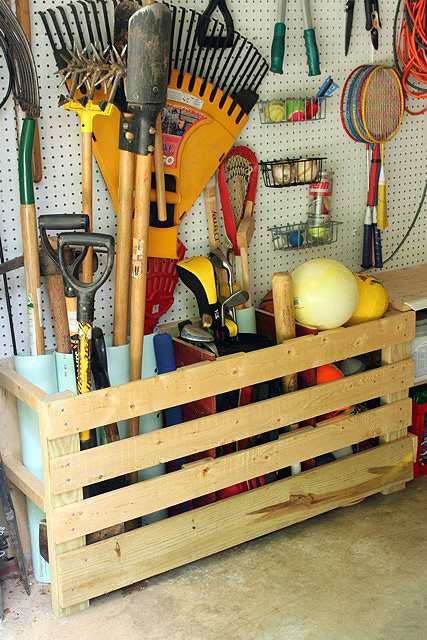
Sometimes you just need an area to corral items that are tall or tend to roll around. In our garage, I built a corral for tools and sports gear using scrap wood and large PVC pipes.
Install Cabinets:
Cabinets are the best storage solution for visual clutter. They look uniform and hide everything inside. You can shop for used cabinets at a ReStore location, look on Craig’s List, or purchase unfinished cabinets, or unassembled cabinets to save money. My favorite storage cabinets in our house are the ones that can be easily reconfigured on a hanging slat wall. You can read how I installed them in our laundry room first, then loved them so much I used them in our bonus room.

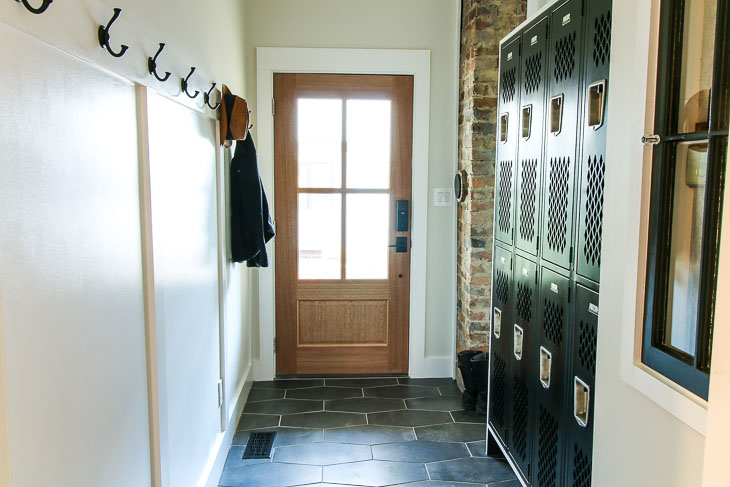
Storage cabinets don’t necessarily have to be cabinets. This set of old gym lockers adds loads of hidden storage in the mudroom at my Saving Etta project.
What to Do with the Donate/Sell Box:
Sort through the Donate/Sell box. Grab a notepad to jot down anything you will be donating. Then put that pile in a bag and put it in your car as well. Be sure to run by Goodwill or the thrift store one day this week. Put the items you intend to sell in a dedicated spot in storage. Make a commitment to yourself to sell them within 3-6 months or donate them if you haven’t after that time frame. (I might have been slacking on this rule. Pretty Handsome Guy might be calling me out on this one.)
Keep Box:
Finally, sort through the remaining items in the KEEP box. Walk around the house with the box and put items away. Go room to room until all the items are put away. (If you have to, go ahead and leave items in the room where they belong, and put away later. Remember today you are only tackling the one room!
Go back to the room you just de-cluttered. Sit there and breathe in. Allow yourself to enjoy the calmness of a clean and clutter-free space. Let yourself fall in love with this space. Anytime you find yourself disgusted with your home, go back to this space and rekindle that flame! Or start on the next room to declutter.
I hope you found this Easy Step-by-Step Guide to Taming the Clutter helpful! Please pin it for later or to help a friend declutter.

Looking for a quick way to hide small items? Use one board to create this adorable storage bin:

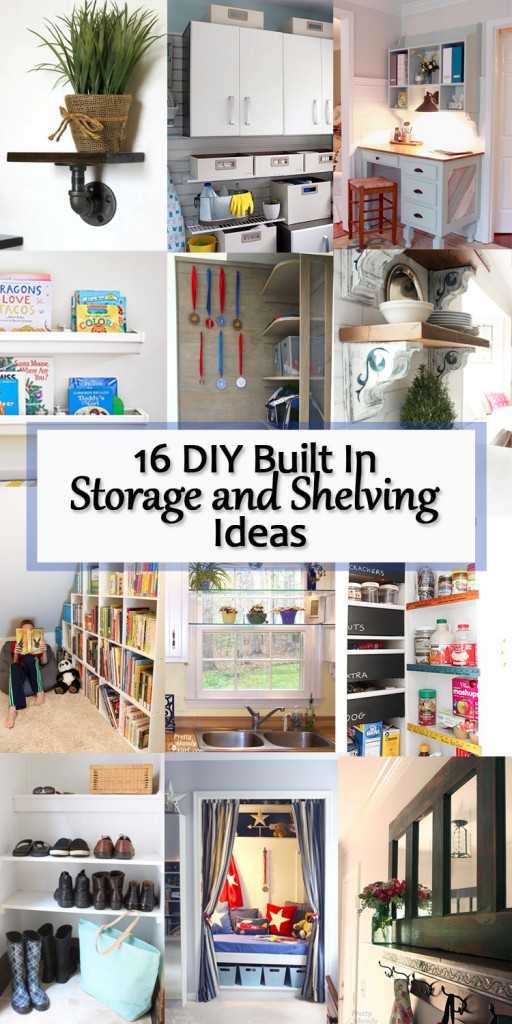
Or use one of these 16 DIY Built-In ideas to add more storage to your home.