Dragonfly Garden Decor using a Dollar Store Whisk and Skewer | Pretty Handy Girl

Dragonfly Garden Decor using a Dollar Store Whisk and Skewer | Pretty Handy Girl

Summertime is coming and I’m enjoying spending more time in our garden. I’m always looking for cute craft ideas that I can do with the kids while school is out. When I saw this great idea for making a wire whisk dragonfly on Morena’s Corner, I knew I had to try it. I altered Morena’s plans slightly using plastic beads and used a skewer for the plant stake. The cost and materials are minimal to make this Dragonfly Garden Decor using a Dollar Store Wire Whisk and Skewer. This craft can be done with the kids, but you’ll need to be the one to cut and bend the wires and watch out for the pokey edges with real little kids.

Dragonfly Garden Decor Materials:
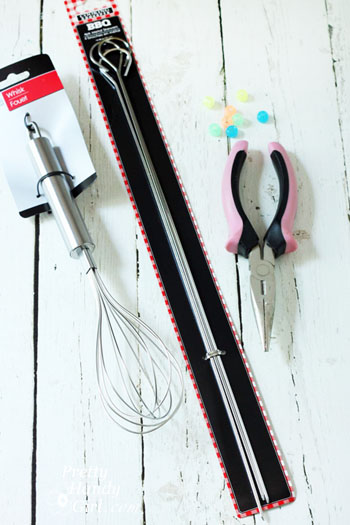
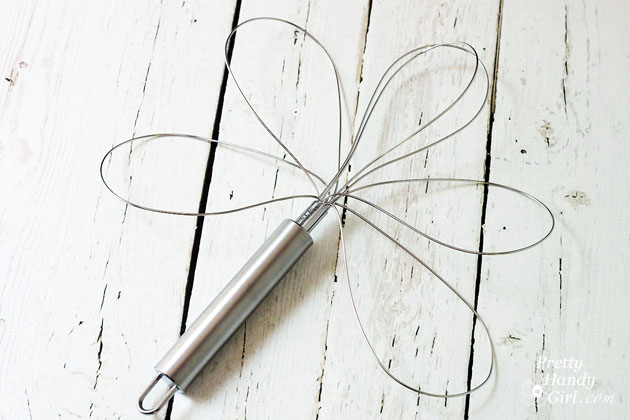
Dragonfly Garden Decor using a Dollar Store Whisk and Skewer | Pretty Handy Girl

  • Wire whisk
  • Wire skewer
  • Beads
  • Needle-nosed pliers

Dragonfly Garden Decor Instructions:

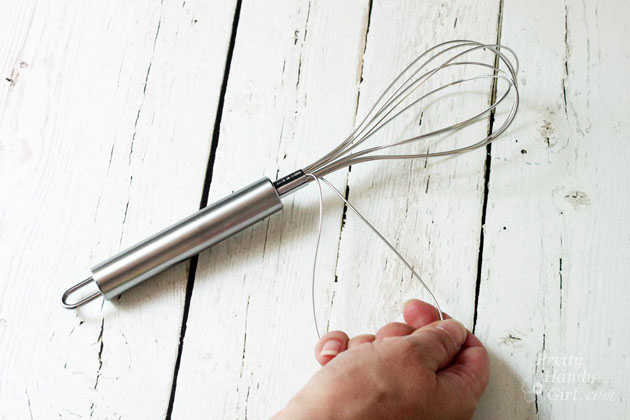
Begin by bending the first wire loop out to the side to create a wing.

Dragonfly Garden Decor using a Dollar Store Whisk and Skewer | Pretty Handy Girl

Repeat with three more loops (2 on each side).

Dragonfly Garden Decor using a Dollar Store Whisk and Skewer | Pretty Handy Girl

Use the needle-nosed pliers to cut one wire loop into two short pieces as shown below. (You might need to twist the pliers back and forth to cut the wires.) Read more

Heart Shaped Topiary | Pretty Handy Girl

Heart Shaped Topiary | Pretty Handy Girl

The season of love is upon us. Have you embraced it? Or are you struggling to find something cute but not cutesy. Or something non-red or pink? Today I have a tutorial to show  you how easy it is to create a heart shaped topiary. Keep it for yourself or give it to the one you love. As the vine continues to grow, the heart will be embraced by the leaves and fill out.

In late Autumn, we had a final blue bloom on our hydrangea bush. I clipped it and brought it inside before the impending cold snap arrived. To keep the hydrangea company, I put a few snips of variegated ivy into the vase too.

Heart Shaped Topiary | Pretty Handy Girl

Over the winter, the ivy grew a healthy root system. Ivy is an easy plant to root. Simply put some clippings in water and keep it watered. After the ivy has rooted, you can create a beautiful topiary plant for a kitchen window sill.

Heart Shaped Topiary | Pretty Handy Girl

Begin by collecting your materials.

Materials:

Heart Shaped Topiary | Pretty Handy Girl

  • Ivy with roots
  • Copper water line or thick wire
  • Wire cutters
  • Pot
  • Rocks
  • Sand
  • Potting Soil
  • Trowel
  • Water

Optional: string, floral wire or a twisty tie

Instructions:  Read more

Flying Yellow Jacket | Pretty Handy Girl

Honeybee vs. Yellow Jacket | Pretty Handy Girl

Summertime is here and I can’t keep shoes on the kids…

Honeybee vs. Yellow Jacket | Pretty Handy Girl

…or clothes for that matter.

Honeybee vs. Yellow Jacket | Pretty Handy Girl

I think my kids inherited it from me. I have fond memories of running around our backyard as a child barely clothed. I also have a not so fond memory of stumbling upon a yellow jacket nest. I ran until my little legs gave out and I hit the ground face first as those little devils stung my backside several times. Nothing puts a damper on summer fun like a bunch of yellow jacket stings on your hiney. Two years ago, my oldest son had the unfortunate experience of stumbling upon a nest in our yard. If I could have taken the stings for him, I would have. Lucky for us, he didn’t experience an allergic reaction on top of the stings. But, allergic or not, yellow jackets are not welcome in my yard!

That summer that I got stung, I learned to tell the difference between yellow jackets and honeybees. Do you know how to tell the difference? It’s important to stop and take a moment to identify which you are dealing with. Did you know that honeybees and yellow jackets are very different in appearance? Once you know what to look for, you can easily identify them: Read more

3 Step Wagon Planter Tutorial | Pretty Handy Girl

3 Step Wagon Planter Tutorial | Pretty Handy Girl

Container gardening is easy and great for instant color gratification. But, it’s especially fun to find “unconventional” objects to use as a planter. You may have noticed my little red wagon planter in the Landscaping 101 post. My 3 Step Little Red Wagon Planter is sure to bring color to your landscaping while also providing some fun and whimsy. Plus, it’s easily rolled to a new spot if you want to change your view. But, the best part is, you can make this planter in 3 steps!

Materials:

  • Drill
  • Large drill bit
  • Little wagon or other container
  • Rocks
  • Soil
  • Plants
  • Hand trowel

Instructions: Read more

Beach-themed Succulent Garden | Pretty Handy Girl

Beach-themed Succulent Garden | Pretty Handy Girl

You like the beach right? Who doesn’t?! Come December I long for the feeling of burying my toes in the warm sand. Bring back those memories by having a Beach-Themed Desktop Succulent Garden nearby. The idea for this garden came as I sat looking at all the shells I’ve collected that were hidden away in the attic. I chose a big conch shell that had few holes and decided it would make a great little planter.

Material:

  • Succulents
  • Conch shell
  • Smaller shells, beach glass or colored glass filler
  • Play sand
  • Potting soil
  • Plant tray

Optional: Hot glue gun, hot glue sticks, felt pads

Instructions: Read more