Make Your Own Terrariums


Terrariums are making a comeback in home décor. Gone are the octagonal mirrored terrariums. They have been replaced by sleak apothecary jars, tall cylinders and lidded glass vessels (to name just a few shapes.)

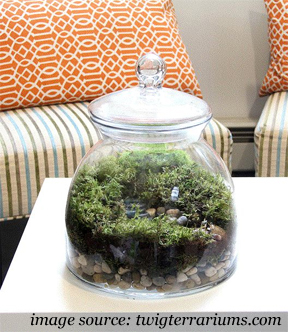
Twig Terrariums has an amazing array of beautiful ready made terrariums or DIY kits for sale! Some of them have stunning details, right down to a little miniature person inside the lush world. The terrarium below sells for $200.

If you want to create your own version that is a little more budget friendly, it isn’t hard to do. In fact you can get some plants from a local nursery or as close as your own backyard!

Materials:

  • Glass container (with or without a lid)
  • Small decorative pebbles or pea gravel
  • Potting soil
  • Live Moss
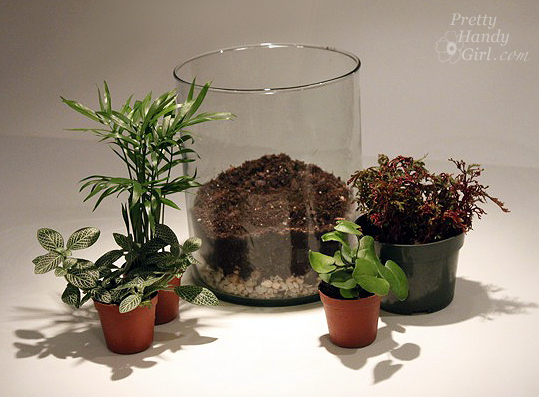
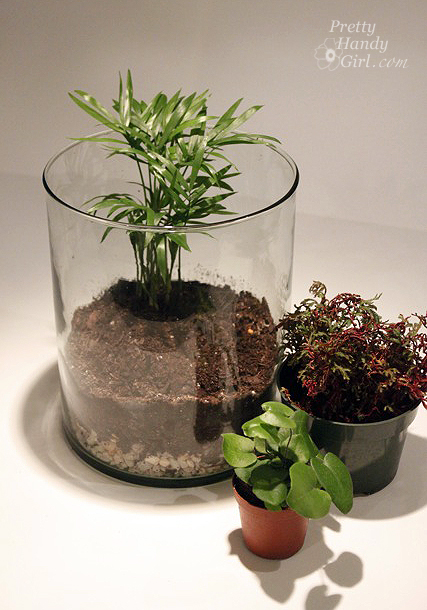
  • Terrarium plants (small shade loving plants)
  • Potting shovel
  • Water

1. Clean your glass container with soap and water and dry it.

2. Add a layer of gravel or decorative pebbles to the bottom of your glass container.


3. Add a layer of potting soil. No need to level it.


4. Collect your plants and think through the plant placement in your head.


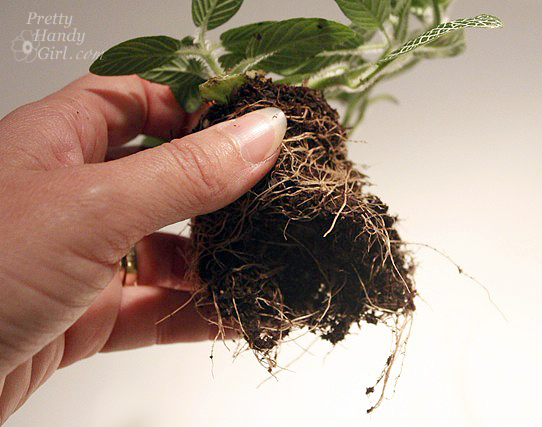
5. Gently remove a plant from the pot.

If it is root bound (all the roots are wound tightly around the bottom) gently tease some of the roots free and break apart the roots at the bottom of the plant.


6. Insert your plants into the soil.

Put taller plants at the back and the shorter ones in the front so you can see all the plants.


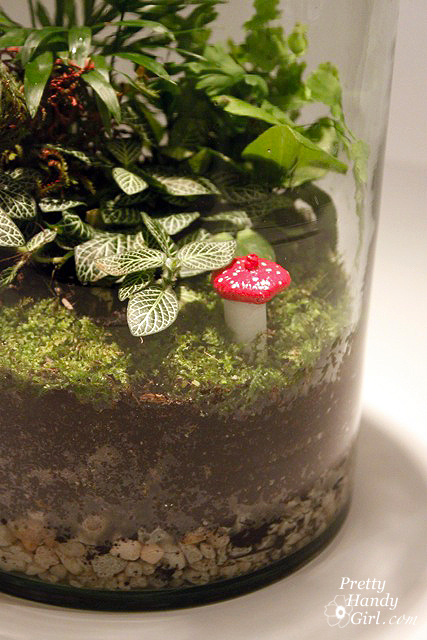
7. Cover the soil with moss. You can cut or tear pieces to fit flush with the edge of the terrarium.

8. Fill your terrarium and let the water soak in. The water should reach the top of the rocks. Check the water level a few times a week and be sure to refill when the water gets low. If your terrarium has a lid you won’t have to water as often as a lidless variety.


9. Add any decorative embellishments like these faux mushrooms (tutorial HERE)…

…or my sons’ favorite, a little plastic dinosaur!

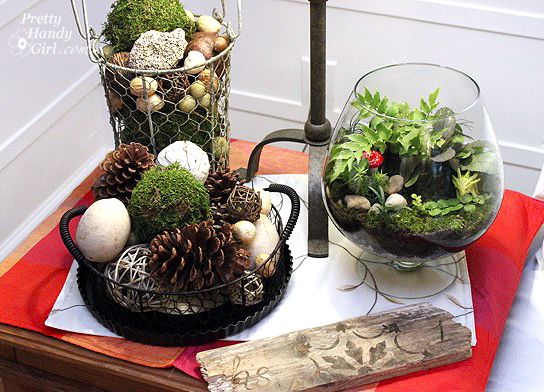
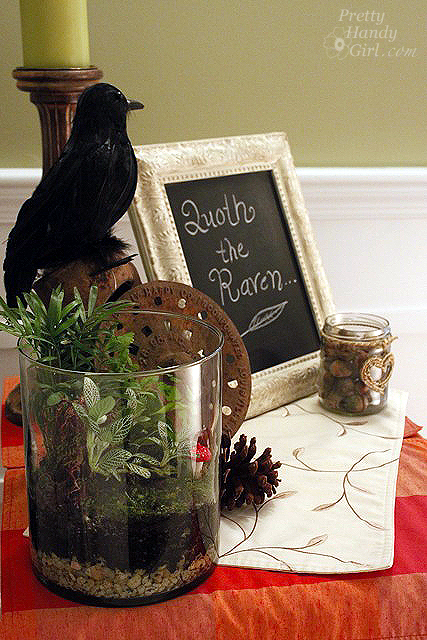
Terrariums make the perfect year round accessory. I have them prominently featured in my living room along with some other natural elements.

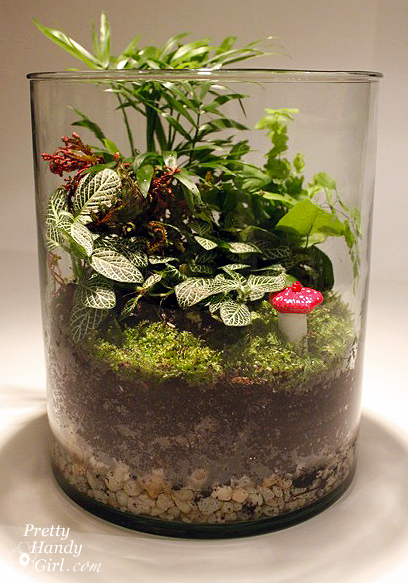
This version was made entirely with plants that I have growing in my shade bed. Small ferns, arugula and creeping ground covers. Plus, I added a few round pebbles for visual interest.

I might pick up a tiny person or two at a hobby shop next time I’m near one. Anyone seen any that look like the characters in “Land of the Lost” heh, heh, heh!


In the meantime, I’m loving my cost effective terrarium. Yes, terrarium singular, because the cylinder terrarium was a gift for our friends who dog sat for us.


I almost wouldn’t be surprised to see a fairy take up residence in one.

I’ve been busy working on some more projects to show you, so hang tight and check back soon! 😉 In the meantime, I hope you have a fabulous weekend and are enjoying Fall!


Are you as nutso about paint chip projects as I am? I’m semi-worried that I might get arrested next time I’m pulling samples at my local paint department. Is there a law against taking too many?* Okay, so let’s just say that I have collected many samples over the years while contemplating room colors (which is true!)

*Paint chips may be free, but please use consideration when taking paint chips. Try not to take more than 2-3 of each color and definitely don’t take the last of a color. It might be a good idea to ask permission from the paint store employee if you need to take more than a dozen.

But, what do you do with all those left over paint chips once you have decided on your color? It seems a shame to throw them away, doesn’t it.

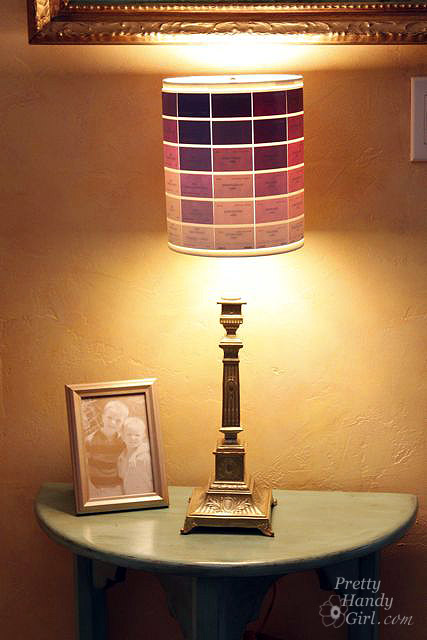
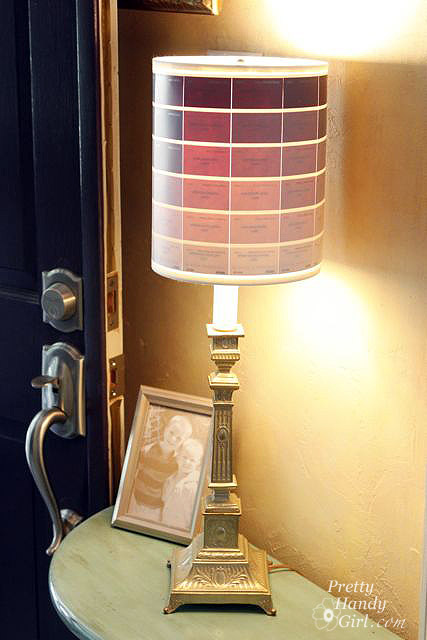
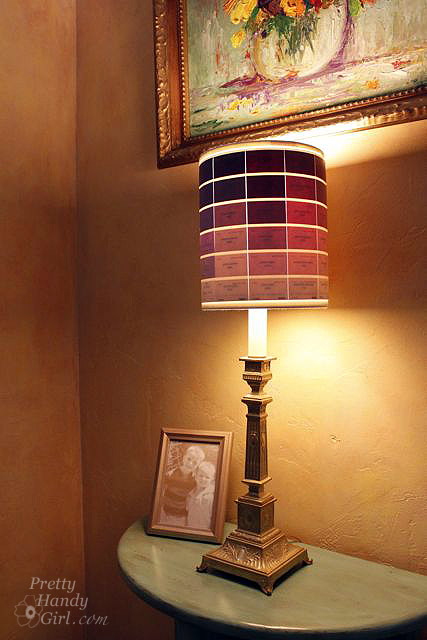
Why not use them to make a lamp shade?

I actually saw this lamp shade on JossandMain.com last week and thought, “Ooo Ooo Oooo! This gives me an idea of what to make with all those paint chips!”

Materials:


  • Lamp shade (best if it isn’t tapered)
  • Paint chips
  • Clear packing tape
  • White paper tape (low stick)
  • X-acto knife
  • Cutting surface
  • Metal ruler
  • Hot glue gun and glue sticks

Tutorial:

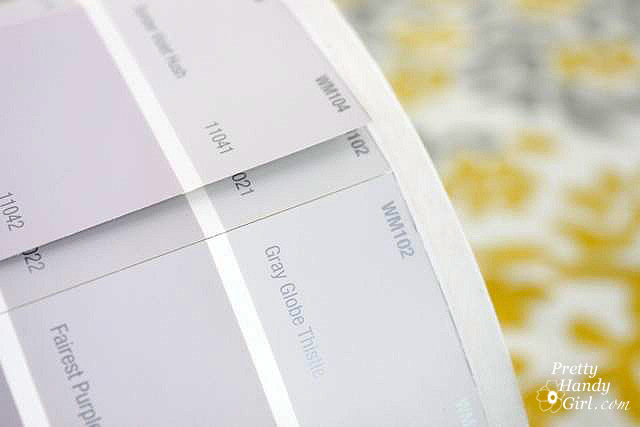
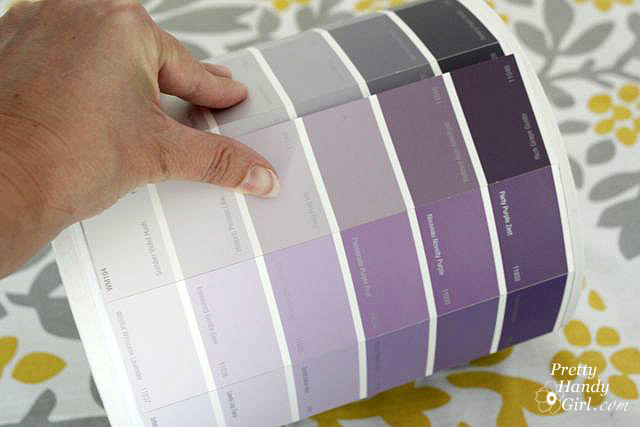
Start by laying out your paint chips side-by-side and organize them any way you like.

To judge how many strips you need, rest the seam of your lamp shade on the end of the paint chips and roll it until you reach the seam again. If you still have paint chips under your shade, then you have enough! I had one small gap leftover, so I added two of the same colored chips together so the small strip wouldn’t be as noticeable.

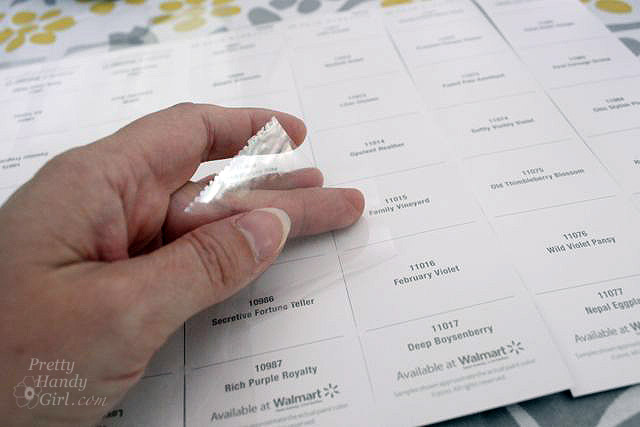
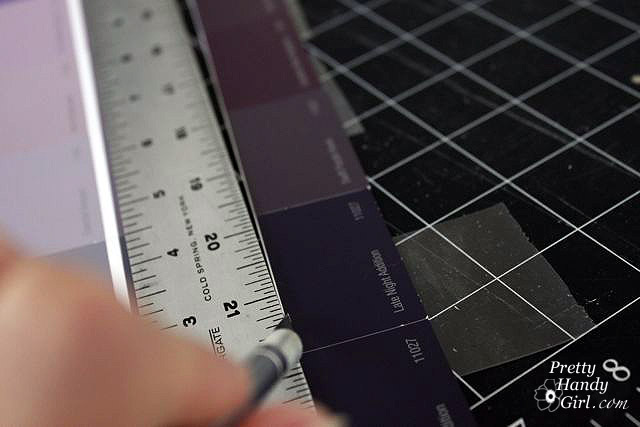
Butt the paint chip strips tightly together. Put paper tape on top of the chips to hold them together.

Gently turn them over and tape the seams with clear packing tape.

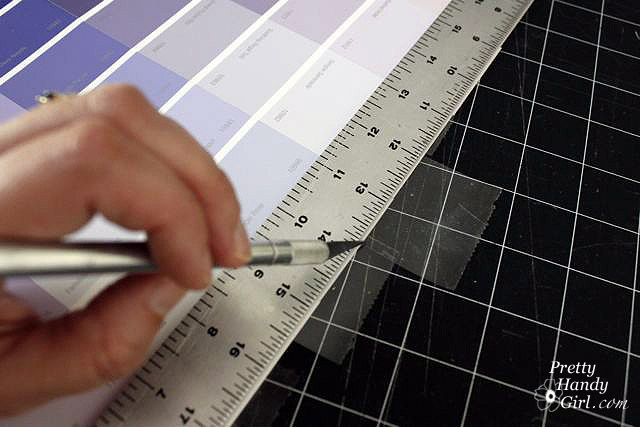
Once all the strips have been taped together, trim off the excess tape.

Measure the height of your lampshade and trim your paint chips to the same height.

Test fit your paint chip roll.

Use your hot glue gun to run a line of glue on the seam of your lamp shade. Glue the end of the paint chips to the shade.

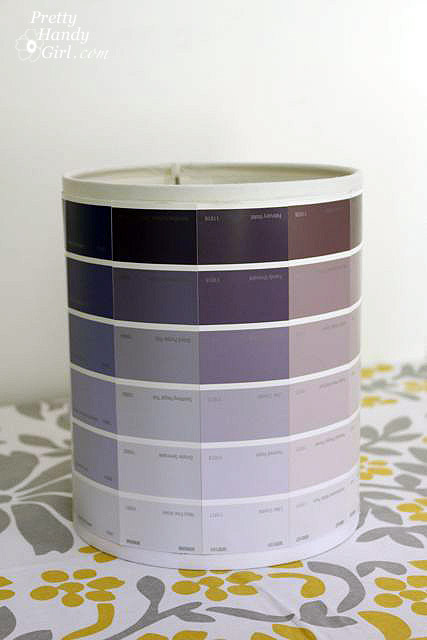
Run a line of hot glue on the top and bottom edges of the lampshade and roll the paint chips around the shade. Secure the end by hot gluing it to the shade.

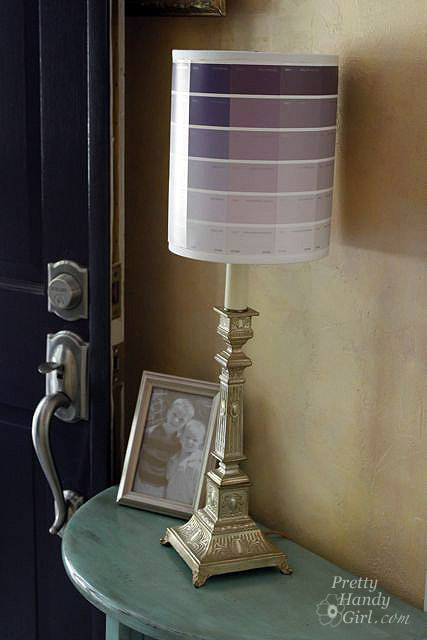
And that is it! A super easy and very colorful home decor project.

I think it is beautiful whether the light is off…

…or on.

When choosing the paint swatches you wish to use, try pulling colors from a painting or use colors that are compliments to your wall color.

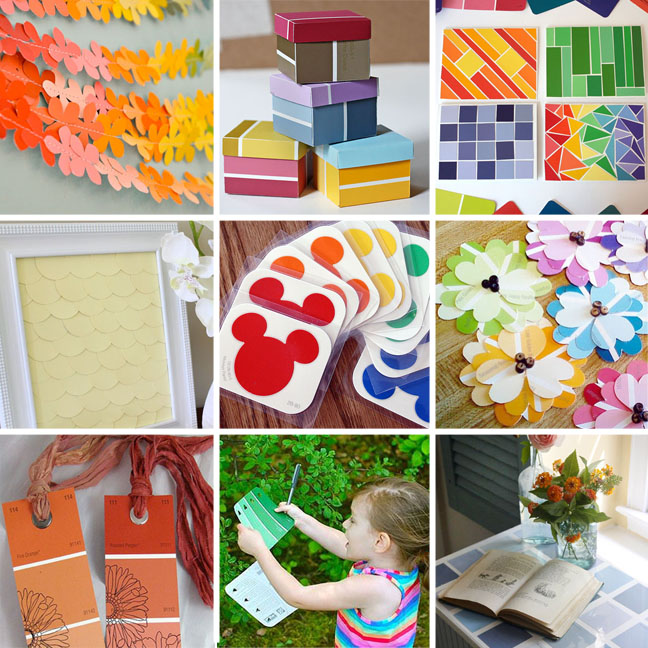
What?! You still want more paint chip home décor ideas?! How about a whole round up of them? Go ahead and scoot your index finger on over to Parentables for 11 Paint Chip Projects to see 9 more amazing paint chip projects:

I guarantee, you’ll never pass through the paint department without grabbing a few paint chips again!

I have amassed quite a collection of “project” furniture and objects waiting for a future date with my creative magic sessions. I worry that some of this behavior is bordering on packratness (I don’t think that is a word, at least my spell check says it isn’t. But, you get my drift, right?!) So, when a Wagner rep contacted me about trying one of their paint sprayers, I couldn’t reply “YES!” fast enough. I had visions of setting up all those projects and spraying them down in a line-up fashion. But, I reined in my “glass half-overflowing” mentality and decided to tackle one project at a time. Good thing too, because although the Wagner Power Painter Plus with EZ Tilt (affiliate link) did spray at lightning fast speed, there were a few drawbacks.

But, I don’t want to get ahead of myself. I still want to give you a bonafide tutorial on how to fix, prep, paint and finish a wobbly yard sale find for yourself.


Materials:

(I’ve included affiliate links for your convenience. I earn a small percentage from a purchase using these links. There is no additional cost to you. You can read more about affiliate links here.)

*These items are purely optional. You don’t NEED them, but they help.

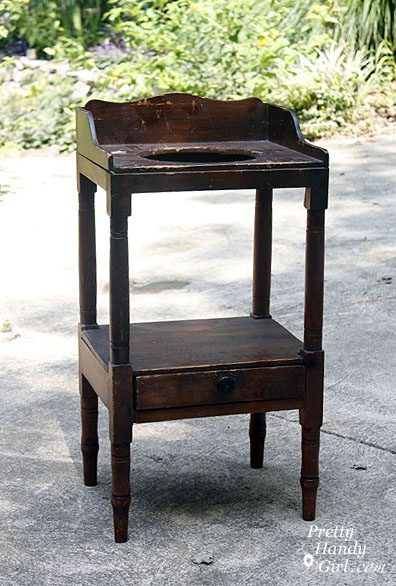
This wash stand had a $5 price tag on it. But, my neighbor gave it to me for $3. Is that robbery to talk someone into less than $5 for this antique?! In self defense, the stand was in pretty poor shape. It was VERY wobbly and had some big scratches on it. Can you forgive me?

Here is what you do when you find yourself as the new owner of a “this really should be trashed” purchase. Take it apart and rebuild it from the ground up. Having done this before with Daisy the Discarded Chair, I was prepared to tear this wash stand down to the ground. But, luckily it had some better joints than I had anticipated. So, I basically pulled apart anything that was not tightly joined.

The shelf over the drawer came off super easy.

As did a few joints.

I wiped the whole wash stand down with a wet rag.

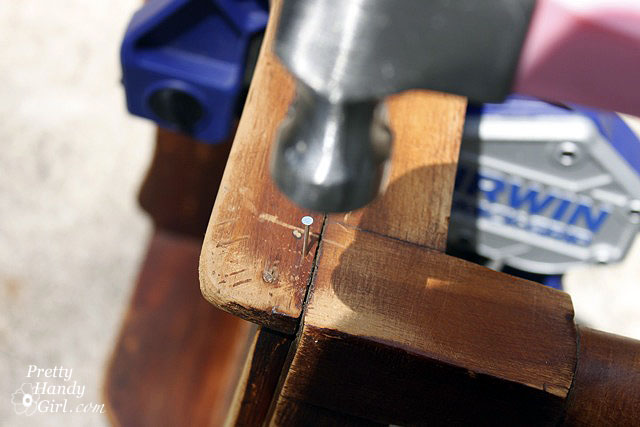
Then, the side of the stand got some new glue and a few finish nails.

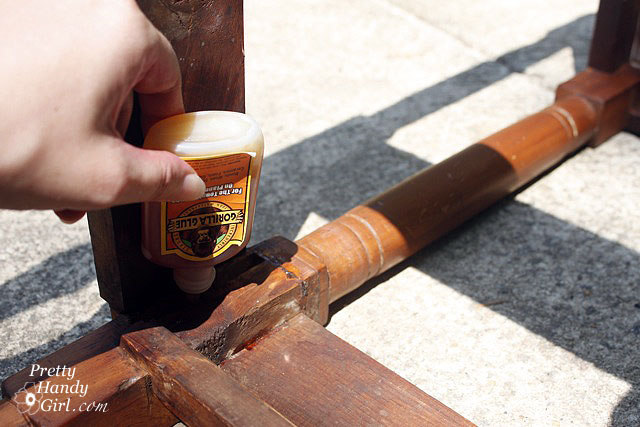
The joints got some Gorilla Glue and were set back together. And, I added a thin bead of glue and some finish nails to re-secure the shelf.

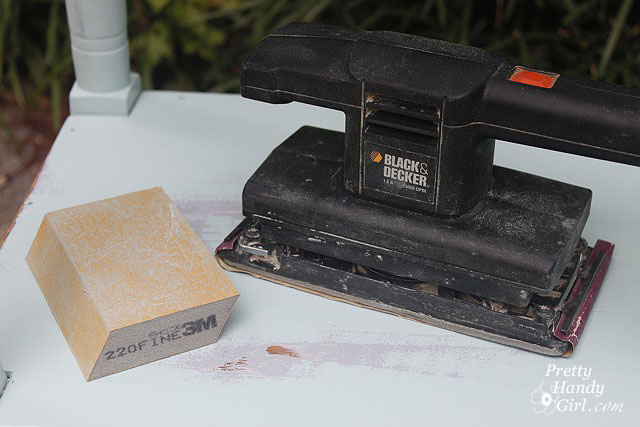
Next I sanded down the whole piece of furniture with these two 3M sanding blocks. I like to call them Tweedle Dee and Tweedle Dum because they are super easy to use. Even an idiot can’t screw up.

They work great for around spindly legs because they can bend and flex (I wish I could bend and flex like that!)

After wiping off all the sawdust, my wash stand looked like this:

Almost too pretty to paint, but it had some serious gouges, so I took a picture and said goodbye to the beautiful wood.

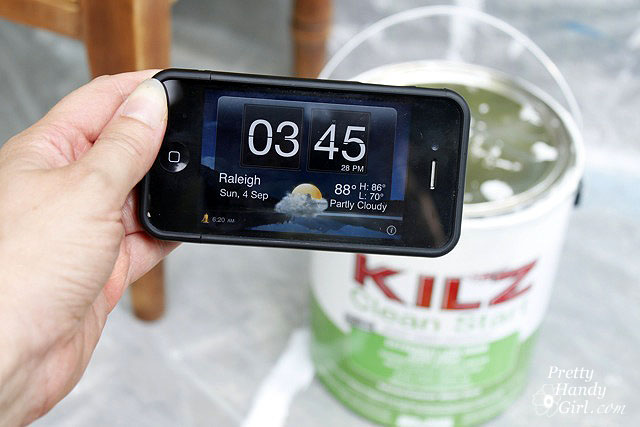
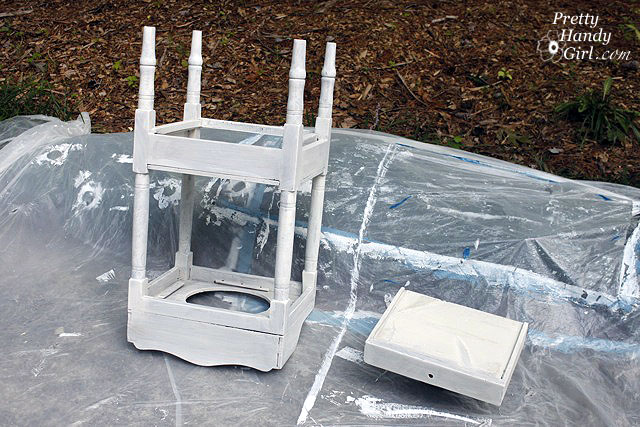
Here is where the race began. I decided to time myself painting on the primer with a brush. Then time myself using the sprayer for the first coat of paint.

Start your engine….paint brush and KILZ Clean Start Primer…GO!


After 30 minutes I had primed the entire stand from top to bottom.

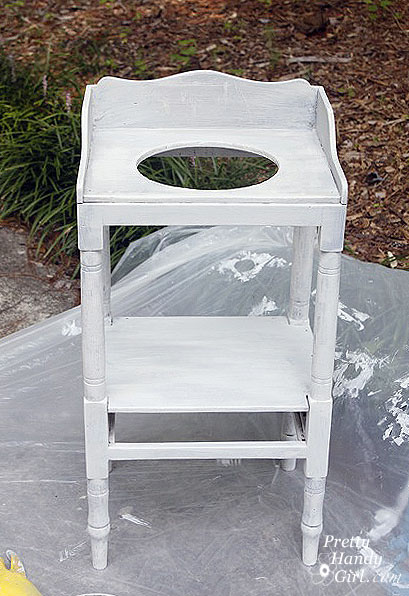
After the primer dried, I gave the stand a quick, light sanding with a 220 grit sanding block and wiped it down with a damp rag.

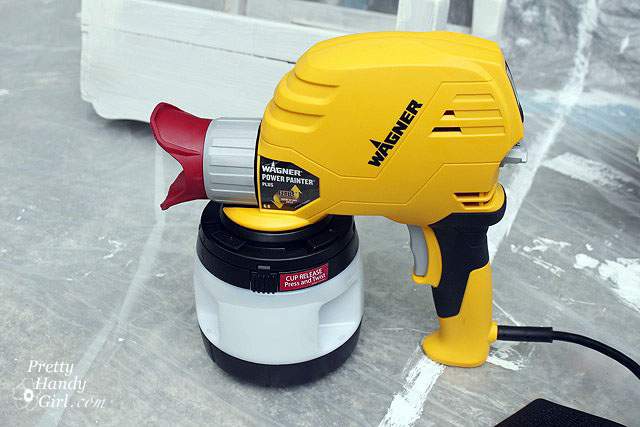
I set up the sprayer, read all the directions (very important!) Then I filled the quart size reservoir and attached it to the sprayer. The Wagner Power Painter Plus doesn’t require a compressor, just a good old fashioned extension cord plugged into your household outlet.

Start your engine…Wagner Power Painter Plus…GO!

VROOOOOOM! The sprayer let out the loudest and most obnoxious noise I had ever heard (Note to self to wear ear protection next time.) I thought the sprayer was going to self destruct, so I let go of the trigger. Then I pulled it again and the noise returned, only to abate after a few seconds once the paint started to come through the nozzle. Phew, that scared me.

I breezed through painting the entire wash stand from top to bottom. I started with it upside down and quickly flipped it while it was still wet (I left a finger print underneath, but no one will know about that unless you squeal.)

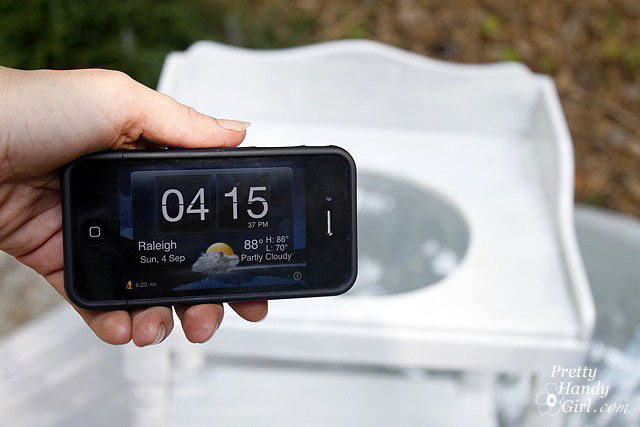
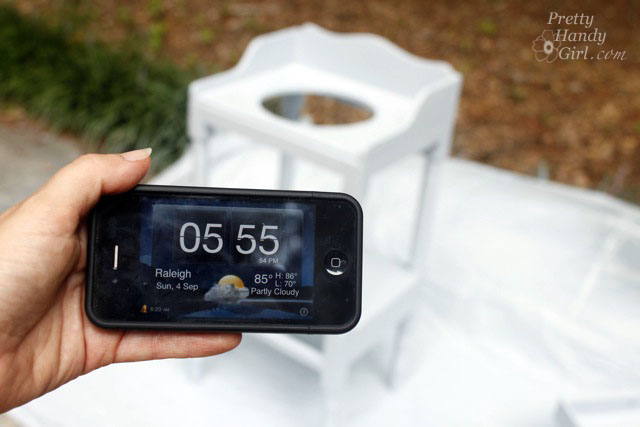
And I was done. Then I looked at my timer and WHAT?!!! 5 MINUTES! Holy Cannoli! I had no idea a sprayer could shave that much time off a paint job.

I left the wash stand outside, while I took apart the paint sprayer.

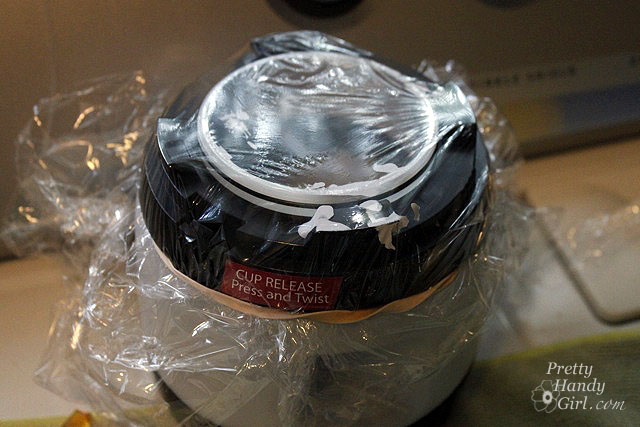
To avoid emptying the paint canister, I covered the container with saran wrap and a rubber band.


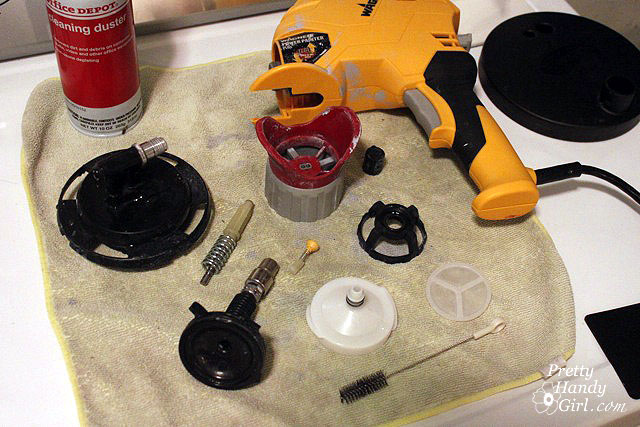
Then I took apart the ENTIRE sprayer and cleaned out all the parts. It is soooo important to clean the sprayer thoroughly or you risk paint drying in your machine and ruining it. This is a look at the sprayer disassembled.

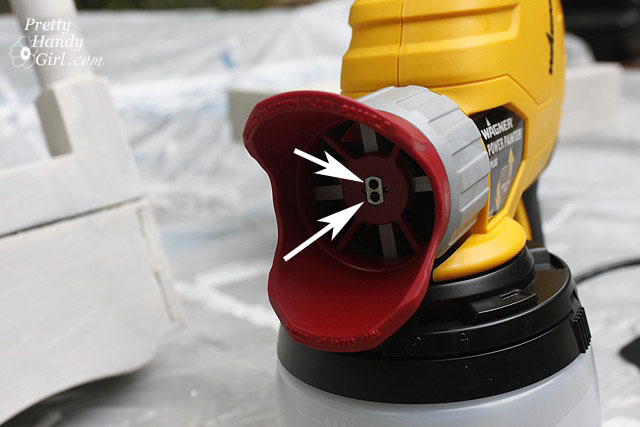
It is paramount to clean the tiny dual spray tips on the machine. They are small slits that can clog easily if the paint is allowed to dry in them.

After the wash stand had dried. I put the sprayer back together and screwed the paint container back onto the gun.

I was all pumped and excited to be done in 5 minutes! With dusk still 30 minutes away, I had no fear. BIG MISTAKE!

What was to ensue was a stressful 45 minutes of paint globbing, paint sputtering, my cursing, and frantic cleaning of the sprayer again. I finished spraying, but I had to use a different top coat color because I ran out of the first paint color. (Which ended up being one of those happy mistakes. You’ll see.)

I wiped off the big globs of paint and decided to give those areas a little “extra” distress in the morning.

After stepping back from the project, doing some research and having a twitter conversation with Shaunna (the furniture painting guru), here is what I concluded from my disasterouos 2nd attempt:

  1. The paint sprayer MUST have a full paint cup in order to work properly. When the reservoir gets down to less than 1/4 full any air that gets into the paint suction tube will cause the sprayer to sputter and discharge big globs of paint, instead of a nice even spray.
  2. The sprayer dispenses an INSANE amount of paint in 5 minutes and when it runs low #1 happens. I used a half gallon of paint on the first coat of paint on this small wash stand. Whereas, I normally would have used maybe half a quart to brush on two coats total. The drop cloth was so heavy with paint when I cleaned up, that I realized the majority of the paint was wasted in overspray.
  3. The Plus does not have a low paint level indicator. Therefore, it is very difficult to determine when you are getting low on paint until the sprayer starts to sputter and shoot out globs of paint onto your project.
  4. In the same vein, the paint canister only holds a quart of paint, and 1/4 of that isn’t useable unless you like Jackson Pollock style painting.

The next morning, I took out my power sander and gave the sink some character by distressing it.


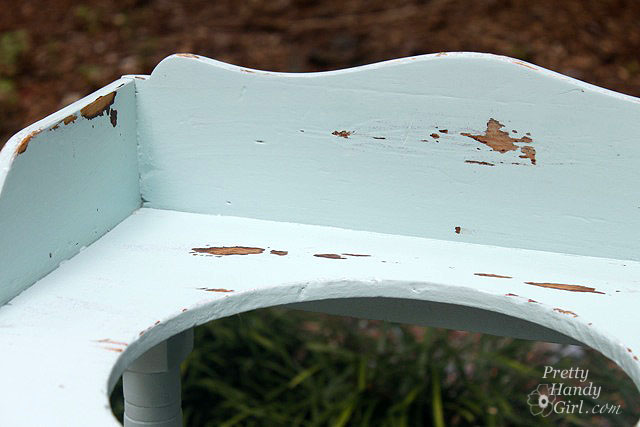
This is where the happy accident occured. Because I had to use an aqua blue as the top coat on my sink, you could see the blue gray color peeking out! Which I think makes it look sweet, shabby and old.

Once I was happy with the amount of distressing, I sanded any chipping paint and rough spots with the 220 grit sanding block. Then, I cleaned off the wash stand with a damp rag. To protect the sink, I used Minwax wipe-on Polyurethane. I like the wipe-on Poly for speed. But, it doesn’t leave as thick a coat as the traditionally brush on kind. So, if you really want to protect a piece of furniture, use the brush on kind instead.

I added a cute little crystal cheap acrylic knob to the drawer.

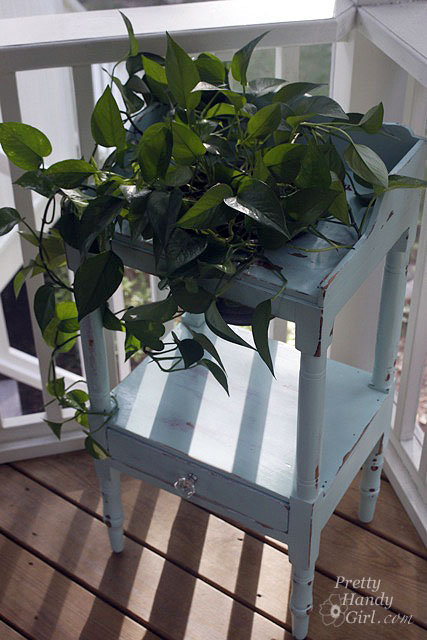
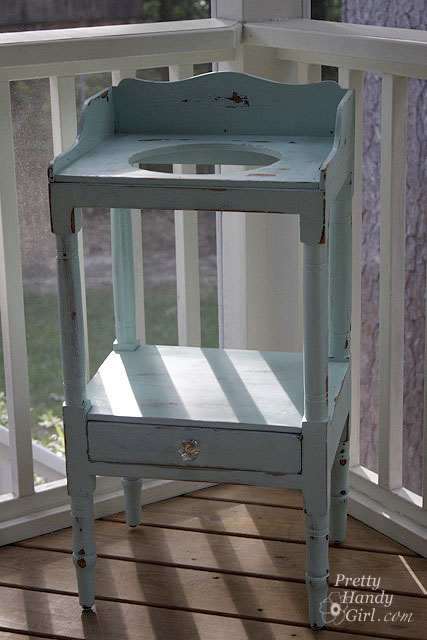
And my new/old dry sink looks right at home in the corner of my porch! Although, it needed something…hmmmm….

…how about a plant! I dropped in a plastic pot with NO holes in the bottom. I filled the bottom 1/4 with rocks for drainage. And my pothos plant. I used to have a chippy pedestal that sat there, but sadly I had to get rid of it. I’ll fill you in on the details next week. It is a sad story ;-(.

Here is my summary of working with the Wagner Power Painter Plus model:

  • Pros – Saves time. $100 price tag. No compressor needed.
  • Cons – Small Paint Cup, No Flow Speed Selector, No Low Paint Level Indicator, Lots of overspray and wasted paint.

I will definitely try the sprayer again. When I do I might add Floetrol to my paint, which is supposed to help your paint even out and give you a smoother finish. (Especially if it globs on you.)

  • Wagner Power Painter Max has a two speed selector AND a paint level indicator. This model runs under $100. Have a great weekend and see you next week with some more DIY goodies.

If you are just joining me and missed the tutorial for building board and batten moulding, you can view that tutorial HERE. Today I want to show you how to hide the holes, seams and how to paint the board and batten moulding. Plus, how I paint the wall so it looks more like wood and not like drywall.

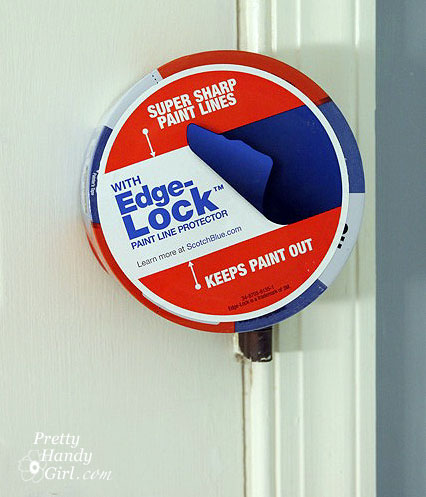
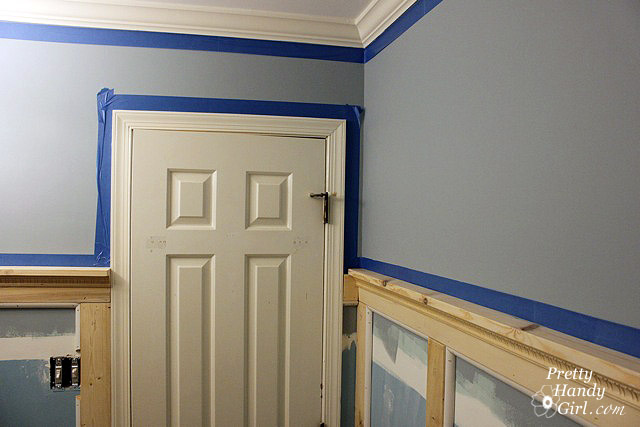
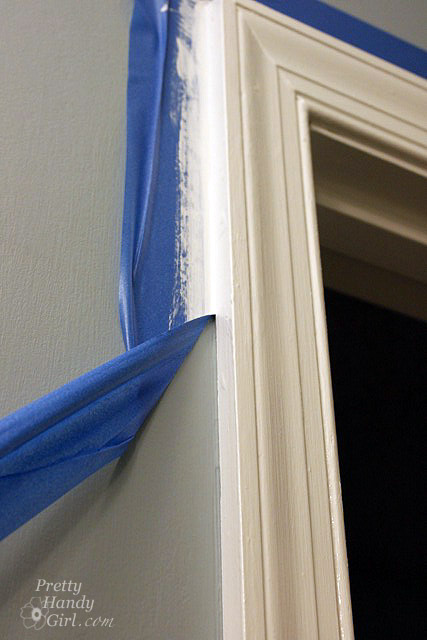
Start by taping off the moulding. I used ScotchBlue painter’s tape with edge lock technology because 3M just sent me these rolls to try out.

If you are re-painting the crown moulding and the door, tape them off as well.

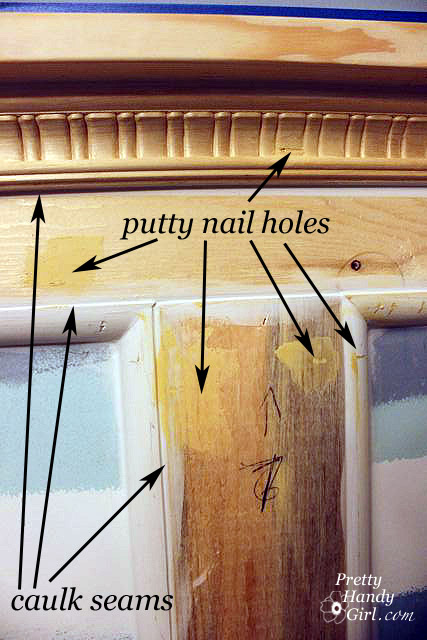
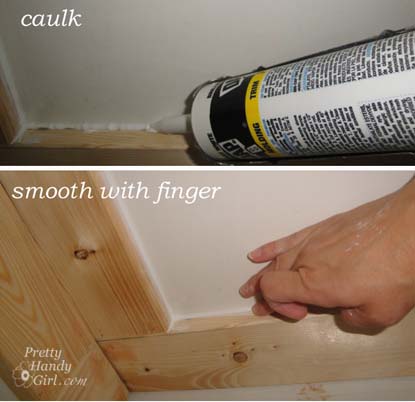
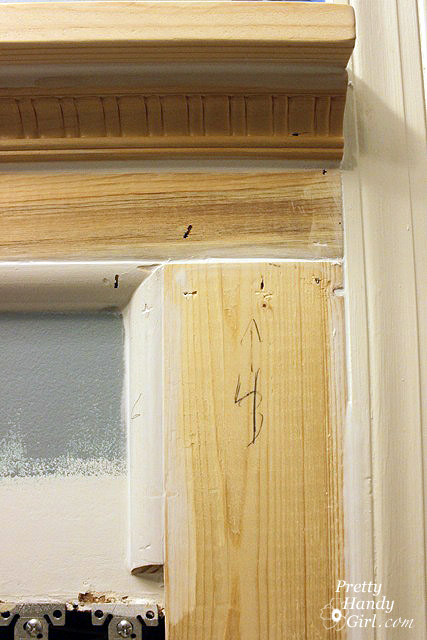
Usually I fill the nail holes with wood putty. Then I fill seams with caulk. To view a tutorial on filling holes with wood putty, click HERE.

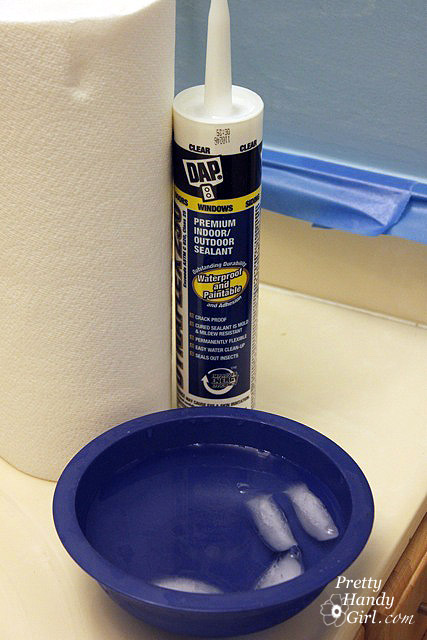
I actually just read about a neat tip on Diane’s blog (who also just added board and batten moulding in her bathroom.)  She uses ice cubes and cold water for working with caulk. I’ve never tried this, but am happy to report that it really helps smooth the caulk and keeps it from sticking to your fingers.


Which caused me to amend the Pretty Handy Girl’s tried-and-true caulking method:

  1. Squeeze out your bead of caulk, using a caulk gun.
  2. Dip finger in the ice cold water.
  3. Run your finger along the bead to smooth it.

Seal every seam in your moulding and then let it dry.

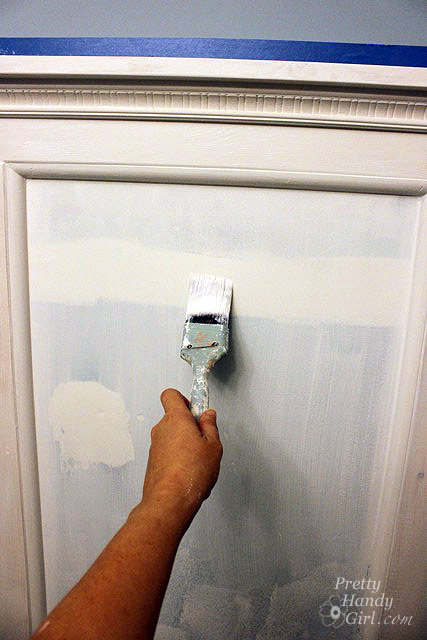
Once all the putty and caulk has dried, get the primer out. Paint primer on all the wood moulding using a paint brush. In the center (drywall areas), you can roll on the primer.

But, before the primer dries use the brush to spread it in long vertical strokes.

After the primer has dried, go ahead and add one coat of paint. Follow the same direction of strokes with the brush as you did when priming.

I made a video to show you the technique I used to give the wall a wood grain texture. Please forgive the painting clothes and unwashed hair! I haven’t hired a hair, makeup and costume stylist yet.

I have yet to be able to get away with only one coat of paint. If you look close you can still see some of the blue wall color showing through.

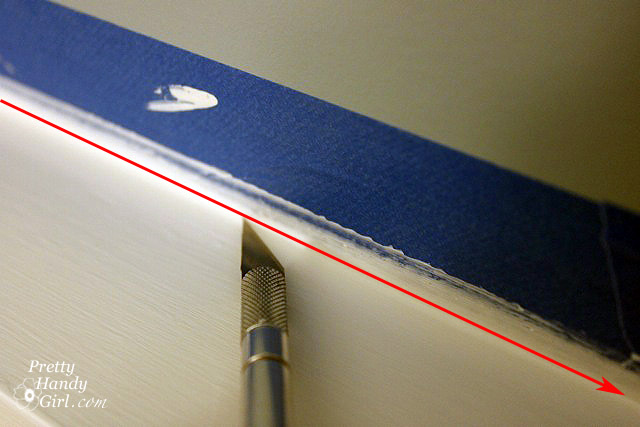
After the paint has dried, it is time to remove the tape. Anywhere that you caulked between the wood and the tape, you need to score the caulk to give it a clean edge when you remove the tape.

Remove the tape and looky at that clean edge! I’ve used ScotchBlue painter’s tape before, but I can honestly tell you that the new Edge lock technology is a big improvement. As long as you press the edges down firmly there is hardly any places where paint seeped underneath. The only places seepage occurred was where there was a dimple or imperfection in the wall.

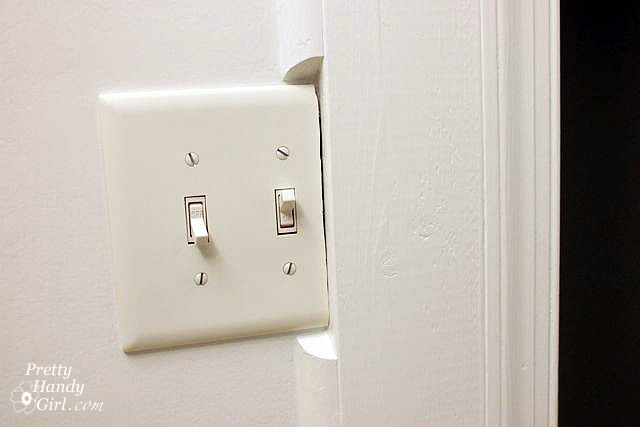
One thing I didn’t caulk was the light switch plate which I had to cut to fit next to the batten. I will probably go back and add a little caulk between the switch plate and the moulding.


I hope you learned something today. Coming up next, the bathroom reveal!

Board & Batten moulding is very popular right now. And why not? It is easy to work with and looks great (after it is painted)! If you remember, I used board and batten in my  my son’s closet turned reading nook last year.

I decided to create a similar look in the boys’ bathroom. Only this time I wanted to round the edges of the battens for more visual interest. I’m warning you now, this tutorial is a bit photo intensive. But, how else would I give you a step-by-step tutorial?

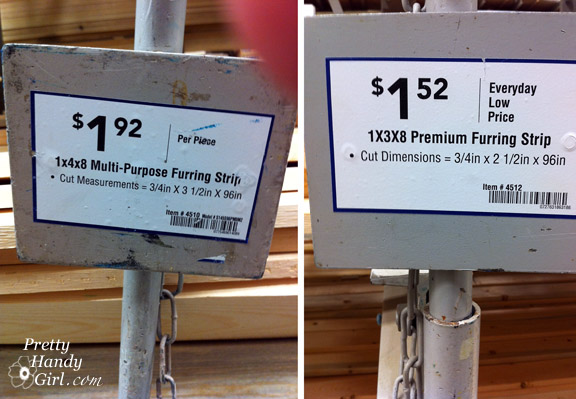
I started by purchasing my lumber at Lowe’s. Did you know you can buy cheap furring strips for your battens? It will save you money. Especially if you don’t mind sifting through the stacks to find the straighter boards and sanding the face of your boards after cutting them. I bought 1x4x8 boards for the battens. And 1x3x8 boards for the upper ledge. I also purchased quarter round moulding and decorative moulding for underneath the upper ledge.
Removing Baseboard Tiles:

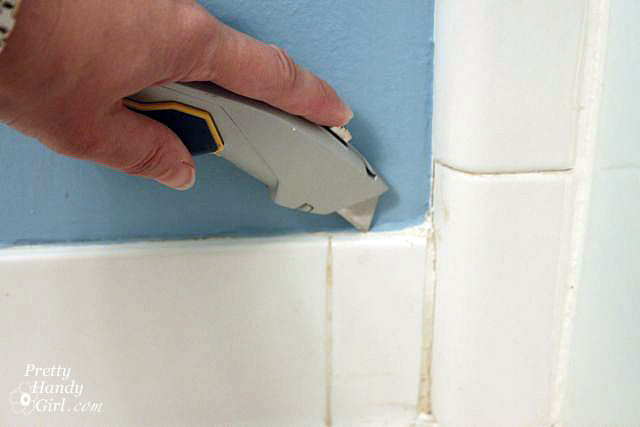
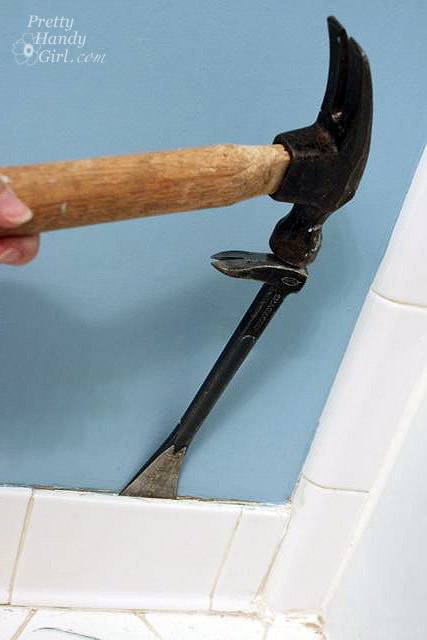
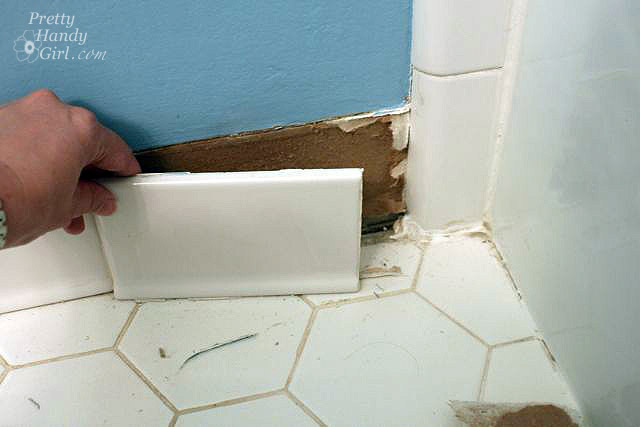
The bathroom had baseboard tiles that had to be removed. I grabbed a few tools and made quick work of removing them. The ear muffs and safety glasses were definitely a must!

Score the edges of the tile with a utility knife.
Hammer a flat pry bar behind the tiles.
Remove each tile one at a time.

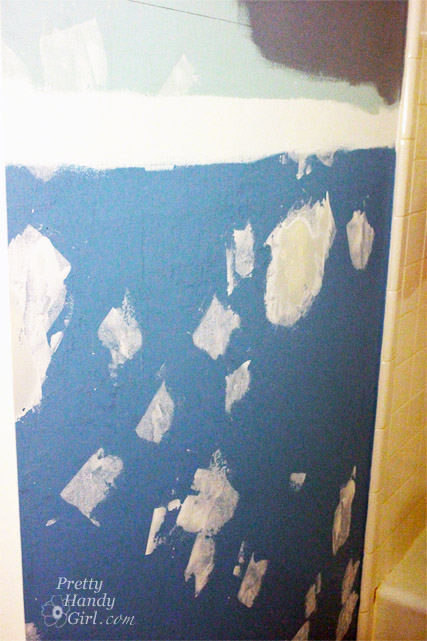
Take some time to patch any holes that are in your wall. You can view a tutorial on patching drywall HERE. I needed my walls to be as smooth as possible since I wasn’t going to add board behind the battens.
Installing Board and Batten Moulding:

Mark the height where you want the top of your moulding to be. I used 5′ as the height, but then ended up lining up the bottom of my boards on the 5′ mark. So, for the 8′ ceiling room, the top of my moulding was at 65″. Use a level mark as a guide line across the width of your room.
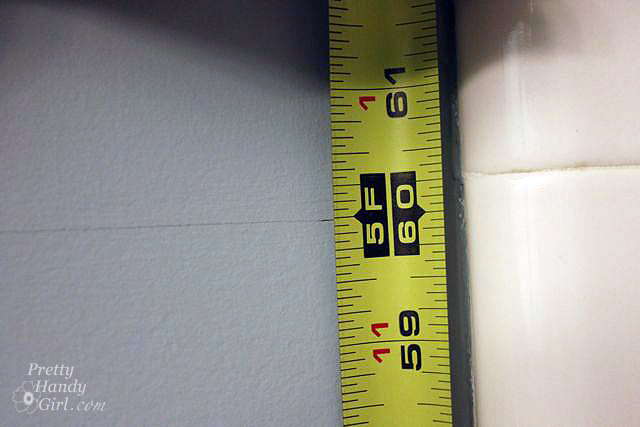
Next measure the widths of the sections that your horizontal boards will be attached to.

Cut your boards to size.
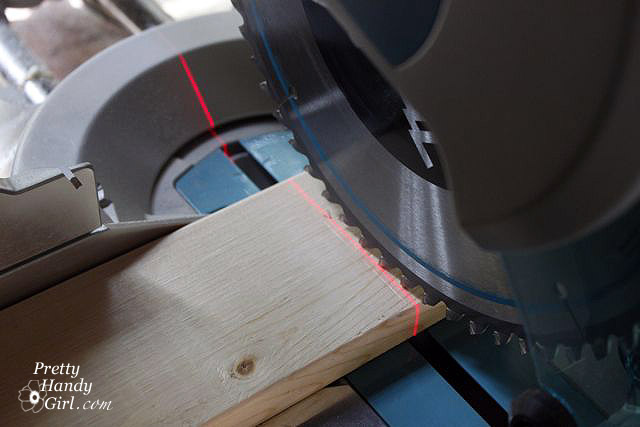
Test fit your boards.

I cut the board that butted up to my mirror at a 30 degree bevel.
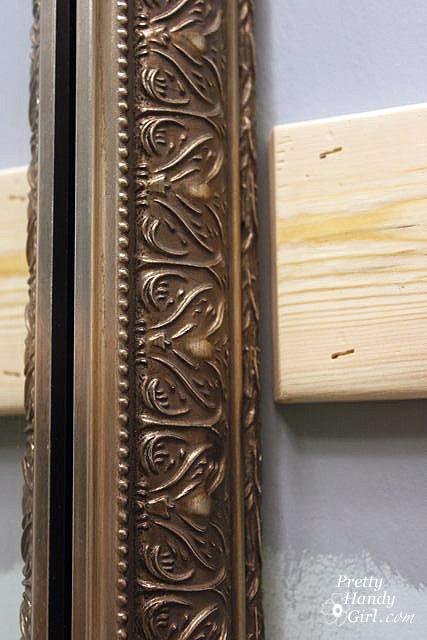
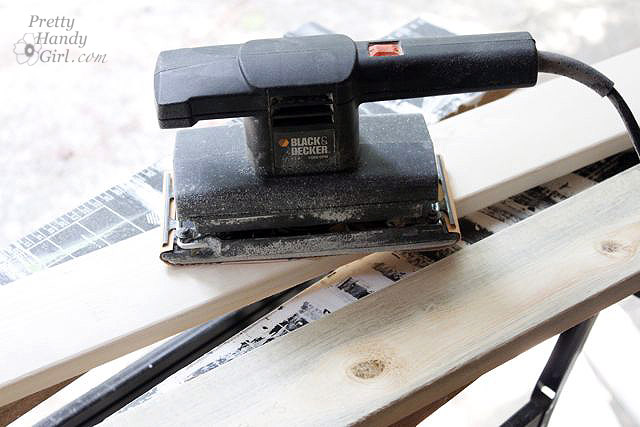
Once you have cut all the boards and they fit. Sand down the face and edges.
A nail gun and compressor are not a necessity, but they do make the job a lot easier! Otherwise, you will be doing a lot of hammering and nailing while holding boards in place.
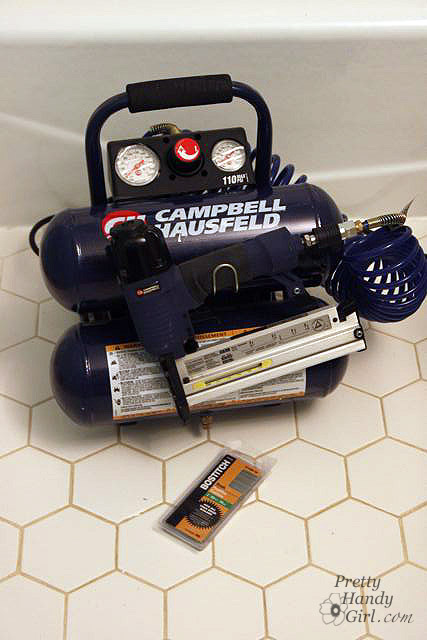
I used the compressor at 110psi, which worked well for the 1″ pine boards. I used 2″ nails for the boards and battens and 1.5″ nails for the quarter round.

Be sure to wear your safety gear. The compressor is LOUD and no need to risk your eyesight. I know, you are jealous of how attractive I look in my safety gear (not!)

For the horizontal top boards, I added some construction adhesive. This is not 100% necessary unless you have monkeys for children. And I do, so the extra adhesive seemed like a good idea.
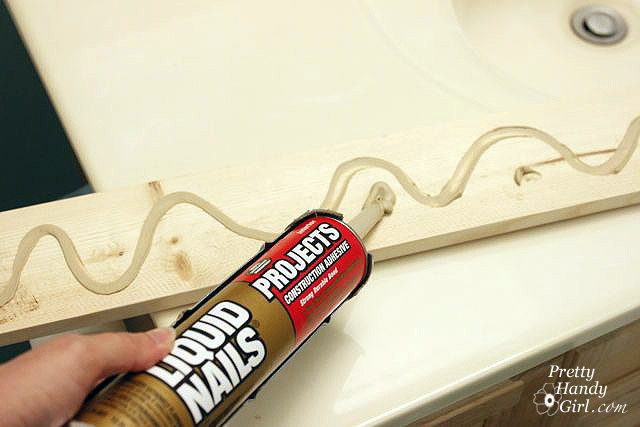
Press the board onto the wall.

Shoot several 2″ nails into the moulding to hold it in place. Be sure to angle your nails to make it more secure.
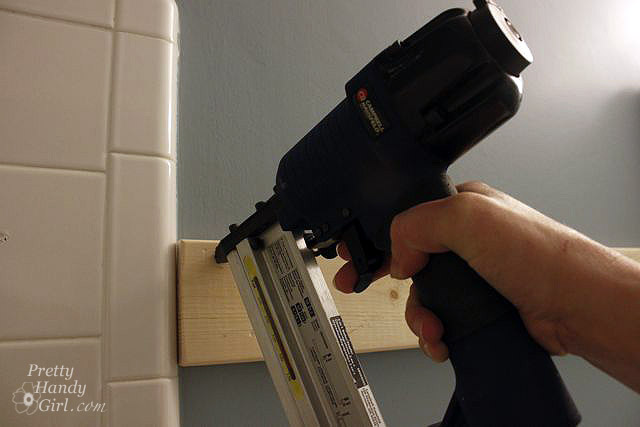
That board shouldn’t go anywhere now!


Repeat the same steps for the baseboard boards (minus the construction adhesive.)

Next, measure the vertical distance between the top and baseboard battens. Be sure to measure at the exact location that a vertical batten will go. I’m sure your heights will vary.

Cut all your vertical boards and sand them down.

When you are figuring out the spacing, be sure to take into account if you will be adding a towel bar or other fixtures to the wall. My old towel bar was 24″ wide, so I made sure to space the battens to accommodate the towel bar.
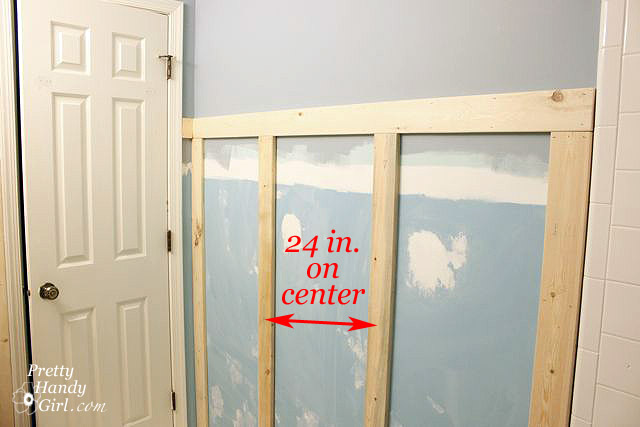
While installing the battens you may run into a few inconveniences. Like, a toilet or something that can’t be moved. To deal with the toilet, I cut a piece of cardstock the same width as my batten. Then I slid it behind the toilet and scribed around the edge of the toilet.
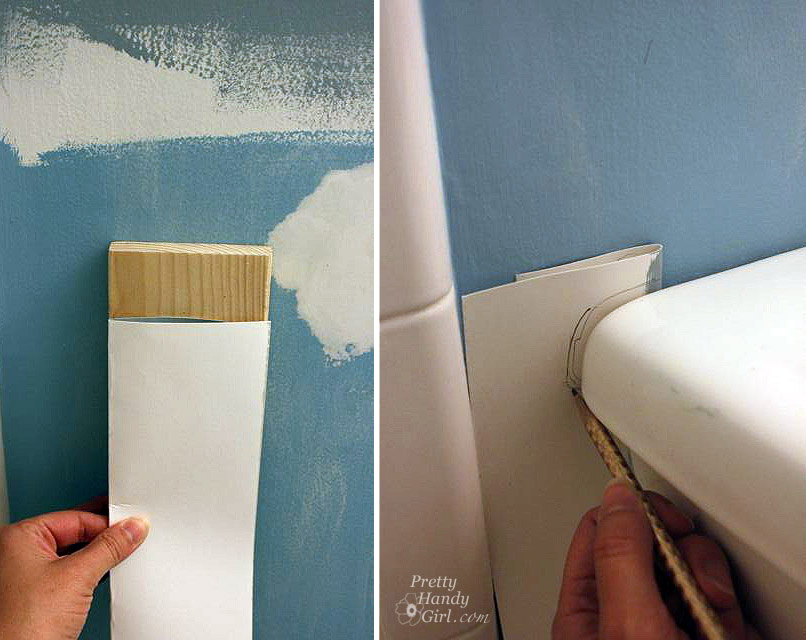
Then I cut along my line and transferred the line to my batten.
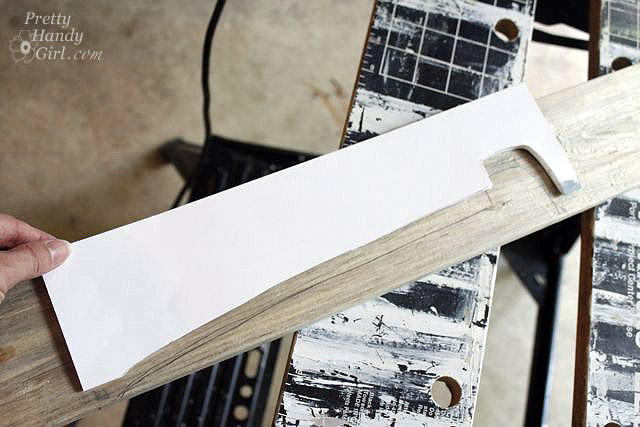


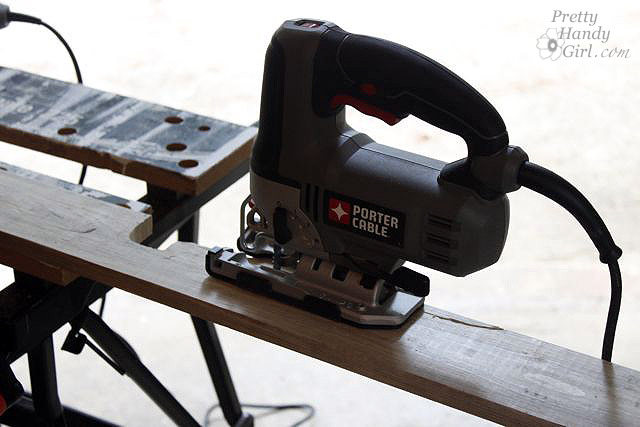
Use a jigsaw to cut out the scribed profile (I tried to use my Dremel Trio to cut out the small section, but it failed miserably. I think the Trio is best used for thin stock like the back of a bookcase.)

Then you can install your batten around the “inconvenient” object.
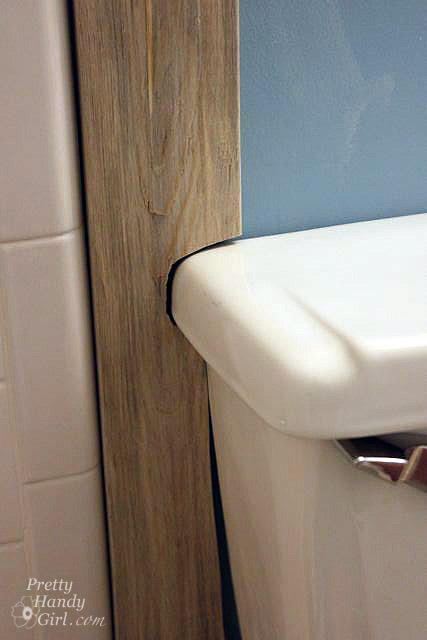
By now your room should resemble something like this:
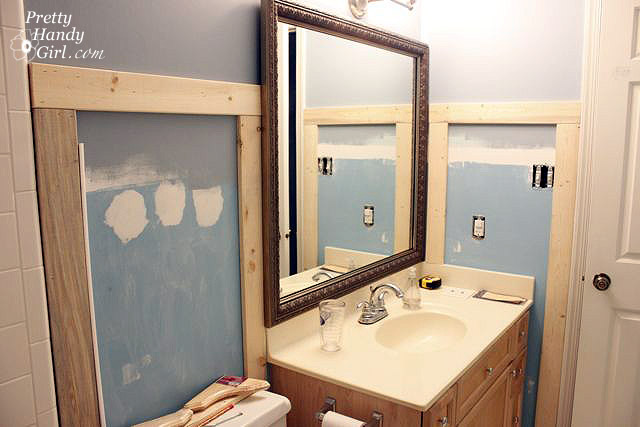
Installing Quarter Round Moulding:

Now comes the step that requires a little more precision. Cutting the quarter round moulding can be a little tricky, but don’t fear I know you can handle it. Remember the old carpenter’s adage, “Measure twice, cut once.”
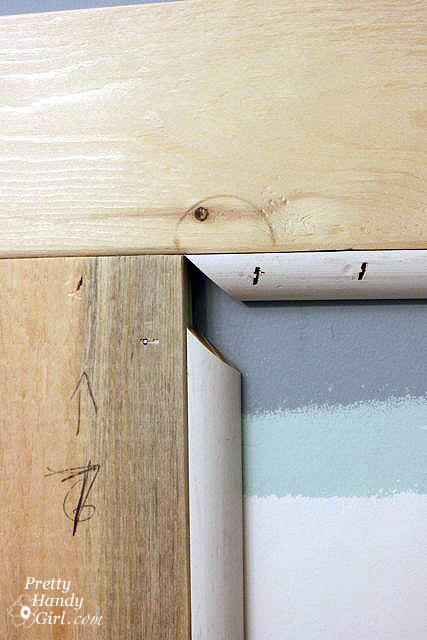
Well, I admit it, I forgot! Ugh. Even I can make mistakes, so don’t be afraid to mess up once in a while. We all learn from our mistakes:
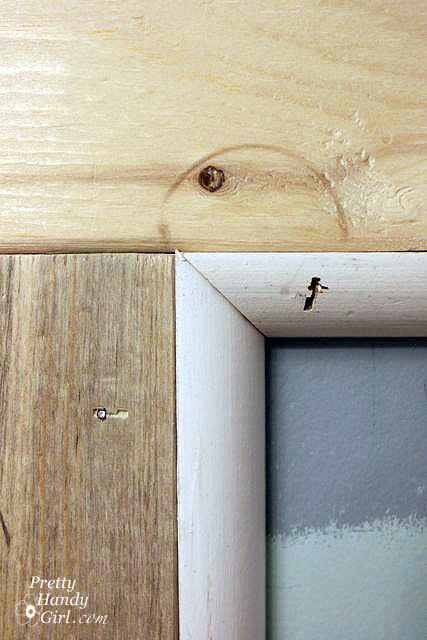
You will need to meaure the width and heights of the rectangle between your battens. Be precise for better accuracy and less caulk later!

Set your miter saw at a 45 degree angle.
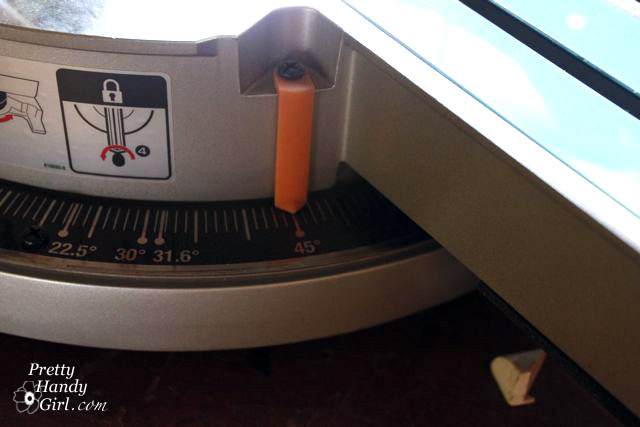


This is what it should look like. The saw should be straight up and down at a 90 degree angle from the saw stand (in other words, no bevel cut).
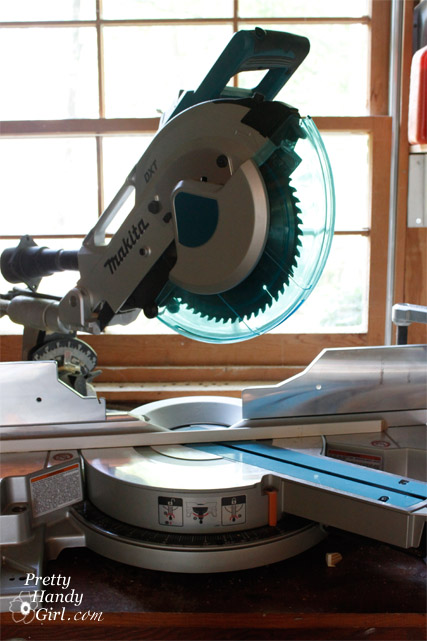


Cut your quarter round so that the longest point on the moulding equals the measurement you took from the rectangle. You may have to face the “round” edge in towards the fence for some cuts. And it might take a few cuts to figure out the angles. But, I know you can do it. Once you have all your quarter round cut and dry fit, you can proceed with the install.

Remember those “inconvenient” objects. End your quarter round right before the toilet.

Add a 30 degree angle when butting up to objects like light switch covers and outlets.
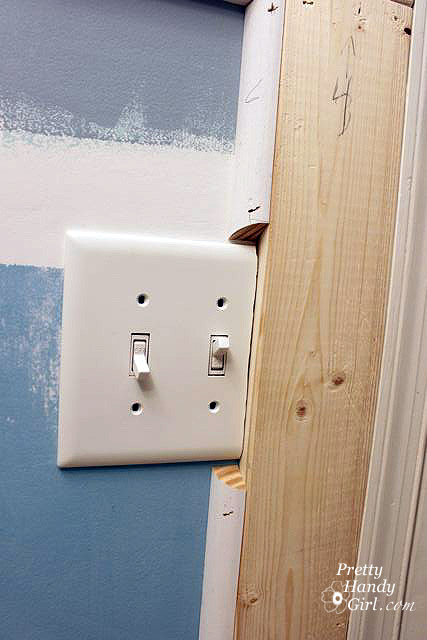
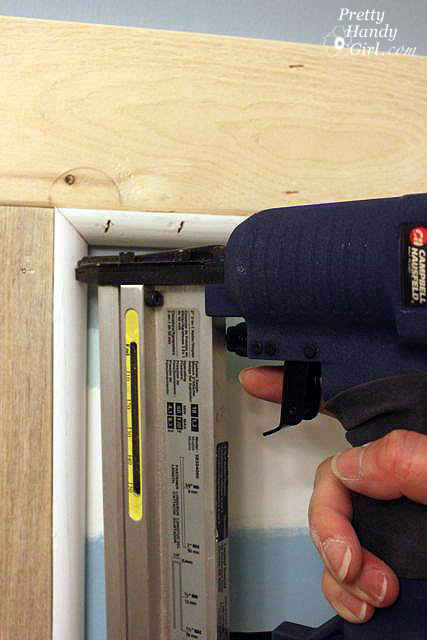
Load the 1.5″ trim nails into your nail gun. Aim your nail gun into the quarter round at an angle so the nail ends up going through the quarter round and into the battens.

Hey, you are about 80% of the way done with installing the moulding!

Installing the top ledge and decorative trim moulding:

Cut the top ledges to size and sand them down. It is a good idea to round any exposed corners with the sander. This will undoubtedly prevent future dents to the head.
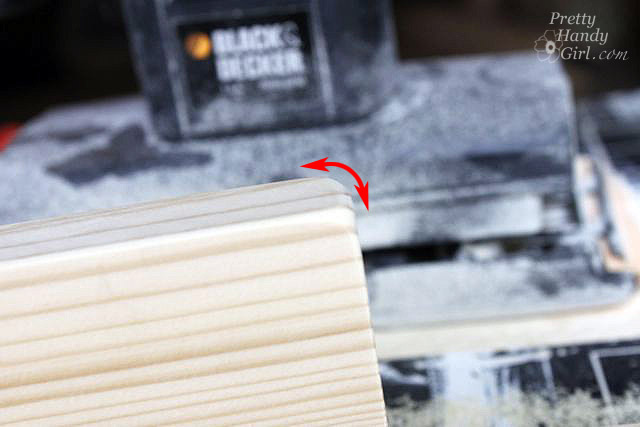
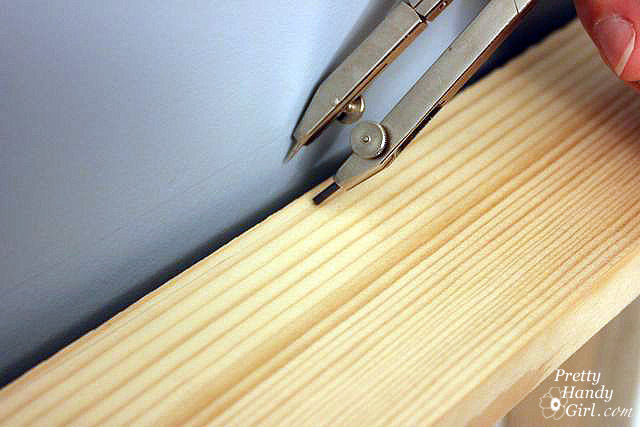
Lay the ledge boards on top of the upper battens. If your walls are uneven, your ledge will likely look like this.

No biggie. Grab your grade school compass. And set the two arms to the width of the widest gap. Then drag your compass along the ledge and the wall.
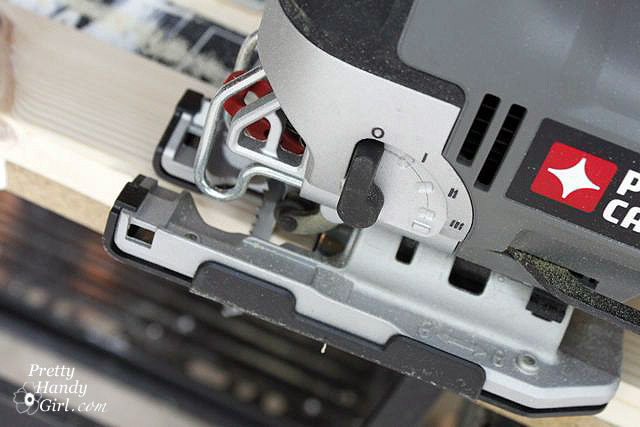
Get out your trusty jigsaw again and cut off that scribed line (have I told you how much I love my Porter Cable Jigsaw?! It pays to buy good quality power tools.)
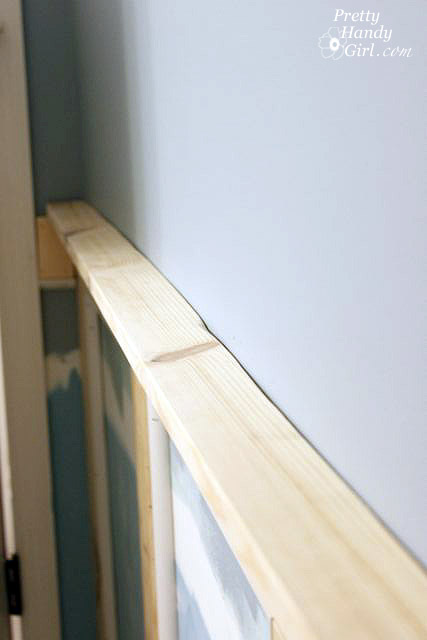
Ahhh, much better. Any smaller gaps will be filled in with caulk later.
Nail the ledge into the batten below it. You can use construction glue for extra stability. (Yes, it is monkey protection for us.)

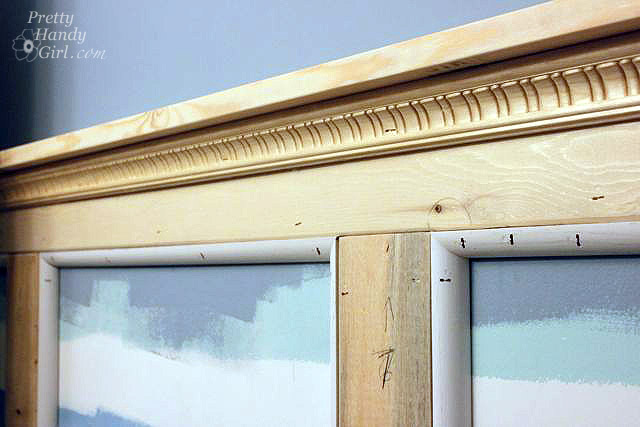
My favorite part of the moulding project is adding a little extra “bling”. I chose this decorative moulding to sit below the ledge and to give it extra support (again I have monkeys!)

Don’t forget to cut a 30 degree angle wherever you cut a batten at that angle.

Nail the decorative moulding onto the batten just below the ledge.
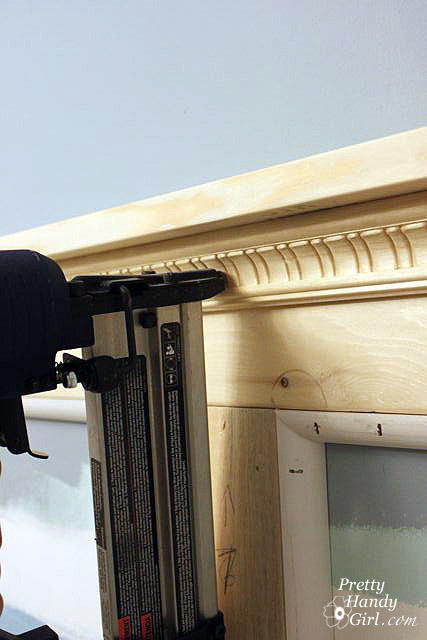
Now doesn’t that look beautiful?!

Fixing a few nail problems:

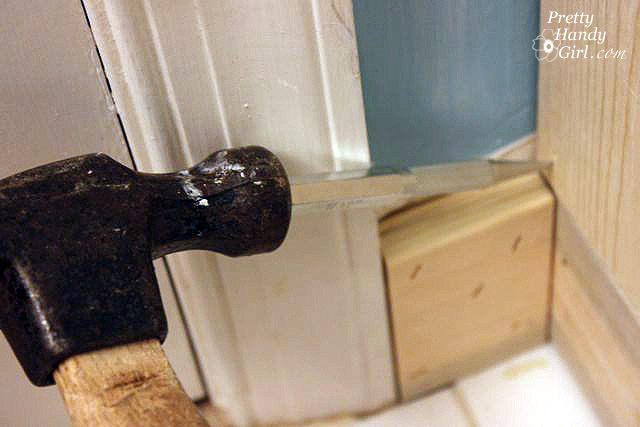
Remember how I said I make mistakes too? Well, here are two easy mistakes to fix when using a nail gun. When the nail doesn’t go all the way in (this usually happens if you don’t keep pressure on the gun when you squeeze the trigger), simply use a hammer and a nail set to hammer it into the wood.
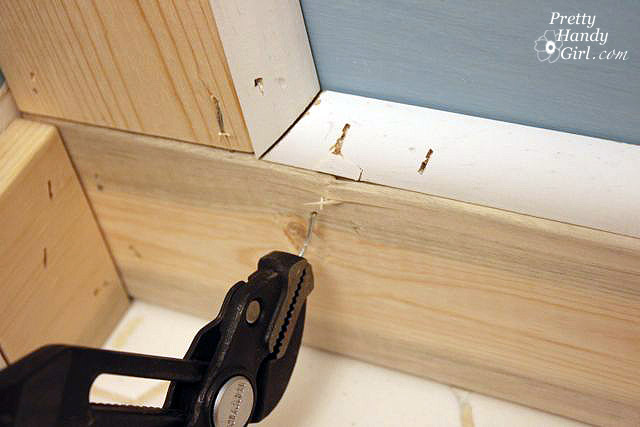
Occasionally a nail may hit something when entering and end up popping out. Grab the end of the nail and pull it all the way through the wood. You may take some wood with it, but you can patch it with wood putty.

I’ll be back to show you how to caulk and paint this beautiful moulding! And then the final reveal of my Boys’ Fishy to Fabulous Bathroom! Finally, a bonus post on creating a branch towel bar.


Photobucket” border=”0″ alt=”Photobucket”>