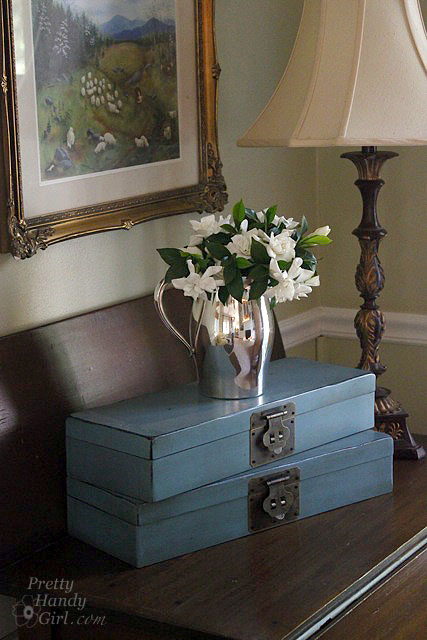
Today you have been invited to take a house tour at my friend Holly’s home. Holly is a good friend of mine, so luckily I didn’t have to beg too much for her to let us into her home. But, before we go in I want to tell you a little more about her. She wears many hats. She is a wife and mother of two boys first and foremost. But, she also runs Storywood Designs, a furniture refinishing business and Framed by Storywood, her Etsy Shop. She has a wonderful eye for color and design (which is evident in her furniture pieces and home décor.) When I first walked into her home, I knew I could live there and not have to change a thing.

Holly and her husband bought their 1980 home a few years ago. There were plenty of touches from previous owners that she worked with or covered in a creative way. I scanned the real estate flyer (sorry about the quality) to give you an idea what their house looked like when they bought it. The changes they made are phenomenal and yet they didn’t break the bank to do it.

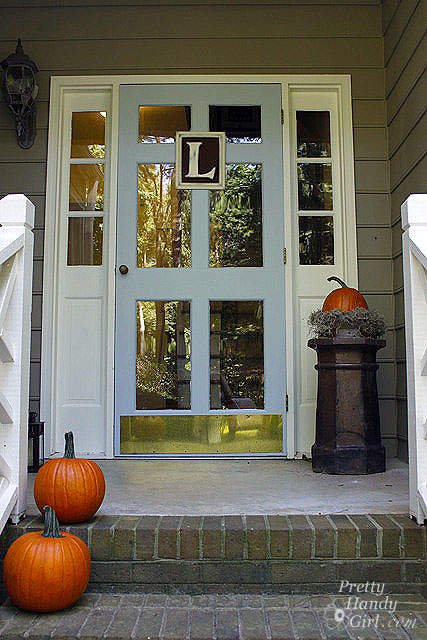
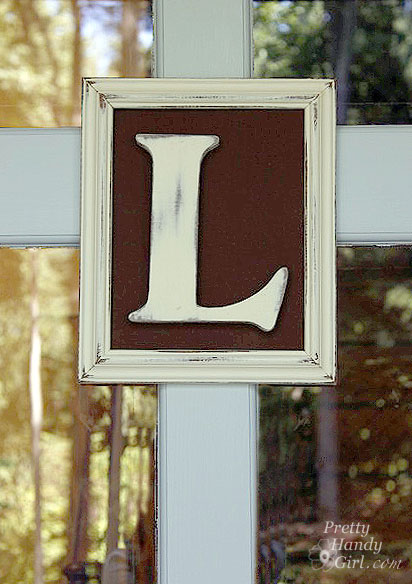
Are you ready for the tour? Wipe your feet and come on it. Do you like the initial on her door?

She sells them in her Etsy shop!

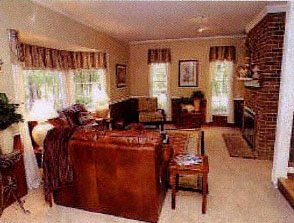
Here we are in the living room, but this is what the room looked like a mere 3 yrs. ago:
And here is the living room today!

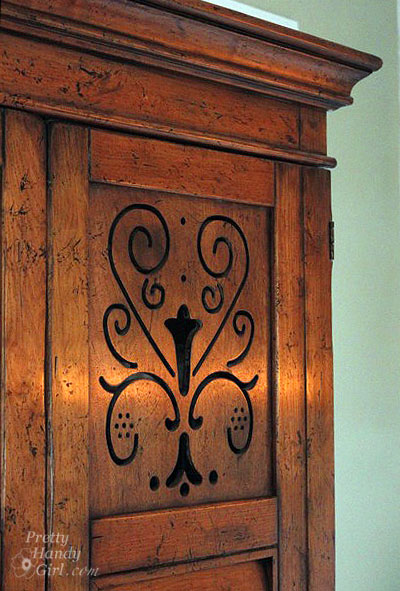
I know armoires are starting to go out of style, but this one is gorgeous with the cut out panels! If she ever tries to get rid of it, I’m grabbing it!

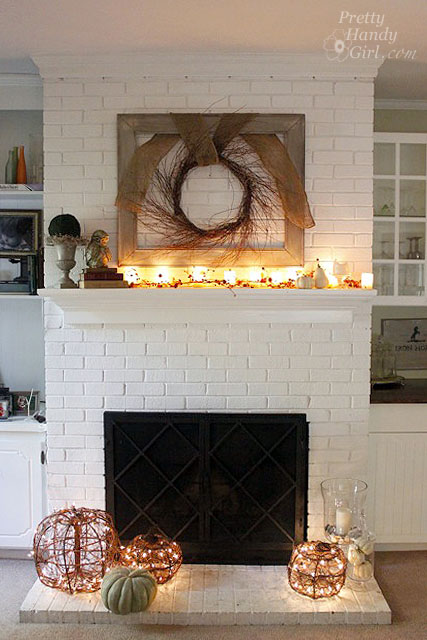
They painted the fireplace white and it really brightens up the room. See, I can appreciate a painted white fireplace, even though I repainted ours to look like brick.


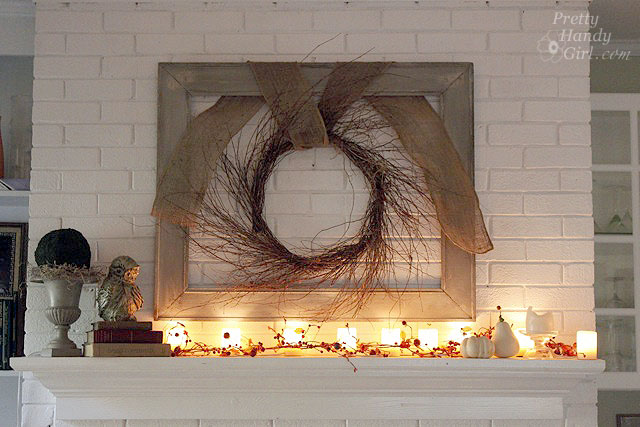
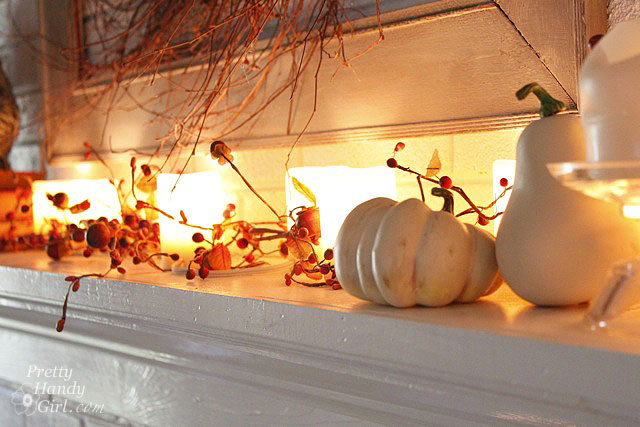
I love all her fall décor. Especially the lit pumpkins on the hearth.
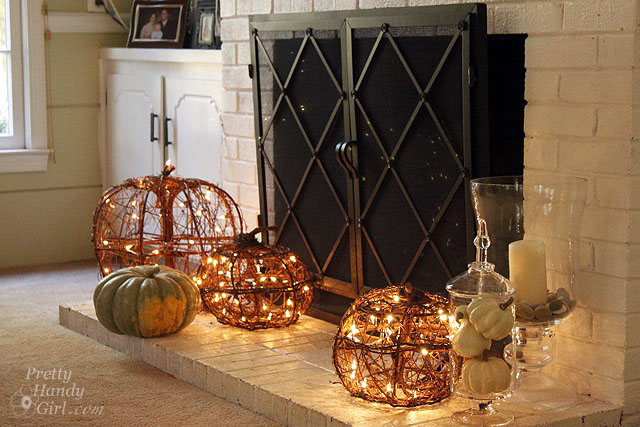

Beside the fireplace are sweet built-in cupboards and cabinets with wood countertops. It adds charm to the small niche.


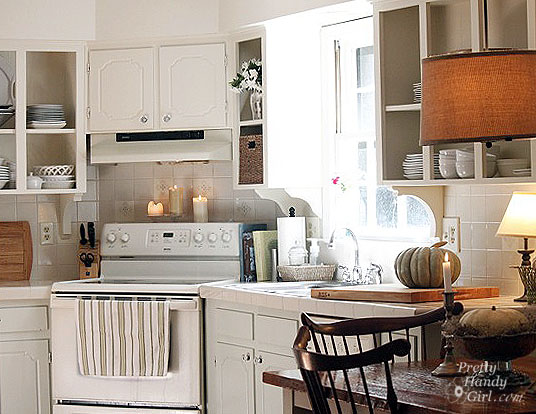
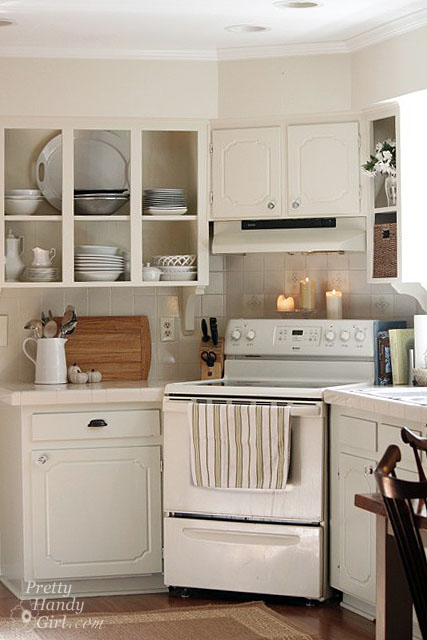
Now we make our way into her kitchen  — my favorite room and the most stunning transformation. This was the kitchen before:


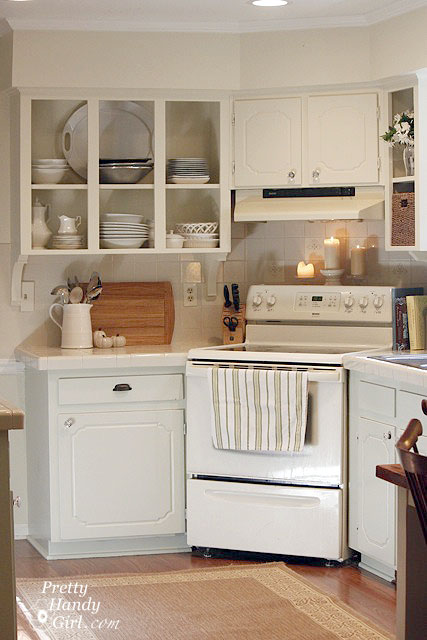
Get ready to catch your jaw before it hits the floor.


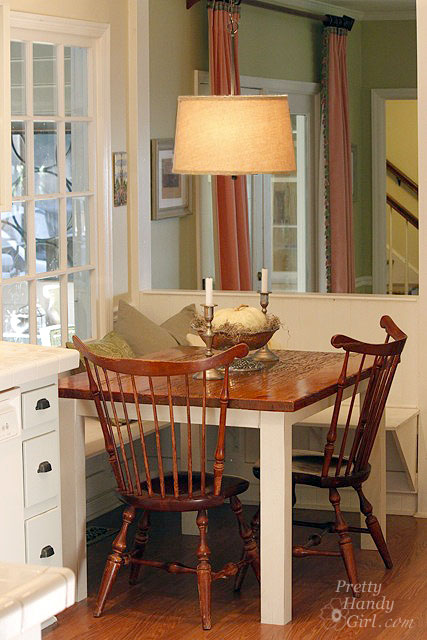
The pendant light adds lots of warmth and texture to the space.
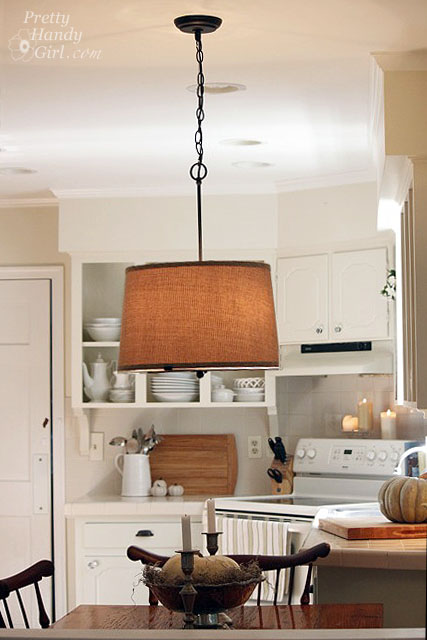

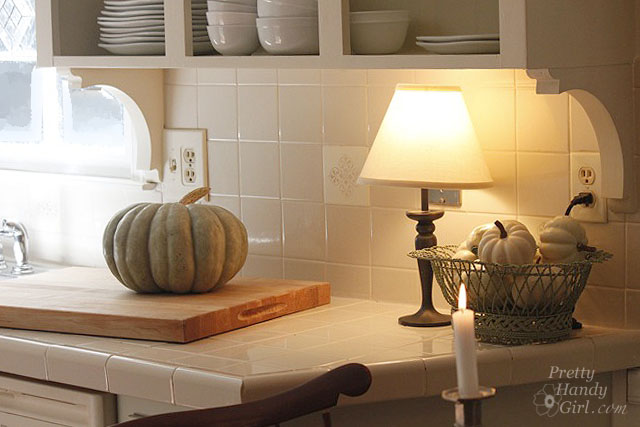
Adding corbels under the upper cabinets was a genius idea for adding instant charm. I am itching to do the same thing to our kitchen cabinets. When I do, you can be sure I’ll share a tutorial.

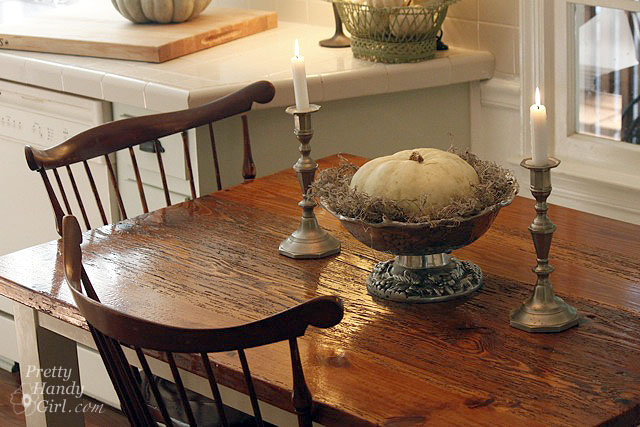

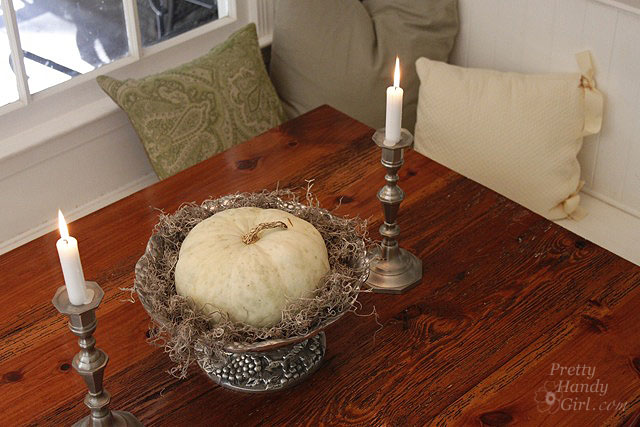
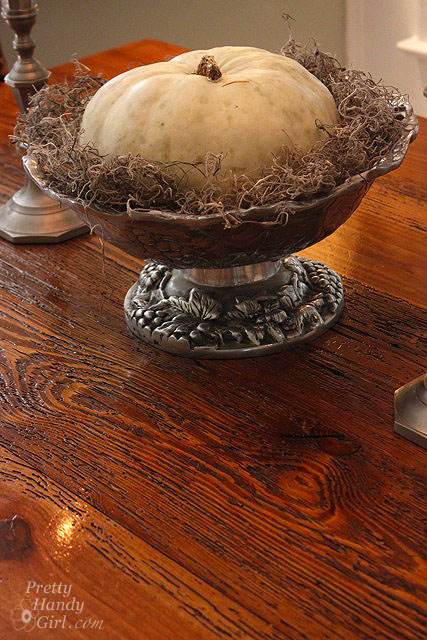
Holly and her husband made the kitchen table. The wood was whistling for my attention the entire time I was photographing the kitchen. And with lines like this, how could I help but stare?
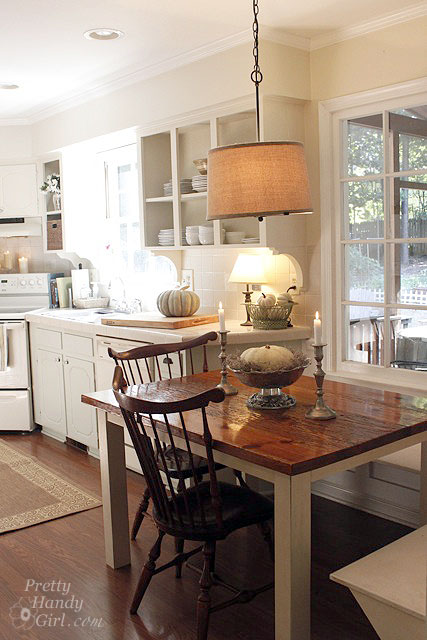
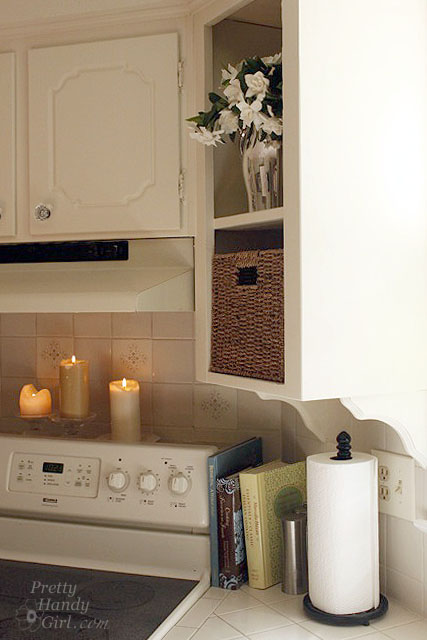

By removing many of the upper cabinet doors they made the kitchen feel larger and more airy.
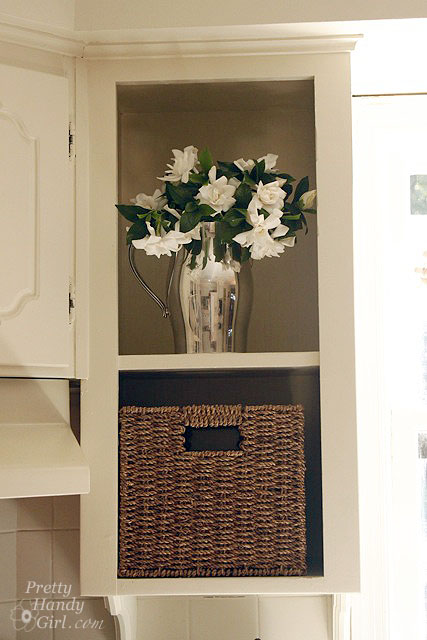


Did you see those little decorative tiles? Would you believe that they had hideous country scenes before. Holly simply painted over the scenes and added a stencil! What a smart idea!

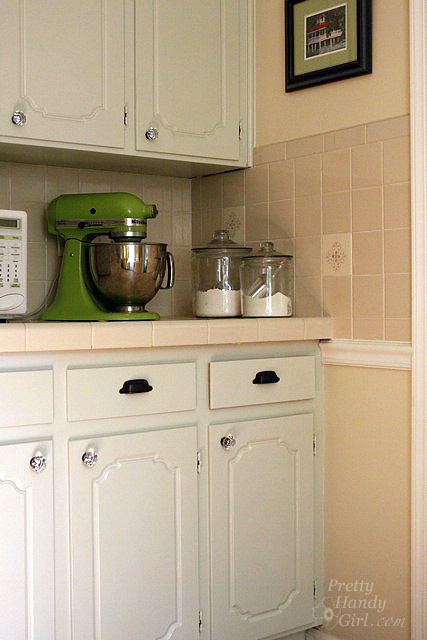

Just in case you wondered (because I definitely wanted to know), the base cabinets got a coat of white sage paint by Olympic. (Holly says that Olympic discontinued the color so Lowe’s had to custom mix it in their kitchen and bath enamel paint.) The top cabinets and walls are painted Benjamin Moore Lancaster White.
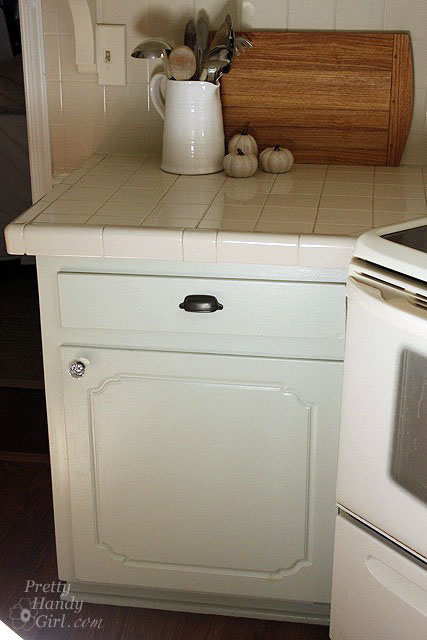

Setting out a little lamp adds some warmth to this corner of the kitchen.


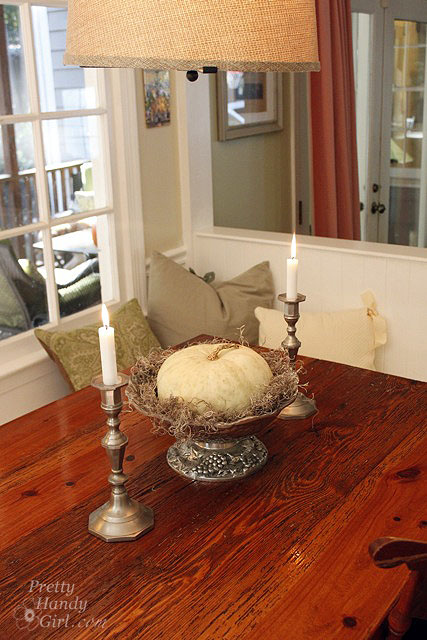
The breakfast area has built-in benchs on two sides. The pillows make the space feel cozy.


One of Holly’s frames turned into a chalkboard:


Okay, right this way to the dining room.
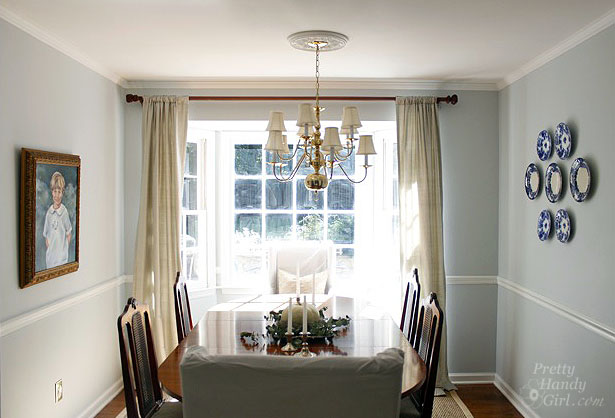

I really want to display my blue and white china like she has done on this wall.
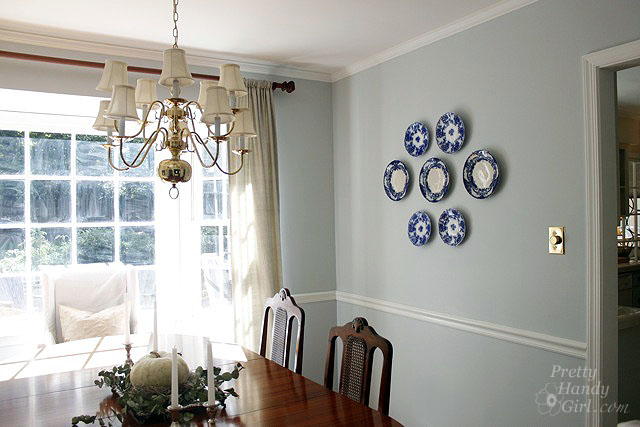

Adjacent to the dining room is her sitting room. Here is the before picture of that room:

She and I (well mostly Holly) just repainted the room a very neutral gray. I can’t believe what a big difference it made.
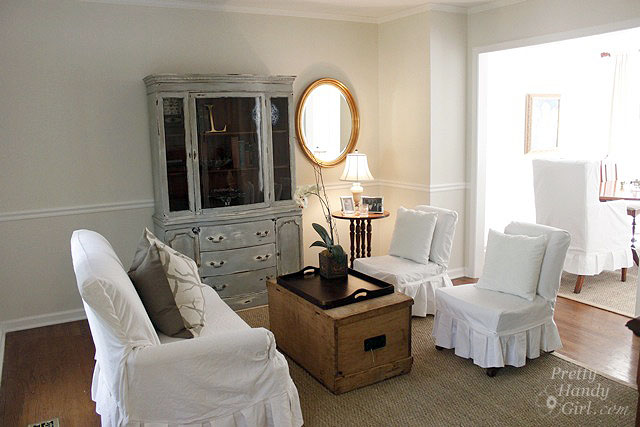
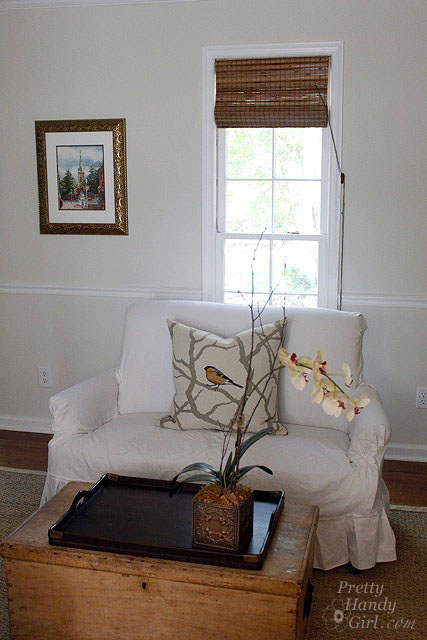

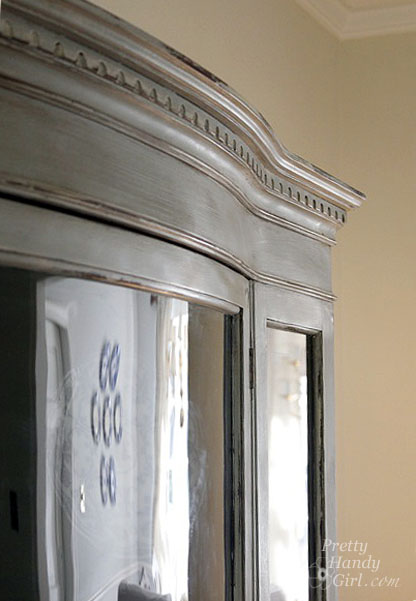
The china cabinet is a recent refinishing project that Holly just completed. The distressing on this piece is perfect!
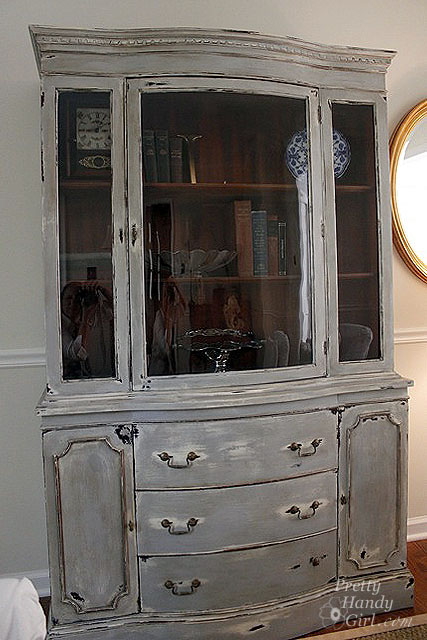

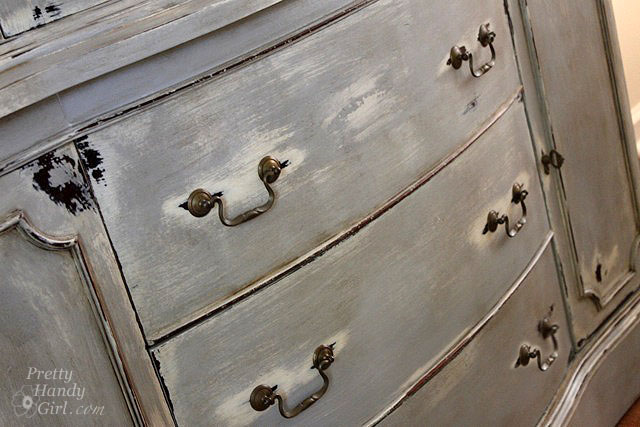
Check out those layers of paint and glaze. Scrumptious!

And the bowed front and curved glass make this cabinet unique.

Speaking of distressing, here is another one of Holly’s tables that she refinished. This little table would make a perfect breakfast table or just a side table. It is for sale right now!

I’m jealous of her talent. Maybe I can convince her to take me as her understudy.


Thank you Holly and family for letting us tour your home. Your hard work really shows in your beautiful home.

I have amassed quite a collection of “project” furniture and objects waiting for a future date with my creative magic sessions. I worry that some of this behavior is bordering on packratness (I don’t think that is a word, at least my spell check says it isn’t. But, you get my drift, right?!) So, when a Wagner rep contacted me about trying one of their paint sprayers, I couldn’t reply “YES!” fast enough. I had visions of setting up all those projects and spraying them down in a line-up fashion. But, I reined in my “glass half-overflowing” mentality and decided to tackle one project at a time. Good thing too, because although the Wagner Power Painter Plus with EZ Tilt (affiliate link) did spray at lightning fast speed, there were a few drawbacks.

But, I don’t want to get ahead of myself. I still want to give you a bonafide tutorial on how to fix, prep, paint and finish a wobbly yard sale find for yourself.


Materials:

(I’ve included affiliate links for your convenience. I earn a small percentage from a purchase using these links. There is no additional cost to you. You can read more about affiliate links here.)
*These items are purely optional. You don’t NEED them, but they help.

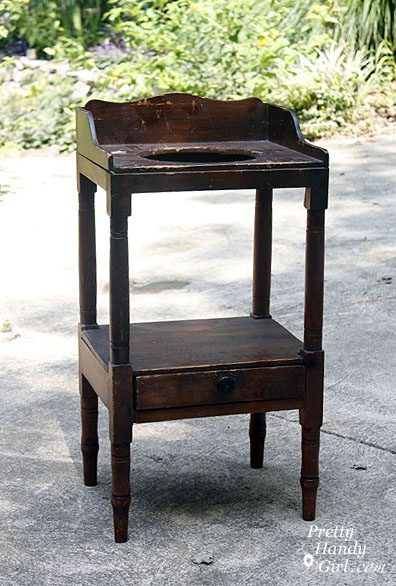
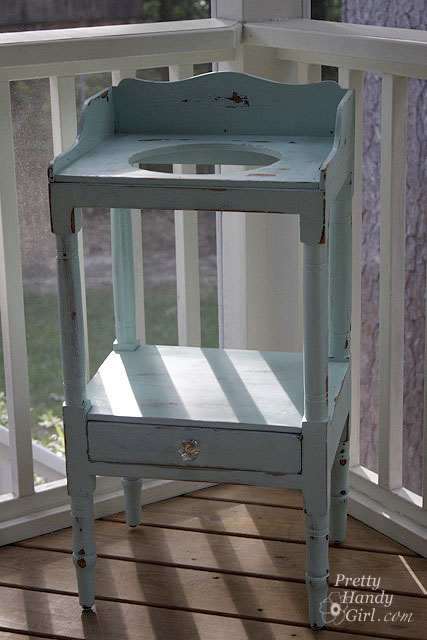
This wash stand had a $5 price tag on it. But, my neighbor gave it to me for $3. Is that robbery to talk someone into less than $5 for this antique?! In self defense, the stand was in pretty poor shape. It was VERY wobbly and had some big scratches on it. Can you forgive me?

Here is what you do when you find yourself as the new owner of a “this really should be trashed” purchase. Take it apart and rebuild it from the ground up. Having done this before with Daisy the Discarded Chair, I was prepared to tear this wash stand down to the ground. But, luckily it had some better joints than I had anticipated. So, I basically pulled apart anything that was not tightly joined.

The shelf over the drawer came off super easy.

As did a few joints.

I wiped the whole wash stand down with a wet rag.

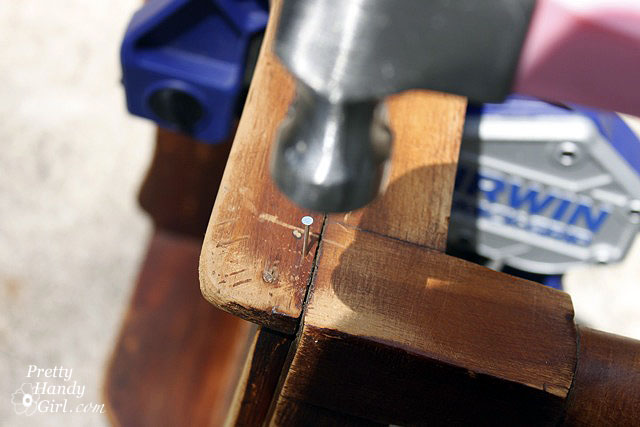
Then, the side of the stand got some new glue and a few finish nails.

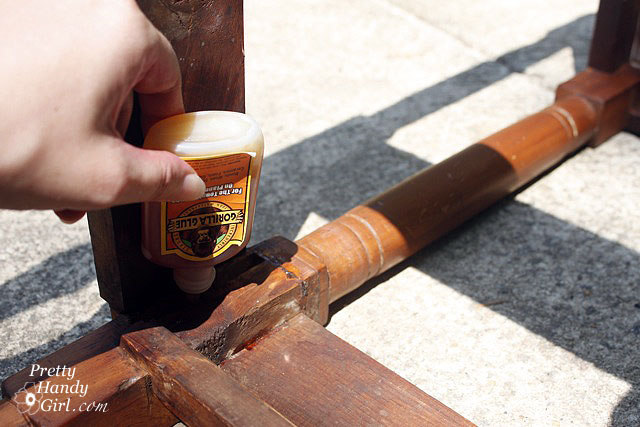
The joints got some Gorilla Glue and were set back together. And, I added a thin bead of glue and some finish nails to re-secure the shelf.

Next I sanded down the whole piece of furniture with these two 3M sanding blocks. I like to call them Tweedle Dee and Tweedle Dum because they are super easy to use. Even an idiot can’t screw up.

They work great for around spindly legs because they can bend and flex (I wish I could bend and flex like that!)

After wiping off all the sawdust, my wash stand looked like this:

Almost too pretty to paint, but it had some serious gouges, so I took a picture and said goodbye to the beautiful wood.

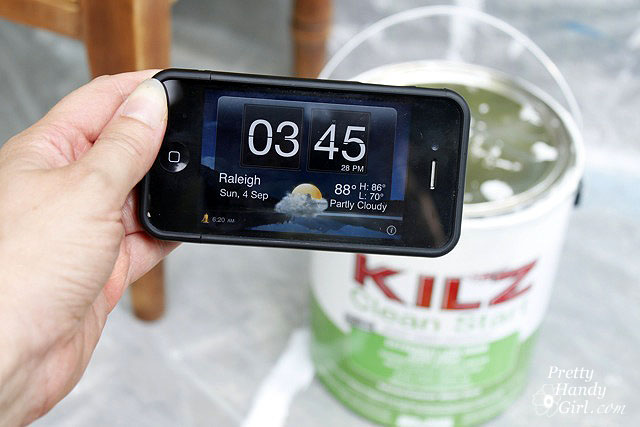
Here is where the race began. I decided to time myself painting on the primer with a brush. Then time myself using the sprayer for the first coat of paint.

Start your engine….paint brush and KILZ Clean Start Primer…GO!


After 30 minutes I had primed the entire stand from top to bottom.

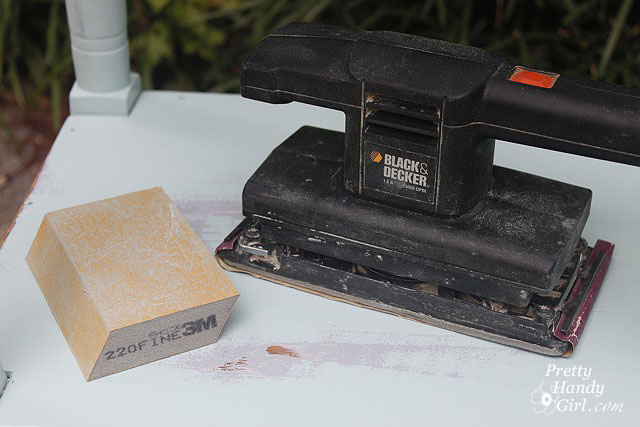
After the primer dried, I gave the stand a quick, light sanding with a 220 grit sanding block and wiped it down with a damp rag.

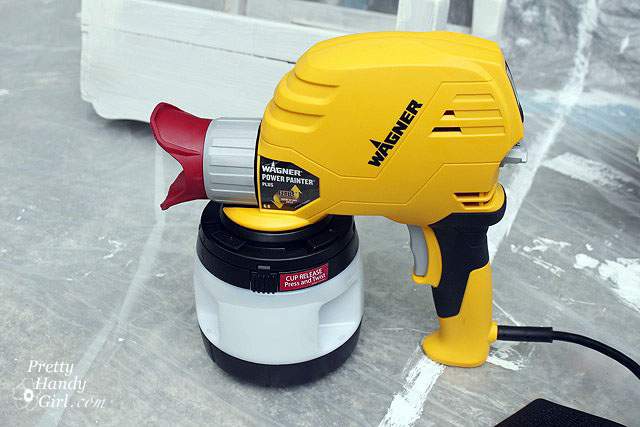
I set up the sprayer, read all the directions (very important!) Then I filled the quart size reservoir and attached it to the sprayer. The Wagner Power Painter Plus doesn’t require a compressor, just a good old fashioned extension cord plugged into your household outlet.

Start your engine…Wagner Power Painter Plus…GO!

VROOOOOOM! The sprayer let out the loudest and most obnoxious noise I had ever heard (Note to self to wear ear protection next time.) I thought the sprayer was going to self destruct, so I let go of the trigger. Then I pulled it again and the noise returned, only to abate after a few seconds once the paint started to come through the nozzle. Phew, that scared me.
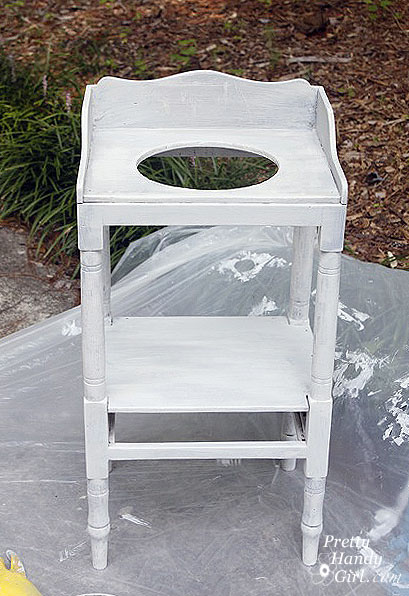
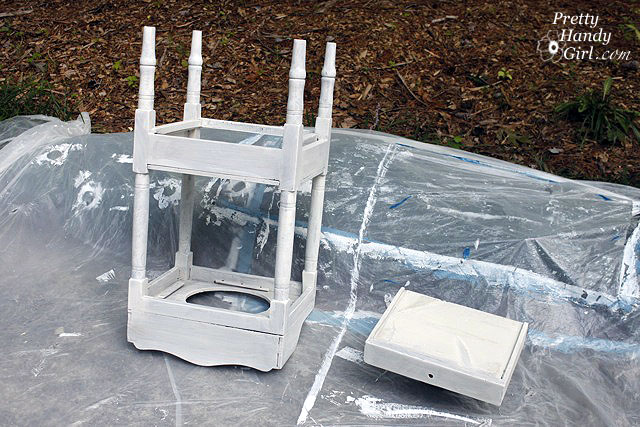
I breezed through painting the entire wash stand from top to bottom. I started with it upside down and quickly flipped it while it was still wet (I left a finger print underneath, but no one will know about that unless you squeal.)

And I was done. Then I looked at my timer and WHAT?!!! 5 MINUTES! Holy Cannoli! I had no idea a sprayer could shave that much time off a paint job.
I left the wash stand outside, while I took apart the paint sprayer.

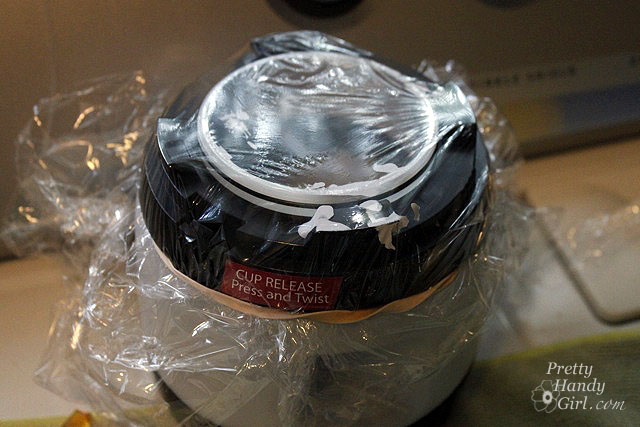
To avoid emptying the paint canister, I covered the container with saran wrap and a rubber band.


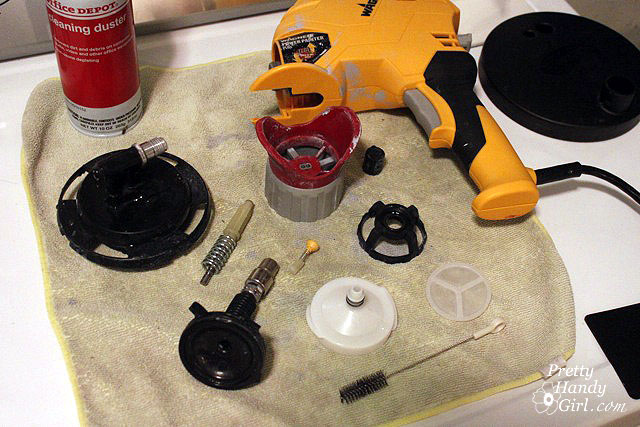
Then I took apart the ENTIRE sprayer and cleaned out all the parts. It is soooo important to clean the sprayer thoroughly or you risk paint drying in your machine and ruining it. This is a look at the sprayer disassembled.

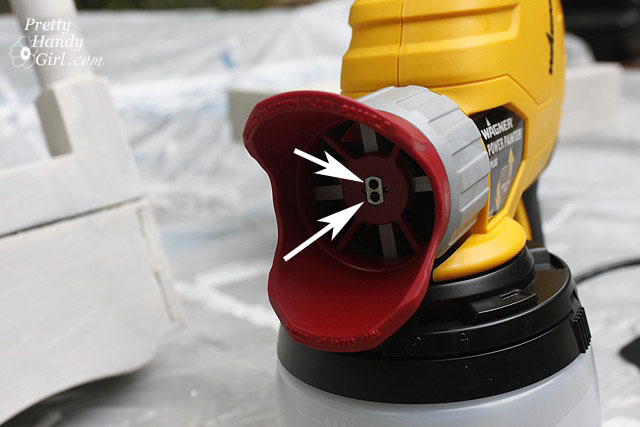
It is paramount to clean the tiny dual spray tips on the machine. They are small slits that can clog easily if the paint is allowed to dry in them.

After the wash stand had dried. I put the sprayer back together and screwed the paint container back onto the gun.

I was all pumped and excited to be done in 5 minutes! With dusk still 30 minutes away, I had no fear. BIG MISTAKE!

What was to ensue was a stressful 45 minutes of paint globbing, paint sputtering, my cursing, and frantic cleaning of the sprayer again. I finished spraying, but I had to use a different top coat color because I ran out of the first paint color. (Which ended up being one of those happy mistakes. You’ll see.)

I wiped off the big globs of paint and decided to give those areas a little “extra” distress in the morning.

After stepping back from the project, doing some research and having a twitter conversation with Shaunna (the furniture painting guru), here is what I concluded from my disasterouos 2nd attempt:

  1. The paint sprayer MUST have a full paint cup in order to work properly. When the reservoir gets down to less than 1/4 full any air that gets into the paint suction tube will cause the sprayer to sputter and discharge big globs of paint, instead of a nice even spray.
  2. The sprayer dispenses an INSANE amount of paint in 5 minutes and when it runs low #1 happens. I used a half gallon of paint on the first coat of paint on this small wash stand. Whereas, I normally would have used maybe half a quart to brush on two coats total. The drop cloth was so heavy with paint when I cleaned up, that I realized the majority of the paint was wasted in overspray.
  3. The Plus does not have a low paint level indicator. Therefore, it is very difficult to determine when you are getting low on paint until the sprayer starts to sputter and shoot out globs of paint onto your project.
  4. In the same vein, the paint canister only holds a quart of paint, and 1/4 of that isn’t useable unless you like Jackson Pollock style painting.

The next morning, I took out my power sander and gave the sink some character by distressing it.


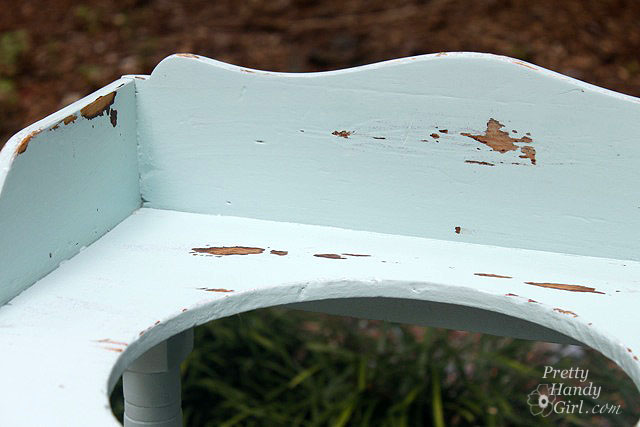
This is where the happy accident occured. Because I had to use an aqua blue as the top coat on my sink, you could see the blue gray color peeking out! Which I think makes it look sweet, shabby and old.

Once I was happy with the amount of distressing, I sanded any chipping paint and rough spots with the 220 grit sanding block. Then, I cleaned off the wash stand with a damp rag. To protect the sink, I used Minwax wipe-on Polyurethane. I like the wipe-on Poly for speed. But, it doesn’t leave as thick a coat as the traditionally brush on kind. So, if you really want to protect a piece of furniture, use the brush on kind instead.

I added a cute little crystal cheap acrylic knob to the drawer.

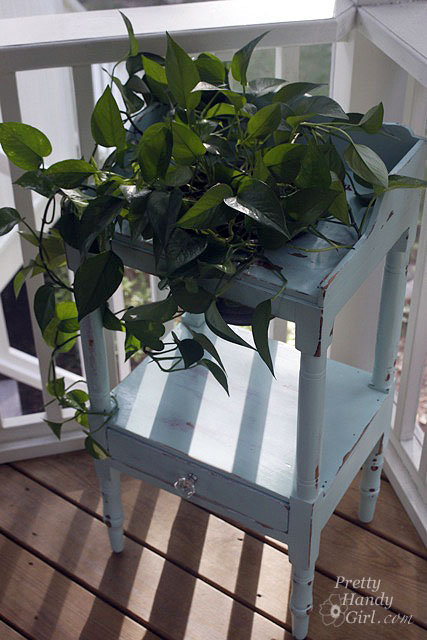
And my new/old dry sink looks right at home in the corner of my porch! Although, it needed something…hmmmm….

…how about a plant! I dropped in a plastic pot with NO holes in the bottom. I filled the bottom 1/4 with rocks for drainage. And my pothos plant. I used to have a chippy pedestal that sat there, but sadly I had to get rid of it. I’ll fill you in on the details next week. It is a sad story ;-(.

Here is my summary of working with the Wagner Power Painter Plus model:

  • Pros – Saves time. $100 price tag. No compressor needed.
  • Cons – Small Paint Cup, No Flow Speed Selector, No Low Paint Level Indicator, Lots of overspray and wasted paint.

I will definitely try the sprayer again. When I do I might add Floetrol to my paint, which is supposed to help your paint even out and give you a smoother finish. (Especially if it globs on you.)

  • Wagner Power Painter Max has a two speed selector AND a paint level indicator. This model runs under $100. Have a great weekend and see you next week with some more DIY goodies.

I am in love with those adorable french provincial dressers. The flourishy handles are what really get my heart pounding.When I saw this dresser on Craig’s List for $35 dollars, I pounced!

 Disclaimer: I stole this picture from the previous owner’s Craig’s List Ad.

Oooo baby, don’t you just love that faux gold outlined accents and off white laminate top. Yes, I said laminate. But I wasn’t afraid of it. For $35 who cares if it gets messed up. If you never take the risk, you’ll never learn anything new, right?!

The drawers were still in good shape, but a little loose around the joints, so I squirted my new favorite Gorilla Glue into the joints and clamped lassoed them up!

Then I used newspaper to protect any of the areas I didn’t want sprayed.

After sanding all the surfaces to rough them up, I put a coat of primer on everything. Loving that crisp clean white, but the dresser told me to “Keep Calm and Carry On.”  So, I cooperated and continued on to another color.

Next, I sprayed Rustoleum Heirloom White and distressed the surface with a wood stain.

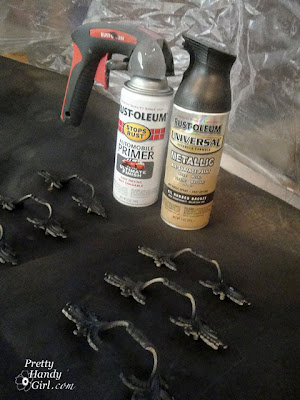
The drawer pulls got their own treatment of automotive primer followed by Oil Rubbed Bronze paint. Thank goodness they were happy with their new color because – I’m telling you – that dresser was certainly acting like a diva! She was still demanding a new color.

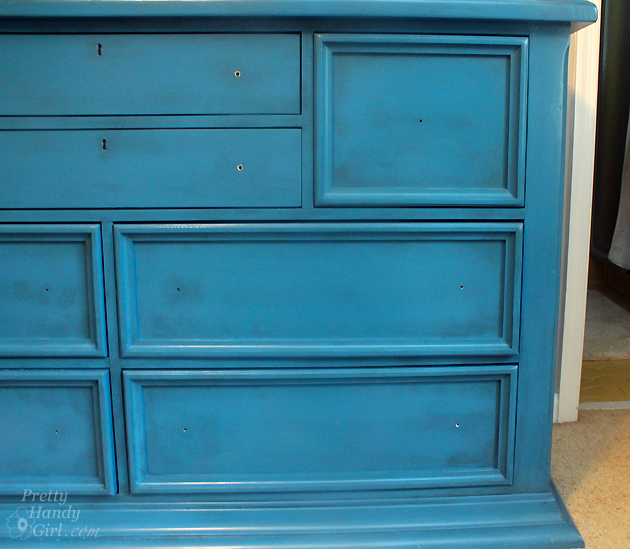
I have seen many Nantucket Fog makeovers and decided to make a run to Ace Hardware to pick up a small sample of that blue gray color. And I grabbed a can of artistic glaze.

After two coats of the Nantucket Fog glaze, that little dresser still wanted something else. Sheesh! So I pulled out some leftover blue paint from my dormer window shutters.

Finally, she shut up! It’s a good thing too, because I LOVE this color. I love it so much that I hauled my tired hiney back over to Ace to match the color just for you.

Does anyone else get starry eyed and entranced by all these fabulous colors?

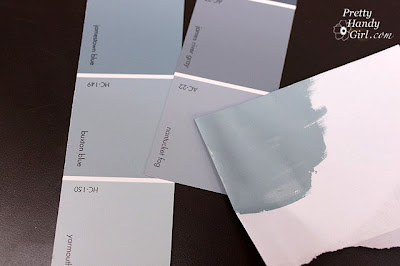
The closest match is Buxom Blue from Benjamin Moore. Not too far off from Nantucket Fog, but you know those divas they want what they want!

Now, all important divas need something to wear that gets them noticed. Thus, I decoupaged some wrapping paper on the side (tutorial is here.)

And then because I liked the pattern so much, I blew it up and added it to two corners of the dresser top (tutorial for adding a sharpie stencil.)

I added some beachy blue glaze over the wrapping paper and the top graphic.

And I have to tell you that – halleluiah – I finally figured out the proper technique when using the valspar glazes (the tutorial is here.)

I finished up with three coats of a semi-gloss polyurethane.

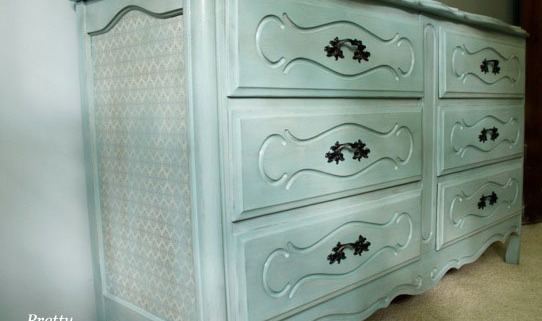
And here is that stunningly beautiful diva of a dresser. Transformed from Cinderella to the Belle of the ball!

Isn’t it amazing what a little oil rubbed bronze can do!
 
 Hard to believe this was wrapping paper in a previous life!
 Peek-a-boo I see a cute stencil.

Now, I have to convince Pretty Handsome Guy that our master bedroom furniture doesn’t have to be all matchy matchy!

 Because I LOVE our Pottery Barn Sleigh Bed. 
But not the matching dresser.
 I love the new-old dresser! What do you think?

Any helpful hints on using Jedi mind tricks on unsuspecting Pretty Handsome Guy?

Update: Thank you to my readers that pointed out that I installed the handles upside down. They have been fixed now ;-).

Aging is so Distressing - Techniques for Antiquing Furniture

Well, despite the fact that I am starting to feel my age, this post will help you achieve that beautiful well worn, loved, aged and antique look on furniture and decor items. This is something you can do to new furniture or to give old furniture a new rustic look.

How to Age, Distress & Antique | Pretty Handy Girl
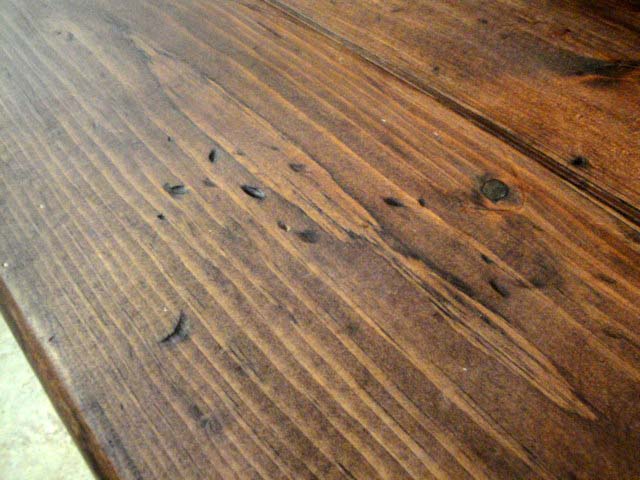
Aren’t these layers of paint, scratches and wear marks art to your eyes?

How to Age, Distress & Antique | Pretty Handy Girl
Nothing shows character like chipping paint and multiple revealed layers on metal.

How to Age, Distress & Antique | Pretty Handy Girl
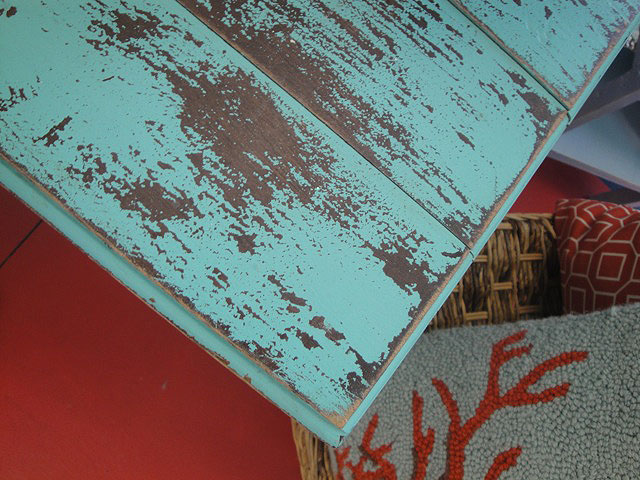
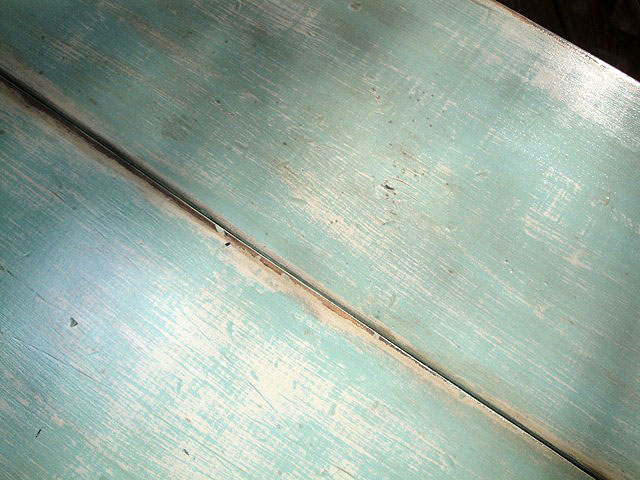
Weathered paint worn thin and rubbed off give a table character!

How to Age, Distress & Antique | Pretty Handy Girl
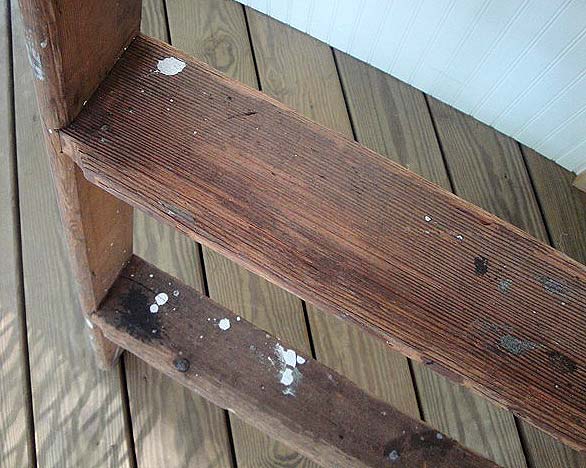
Paint splotches on an old ladder beg to tell stories of the projects it has seen.

How to Age, Distress & Antique | Pretty Handy Girl

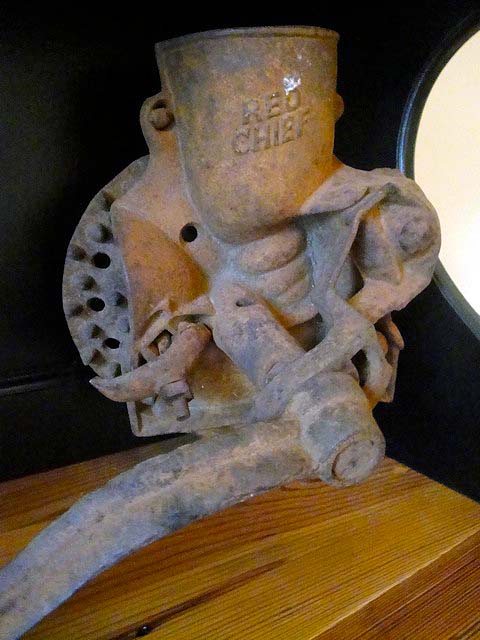
And you can’t forget rust, love that beautiful brown patina!

I have been experimenting with several techniques to add age to “newer” pieces of furniture. Here are a few ways to add some character through distressing. (This post contains affiliate links. To learn more read my disclosure page.) 

Distress Marks:

Achieving a worn look can be as easy as adding dings and scratches. This process can also be a great stress reliever! Grab some chains and let’s work out some of that pent up aggression!

Materials:

distress tools

Throwing a chain at wood gives you those elliptical dents. Dragging the sharp edges of a pry bar across wood will give it some deep grooves. Set a screw on its side and lightly hammer it into the wood. Finally a few random hammer marks here and there finish off the worn look.

How to Age, Distress & Antique | Pretty Handy Girl

This is the same technique I used on my mudroom bench.

Sanding through layers:

How to Age, Distress & Antique | Pretty Handy Girl

The easiest way to add some age to a piece of furniture is to expose layers of paint. Whether you paint a few contracting colors on yourself or you sand a pre-finished piece, sanding is one of my favorite ways to add age. A note of caution: Before you begin sanding, always check for the presence of lead paint. You can learn more about how to detect lead paint in this post.

Materials:

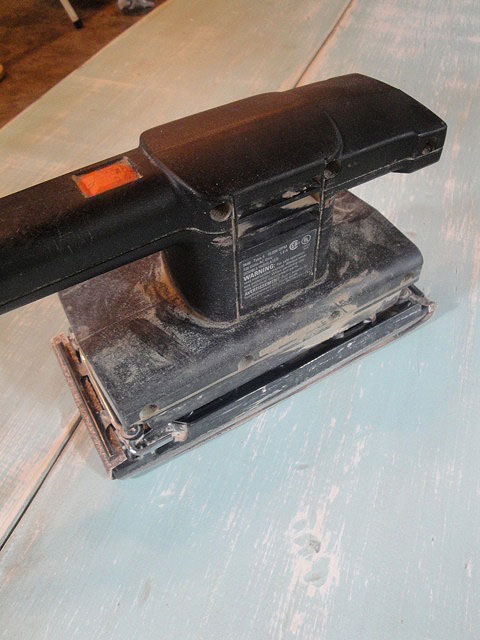
You’ll get the best results using 150 grit sand paper (but use whatever you have on hand). Attach it to your power sander and go to town on the furniture! Work in areas that would normally get a lot of use or abuse. Corners and edges of furniture usually take more abuse. Table center is a good place to show signs of worn paint. Be sure to move the sander around and be random rather than symmetrical.  A good example of a sanded finish can be seen on this Trashy Coffee Table.

How to Age, Distress & Antique | Pretty Handy Girl

A table that was previously painted white received a sea-inspired blue layer of paint on top of the white. (You could always add a third color if you want more colors showing through.) Sand through the layers of paint down to the bare wood in spots. The challenge with a new piece of wood is it lacks the deeper darker color tone of antique lumber. Unfortunately, when new wood is exposed,  it will look blonde and – well – brand spankin’ new.  Read on to learn how I solve this problem.

Faking Age with Stain:

I have a trick up my sleeve for creating those darker wood tones in seconds! Ready to learn my secret?

Materials:

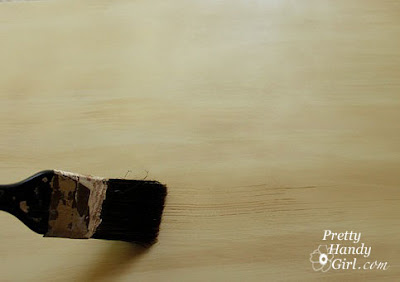
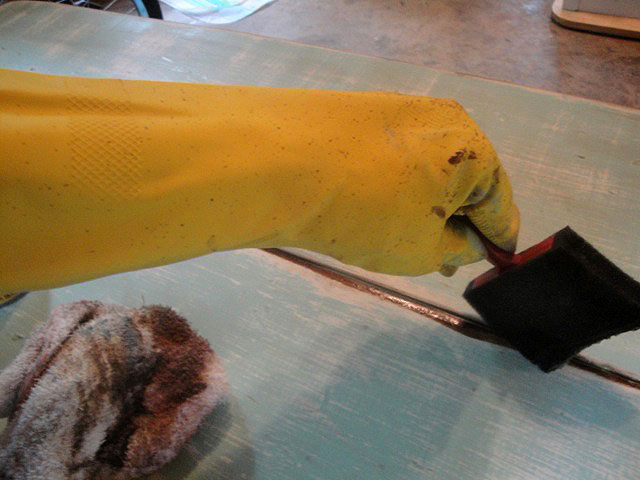
To hide the look of new blonde wood, carefully paint some wood stain onto the bare wood spots.

How to Age, Distress & Antique | Pretty Handy Girl

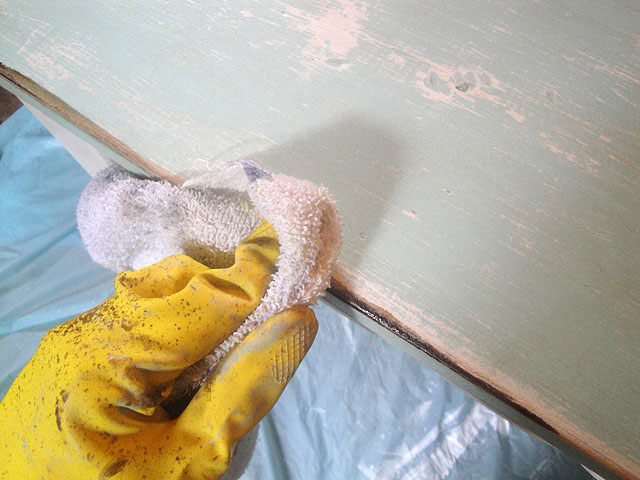
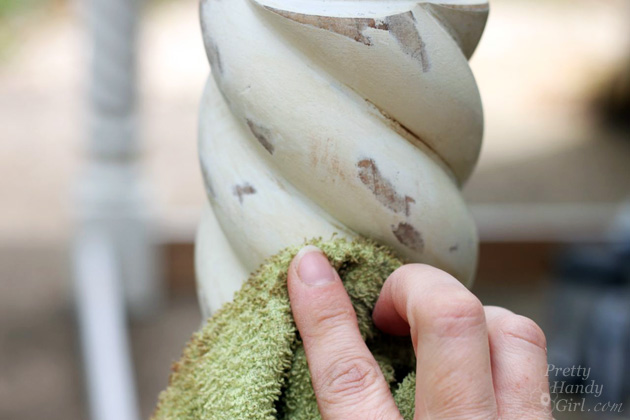
Wipe off any excess immediately with a dry rag.

How to Age, Distress & Antique | Pretty Handy Girl

If you desire darker wood repeat painting and wiping off the excess.

How to Age, Distress & Antique | Pretty Handy Girl
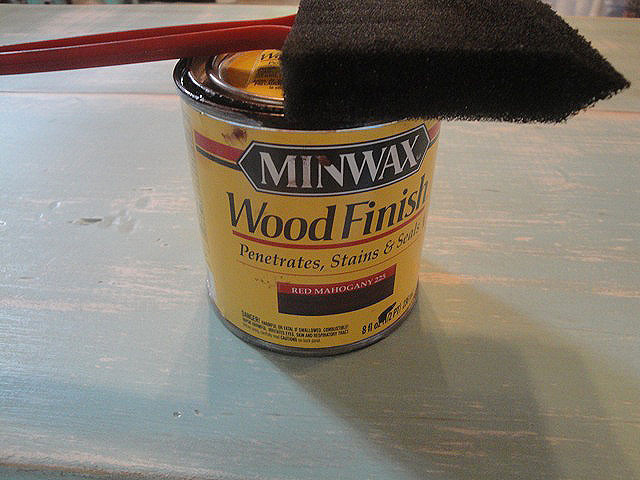
My two favorite stains for aging are Minwax Red Mahogany and Minwax Early American, but any dark color stain would work just as well.

How to Age, Distress & Antique | Pretty Handy Girl

“Tea” Stains:

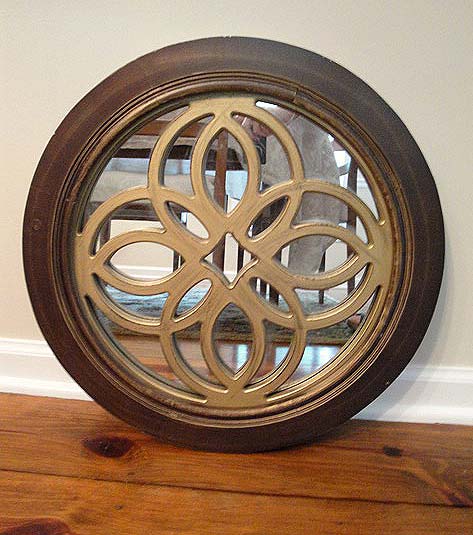
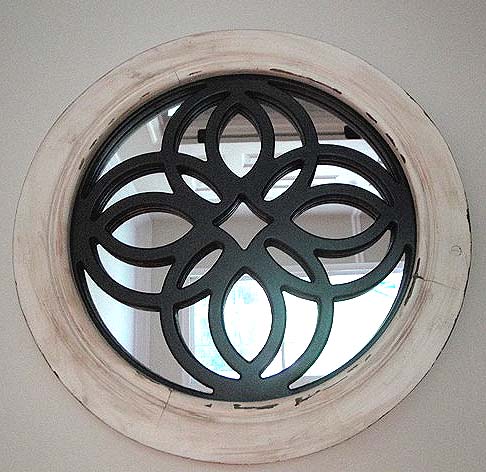
You can use the same dark stain to give your object a faux “tea stain”. This antique gold 80’s mirror is easily transformed with spray paint and some stain.

How to Age, Distress & Antique | Pretty Handy Girl

Materials:

If you use regular white spray paint, it will be difficult to “dirty” your object. Instead I like to use Rust Oleum Heirloom White which gives a soft antique white look. (FYI, I used Rust-Oleum Oil Rubbed Bronze for the inside decorative design.)

How to Age, Distress & Antique | Pretty Handy Girl
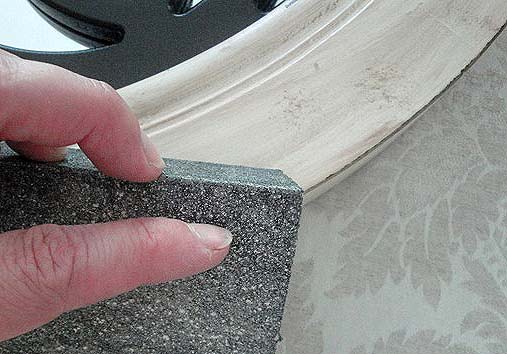
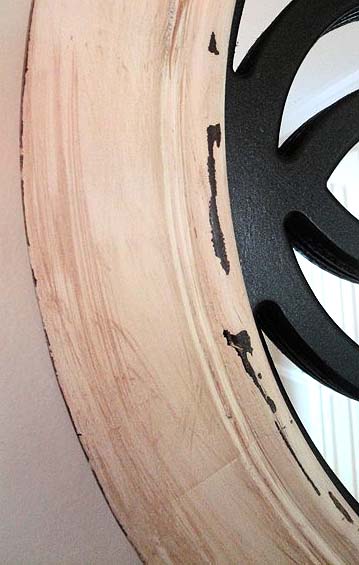
After the paint dries, hand sand some of the edges to expose the stained wood beneath.

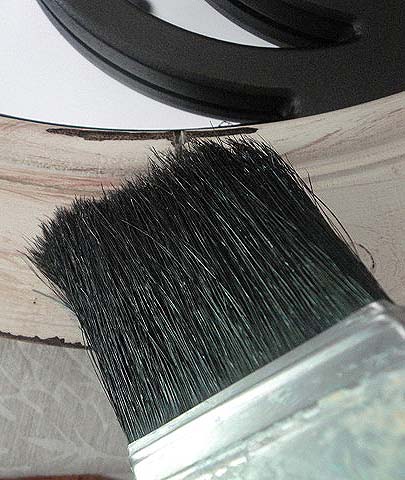
Use a dry brush technique* to brush on the stain and wipe the excess off immediately. *Keep your brush dry by dipping in the stain and wipe off your brush on a rag before using it.

How to Age, Distress & Antique | Pretty Handy Girl

For the best results, use an old shaggy brush or rough up your chip brush. The rattier the brush the better because anywhere the stain lands is where it will remain.

How to Age, Distress & Antique | Pretty Handy Girl

The end results are pretty tea stains and peek-a-boo dark wood below.

How to Age, Distress & Antique | Pretty Handy Girl

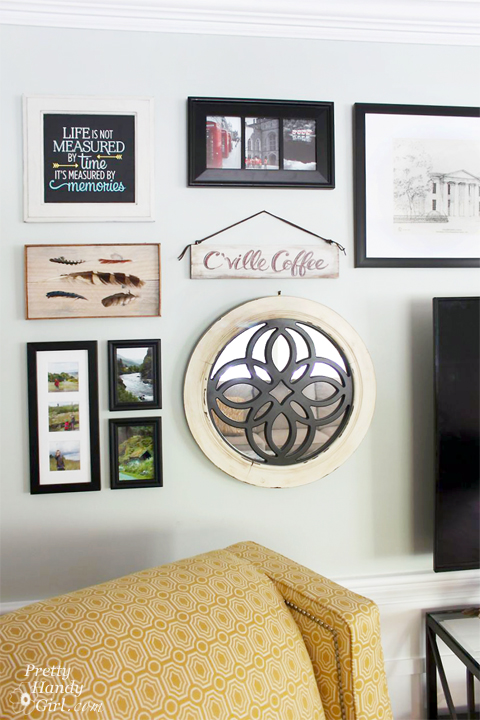
A totally new look for that sad 80’s mirror. It fits in nicely on our living room gallery wall.

Tips for Creating a Gallery Wall | Pretty Handy Girl
Glazing:

Do the permanency of stains scare you? Have no fear, one of the more forgiving ways to give your object an antique tone is to use a glaze.

Materials:

Glazes add depth and dimension to furniture that has a detailed profile. Glazes can be used on everything from kitchen cabinet doors to table legs and picture frames. But, don’t let that limit the places you can use glazes.

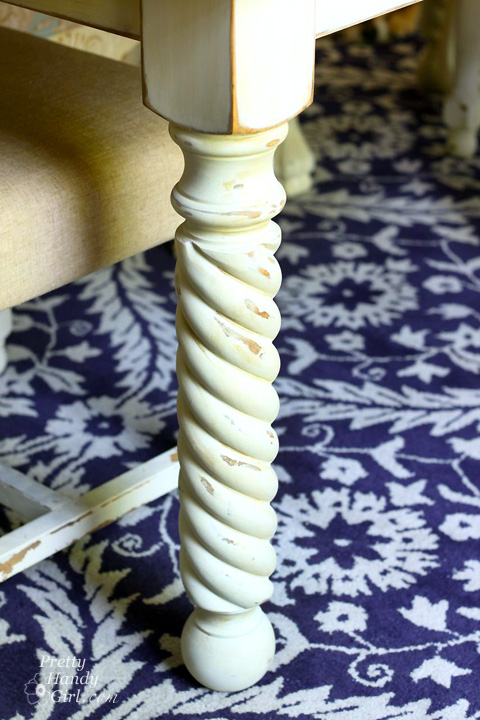
The table legs on my DIY Farmhouse Table have Van Dyke glaze on it that accentuates the rope turns.

Aging and Antiquing Furniture | Pretty Handy Girl

This dresser needed more than a coat of paint to give it an attractive new look. I added black glaze for pretty gray tones.

Facelift for a Knotty Pine Dresser | Pretty Handy Girl

Simply brush on the glaze (again use a ratty almost dry brush.) Push more glaze into the gouges and crevices to show off the details.

Aging and Antiquing Furniture | Pretty Handy Girl

Wipe off any excess with a clean dry rag.

Aging and Antiquing Furniture | Pretty Handy Girl

The glaze stays wet for longer than the wood stains. It can be wiped off immediately if you make a mistake. Once you like the look, let the glaze dry to permanence.

Side_across_coffee_table

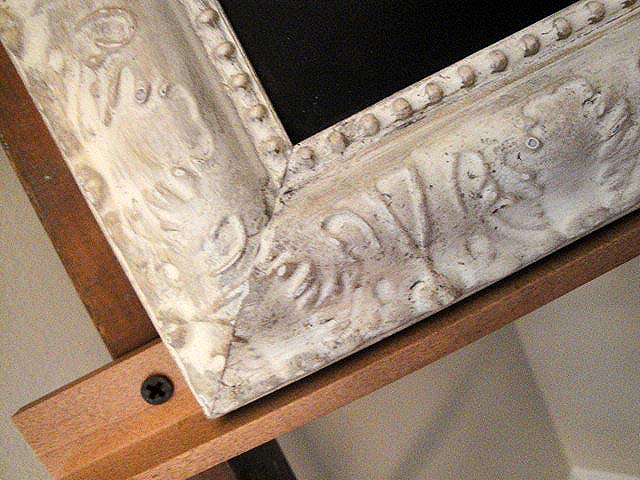
When working with black glaze, use the same technique of wiping on and blotting off. The black glaze gives you more gray tones and gave this picture frame a dirty distressed look:

How to Age, Distress & Antique | Pretty Handy Girl

It may take a while to build up the glazing. But, you end up with a really nice final product.


Spattering:

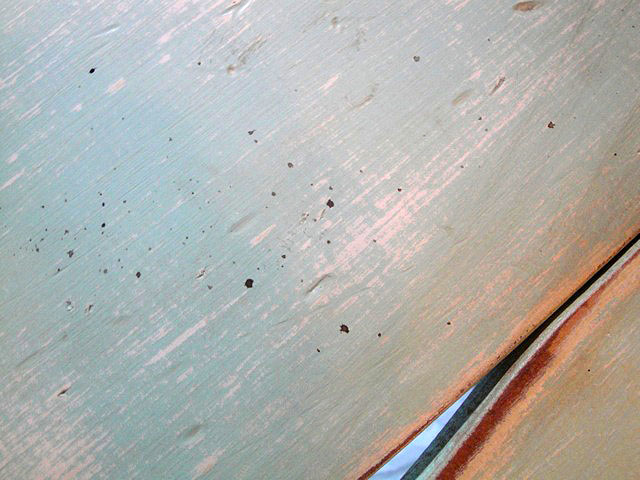
Another technique I like is adding paint or stain spatters. This is easy to do, but if you aren’t wearing protective clothing you might give yourself some freckles.

How to Age, Distress & Antique | Pretty Handy Girl

Materials:

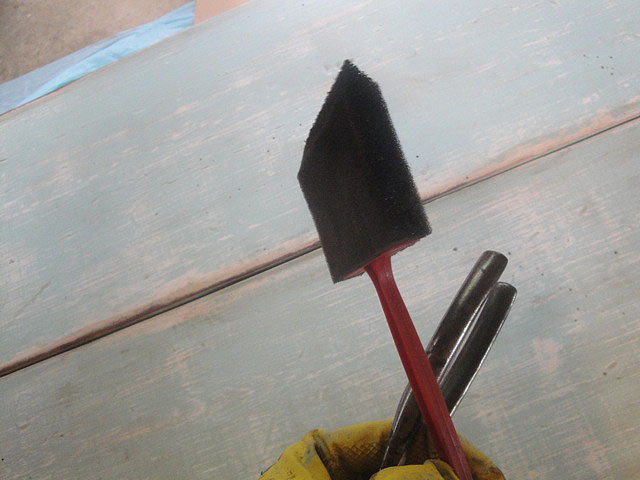
Dip a foam brushTechniques for Antiquing Furniture into the stain and wipe off any excess. Then gently tap the brush on a stick or handle of something sturdy. (A large screwdriver or other solid object works well.) This time I don’t wipe the stain off. Let it dry a little then dab up any excess.

How to Age, Distress & Antique | Pretty Handy Girl

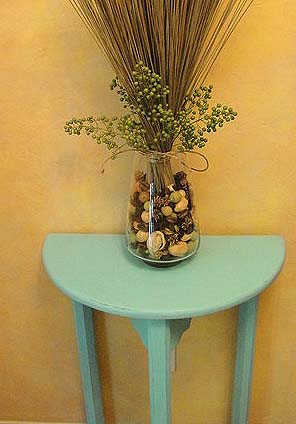
With these techniques, you can take a plain painted side table from this:

How to Age, Distress & Antique | Pretty Handy Girl

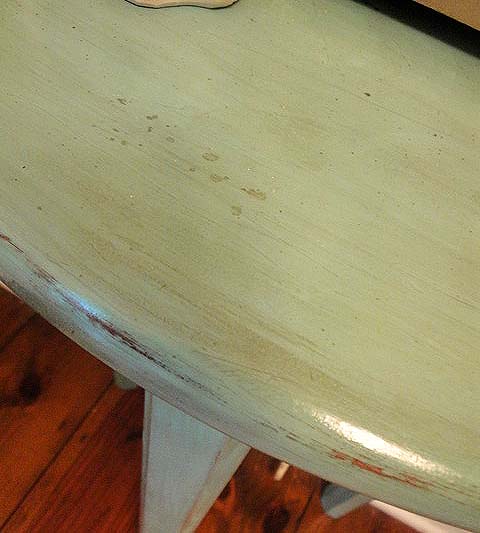
To a more sophisticated antiqued older sister:

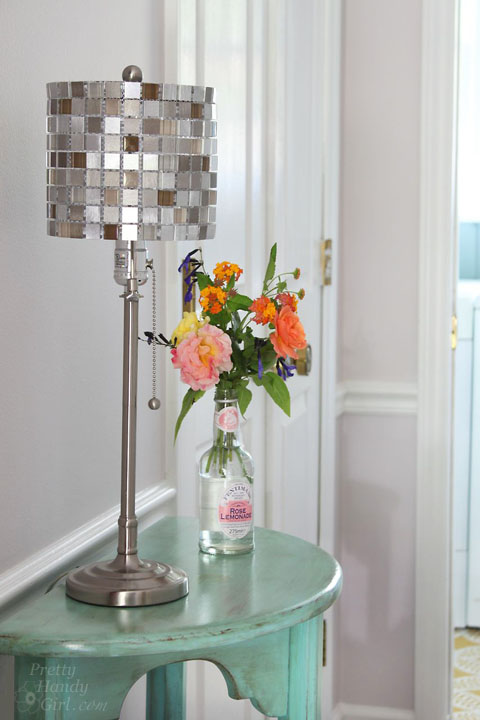
Make Your Own Mosaic Tile Lampshade | Pretty Handy Girl

How to Age, Distress & Antique | Pretty Handy Girl

Protective Coating:

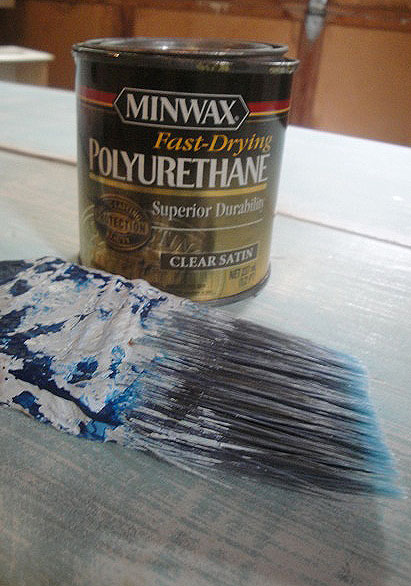
Once you have achieved the antiqued look you like, be sure to put a protective coating over your furniture. I prefer using Minwax Oil-Based Polyurethane. This adds the perfect age to furniture. (If you use new oil-based poly, it will yellow in a few years time.) If you don’t like the yellowing effect, stick to Minwax Satin PolycrylicTechniques for Antiquing Furniture.

How to Age, Distress & Antique | Pretty Handy Girl

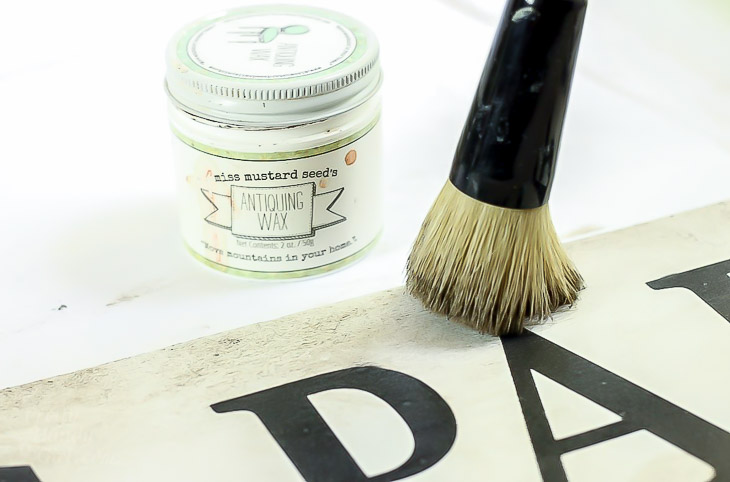
You can also use a good quality furniture wax for a satin finish. Or use an antiquing waxTechniques for Antiquing Furniture to really give it an old appearance.

Make Your Own Street Sign | Pretty Handy Girl

Now, don’t be distressed, grab some sandpaper and a brush and give your furniture an age boost!

How to Age, Distress & Antique | Pretty Handy Girl
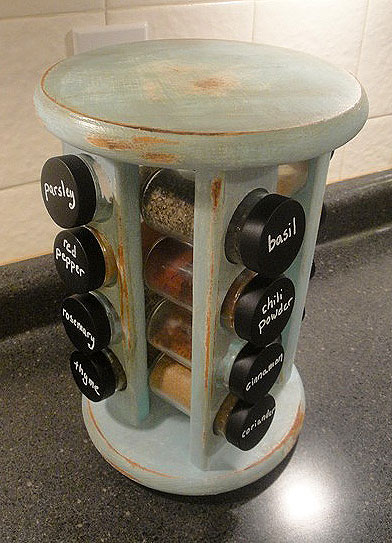
Yard Sale spice rack turned rustic! Chalkboard lids tutorial here.

Watch a live tutorial to see how I accomplished an aged paint look on this trough. And be sure to subscribe to my YouTube channel to get notifications when a new video is uploaded.

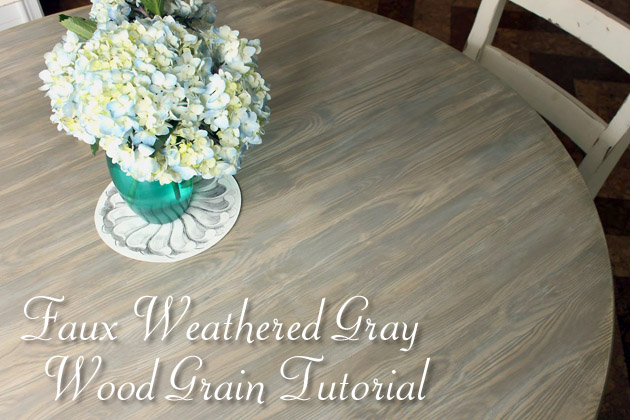
Now that you have some aging and distressing techniques under your belt, you can push your skills by trying your hand at some more complicated techniques! Like creating a faux wood texture on surfaces following this tutorial.

Faux Weathered Gray Wood Grain Tutorial | Pretty Handy Girl

How to Age, Distress & Antique | Pretty Handy Girl

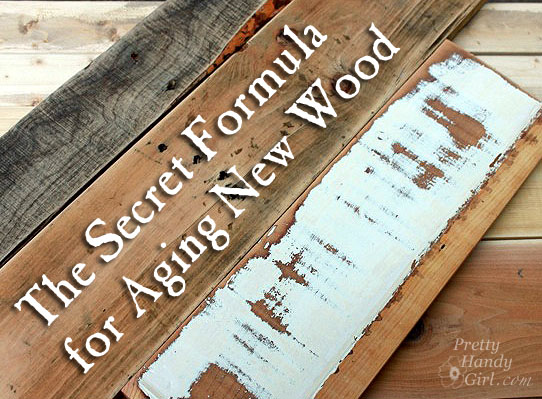
As a follow up to this post, I divulged my top secret recipe for making new wood look old!

Make New Wood Look Old - Aging Wood FAST!

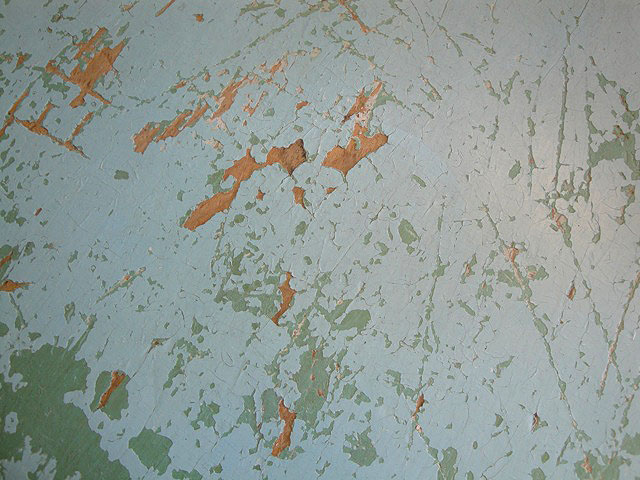
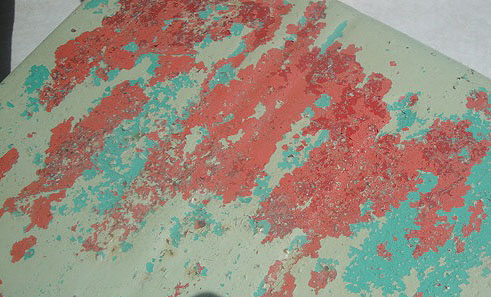
And how to get the true chippy paint look:

Techniques for Antiquing Furniture

You may also want to check out my gallery of rustic and distressed projects!

How to Age, Distress & Antique | Pretty Handy Girl

Sign Up to Receive More Painting Tutorials in Your Email:


Or follow me on TwitterFacebook, Instagram, or Pinterest so you can be the first to know what I’m working on next!

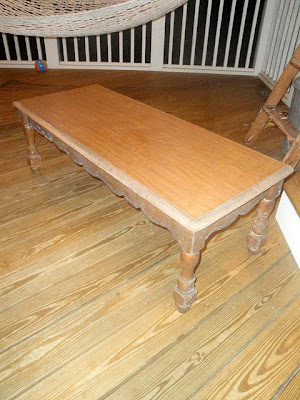
Okay readers, so the truth is out, I just can’t seem to pass up discarded furniture. They look so sad and pitiful awaiting the trash trucks. They plead with me to rescue them from life in the dump. That is how I found this coffee table.

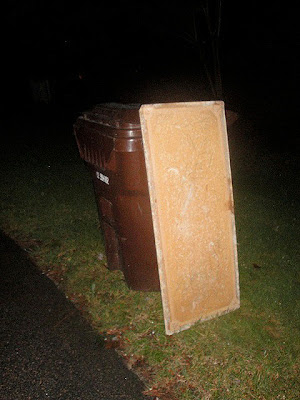
It was resting against a dumpster. The legs and skirt of the coffee table were in good shape structurally, but the top was cheap masonite (compressed and glued fibers of wood.) This type of wood will swell and absorb water like a sponge. I’m one of those unfortunate homeowners who’s house is sided with hardboard (essentially the same as masonite.) Now you can see why that isn’t a good thing:

Moisture causes mold to grow, and the retained moisture also causes the wood to swell, become misshaped and will eventually rot away. The first thing I did was unscrew the top and throw it away! Yuck.

Sorry Mr. Tabletop, there was no rescuing you.

I also removed the hardware from the table skirt and saved it with the screws.

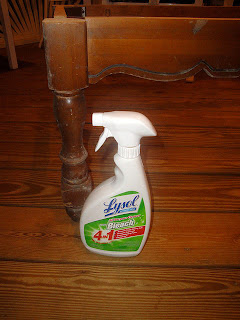
I cleaned the base of the coffee table with bleach cleaner to get rid of all the mold.

After it dried, I roughed up all the surfaces on the legs and base.

Then I primed it to seal the wood and prepare it for painting.

I painted the legs and skirt with two coats of Benjamin Moore Impervo white paint (leftover from our living room trim.)
I always paint the undersides or the hidden side first, then I use a technique for elevating my object and keeping it from sticking to the drop cloth.

Simply tap a nail into each leg after you have painted the foot. Then turn the table over and continue to paint. Some other bloggers have found the Rockler painting pyramids, but I have yet to find any in my local stores to try them out. Hey Rockler, if you are reading this, send me some painting pyramids so I can give them a spin and see if they work better than my nail technique!

After the paint dried, I removed the nails from the bottom of the legs and hammered floor protectors in their place.

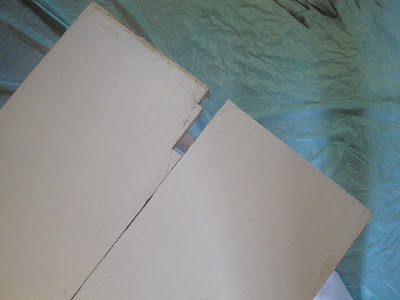
Now, to replace the masonite top with something with more age and character. I searched through my wood stash and found these two discarded boards that I think used to be in someone’s closet or pantry.

The boards fit well on the skirt of my coffee table, but it had a funny cut out on the edge of one of the boards. It was probably a profile cut.

It didn’t look very old or interesting to me, so I drew a line diagonally along the board and cut it off with my jigsaw. That looked much better! More like a salvaged board. Then I flipped the cut board to the inside edge.

I distressed my new table top with a heavy chain, pry bar, and hammer (read more here.)

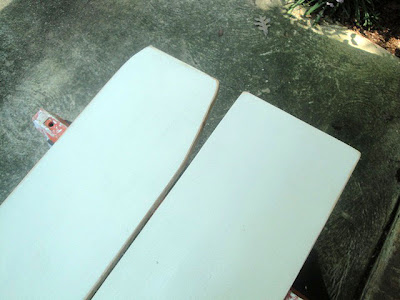
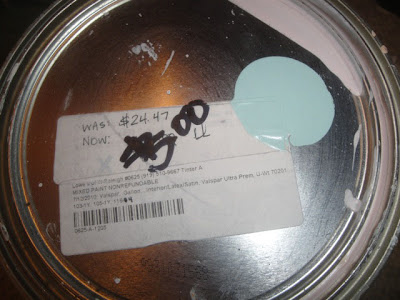
At this point, I went to my “oops” paint stash and chose this gallon of $5 baby blue color.

I know it looks like a nursery color, but I wanted something vibrant to show through after glazing and antiquing. I painted the whole table top this light blue color. Luckily I was able to skip the priming step because the boards had previously been painted.

After the boards were dry, I sanded, glazed and then applied a stain to antique it (more on these techniques here).

Then I turned the boards upside down, and used the screws I set aside to attach my boards to the table skirt.

I decided not to re-use the handle hardware that was originally on the coffee table.  Instead I wanted to give this table a beachy look. So, I added some shells to the front of the coffee table using my new favorite glue, E-6000 glue. This glue holds super strong, I even set the table down on the shell edge (forgetting they were there,) and the shell broke, but all the shells remained glued to the table. Now that is a strong bond!

My last step was to put a protective coating of polyurethane over the whole coffee table. I used an old can of oil based polyurethane that had yellowed. This added the perfect age to my coffee table.

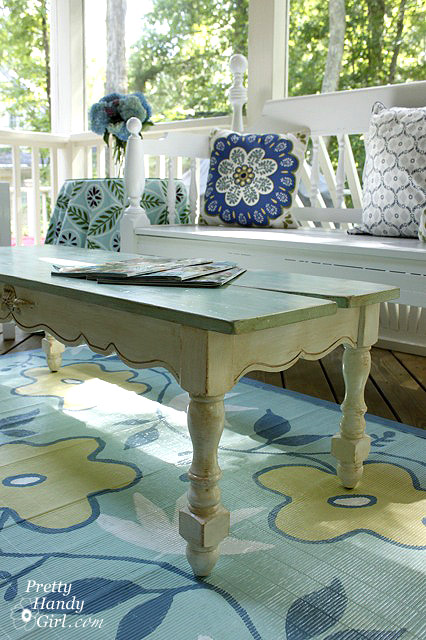
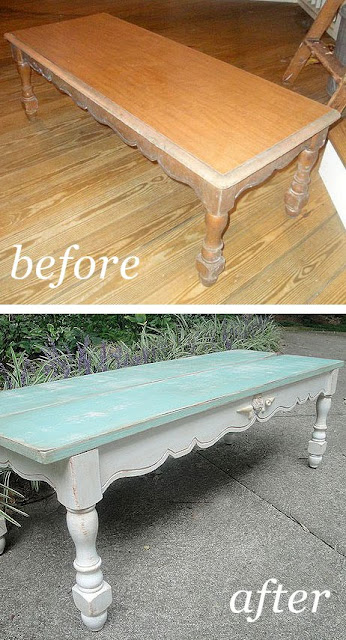
And here is my Trashy Coffee Table turned into a Beautiful Beachy Babe!

Uneven boards = instant character


Glazed legs and table skirt


Now isn’t she beautiful?
One more look at the before and after:
 

Not bad for a new coffee table for our porch that essentially cost me NOTHING, since I already had all the paint and supplies leftover from other projects. What do you think? Do you like her color? Or too baby blue for you?

Next Up: More tips on antiquing, distressing and adding age to objects. I hope you come back soon.

(I’ve included affiliate links for your convenience. I earn a small percentage from a purchase using these links. There is no additional cost to you. You can read more about affiliate links here.)