DIY Barnwood FrameDIY Barn Wood Picture Frame

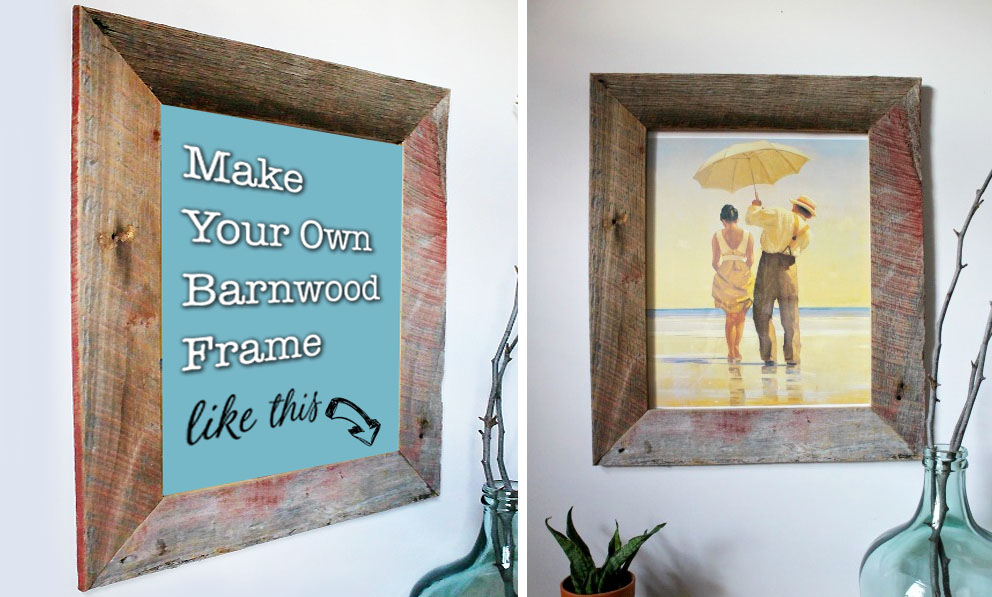
Hey all, it’s Shara here again from Woodshop Diaries!  Today, I’m excited to show you how to make a simple barn wood picture frame!

A friend of mine tore down his family’s tobacco barn recently and he asked me to make a few things out of the wood for him.  I recently finished a dining table and bench. I also made a few barn wood frames and they turned out beautifully!

In fact, they came out so great, I knew I wanted to show you how to make your own!

Materials:

(I’ve included affiliate links for your convenience. I earn a small percentage from a purchase using these links. There is no additional cost to you. You can read more about affiliate links here.)
Cut List for 16×20 frame:

  • (2) ¾” x 4″ x 27 3/8″ (both ends mitered 45 degrees NOT parallel)
  • (2) ¾” x 4″ x 23 3/8″ (both ends mitered 45 degrees NOT parallel)
  • ¼” x 18″ x 22″ backing

Instructions:

Step 1: Cut frame boards to size per cut list above.

For this project, I used barn wood.  It was old, dirty, and rough.  None of it was cut to the same size, so the first thing I did was rip all my boards the same width.  If you are using old barn wood, or pallets, you’ll want to rip all your lumber to the same width.  If you are using new boards from the lumber store, you can skip this step.

To achieve the same width as my barn wood frame, rip all boards to 4 inches wide.  (Remember, if you buy new boards, 1x4s are only 3 ½” wide and 1x6s are 5 ½” wide, so your measurements will be slightly different than mine since I used 4″ wide boards.)

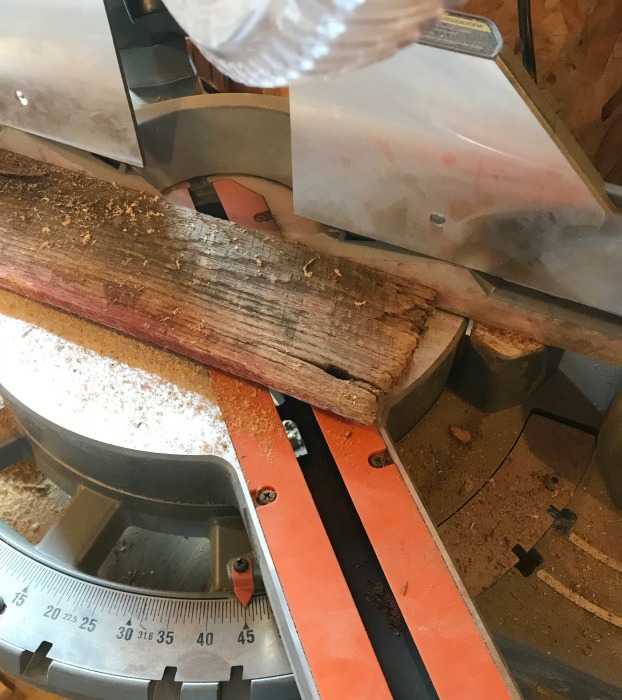
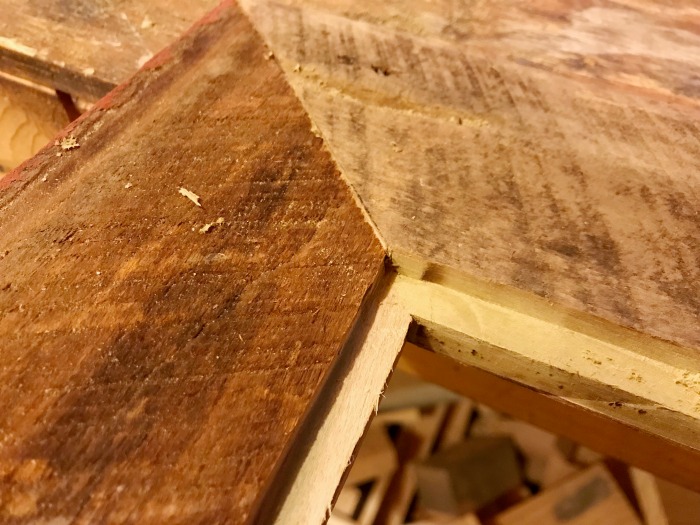
Miter the ends of each board 45 degrees.

Step 2: Glue frame together

Dry fit the frame pieces together and make sure they fit and everything is square.

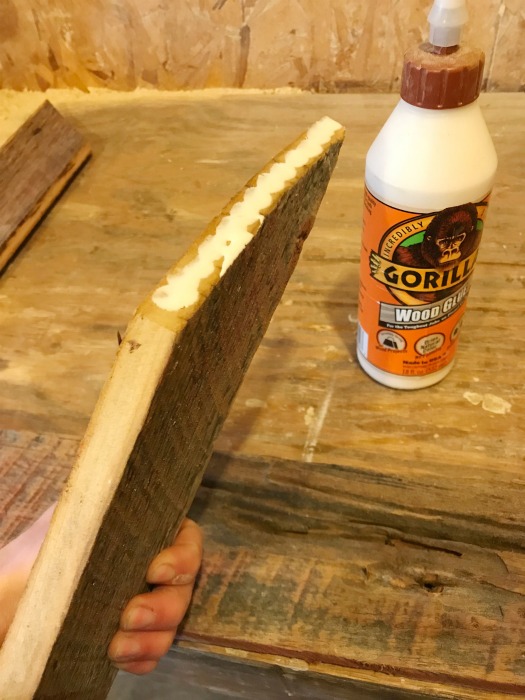
Use wood glue to join all the corners and press together.

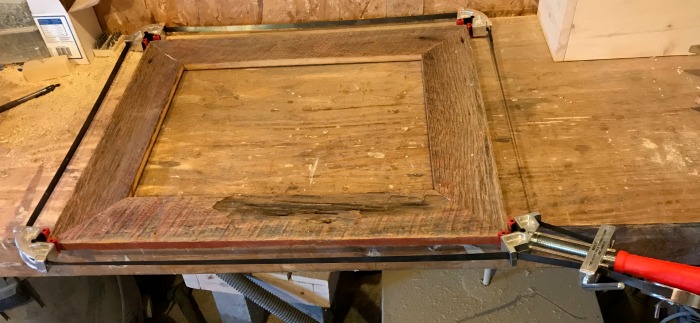
Use either bar clamps, or a corner clamp to hold the frame together while the glue dries.  Reinforce the joints by stapling the back side of the corners. Alternatively, you can use metal L brackets, just make sure the screws don’t go all the way through your frame.

Step 3: Route out back side for glass panel

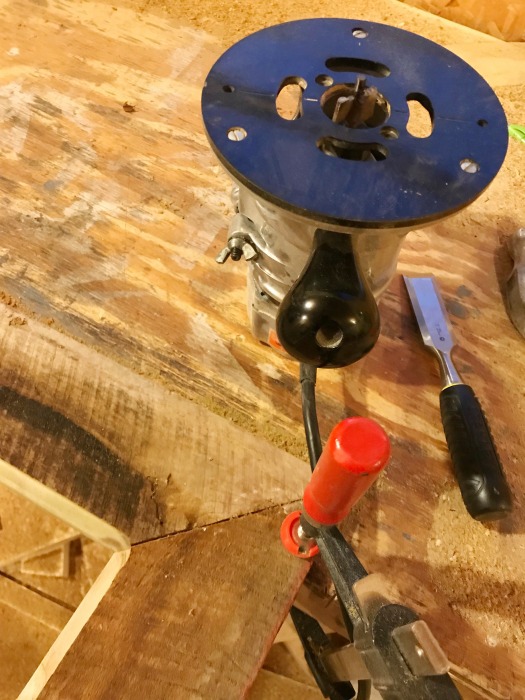
Using a router and a 3/8″ rabbet bit, route out the inside opening of the back of the frame like shown.  Set your cutting depth the same or slightly more than the thickness of the 16×20 glass panel for the frame.

Clean up and square off the corners using a chisel.

Set your glass panel in place to make sure it fits.  If it doesn’t, chisel out any material keeping it from fitting in place.

Step 4: Glue glass in place

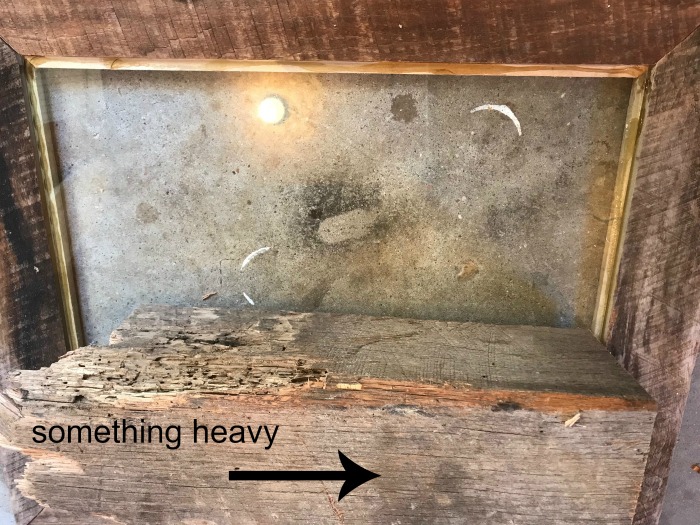
Using Clear Gorilla Glue (which, by the way, is awesome stuff), run a bead of glue in the groove you cut in step 3 and place glass panel in place.

Set something heavy (but not too heavy) on the glass to hold in place until the glue dries.

Step 5:  Add backing

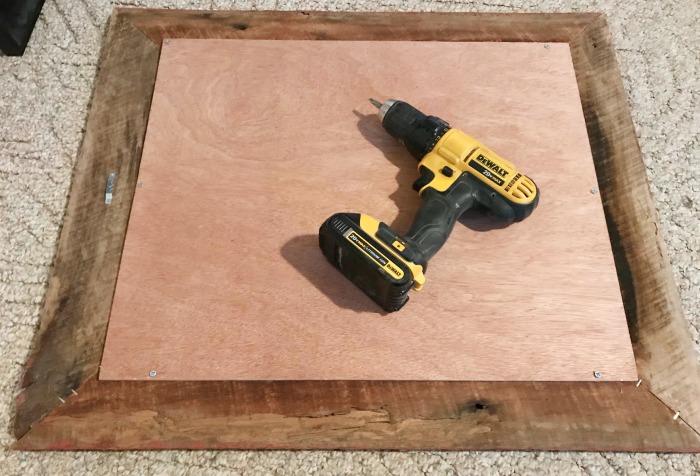
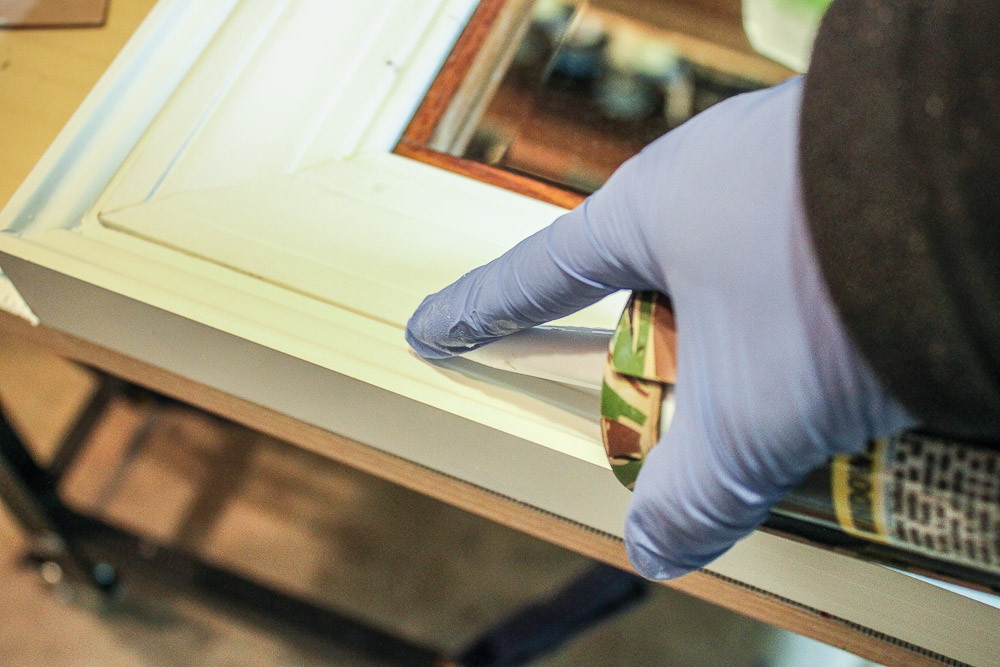
Once the glue is dry, place your picture in the frame, then attach the backing and hanging hardware.  Use 5/8″ wood screws to attach the ¼” plywood backing like shown.  Attach the hanging hardware in your frame.

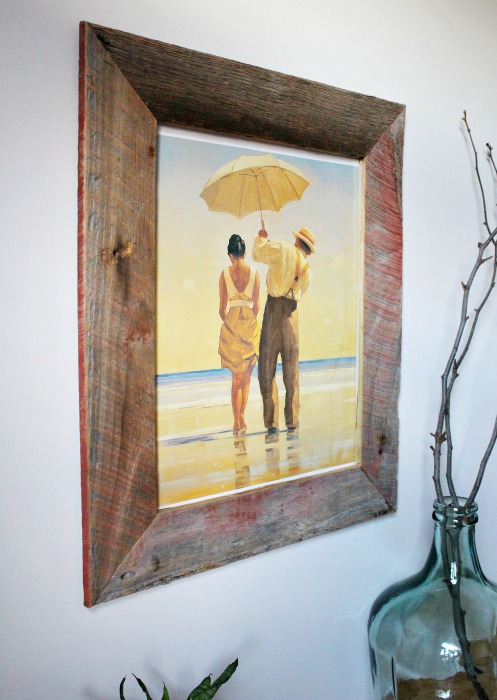
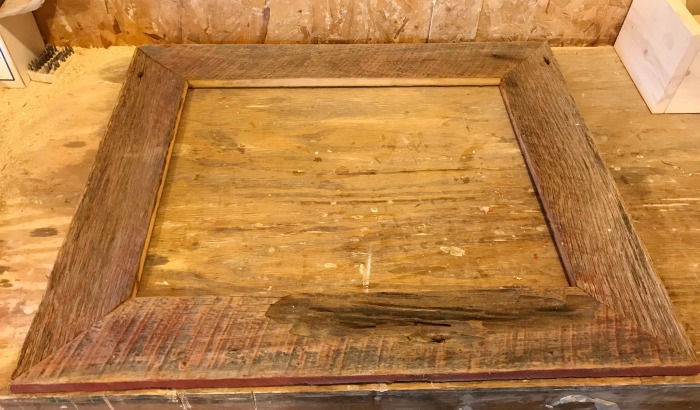
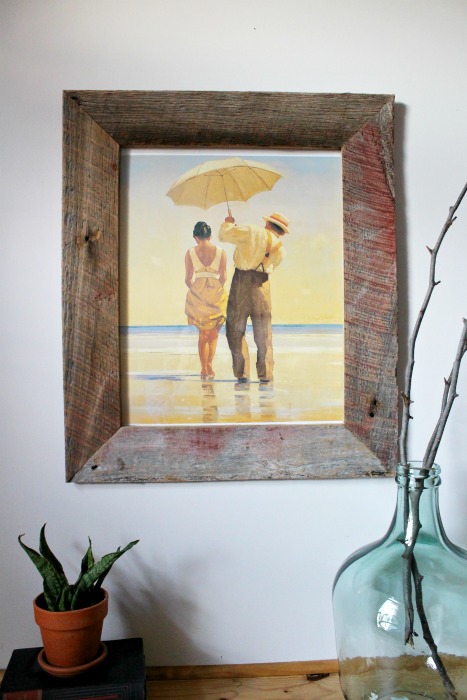
And that’s it!  Your DIY Barn Wood Frame is ready to hang!

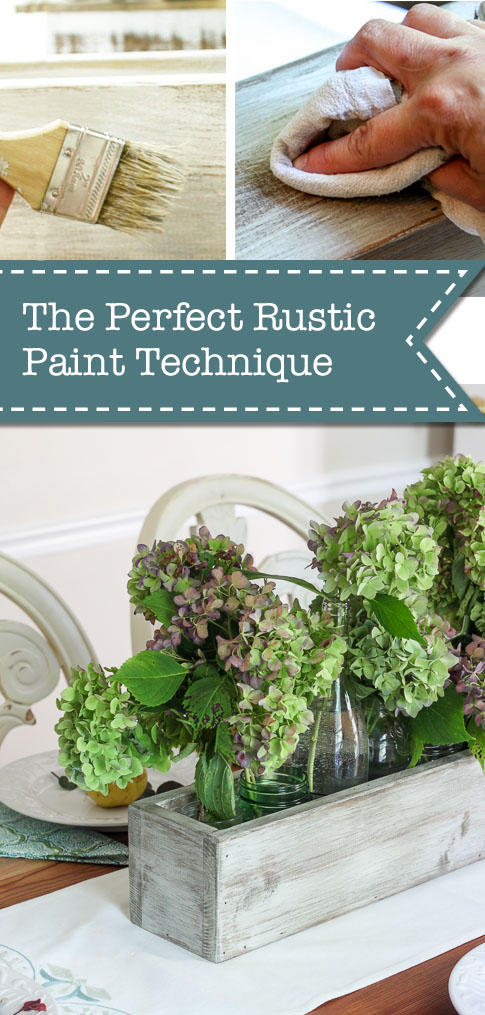
The detail on this old wood is so pretty!

This would also be a great project for pallet wood or any old reclaimed wood if you don’t have actual barn wood available!

I hope you enjoyed this tutorial and give it a try for yourself!  Happy building!

Shara's Signature

~See more of Shara’s tutorials~

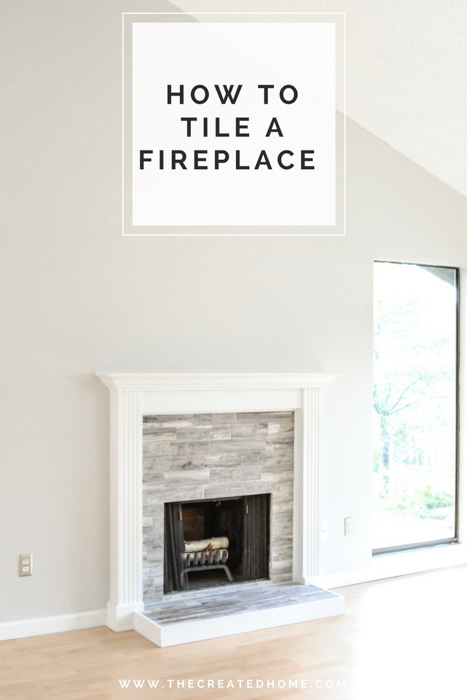
How to tile a fireplaceHow to Tile a Fireplace

Hello Pretty Handy Girl Readers! Sarah here from The Created Home. Today I’m sharing how you can update and customize your fireplace by doing your own tile work. Don’t be intimidated, tiling is actually quite accessible for DIYers, and once you get the hang of it you’ll be unstoppable. You may even find that you really enjoy it!

As with any DIY, especially one you are new to, you will need to read all the way through to make sure you are familiar with the process and always take proper safety precautions. Use ear and eye protection when you are using a tile saw. Read the manual for your tile saw and make some test cuts to get the feel for using it.

Note: This tutorial will not cover the grouting step. The tile I chose for this project was close together and did not require grout. I’ll cover that in more detail in just a bit. To learn how to grout, read Brittany’s tutorial on grouting and sealing tile.

Materials:

(I’ve included affiliate links for your convenience. I earn a small percentage from a purchase using these links. There is no additional cost to you. You can read more about affiliate links here.)

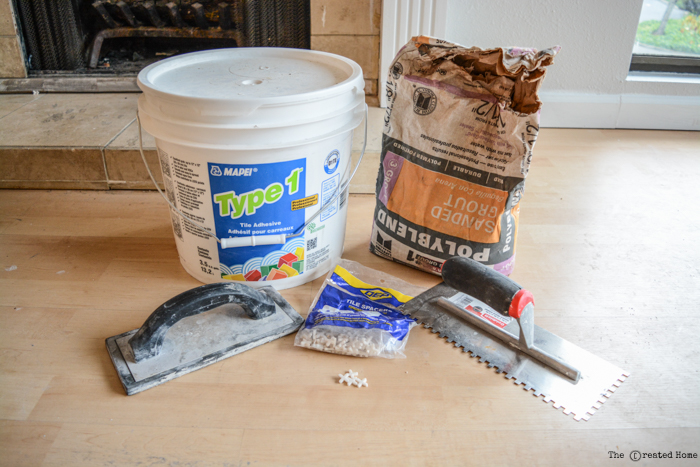
tiling supplies

How to Tile a Fireplace: Make a plan

Entire tutorials can be written about how to choose and plan out your tile. There are a LOT of options out there. Bear in mind that a patterned tile will require more work when laying out, as the pattern needs to be visible and centered in the space. Example: In this fireplace I would have loved to use a cement tile look, but the tiles I found were 8″ and the sides of the firebox only allowed for 6 ½” (which would have looked awkward with the designs I liked.)

Ugly Before Shot:
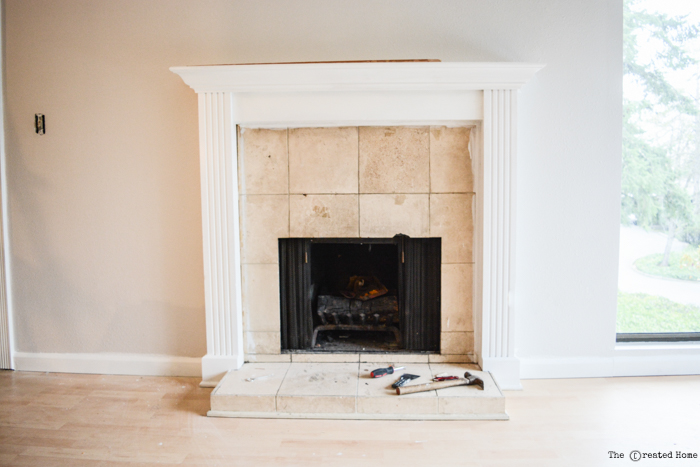
tile fireplace before

A second thing to keep in mind is that knowing the square feet to be covered is only half the battle. Chances are you’ll have a number of small pieces to cut which will render some part of each tile unusable. It’s a good rule of thumb to always get 10 – 15% more tile than you need.

Once you have the tile you will need to plan your layout. Where will a row have to be ripped to fit? Where will the pattern repeat? What order will the tile need to be applied? For this project my husband and I spent just as much time making the plan as actually installing the tile.

Get to work:

For this project we chose to tile over existing tile, which was far simpler than removing what was there (even with the poor shape it was in.) If your tile doesn’t have adhesion issues this may be a great route for you. We tested the waters [tile] here and found that the damage to the existing tile was superficial, albeit highly unattractive.

damaged tile fireplace

Once you have a game plan it’s time to make your first cut. A tile saw (or wet saw) cuts much like a table saw, but it needs a constant source of water to keep the blade cool and the dust down. Keep a pail of water on hand to refill the saw as needed. Some tile saws can be hooked up to a water source via a hose.
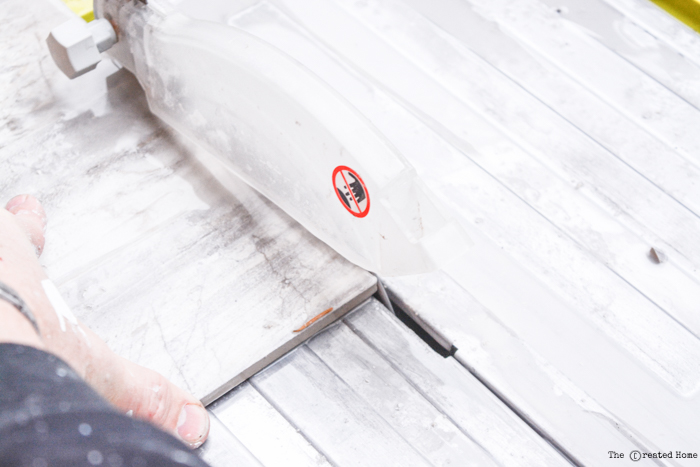
tile saw wet saw

You will be covering the edges where the tile runs into the wood mantle surround with some sort of trim, so it’s not important that you are dead on with every cut fitting perfectly against that edge. This is also useful if you run into issues with things being out of square (which happens frequently). You can see in the photo below the tile does not fit snuggly, or uniformly along the far sides.
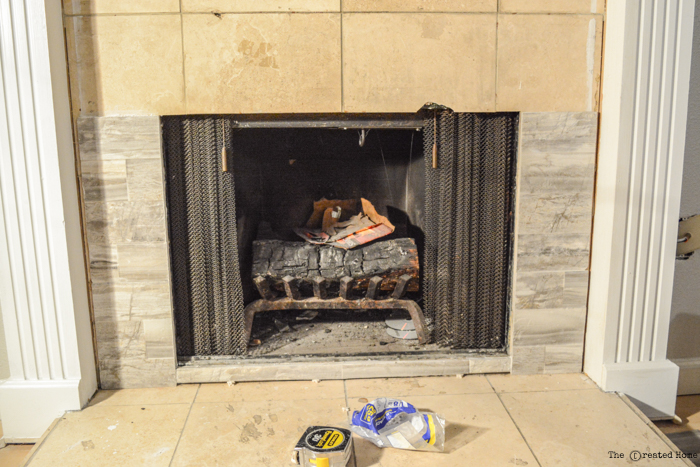
How to Tile a Fireplace

Using a Wet Saw: a few tips

I recommend using a tile saw rather than a snap cutter (which just doesn’t work very well). It can be intimidating at first, but go slow, use caution, and follow some basic rules to ensure a professional looking, safe job.

The first rule, is to keep those fingers away from the blade. Make your cuts slow and steady. Water should be flowing around the blade constantly as you gently push the piece through. You can avoid chipped ends by pushing the piece through very, very slowly as you reach the end, being careful not to force the blade. Too fast and the corner of your tile will likely chip off.
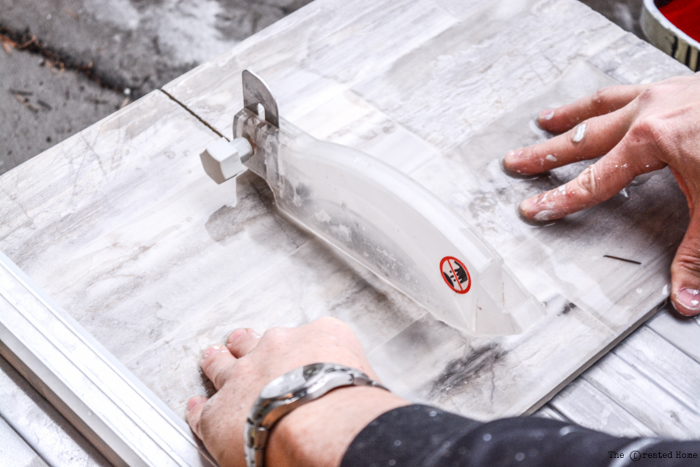
wet saw tile saw fireplace

Use your fence to make sure your cuts are straight. You may have to trim off ends if you tile is staggered, as ours was. Place the trimmed end to the outside, where it will be covered with molding.
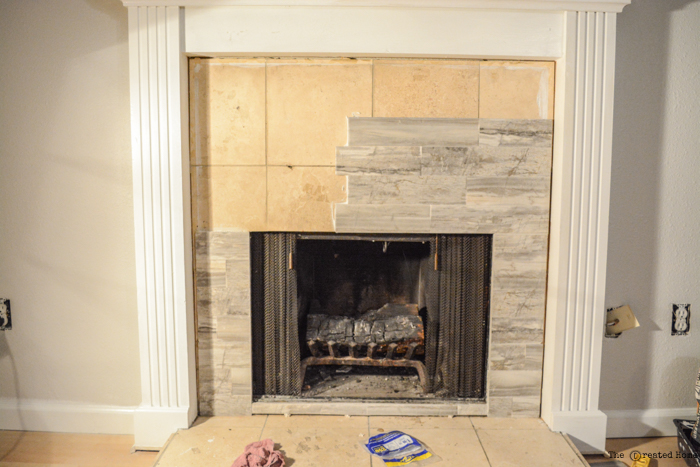
How to Tile a Fireplace

How to Tile a Fireplace: adhering the tile

Tile adhesive comes either pre-mixed or in powder form. Pre-mixed is great for small jobs like a fireplace, but either route is fine. Use the notched trowel to spread the adhesive on the back of the tile piece, covering the entire back.
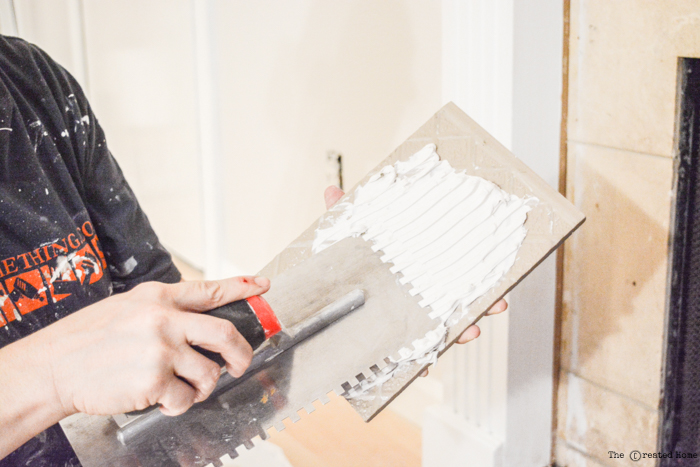
how to tile

The notches will leave tracks, like so:
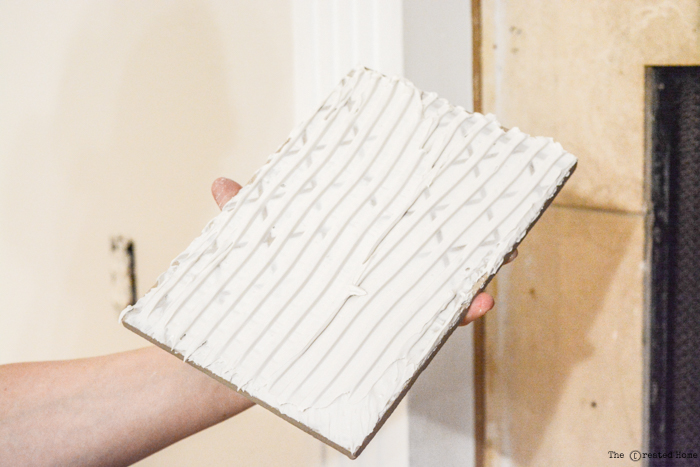
how to tile

Position the tile where you want it and push firmly, wiggling it around a bit so those tile tracks fill and the tile is firmly adhered along every point to the fireplace.
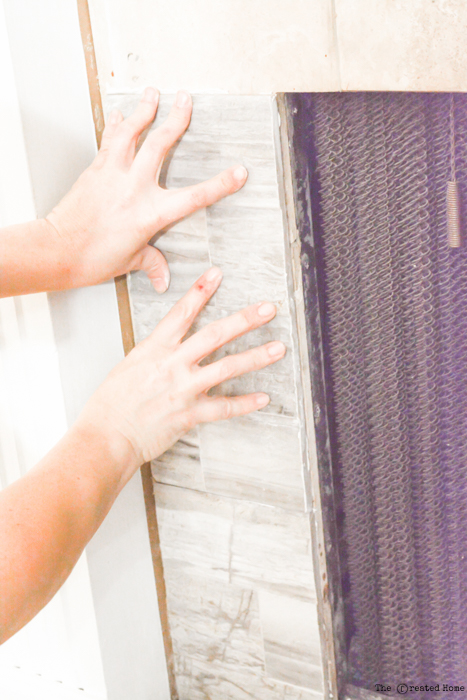
how to tile a fireplace

If you are grouting between your tiles you will use spacers around each piece. The pieces we used required being set close together to mimic the look of the “preset” tiles. We used the adhesive to fill any small gaps that did show. Again, be sure to check out Brittany’s grouting tutorial if you plan to use grout.

how to tile a fireplace

Continue adding the tiles to the desired pattern. Be sure to account for how your final row will fit, as it will in all likelihood require cutting the tile crossway to fit correctly. The good news is you will be able to hide the seam at the top with some molding.
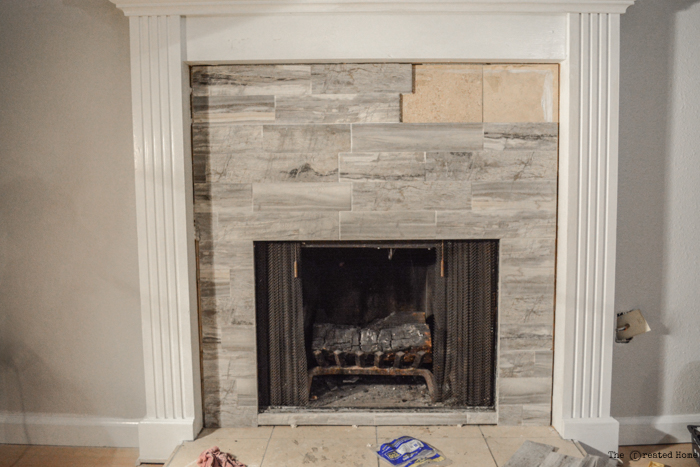
tiling over existing tile - How to Tile a Fireplace

This fireplace required tile down on the hearth as well, which meant notching around the mantle. To make those cuts be sure you are cutting the tile face up and draw lines to help guide your cuts. The blade will undercut a bit farther than your top cut, but it will be hidden underneath. You’ll quickly discover that most lines are not square, and probably have a gap something like this. Use some caulking to seam it all together and it will look just fine.

tiled hearth

Finishing the Fireplace: adding trim

Molding completes the finished product and hides those seams. Quarter round is a great option for the fireplace. Paint the molding to match the mantle. Attach by driving brad nails through the quarter round at an angle so it goes into the hearth. Caulk around the molding for a seamless look.
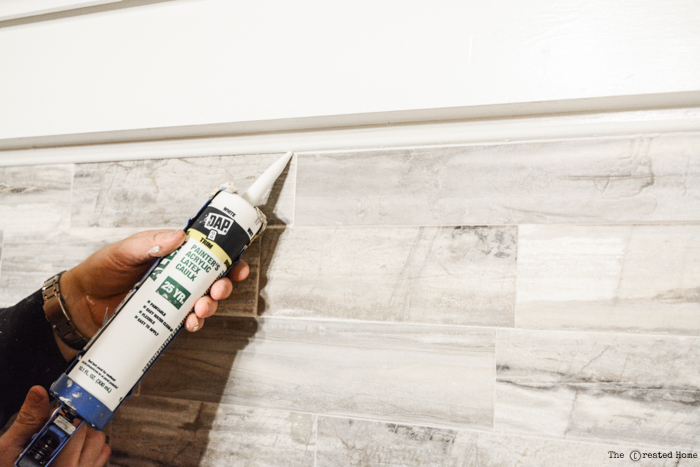
fireplace molding

Bonus Content: wrapping the hearth

The front of the hearth here had tile, and I decided the better look would be to wrap it in wood instead to tie it into the white of the mantle and break up the tile a bit. It’s the same look I created when we redesigned our own fireplace.
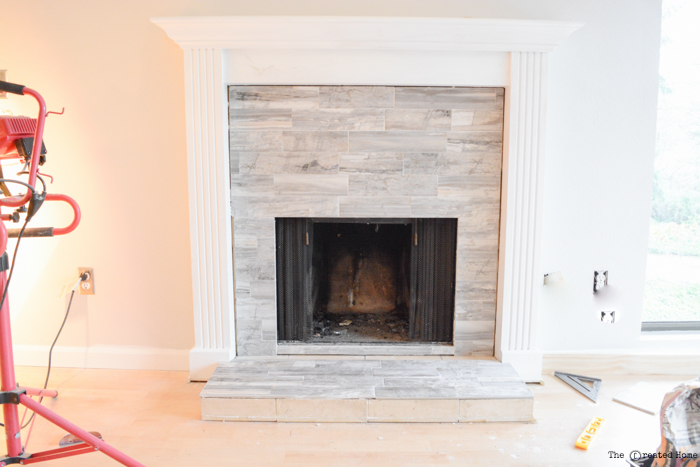
how to tile a fireplace

To create this look you will need a piece that is the same width as the height of the hearth front inclusive of the tile you just added. If you are lucky you won’t have to rip a piece down to fit.

The sides of that front can be square cut or mitered. To miter the front, cut one end at a 45 degree angle. I prefer to use the saw’s bevel function to get this cut nice and straight.
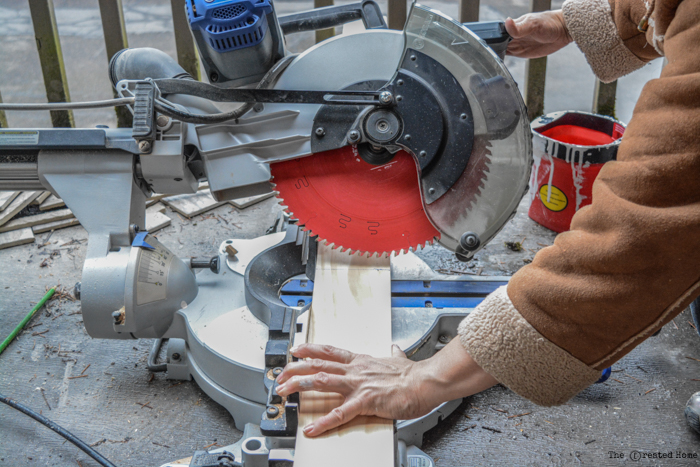
bevel cut

Place the piece against the front of the hearth and line up where it will sit.
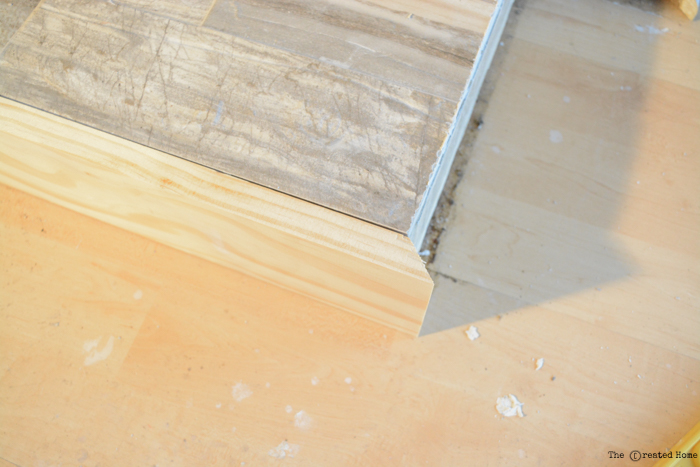
miter cut hearth front

Mark the other end where the short end of the 45 will sit. This is easier and more accurate than simply measuring.
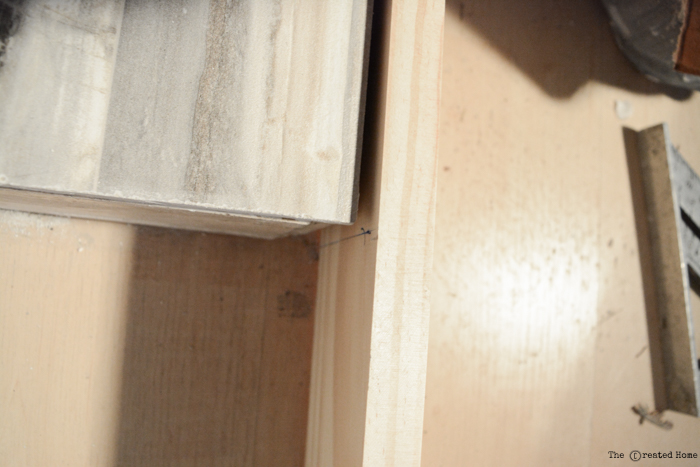
marking cut

It also helps to sketch the angle of your cut while the wood is in place to ensure you don’t cut the wrong way (it’s easy to do).
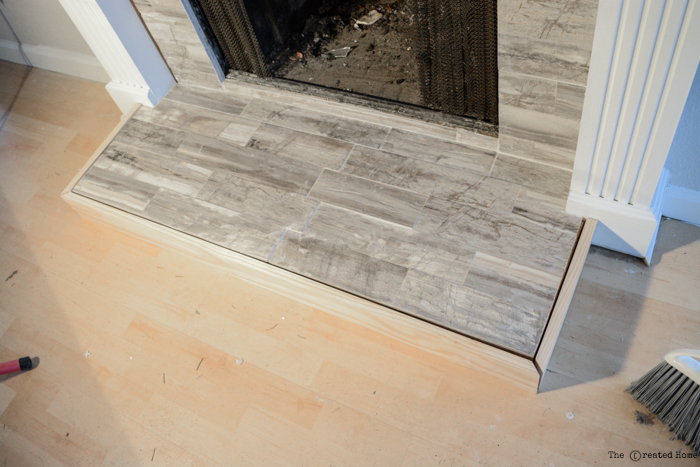
How to Tile a Fireplace

Cut 45˚ for the side pieces, then measure and make the 90 degree cuts. You can easily cut those back to fit, so cut a little at a time. Paint the molding. Attach by finish nailing the angles together, and then either nail or glue it to the face of the hearth. We used construction adhesive and clamps, letting them sit overnight.

Stand back and enjoy your hard work!
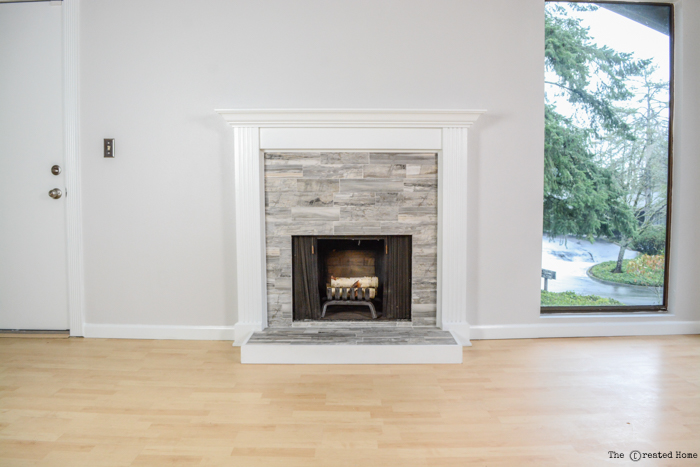
how to refinish a fireplace with tile

As you can see, not only are there a lot of options for refinishing a fireplace, there are a ton of options for tile itself. Tiling is a great way to go that doesn’t have to cost a lot of money. Our cost for this fireplace was just over $100.

When we started, this fireplace was far from the focal point of the home, as you can see . . .
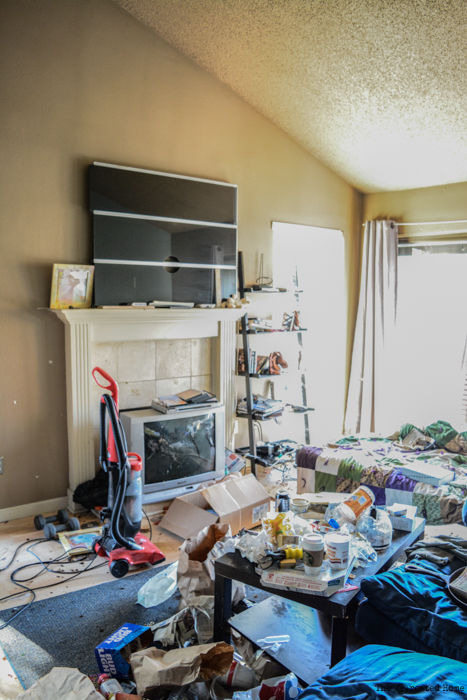
fireplace before

. . .and here’s the dramatic finished look.
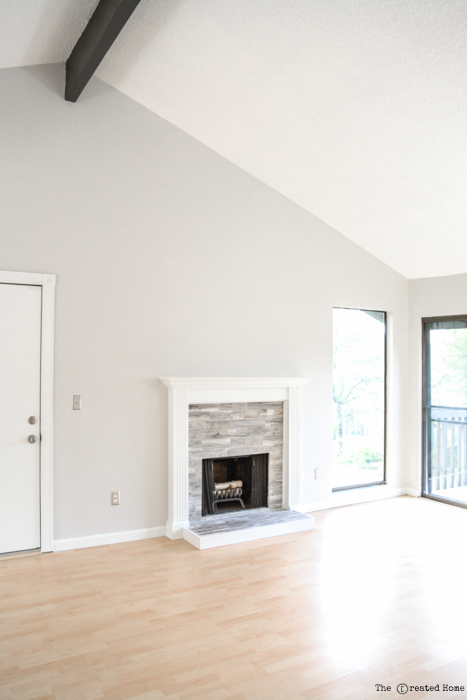
How to Tile a Fireplace

Now it’s your turn! Put those tiling skills to work and tile it up! In no time at all you’ll be chatting with company and casually mention, “Oh yes, the fireplace. did that. No big thing.” And don’t forget to share your before and after photos so we can all admire the transformation with you.

Happy tiling!

~See More of Sarah’s Projects~

Check out these other posts to up your tiling game!
 

8. Complete with "L" brackets on corners. Add gifts and deliver!

DIY Sheet Metal Gift TraysDIY Sheet Metal Gift Trays

The holidays are fast approaching and it’s time to start thinking about gift giving ideas! Gift trays are a great way deliver gifts to your friends, neighbors or teachers. The best part of a gift tray is it can be reused for anything they want and nothing goes to waste! Follow along with this tutorial to see how to make these DIY Sheet Metal Gift Trays.

Materials:

(I’ve included affiliate links for your convenience. I earn a small percentage from a purchase using these links. There is no additional cost to you. You can read more about affiliate links here.)

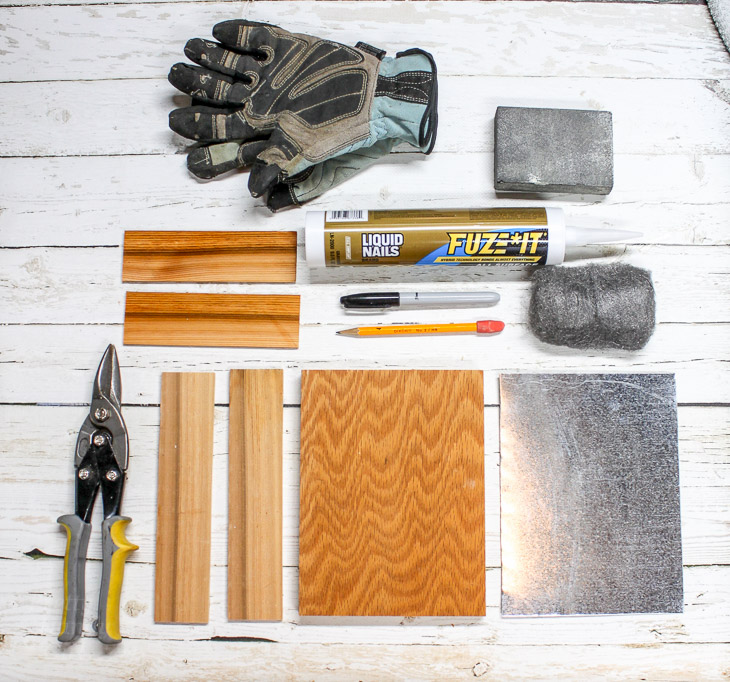
Materials: Sheet Metal Gift Tray

  • 1/2″ or 3/4″ Plywood scrap wood
  • 2″ pieces of lathe or scrap moulding
  • [amazon_textlink asin=’B000W49NPC’ text=’Sheet metal scrap’ template=’ProductLink’ store=’prett-wp-001-20′ marketplace=’US’ link_id=’4f103892-cbe2-11e7-a00c-3fda84932599′] (large enough to cover plywood base)
  • [amazon_textlink asin=’B00009OYFY’ text=’Sheet metal snips’ template=’ProductLink’ store=’prett-wp-001-20′ marketplace=’US’ link_id=’56db011a-cbe2-11e7-88c9-230adf5bdb2c’]
  • [amazon_textlink asin=’B000S7ZSTS’ text=’Construction adhesive’ template=’ProductLink’ store=’prett-wp-001-20′ marketplace=’US’ link_id=’65c9549d-cbe2-11e7-8619-39ed35fc6585′]
  • [amazon_textlink asin=’B000DZF2Q4′ text=’Caulk gun’ template=’ProductLink’ store=’prett-wp-001-20′ marketplace=’US’ link_id=’6d3fe28c-cbe2-11e7-bb25-e144f3be5a89′]
  • [amazon_textlink asin=’B00125NQBC’ text=’Sandpaper’ template=’ProductLink’ store=’prett-wp-001-20′ marketplace=’US’ link_id=’7f0ff979-cbe2-11e7-b34f-fb2f071c5869′]
  • [amazon_textlink asin=’B001JYVDSE’ text=’Steel wool’ template=’ProductLink’ store=’prett-wp-001-20′ marketplace=’US’ link_id=’8e654c5e-cbe2-11e7-b495-0ffc93a9294c’]
  • [amazon_textlink asin=’B01I7DNOYA’ text=’Gloves’ template=’ProductLink’ store=’prett-wp-001-20′ marketplace=’US’ link_id=’b09e21ba-cbe2-11e7-91af-d908a698cd02′]
  • Drill
  • Pencil or Marker
  • 4 – [amazon_textlink asin=’B01N6NID4X’ text=’L brackets’ template=’ProductLink’ store=’prett-wp-001-20′ marketplace=’US’ link_id=’de9d5670-cbe2-11e7-84b2-2f143e838863′] and 1/2″ wood screws
  • [amazon_textlink asin=’B001PNH8D8′ text=’Brad nails ‘ template=’ProductLink’ store=’prett-wp-001-20′ marketplace=’US’ link_id=’0337c2d4-cbe3-11e7-b1d7-3dfa06c67bf1′]Nail gun

Instructions:

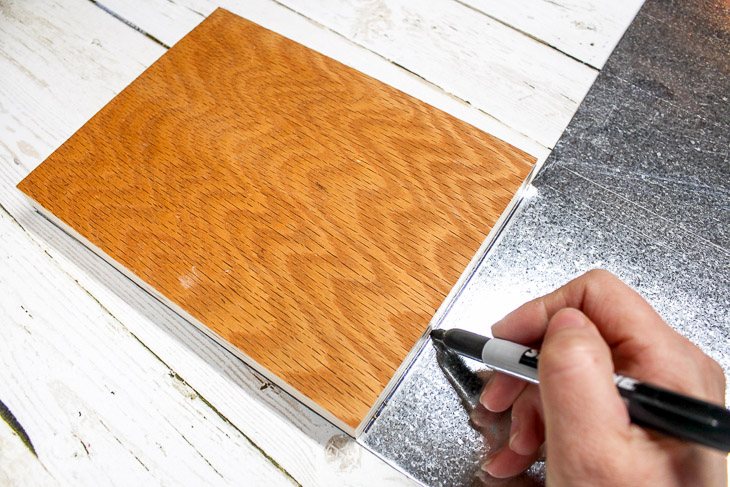
Cut your piece of plywood to the desired size for the tray base. Lay the plywood base on top of the sheet metal and trace with a permanent marker. Use tin snips to cut the metal to size.

1. Cut base and mark sheet metal size.

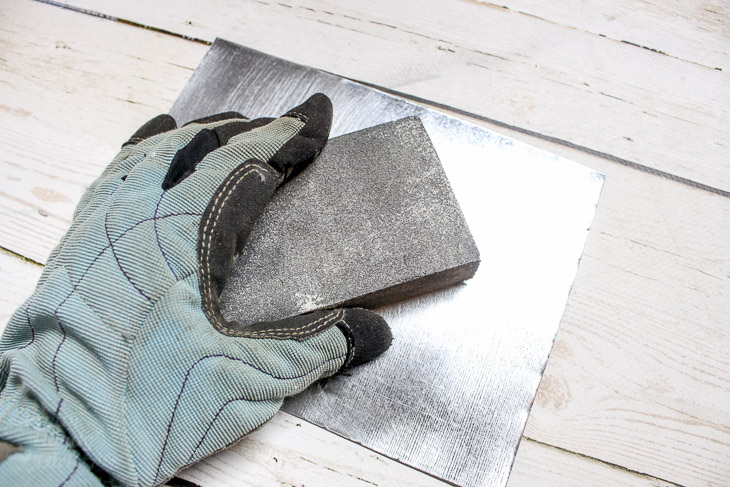
Put on your safety gloves and use the sanding block to remove some of the shine from the sheet metal. Smooth over any sharp edges.

2. Sand Sheet metal edges and base.

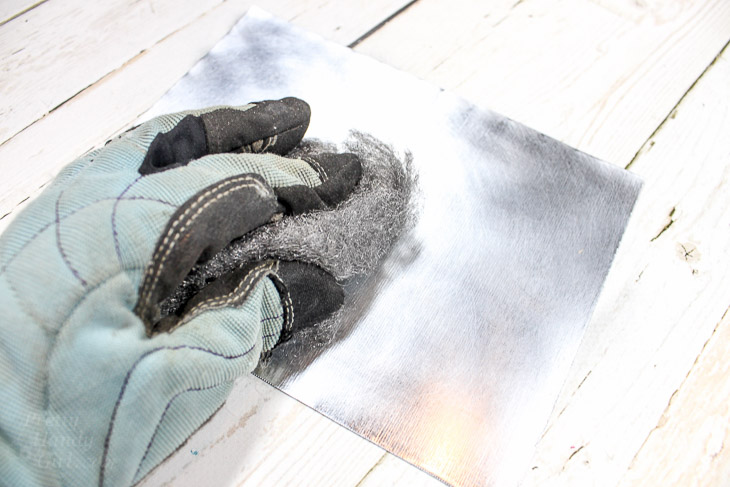
Rub the steel wool over the entire sheet metal piece to give it a soft polished finish.

4. Use steel wool to dull sheet metal surface.

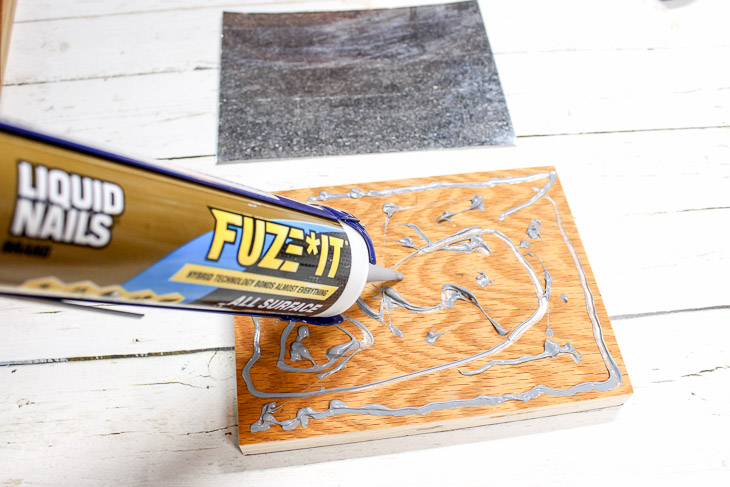
Load a tube of construction adhesive into your caulk gun. Apply a fair amount of adhesive to the plywood. Glue the sheet metal to the top of the plywood.

5. Add Construction Adhesive to wood base

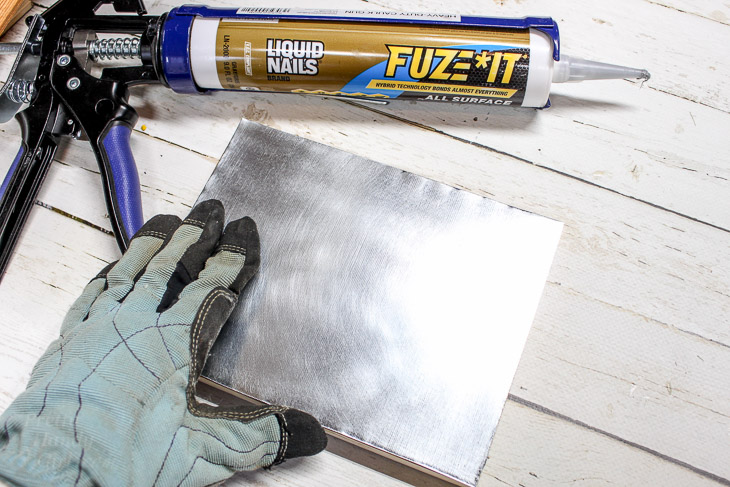
Press the sheet metal down evenly on top of the adhesive. Wipe off any excess if needed with a paper towel.

6. Press sheet metal on top of wood base.

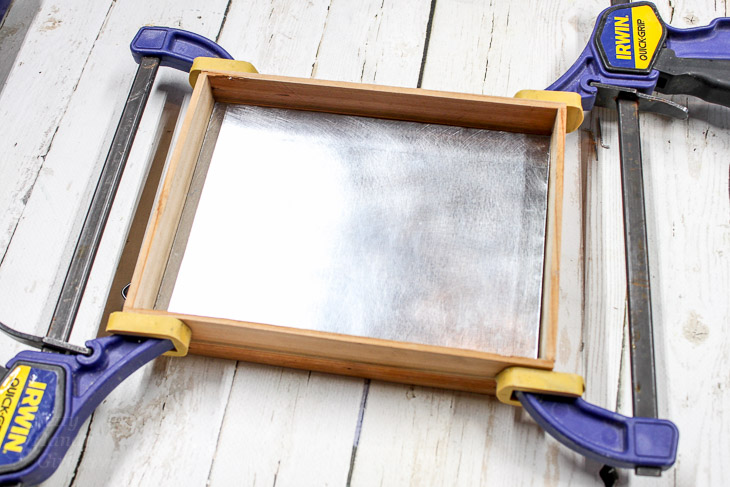
Cut the 2″ pieces of lathe or scrap moulding to the length of the two shorter sides. Next, measure and cut two pieces of lathe for the long ends. (Be sure to allow extra length to overlap the short pieces of lathe/moulding.  Use the construction adhesive and brads to secure the lathe to the sides of the plywood. Clamp the sides until the adhesive cures.

8. Clamp sides while glue cures.

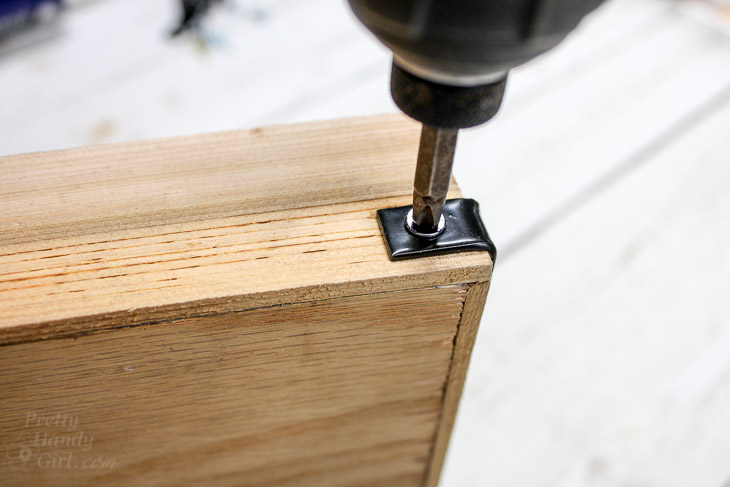
Once the adhesive is cured, remove your clamps. Attach the L brackets on the lower half of each corner using 1/2″ wood screws. The L brackets will reinforce the sides and add an industrial look.

9. Add corner brackets for extra support and decoration.

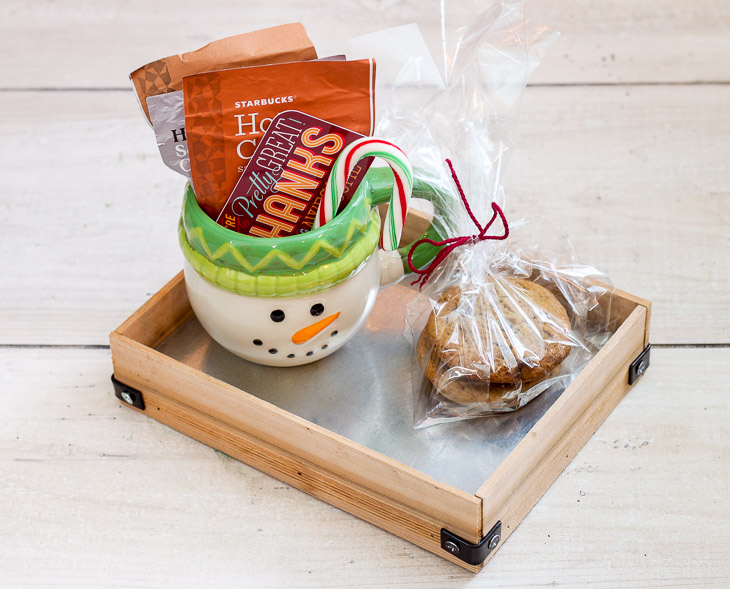
There you have it! These DIY Sheet Metal Gift Trays are easy to make, look great, and are an extra special and environmentally-friendly way to give gifts!
10. Add gifts and deliver!

I hope you love this project. Do you have other ideas for quick gift giving? Please share!

signature

Want some more gift giving inspiration?

DIY Scrap Moulding Trays

scrap-moulding-trays

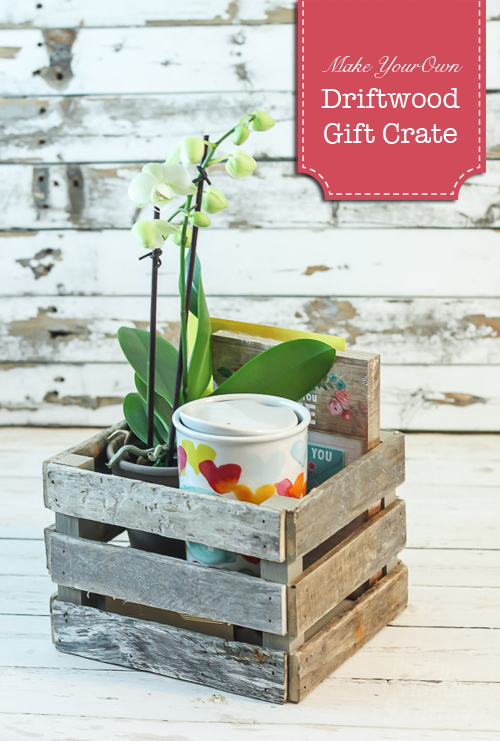
Make a Driftwood Gift Crate

Make a Driftwood Gift Crate | Pretty Handy Girl

5 Tips for Building Professional Looking Furniture


5 Tips to Building the Best Looking Furniture

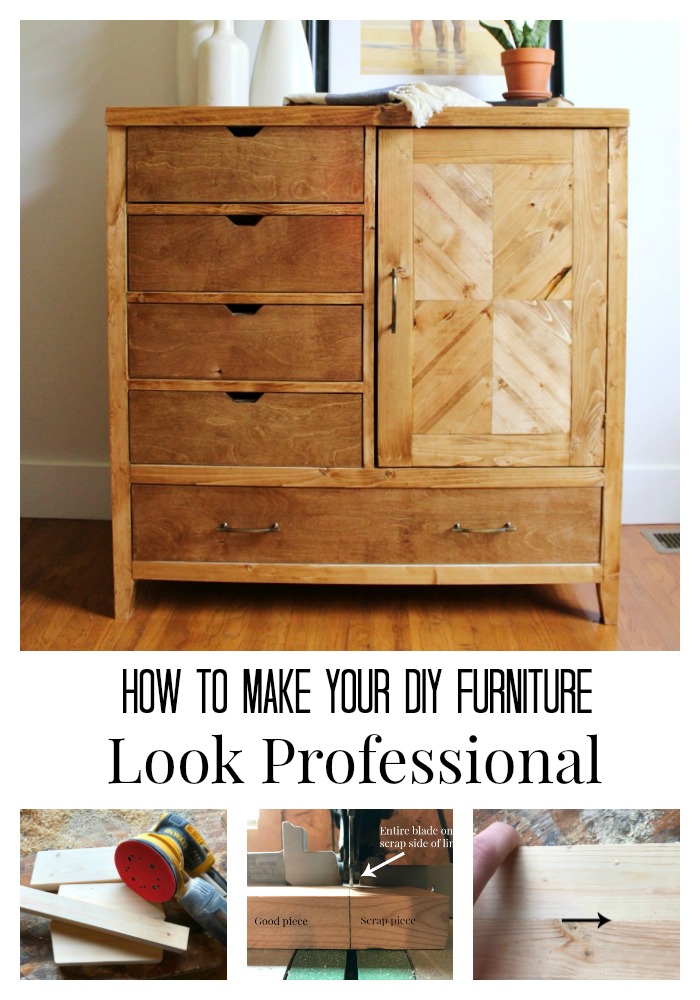
It’s Shara here again from Woodshop Diaries and today I want to share Five Tips to Building the Best Looking Furniture, which will result in more professional looking results.

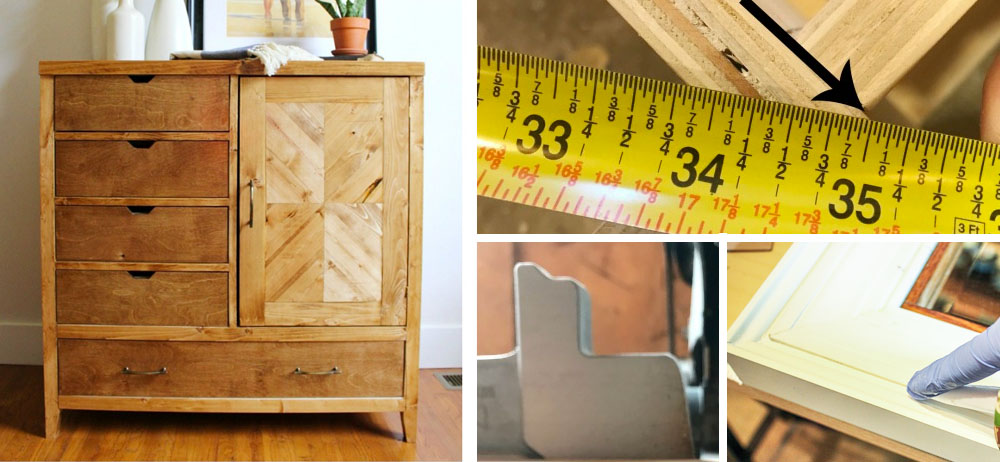
I build a lot of DIY furniture–like the modern dresser cabinet in the image above.  Over the past couple of years I’ve learned a few simple tips (mostly the hard way) that can make a huge difference in the look and quality of your DIY furniture.  Luckily, these are simple tips that won’t take much time or effort to learn. Now that we’re friends, I’ll share all my pro secrets with you. 😉

1. Putty or Caulk Imperfections

Never assume that paint will hide imperfections. Overfill any small cracks, imperfections, or holes with wood putty. (Be sure to use stainable putty if you are staining instead of painting your furniture.) After the putty dries it will shrink slightly (which is why you should overfill). Then sand it down smooth.

If you have a seam between two pieces (i.e. a piece of trim secured to lumber), caulk the seam with paintable caulk. Caulk will flex as the two pieces move independently. Let dry and paint.

2. Sanding Isn’t Optional

Sanding is an absolute must.  I know, I know! Yuck, right?  No one likes sanding.  But, for a clean and professional looking piece of furniture, you’re going to have to sand.

A few sanding tips to make your life easier:

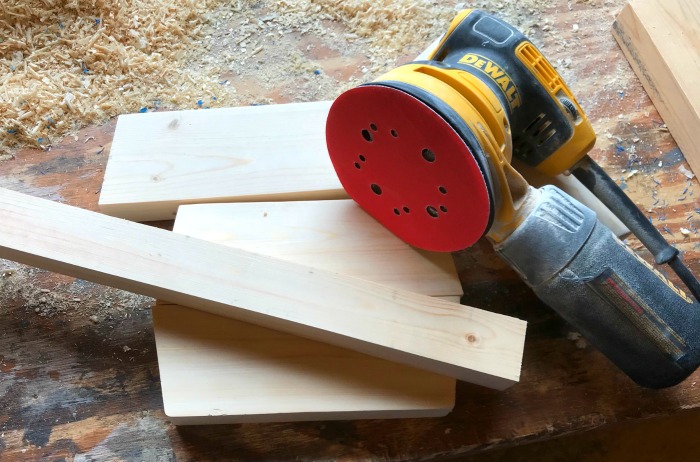
  1. Use an orbital sander (or belt sander if necessary) to smooth all pieces before assembling.  I usually sand all my pieces with at least 220 grit before putting anything together.  It’s hard to sand those hard to reach areas after assembly. Doing it before saves you time and energy later.
  2. After assembly, sand uneven areas with a low grit (like 60, 80, 120) to smooth edges, then buff out sanding marks and smooth down with a higher grit (like 220, 320).  After sanding with 220 or 320, it should be super smooth (like a baby’s bottom!)

Need more sanding tips? I wrote a whole post on sanding here.

One more note:  Be careful when sanding plywood.  Sanding plywood veneer with high grit sandpaper can easily remove the top layer and ruin your piece.  Sand plywood very lightly and with a low grit to prevent this from happening.

3.  Account for Blade Widths on Cuts

Saw blades for circular, miter, and table saws are typically about 1/8″ wide (measure your own to be certain.)  This is not something I considered when I first started out.  I quickly learned that this was important to know when I cut some table legs and realized that a couple were 1/8″ longer than the other—after it was already assembled.

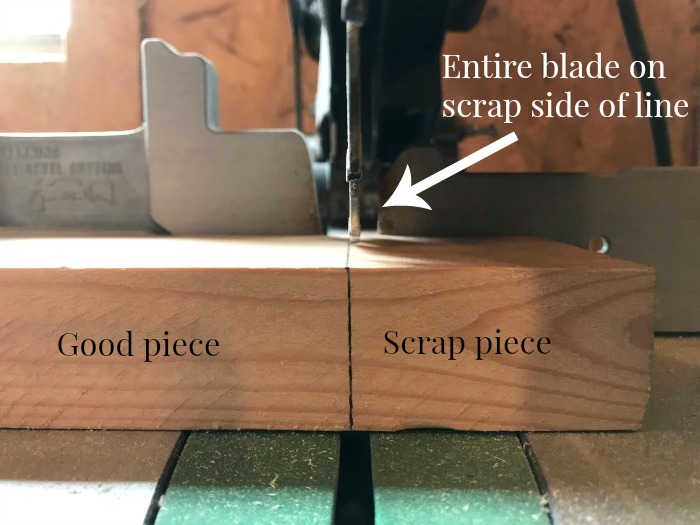
When you make your cut marks, always remember to set the blade on the scrap side of the mark. Don’t cut in the middle of the mark and don’t line up the blade with the wrong side.  One eighth of an inch doesn’t seem like much, but it can really throw off your project. For added insurance, mark an “X” on the cut off (or scrap) side of your lumber.

If you accidentally cut one board for a project a little short because you forget about the blade width (which, by the way, is also called “kerf”), it’s okay.  Just be consistent.  If you made the mistake on a table leg, then make sure to cut all the legs a little short.  If you made the mistake on a table apron or the frame panel of a cabinet, just make sure to cut all the others in the project a little short.  As long as you are consistent, you can usually recover.

4:  Check for Square

This is usually something most people (like me) learn the hard way.  I can’t tell you how many times I built something with doors and they looked crooked.  Usually either the door or the cabinet isn’t square.  Once you’re to this point, it’s usually too late to fix.

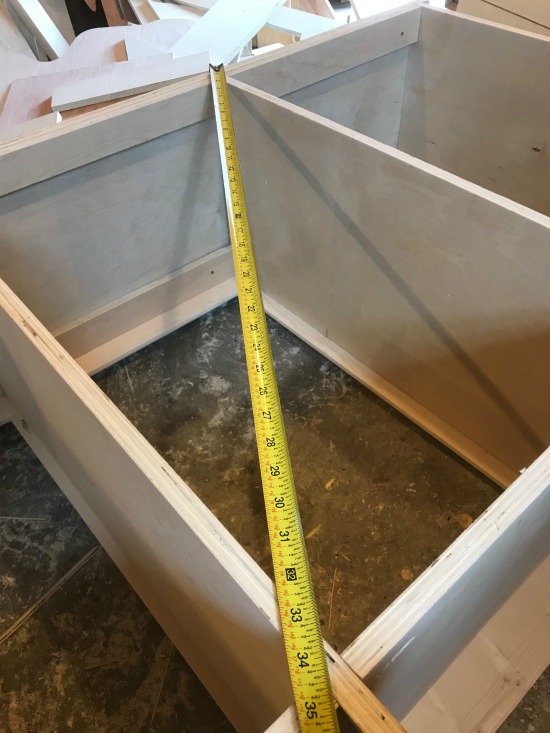
If you are building a cabinet or a table (or anything really), check for square after each step.  If you aren’t a math person and don’t want to think about the logic behind Pythagorean’s Theorem, this is how you measure for square:

Depending on what you are building, this may look slightly different. Let’s say (for example) you are building a cabinet and you have all the sides together and are about to put on the back.  You want to check that it’s square before you nail on the back piece because you don’t want to nail it on crooked.  Take your tape measure and place it on one outside corner and take a measurement to the opposite outside corner.

Then repeat for the other two corners.

The two measurements should be equal as shown above. If they are not, make any necessary adjustments.  Making adjustments can be as simple as removing screws and repositioning, or simply clamping two corners to pull them together before you nail on the back. Whatever you do, don’t move on to the next step until you’ve squared up your piece.  This will save you headache later on, I promise!

5:  Square your edges

Speaking of square, squaring off your board edges before using them can really take your DIY furniture up a notch.  Your joints will look cleaner; your measurements will be more accurate; and it will be much easier to assemble.

What do I mean by squaring off your board edges??  When you purchase any 2x board (and sometimes 1x boards too) at the building supply or big box store, the edges are rounded like this:

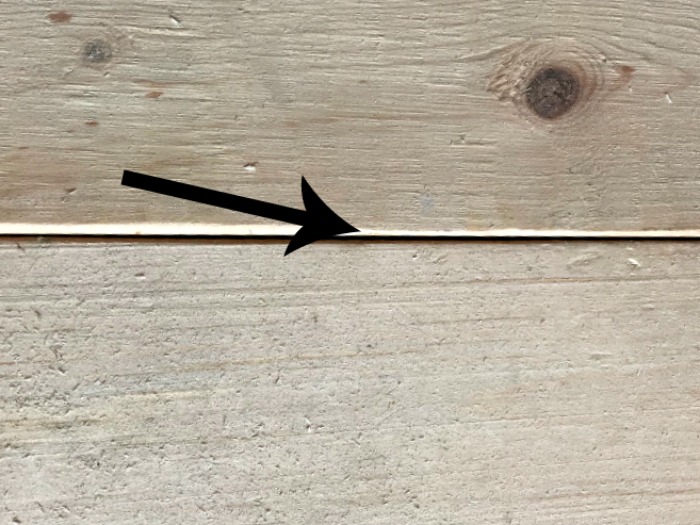
When you try to join a flat edge to this round edge, you get this large, awkward gap.

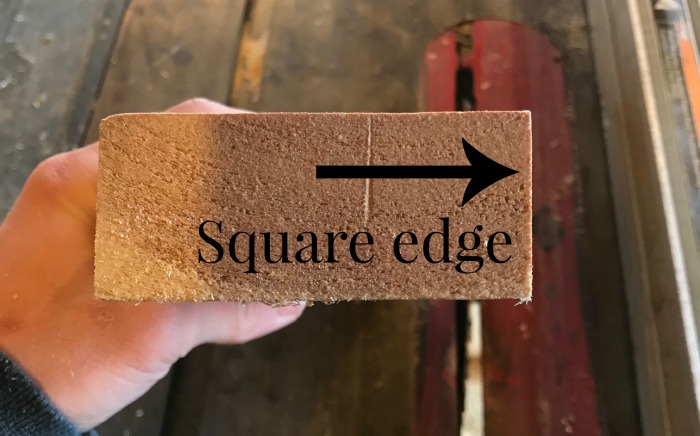
To fix this issue, you can use a table saw to rip this corner off the boards so the edge is square and flat like this:

Then you have nice clean joints.

One thing you have to remember about squaring off your edges is that your board will now be slightly narrower.  If you are following plans you found online or in a book, you may need to make a few adjustments to account for this change in width.  It’s slight, but just like the kerf we talked about before, it can really throw you off if you aren’t careful. Want to see more details about squaring off boards? You can check out my post here on how I square off my board edges and how I make my own 2×2 boards.

Those are my top five tips for how to get better looking and better quality DIY furniture.  I hope some of these were helpful and you can start improving your furniture builds today.  What are your tips for quality looking DIY furniture!  Leave a note in the comments about your best tip to improve your DIY furniture.

Happy Building!

Shara's Signature

~Read more of Shara’s Tutorials~

DIY Library Book BoxDIY Library Book Box

Hello Pretty Handy Girl readers! Sarah here from The Created Home to share with you a fun solution for housing library books: A Library Book Box!

Recently I had to cough up $10 to our local public library for a missing book — which sort of kills me since I have turned our home upside down looking for it. I mean, it’s Curious George, and those things are bright yellow! Has this ever happened to you? Even if it hasn’t, it is helpful to have a designated spot for library books. After all, we want to encourage reading, not get frustrated about trying to find them. Right?!

We love books around here. In fact, I built two reading nooks to support my own little readers. This elevated version in our playroom features bookshelves that double as a secret stairway. And this one is built right into my kids’ closet. Not ready for a full reading nook? This book box is a simple way to bring some reading fun into your home!

Materials:

  • Wood for box frame (We will talk about lengths in a bit)
  • Wood inserts for books
  • Wood glue
  • Finish nails
  • Brad nailer
  • 2 books
  • Acrylic paint (optional)
  • [amazon_textlink asin=’B000BZZ3S8′ text=’Varnish’ template=’ProductLink’ store=’prett-wp-001-20′ marketplace=’US’ link_id=’ca82d0cd-c9af-11e7-a2c5-03ec0e36f2f5′]

Instructions:

Step 1

You’ll need a couple of books that you don’t mind deconstructing. Check your local thrift store to pick up some great vintage looking hardbacks or get creative with whatever look you like! The books will need to be the same dimensions for this project. Remove all of the pages from the books, leaving only the hard covers.

vintage books box handles

Trace two pieces of wood to fit inside the books. 3/4″ scraps worked perfect for this purpose.

vintage books box

Glue the wood into the book covers, leaving the outside cover free on both. This is for when you put them against the box you can open the cover and nail into the box sides through the wood. I didn’t do this with mine because I realized it would be a good idea too late.

DIY Library Book Box Tutorial

Step 2

Make the box. This is an excellent scrap wood project! You can make the book box as long as you like, though 18″ seems to work well for us. My pieces are scrap flooring from a friend’s business, so they are approximately 4″ tall (1×6 would work just as well). The width of the box is determined by the width of your books, since they are the box sides. Your bottom piece of wood will need to be the width between the front and back pieces.

DIY Library Book Box Tutorial

You can choose to simply glue and nail the pieces of wood together with a finish gun, or you can get fancy and use your router to dado a groove in the wood for the bottom to sit in. Either way works fine!

Step 3

Attach the book sides. As with the other parts of this book box, you’ll want to use both glue and nails to ensure stability. Nail right through the inner part of the “books” into the box sides. Be careful to line the nails up correctly so they don’t go through the box and out the side. Then glue the book cover closed to hide the nail holes.

Read box

Step 4

Add decorative touches and finish. Stain the wood if you like, or simply add varnish. You can choose to add lettering as well – a name or simply “READ” works well. I painted them fun colors because it is for my kids.

DIY Library Book Box Tutorial

Step 5

Load it up! A box about this size holds somewhere around 20 children’s books. If I did it again I might go a bit larger. Another option is to put this on wheels, which would look great. (But, my kids have a tendency to turn everything into skateboards, so I left it grounded!)

DIY Library Book Box Tutorial

That’s it! Hopefully this simple solution will keep your library books corralled and your account happily fine-free. If you make one be sure to share a photo, and happy reading!

DIY Library Book Box Tutorial

~See More Projects by Sarah~

Like this idea? Be sure to check out this awesome closet library Brittany built.

Children's Closet Library with Secret Pass Through | Pretty Handy Girl

or the reading nook she built in her son’s bedroom:

Boy's Red, White & Blue Themed Room | Pretty Handy Girl