Hate wire shelves? Turn that boring closet into a show stopper with beautiful custom shelving. Here's how:

DIY Custom Closet Shelving

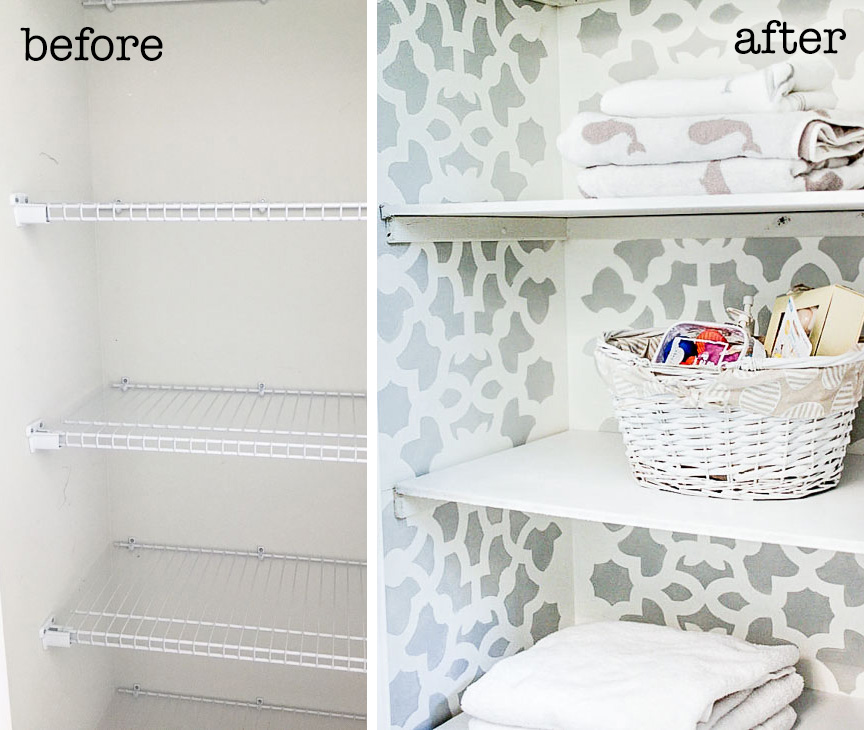
I don’t like wire shelving in closets! Who’s with me on this one? I am slowly replacing all the wire shelving at my daughter’s new home. As you may know, custom closets are super expensive. While researching “small closet solutions”, I found a way to transform a plain builder grade wire shelf closet into a custom stenciled closet!

stencil background custom storage shelves

Hi! I’m Maria from Simple Nature Decor here today to show you how to take a builder grade closet and turn it into your own custom dream closet!

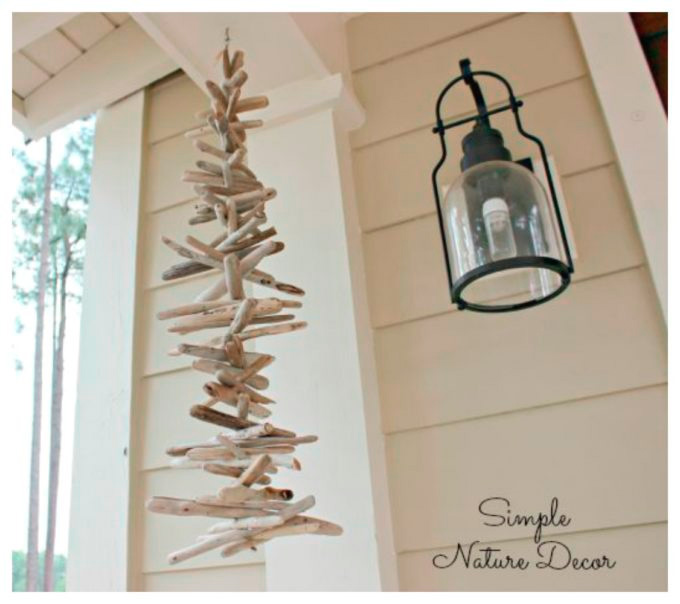
Usually I like to create with things I find in nature around my coastal Carolina home. My hanging drift wood chime was created from the driftwood I find on the local beaches. Because the weather is great most of the year, I work on many of my projects outdoors in the fresh air. I love painting furniture outdoors.

But, today I’m turning my talents inside to show you how to give your closet shelves a custom makeover for very little money. Ready? Great, here’s how to DIY Custom Closet Shelving.

Materials:

(I’ve included affiliate links for your convenience. I earn a small percentage from a purchase using these links. There is no additional cost to you. You can read more about affiliate links here.)

Instructions:

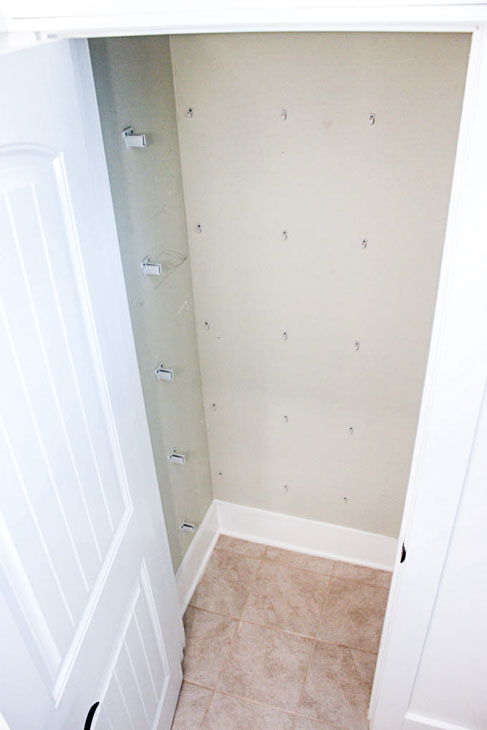
Remove those wire shelves.
removed wire shelves

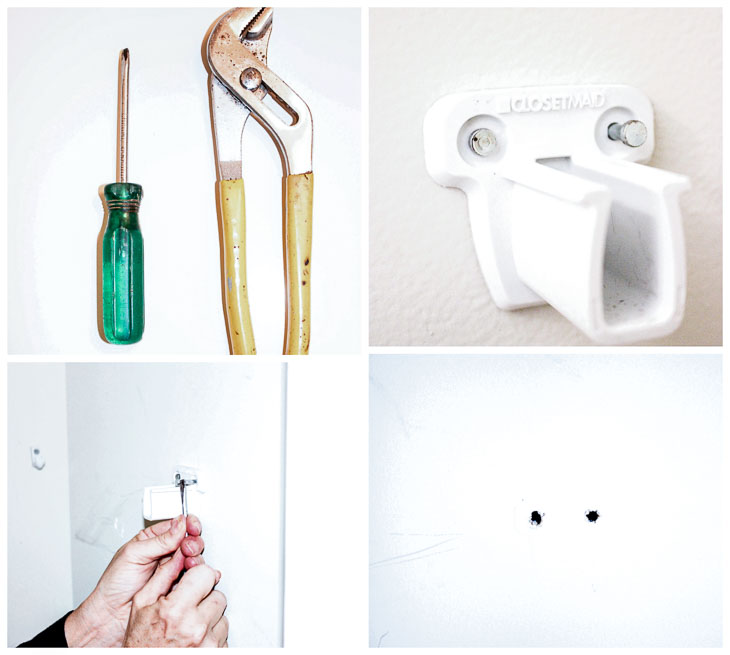
Step 1: Using a small flat head screwdriver, pull out the bracket nails. Then use the pliers to pull them completely out of the wall. All the holes will need to be plastered.

tools to remove wire shelf supports
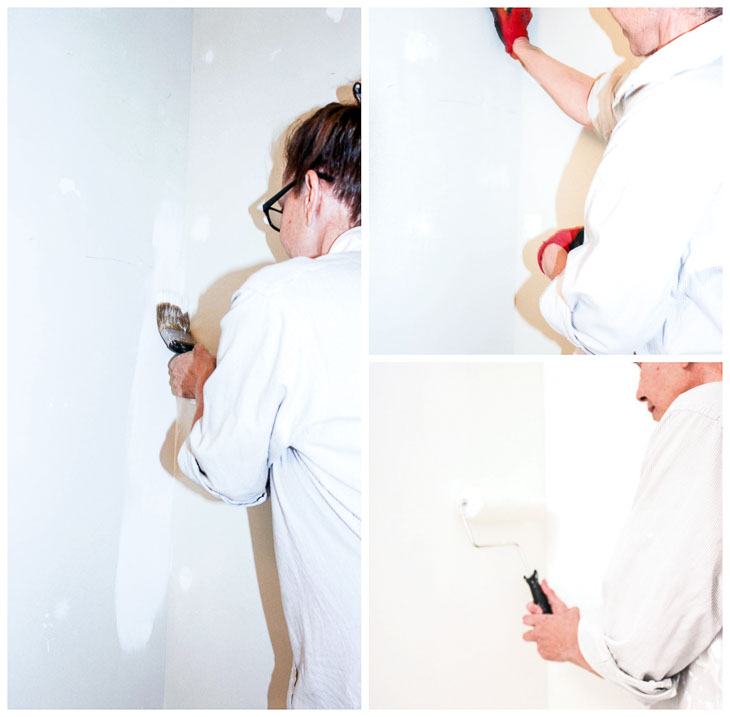
Step 2: Use joint compound (spackle) to fill the nail holes. You may have to use two coats. Spread one coat. Let it dry completely. Sand and repeat to get a smooth finish. Paint your closet walls.

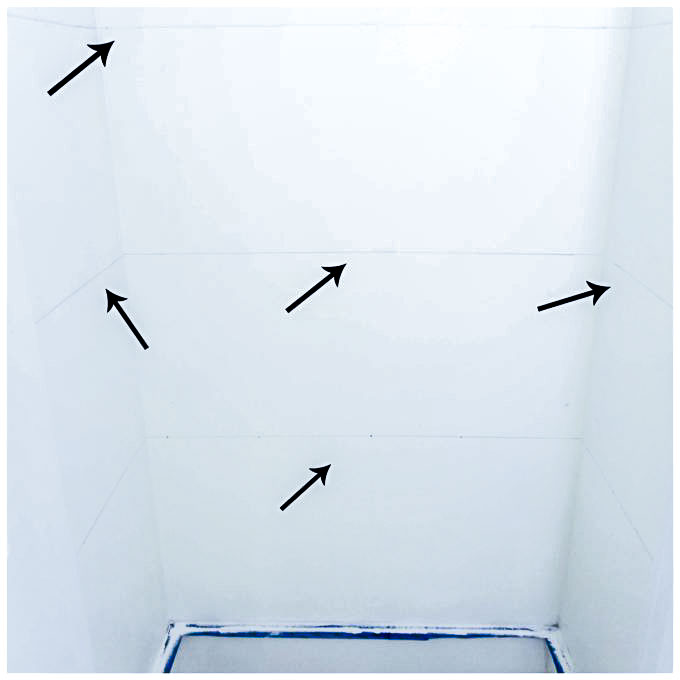
Step 3: Determine your shelf heights. (Tip: Use the same spacing as your wire shelving or measure the heights of items like baskets or products that will be stored on each shelf.)  Use a ruler and pencil to mark shelf heights on the walls. Use a level to draw the lines on all three walls.

mark shelf heights Before adding the shelf supports, stencil the entire interior of the closet. Measure and line up your stencil in the center of the back wall. Use painter’s tape to hang the stencil. (We used this Moroccan style stencil.)

paint over stencil

Use a small foam roller to paint over the stencil. Make sure to blot off excess paint by running your roller over a paper towel after loading it with paint. Otherwise, it will have too much paint and can bleed through the stencil. Remove the stencil and line it up with an adjacent section. Stenciling an entire closet will take patience, but the results will be a true work of art!

Step 5: Use (4) 1″ x 2″ x 8′ wood strips and 3 sheets of MDF wood. You can request to have the MDF wood cut to your closet measurement. (Tip: Take your width measurement and subtract 1/2″. Measure the depth of your closet and subtract an inch. This will compensate for any irregularities in your wall or door frame.)

nail shelf supports

Cut the 1″ x 2″s to fit on each side of your closet. Hold the strips at the shelf location marks you made before stenciling. Secure the strips using nails or screws into the stud locations. (Having trouble finding the studs? Use one of these 5 Methods to Find a Stud without a Studfinder!) Repeat for each shelf. This will create the ledge to support each shelf.

Step 6: Paint your wood strips white to match the closet walls.

paint shelf supports

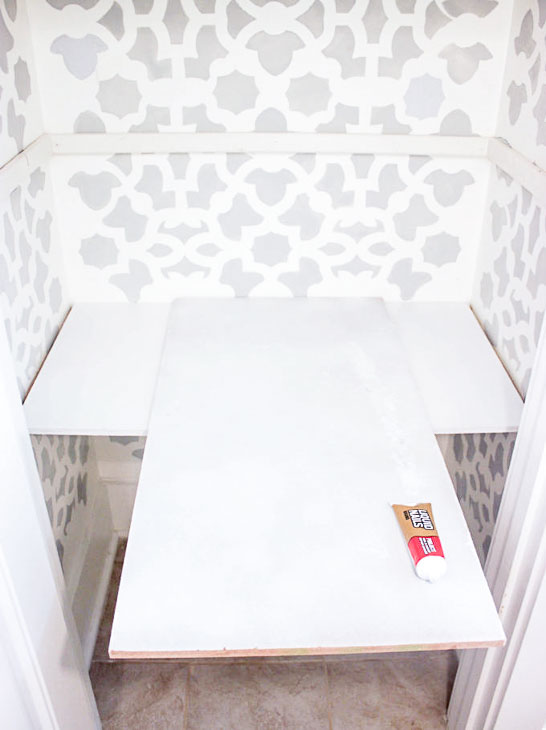
Step 7: Run a bead of construction adhesive along the top of the shelf support strips. Lay the shelves on top of the supports.

Hate wire shelves? Turn that boring closet into a show stopper with beautiful custom shelving. Here's how:

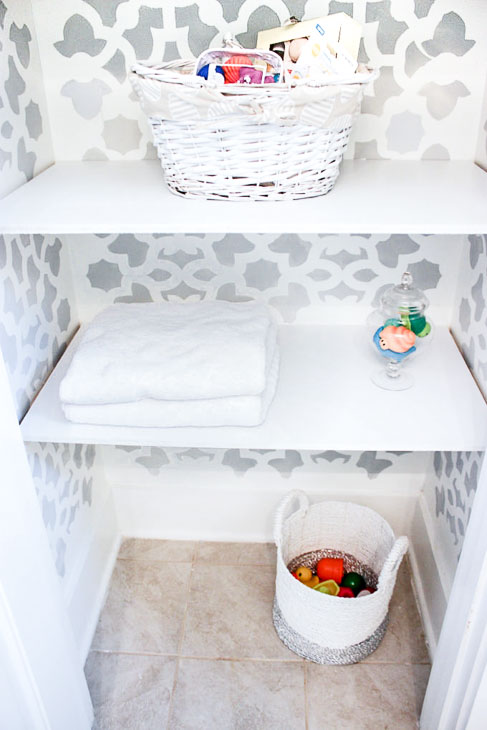
Load up your new custom shelving with items.

What a transformation! Do you like the new look?

Thanks for letting me share with you how to give your closet and storage shelving an upgrade!

Disclosure: Maria was provided with the stencil from Cutting Edge Stencils at no cost to her. All words and ideas are her own. She was not told what to write. 
Hi I’m Maria and I’ve been a lover of nature for my entire life! Five years ago I created a blog called Simple Nature Decor. It’s about bringing what’s beautiful in nature into your home. I create nature-inspired decor ideas for the home. My home in coastal Carolina is filled with amazing elements that have inspired me to create some of my favorite DIYs. Come visit me at Simple Nature Decor!

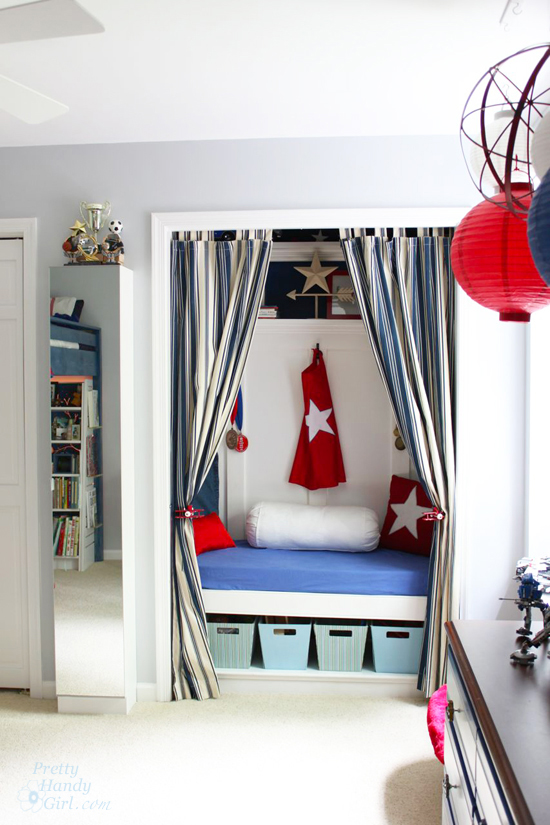
If you liked this tutorial. You’ll love reading how to turn a closet into a reading nook:
Boy's Red, White & Blue Themed Room | Pretty Handy Girl

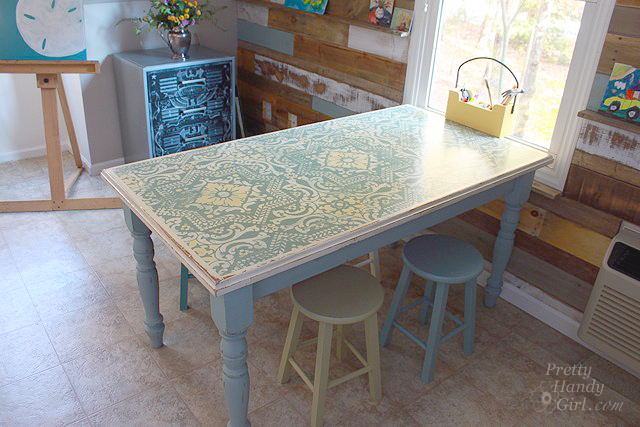
Or you might like to learn how to use a stencil on more than just walls, like on this dumpster-destined table:

How to build a laptop stand to keep it at same level as large screen

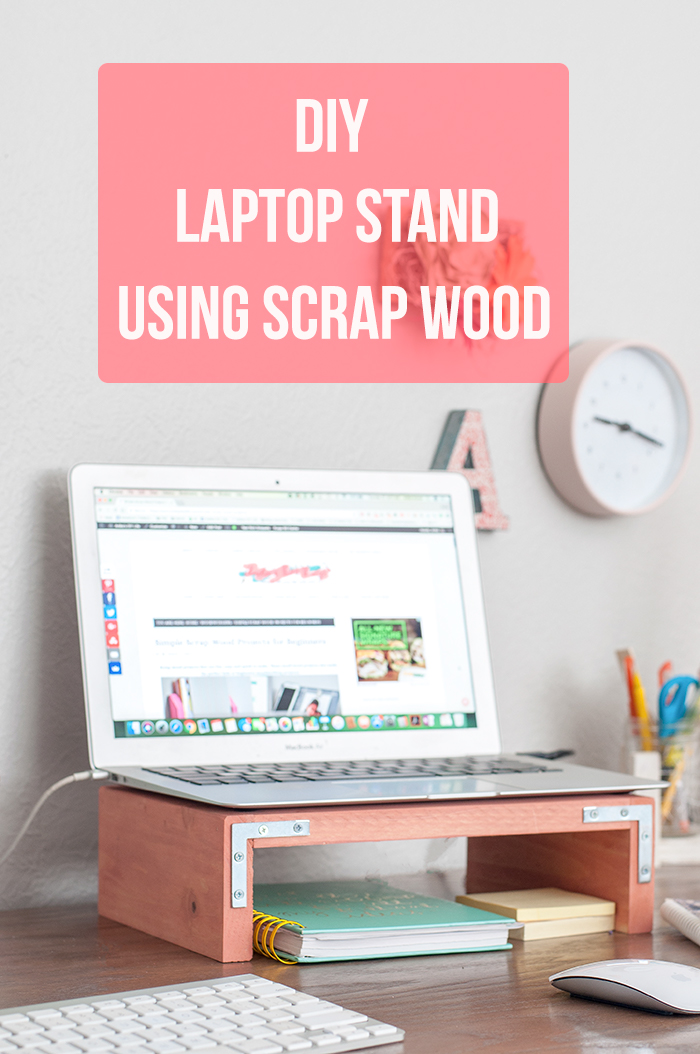
How to build a laptop stand using scrap wood.

DIY Scrap Wood Laptop Stand

Hello, Pretty Handy readers! Anika from Anika’s DIY Life back again with a quick and fun project that is useful and will improve your posture! Do you use a laptop? If so, you will help your neck and back immensely by making a DIY Scrap Wood Laptop Stand!

About a year ago, I built myself a desk that I love! My work set up uses a large monitor tethered to my laptop in a dual screen mode. Unfortunately, there was one problem; the laptop screen wasn’t at the same level as the monitor. I temporarily solved it by putting a few of my old books to good use. (Sometimes you work with what you’ve got!) Did I say temporarily? Truth be told, that’s how it has been for a whole year!

before building a DIY Laptop stand

It was high time to fix this situation with a permanent solution. So I went into my workshop aka garage and whipped up a quick project using scrap wood. Want to learn how to make your own DIY Scrap Wood Laptop Stand? Let’s get making!

Materials:

(I’ve included affiliate links for your convenience. I earn a small percentage from a purchase using these links. There is no additional cost to you. You can read more about affiliate links here.)

Instructions:

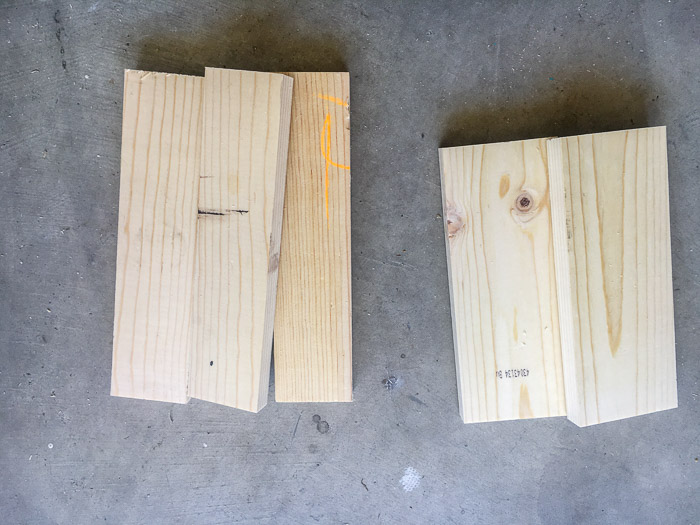
Step 1: Cut out all your boards to the dimensions in the material list.

Lumber to build a laptop stand

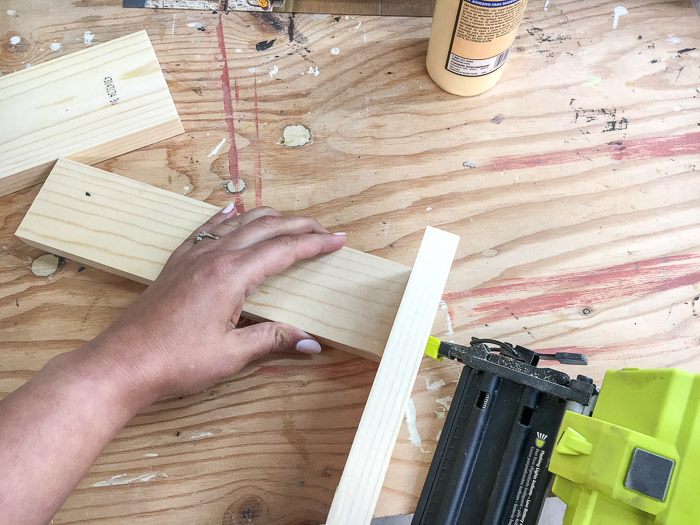
Step 2: Start by attaching one 1″ x 3″ board to the 1″ x 4″ board at a right angle using wood glue and finish nails (as shown below.)

How to build a laptop stand

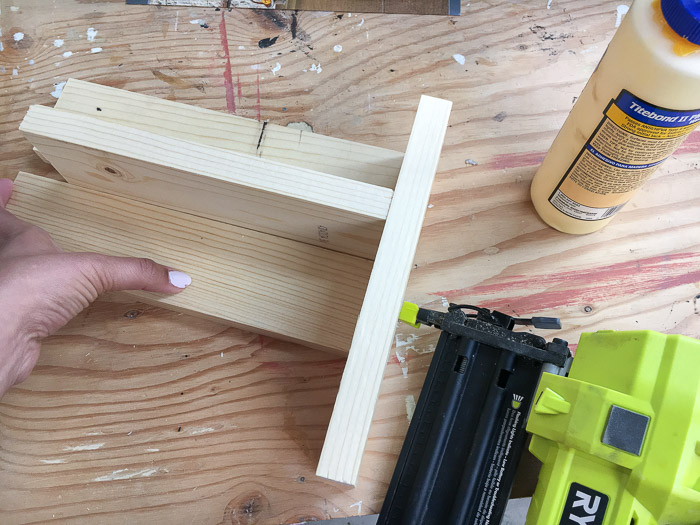
Step 3: Layout and attach the remaining 1″ x 3″ boards, using a ¾” board to space between them.

Building a laptop stand

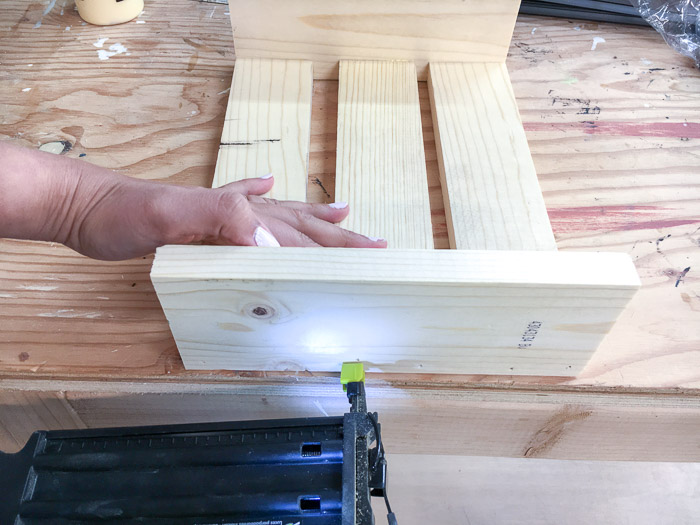
Step 4: Attach the second 1″ x4″ board to the other end of the 1″ x 3″ boards using wood glue and finish nails.

How to build a laptop stand with scrap wood.

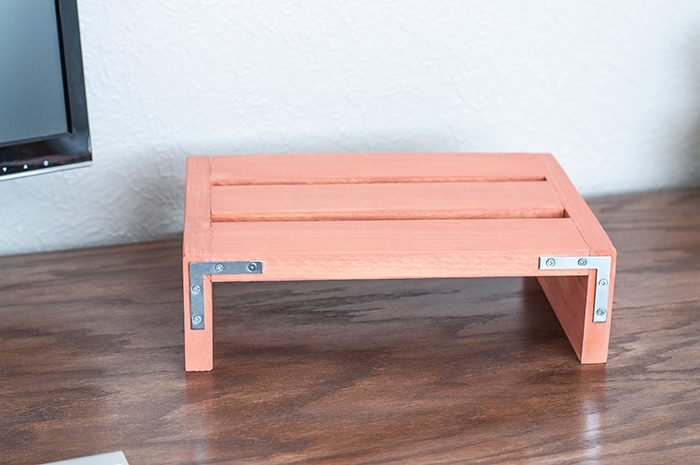
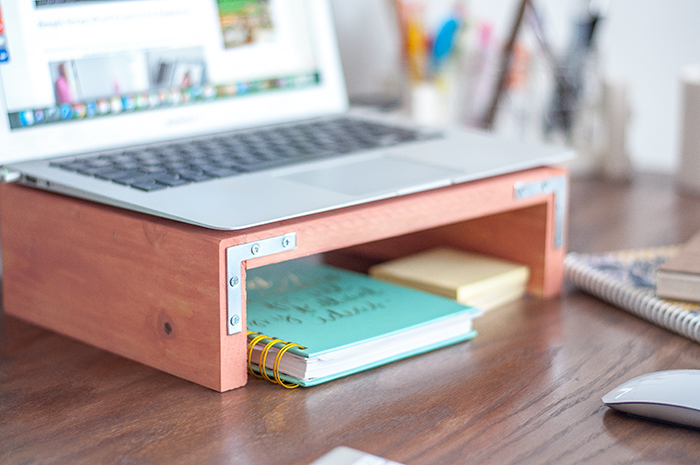
Step 5: Sand and paint (or stain) your laptop stand. (I chose to paint my stand with a coral wood stain to add some color to my workspace.)

DIY laptop stand

You can always add a little industrial details by attaching metal corner braces to the laptop stand.

Easy DIY Laptop stand using scrap wood.

I love the functionality of my new DIY Scrap Wood Laptop Stand! My desk looks a lot less cluttered and I have space underneath to keep notepads and sticky notes close at hand.  Let’s not forget the biggest advantage of all, having the laptop screen at eye height.

How to build a laptop stand to keep it at same level as large screen

I’m not sure why I waited so long to build this. It was such a quick and simple project!

If you love quick and easy builds, be sure to check out the collection of easy scrap wood projects on my blog including that mason jar pencil holder in the picture.

Come visit me on my blog Anika’s DIY Life to see what I am up to.

~See more of Anika’s tutorials~

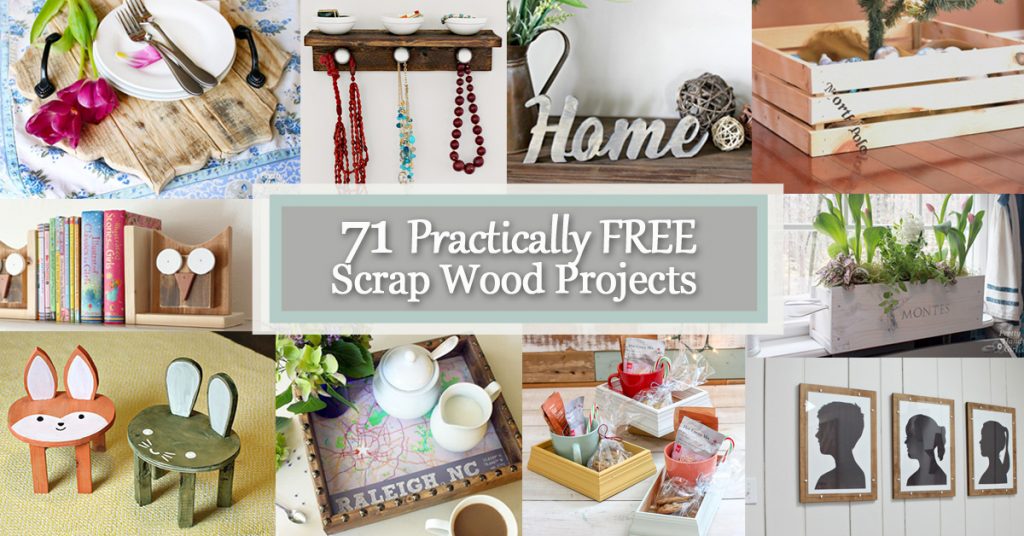
 If you are looking for more scrap wood project ideas, be sure to check out Brittany’s list of 71 scrap wood projects 

71 Practically FREE Scrap Wood Projects

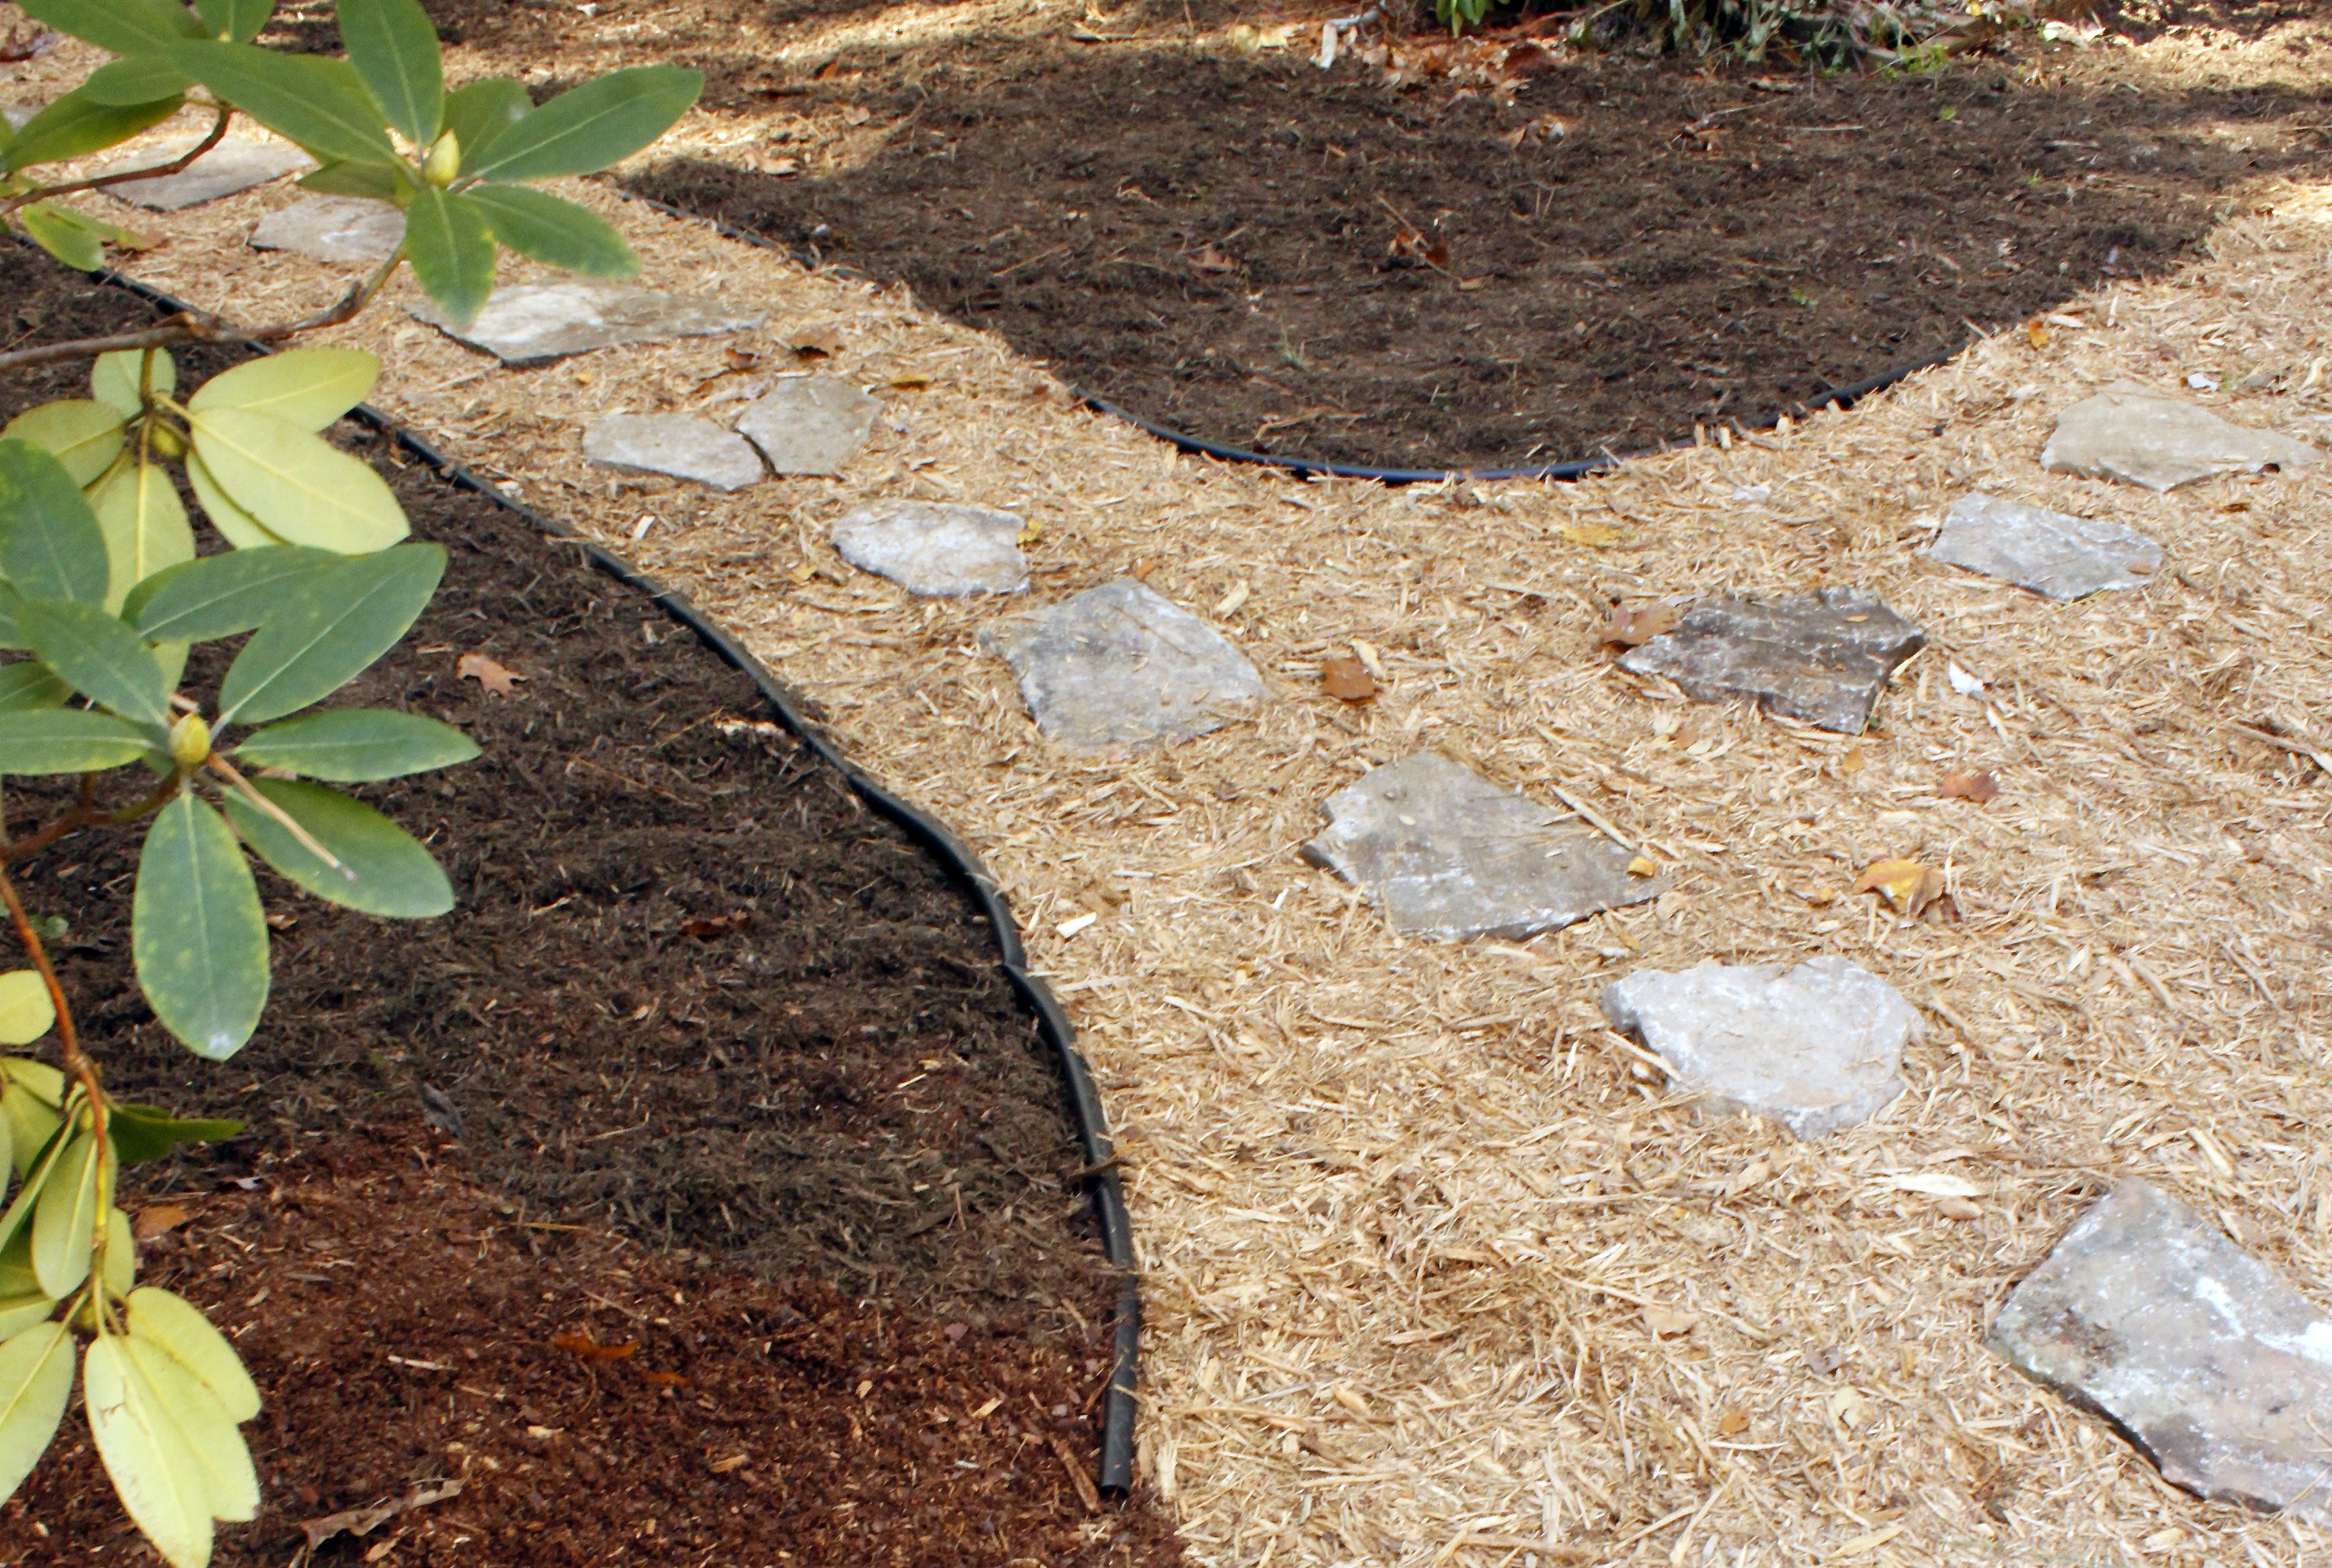
beautiful two color mulch pathway

Creating walkways around your home can keep mud and dirt from getting on your shoes and ultimately from being tracked into your house. Today I’ll show you how to create a super easy (and inexpensive) pathway using mulch, stones, and edging. It’s a very easy DIY project, let’s get going on this landscaping task.

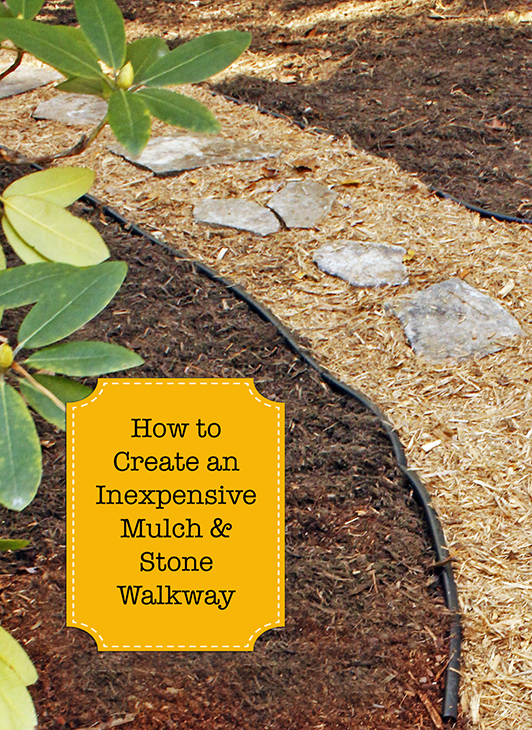
How to Create an Inexpensive Stone & Mulch Walkway

How to Create an Inexpensive Stone and Mulch Walkway

Spring is on its way and that means more rain. It’s also the time of year when the grass has been dormant, we had a harsh winter (lots of snow and ice), and there is more exposed dirt and mud in the yard. Let’s be honest, everyone tends to have problem spots in their landscaping that end up looking like a mud pit. And if you have kids or pets running around, that mud means keeping your home clean is a constant battle.

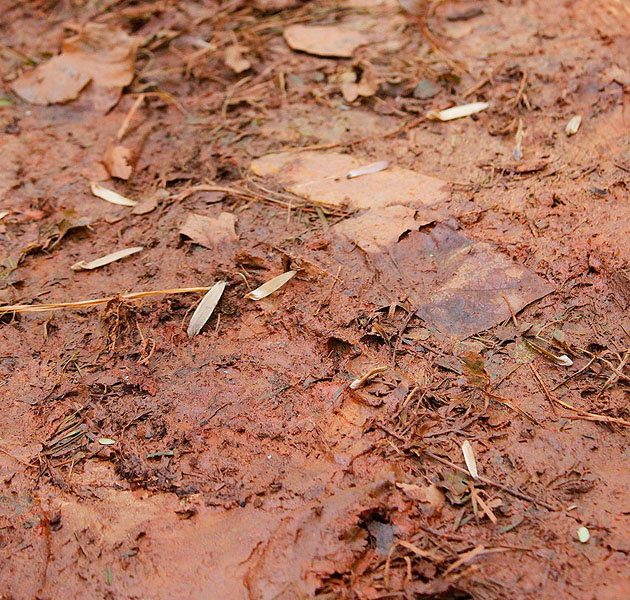
mud

For those of us that live in the south, mud is not just wet dirt. It’s usually tough red clay! And unfortunately, it will stain everything you own and make housekeeping a nightmare. With early spring here, it’s time to come up with a fast and inexpensive solution to the mud problem. Let’s put a stop to the muddy yard.

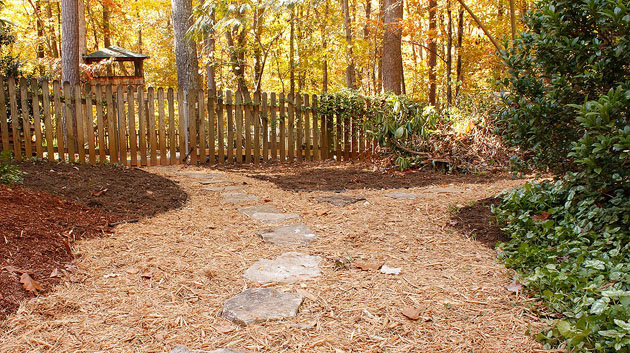
landscaped backyard with mulch pathway

Potential Materials:

While searching the exterior section at Lowe’s, I found a large selection of materials both man-made and organic in a variety of colors and textures.

  • Pea gravel
  • Crushed granite or crushed limestone
  • Crushed limestone
  • Pine bark mulch
  • Hardwood mulch
  • Rubber mulch
  • Concrete pavers
  • Brick pavers
  • Crushed granite
  • Natural stone (flagstone, limestone, sandstone, slate, blue stone, quartzite, or granite)
  • Cobblestone (for an old antique look)
  • Hardwood tree stumps
  • Deck Boards
  • Concrete cement
  • Any non-slip smooth surface material

Considerations When Choosing Materials:

I really mulled over the different options and considered all the pros and cons of the different materials. 

  • house style/landscaping (a cottage style garden may not fit with a modern architecture house)
  • color selection (color should compliment your house not compete)
  • material availability
  • cost (what’s your budget)
  • maintenance (will the material break down or scatter too easily)
  • sloped or flat path (will the material stay put or be a tripping hazard)
  • choking hazard (do you have little kids or pets that might eat pea gravel)

For this pathway project, I had a very limited budget. Plus, I didn’t want to haul a lot of heavy materials home. Finally, I liked the idea of covering the entire area with organic materials that would help by adding nutrients as it breaks down. I chose to use two different colors of mulch.

Edging Choices:

Using edging for your pathway is important to keep the walkway materials from shifting or scattering. Like most home improvement stores, there are a wide variety of edging materials to choose from.

  • Brick
  • Cast concrete
  • Stone pavers
  • Steel or aluminum edging
  • Rubber or plastic edging
  • Landscape timbers
  • Creative recycled materials (old bottles, metal parts, tiles, or roof tiles)
  • Durable plants (shorter plants like liriope or taller plants like boxwood hedge)

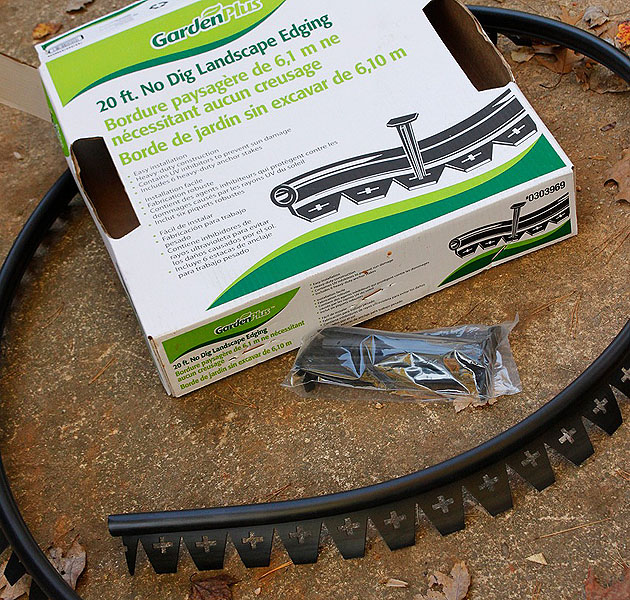
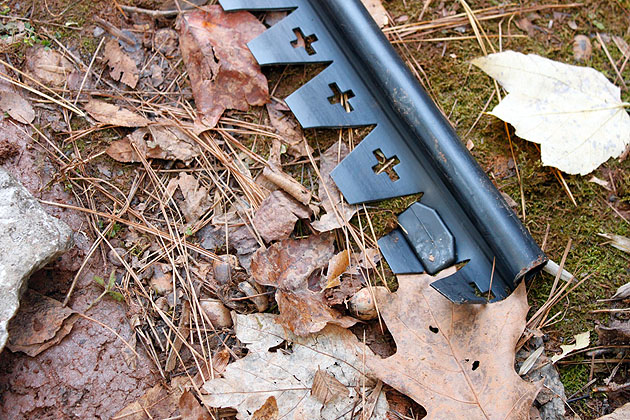
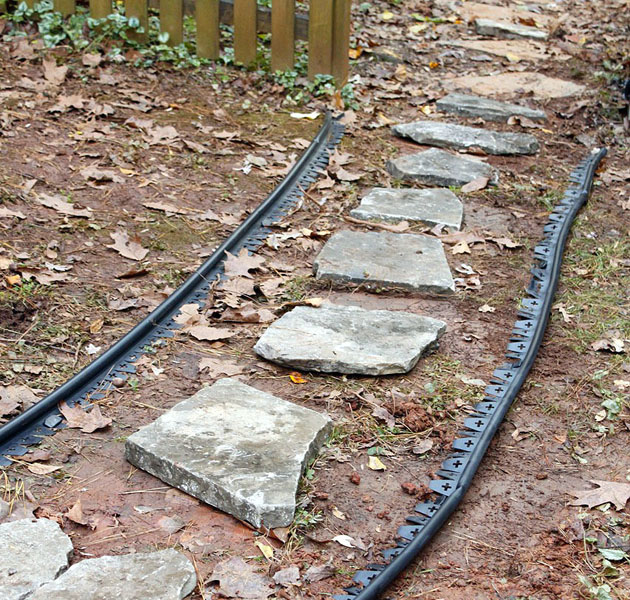
I would have chosen a more professional-looking edging (like pavers or landscape timbers), but my budget was tight so I chose an inexpensive (and time saving) no-dig landscape edging. This plastic edging doesn’t require any power tools and no digging a trench to bury half of the edging like you’d need to do with a metal edging This no dig edging uses pegs to nail into the ground and hold the edging in place. 

flexible edging material

How to Create an Inexpensive Stone and Mulch Walkway

landscaped backyard with mulch pathway

Materials:

(I’ve included affiliate links for your convenience. I earn a small percentage from a purchase using these links. There is no additional cost to you. You can read more about affiliate links here.)

  • Stepping stones (flagstone, limestone, sandstone, slate, or blue stone)
  • No Dig Landscape Edging Kits (or your choice of edging)
  • 2 Types of Mulch (Pine bark, hardwood mulch, pine needles, pine nuggets, cedar, cypress mulch)
  • Yardstick for your width template
  • Hammer
  • Garden Rake

Optional:

  • Garden hose
  • String & Stakes
  • Spray Paint
  • Weed barrier
  • Sand or Paver base

Instructions to Create an Inexpensive Mulch and Stone Path:

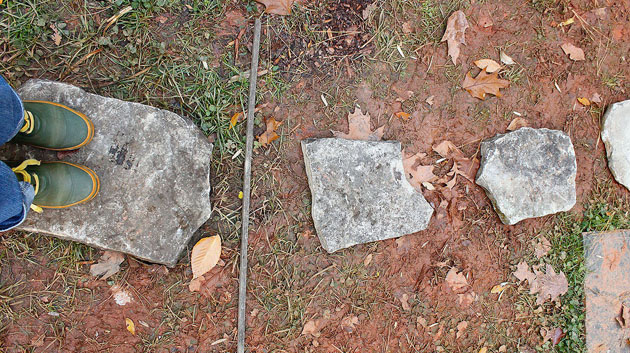
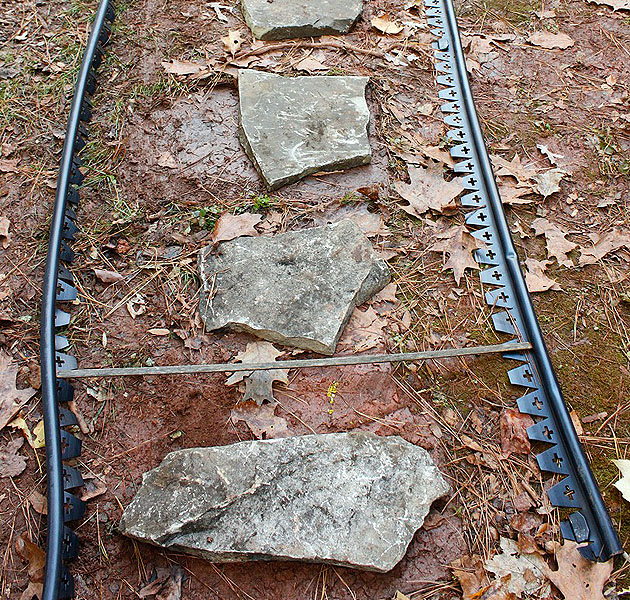
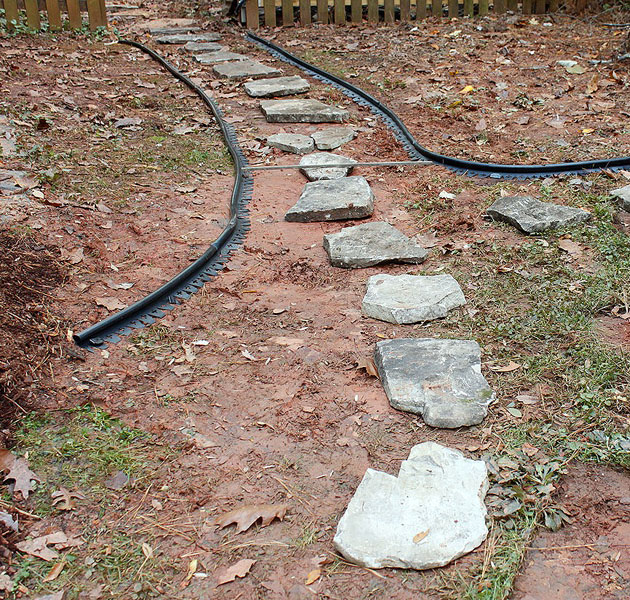
Gather all your materials near the path site. Layout your stones and walk on them to make sure they are spaced for a comfortable gait. (Do you see that stick in the above picture? That is my three foot path width guide.)

For a perfectly curved path, use a garden hose to line one side of the path creating smooth curves. For straight lines, use stakes and strings to set the path line. Once you are happy with your path location and shape mark the edges with spray paint.

stepping stone spacing

Use your path width template (aka stick) to keep your edging equal distance apart the entire length of your path. (You may need to put a weight on your edging or set a peg in halfway to hold the edging in place.)

set standard width

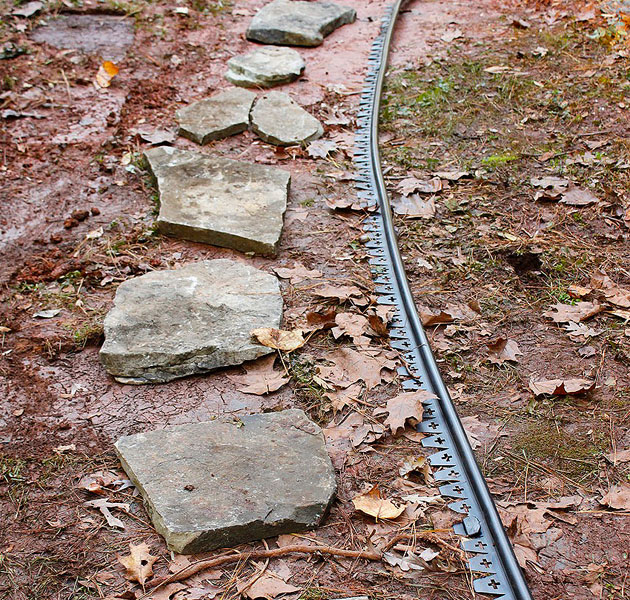
After the path and edging are laid out, step back and take a look. Make any tweaks to your pathway now.

set stones inside edging

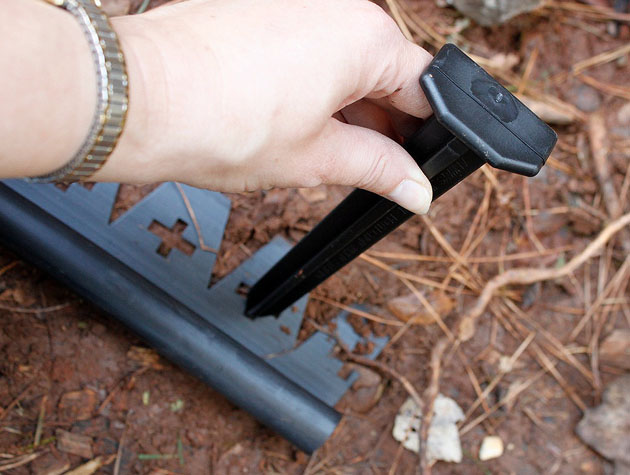
To set the path, start from one end and insert a peg into one end of the edging.

Hold peg

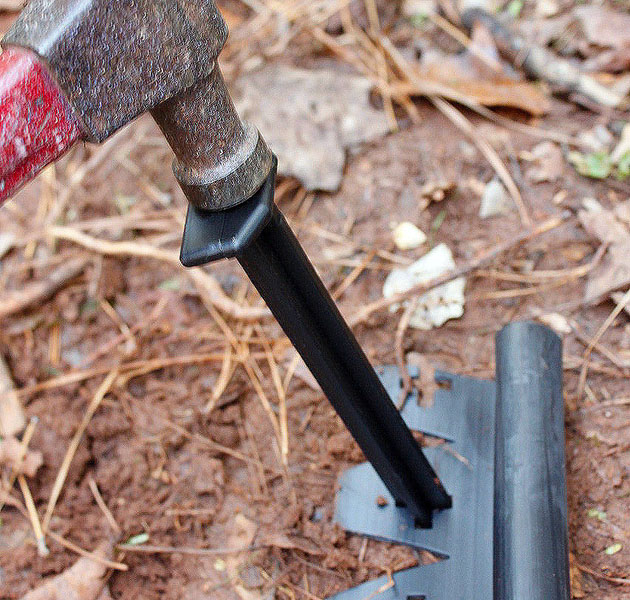
Then hammer the peg into the ground…

hammer stakes into edging

…until it is flush with the earth.

peg set in edging

Continue setting a peg every 4-6 feet (and especially at the peak of any curves.)

one side path set

Repeat for the other side of your path. If you want to lay down weed barrier cloth, now would be the time to do it. 

Also, check to make sure your stepping stones are flat and don’t rock when you walk on them. (If you have very hard or compact soil, you should level underneath the large stones with sand or paver base.)

layout stones inside edging

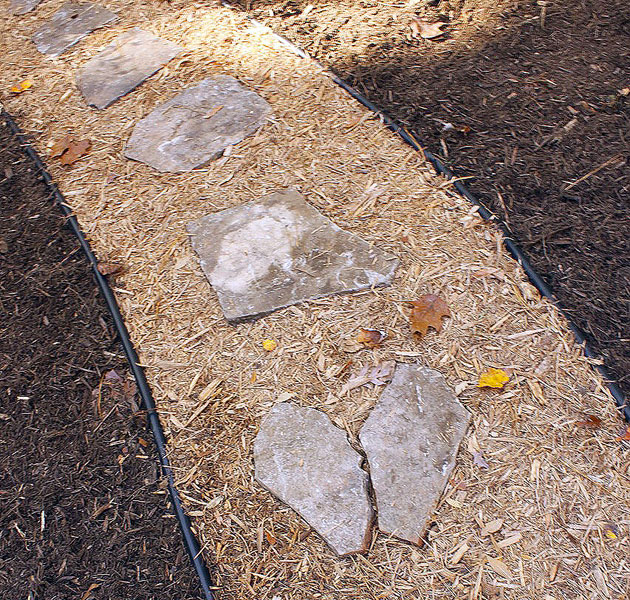
Open a bag of mulch and first spread one color to the top of your stones and the edging. Use the back side of your garden rake to smooth the mulch and eliminate any high or low spots.

stones sitting in mulch

Repeat until you have filled your entire path. Then spread the second color mulch (a nice dark brown color is a great contrast to the lighter mulch) on the outside of your path.

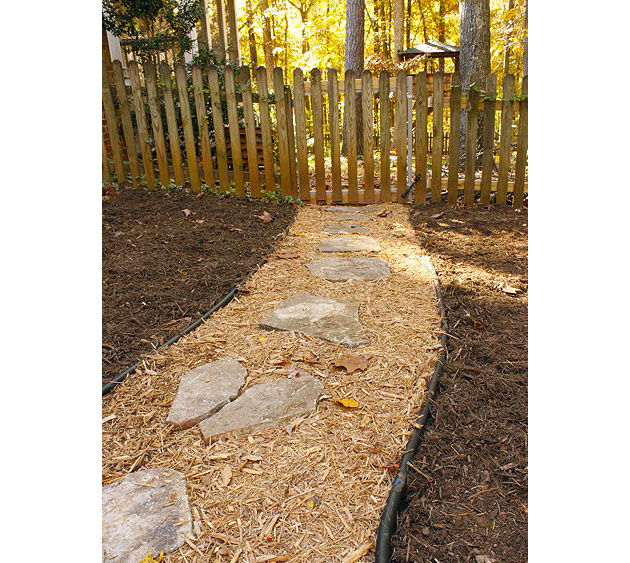
beautiful two color mulch pathway

Don’t you just love the contrast between these two? The lighter colored mulch is cypress and the darker is hardwood mulch and adds some much-needed color to this previously barren area. Walk on your stones and put some dirt or sand underneath any that wobble. Now stand back and admire your finished path! I think my favorite stepping stone is the broken heart stone I made with two rocks.

Stone and mulch pathway

The entire path took me just over two hours. Not bad, and the bonus is that I didn’t need to go to the gym to workout that day!

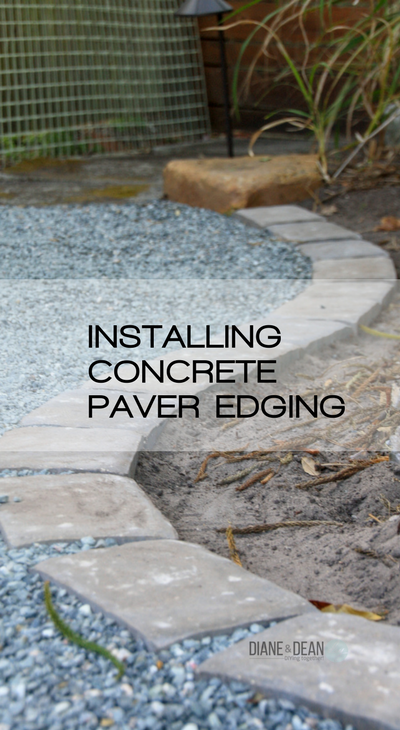
If you wanted to learn how to use concrete pavers to edge your walkway, I have you covered in this tutorial:

Installing Concrete Paver Edging

Finally, I have a great article helping you find 10 Creative Concrete-Free Walkway Ideas for Your Home.

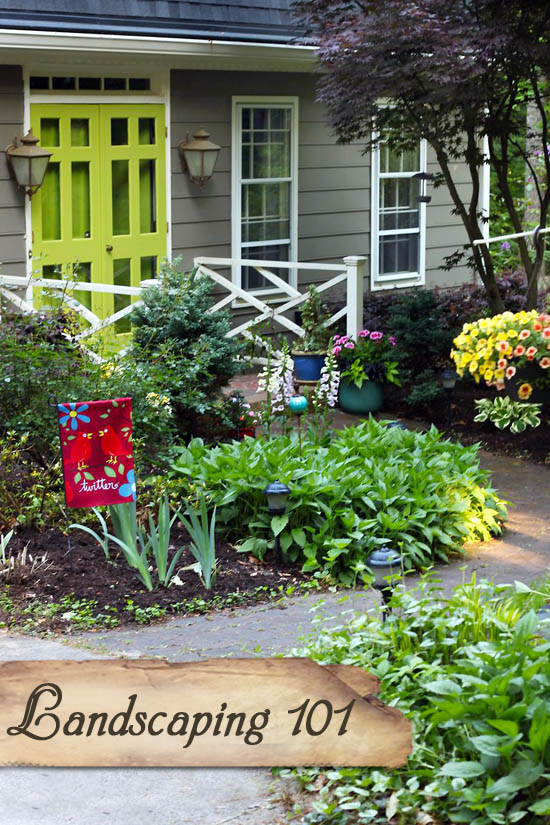
Want to improve your curb appeal? Here are some tips and tricks to improve your landscaping in no time!

Landscaping 101: Tools, Planting, and Adding Color to your Landscaping | Pretty Handy Girl

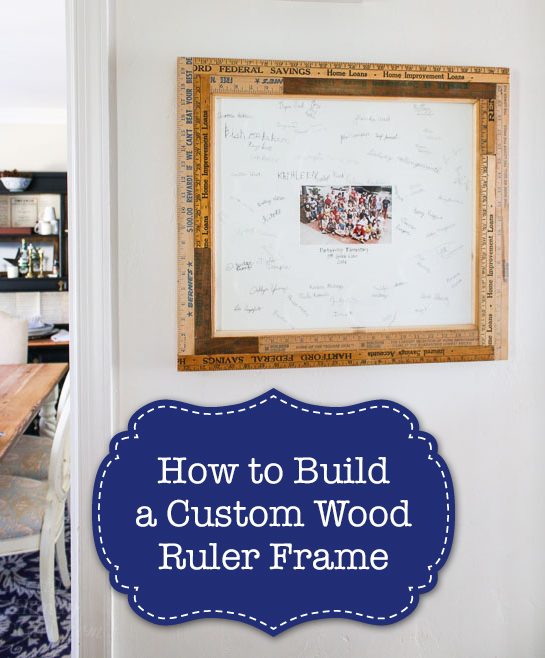
How to Custom Build a Vintage Ruler Picture Frame

How to Build a Custom Vintage Wood Ruler FrameHow to Build a Custom Vintage Ruler Picture Frame
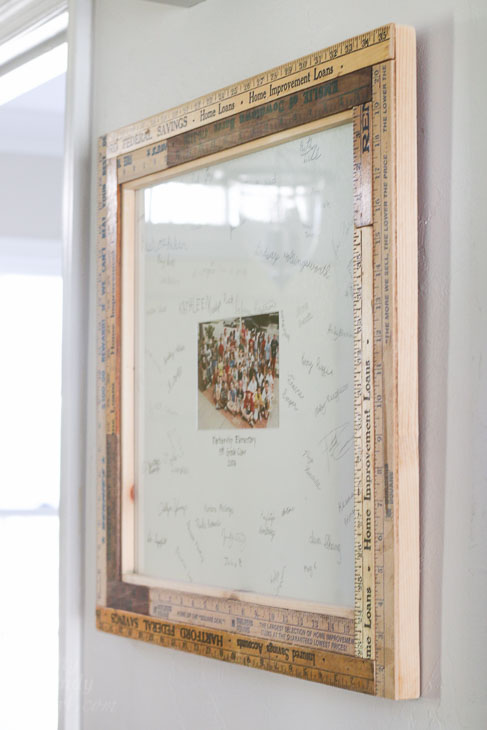
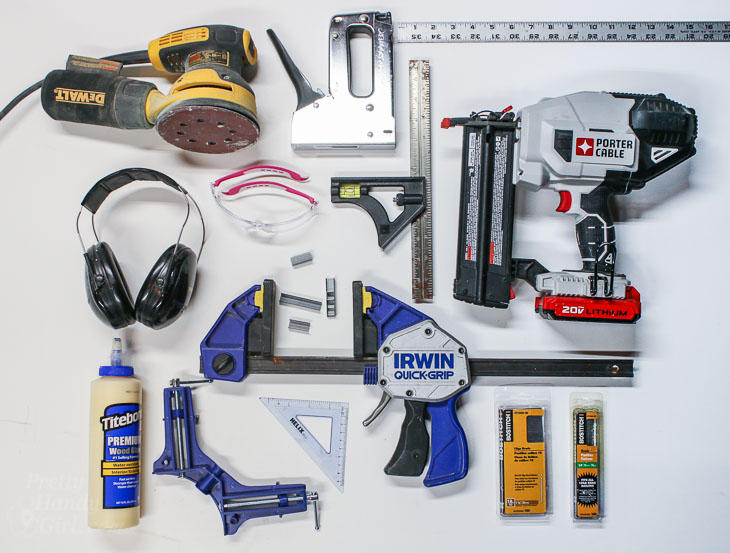
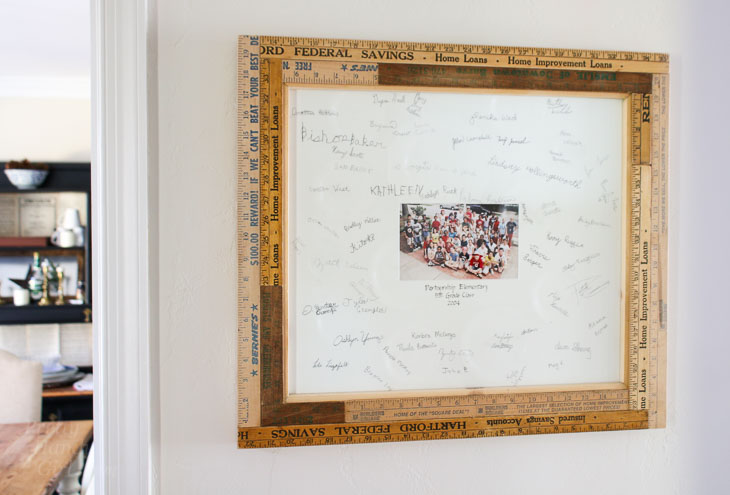
Every year when I go to meet my sons’ new teachers, I tell them if there is anything that needs fixing to let me know. It’s my small show of appreciation for all they do for my kids. Before Christmas, one of the teachers took me up on my offer. She asked me to fix a frame that had fallen off the wall and broke. I took one look at the cheap MDF frame and knew it was beyond repair. I didn’t tell her, because I wanted to surprise her with a Custom Built Vintage Ruler Picture Frame.

The great thing about this project is it uses cheap 1″ x 4″ lumber. And you can add your own moulding to dress up the frame if you like. Or just leave the frame plain, either way you’ll save major money by building your own custom frames!

How to Custom Build a Vintage Ruler Picture Frame
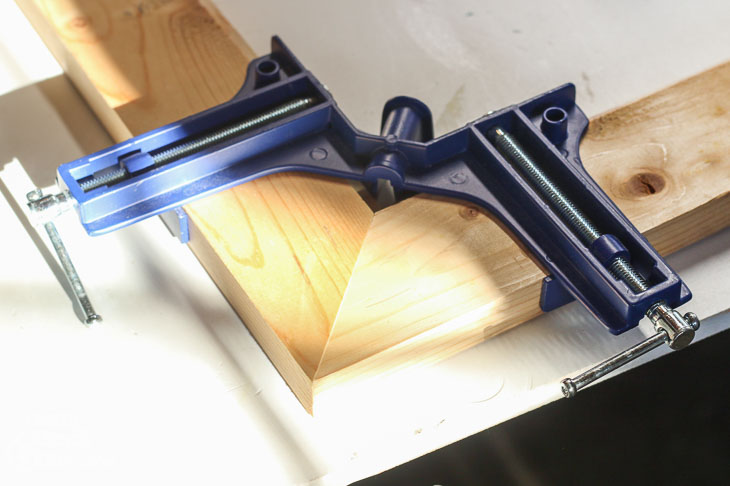
Ready to learn how to build your own custom vintage ruler picture frame? Let’s get framing!

Materials:

(I’ve included affiliate links for your convenience. I earn a small percentage from a purchase using these links. There is no additional cost to you. You can read more about affiliate links here.)

Materials to build frames

Instructions:

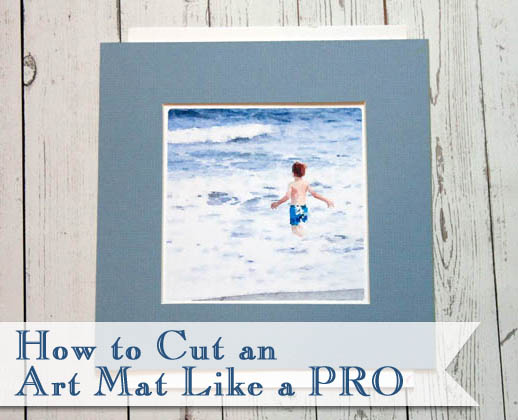
This tutorial assumes you have mounted art and glass, but if you don’t you can follow this tutorial for cutting your own art mats.

How to Cut an Art Mat Like a Pro | Pretty Handy Girl

Cutting the Frame:

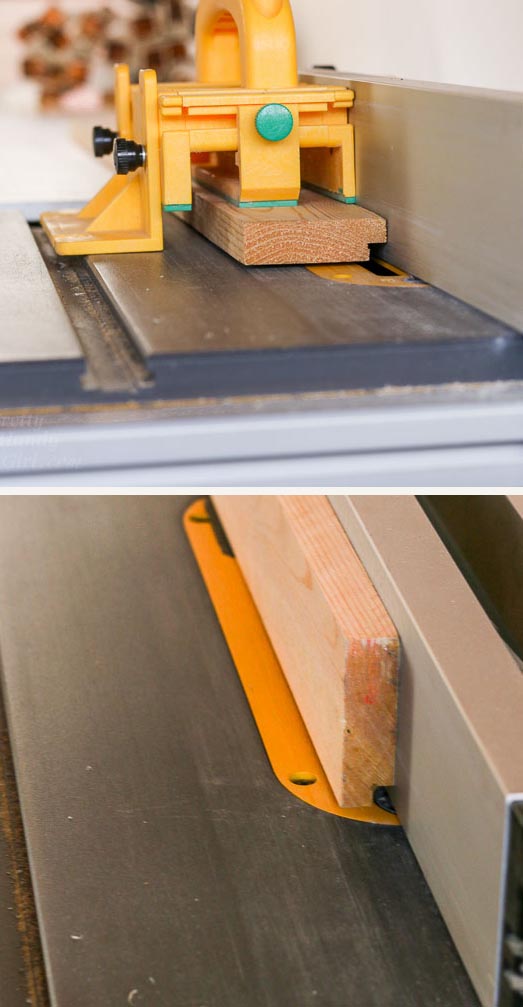
Use a table saw to rip your 1″ x 4″ lumber. Run your board through the saw along the 4″ side, then flip the wood up and run it through again. This will take 1/4″ off one corner to create a rabbet to place your art into.

How to Custom Build a Vintage Ruler Picture Frame
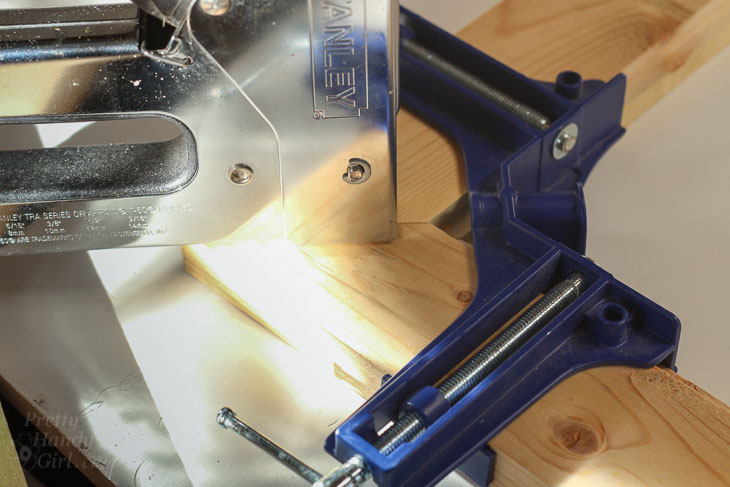
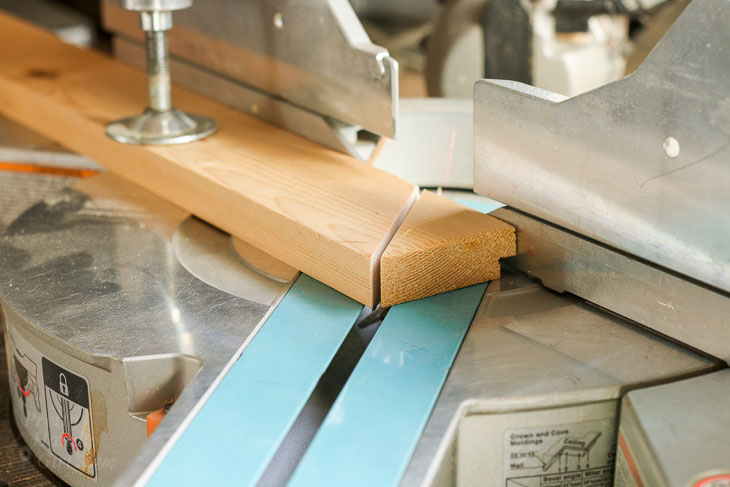
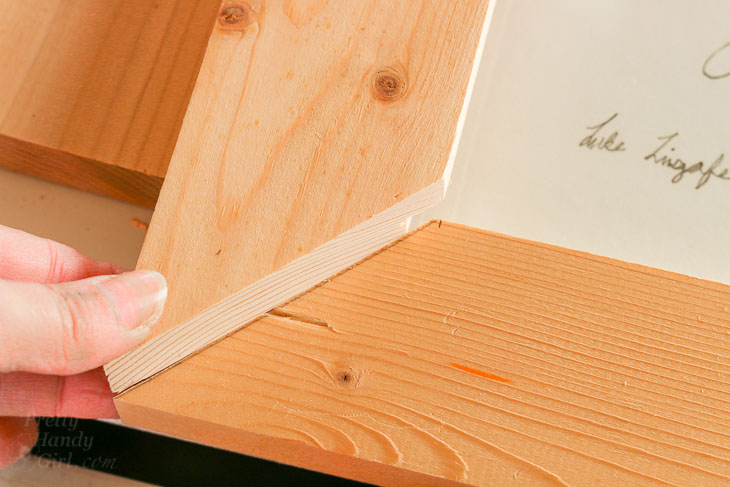
Lay your ripped 1″ x 4″ boards against the fence of your miter saw. (I like to pre-cut four pieces a few inches larger than my artwork.) Cut one end of your boards at a 45° angle (angle the saw blade to position the rabbet on the short side.)

How to Custom Build a Vintage Ruler Picture Frame
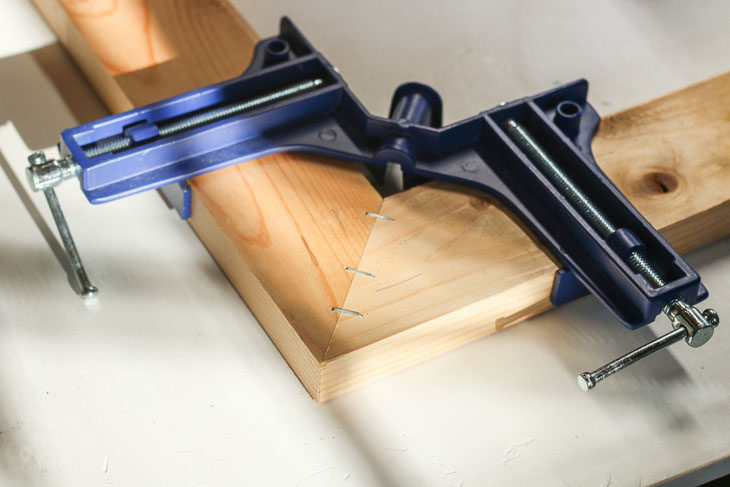
Set one board against your art. Before cutting the other side, measure the width of the art. Add an extra 1/8 inch. Mark the inside corner and cut to length (angling the miter saw blade in the opposite direction as your first cut.)

How to Custom Build a Vintage Ruler Picture Frame
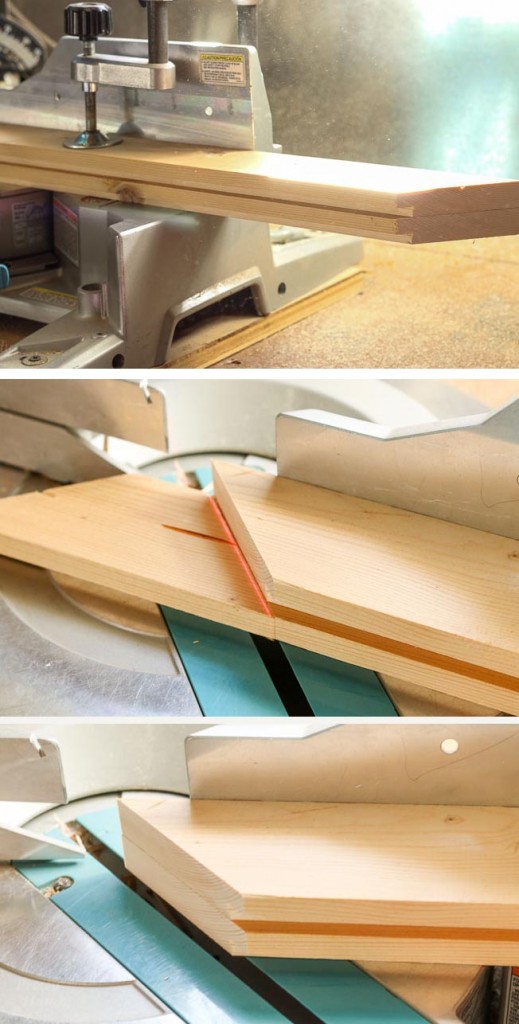
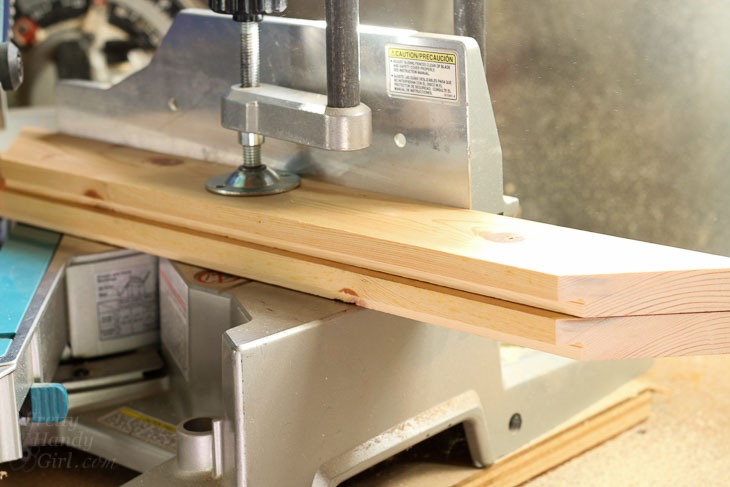
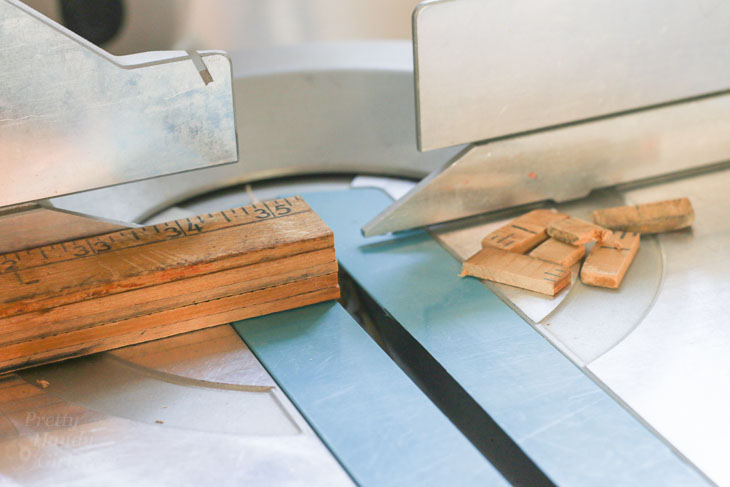
Take your first cut board and lay it on to of a second board. A quick way to cut them exactly the same length is to place the already cut board on top of the second board and line up the ends. Then line the blade up with the cut on your first board.   Clamp the boards down and cut.

How to Custom Build a Vintage Ruler Picture Frame
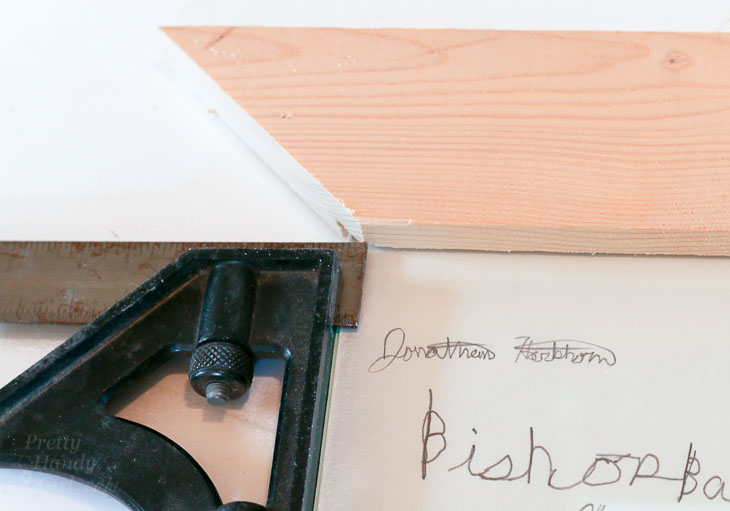
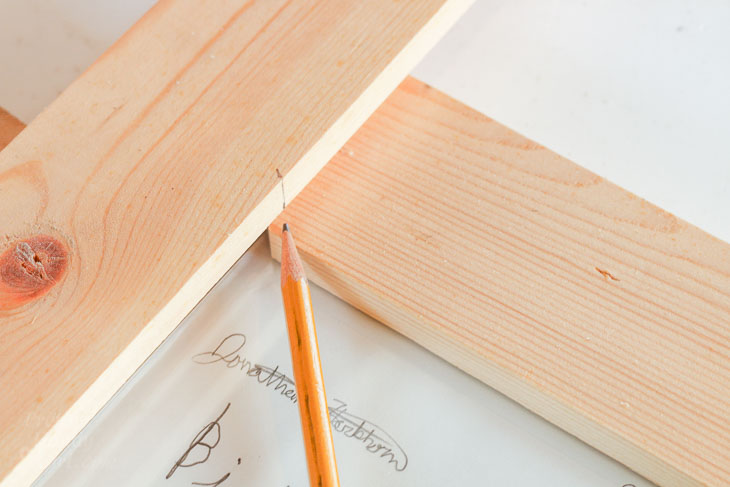
Dry fit the two identical sides. Lay one 1″ x 4″ board over the cut boards at a 9o° angle. Mark the inner corner where you need to cut.

How to Custom Build a Vintage Ruler Picture Frame
Cut the side piece and dry fit to make sure the cut is perfect.

How to Custom Build a Vintage Ruler Picture Frame
Repeat the process above to cut two identical parallel side pieces.

How to Custom Build a Vintage Ruler Picture Frame
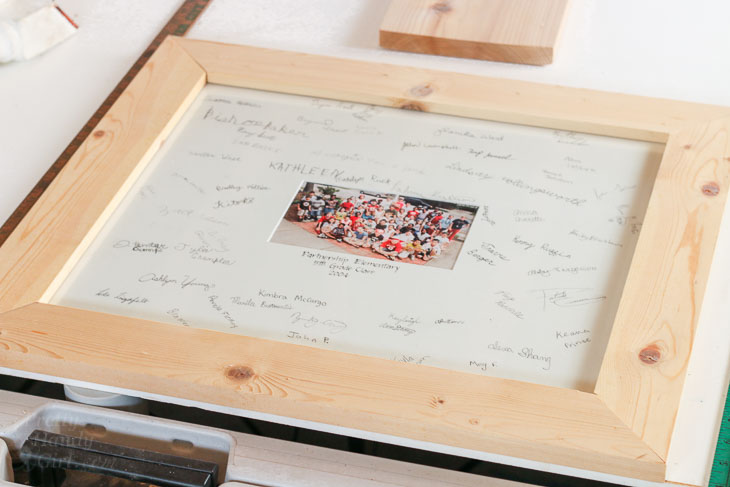
Dry fit the frame around your artwork to make sure everything is square and fits inside the rabbet.

signature


Assembling the Frame:

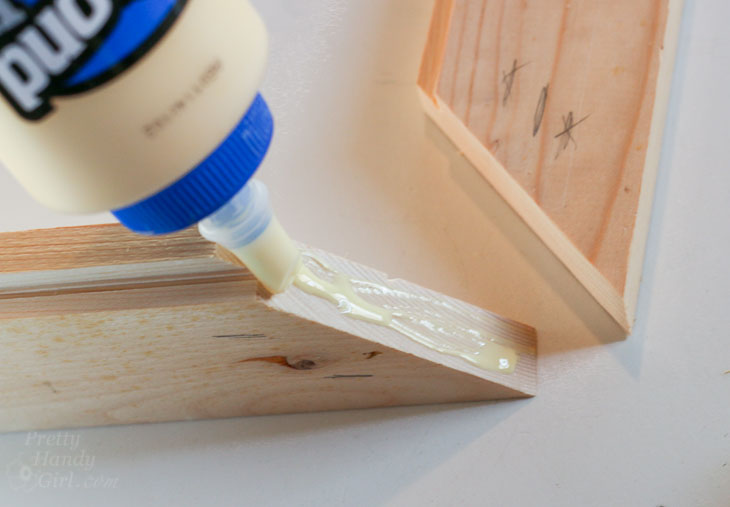
Apply a line of wood glue on the corners.

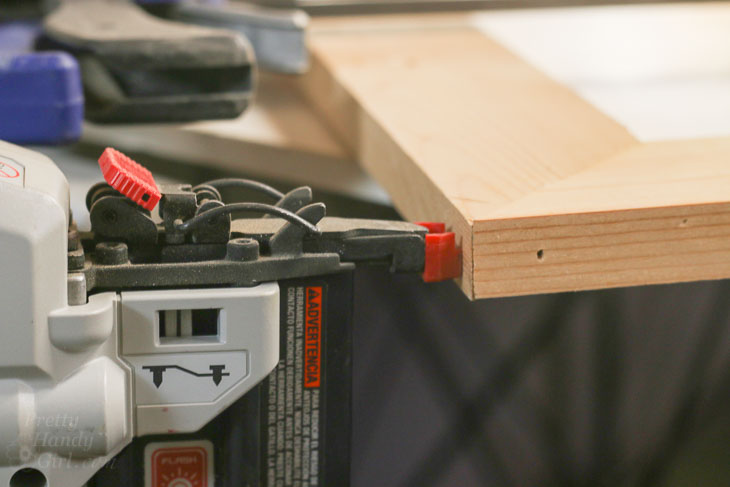
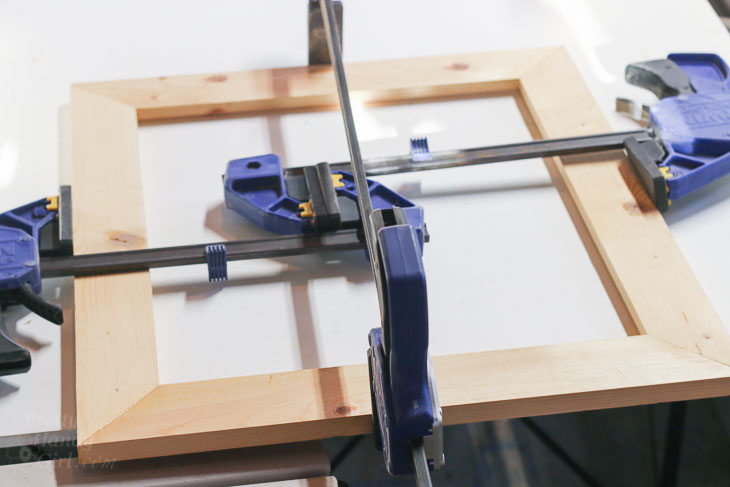
Clamp the corners with a 90° clamp then use your staple gun to fasten them together (on the back side of your frame). The wood glue is strong, but this will hold it in place while the glue dries.

I like to add 1 ½” brad nails (one on each side of the corners) to further hold the frame together. (I don’t want the teacher’s frame to fall apart ever again!)

Clamp the frame and let the wood glue harden. If you don’t have clamps long enough, here is how to make one long clamp with two short clamps!

While the glue cures, cut off any chipped, broken, or rounded ends from your vintage rulers.

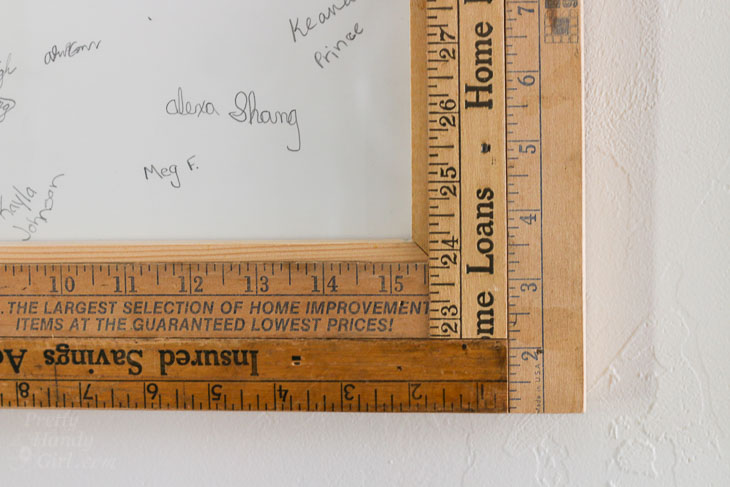
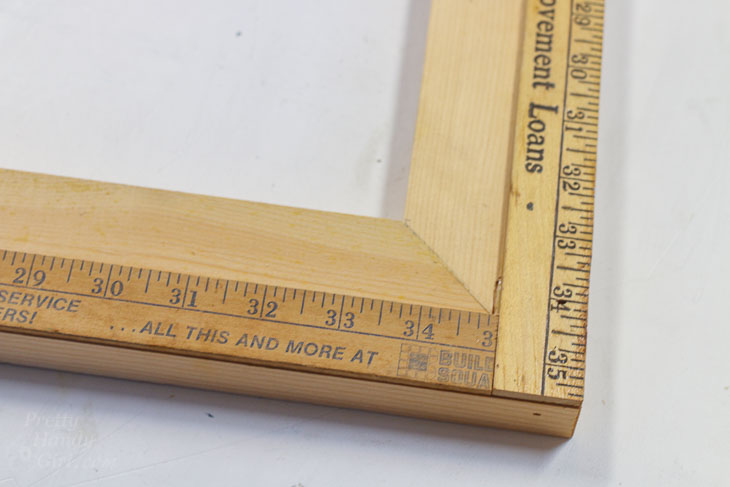
Lay the first two rulers against the outer edge of your frame.

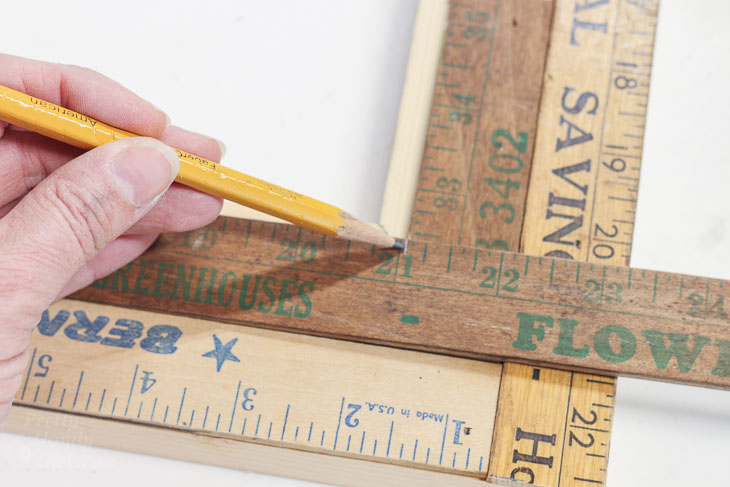
Mark the ruler where you need to trim and cut off the excess.

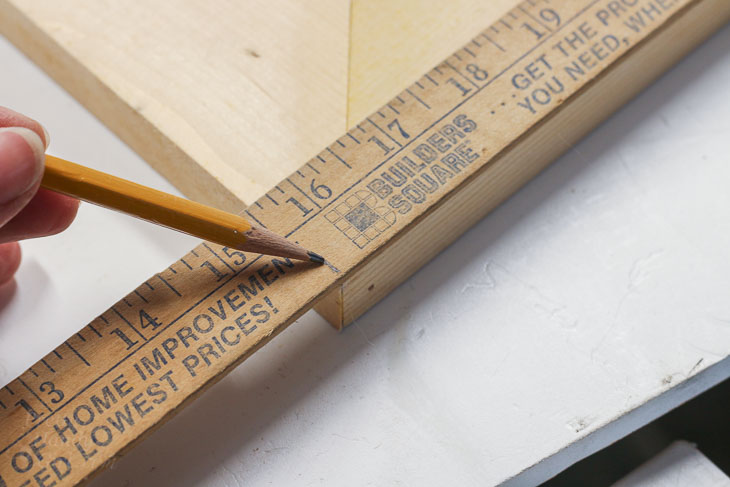
Continue until the outer edge of your frame is covered by rulers. Then start working on the inside of the first rulers. Measure, mark and cut the rulers to fit. Don’t worry if you are left with a small section of frame showing.

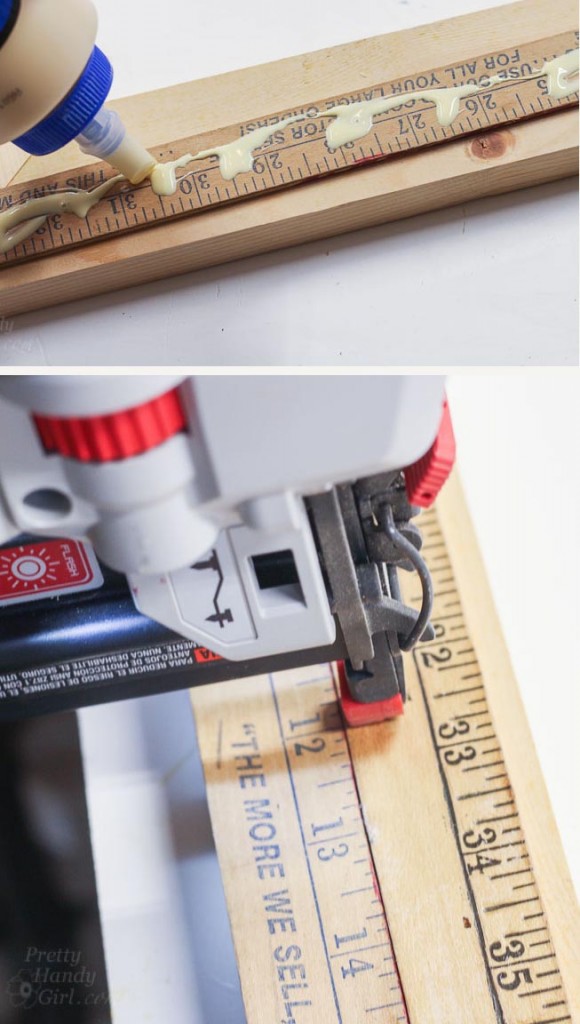
After all the rulers are measured and cut, use wood glue to adhere them to the frame. Follow up with a few brad nails to hold the rulers in place while the glue dries.

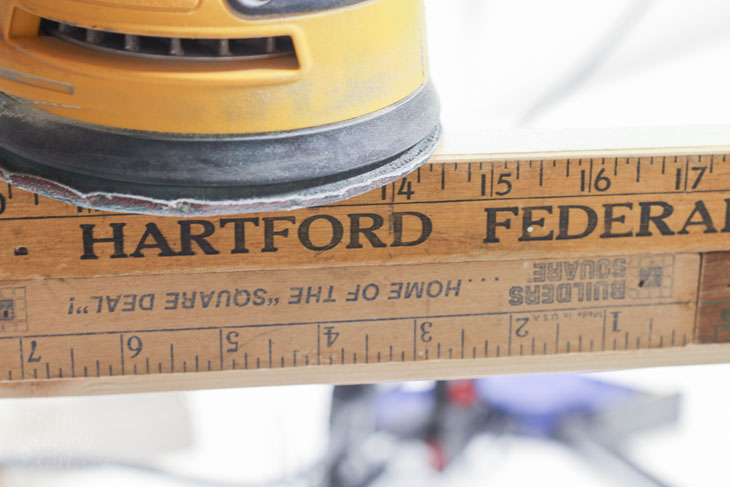
Sand the edges lightly with your sander to remove any splinters or rough edges.

Securing Artwork and Adding Hanging Hardware:

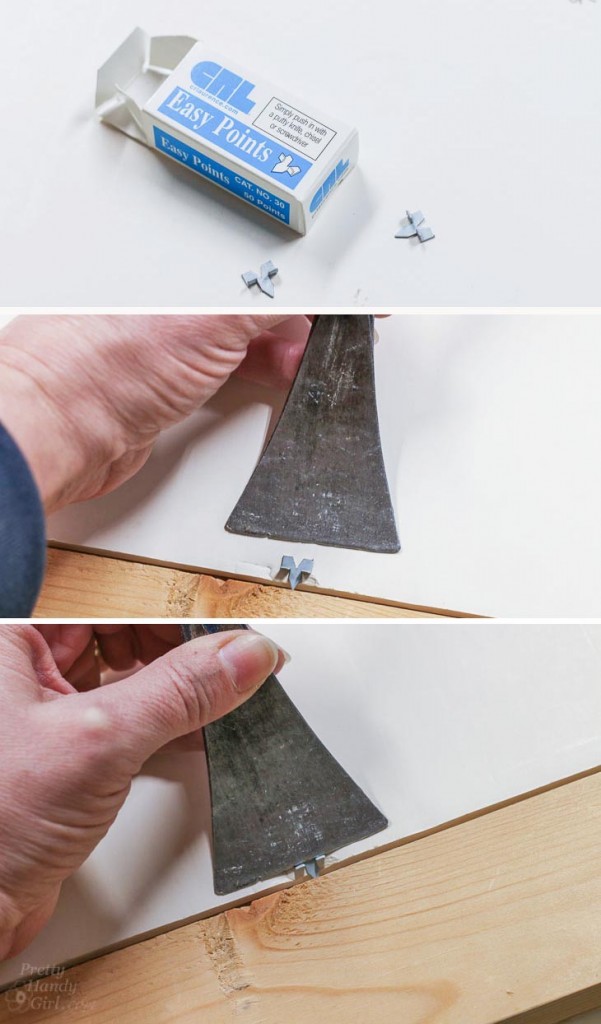
Fit your artwork into the frame. Place a framing point onto the back of the artwork with the point toward the frame. Use a 5-in-1-painter’s tool (or other flat tool) to push the point into the wooden frame. These will hold your artwork secure within the frame.

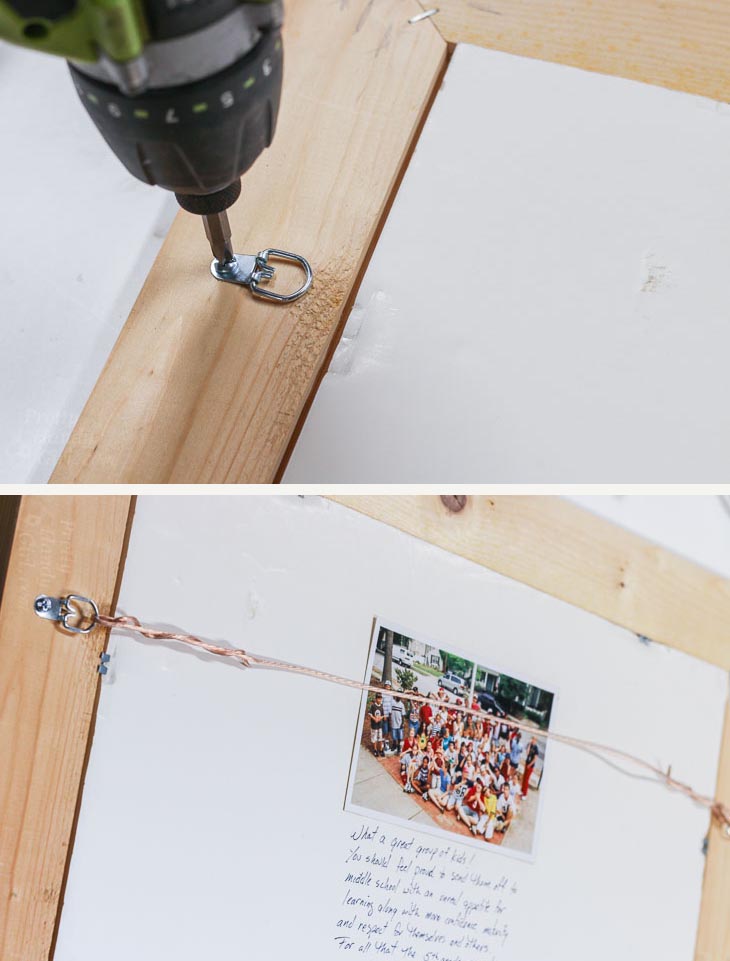
Add your hanging hardware. I prefer using D-rings and picture hanging wire, but you can use any hanging hardware you like.

Congratulations! You are done and now have a beautiful (and unique) Custom Vintage Ruler Picture Frame!

This is an easy project to build and enables you to customize the frame to any size that you need. The vintage rulers add some character and charm to the frame.

I hope you liked this tutorial on How to Build a Custom Vintage Ruler Picture Frame. Check your local vintage shops, Craig’s List or Ebay for some rulers and make one of your own!

Pin or Share this project with your friends! Because friends don’t let friends spend lots of money on art frames!

If you liked this tutorial, you’ll love these frames:

Scrap Wood Shadow Box Frame:

Rustic Scrap Wood Shadow Box Frame | Pretty Handy Girl

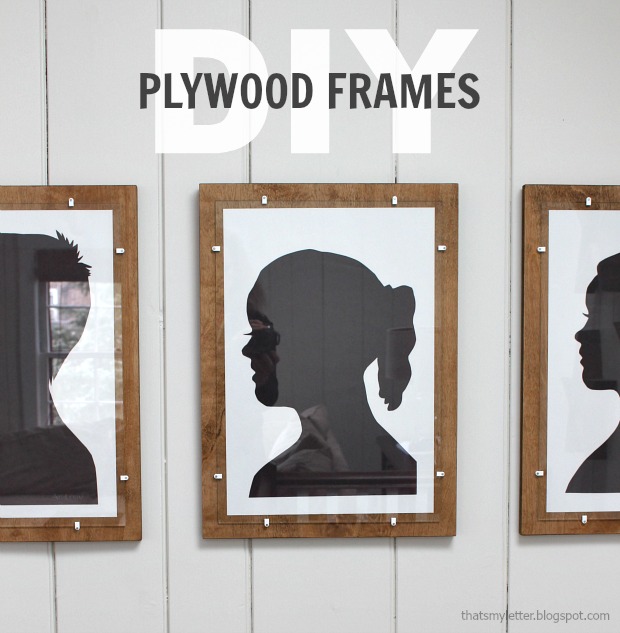
DIY Plywood Frames:Simple Plywood Frames

How to Make a Long Clamp with Short Clamps | Pretty Handy Girl

How to Make a Long Clamp with Short Clamps | Pretty Handy GirlHow to Make a Long Clamp with Shorter Clamps

When you are trying to outfit your workshop with equipment it can be tempting to skip purchasing more expensive long clamps. After all, how often do you really need to clamp something longer than 12 – 18″? Luckily, I’m here to justify your decision to purchase two short clamps in place of one long clamp, because here’s How to Make a Long Clamp with two Shorter Clamps!

How to Make a Long Clamp with Short Clamps | Pretty Handy Girl

(I’ve included affiliate links for your convenience. I earn a small percentage from a purchase using these links. There is no additional cost to you. You can read more about affiliate links here.)

When it comes time to clamp that extra long project, grab two of the same brand clamps (this may also work with different brands, but you’ll just have to experiment). I use Irwin Quick Grip clamps. 

How to Make a Long Clamp with Short Clamps | Pretty Handy Girl

Open the two clamps to the full extension. Set the grip handle side of one clamp on one side of your item to clamp.

How to Make a Long Clamp with Short Clamps | Pretty Handy Girl

Take the second clamp and flip it toward the opposite side, resting the handle side on the opposite side of the item.

Then set the two middle clamp pads against one another to form an “S” shape as shown below.)

How to Make a Long Clamp with Short Clamps | Pretty Handy Girl

Tighten the two clamps and you have one long clamp made from two shorter clamps!

How to Make a Long Clamp with Short Clamps | Pretty Handy Girl

Tell me the truth, did you already know about this clamp hack? I debated whether to write this post because the idea is so simple, I figured it may be nothing new.

If you didn’t know how to make one long clamp out of two smaller ones, I hope this tip helps you one day. I know it really helped me this weekend when I was trying to clamp a larger picture frame.

How to Make a Long Clamp with Short Clamps | Pretty Handy Girl

Do you have any helpful workshop tips to share? I’d love to hear them.

signature