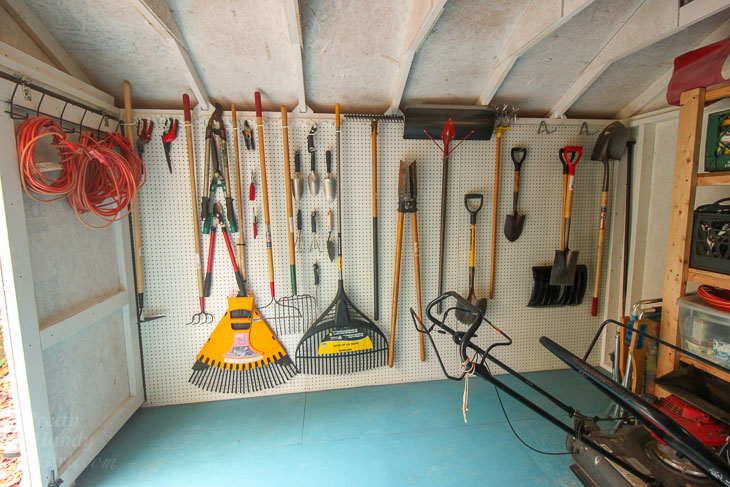
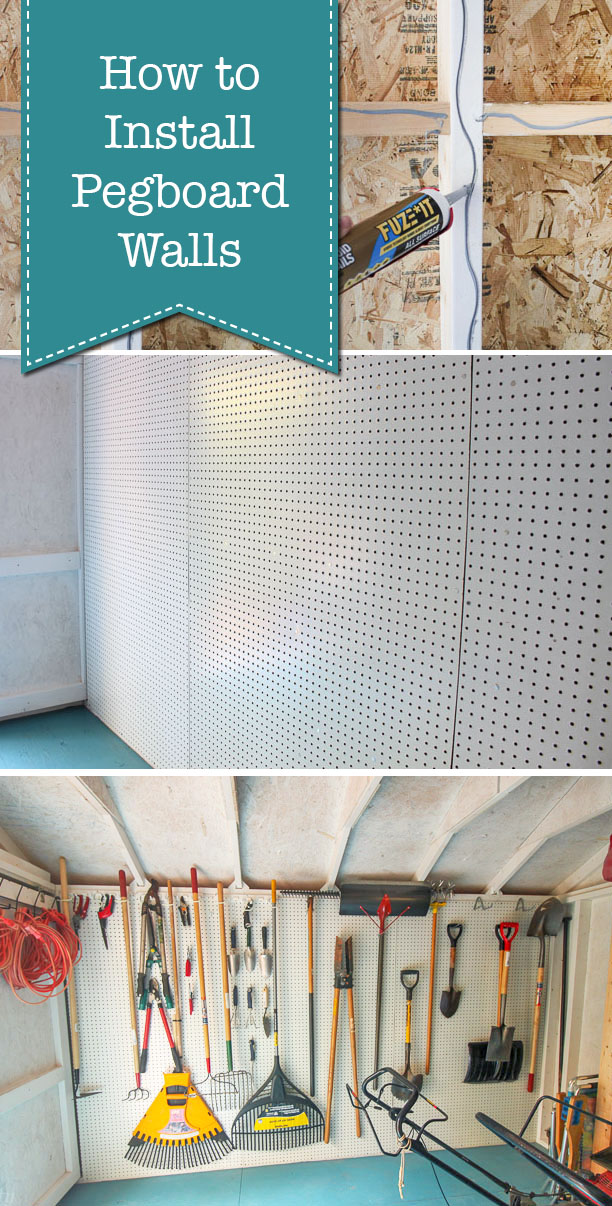
Pegboard walls are the bomb, aren’t they? They provide a ton of storage organization without taking up valuable floor space. Pegboard can be used in a variety of spaces successfully. A garage or shed aren’t the only places that can use this fantastic vertical storage. I’ve seen some amazing craft and sewing spots that utilize pegboards. Heck, even a kitchen can use some pegboard storage like this example from Curbly:
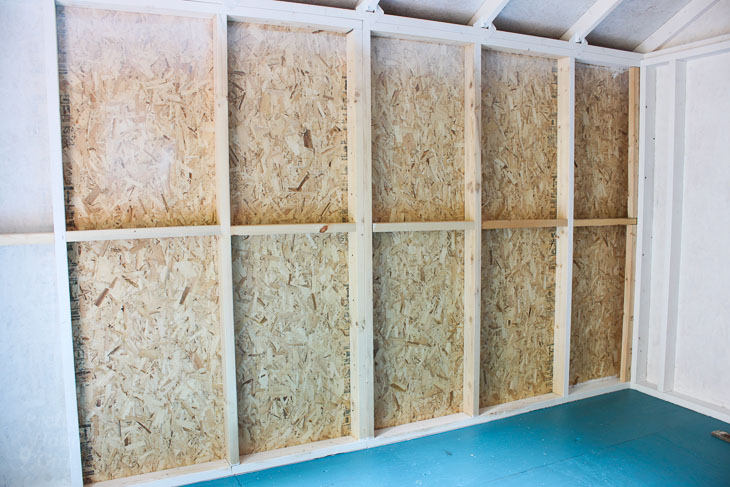
Today, I’ll show you how to install pegboard walls anywhere you want! I’ll be showing you the process on an open stud wall. If you have a finished wall, simply screw strips of wood into the studs before installing your pegboard. Easy peasy! Ready to get started?
Materials:
(I’ve included affiliate links for your convenience. I earn a small percentage from a purchase using these links. There is no additional cost to you. You can read more about affiliate links here.)
Installing pegboard is ideally done on exposed studs walls. If you don’t have exposed studs, you can secure 1″ x 2″ boards (or other wood strips) to the studs in your wall. This will create the hollow space behind the pegboard for the hooks set into.
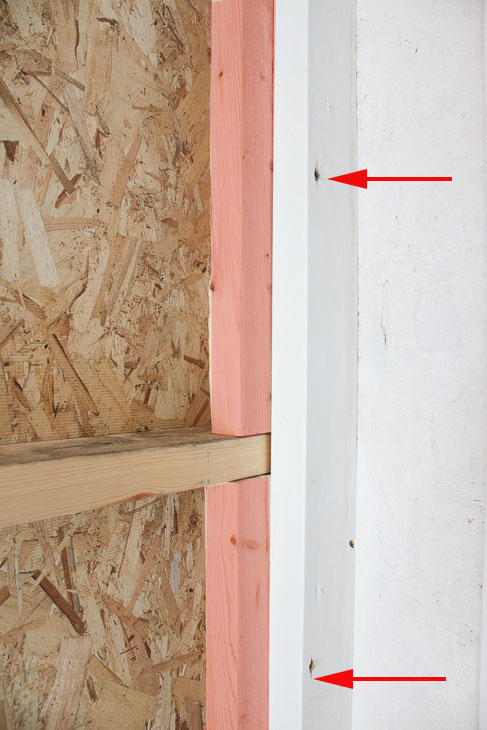
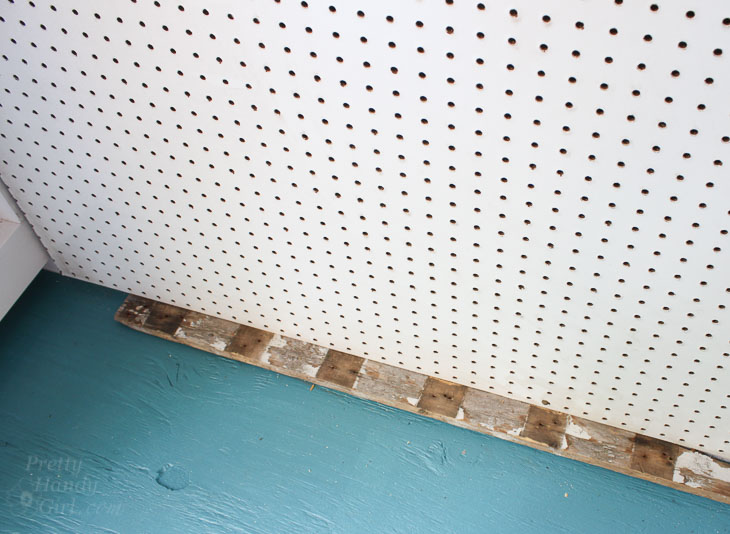
Add blocking to the corner if needed for something to nail into. To secure the blocking, drive screws through studs into the blocks as shown below.
Measure and cut your pegboard panels insuring that each side will line up on a stud.
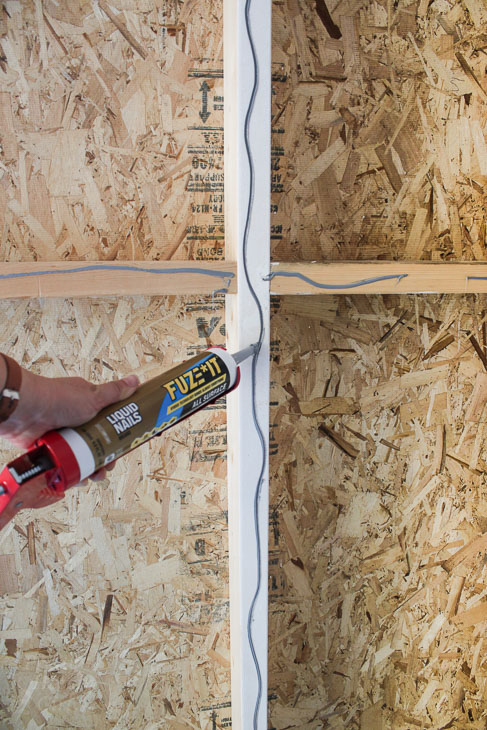
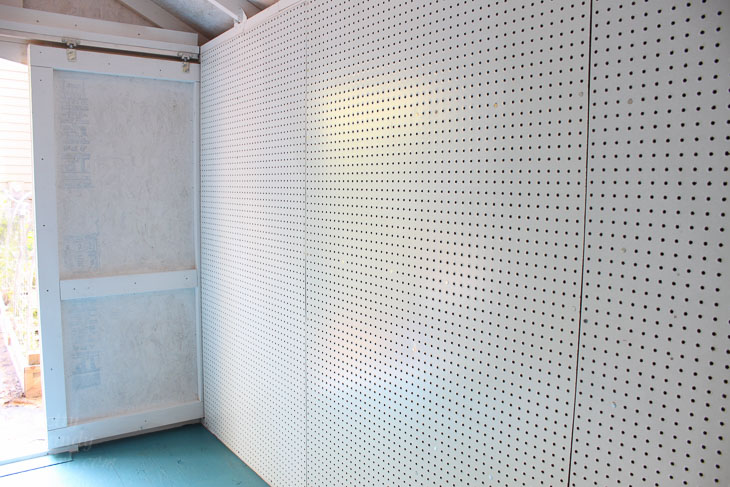
Start in one corner. Run a bead of construction adhesive along all the studs that will hold your first pegboard panel.
Set scrap wood below the pegboard to raise it off ground (this will prevent liquid spills from soaking into the pegboard. It will also allow for some expansion.)
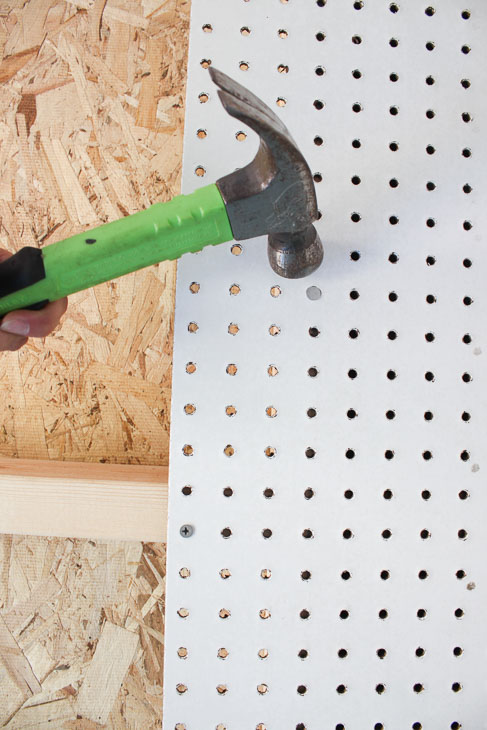
Nail one side of the pegboard to the end stud. Place nails every 9 – 12 inches.
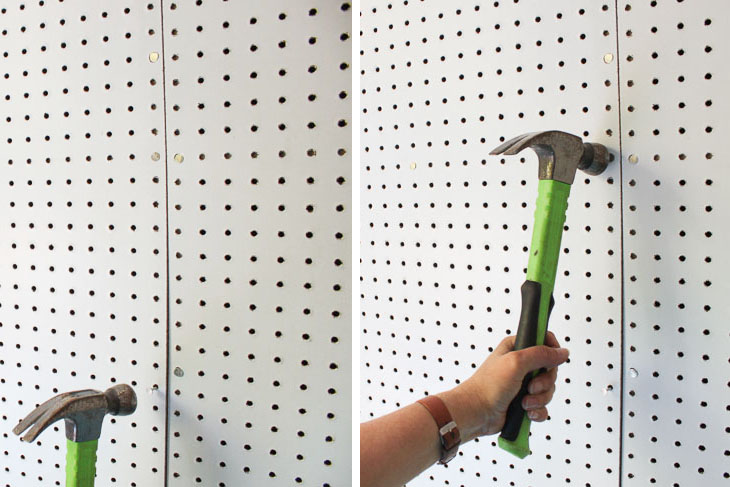
Continue adding pegboard panels following the same process (construction adhesive, then hammer nails to secure.)
Continue until all your pegboard panels are hung.
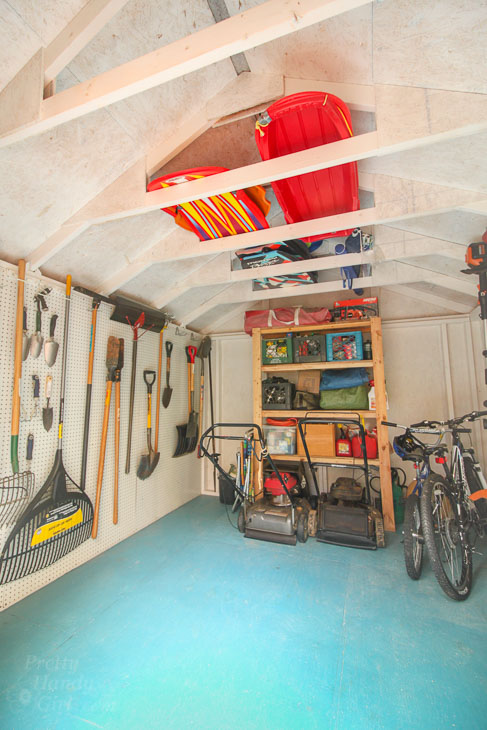
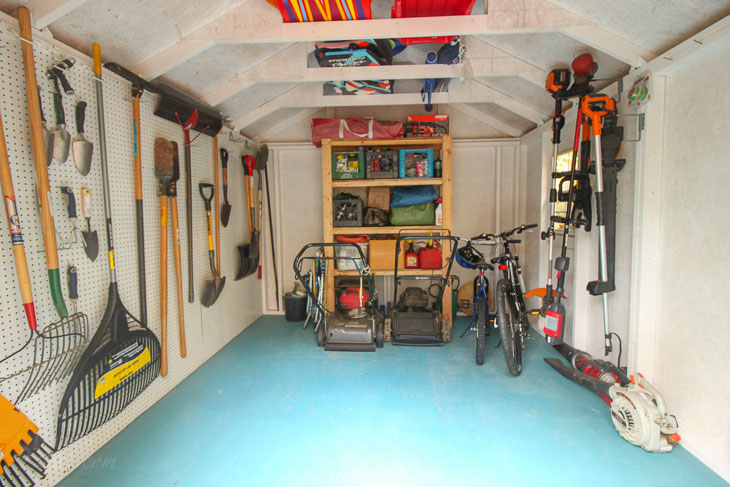
Add pegboard hooks and hangers. (To help me get my shed more organized, National Hardware sent me a wide selection of pegboard hooks and hangers. I can honestly say, they have all the bases covered with their assortment of storage products.) Hang all your items on the wall, for instant vertical storage.
Having all the lawn and garden tools on the wall frees up the floor for two mowers. Don’t ask me why we have two mowers. That’s Pretty Handsome Guy’s department.
But, I guess I can’t judge, I do have duplicate tools. Doesn’t everyone need two drills and two power sanders?
Anyway, now that you know How to Install Pegboard Walls, are you ready to add some pegboard walls to your home?
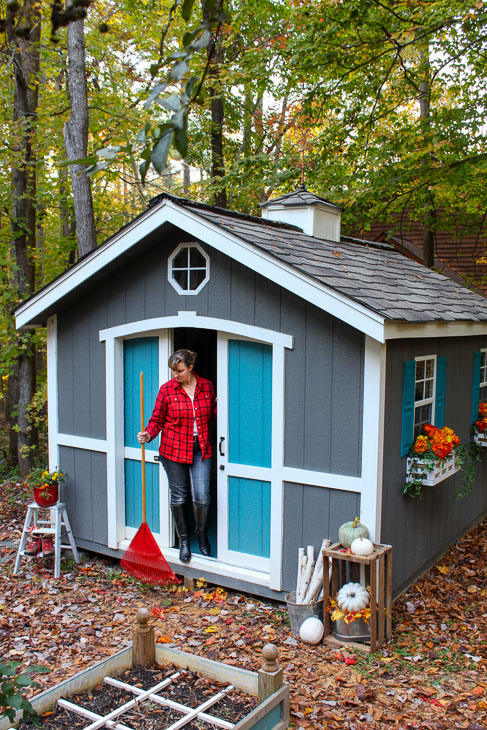
Happy New Year! It’s time to store away all those awesome gifts and maybe create more storage solutions. I’m not sure about you, but our garage was definitely bursting at the seams. That’s why I’m super excited to share with you how to Build a Cute Garden Shed. Before you think that you could never build a shed, I beg to differ! This shed comes in a kit. Most of the pieces are pre-cut for you. And it comes with detailed instructions. It does help to have a friend to help with a few of the heavy lifting steps, but the majority of the build can be done by one person.
Let’s get down to the details. I’ve partnered with Lowe’s Home Improvement to show how you too can build a cute garden shed. Don’t be fooled by the half dozen sheds that are on display in the Lowe’s parking lot. Lowe’s has more than 150 wooden shed kits online waiting for you to explore them! Once you purchase a kit shed, you can customize it to your desires. For example, I looked at tons of sheds online and in person, but ultimately narrowed my choice down to the Cambridge Shed from Lowe’s Home Improvement. The shed wasn’t exactly cute, but it had potential.
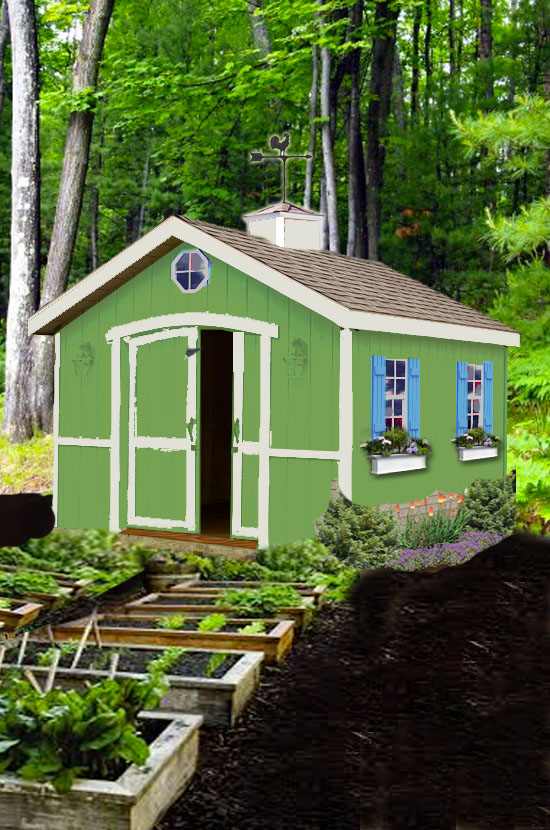
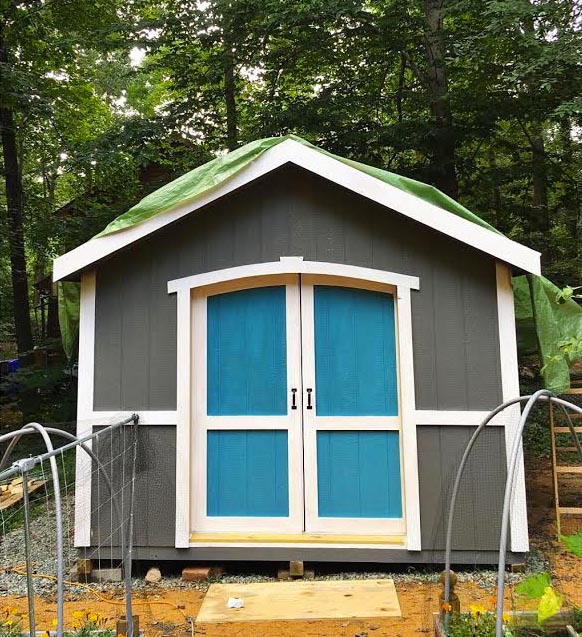
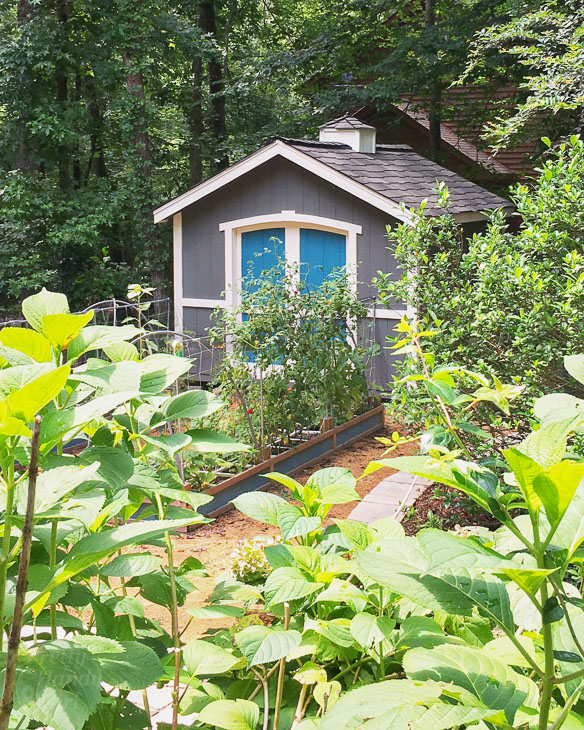
For fun I photoshopped this rendition of the shed with some bright colors on it in our yard. (Note: The windows, cupola and weathervane were options that must be purchased separately. Also, for your needs, the shed kit can be purchased with wood joist flooring system or no flooring if you are building it on top of a concrete pad.)
Then I called my neighbor and ran the idea by them since they would see the shed every time they came and went from their house. I nearly choked when the wife said, “Brittany, I’m sure whatever you build will be very tasteful and adorable. It’s not like you would paint the shed a neon green color.” At that moment, the husband opened my email with the green shed picture and he frantically waved to his wife to hush. We all had a good laugh about it, but ultimately I decided to tone down the shed colors to avoid it looking too “noticeable.”
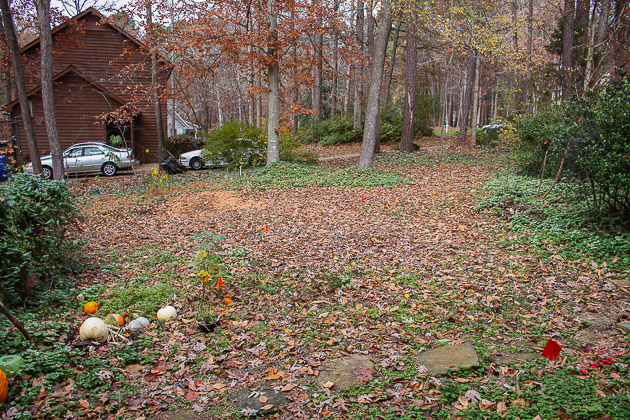
After I received my neighbors’ okay to proceed, I checked our survey and called 811 to have the utilities marked in the yard. Luckily the only thing moved was our compost pile.
To prepare the site for the shed, I hired a landscape company to install a retaining wall. This helped to level the slope.
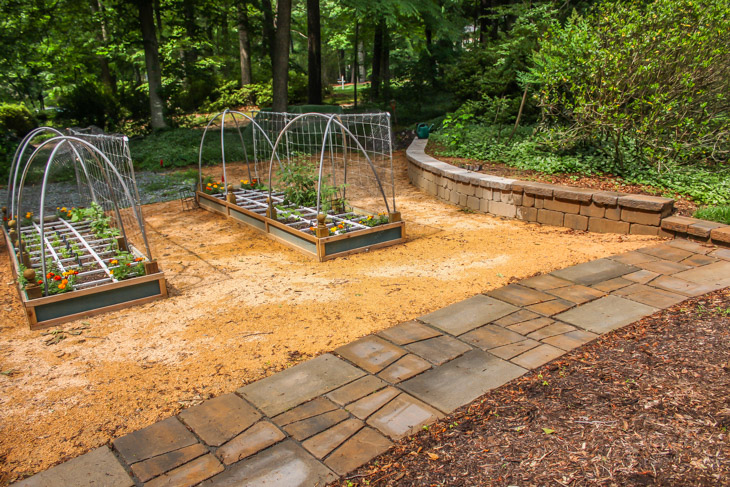
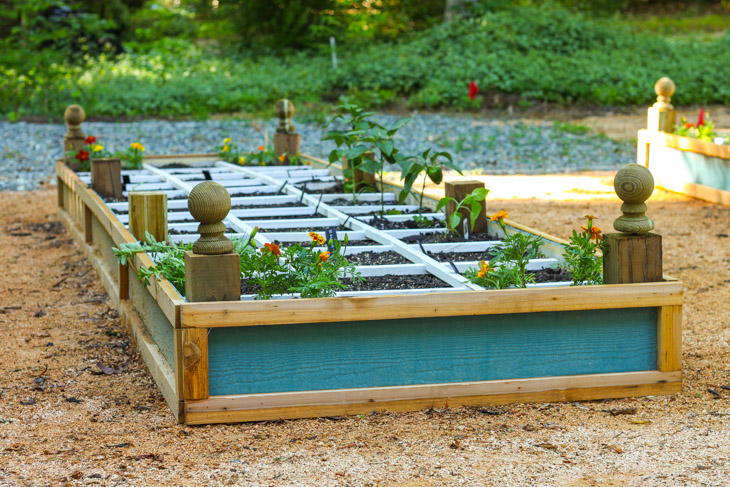
Because the shed was supposed to be a cute GARDEN shed, I built two rot-resistant raised planter beds in front of the shed site. (If you have an eagle eye, you can see the gravel pad behind the planter beds.)
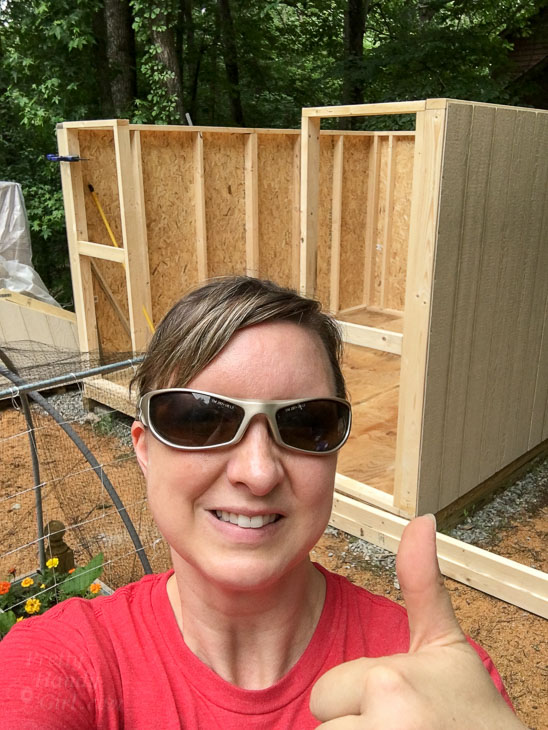
Then life happened and I had a very complicated sinus surgery in Houston, Texas. Thankfully all is well and I can breathe (and smell) so much better. Unfortunately the shed was put on hold until I was given the okay to lift heavy items again. Once I had the doctor’s okay, I jumped into action the next day! (I’m not sure he knew I’d be lifting heavy sheets of siding and hand nailing rafters, studs and roof shingles or he may have made me wait longer. LOL.)
If you are my friend on Instagram, you saw some of the progress pictures from this shed build last summer. I admit, I’m behind in posting about this fabulously cute garden shed. I hope you’ll forgive the delay.
How to Build a Garden Shed from a Kit:
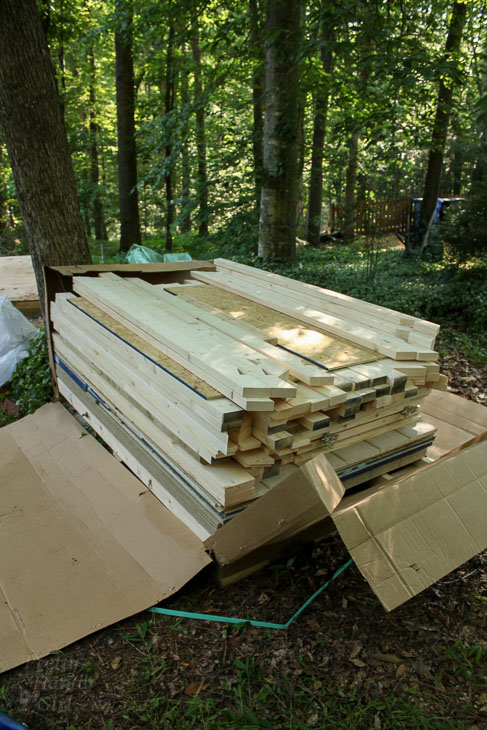
This shed kit was by no means a difficult project for an average DIYer to build. But, it will take longer than a weekend. You will also need to get a helper for several of the steps. Especially when lifting the walls and trusses. Otherwise, most of the shed can be built by one person. Your shed kit will be delivered from Lowe’s and dropped in your yard by a wide forklift machine. Make sure the location you want it delivered is near where you want the shed built and that it can be accessed by the forklift (it needs an 8′ wide radius to maneuver through trees, etc.) Open your box and find the instructions. All the hardware, nails and fasteners should be included in the kit. (Although I did end up needing to buy another box of nails when we ran out: possibly because we bent too many or I used more than necessary.)
Preparation:
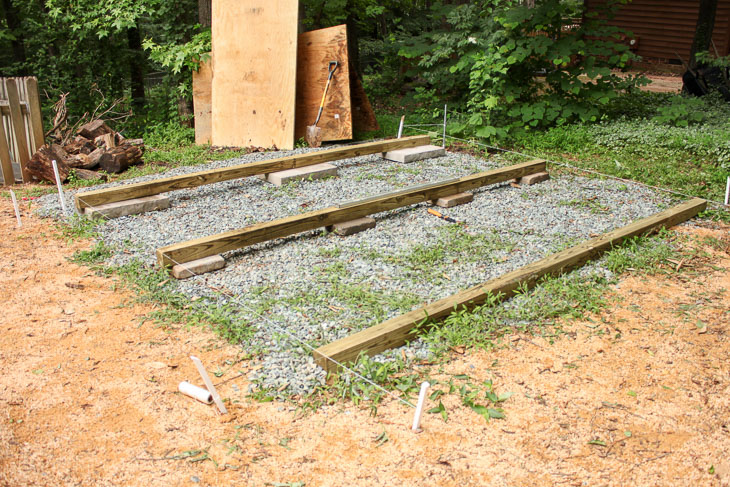
Call 811, your local utilities marking service to have all your utilities marked. Check with your city or county Building and Development office to find out what the requirements are for accessory structures on your property. Find out what your setback is and if you need a permit (in our area, the set back is 10 feet and a permit is required for structures over 144 sq. feet.) Level your site and add drainage rock to create a firm base that will not allow water to pool under your shed.
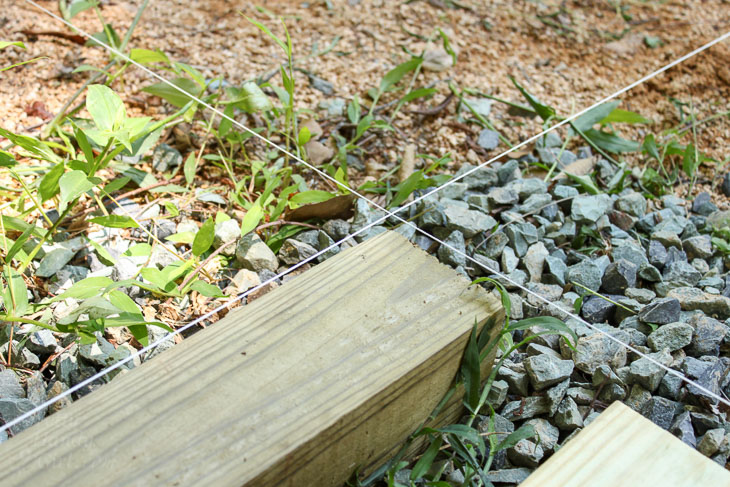
Lay out your site and put up stakes and level strings to delineate where the shed support is to be constructed.
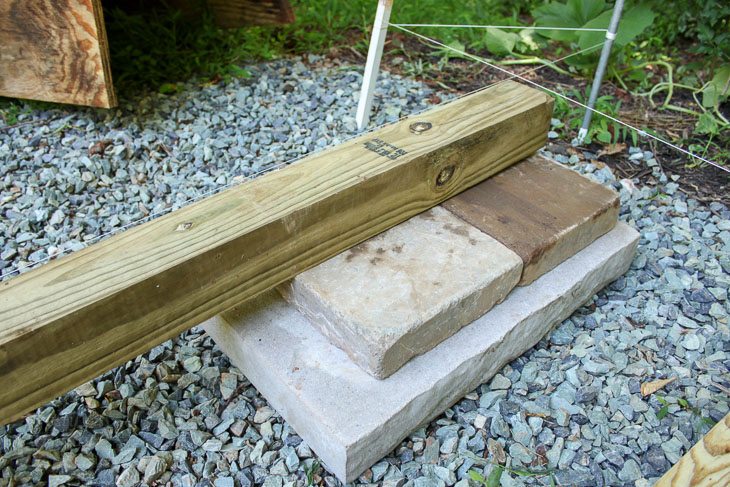
Lay your sleeper posts on the ground and concrete pads or footers if necessary to level.
Take your time with this process. A good foundation is important for a well built structure.
Building the Shed Floor:
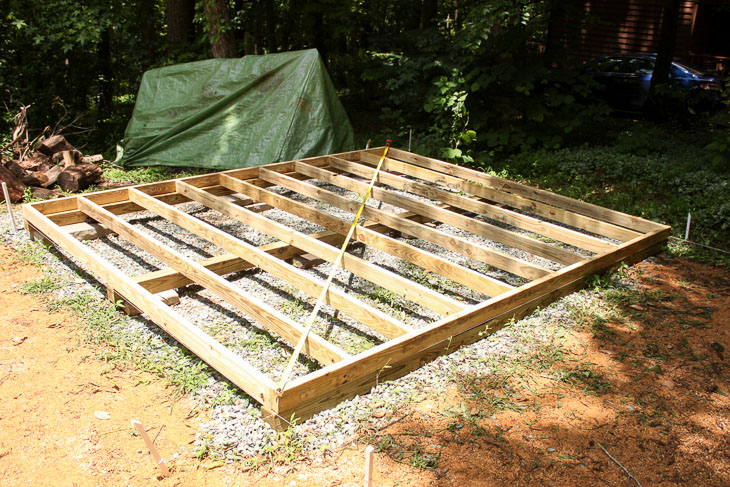
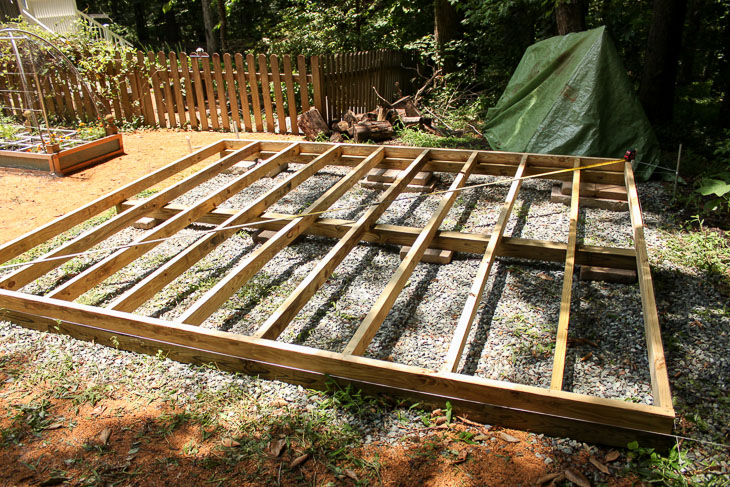
Follow the instructions for your shed. Build the floor system with 2″x6″ pressure treated lumber. Check that your flooring structure is square by measuring from corner to corner.
Repeat for the opposite corners. The two measurements must be equal before proceeding.
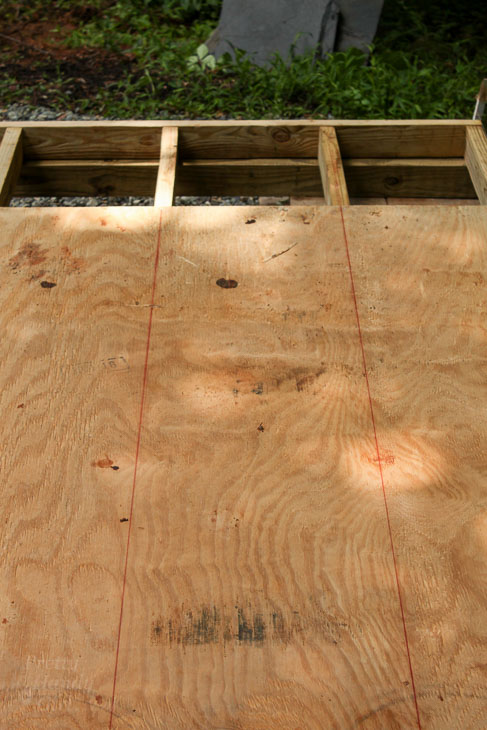
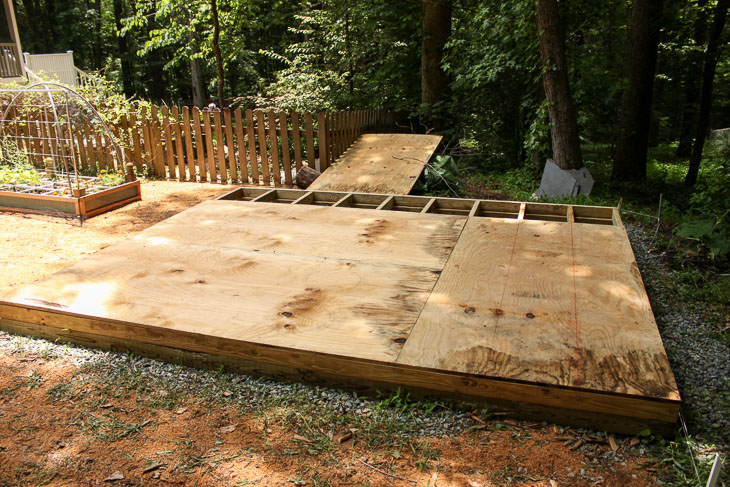
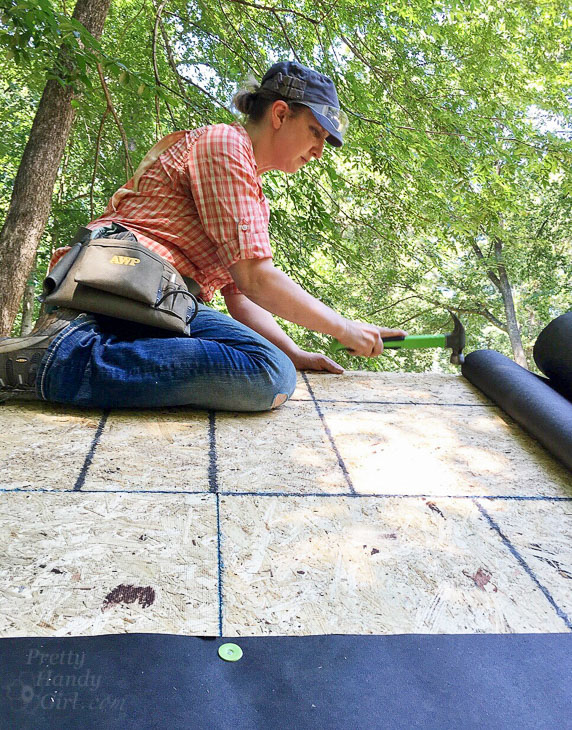
Lay the plywood flooring on top of the floor joists. (Pro-tip: Use a chalk line to mark where the joists are under the plywood. This will make nailing the flooring to the joists super simple.)
Nail the plywood flooring to the floor joists.
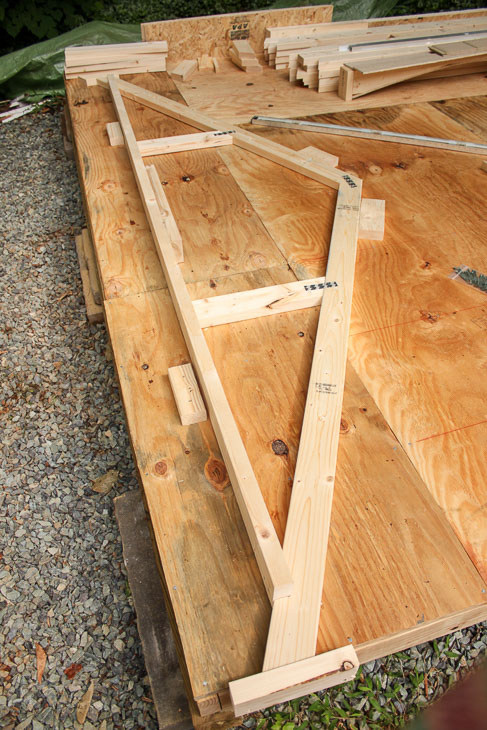
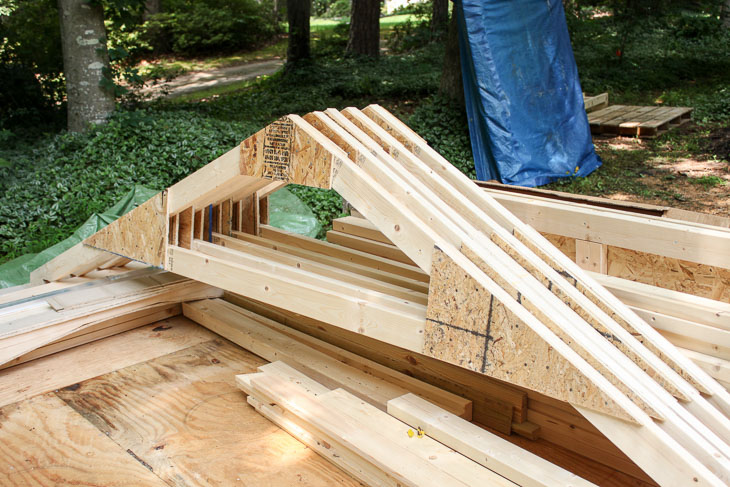
After the plywood flooring is completely installed. Build your roof trusses. Follow the instructions. To build the trusses identically, use shipping blocks to create a template to use for each truss assembly.
Once the trusses are built, set them aside.
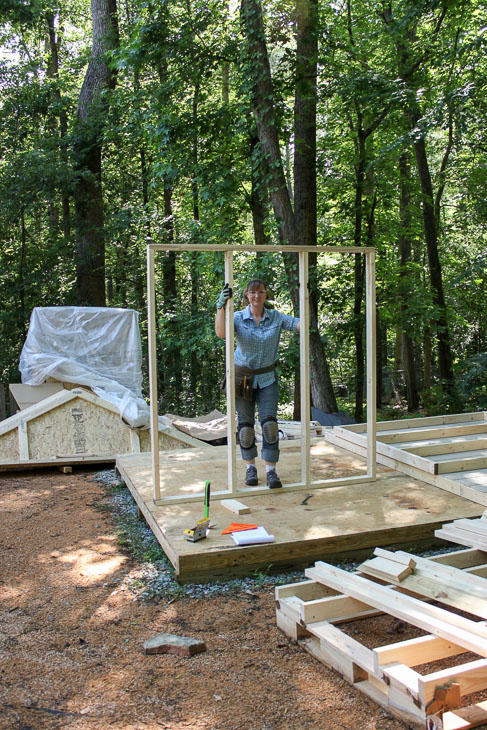
Build your walls according to the plans. Add the exterior panels before raising your walls (with the exception of the front wall).
It’s helpful to mark out your stud locations on the top and bottom plate to assure your walls are built plumb and square.
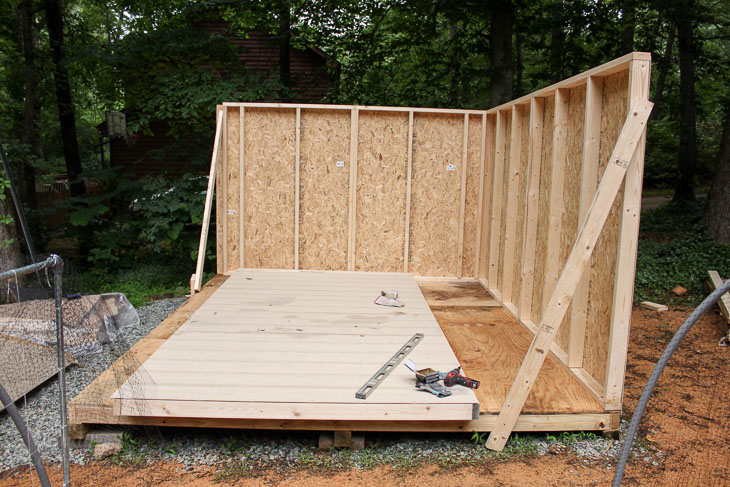
Have a second pair of hands help you erect the walls one at a time. Brace the walls after checking for plumb. Then secure the walls to the flooring by nailing or driving fasteners through the bottom of the wall.
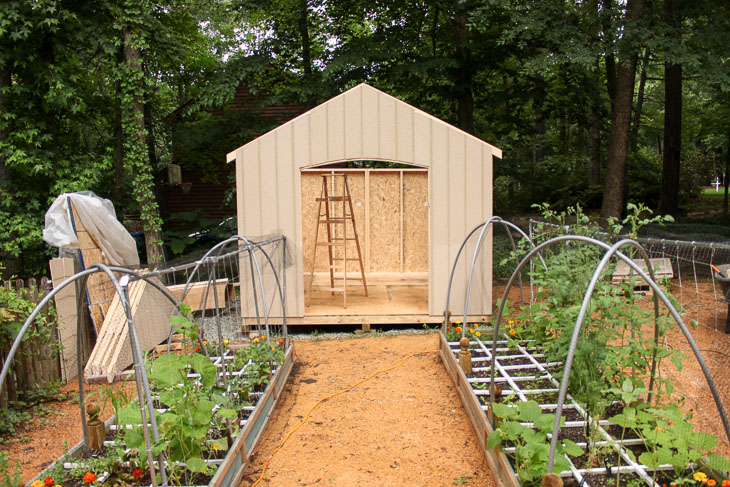
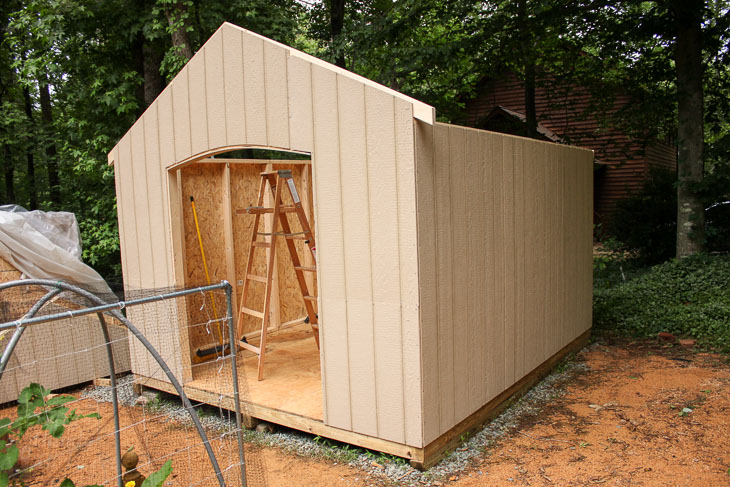
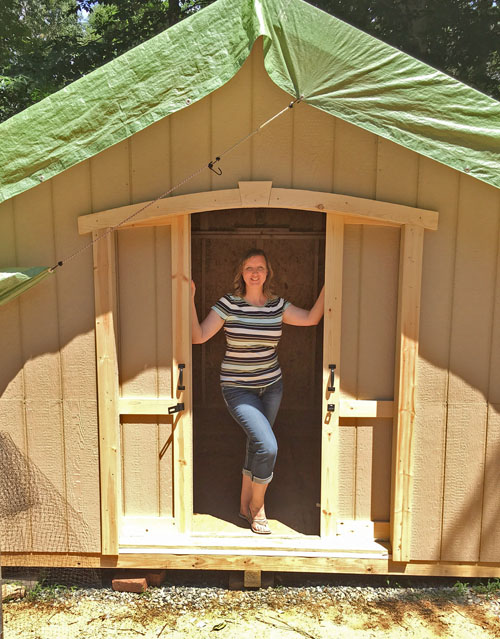
Now give yourself a big pat on the back! The shed walls are up!
Add the exterior sheeting to the front of the shed.
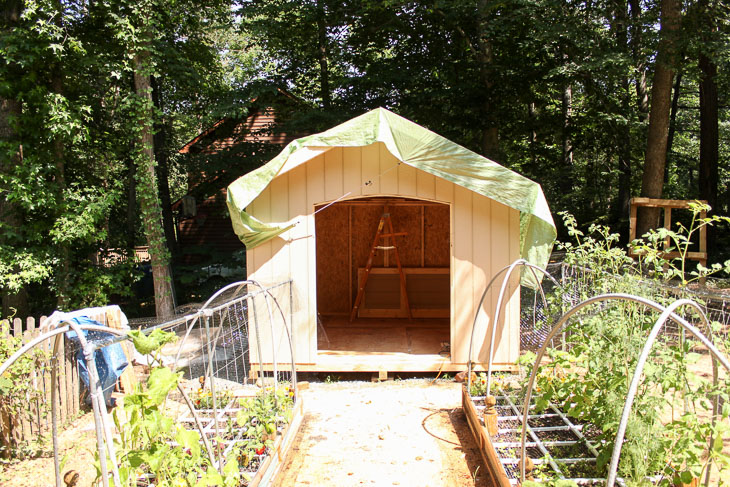
Call in your assistant to help you raise the trusses onto the garden shed.
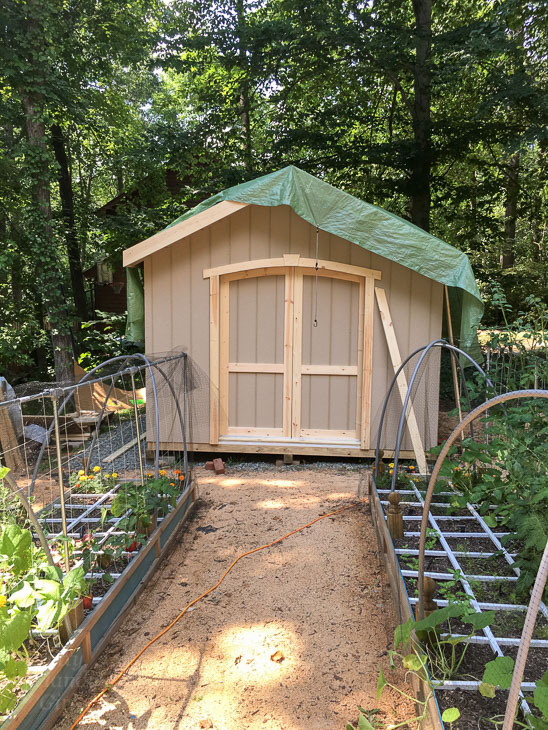
Trusses are installed, but rain was threatening, so we threw up the tarp to cover the shed.
Install the door hardware to hang the sliding doors. Honestly, this was the toughest task. In fact, I’d recommend installing the sliding door track BEFORE adding the roof panels (opposite of what the directions tell you to do.)
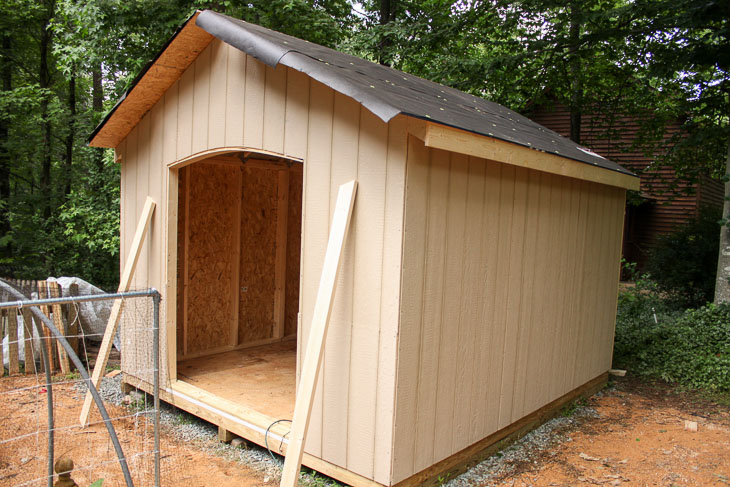
Then you can nail the OSB roof panels to the roof trusses.
Attach the felt paper on top of the roof. (Trim the overhanging tar paper.)
Be sure to install drip edges along all the edges of your roof (not shown).
Install the trim on your shed.
Paint your shed any colors you fancy.
Add your roof shingles starting from the bottom first and work your way up.
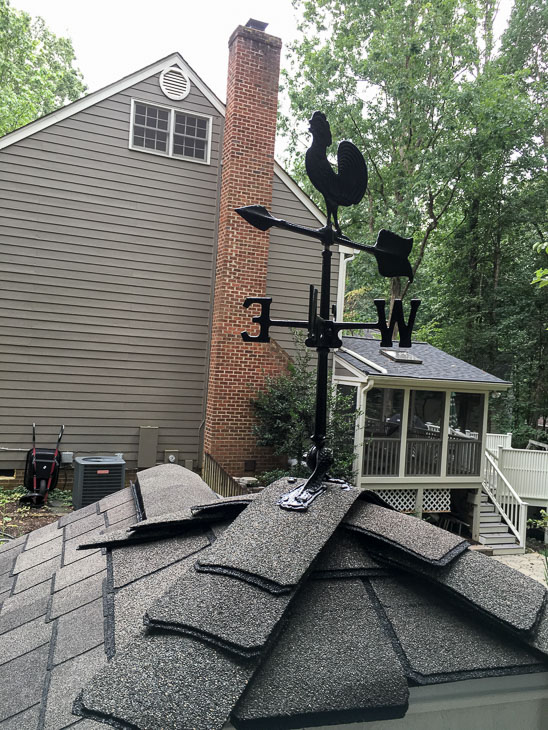
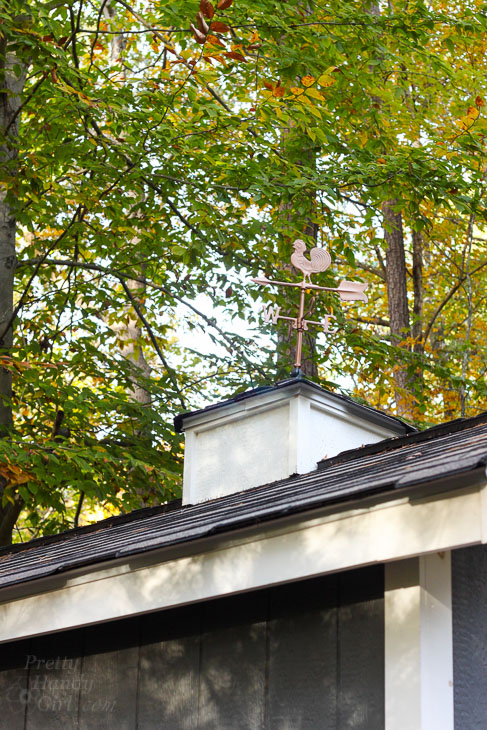
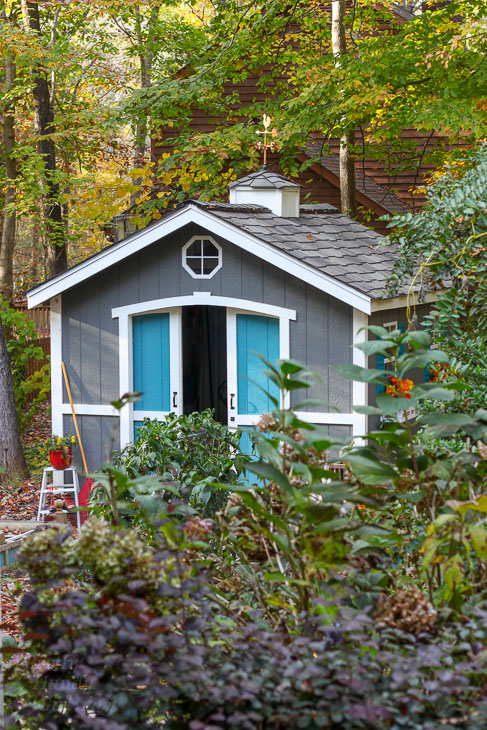
Install a cupola and weathervane if you like. After the cupola is installed, add the ridge vents, and shingles onto the ridge vents.
I recommend adding the shingles and weathervane to the cupola AFTER installing it on the shed. This keeps the weight on the cupola down when you have to lift it onto the roof.
If you noticed the rooster changed colors, your eyes aren’t deceiving you. I spray painted the weathervane a copper color to make it stand out better.
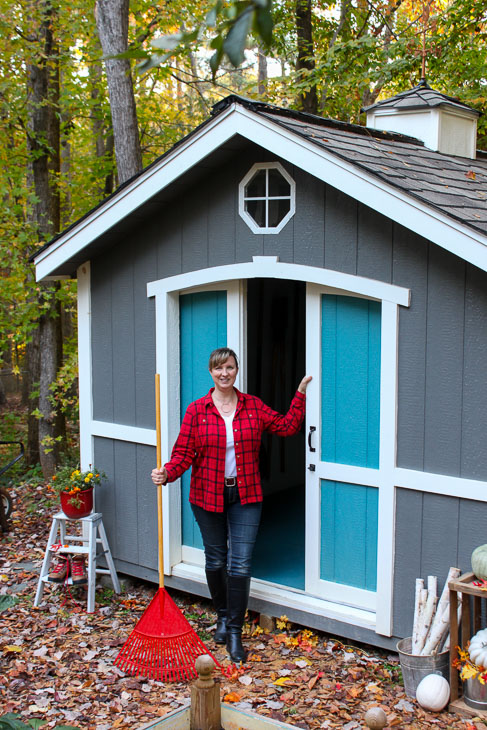
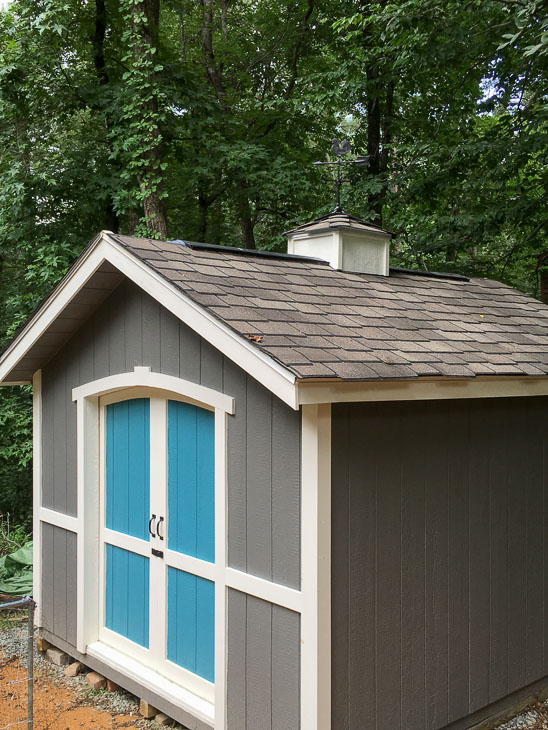
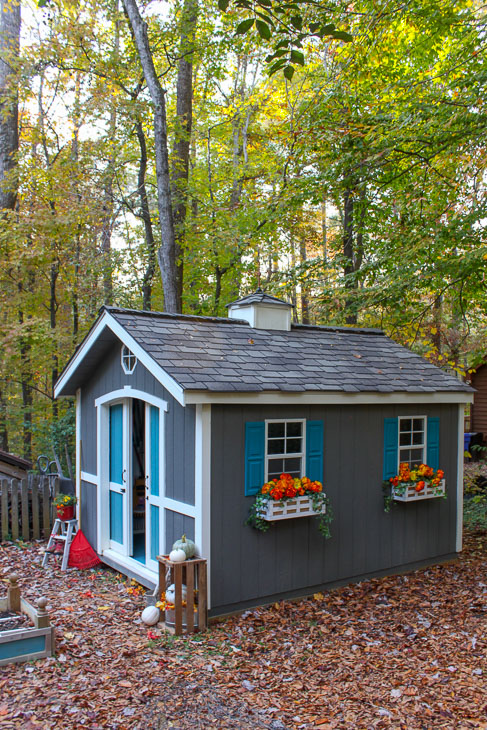
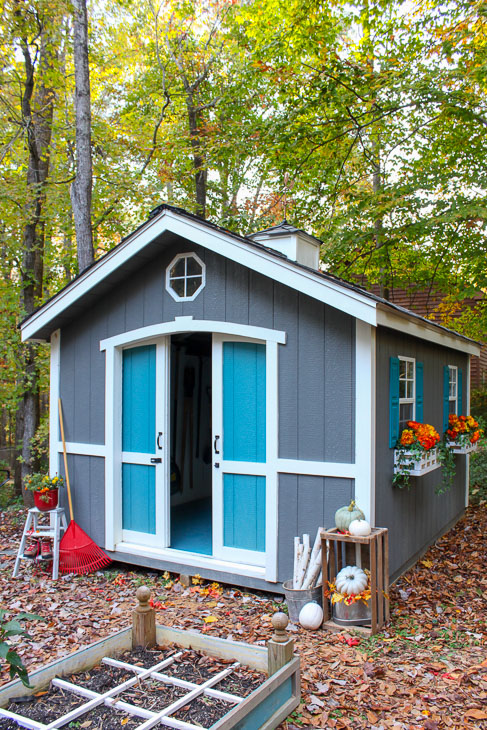
Now stand back and admire the cute garden shed that you built!
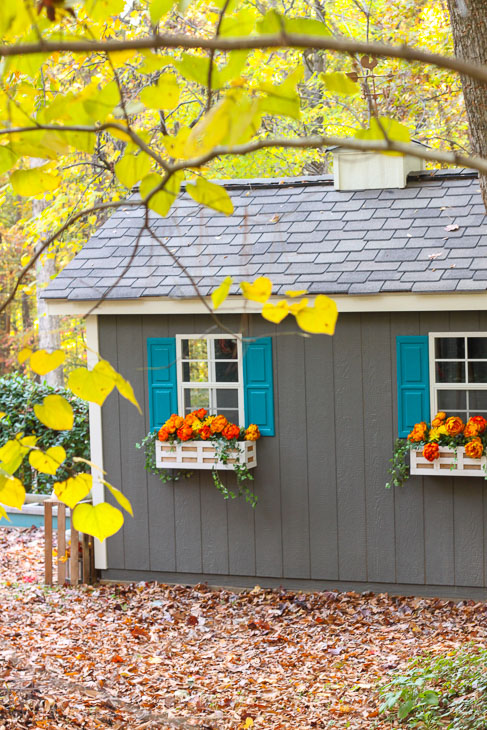
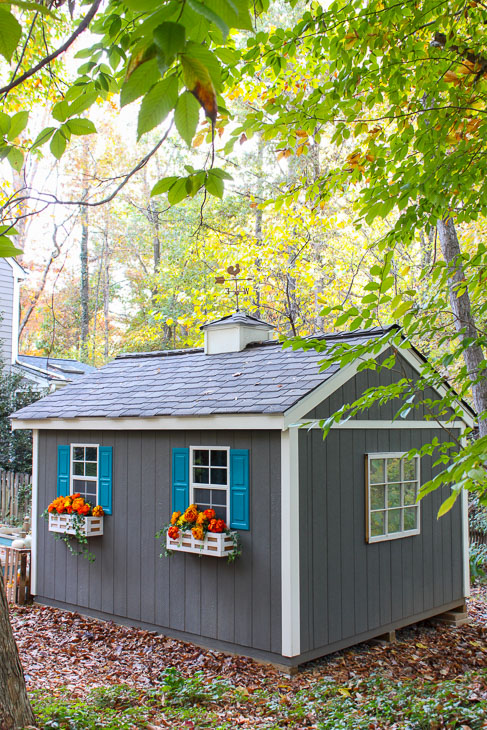
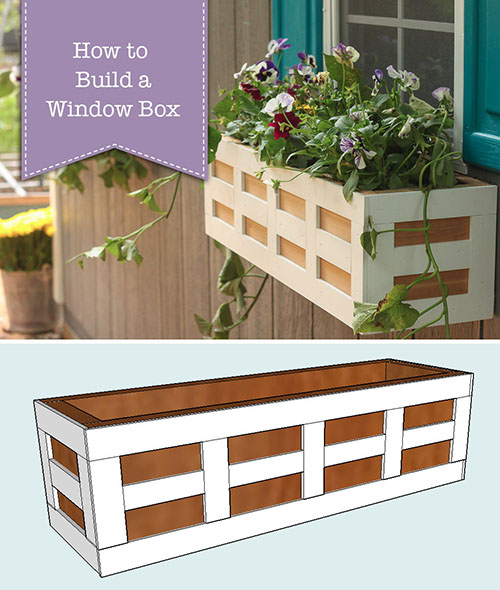
Feel free to add windows and window boxes for a more cottage style feel.
Paint Colors:
Benjamin Moore Kendall Charcoal Gray
Benjamin Moore Calypso Blue for the door and shutters
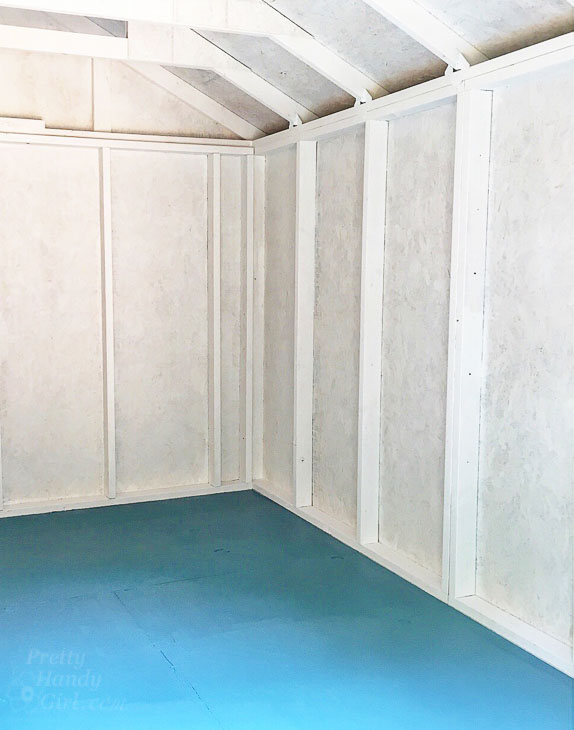
I painted the floors the same color as the doors and primed the walls and ceiling.
The shed holds all our garden and landscaping tools. I’ll put up a tutorial for adding the pegboard wall next week. For maximum organization, l used pegboard hooks and hangers to maximize the storage.
Of course, there is additional storage in the rafters. We have enough room for boogie boards, sleds, and beach umbrellas up there.
I love how my garden shed turned out.
But, best of all, my neighbor likes it too.
I added a fake mirrored window on the back of the shed. Some day I’ll add shutters to the mirrored window.
Hope you found the encouragement to build your own garden shed. I’d love to stick around and chat, but the leaves are piling up and need to be raked.
If you want to see the time-lapse video of the shed build, here it is:
Until next time.
Disclosure: This project was sponsored by Lowe’s Home Improvement. I was provided with materials to build the shed in exchange for sharing the building process with you. I will always let you know if a project is sponsored. All opinions are my own.
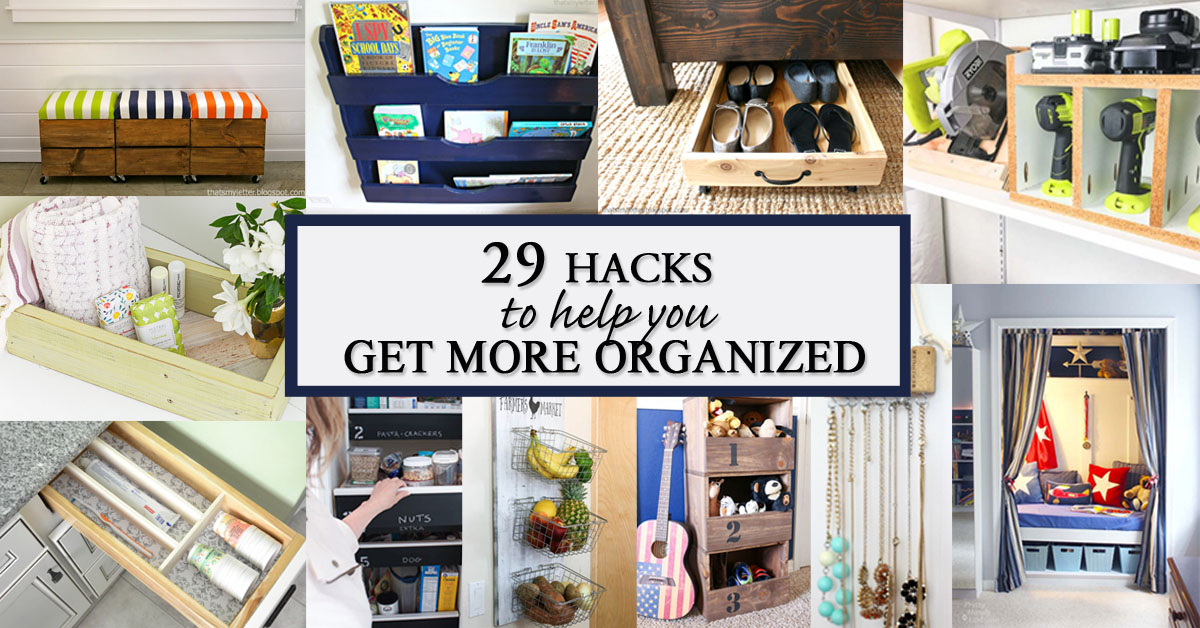
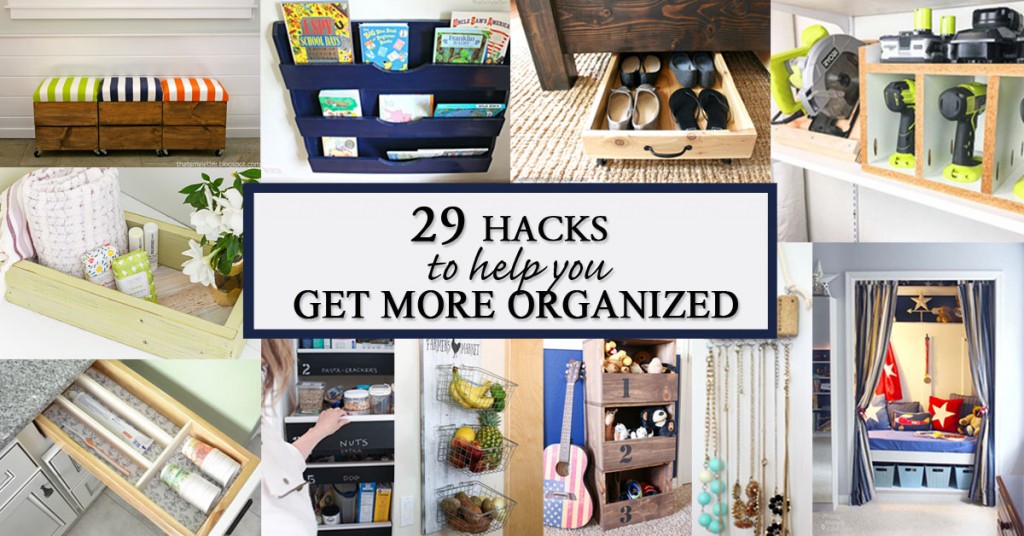
January is the time of year where we focus on making the next year better than the last. Often that involves new workout goals or resolutions. Other times it means getting more organized. There is something intensely motivating about being organized and saving yourself small bits of time. With that in mind, here are 29 hacks to help you get more organized for the coming year! Learn how to make your own bins, trays, and more to complete those organizational projects! I hope this helps you start your year off on the right foot.
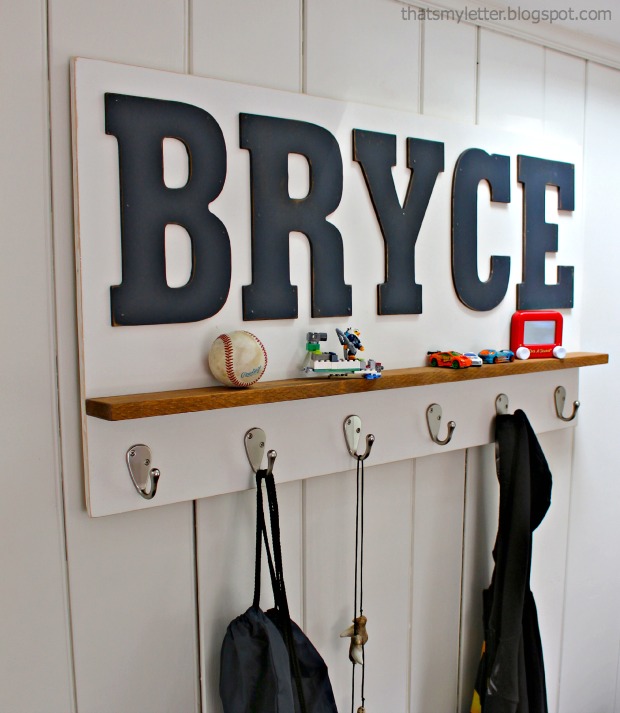
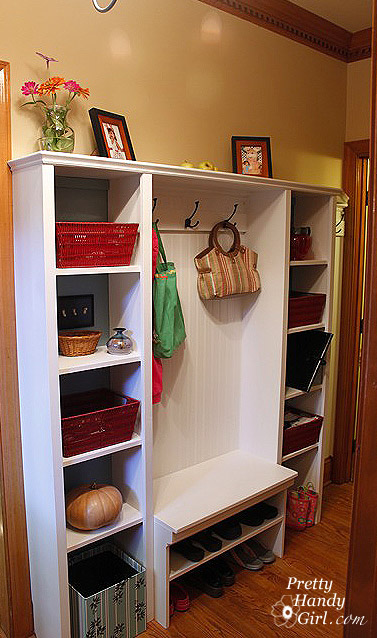
Not enough closet storage? Consider building a Personalized Wall Shelf for jackets, backpacks, and knick knacks.
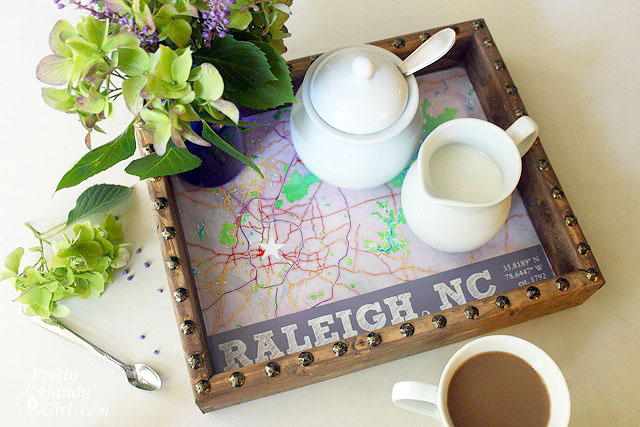
Having your morning coffee supplies on a tray like this Rustic Map Serving Tray keeps them looking less cluttered and easy to find even on those mornings that come a little too early.
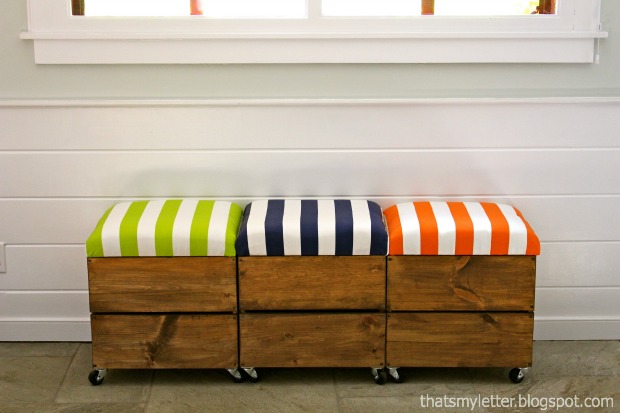
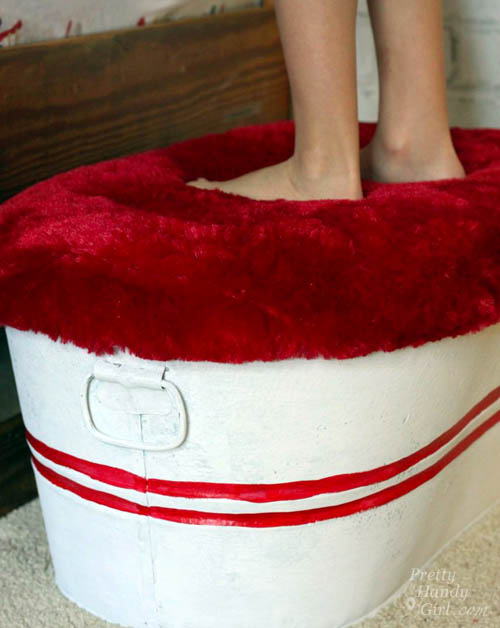
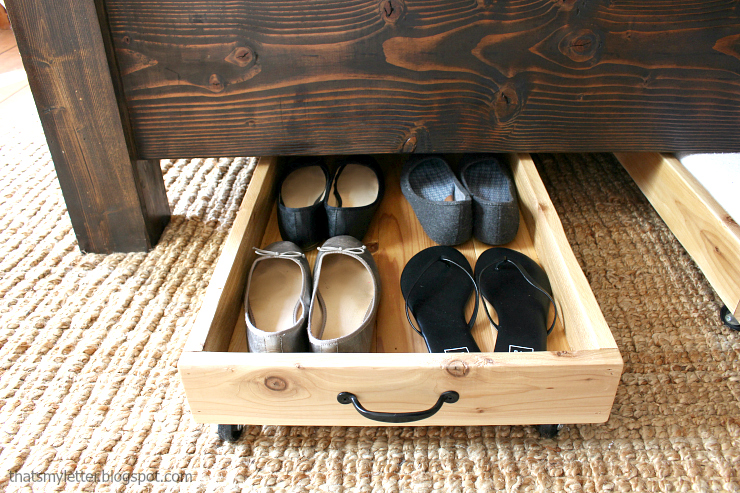
Build these DIY Rolling Storage Stools for extra seating and hidden storage! They can be useful in any room!
This rustic Ladder Display Shelf is perfect for organizing and displaying keepsakes or supplies. (Not to mention taking advantage of vertical storage.)
Turn a spare Closet into a Reading Nook with some under seat storage to keep your child’s room neat, organized, and adventurous!
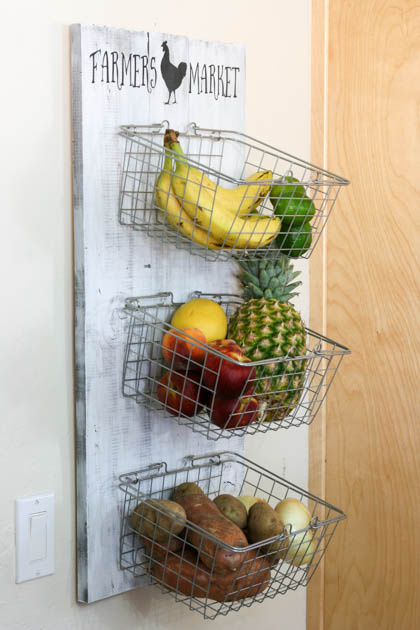
Make this DIY Produce Rack to keep fruits and veggies fresh, accessible, and off your counter.
Improve the space in your bathroom drawers with these DIY Drawer Dividers. They’d work beautifully in the kitchen as well!
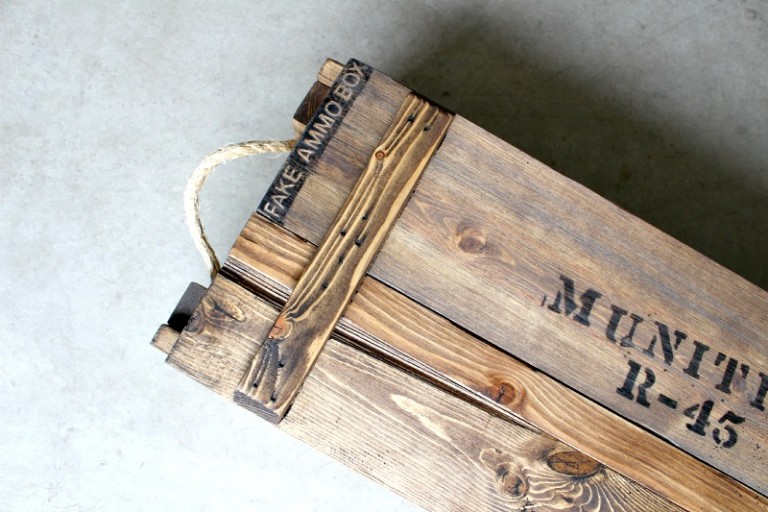
Make this rustic DIY Decorative Ammo box to add a cool conversation piece to your room with bonus hidden storage inside.
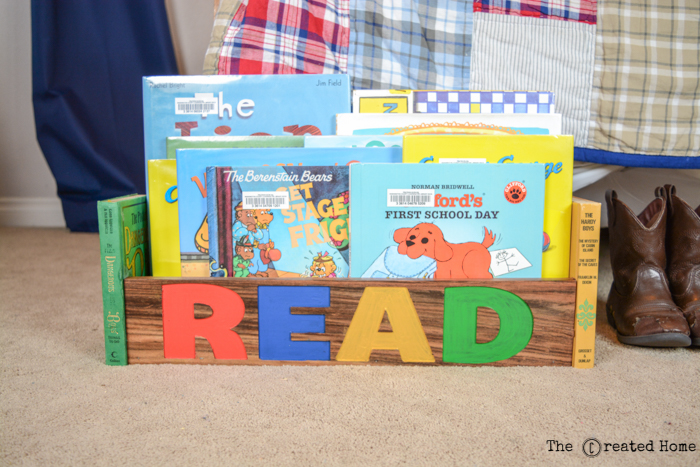
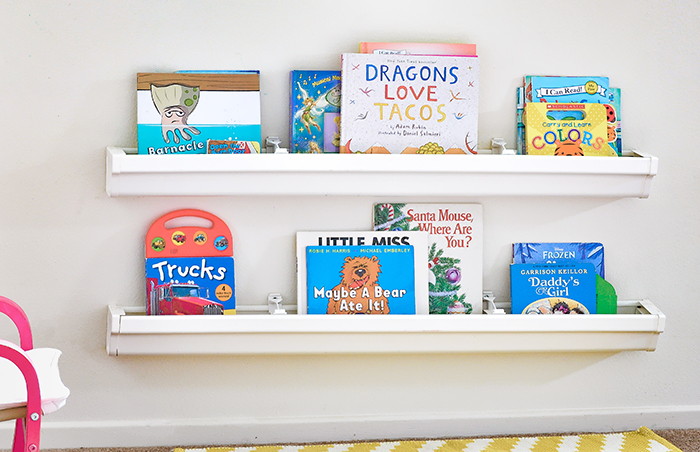
Encourage those little readers by keeping kids books in sight and organized with this DIY Wall Bookrack.
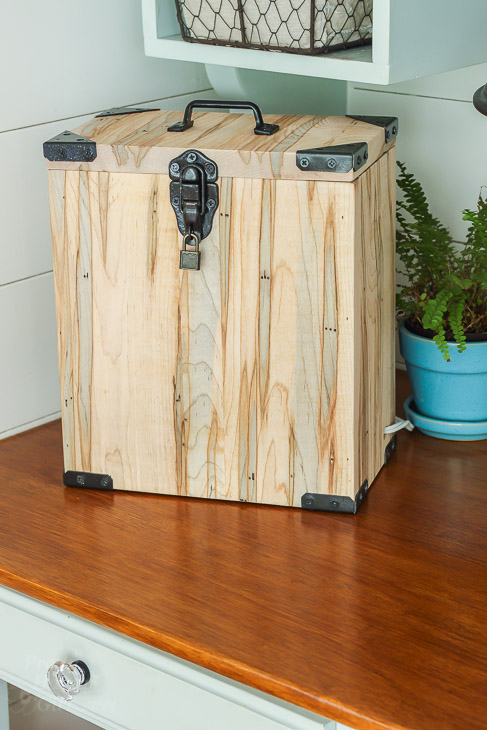
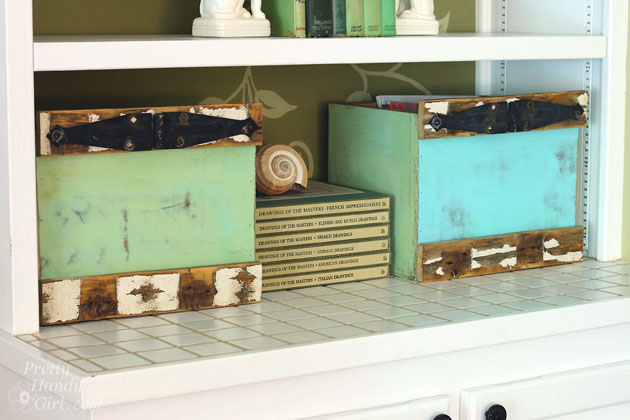
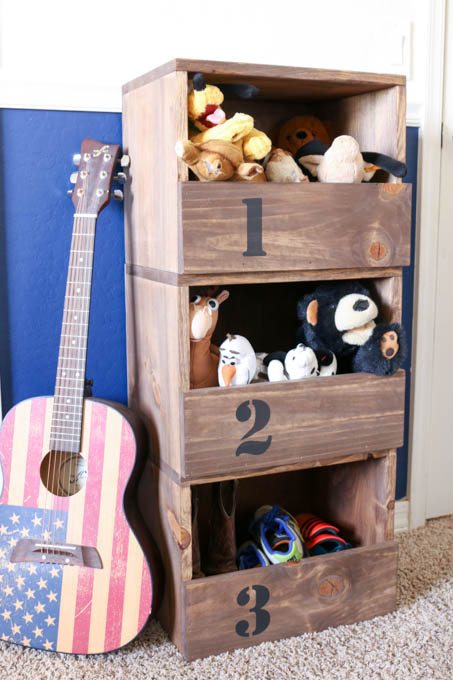
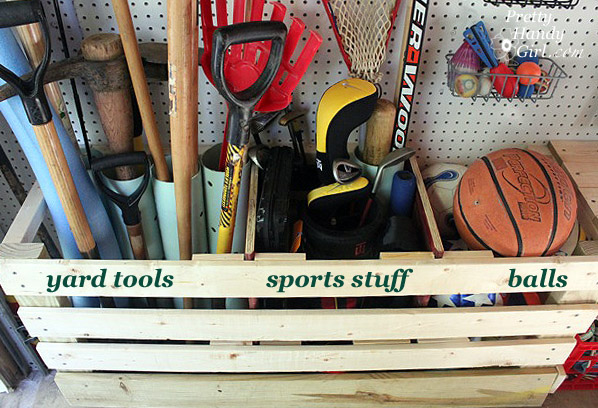
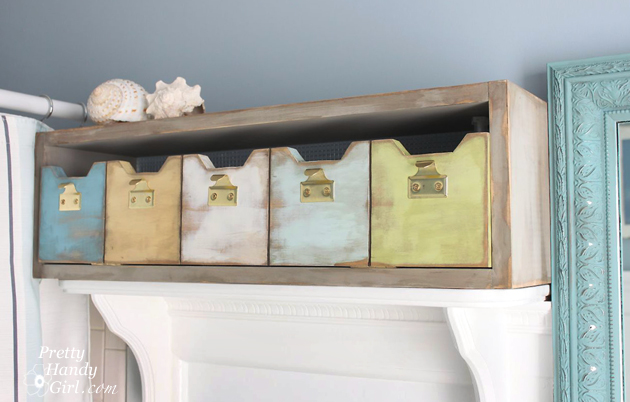
Build some Rustic Wooden Box Crates to store your paperwork, magazines, or anything you want to store out of sight.
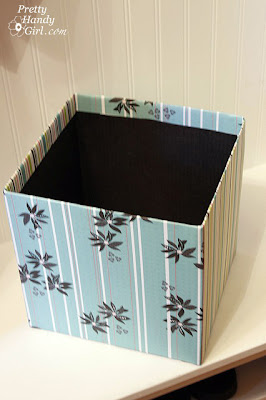
Don’t throw it away! Turn a Cardboard Box into A Decorative Bin to store anything you like. This has to be the most economical storage solution ever.
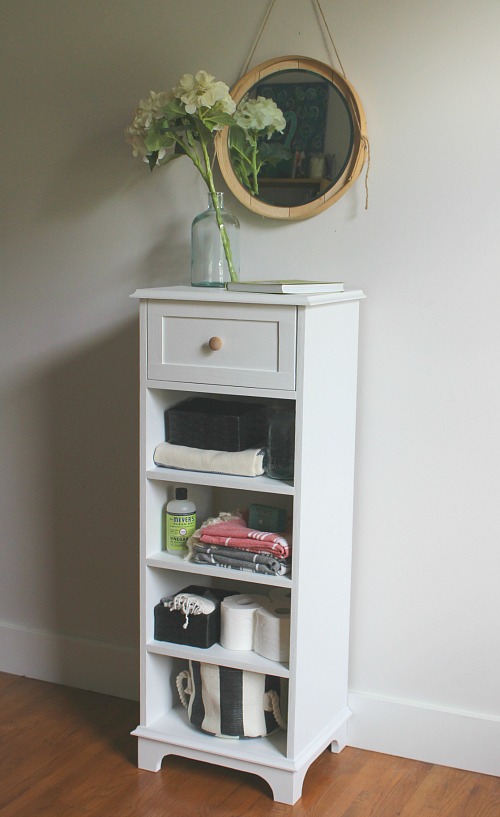
Build this Tall and Skinny Storage Cabinet to solve storage problems in a small space. Imagine the storage possibilities in a bathroom, guest room, or kitchen!
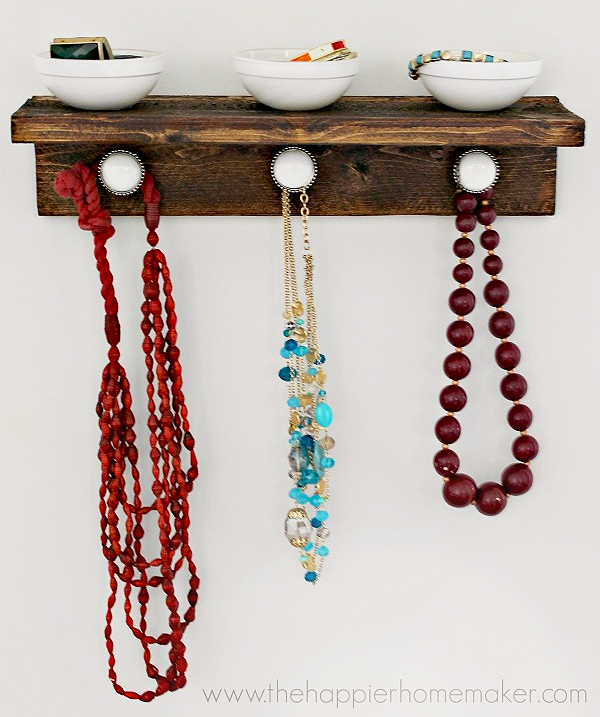
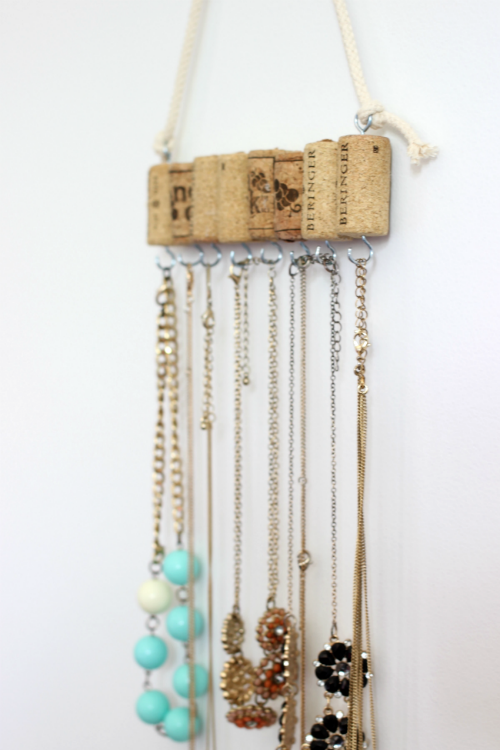
Make a new and unique Cork Jewelry Holder to organize all your necklaces. This little holder is perfect for the back of a door or a small spot between doorways.
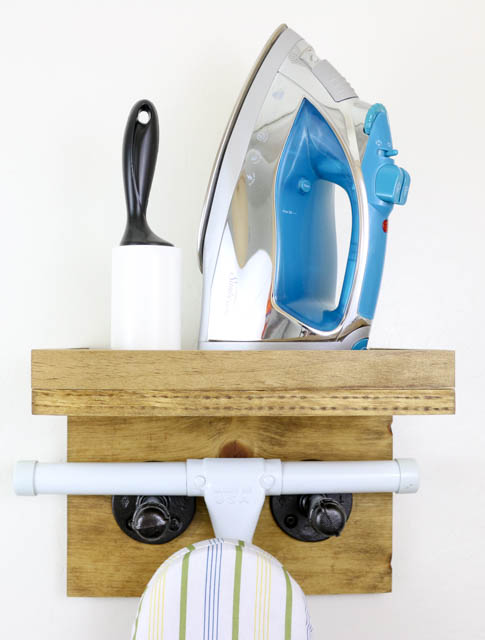
One board is all you need to make this DIY Storage Organizer that can be used in many different ways.
Build a Scrap Wood Caddy for any supplies you need to keep organized and transportable. Think cleaning supplies, art & craft supplies, office supplies and much more.
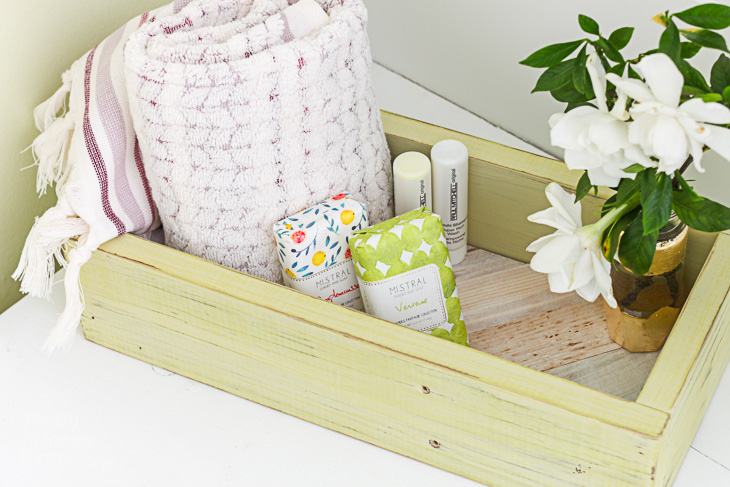
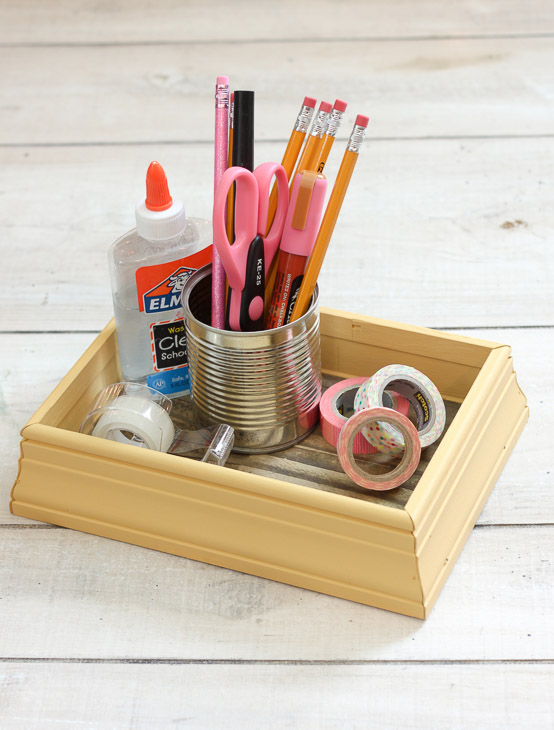
This Scrap Moulding Tray is one way to use up those casing and trim scraps. Plus, it’s an attractive way to corral and store project supplies.
I hope this helped give you some more organization ideas! Do you have any great organizational hacks? Share them in the comments please!
https://prettyhandygirl.com/wp-content/uploads/2018/01/29-hacks-to-help-you-get-more-organized-social-media-image.jpg6281200Brittany Baileyhttps://prettyhandygirl.com/wp-content/uploads/2021/07/PHG-logo-tagline-2020-1030x211-R.jpgBrittany Bailey2018-01-05 07:00:002017-12-29 13:52:5129 Hacks to Help You Get More Organized
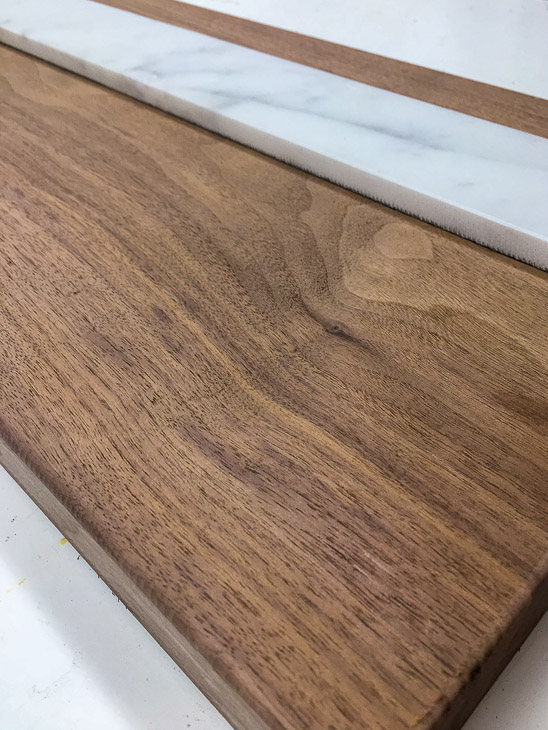
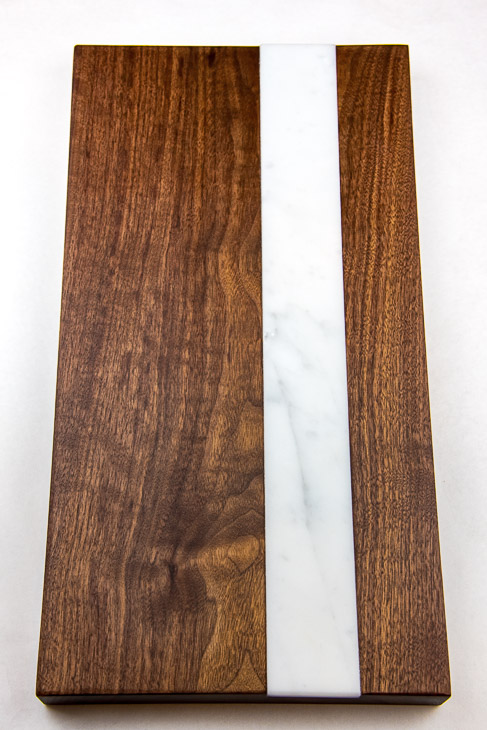
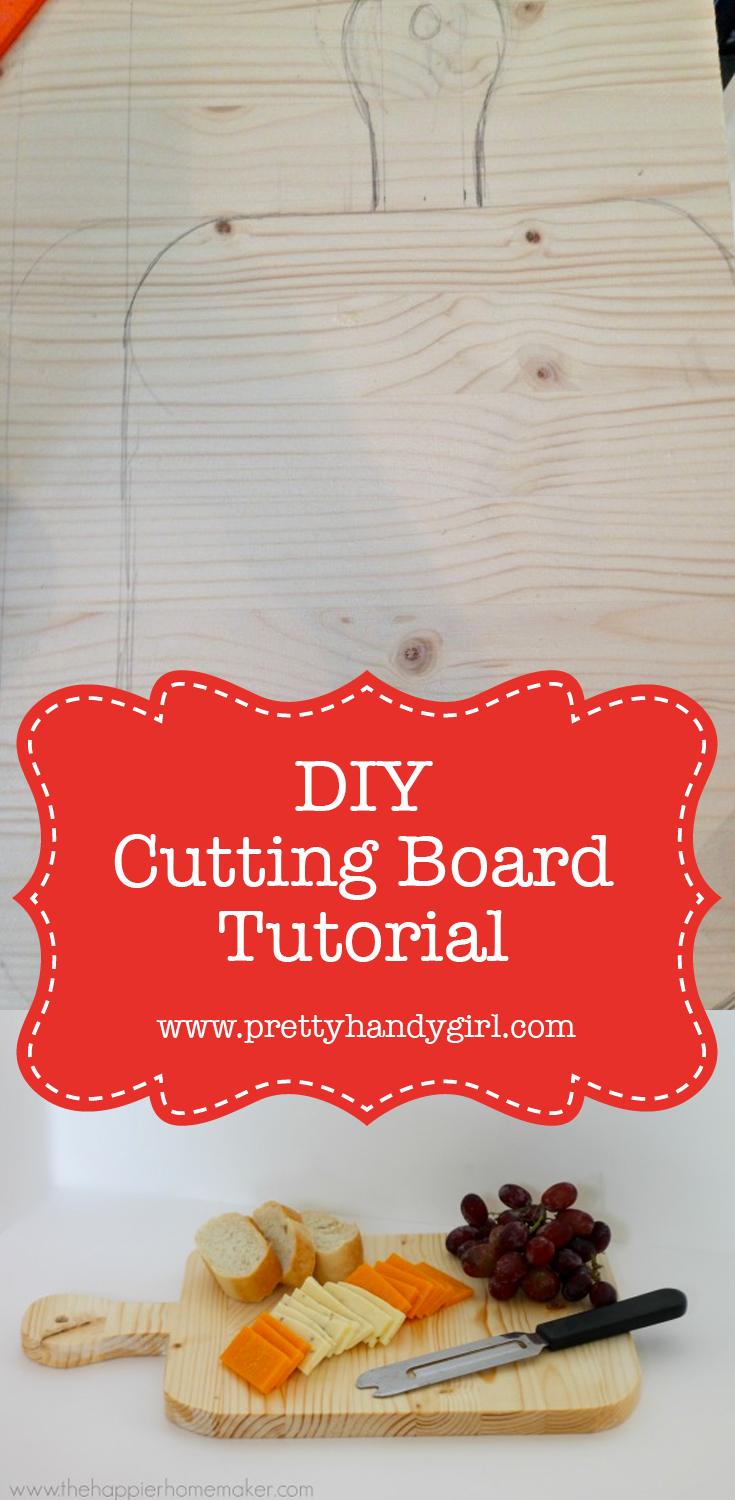
Hi there, Pretty Handy Girl readers! I’m Vineta from The Handyman’s Daughter, back with another tutorial for you! This bread and cheese board was a gift to my mom for Christmas, and she absolutely loved it! The marble inlay is perfect for keeping cheese cool, and the walnut cutting surface contrasts beautifully against the white marble.
I was nervous cutting into this gorgeous walnut piece. I decided to wait until my dad, The Handyman himself, visited for Christmas. The whole process was actually quite simple, and we finished just in time to put the present under the tree!
Materials:
(I’ve included affiliate links for your convenience. I earn a small percentage from a purchase using these links. There is no additional cost to you. You can read more about affiliate links here.)
Walnut wood at least 3/4″ thick and 8″ wide (I went to my local hardwood lumber store and found a gorgeous piece that was 1 1/4″ thick and 9 1/2″ wide.)
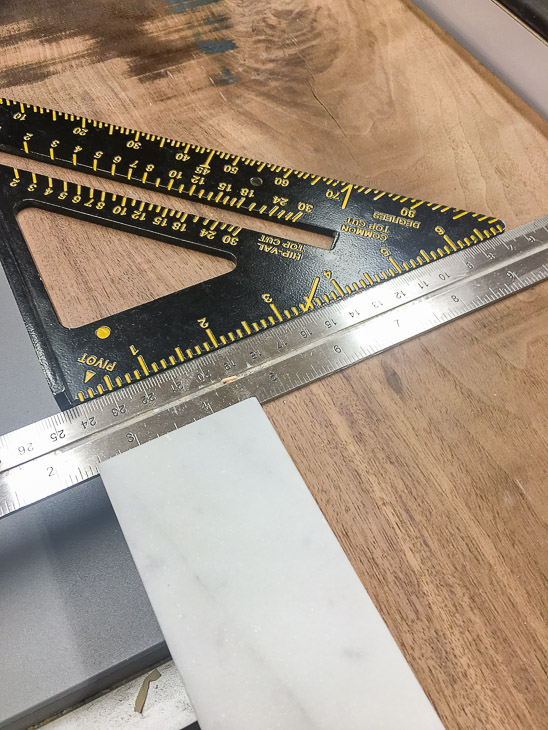
Start by cutting a piece of marble tile to your desired size. (Mine was already 2″ x 18″, so I just sanded down the cut edges to remove any bumps from the tile saw.)
Next, cut your walnut to the length of the tile. Make sure the ends are square before proceeding.
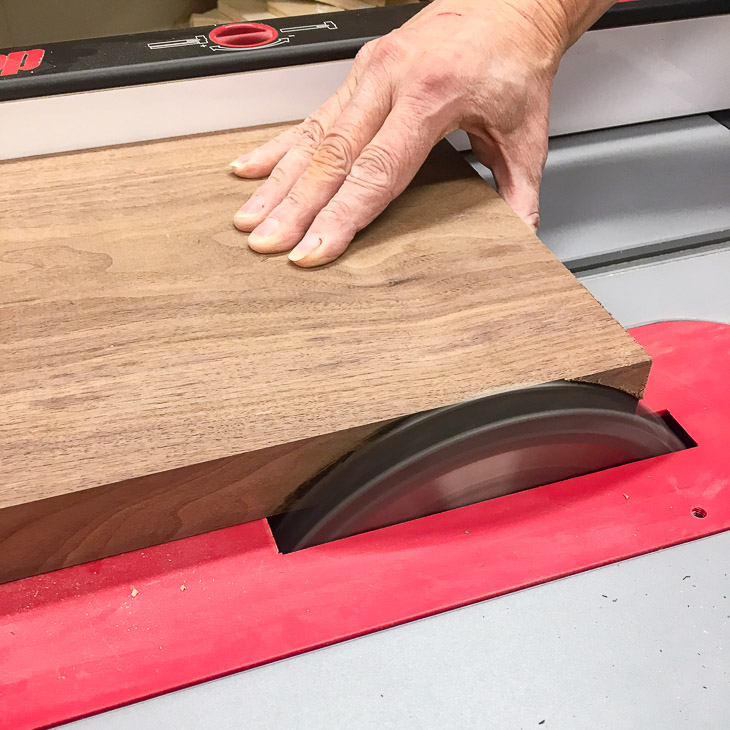
Run your walnut through the table saw to make sure is square. (The dado blade was already in place, so my dad just used the blade closest to the fence to make the cut.)
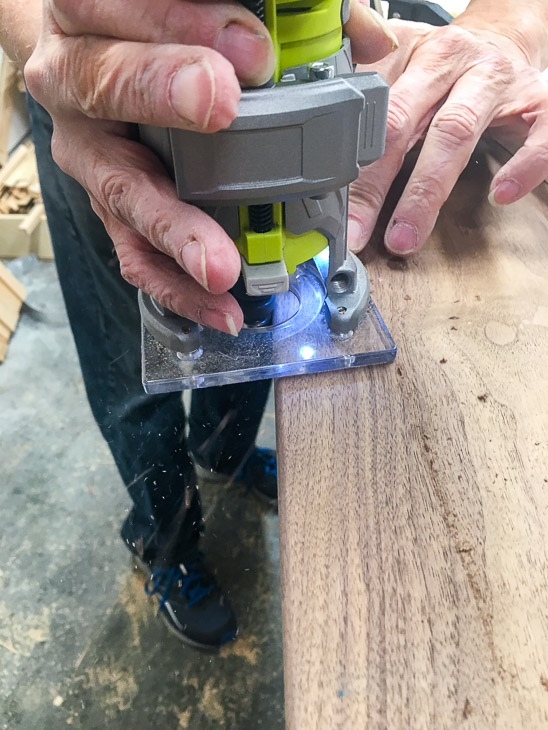
Using a 1/8″ roundover bit in your router, remove the hard corners from each side.
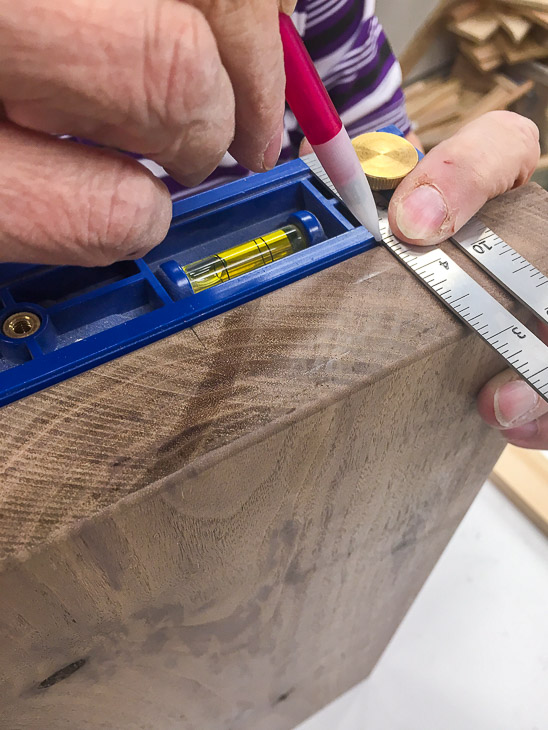
Determine where you want the marble to go in your finished piece. (I wanted my marble stripe to be asymmetrical, so I placed it 2″ from the edge.)
Mark the width and depth of the marble tile on the end grain of your walnut.
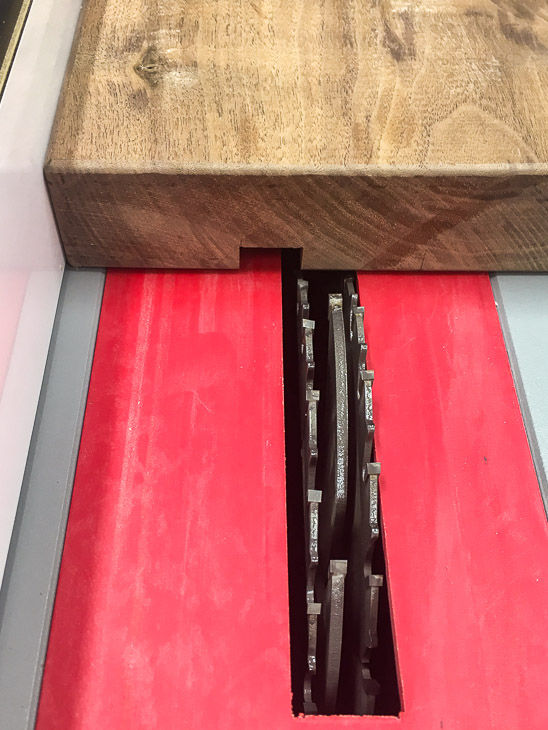
Set the depth of the dado blades on the table saw to the same depth as the marble. Line up the edge of the blade with your markings, then make the cut. Repeat the cut until you reach the mark for the other side.
Test the fit of your marble tile inside the groove. There should be a tiny bit of room on either side to allow for wood movement. If the marble rocks when you press down on one side, you can clean up the bottom of the groove with a straight router bit.
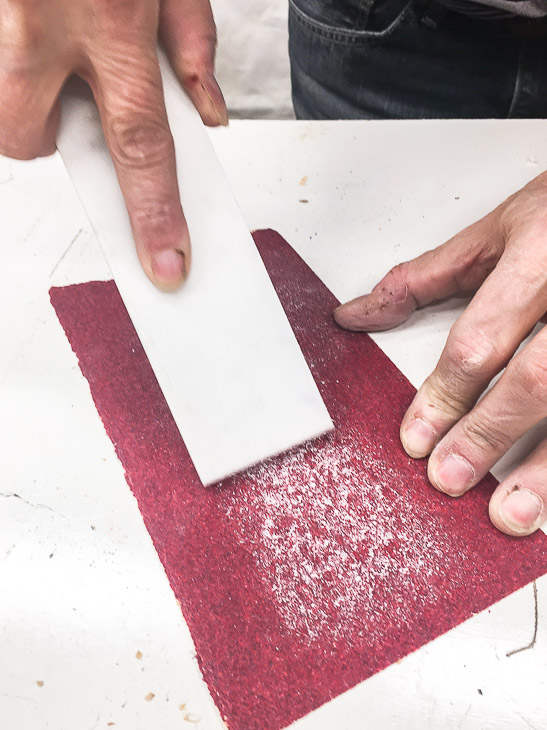
We soon realized that the corner of the marble was sharp, while the rest of the cutting board edge was curved. Luckily, marble is very soft, so we were able to round over the corner with 80 grit sandpaper.
Sand your cutting board with progressively finer grits of sandpaper. Be careful not to round over the edges of the groove.
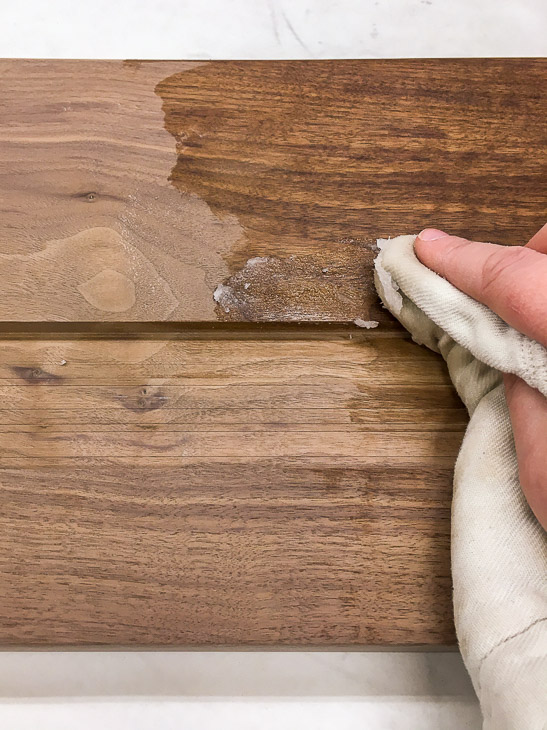
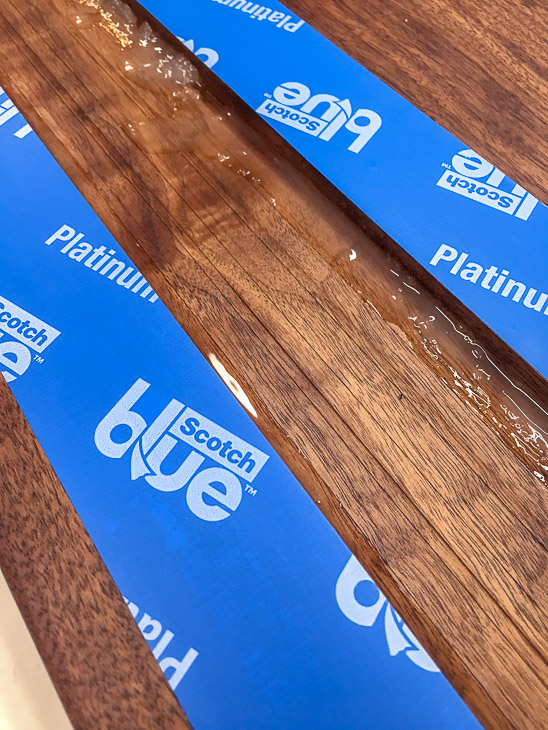
Give the surface of the wood an initial coat of mineral oil or cutting board wax. This will prevent the silicone from seeping into the grain. (Isn’t it amazing how the wood comes alive as it soaks up oil?)
Tape off the edges of the groove with painter’s tape. Then apply a line of silicone along the perimeter. Check the label to make sure it’s food safe 100% Silicone.
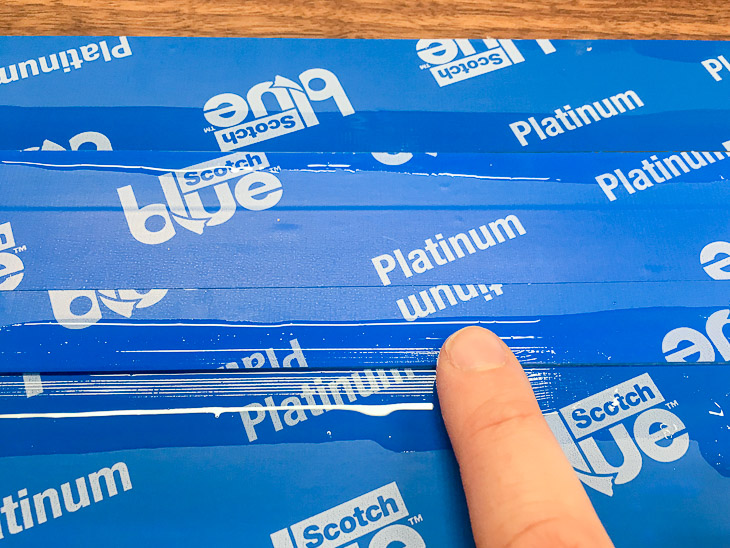
Cover the top of the marble with painter’s tape, then lay it in the groove. Run another bead of silicone in the gap between the marble and the wood, and run your finger along the seam. This will prevent crumbs from getting into the cracks, while also allowing for wood movement. Let the silicone set for at least 24 hours before use.
Remove the painter’s tape and clean up any silicone that might have squeezed out with a razor blade. Then give it another coat of mineral oil and it’s ready to use!
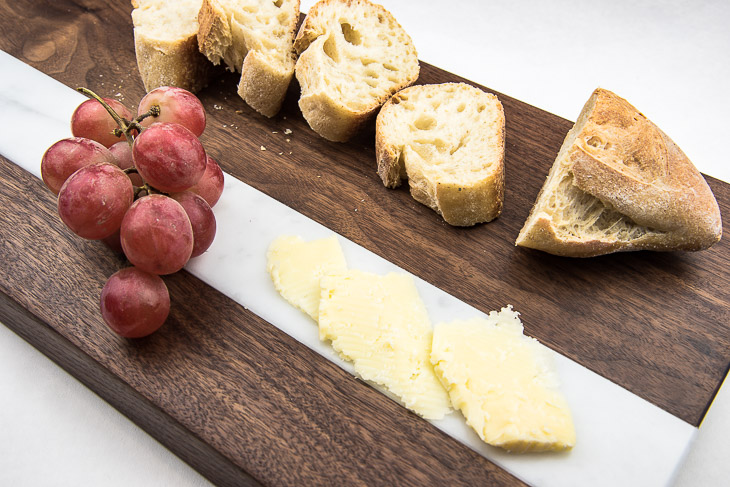
We put the bread and cheese board to work right away serving appetizers on Christmas Day!
I plan to make a few more of these to give as gifts in the future. It’s such a simple project that’s sure to impress!
2017 was another busy year that flew by. For those of you that may have missed some of the best tutorials and DIY posts of 2017, I’ve collected them all together for you in one place. Without further delay, here is the Best of 2017!
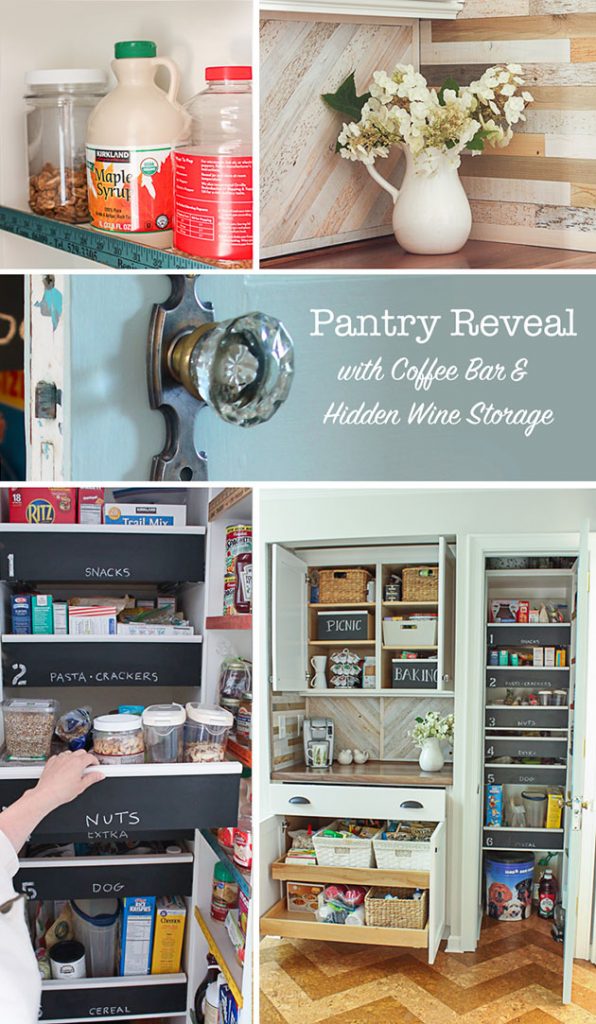
It only took me four years, but I finally finished my built-in pantry with a coffee bar, hidden wine storage, and soft closing pull out shelves. Here are all the pictures and details for my finished kitchen pantry.
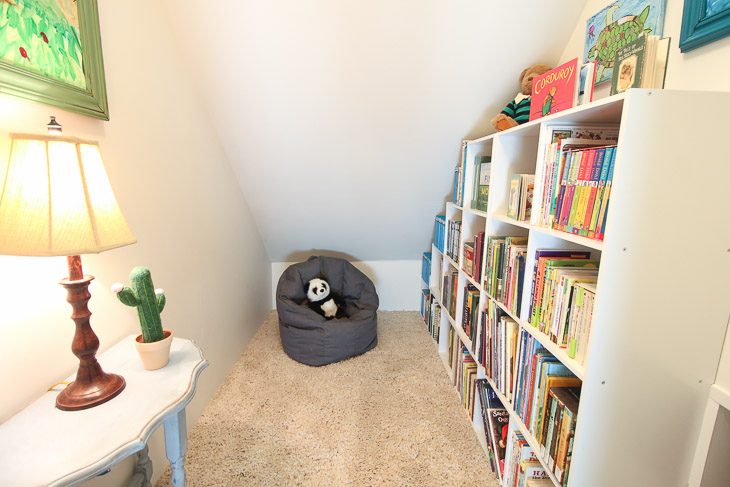
My growing boys have found a real love in reading. This closet that used to be a jumbled toy storage, is now a comfy and cozy library reading nook. You’ll want to check out the secret passage inside this Children’s Library Closet.
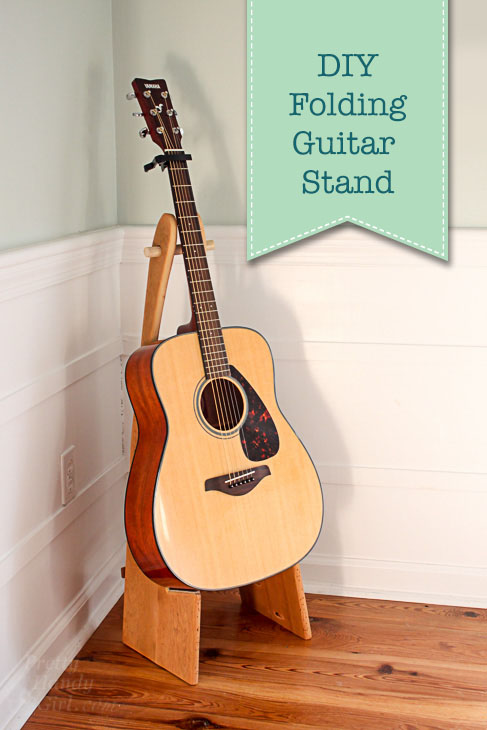
My husband has been playing guitar for the past few years. In an effort to keep his guitar close at hand (and store away the guitar case), I built him this DIY Folding Guitar Stand. You’ll never believe what trash item I used to build it.
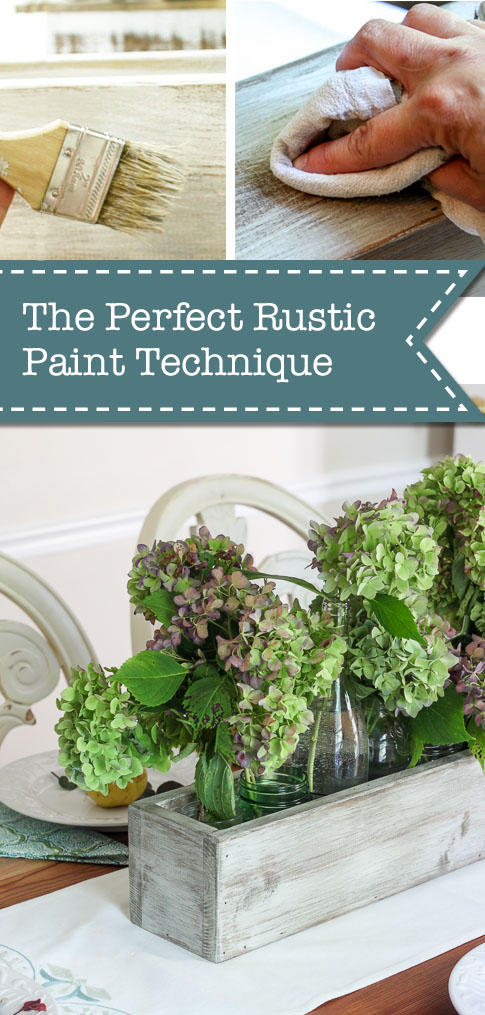
One of my most popular posts this year was actually a video tutorial sharing the Perfect Rustic Paint Technique I use on most of my wood projects. You too can learn how to make anything look old and aged by following this tutorial.
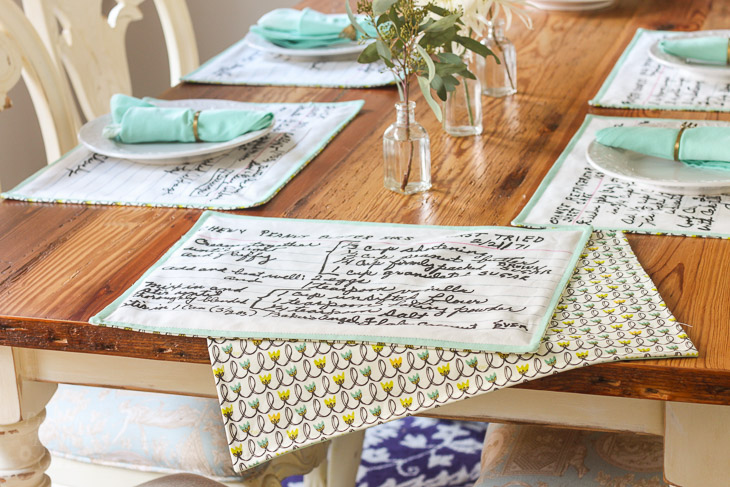
For Mother’s Day I made these reversible recipe placemats for my mother-in-law. I scanned recipe cards her recently departed mother created for our wedding present. The placemats turned out to be a great way to commemorate a wonderful woman.
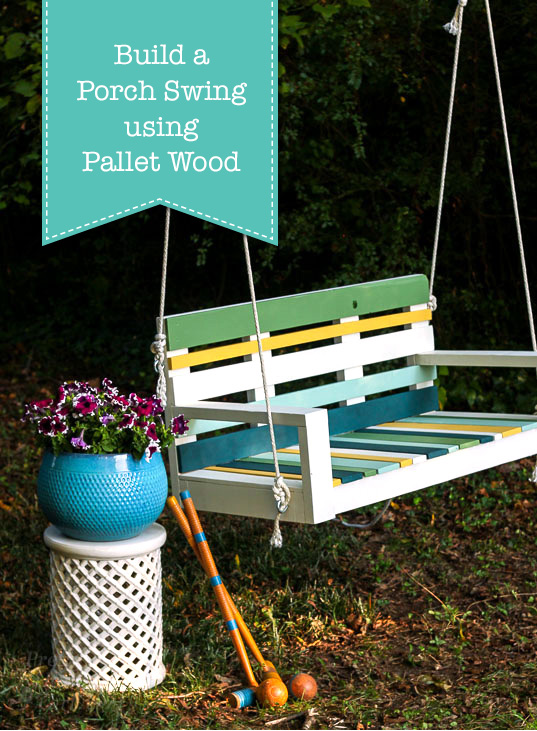
One of my favorite projects this year was building this Striped Porch Swing using Scrap Wood. It was a good way to use up scraps from the shop and build a fun swing for next to nothing.
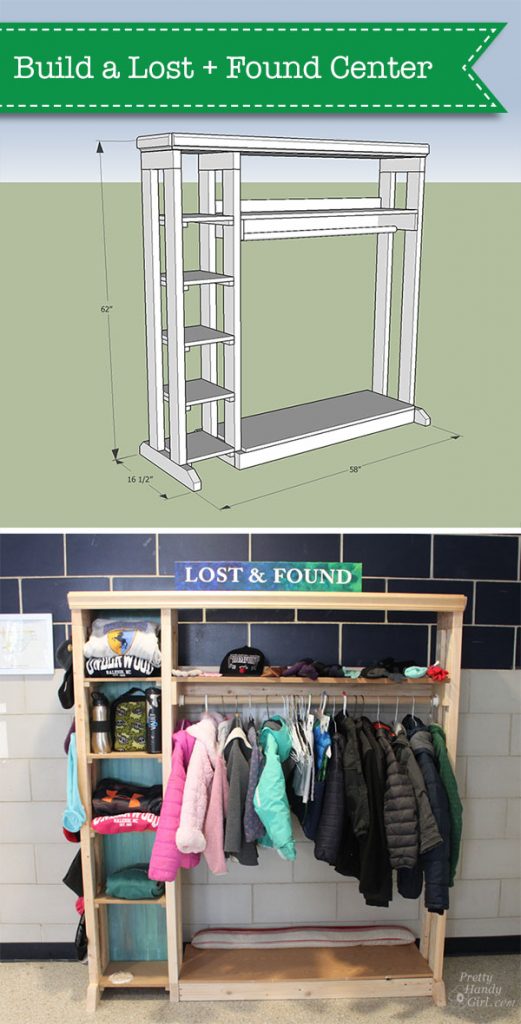
Speaking of building something with scraps, this tutorial is another build using leftover wood in the shop. The best part of this project is it’s a wonderful way to give back to a school! Learn how to Build this Lost & Found Center in a few hours.
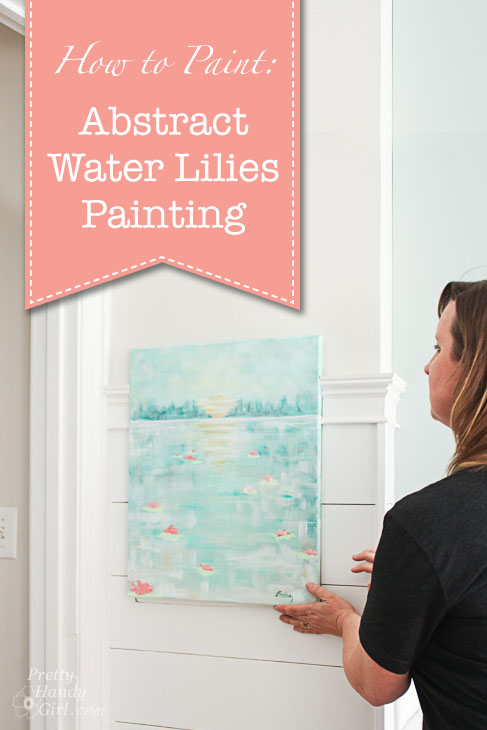
For the aspiring artists, this tutorial for Painting Abstract Water Lilies was very popular. Plus, I showed how to cover up those ugly eyesores in your home.
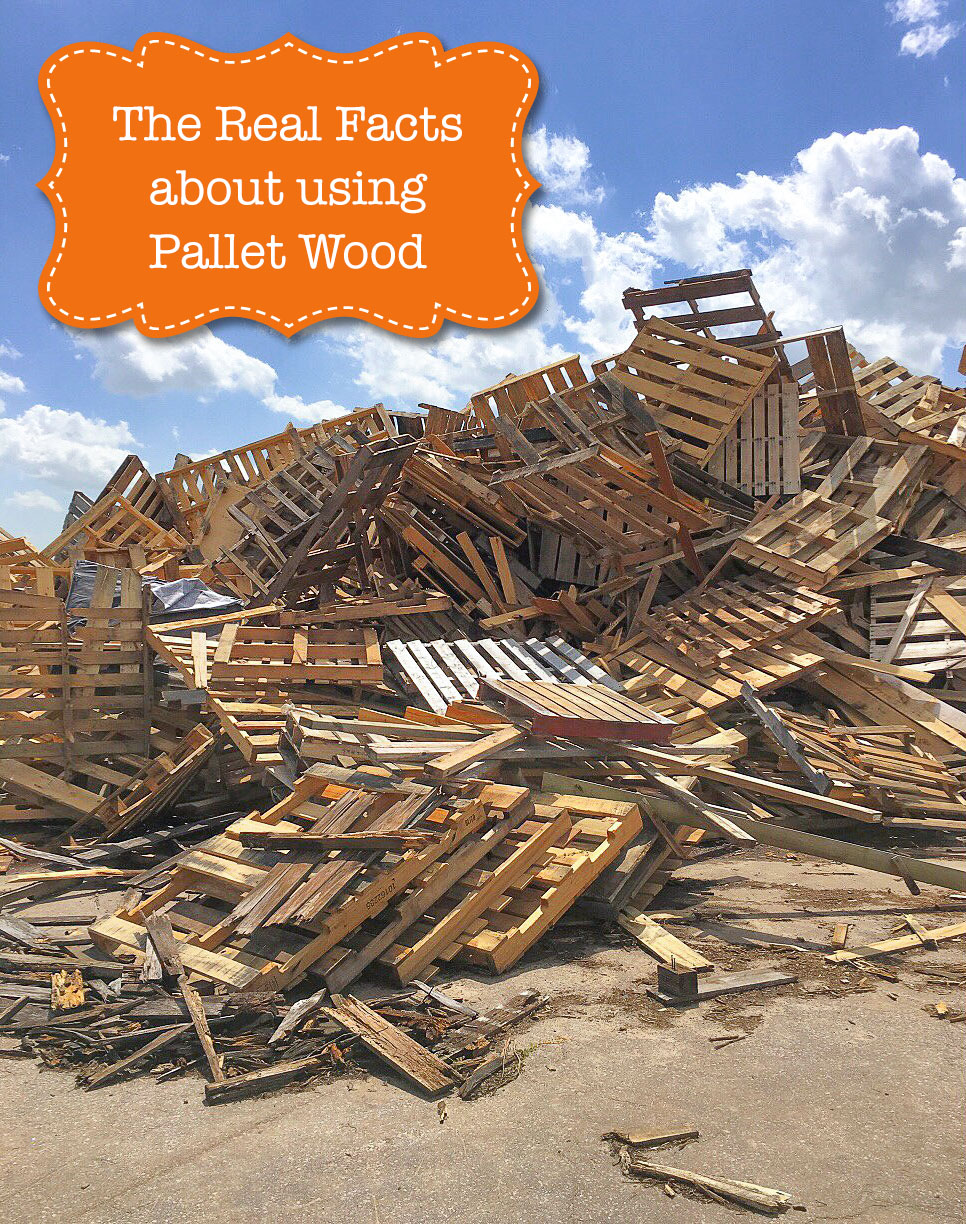
Pallet projects reached a height in popularity this year. I finally decided to come clean on the Real Facts about Using Pallet Wood so you can decide for yourself whether that free wood is really worth it.
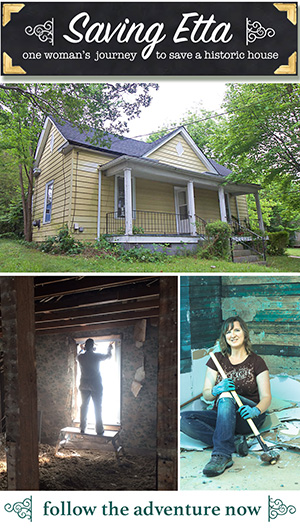
I saved the best for last. This year I purchased a house built in 1900 and I’m trying to save her. The Saving Etta Chapters are my way of chronicling the process. The Saving Etta chapters have been extremely popular and well received by my readers. Thank you for allowing me to deviate from tutorials and journal about my adventures saving this historic property. Read all twelve short chapters here.
Want to see more of my Best of the Year posts? Here are the Best of: 2010 | 2011 | 2014 | 2015
 How to Install Pegboard Walls
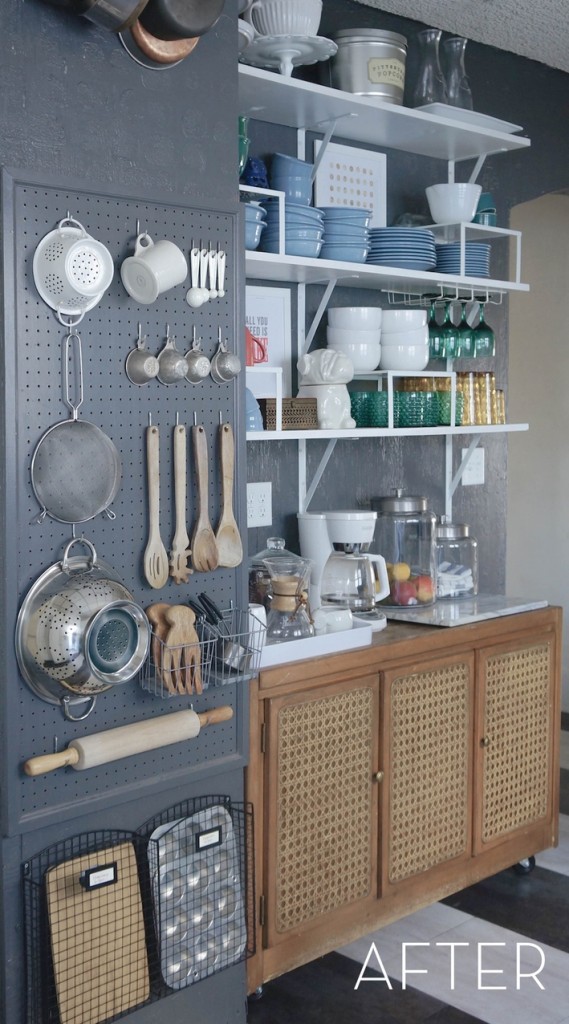

 Build a Garden Shed
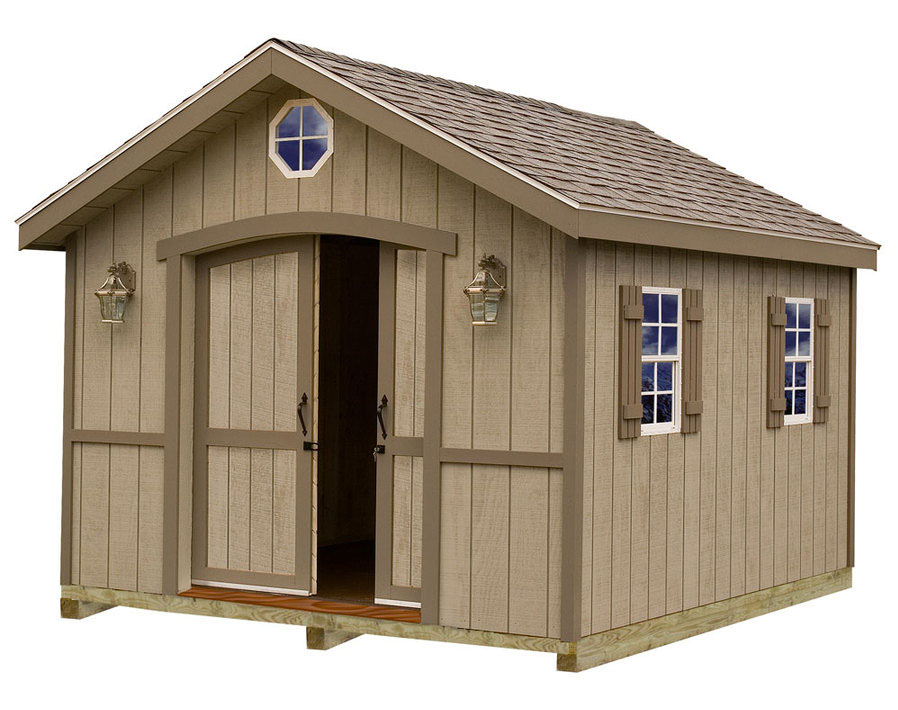


 Build a DIY Tray Box
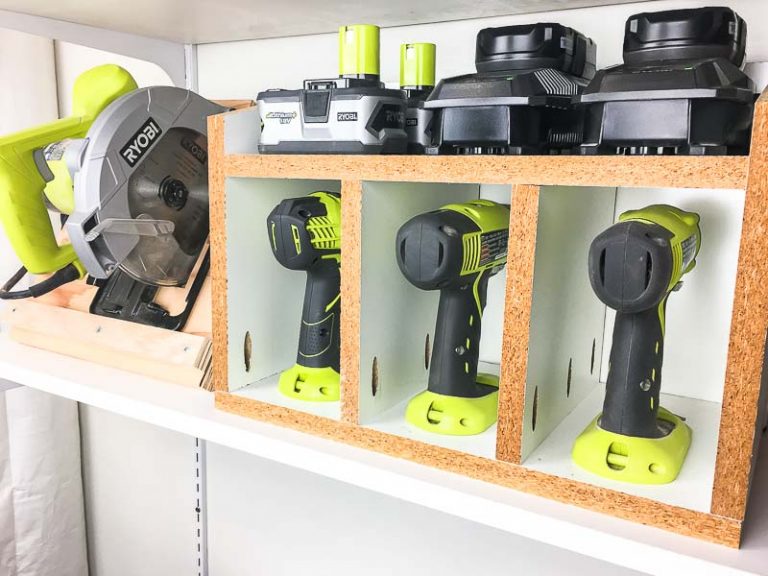
 There are so many awesome garage storage ideas in this one post, like this
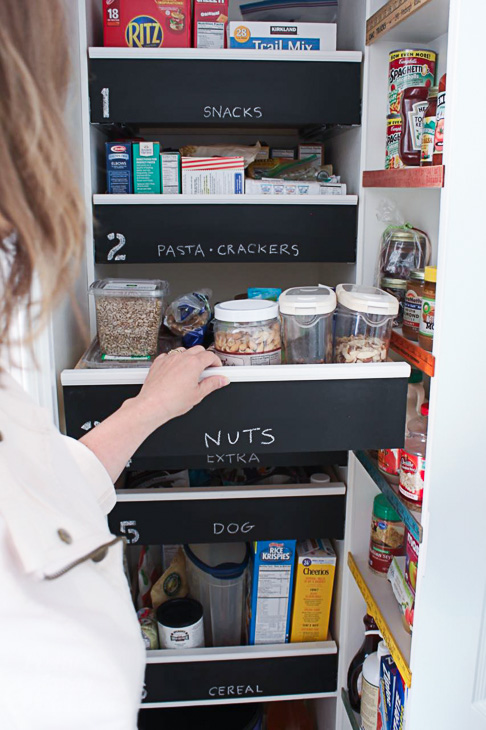


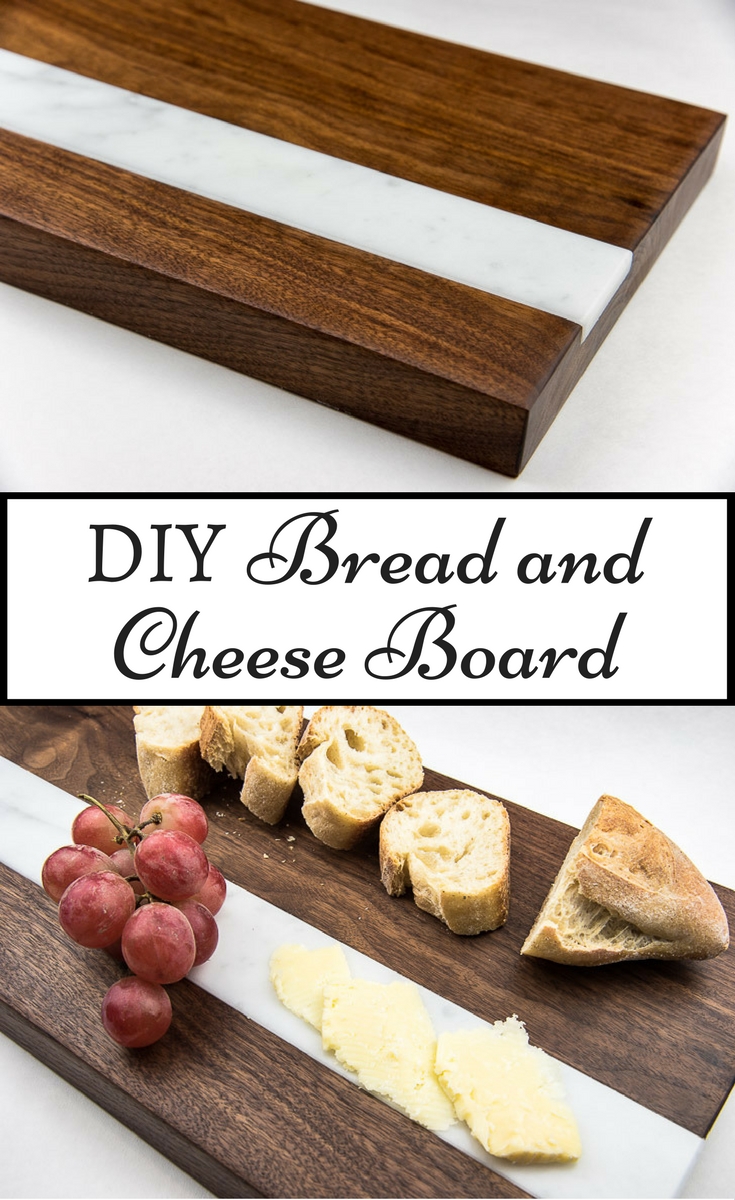 DIY Bread and Cheese Board