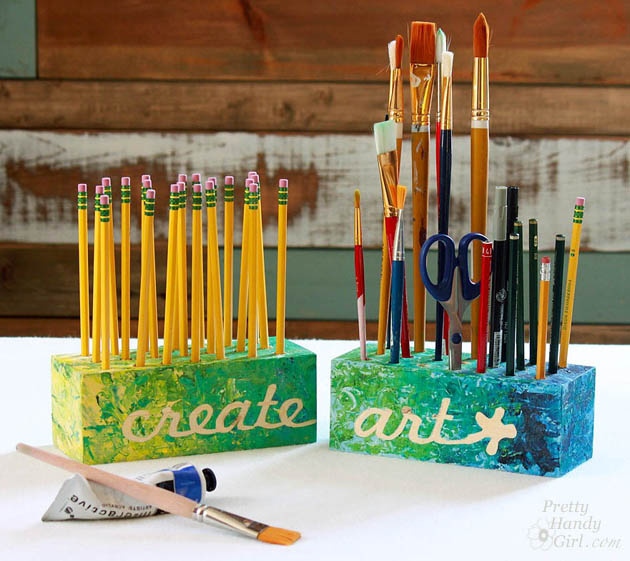
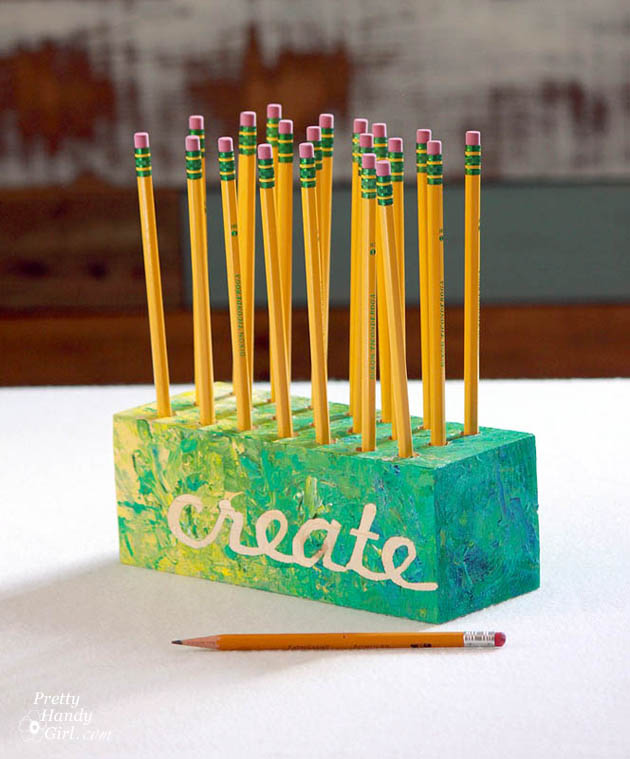
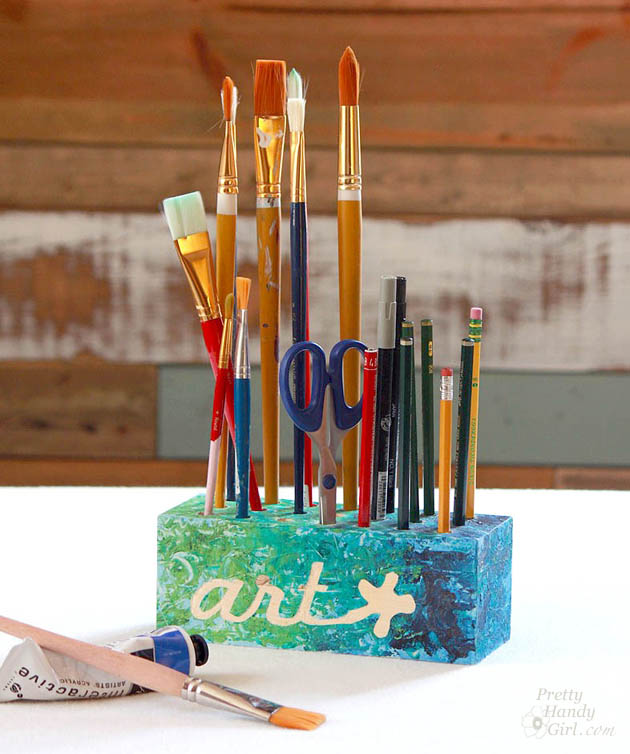
Need a quick gift using scrap wood? A Creative Block Desk & Art Utensil Holder is an easy and fun gift to make and certainly a project that you can customize to meet your needs. Best of all, the kids can help with the painting step!

create_art_block_holders_sm

Creative Block Desk & Art Utensil Holder

Mother’s Day is this coming weekend! Have you decided how to show her your appreciation and love?! I did! My mother is a professional artist. She creates amazing paintings that inspire others and brightens their homes. For Mother’s Day I wanted to brighten her studio with these art utensil holders. I call them “Creative Blocks.”

Go ahead and raid your scrap pile and join us as we make these colorful and fun Creative Block Desk & Art Utensil Holders.

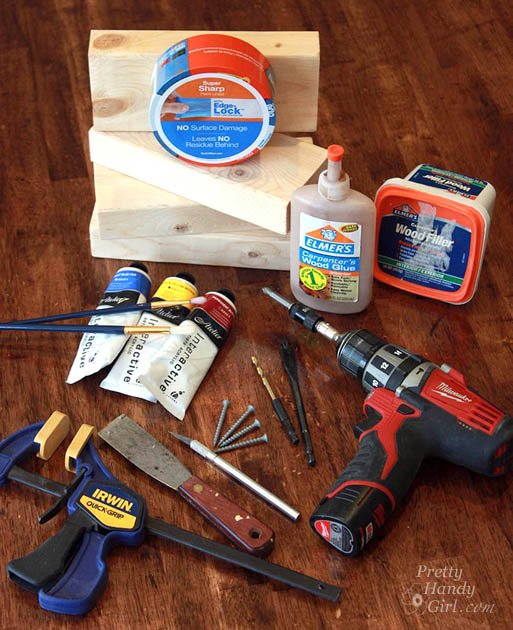
Materials:

(I’ve included affiliate links for your convenience. I earn a small percentage from a purchase using these links. There is no additional cost to you. You can read more about affiliate links here.)

materials_wood_blocks_sm

Instructions:

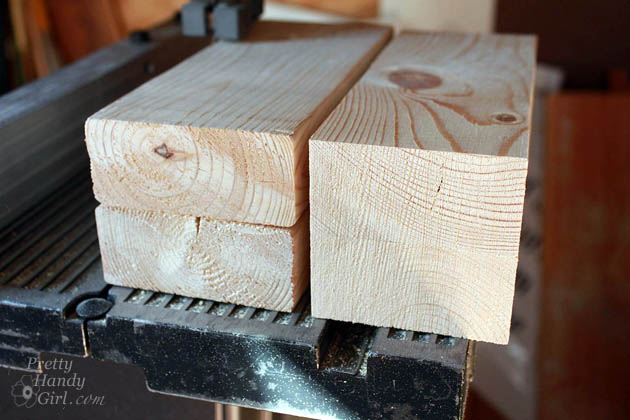
1. Block assembly: Select two 2×4″ scraps cut to the same length. Spread glue on one board and sandwich them together.

glue_blocks_together_sm

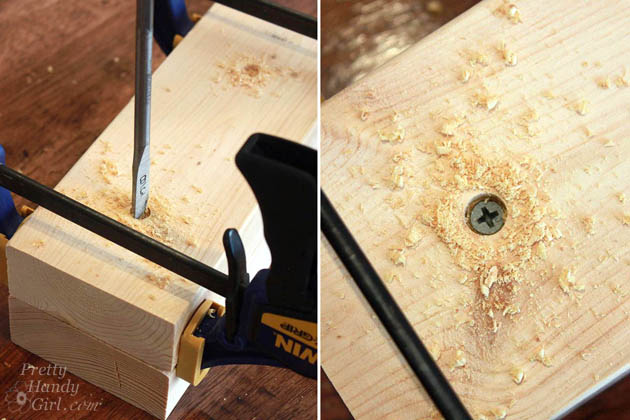
Clamp the wood together and drill two small holes to countersink the heads of the screws. Drive two screws into the bottom of the wood to hold the pieces together.

drill_blocks_together_sm

Use a band saw, jigsaw, or table saw to trim off the rounded edges of the wood so you have a square block of wood with straight corners.

square_off_2x4s_bandsaw_sm

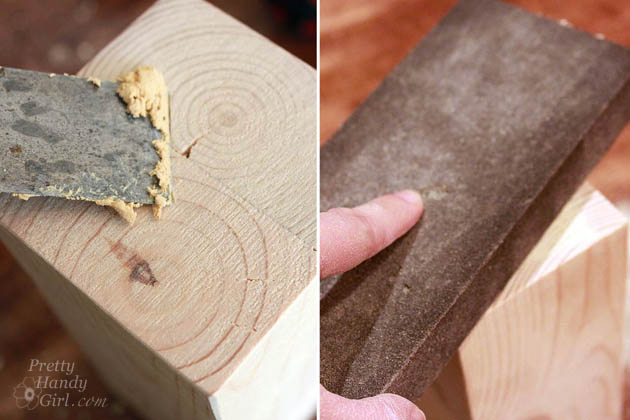
Putty any cracks or holes. Sand until smooth.

putty_and_sand_blocks_sm

2. Creating the mask:

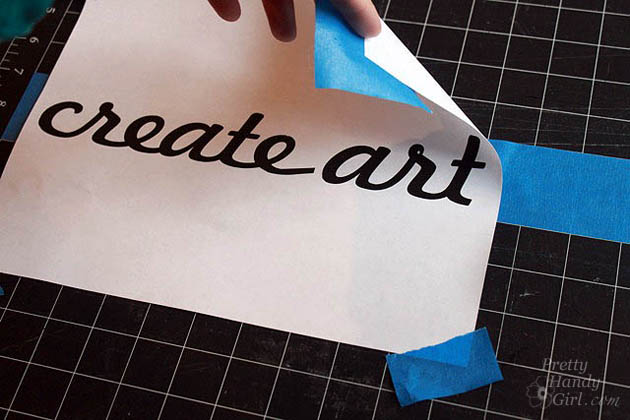
If you have a craft cutter (Silhouette or Cricut) you can create a mask in vinyl easily. But, if you don’t you can use the computer to print out your words. Lay the print out on top of a strip of Painter’s Tape. Use a few pieces of tape to secure the corners.

create_art_printout

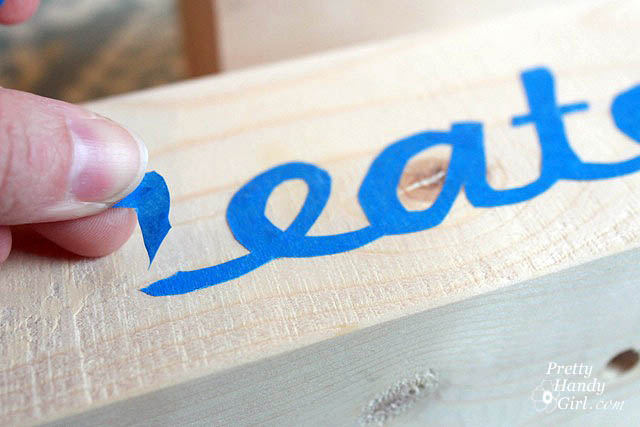
Trace around the words with the X-acto knife (be sure to have a few fresh blades on hand.) Transfer the resulting cut-out tape onto the block of wood. Press the edges of the tape mask to secure the tape.

add_scotch_blue_tape_letters

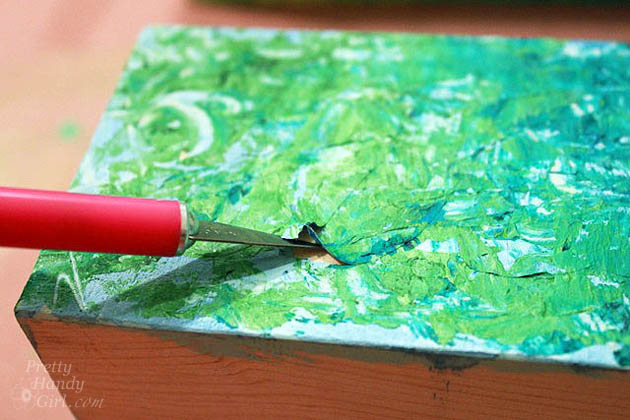
3. Painting the block: Paint a base color onto the block. Then use a brush and/or palette knife to dab thick paint over the block (minus the base.) Use the X-acto knife to gently peel off the tape mask. Let the paint dry thoroughly overnight.

lift_tape_up

4. Drilling Holes:  After the paint has dried completely, mark the location of the utensil holes with a pencil. Put a piece of painter’s tape on the drill bit to mark the depth of your holes. Clamp the block and drill holes at each pencil mark.

drill_holes

Dump sawdust out of the holes.

Wrap up the blocks in gift wrap and enjoy the look of joy as your Mom opens her Creative Block Mother’s Day gift!

create_pencil_holder_sm

art_brush_holder

You know, as an artist myself, I almost loved these too much to give them away. But, my Mom is worth it. (And I can make another set if I want ;-).)

create_art_block_holders_sm

For more last-minute Mother’s Day gift ideas and many other creative projects, check out the Gift Ideas section here on the blog.

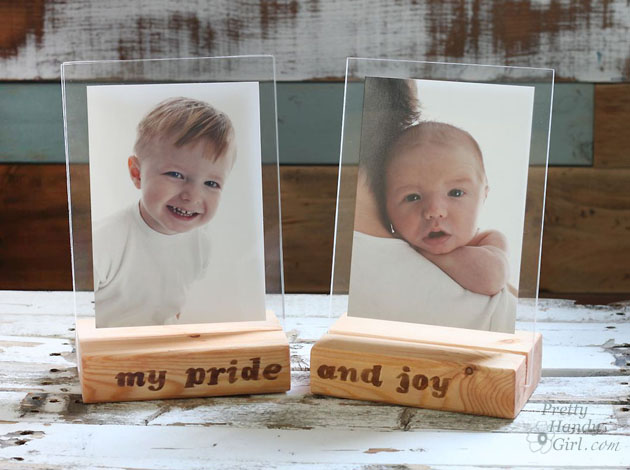
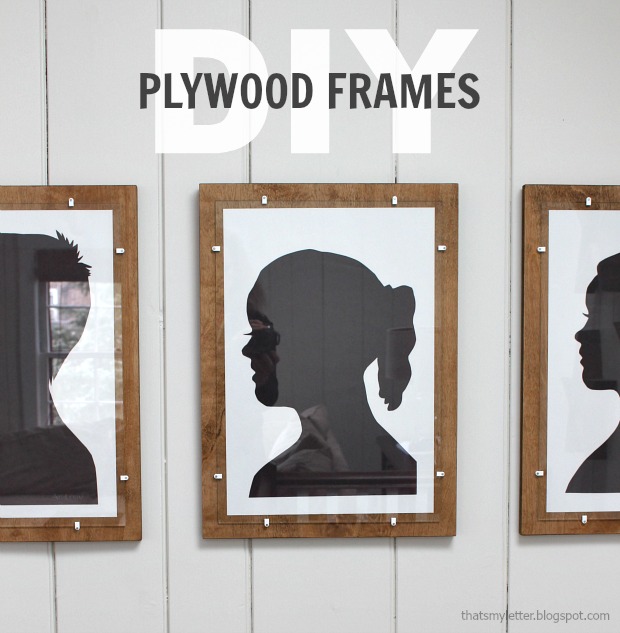
PHGFancySignIf you liked this project, you’ll love these floating picture frames using more 2×4 scrap wood.

wood-block-picture-frames

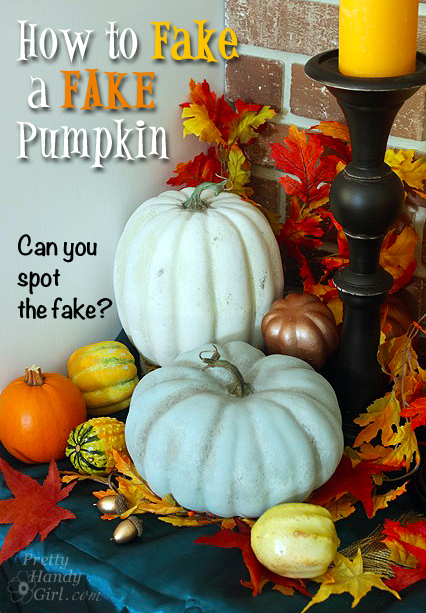
How-to-faux-paint-a-fake-pumpkinHow to Fake a Fake Pumpkin

Have you seen those neon orange fake pumpkins and nearly vomited because you wouldn’t dream of decorating with them. I mean—get real—everyone would know they were fake. Ah ha, but have you seen the price tags? $1 – $6? For that price you might just be willing to take a leap of faith with me, wouldn’t you? Awesome, because I’m going to show you how to faux paint a fake pumpkin so you can decorate with them year after year and fool your friends.

Materials:

(I’ve included affiliate links for your convenience. I earn a small percentage from a purchase using these links. There is no additional cost to you. You can read more about affiliate links here.)

materials

Instructions:

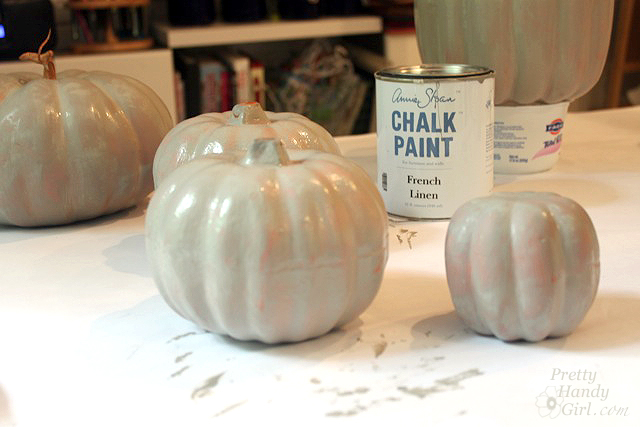
Start by painting all the pumpkins with Chalk Paint (use gray, white, green and blue paint.) Allow the pumpkins to dry.

paint-pumpkins-french-linen


Painting Realistic White Pumpkins:

It helps to look up some pictures of real pumpkins to refer to.

pure-white-country-grey

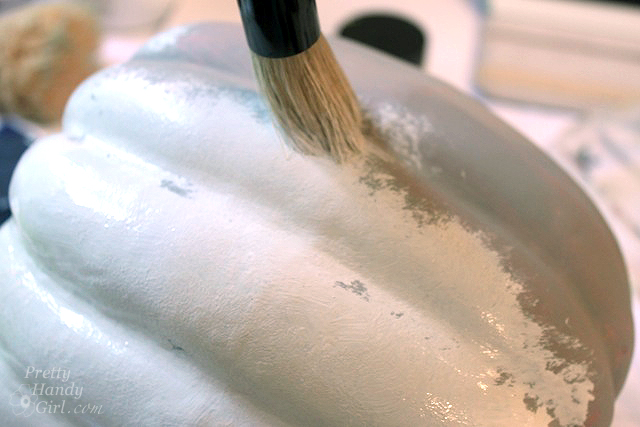
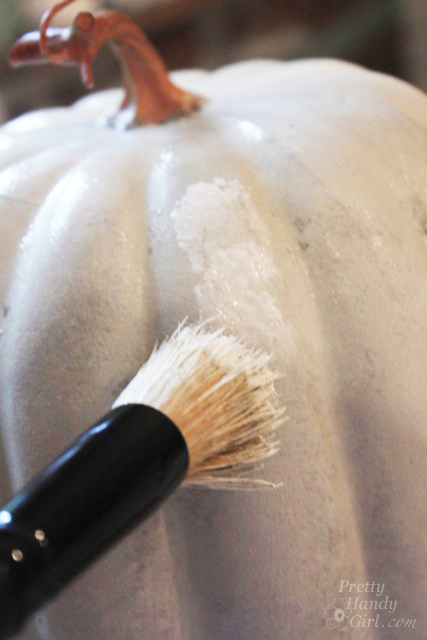
Using the stencil brush, paint a mixture of grey and white on one of the pumpkins.

paint-white-mixture

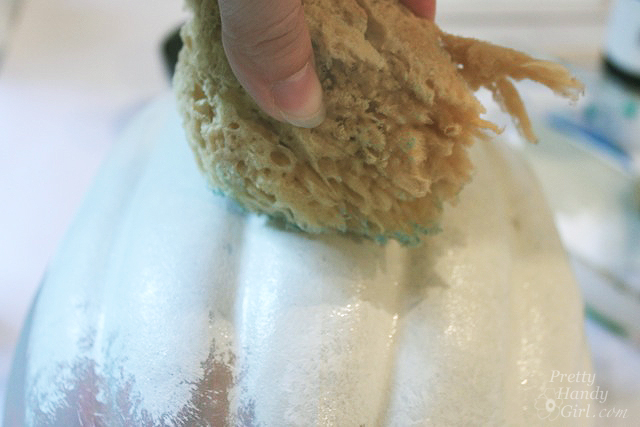
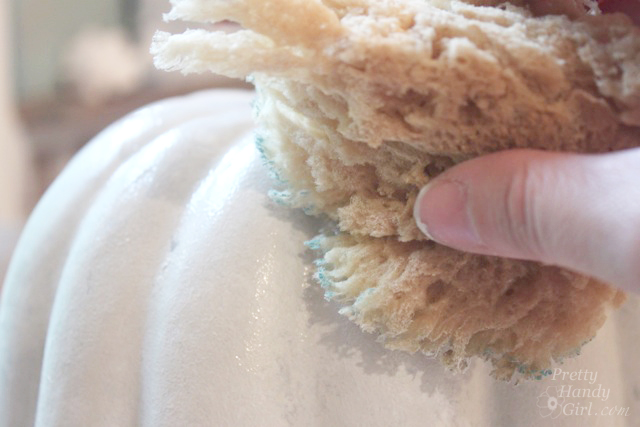
Before the paint dries, dab some of it off with the sea sponge. (Keep your sea sponge dry, not wet during the process.)

sponge-off-white

Dip the stencil brush into the white paint and add paint on the outer most bumps on the pumpkins. This is adding highlights.

highlights_on-white-pumpkin

Dab the highlights gently with the sea sponge to blend.

sponge-off-white-2

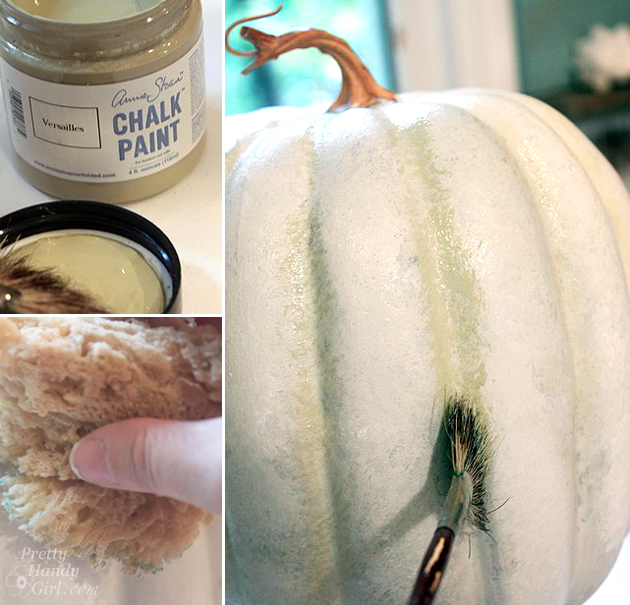
Use the fan brush dipped in a small amount of green paint inside the pumpkin ridges. Dab the ridges with the sea sponge to blend.

white-gourd-pumpkin

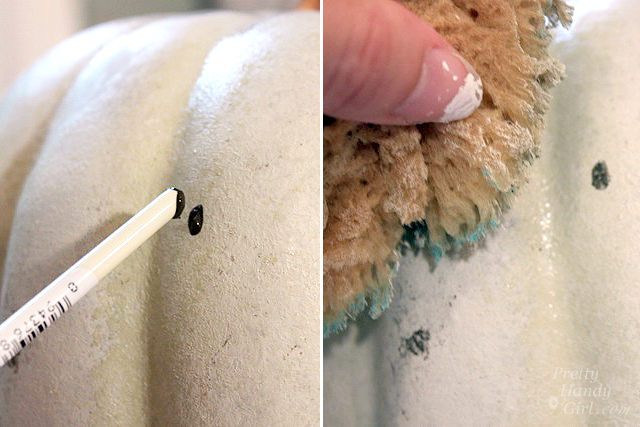
Have you ever seen a truly unblemished pumpkin? I think not. It’s time to add some spots or marks on the pumpkin to truly fool your friends. Dip the end of the paint brush into brown paint and dot it onto the pumpkin. Blot the spot with a sea sponge and maybe even transfer a few new spots with the sponge.

add-blemishes

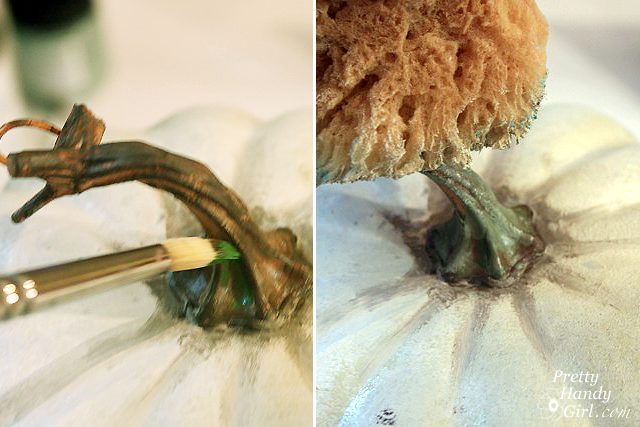
Paint grey around the base of the stem and into the grooves with the round paint brush.

add-dark-depth-around-stem

Paint brown and green paint onto the pumpkin stem. Blend slightly with the sea sponge.

paint-sponge-stem

Can you spot my fake white pumpkin? Well, of course you can because I just showed you how to paint it. But, it will definitely fool your friends!

grouping_left_pumpkins

Painting Realistic Blue Pumpkins:

Painting blue pumpkins uses the same technique as painting the white pumpkins, only using a few different colors.

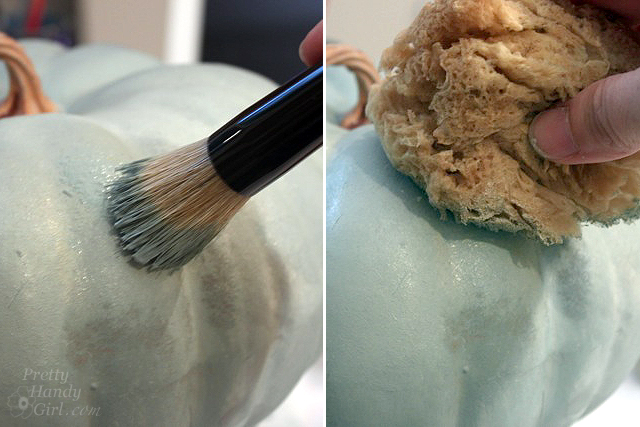
Use the stencil brush to paint blue onto another pumpkin. Dab the blue paint while it’s still wet with the sea sponge.

add-duck-egg-blue-sponge

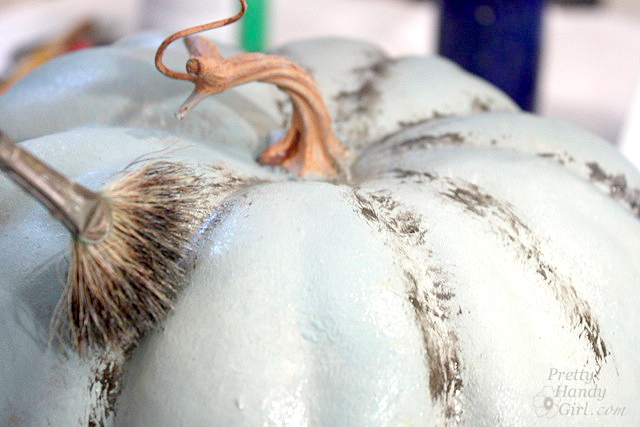
Use the fan brush dipped in gray and brown craft paint to fill in the ridges.

darken-crevices

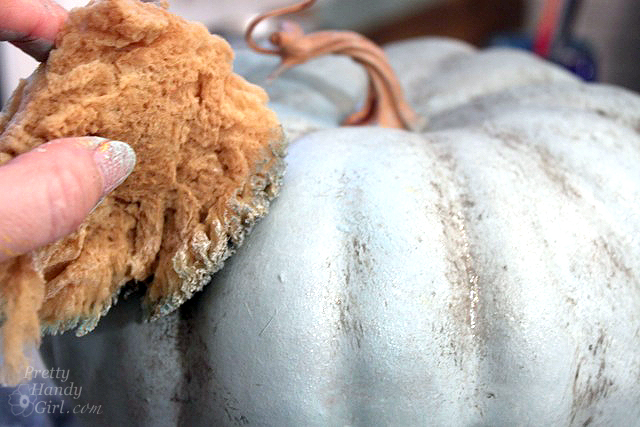
Dab the paint with the dry sea sponge to blend.

sponge-crevices

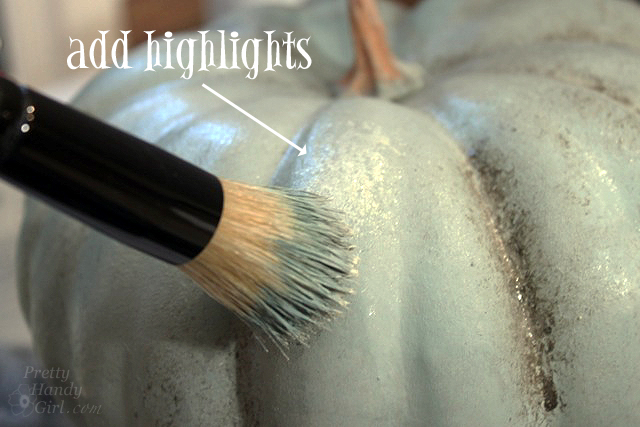
Add some highlights with a mixture of grey and white. This serves two purposes. 1) It adds dimension. 2) It tones down the excess blue on the pumpkin.

add-highlights

Paint the stem the same way you learned above.

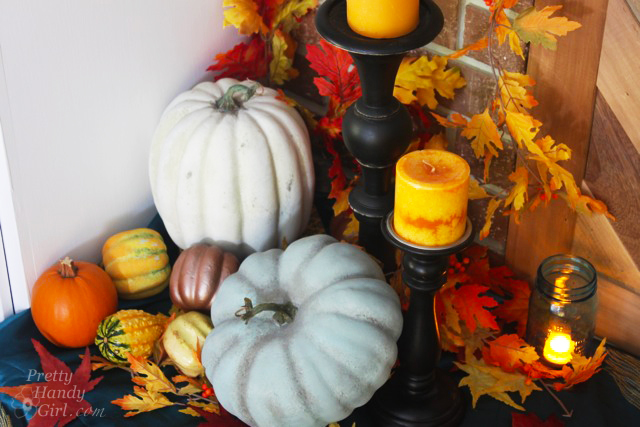
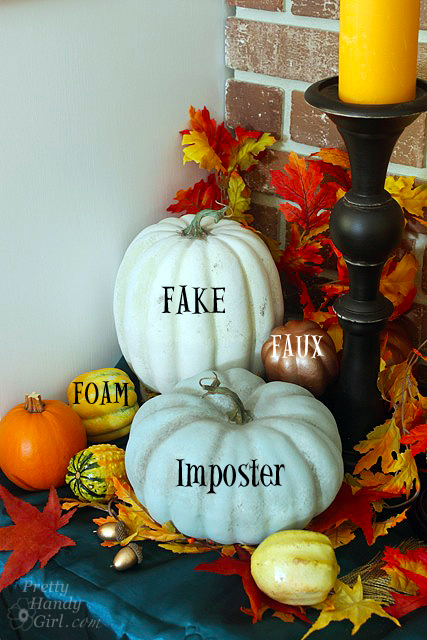
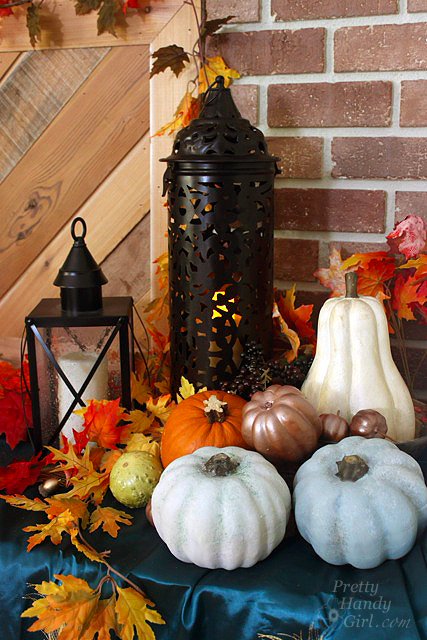
To truly fool people, set up your fake pumpkins with some real pumpkins and real gourds. Sooo, can you spot the fakes?

guess-the-fakes

How many did you get right? The metallic gourd is simply spray-painted with copper spray paint. But, I did try my hand at faking a green and yellow gourd using the same technique as the pumpkins, but adding green to the top and yellow to the bottom.

the_fakes

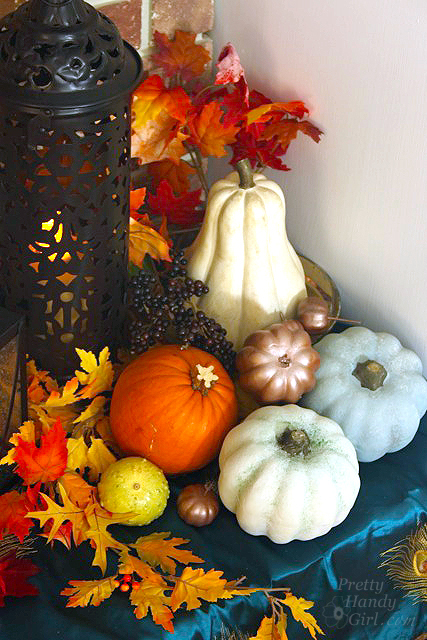
Okay, I’ll give you a second shot. Guess the fakes:

vertical-fall-vignette

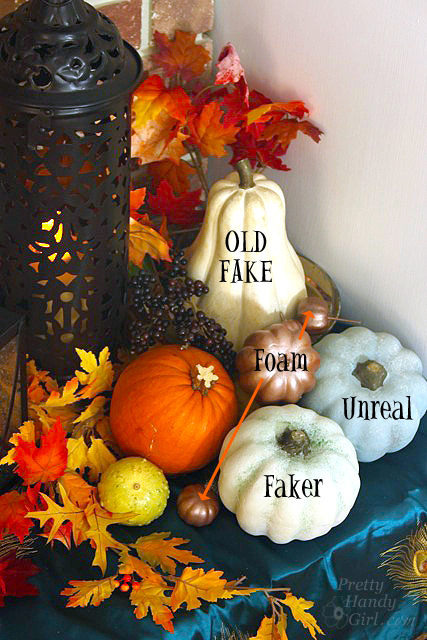
How did you do this time? Ha, you can now apply for a job as an art forgery detective ;-).

truth_fake_gourds
Now seriously, how many people will be viewing your pumpkins that close? Umm, next to no one. Normally they’ll view them from afar.

full-living-room-shot

Get your paints and palette out and go fake some fakes! It will be our little secret.

fall-vignette-grouping

PHGFancySignDid you like this painting post? Ahhh, then I know you’ll like this Ballard Pear painting tutorial:

Or if you’re feeling like taking on a larger scale project…how about Faux painted bricks!

Or perhaps you’d like to perform some faux zinc painting magic:

You can do it! I know you can.

Hang up your Mini Macrame Wall Hanging

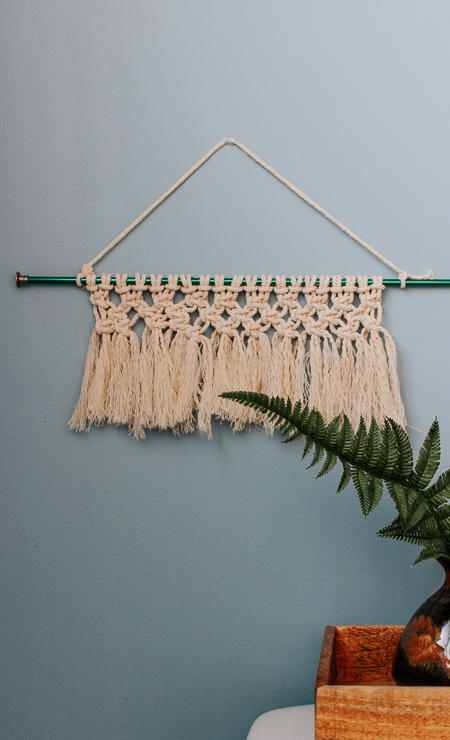
Learn how to make a mini macrame wall hanging - you can hang this anywhere and it only takes 20 minutes to make!

How to Make a Mini Macrame Wall Hanging

If there’s one hobby that has become quite the obsession for me – it’s macrame! It’s really fun to create and the projects are inexpensive to complete.  Right now macrame wall hangings are all the rage, and add an eclectic look to your decor.  Today I’m showing you how to make a mini macrame wall hanging.  So chic!

If you’ve been wanting to start macrame—but are intimidated—you’re in luck! This project is small, simple, and can be completed in about 30 minutes!

This mini macrame wall hanging is a subtle nod to bohemian decor and it will look great pretty much anywhere in your home! Hang in your bathroom on in your office. Or, include it with a grouping of gallery wall prints for a more collected feel.

Here’s how to make it …

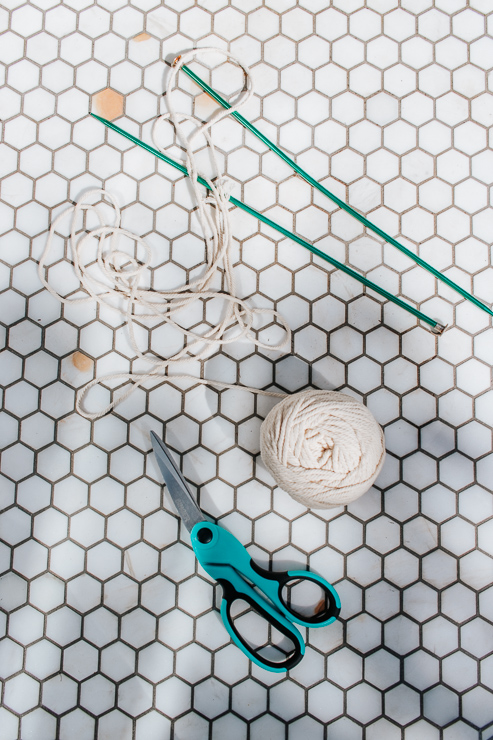
Materials:

(I’ve included affiliate links for your convenience. I earn a small percentage from a purchase using these links. There is no additional cost to you. You can read more about affiliate links here.)

Materials Needed for Mini Macrame Wall Hanging

Instructions:

Step One – Cut your Cords

Measure and Cut Macrame Cording to Size

Start by cutting your macrame cording. You will need 20-20 inch cords for this project. (20″ will make a mini wall hanging. After you get the hang of this, you can make your macrame art skinnier or longer. Whatever your heart desires.)

Step Two – Attach with Lark’s Head Knots


Once you have your cords cut, you want to attach the cords by creating 20 lark’s head knots. Here’s a quick video to show you how to make a lark’s head knot:

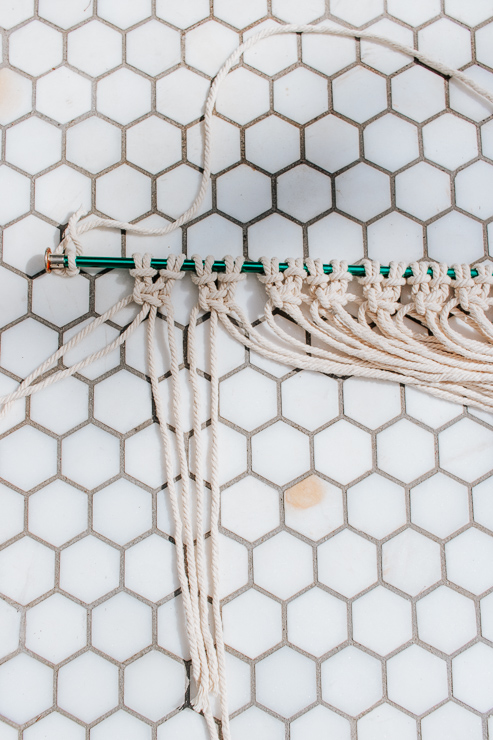
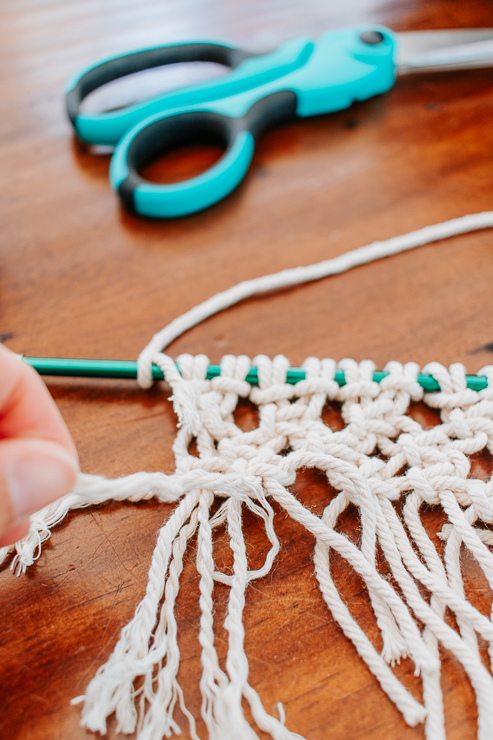
Take your cord and fold it in half. Take the loop part and fish it under your rod. Loop the ends of the cords through the cord – and pull tight! Now repeat this 19 more times with the rest of your cords.
Step Three – Make a Row of Square knots

Now that your cords are all attached, we are going to make Square Knots and Alternating Square Knots. Here’s how to make a square knot:

To make a square knot – take the first four adjacent cords and do the following:

  1. We are going to take the outer left cord and cross it over the two middle cords. Now take the outer right cord and place it on top of the left cord and UNDER the two middle cords.
  2. Loop it through the hole on the left side.
  3. Now pull to tighten the knot.
  4. Now take the outer RIGHT cord and cross it over the two middle cords.
  5. Take the outer left cord and place it on top of the left cord and UNDER the two middle cords.
  6. Loop it through the hole on the right side.
  7. Now pull your cords tight.

You have completed the full square knot.

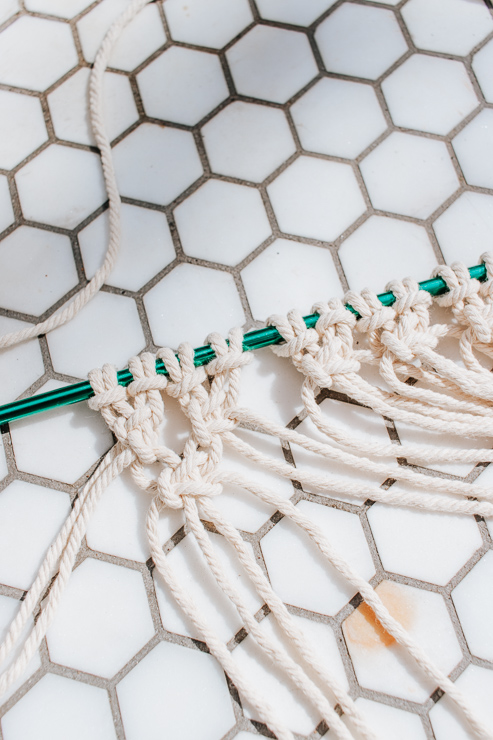
You want to keep working the next four adjacent cords to make a row all the way across of square knots.

Step Four – Make a Row of Alternating Square Knots.

Our next row is going to be alternating square knots.

To make these knots – follow the same steps as above, however skip the first two adjacent cords – start with the third cord and work the adjacent 3 cords.  Continue all the way across the row!

Step Five – Make a Row of Square Knots Again

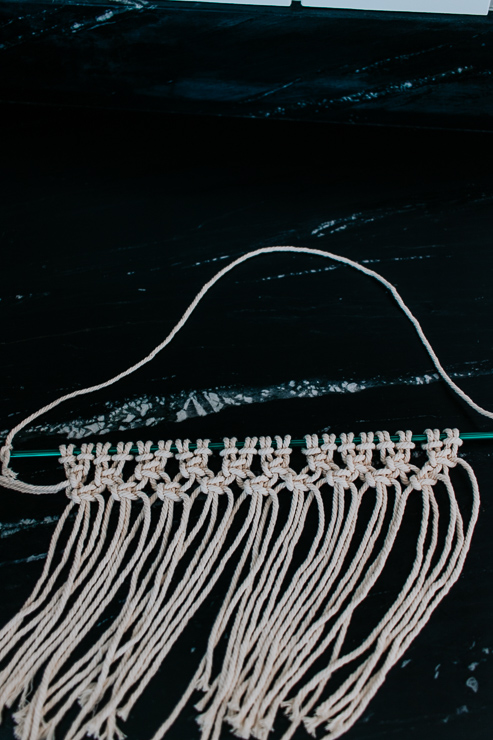
To complete our mini macrame wall hanging, our last row will be a row of square knots – so follow Step 3 again.

You should have something that looks like the photo below.

Trim the bottom of the wall hanging to even it up

Step 6 – Cut and Fray the Ends of your Wall Hanging

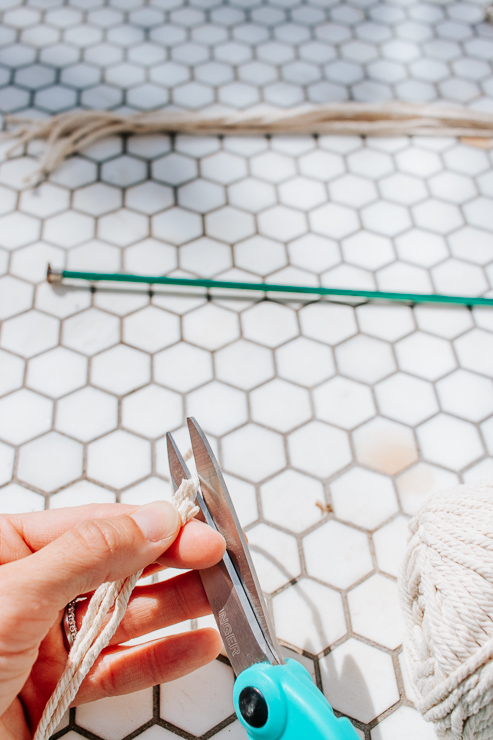
Take your scissors and cut straight across to create an even line of fringe. Take each cord and unravel it with your fingers.

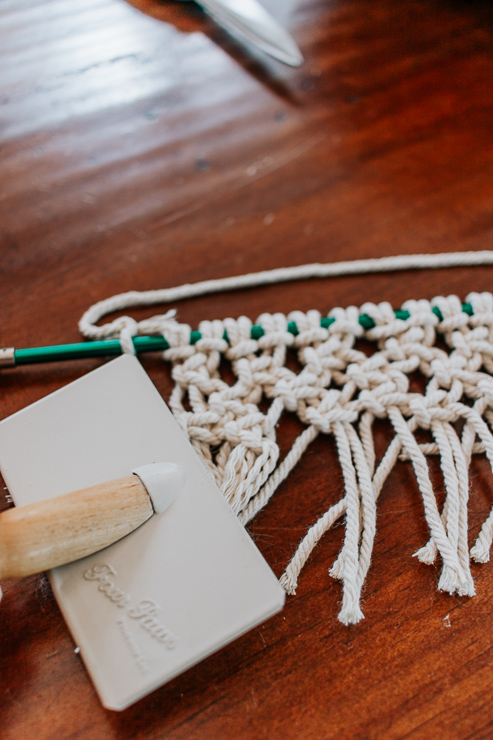
Now, take a wire brush and carefully brush through the unraveled cords to fray them.

All done!

Hang up your Mini Macrame Wall Hanging

Now all you have to do is hang it up and enjoy your beautiful work.  Can you imagine how pretty these would be if you made a trio of mini macrame wall hangings for a cohesive collage.  I really love that idea.

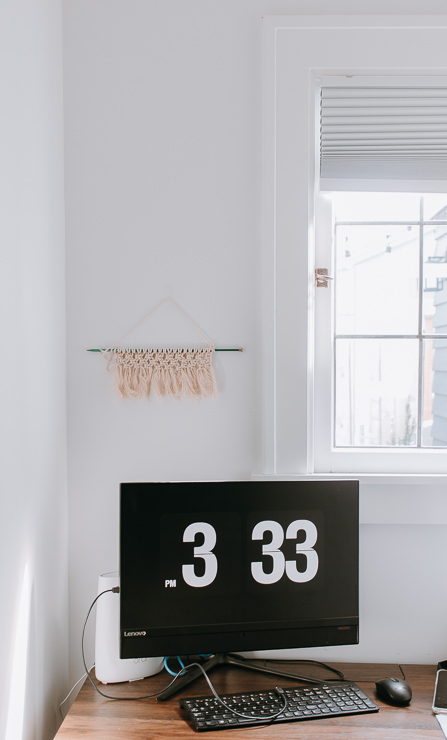
I hung my mini macrame over the computer for some style and texture in this little corner.

Mini Macrame Wall Hanging in an Office

If you want some additional help and projects – go to my blog and check out my Step by Step Basic Macrame Knots Guide.  And check out the cool macrame planter hanger here on Pretty Handy Girl for another cool project!

DIY Macrame Plant Hanger

Once you learn how to make the most basic knots – you can create all kinds of cool projects for your home. Such as Macrame Pillows, Mason Jar Covers, Jar Candle Hangers, Macrame Feathers – I could go on and on!

Feel free to leave me any questions or comments below – I hope this inspired you try Macrame if you haven’t yet.

I’ll see you right here next month with another awesome project for you.

karen signature

~ See More of Karen’s Tutorials ~


karen from decor hintHello!  I’m Karen, the creator of the Home Decor and DIY Blog: Decor Hint . I’m a Native of the East Coast, but I currently live in beautiful Seattle with my hubby, our two wonderful children and our spunky wheaten terrier.

You can usually find me with some sort of craft in one hand and a coffee in the other. And I’m always rearranging furniture or moving lamps from room to room. I have a passion (read: obsession) for decorating, DIY, and gardening. In short, I love making my house into a home.

Like many, I’m inspired by what I see in home decor magazines, but I’m not so inspired by the price tags.  Consequently, I love finding and creating beautiful budget-friendly home decor items. In a head to head competition, I bet you’d never know the difference between the designer items and my DIY creations!  Many of my DIY projects focus on sewing, crafting, upcycling and organizing. Some of my favorite projects have been making pretty wreaths , sewing my own tassel hand towels, and crafting these trendy wood bead garlands . I can’t wait to inspire you and spark your creativity through my DIY projects.

You can always connect with me on Pinterest , Twitter or Instagram.


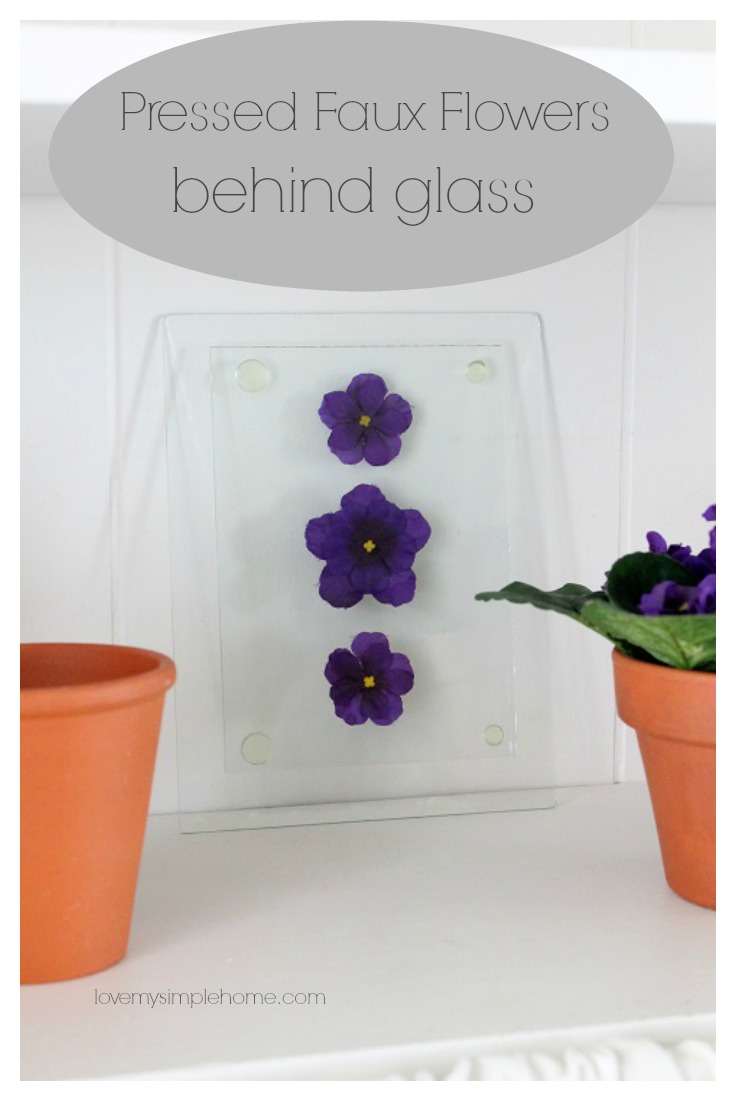
Pressed faux flowers behind glassPressed Faux Flowers

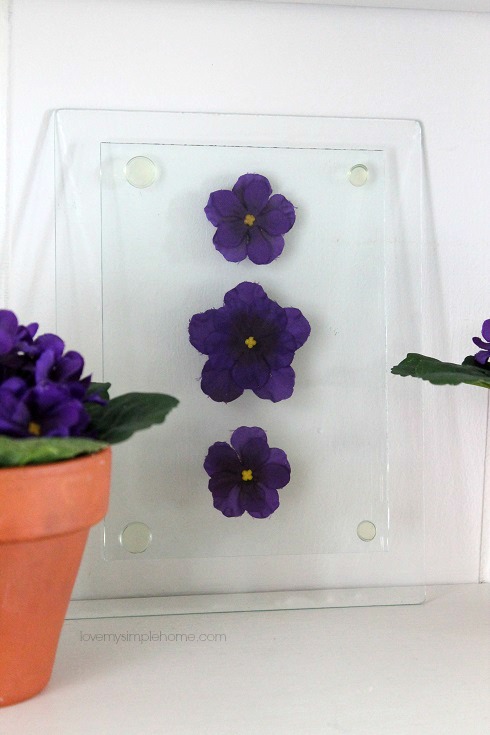
Hello, Pretty Handy Girl friends!  Julie from love my simple home here, with a new DIY project!  Pressed faux flowers behind glass is quick and easy to make. You’ll end up with a beautiful piece of leaning art that you can display on a shelf in your home.

Materials:

  • Faux Silk Flowers
  • Glass from two picture frames in different sizes
  • Scissors
  • Hot Glue Gun
  • Craft Glue

Instructions:

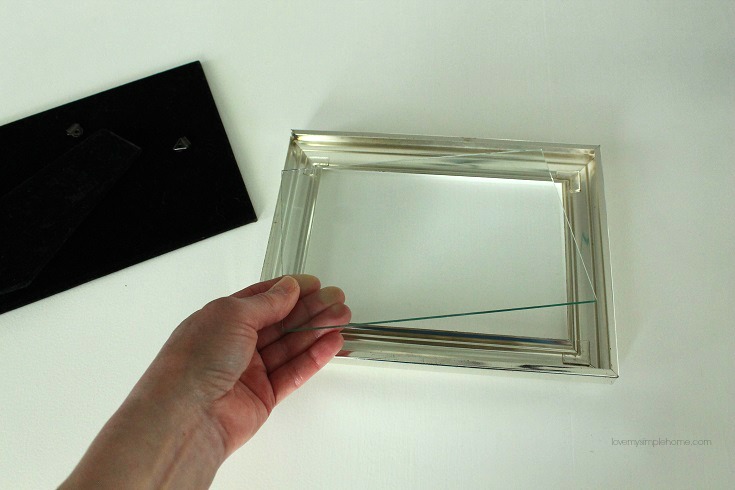
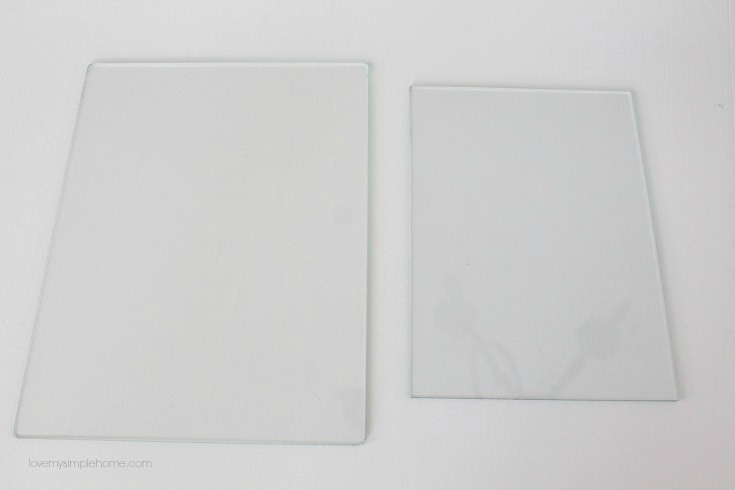
  1.  Choose two different size picture frames (they can be any size you want.)  Make sure they will fit on your shelf.  I used one 5″ x 7″ and one 8″ x 10″.

Materials for Pressed faux flowers behind glass

Remove the back and the glass from your picture frames.

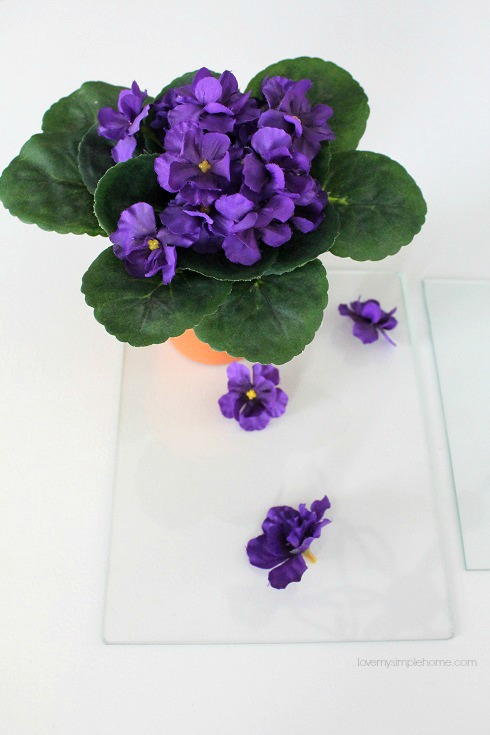
2.  Select the flowers of your choice. Pull the blooms off the plastic stems.

Pressed faux flowers behind glass

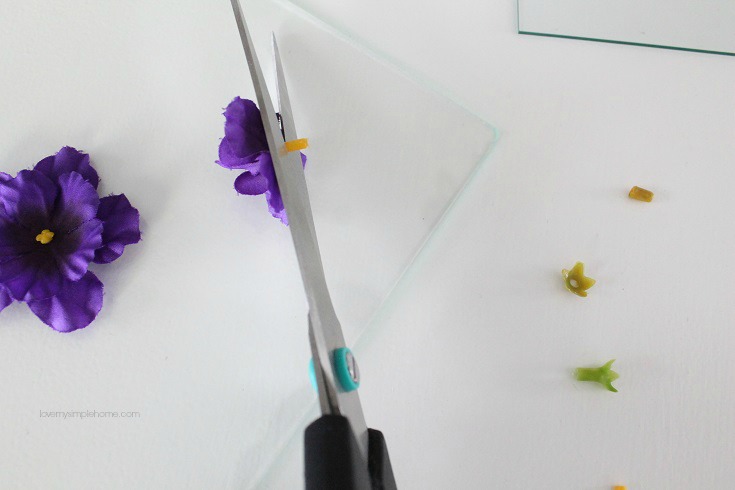
3.  Cut the plastic stems from the flowers. Use your scissors for this task.


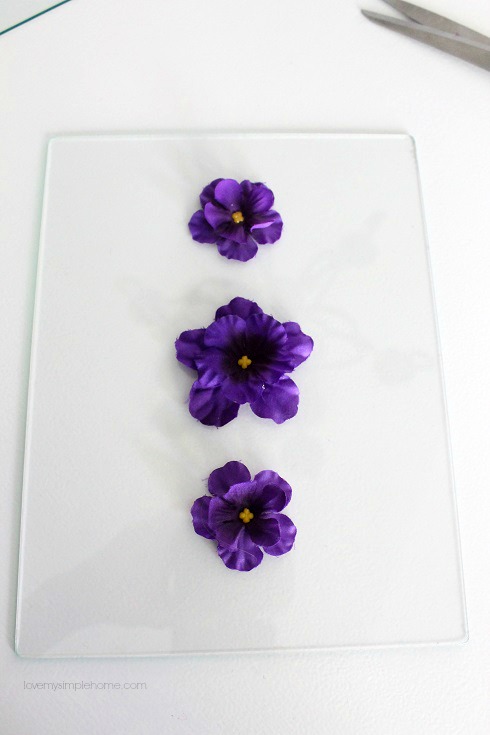
4.  Arrange the flowers any way you like on top of the larger piece of glass.  When you like what you see, add a dab of craft glue to the back of each flower and gently press onto the glass.

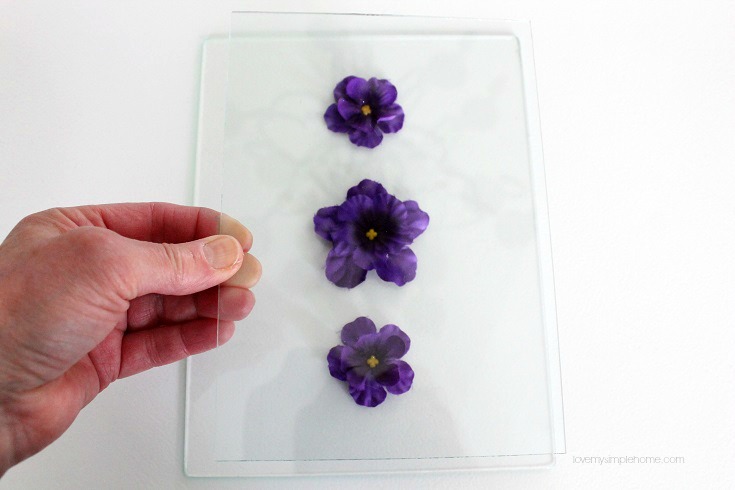
6. Place the smaller piece of glass on top of your lovely flower arrangement.  Grab your trusty hot glue gun and put a dab of glue on the four corners of the smaller glass piece.

7.  Flip the glass, then lay the glass down over the flowers. The glass should be centered on the large piece of glass. Gently push down on the four corners and hold it in place for about 30 seconds or more until the glue adheres to the glass.   After the top piece of glass is in place, the flowers will lay flat pressed between the two pieces of glass.

Pressed faux flowers behind glass

Pressed faux flowers behind glass

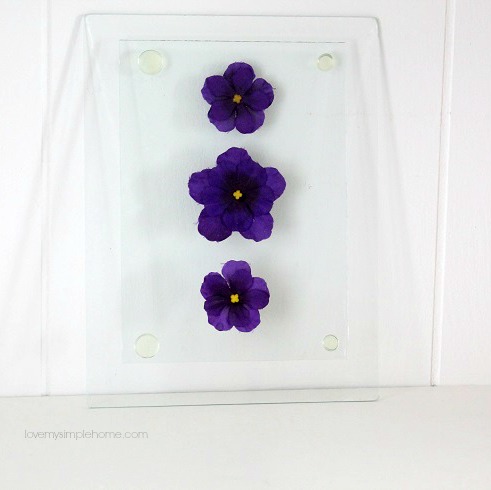
That’s it, you now have a beautiful piece of leaning art you can display on a shelf in your home.

Pressed faux flowers behind glass

I hope you enjoyed this quick and easy DIY art idea.

Be sure to check out my other tutorials here at Pretty Handy Girl and over on my website love my simple home.

How to Custom Build a Vintage Ruler Picture Frame

How to Build a Custom Vintage Wood Ruler FrameHow to Build a Custom Vintage Ruler Picture Frame

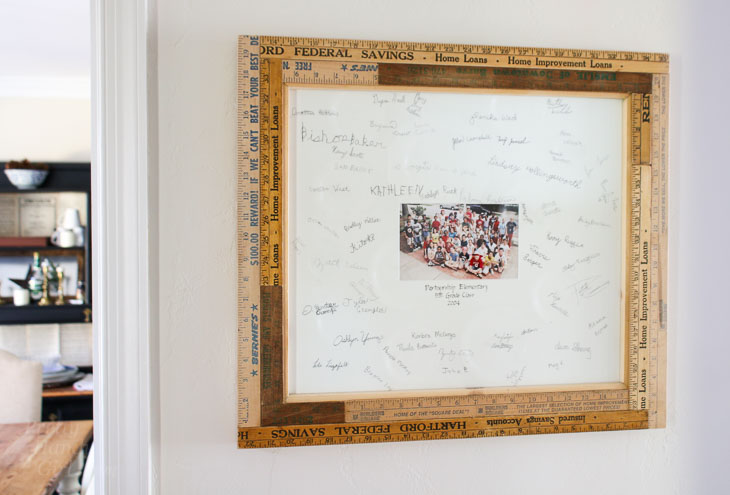
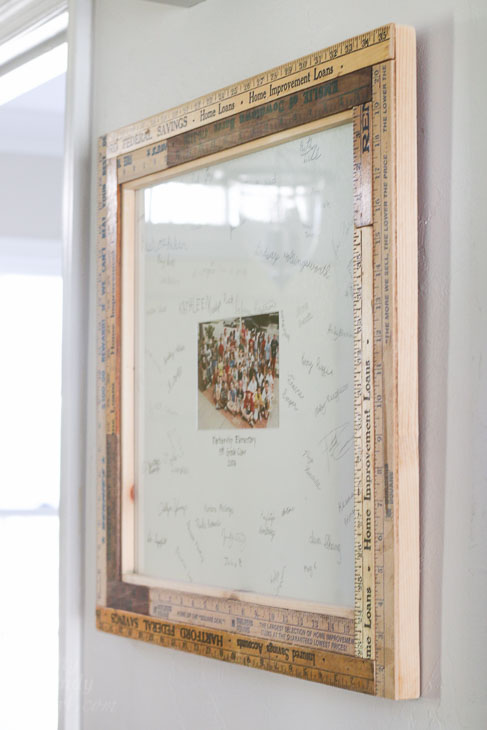
Every year when I go to meet my sons’ new teachers, I tell them if there is anything that needs fixing to let me know. It’s my small show of appreciation for all they do for my kids. Before Christmas, one of the teachers took me up on my offer. She asked me to fix a frame that had fallen off the wall and broke. I took one look at the cheap MDF frame and knew it was beyond repair. I didn’t tell her, because I wanted to surprise her with a Custom Built Vintage Ruler Picture Frame.

The great thing about this project is it uses cheap 1″ x 4″ lumber. And you can add your own moulding to dress up the frame if you like. Or just leave the frame plain, either way you’ll save major money by building your own custom frames!

Ready to learn how to build your own custom vintage ruler picture frame? Let’s get framing!

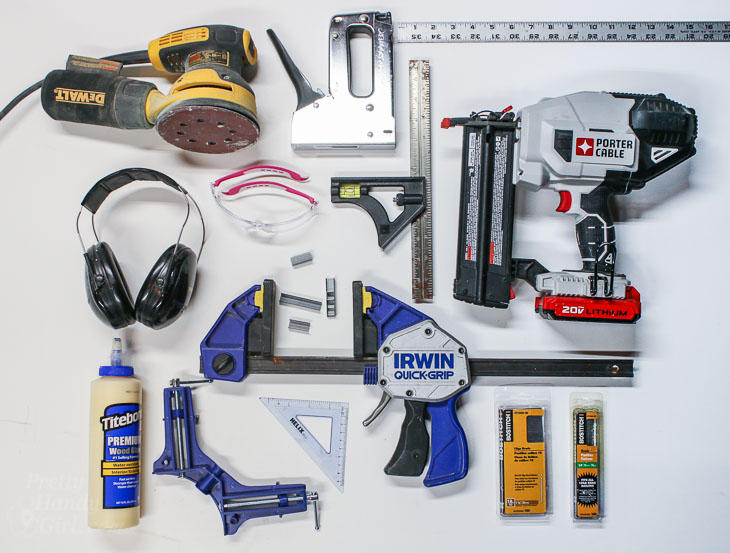
Materials:

(I’ve included affiliate links for your convenience. I earn a small percentage from a purchase using these links. There is no additional cost to you. You can read more about affiliate links here.)

Instructions:

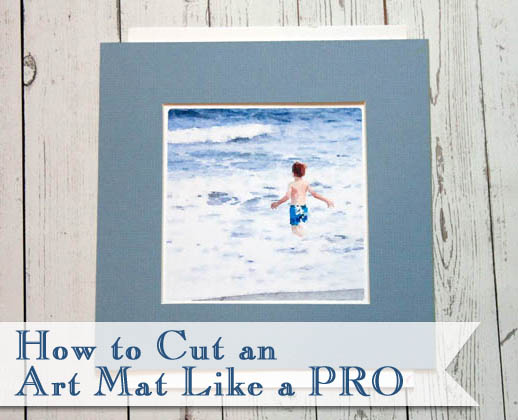
This tutorial assumes you have mounted art and glass, but if you don’t you can follow this tutorial for cutting your own art mats.

How to Cut an Art Mat Like a Pro | Pretty Handy Girl

Cutting the Frame:

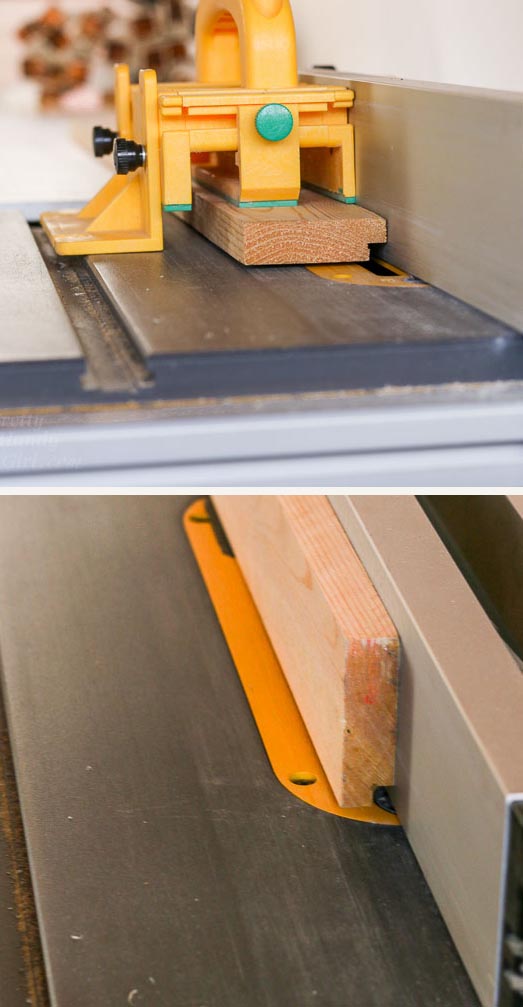
Use a table saw to rip your 1″ x 4″ lumber. Run your board through the saw along the 4″ side, then flip the wood up and run it through again. This will take 1/4″ off one corner to create a rabbet to place your art into.

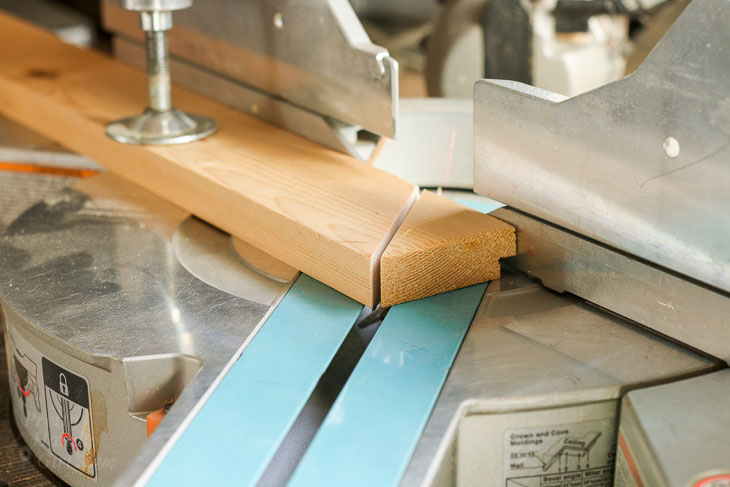
Lay your ripped 1″ x 4″ boards against the fence of your miter saw. (I like to pre-cut four pieces a few inches larger than my artwork.) Cut one end of your boards at a 45° angle (angle the saw blade to position the rabbet on the short side.)

Set one board against your art. Before cutting the other side, measure the width of the art. Add an extra 1/8 inch. Mark the inside corner and cut to length (angling the miter saw blade in the opposite direction as your first cut.)

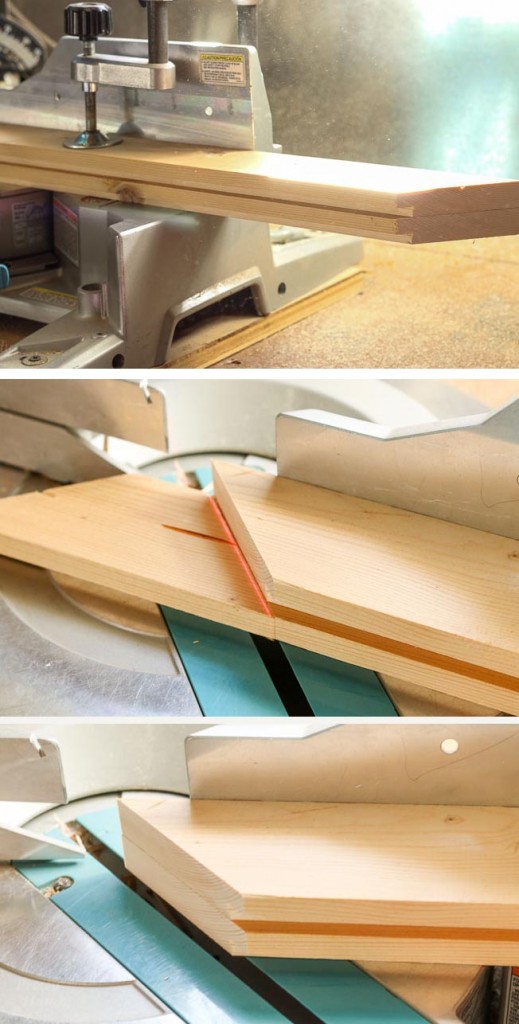
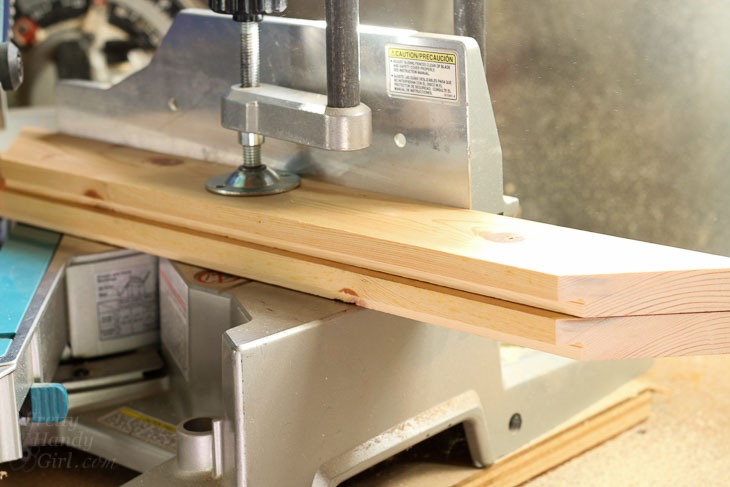
Take your first cut board and lay it on to of a second board. A quick way to cut them exactly the same length is to place the already cut board on top of the second board and line up the ends. Then line the blade up with the cut on your first board.   Clamp the boards down and cut.
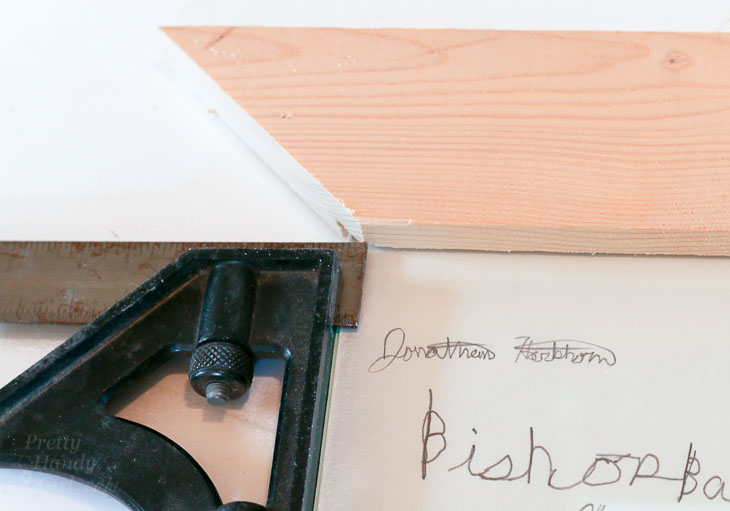
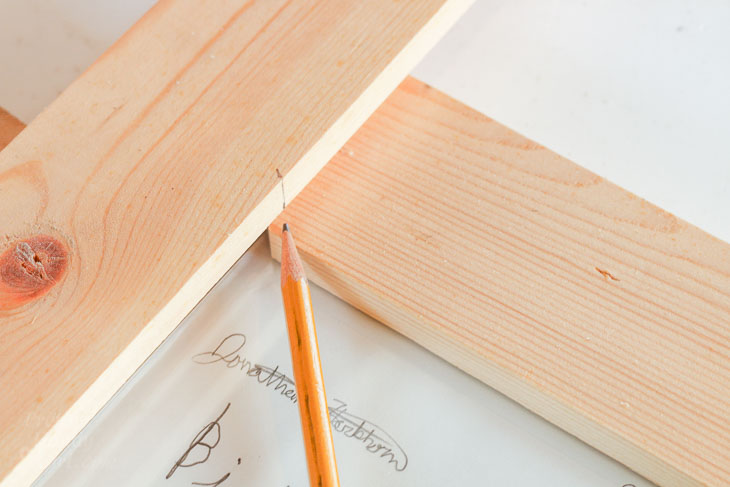
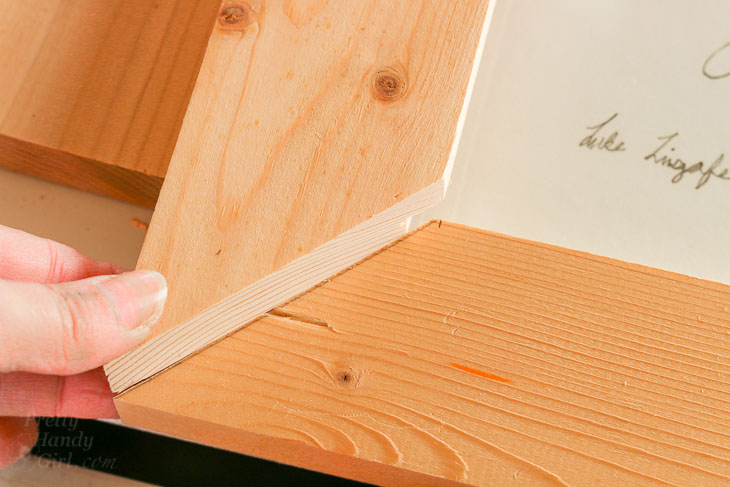
Dry fit the two identical sides. Lay one 1″ x 4″ board over the cut boards at a 9o° angle. Mark the inner corner where you need to cut.

Cut the side piece and dry fit to make sure the cut is perfect.

Repeat the process above to cut two identical parallel side pieces.

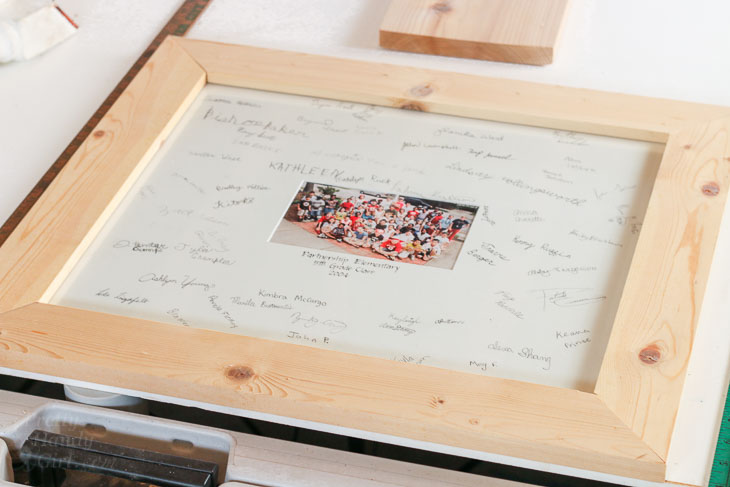
Dry fit the frame around your artwork to make sure everything is square and fits inside the rabbet.


Assembling the Frame:

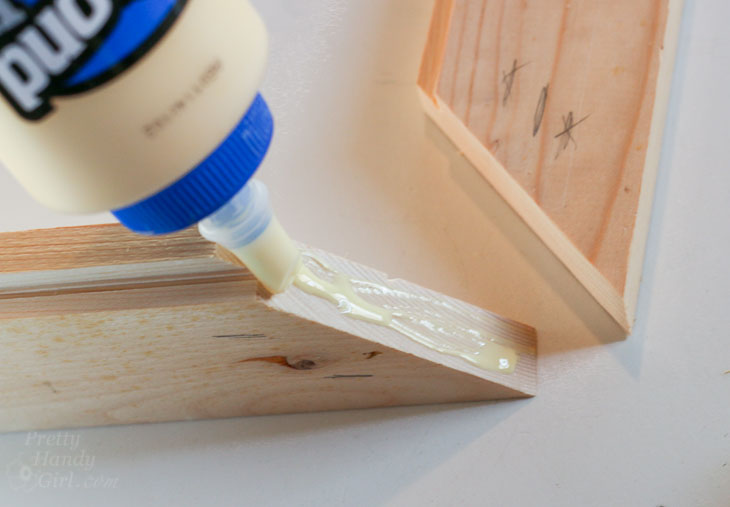
Apply a line of wood glue on the corners.

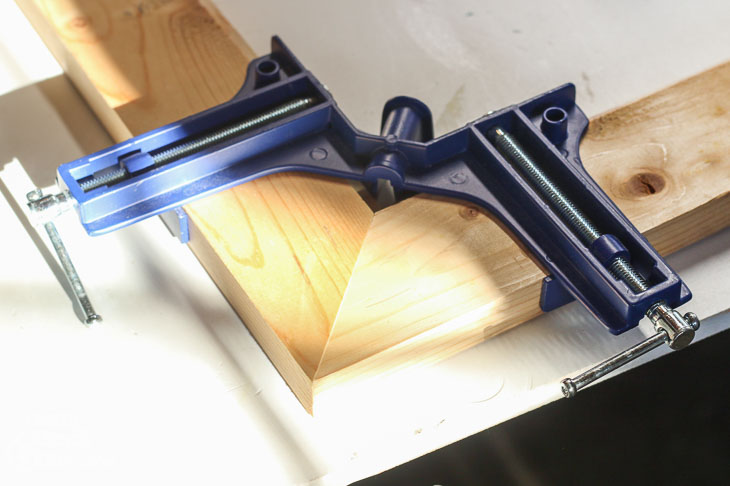
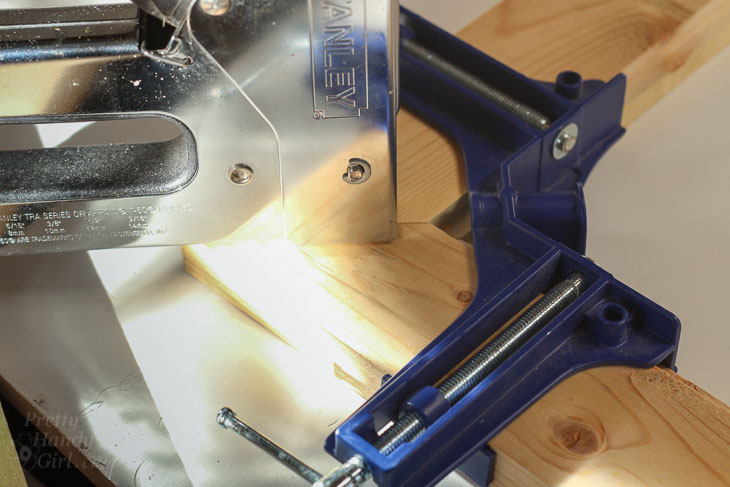
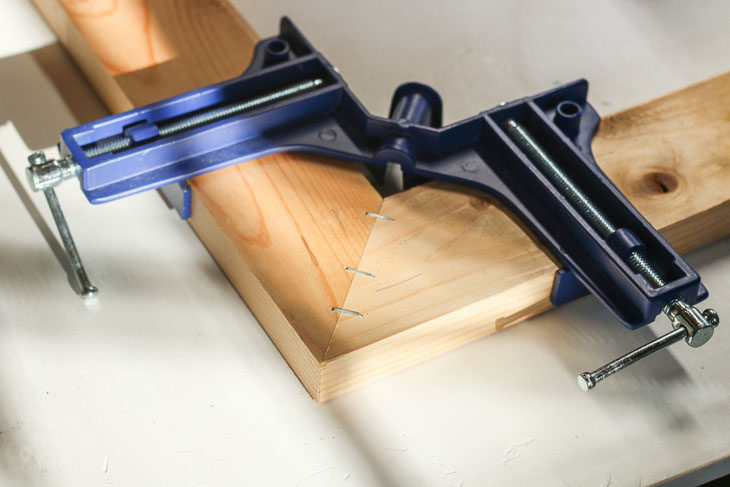
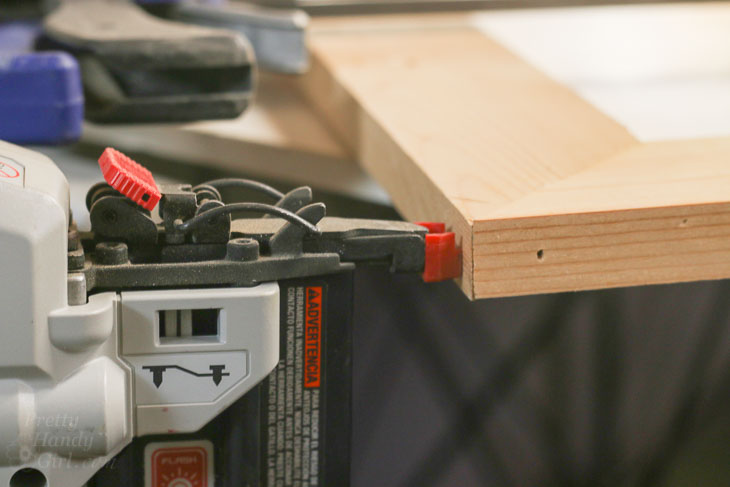
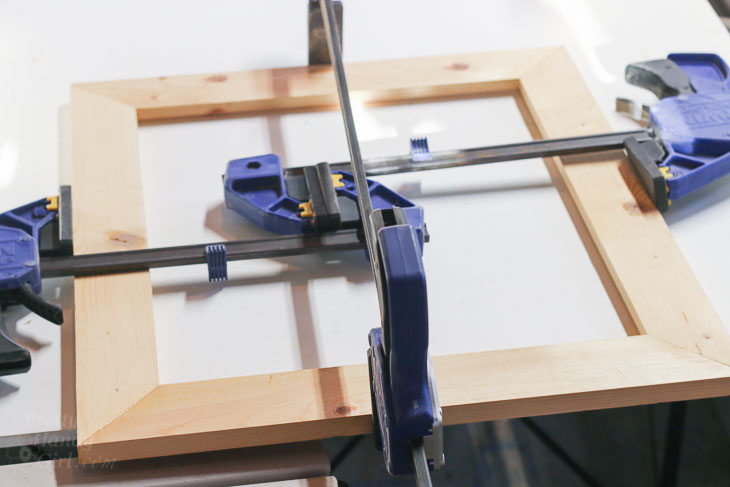
Clamp the corners with a 90° clamp then use your staple gun to fasten them together (on the back side of your frame). The wood glue is strong, but this will hold it in place while the glue dries.

I like to add 1 ½” brad nails (one on each side of the corners) to further hold the frame together. (I don’t want the teacher’s frame to fall apart ever again!)

Clamp the frame and let the wood glue harden. If you don’t have clamps long enough, here is how to make one long clamp with two short clamps!

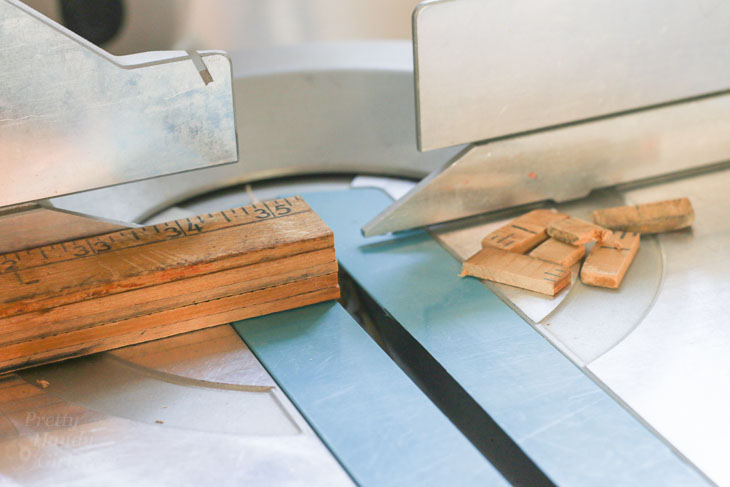
While the glue cures, cut off any chipped, broken, or rounded ends from your vintage rulers.

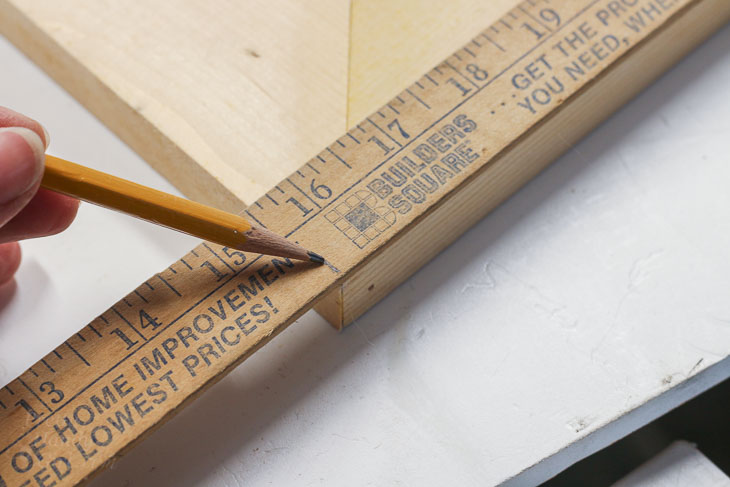
Lay the first two rulers against the outer edge of your frame.

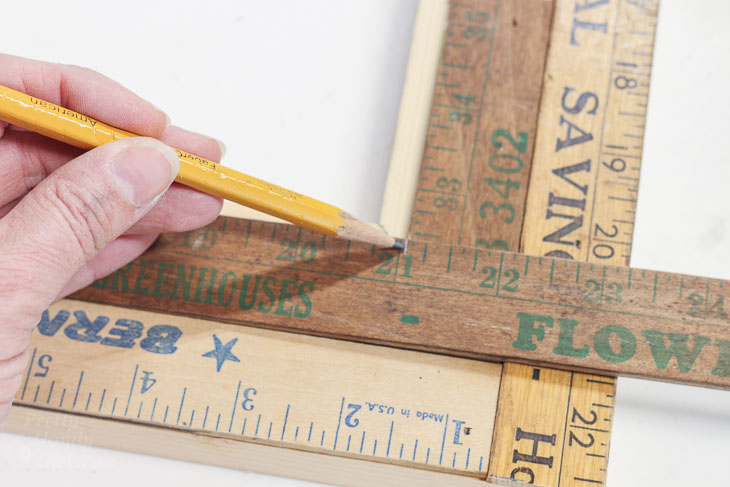
Mark the ruler where you need to trim and cut off the excess.

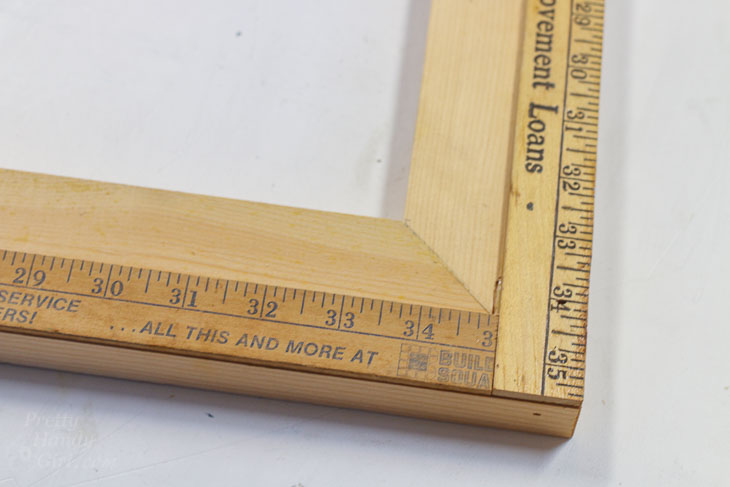
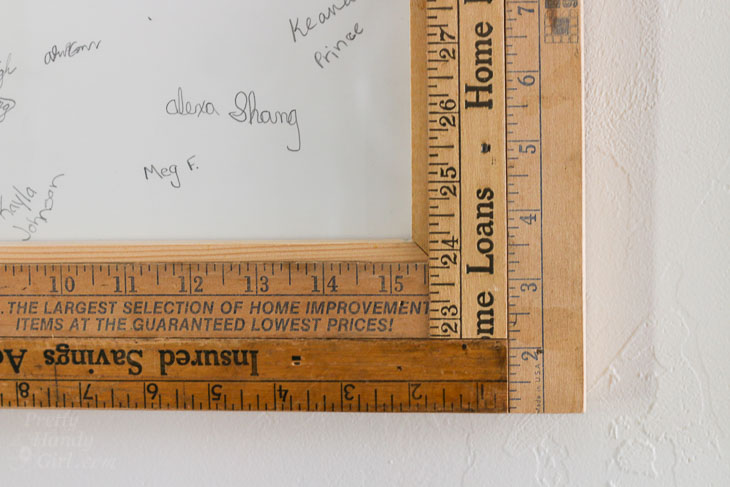
Continue until the outer edge of your frame is covered by rulers. Then start working on the inside of the first rulers. Measure, mark and cut the rulers to fit. Don’t worry if you are left with a small section of frame showing.

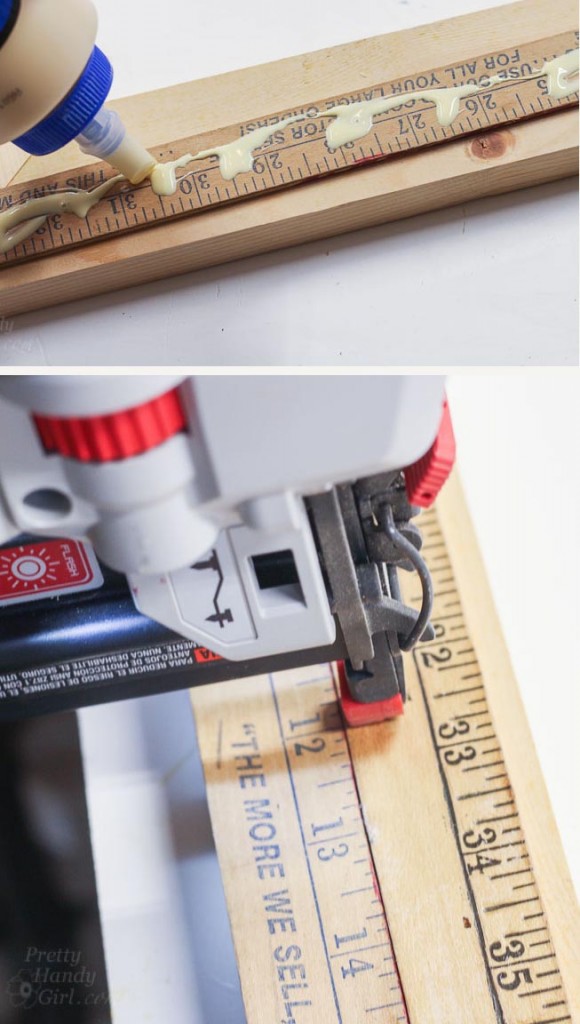
After all the rulers are measured and cut, use wood glue to adhere them to the frame. Follow up with a few brad nails to hold the rulers in place while the glue dries.

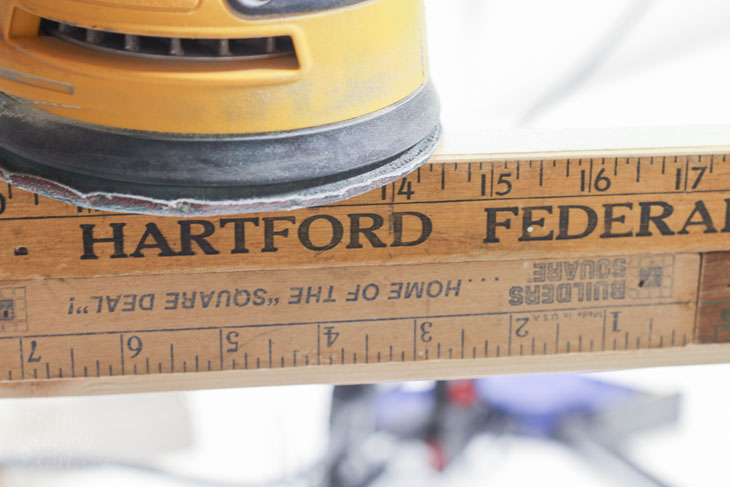
Sand the edges lightly with your sander to remove any splinters or rough edges.

Securing Artwork and Adding Hanging Hardware:

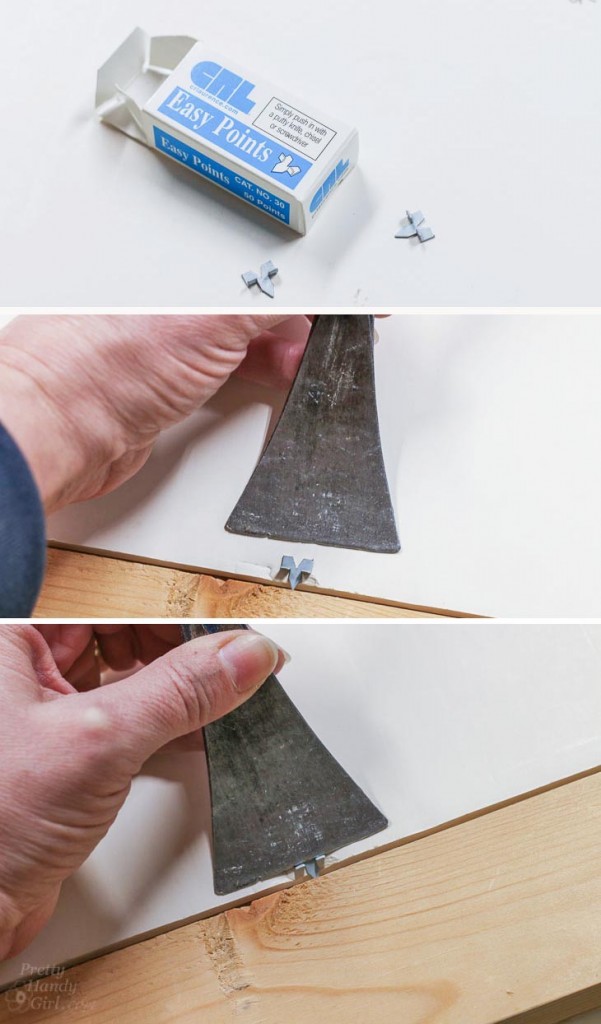
Fit your artwork into the frame. Place a framing point onto the back of the artwork with the point toward the frame. Use a 5-in-1-painter’s tool (or other flat tool) to push the point into the wooden frame. These will hold your artwork secure within the frame.

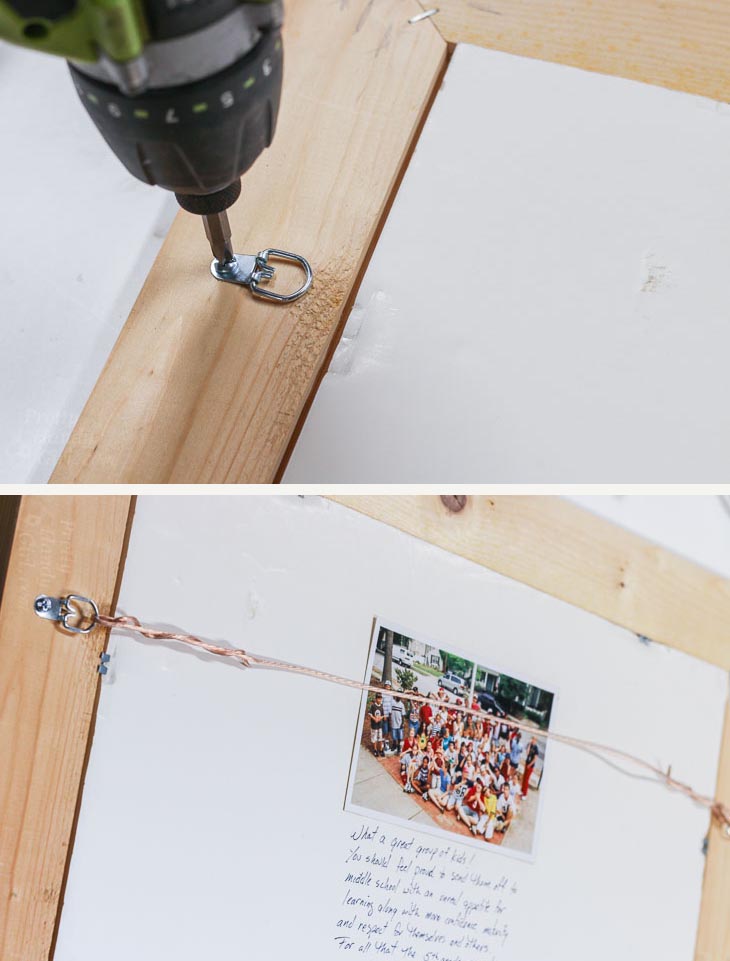
Add your hanging hardware. I prefer using D-rings and picture hanging wire, but you can use any hanging hardware you like.

Congratulations! You are done and now have a beautiful (and unique) Custom Vintage Ruler Picture Frame!

This is an easy project to build and enables you to customize the frame to any size that you need. The vintage rulers add some character and charm to the frame.

I hope you liked this tutorial on How to Build a Custom Vintage Ruler Picture Frame. Check your local vintage shops, Craig’s List or Ebay for some rulers and make one of your own!
Pin or Share this project with your friends! Because friends don’t let friends spend lots of money on art frames!

If you liked this tutorial, you’ll love these frames:

Scrap Wood Shadow Box Frame:

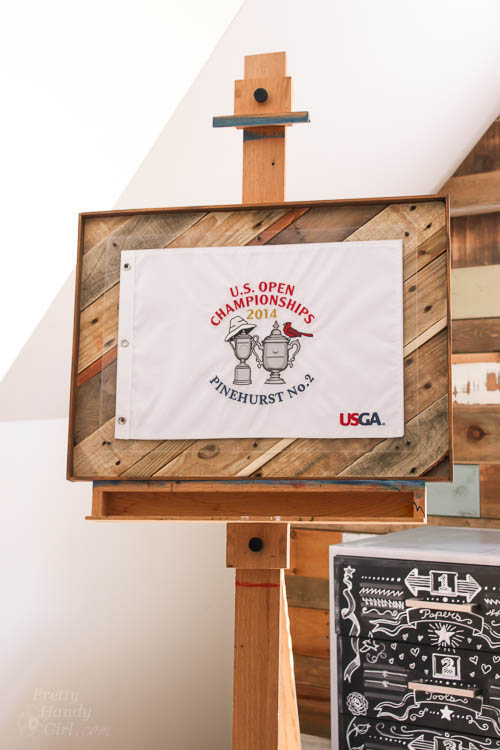
Rustic Scrap Wood Shadow Box Frame | Pretty Handy Girl

DIY Plywood Frames:Simple Plywood Frames