cupcake stand

Make these DIY industrial cupcake stands now and you’ll be ready for all the upcoming holidays, Thanksgiving and Christmas are fast approaching!  The cool black steel plumbing parts base combined with the natural wood slice platform lends itself to an unexpected industrial feel.

Each cupcake stand costs $5.50 in parts (not including the birch log), very reasonable for a unique, DIY project that could easily lend itself to become a favor or small gift.

cupcake stand 3

Supplies required (for one DIY Industrial Cupcake Stands):

  • 1/2″ black steel floor flange
  • 1/2″ x 3 1/2″ black steel nipple
  • birch log (approx. 5″ in diameter)
  • hand saw or circular saw
  • palm sander or sandpaper
  • drill
  • 3/4″ circular drill bit
  • E-6000 glue

DIY Industrial Cupcake Stands Instructions:

cupcake stand 4

Step 1: Using a handsaw or circular saw slice off 3/4″ thick disc of wood from the birch log. (If you’re concerned about bugs, you can bake them as shown here.)

Step 2: Sand wood slices smooth.

Step 3: Using a drill with a 3/4″ circular bit drill out a small hole for the nipple piece, only about 1/4″ deep, be careful not to let the tip of the bit pierce through to the other side of the wood slice.

cupcake stands 5

Step 4: Apply E-6000 glue to one end of nipple and screw it into flange.

Step 5: Apply E-6000 glue to circular hole in wood slice.

Step 6: Gently ‘screw’ other end of nipple into wood slice.

cupcake stand 6

Let the glue dry while the cupcake stands are upside down.

When dry, flip the stands over and load them up!  They are perfect not only for cupcakes but candles too:

cupcake stand 2

Cupcakes, candles and individual pies too!  Mini pumpkin and pecan pies are on definitely my Thanksgiving menu this year:

DIY Industrial Cupcake Stands

Jaime signatureLearn more about Jaime ~


Pin for later!

DIY Industrial Cupcake Stands

How to DIY a GIANT artist canvas | Pretty Handy Girl

Have you ever yearned to own a giant piece of artwork but the cost was prohibitive? Or you knew you could create some awesome abstract paintings, but buying large canvases would cost too much. Well, for those hesitant artists, I have this quick tutorial for building your own GIANT canvas!

Materials:

How to DIY a GIANT Artist Canvas

  • 2×2″ boards for frame supports (two sides, top, bottom and center support)
  • Kreg Jig and pocket hole screws
  • Drill
  • White fabric (canvas material would be best, but use what you have)
  • Staple gun and staples
  • Paint brush
  • Gesso (if you don’t have gesso, primer would probably work fine)

Instructions:

Cut your 2×2″ lumber down to size. Cut your top and bottom the full widths. Cut the two sides and the center support 3″ shorter to accommodate the height of the added top and bottom pieces. Note, if your canvas is portrait (instead of landscape), your support will be a center horizontal brace instead of vertical as shown. Read more

DIY Room Divider King Headboard

I’m still working on my bedroom re-do, it’s been a long process but it is slowly coming to an end with the decorative part.

After painting the room, my big question was how to make the bed or that whole wall where my bed is going to be located, the focal point in the room.  At first I was thinking about installing wall paper with a nice design, then I thought about using a stencil since its a more economical choice. A painted stencil would also be easier to change later on.  Then, I received a stroke of luck! I scored a cabinet in the FREE section of Craiglist! When picking it up, the owner asked me if I also wanted this room divider:

DIY Room Divider King Headboard

“Of course!” I said and run out of there before he had time to change his mind!  That thing is super heavy! It looked really nice after a good cleaning, up close not that much, something was sprayed on it 🙁 there were lots of spots all around.

DIY Room Divider King Headboard

That’s why I decided to paint it and use it as my bedroom’s headboard.

The materials and tools you will need: Read more

Easy Fall Wreath Tutorial

Easy Fall Wreath Tutorial

Who’s too busy to spend more than 5 minutes creating a new wreath for Fall? {Raising my hand high!} Well, I’m about to give you the Easiest Fall Wreath tutorial…EVER!

Do you have one of these store bought wreaths? Pretty, but maybe a little lacking in color. Or maybe you’re just sick of looking at the same store bought wreath going on ohhhh six years now?

Easy Fall Wreath Tutorial

Quick! Go grab these five things:

Easy Fall Wreath Tutorial Read more

Autumn Mantle Décor and Vignettes | Pretty Handy Girl

Autumn Mantel Décor and Vignettes | Pretty Handy Girl

Fall is here! Hip Hip Hooray! I’m not exactly a summer gal (although I was born in June.) I prefer the cooler temperatures, the colorful landscape and jean weather! When the first cool day rolled into North Carolina, I was ready and waiting! But, my living room was still stuck on 4th of July (you know I’m a procrastinating decorator, right?!) I trudged up to the attic to pull down some fall décor. But, frankly, I wasn’t excited about putting the same stuff out again. I wanted a new look, something with bright colors and BLING!

Come on inside to view my Fall mantel and living room vignettes and cozy up near the hearth.

Autumn Mantel Décor and Vignettes | Pretty Handy Girl

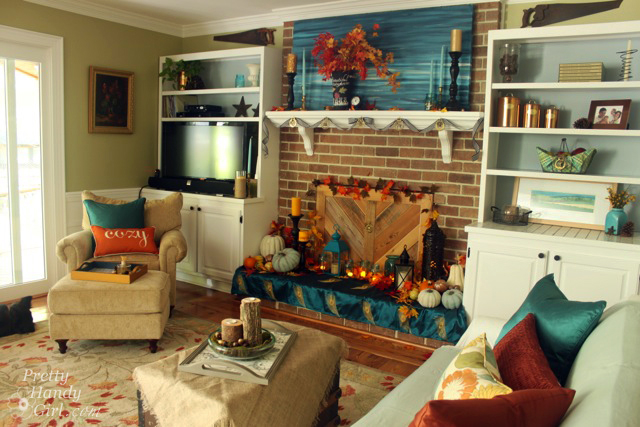
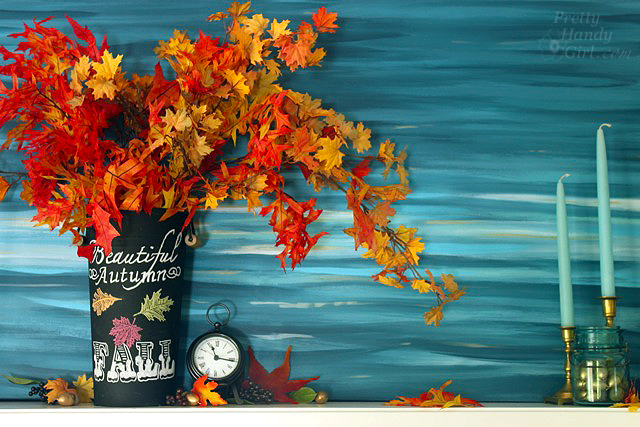
I knew upfront that I wanted to use an aqua and vermillion color scheme. I really love the bold contrast of colors.

Autumn Mantel Décor and Vignettes | Pretty Handy Girl

I ordered a lantern and some faux leaves, for decorating. While I waited for them to arrive, I spent an hour building a giant canvas with scrap 2″ x 2″ pieces of lumber and cheap fabric.

blank_canvas

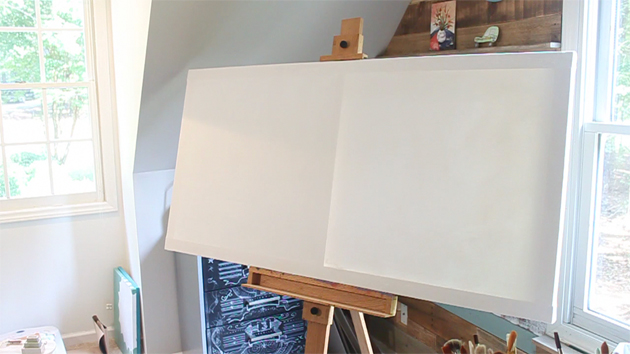
The next day I created a giant abstract water painting. You’ll be thrilled to know that I’ll indulge you with a video tutorial so you can create your own!

Autumn Mantel Décor and Vignettes | Pretty Handy Girl

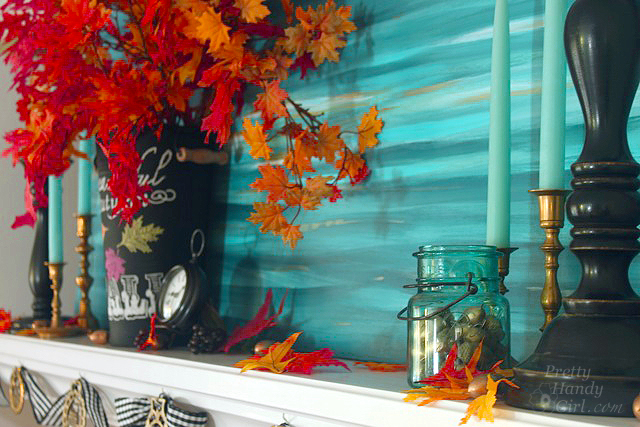
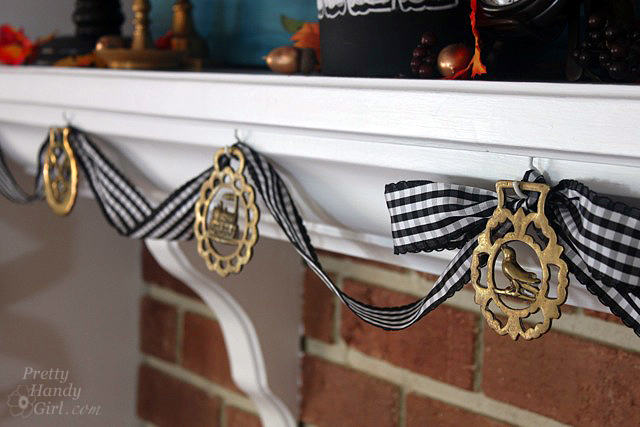
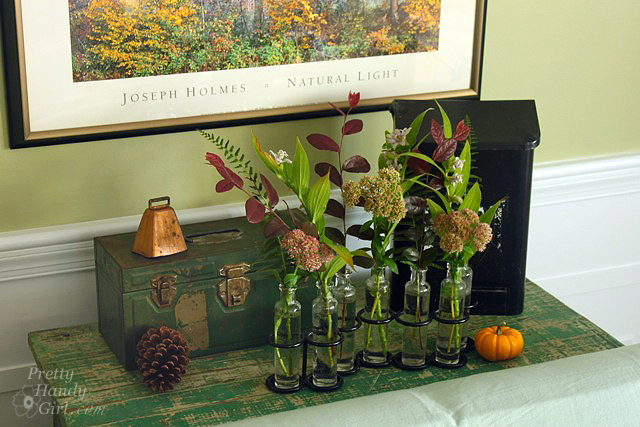
When my order arrived, I integrated the Pottery Barn items (see if you can spot them) with several other objects that I already had. The two leaf branches I ordered weren’t enough on their own, so I grabbed a few bunches of dried leaves at the grocery store (check in the floral department.)

Autumn Mantel Décor and Vignettes | Pretty Handy Girl

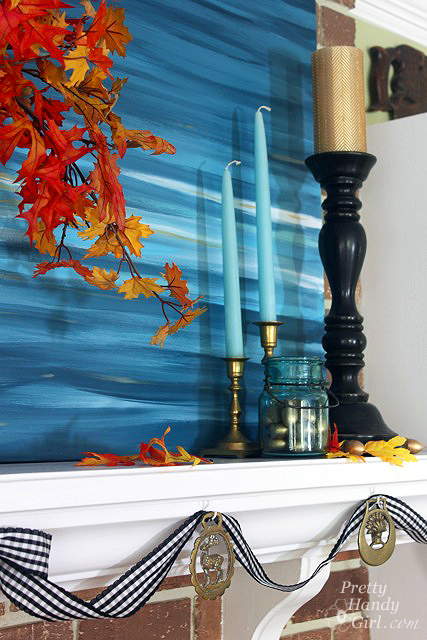
The brass medallions are vintage British horse bridal medallions. They are actually a gift from a friend upon her return from England. (The perks of dog sitting!)

Autumn Mantel Décor and Vignettes | Pretty Handy Girl

Autumn Mantel Décor and Vignettes | Pretty Handy Girl

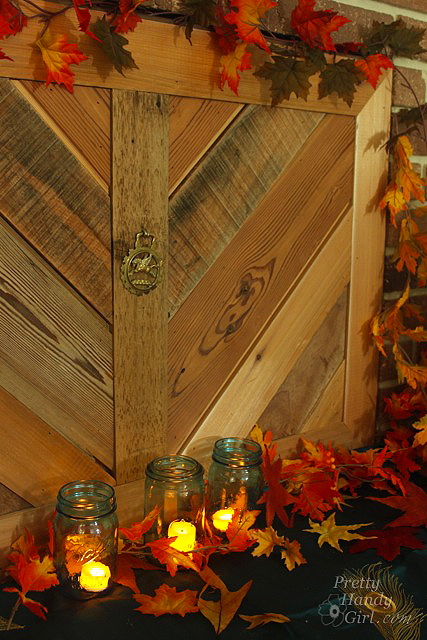
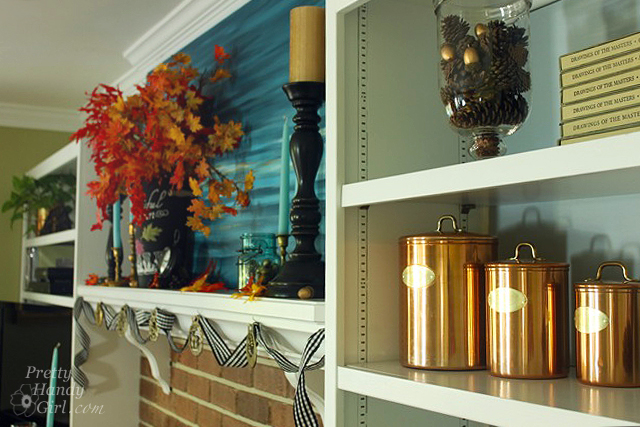
On the hearth, I added more faux leaves and candles to further decorate the fireplace.

Autumn Mantel Décor and Vignettes | Pretty Handy Girl

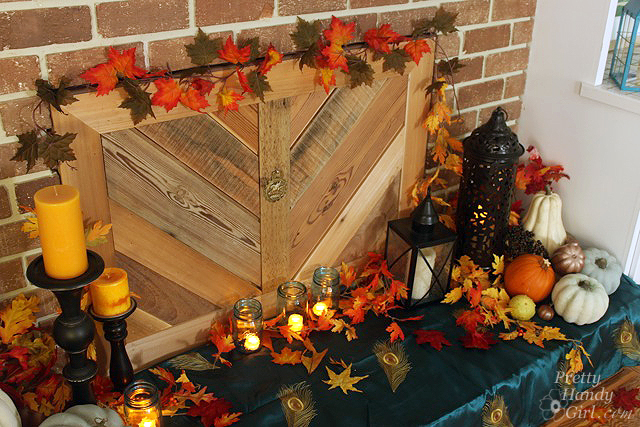
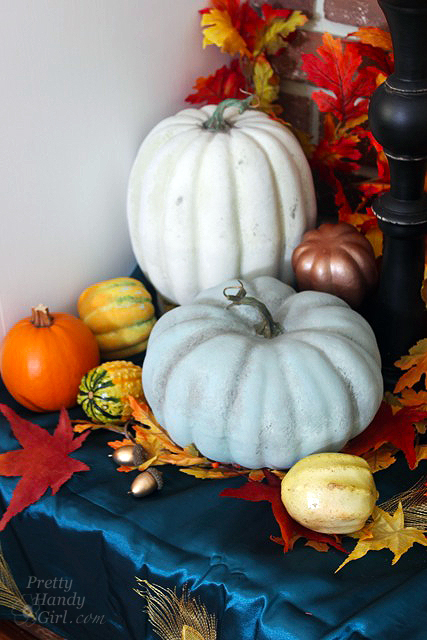
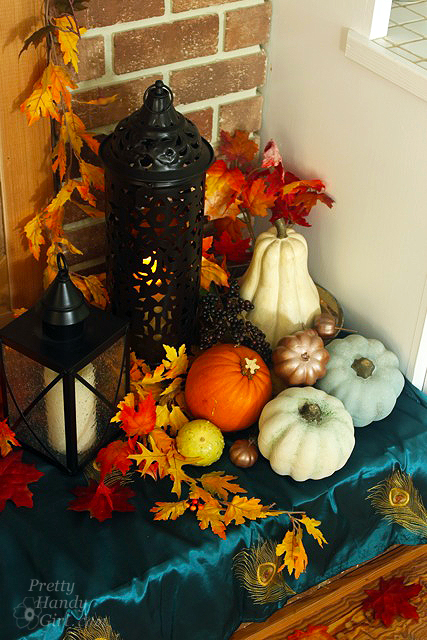
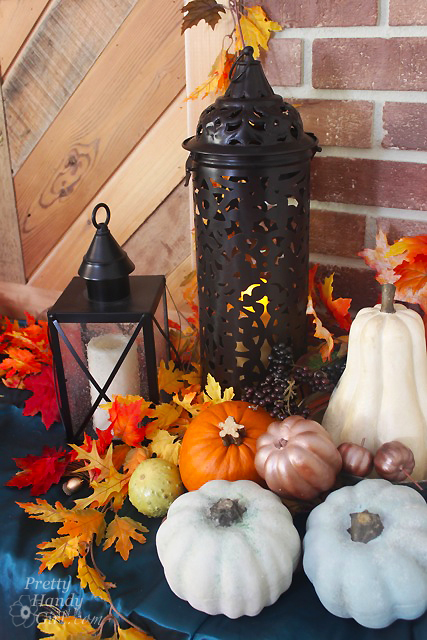
I also popped some gourds and pumpkins onto the hearth.

Autumn Mantel Décor and Vignettes | Pretty Handy Girl

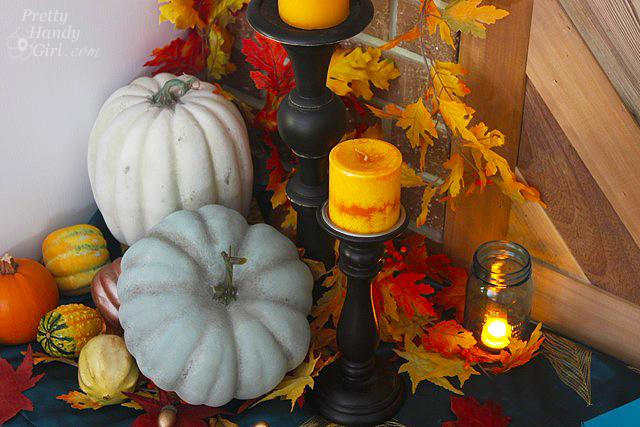
Can you spot the fakes? (If you’re having trouble, good because I have a tutorial on how to fake a fake pumpkin.)

Autumn Mantel Décor and Vignettes | Pretty Handy Girl

The fabric was a last minute purchase that I made at Pier 1 Imports. It’s actually a curtain panel. The color coordinated perfectly with my painting on the mantel.

Autumn Mantel Décor and Vignettes | Pretty Handy Girl

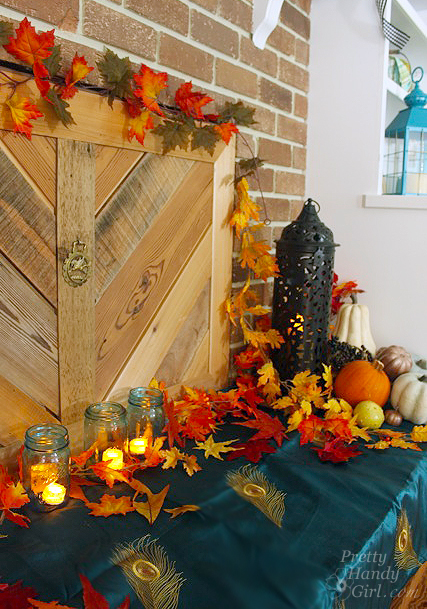
The Pottery Barn lantern fit in nicely on the other side of the hearth and added some needed height to the arrangement (it is tall despite being the small-sized lantern!) I added in my DIY PB inspired lantern for a collected look.

Autumn Mantel Décor and Vignettes | Pretty Handy Girl

Autumn Mantel Décor and Vignettes | Pretty Handy Girl

Do you have a drafty fireplace? If so, you’ll want to learn how to make this rustic fireplace insert to stop drafts!

No more drafty winter evenings and the insert is a beautiful backdrop instead of a big black hole.

Autumn Mantel Décor and Vignettes | Pretty Handy Girl

Autumn Mantel Décor and Vignettes | Pretty Handy Girl

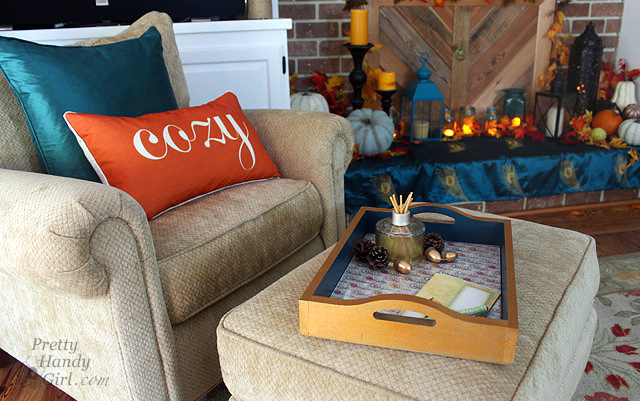
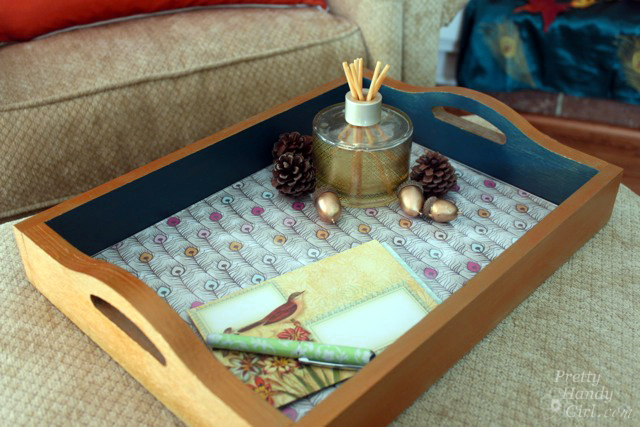
This tray was literally a quickie makeover using an old tray I had on hand. I’ll be sure to show you this transformation in the coming weeks.

Autumn Mantel Décor and Vignettes | Pretty Handy Girl

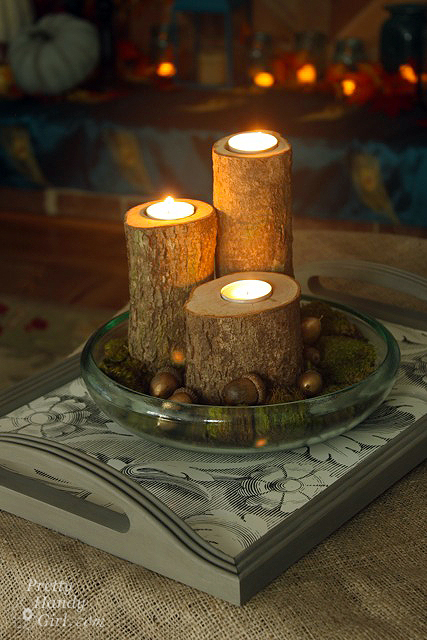
Recognize these log pillar candles from the tutorial I gave you last Christmas?

Autumn Mantel Décor and Vignettes | Pretty Handy Girl

Autumn Mantel Décor and Vignettes | Pretty Handy Girl

Autumn Mantel Décor and Vignettes | Pretty Handy Girl

Autumn Mantel Décor and Vignettes | Pretty Handy Girl

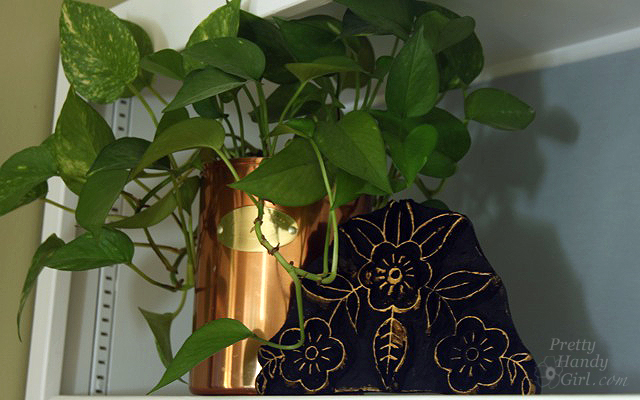
This was one of my souvenirs I brought back from our vacation in England. A printing block. I thought it was for sari printing, but I was told it was for making an impression on furniture that would then be relief carved. It was dark black until I rubbed some gold Rub n’ Buff over the raised areas.

Autumn Mantel Décor and Vignettes | Pretty Handy Girl

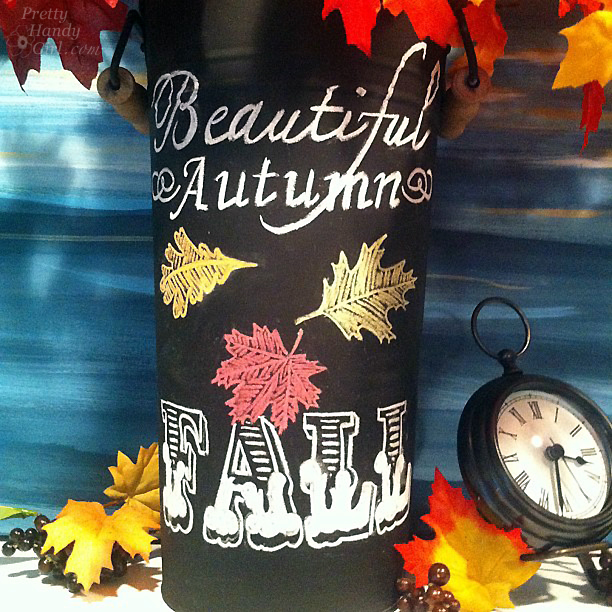
The black bucket was a yard sale find that I spray painted with chalkboard paint and added a fun message that I designed.

Autumn Mantel Décor and Vignettes | Pretty Handy Girl

Finally, I want to leave you with this little gift.  Feel free to download this Autumn inspired printable to use in your own home:

Chalkboard Autumn Free Printable - Autumn Mantel Décor and Vignettes | Pretty Handy Girl

Which was your favorite item or vignette? Are you on pins and needles waiting for a specific tutorial? Do tell.

PHGFancySign