Make Your Own Finger-Printed Star Pillows | Pretty Handy Girl

Make Your Own Finger-Printed Star Pillows | Pretty Handy Girl

Personalized finger-printed envelope star pillows are an easy and fun gift item to make. My boys and I enjoyed making these pillows for their home room teachers. We got the idea from Cristina’s beautiful seaside themed thumb print pillows.

Materials:

Make Your Own Finger-Printed Star Pillows | Pretty Handy Girl

  • Fabric (I used bleached and washed leftover drop cloths)
  • Pillow insert
  • Thread
  • Sewing machine
  • Freezer Paper
  • Fabric Paint
  • X-acto knife
  • Small Flat Brush
  • Permanent Marker
  • Scissors
  • Piping (here’s the tutorial to make your own piping)

Instructions:

Cut your front fabric with 1 inch excess around the pillow form. Cut the two back pieces of fabric with a 1 inch excess on all sides, plus allow for a 3″ overlap in the center.

Make Your Own Finger-Printed Star Pillows | Pretty Handy Girl


Fingerprinted Star Tutorial:

Here’s a great way to customize your pillow for the recipient. Let your little ones finger-print inside the star. Read more

Pros and Cons of 4 Types of Picture Hangers

Pros and Cons of 4 Types of Picture Hangers

Hello! It’s Jessica, from Decor Adventures and I’m back this month with some very handy tips to help hang items up on the wall. Do you ever wonder which picture hanger to use? Did you know there are several ways you can hang things up? From curtains to art and mirrors to lightweight decorations — there are many options for hanging (and sometimes you don’t even have to put a hole in your walls.)

I live in a 115 year old house that has both plaster and drywall, and I’ve experimented with many types of ways to hang items on the walls. Today I’ve compiled The Pros and Cons of 4 Picture Hangers.

1. Picture Hooks and Nails:

This is probably the most common way to hang up items. Simply mark where your item will go and hammer in your nail and hanger. Brittany shows you how to hang up items when putting together a gallery wall here.

insert-nails-into-hanger

Pros:

Hooks and nails come in many lengths so they can work well in most walls and are easy to use. They are also affordable and go into a wall quickly. All you need is a hammer.

Cons:

Hooks and nails don’t always work in every wall type and can rust. They can’t be used in plaster walls. When hanging heavier art, you need to find a stud to nail into. Read more


kids scooters title

Looking for a quick and easy DIY kids toy you can make at home?  Let’s make kids scooters!  Hello Pretty Handy Readers I’m Jaime from That’s My Letter here to share how to make these DIY Kids Scooters using scrap wood and a few hardware bits.

kids scooter action

My 9 year old daughter is here giving the scooter a whirl and she fits fine but it’s really my 7 year old boy who loves the scooters.  (Unfortunately, I don’t have a picture of him on a scooter, but you’ll have to trust me.)  I would say this DIY toy is aimed at kids 8 and younger as they especially love pushing each other on the scooters!

kids scooter detail

If you happen to have a piece of 2×12 scrap wood lying around then this project was made for you.  The chunky 1 1/2″ thick material is solid and sturdy and can be painted any color you choose.

kids scooters 1

Materials:

  • 1 – 2×12 @ 11 1/4″ (must be a square, measure your 2×12 first, some are 11 1/8″w)
  • 4 rotating casters (2″ wheels)
  • 2 handles
  • jigsaw
  • sandpaper
  • drill
  • 1 1/4″ self tapping screws
  • measuring tape &  pencil
  • curved object (small paint can)
  • paint


kids scooter sketch

Instructions: Read more

12 Tips to Maintain the Value of Your Car | Pretty Handy Girl

12 Tips to Maintain the Value of Your Car | Pretty Handy Girl

We’ve sold a few cars in our lives. Each time we were able to get top dollar for our used vehicles. Today I have 12 Tips to Maintain the Value of Your Car. 

(This is a sponsored post for Spiffy Mobile Car Wash, my newest favorite way to get my car washed!)

You’ve all heard the saying that a new car depreciates the moment you drive it off the lot. Although, this is somewhat true, you can prevent your car’s value from depreciating too much and too quickly by following these tips:

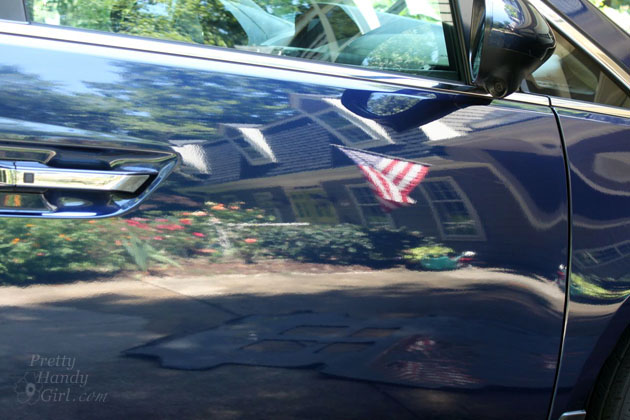
1. Keep it Clean – Leaving dirt and debris on your vehicle can cause small scratches. Worse yet, bird poop and splatters can actually damage the paint. A regular cleaning is going to keep your car in tip top shape.

As you know, those inexpensive drive thru car washes don’t get your car completely clean, especially on the inside. But, do you really have time to drop off your car to a mobile detailer? That’s where Spiffy Mobile Car Wash can help. They come to your home or place of business and clean your car while you work or chase the kids.

12 Tips to Maintain the Value of Your Car | Pretty Handy Girl

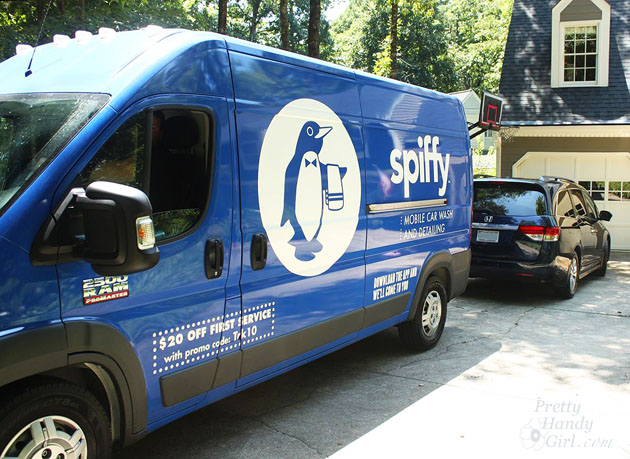
All you have to do is download the app and select your service and appointment time. Then watch as your car gets cleaned from the inside out. I’ll give you more details about the service at the end of these tips.

2. No Salt – If you live at the beach or in a harsh winter area, salt can break down your car’s paint and cause metal to rust much faster. It’s important to keep your car protected with frequent car washes and wax your vehicle’s exterior. (Spiffy Mobile Detail can do this for you if you chose the 3,4, or 5 service!)

3. Change Your Oil Regularly – Help your car’s engine run smoothly for a long time by keeping up with your oil changes. Depending on the age of your vehicle, oil changes are recommended every 3,000 – 5,000 miles. Be sure to keep your receipts to show potential buyers that your car was well cared for.

4. Check Fluids – Make sure to check your car’s fluid levels at least once a month. You can check the fluids yourself or ask a mechanic to check for you. Top off engine oil, windshield wiper fluid, transmission fluid, power steering fluid, coolant, and brake fluid if they are low. As an easy reminder, ask your mechanic to check and top off fluids at every oil change. Read more

Top 15 Painting Tools

I have painted almost every room in our home now. Make that almost every room in two homes! You could say that over the years I’ve learned a few tricks of the trade and have acquired quite a few painting tools. But, only a handful are my tried and true gear that get pulled out for every painting job. These are my Top 15 Must Have Painting Tools!

Here they are (affiliate links included):

Top 15 Must Have Painting Tools

1. ScotchBlue Tape with Edge-Lock:

Top 15 Must Have Painting Tools

Painter’s tape is a necessity for clean lines. I’ve been using ScotchBlue for years and I can tell you that the painter’s tape you used 5 years ago has changed. ScotchBlue is constantly researching and developing better painting products every year. We always have a supply of ScotchBlue in my tape drawer and we definitely go through it!

2. Pro Masker 2000:

Top 15 Must Have Painting Tools

I used to be a taper and taped off every room we painted. (Now, I’ve gotten much better at cutting in with just a brush.) In a desperate attempt to save time, I bought this paint tape dispenser and was thrilled to shave some time off my taping tasks. You can watch a brief video here. I still tape off some edges when I know it will take me more time to be meticulous than to tape off some trim.

3. Metal Paint Tray with Hooking Legs (and Plastic Bags):

Top 15 Must Have Painting ToolsI have a no-frills metal paint tray. It has legs that can hook onto a ladder, which comes in handy when painting high on a ladder. This paint tray is the first and last tray you’ll ever need because you can line it with plastic grocery bags for easy clean up and for protecting the tray from a multitude of layers of paint.

Top 15 Must Have Painting Tools

4. Paint Mixing Drill Attachment:

 Paint Mixer Attachment

Okay, I know you already know how much I love my cordless drill. Which is why you’ll understand why I jumped at buying this paint stirrer drill attachment just to have an excuse to pull out my drill for another project! Honestly, unless you like the slow process of thoroughly mixing old paint or blending colors, you’ll want one of these for your own. It makes your paint super smooth and creamy. Mmmmm.

5. Paint Pail with Handle:

Top 15 Must Have Painting Tools

Having a small pail to hold paint for painting trim while balancing on a ladder just makes sense (unless you like step aerobics.) This handheld paint pail has a magnet inside that will keep your paint brush from being completely submersed. It’s lightweight and easy to hold in one hand while you brush with the other.

6. Shurline Edge Like a Pro: Read more