Tag Archive for: diy

Hostess gift ideas pinterest image

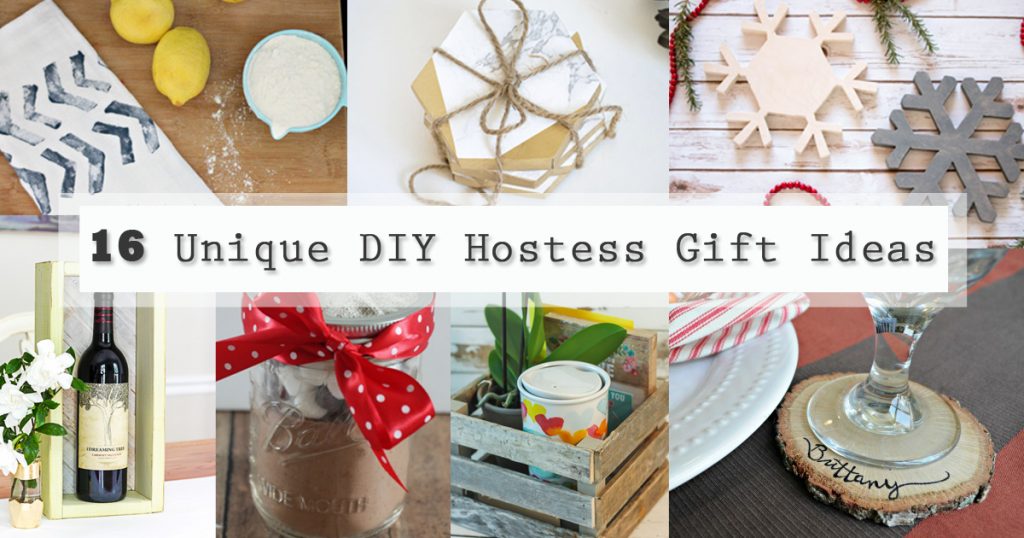
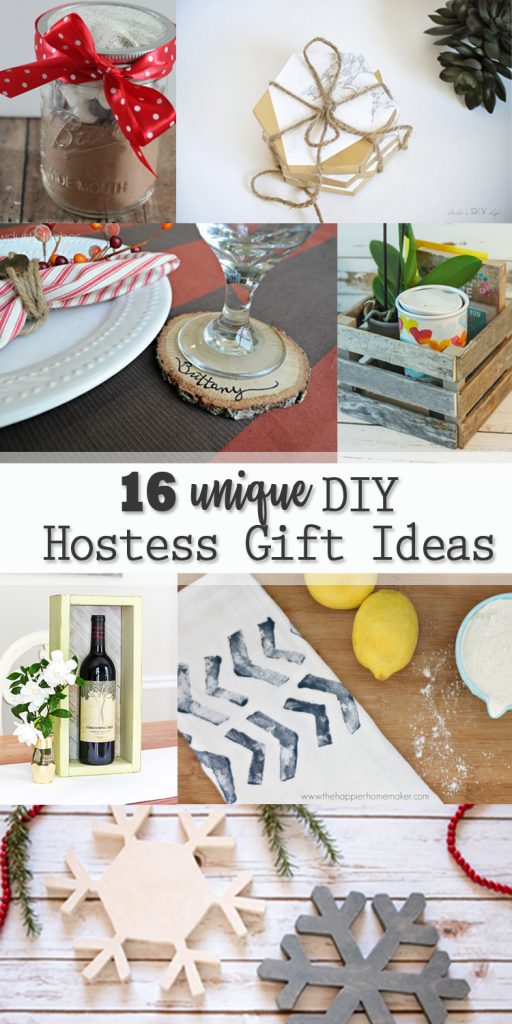
Hostess Gift Ideas social media image16 Unique DIY Hostess Gift Ideas

Holiday festivities are about to begin, and you don’t want to arrive to those parties empty-handed! Thank your hostess by bringing a thoughtful and personal gift that is sure to put a smile on his or her face. Here is a collection of Unique DIY Hostess Gift Ideas!

YEAR-ROUND IDEAS

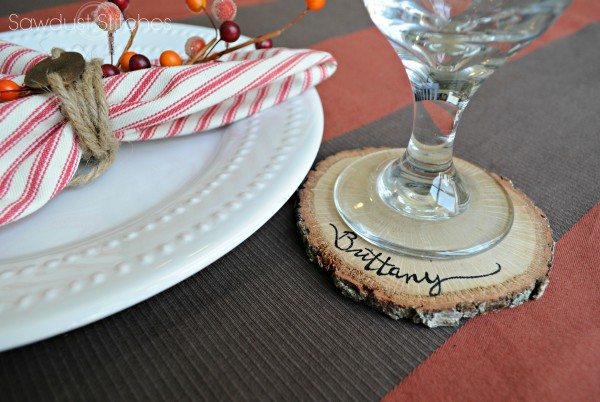
Hostess Gift Ideas - Personalized Wood Slice Coasters

Give your hostess something unique like these Personalized Wood Slice Coasters.


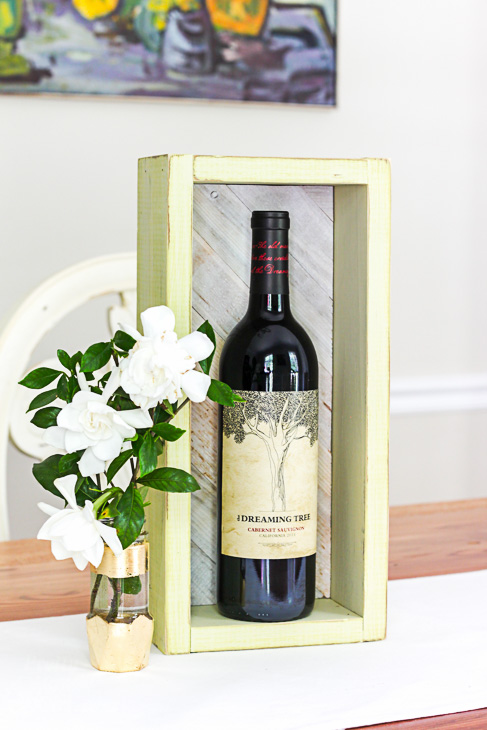
Hostess Gift Ideas - DIY Gift Tray Box

Add wine or a few small items to this DIY Gift Tray Box for a sweet thoughtful gift.


Hostess Gift Ideas - Gold and Marble Coasters

These Gold and Marble Coasters would make a sleek gift for your next dinner party hostess.


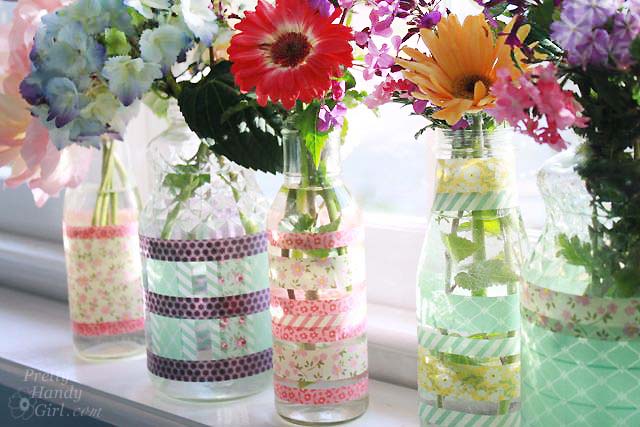
Hostess Gift Ideas Washi Tape Vase

Add some flowers to a Simple Washi Tape Vase for a beautiful gift at the next party.


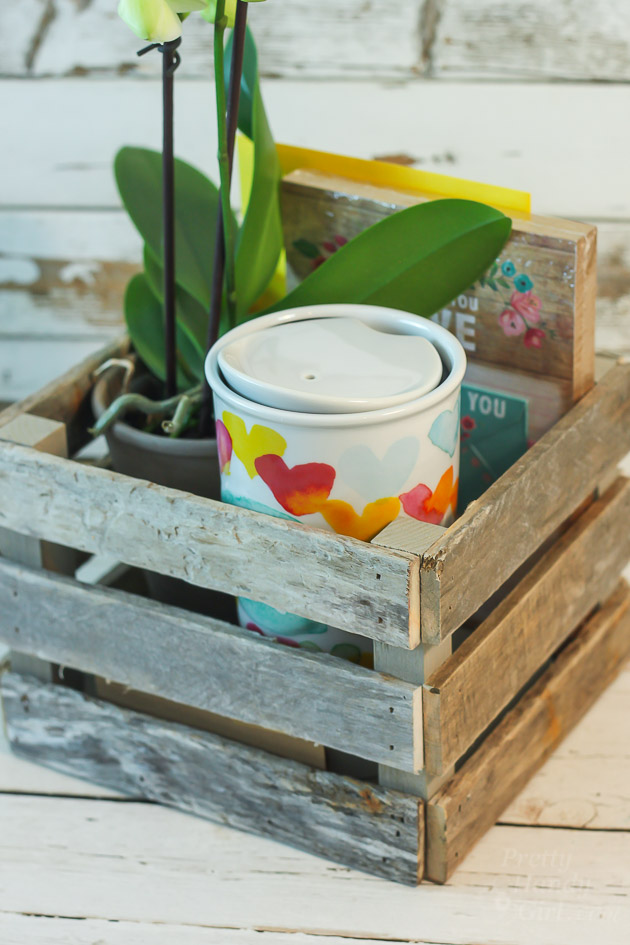
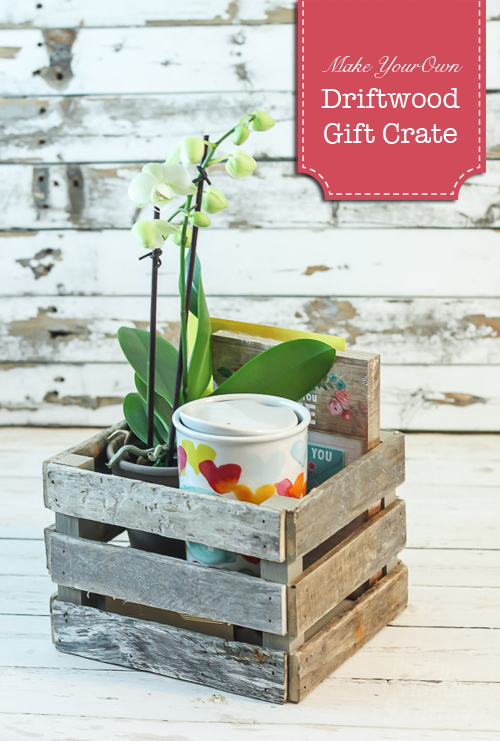
Hostess gift ideas Drift wood Gift CrateBuild a Driftwood Gift Crate and fill it with some items as a kind gesture.


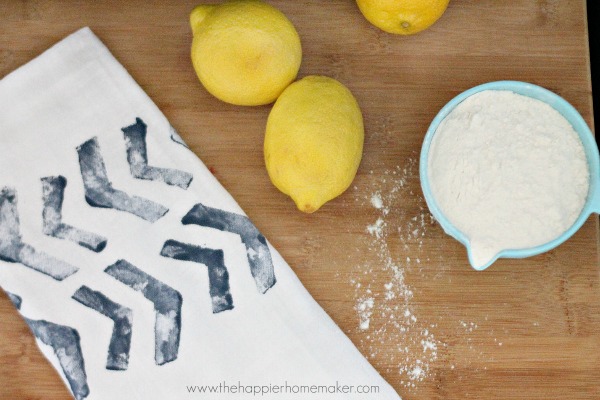
Hostess Gift Ideas - Block Print Stamped Tea TowelDoes your hostess love to work in the kitchen? Make some custom Block Print Stamped Tea Towels.


Hostess Gift Ideas - Eat Your Veggies Cloth Napkin Gift SetThis “Eat Your Veggies” cloth napkin set is sure to be the perfect gift for the hostess with a good sense of humor.


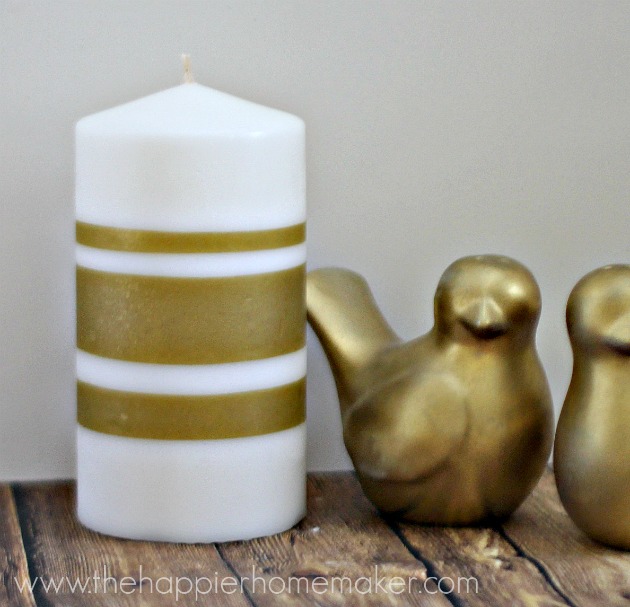
Hostess Gift IdeasFor a hostess who loves gold touches in her home decor, these Tissue Paper Candles would be a perfect thank you.


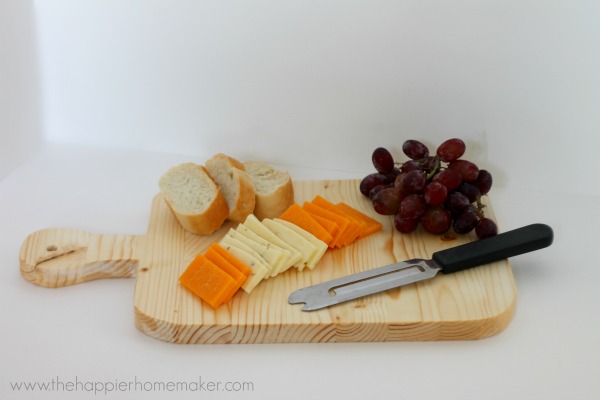
Hostess Gift Ideas - DIY Cutting BoardHow about a custom DIY Cutting Board for your next hostess gift? Useful and beautifully crafted.


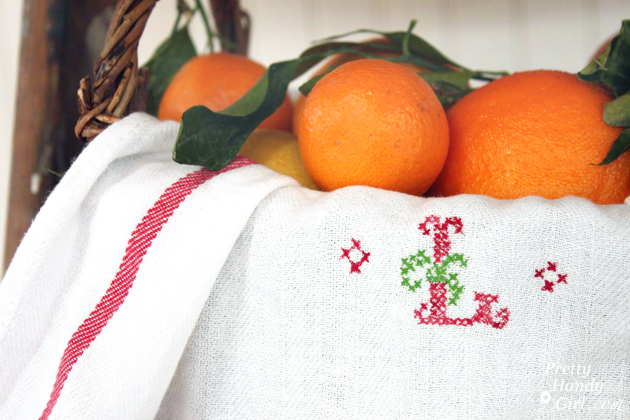
Hostess Gift Ideas - DIY Faux cross stitch Tea TowelImpress your host with this adorable Faux Cross-stitch Tea Towel that is sure to make a lasting impression.


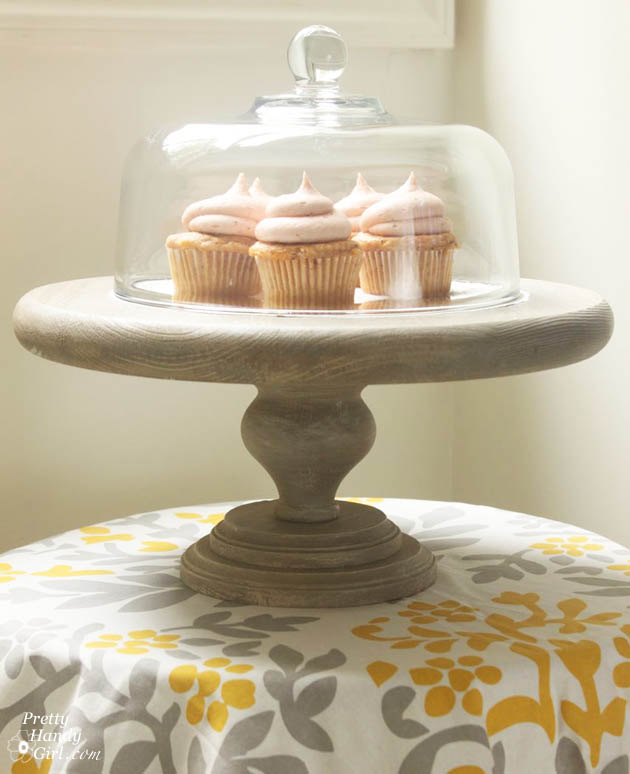
Hostess Gift Ideas - rustic cake standDoes your hostess love to bake? Make this amazing Rustic Cake Stand!

HOLIDAY IDEAS

Hostess Gift Ideas - DIY Snowflake Christmas Trivets

These Snowflake Christmas Trivets would be the perfect gift to keep the table festive and protected.


Hostess Gift Ideas - Paper Bag Ornaments

A Paper Bag Ornament would be a sweet holiday gift for their tree.


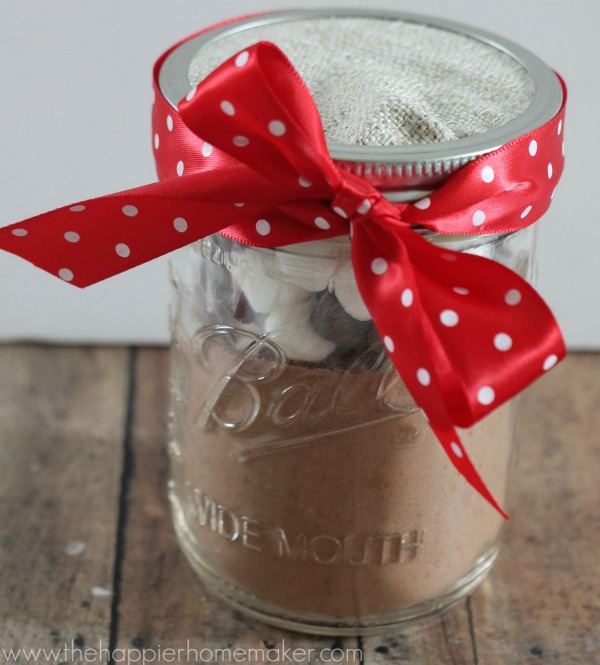
Hostess Gift Ideas - Hot Cocoa Mix in a JarMake your dear friend some Hot Cocoa Mix in a Jar as a thank you for their next holiday gathering.


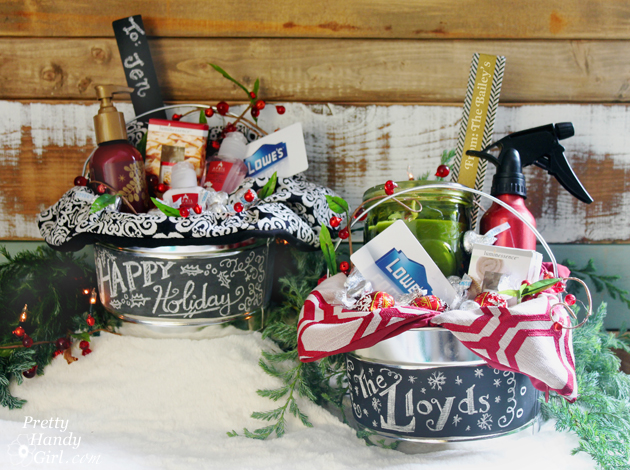
Hostess Gift IdeasAdd some fun items to this Customized Gift Paint Can for a unique and fun gift! (This would also make a fabulous housewarming gift.)


Hostess Gift Ideas - Chalkboard Paint MugsAn adorable set of Chalkboard Painted Mugs would make the perfect gift for a holiday hostess.

I hope this post gave you some great ideas for gifts that you can give to show appreciation for your hostess! We all know how much work goes into a party or gathering. Giving thoughtful gifts is a sure way to keep the invites coming!

If you like this roundup, please Pin this image:

Hostess gift ideas pinterest image


Here are some other posts you might like:

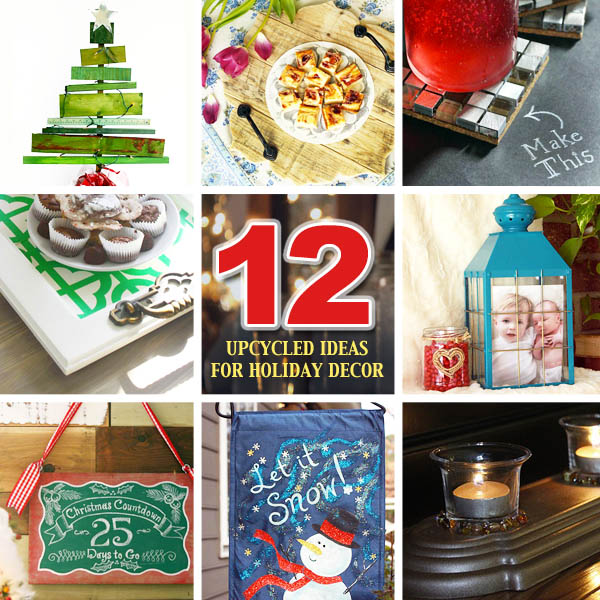
Holiday Decor Ideas12 Great Upcycled Ideas for Holiday Decor


Creative gift wrap ideas21 Creative Gift Wrapping Ideas


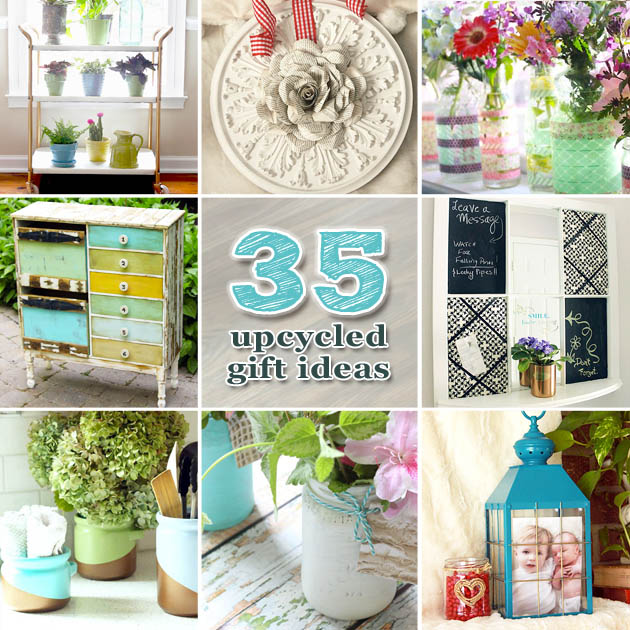
35 upcycled gift ideas35 Upcycled DIY Gift Ideas

8. Complete with "L" brackets on corners. Add gifts and deliver!

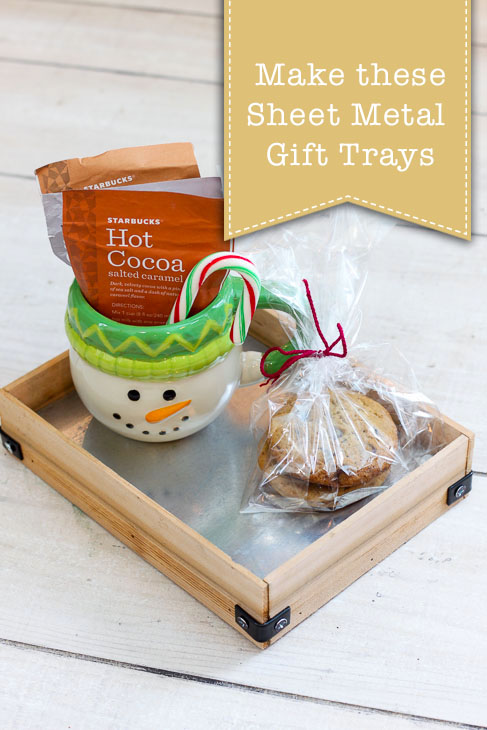
DIY Sheet Metal Gift TraysDIY Sheet Metal Gift Trays

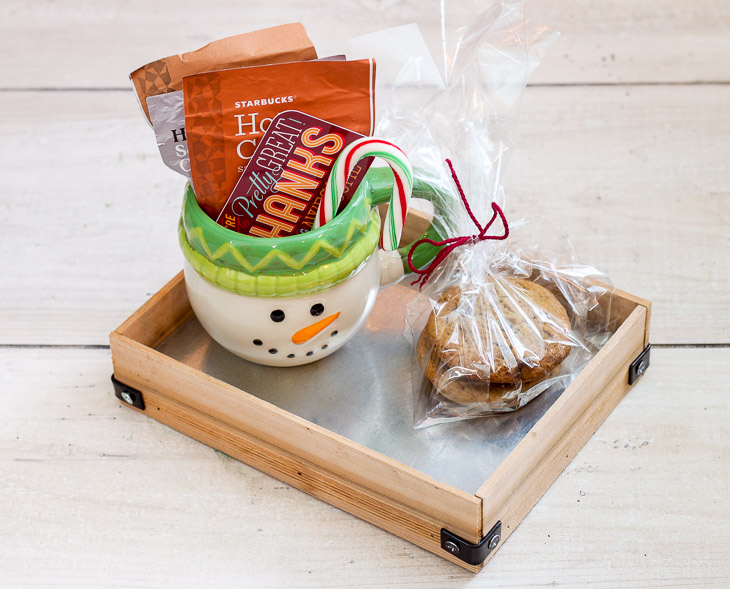
The holidays are fast approaching and it’s time to start thinking about gift giving ideas! Gift trays are a great way deliver gifts to your friends, neighbors or teachers. The best part of a gift tray is it can be reused for anything they want and nothing goes to waste! Follow along with this tutorial to see how to make these DIY Sheet Metal Gift Trays.

Materials:

(I’ve included affiliate links for your convenience. I earn a small percentage from a purchase using these links. There is no additional cost to you. You can read more about affiliate links here.)

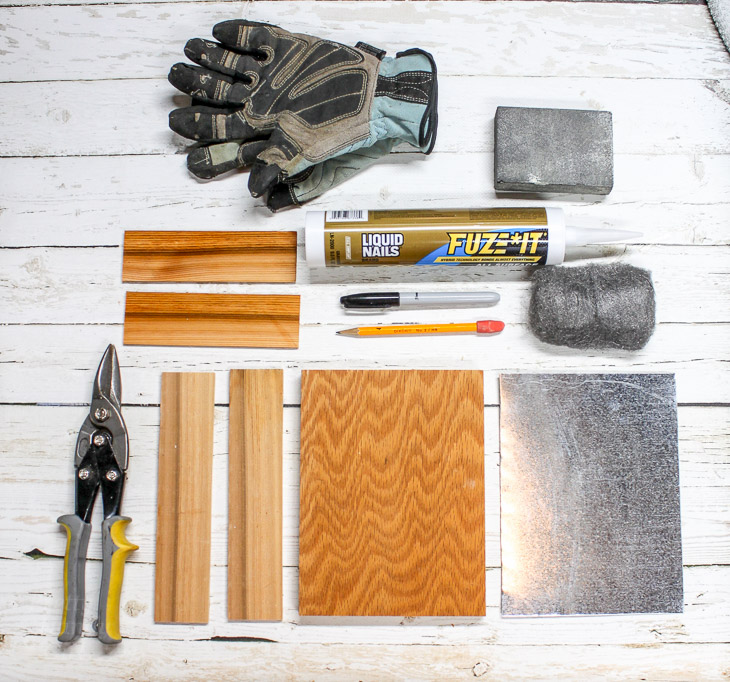
Materials: Sheet Metal Gift Tray

  • 1/2″ or 3/4″ Plywood scrap wood
  • 2″ pieces of lathe or scrap moulding
  • [amazon_textlink asin=’B000W49NPC’ text=’Sheet metal scrap’ template=’ProductLink’ store=’prett-wp-001-20′ marketplace=’US’ link_id=’4f103892-cbe2-11e7-a00c-3fda84932599′] (large enough to cover plywood base)
  • [amazon_textlink asin=’B00009OYFY’ text=’Sheet metal snips’ template=’ProductLink’ store=’prett-wp-001-20′ marketplace=’US’ link_id=’56db011a-cbe2-11e7-88c9-230adf5bdb2c’]
  • [amazon_textlink asin=’B000S7ZSTS’ text=’Construction adhesive’ template=’ProductLink’ store=’prett-wp-001-20′ marketplace=’US’ link_id=’65c9549d-cbe2-11e7-8619-39ed35fc6585′]
  • [amazon_textlink asin=’B000DZF2Q4′ text=’Caulk gun’ template=’ProductLink’ store=’prett-wp-001-20′ marketplace=’US’ link_id=’6d3fe28c-cbe2-11e7-bb25-e144f3be5a89′]
  • [amazon_textlink asin=’B00125NQBC’ text=’Sandpaper’ template=’ProductLink’ store=’prett-wp-001-20′ marketplace=’US’ link_id=’7f0ff979-cbe2-11e7-b34f-fb2f071c5869′]
  • [amazon_textlink asin=’B001JYVDSE’ text=’Steel wool’ template=’ProductLink’ store=’prett-wp-001-20′ marketplace=’US’ link_id=’8e654c5e-cbe2-11e7-b495-0ffc93a9294c’]
  • [amazon_textlink asin=’B01I7DNOYA’ text=’Gloves’ template=’ProductLink’ store=’prett-wp-001-20′ marketplace=’US’ link_id=’b09e21ba-cbe2-11e7-91af-d908a698cd02′]
  • Drill
  • Pencil or Marker
  • 4 – [amazon_textlink asin=’B01N6NID4X’ text=’L brackets’ template=’ProductLink’ store=’prett-wp-001-20′ marketplace=’US’ link_id=’de9d5670-cbe2-11e7-84b2-2f143e838863′] and 1/2″ wood screws
  • [amazon_textlink asin=’B001PNH8D8′ text=’Brad nails ‘ template=’ProductLink’ store=’prett-wp-001-20′ marketplace=’US’ link_id=’0337c2d4-cbe3-11e7-b1d7-3dfa06c67bf1′]Nail gun

Instructions:

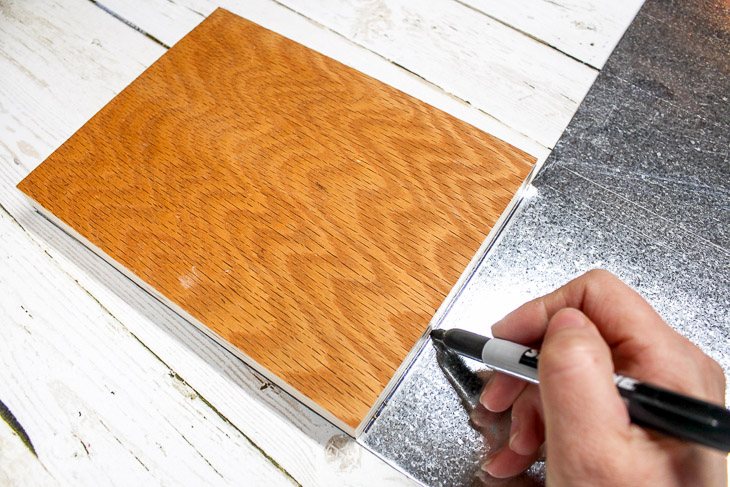
Cut your piece of plywood to the desired size for the tray base. Lay the plywood base on top of the sheet metal and trace with a permanent marker. Use tin snips to cut the metal to size.

1. Cut base and mark sheet metal size.

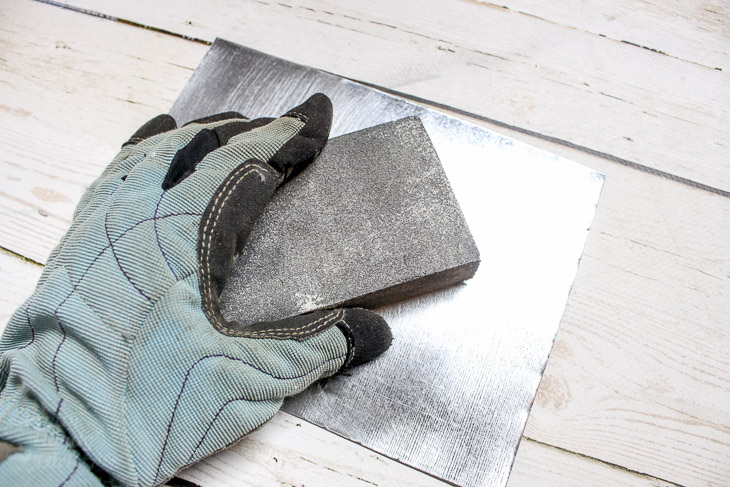
Put on your safety gloves and use the sanding block to remove some of the shine from the sheet metal. Smooth over any sharp edges.

2. Sand Sheet metal edges and base.

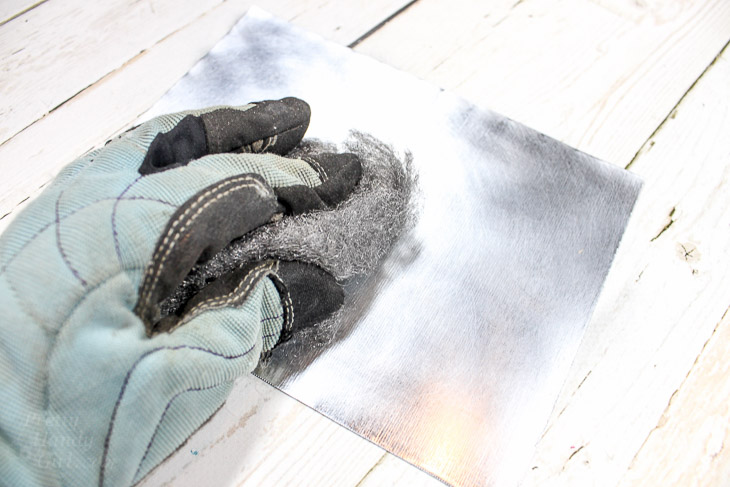
Rub the steel wool over the entire sheet metal piece to give it a soft polished finish.

4. Use steel wool to dull sheet metal surface.

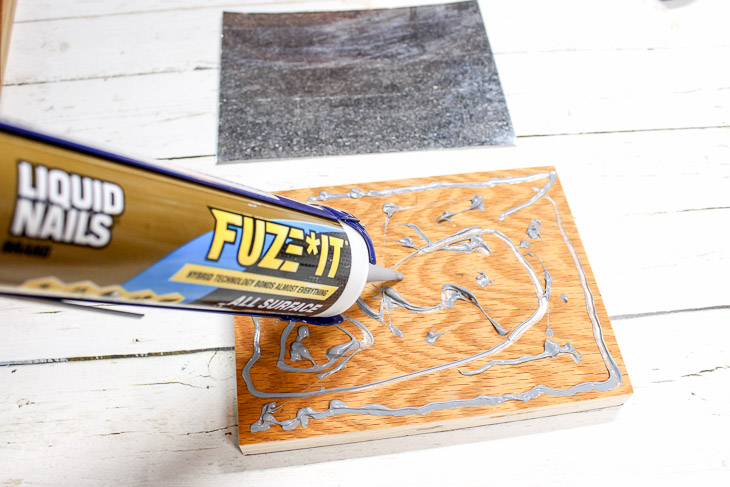
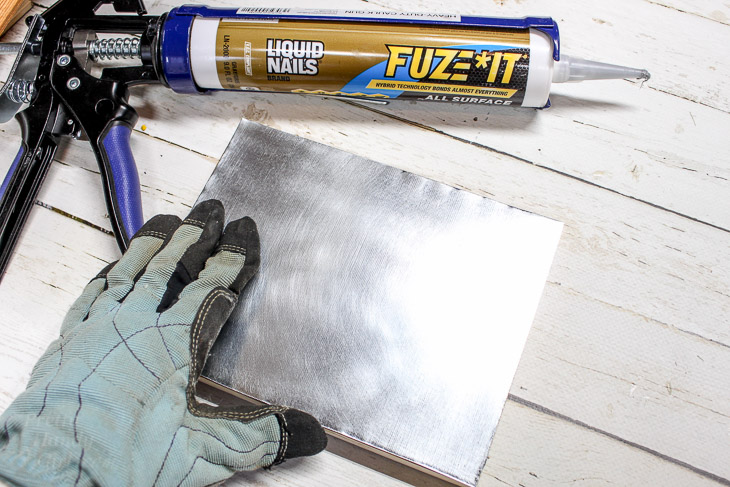
Load a tube of construction adhesive into your caulk gun. Apply a fair amount of adhesive to the plywood. Glue the sheet metal to the top of the plywood.

5. Add Construction Adhesive to wood base

Press the sheet metal down evenly on top of the adhesive. Wipe off any excess if needed with a paper towel.

6. Press sheet metal on top of wood base.

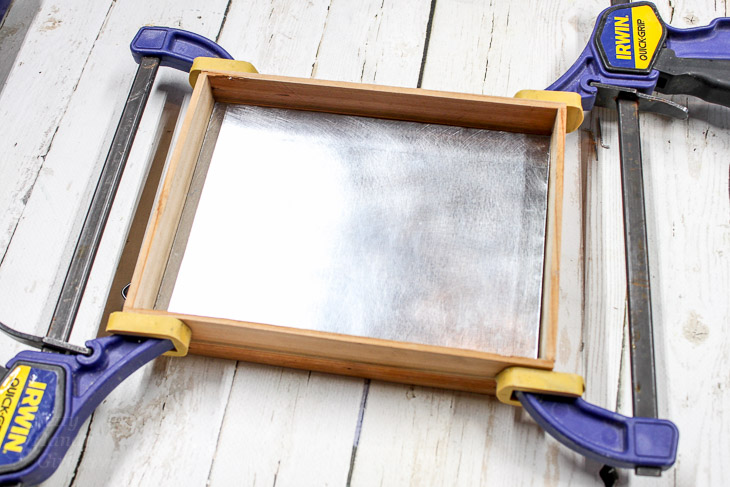
Cut the 2″ pieces of lathe or scrap moulding to the length of the two shorter sides. Next, measure and cut two pieces of lathe for the long ends. (Be sure to allow extra length to overlap the short pieces of lathe/moulding.  Use the construction adhesive and brads to secure the lathe to the sides of the plywood. Clamp the sides until the adhesive cures.

8. Clamp sides while glue cures.

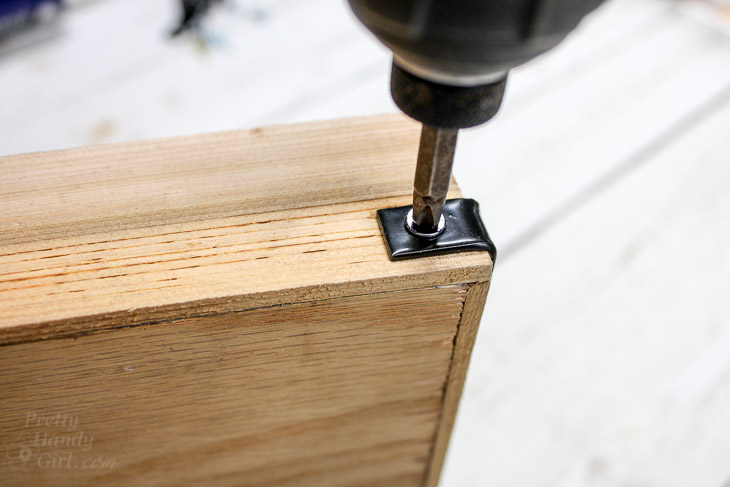
Once the adhesive is cured, remove your clamps. Attach the L brackets on the lower half of each corner using 1/2″ wood screws. The L brackets will reinforce the sides and add an industrial look.

9. Add corner brackets for extra support and decoration.

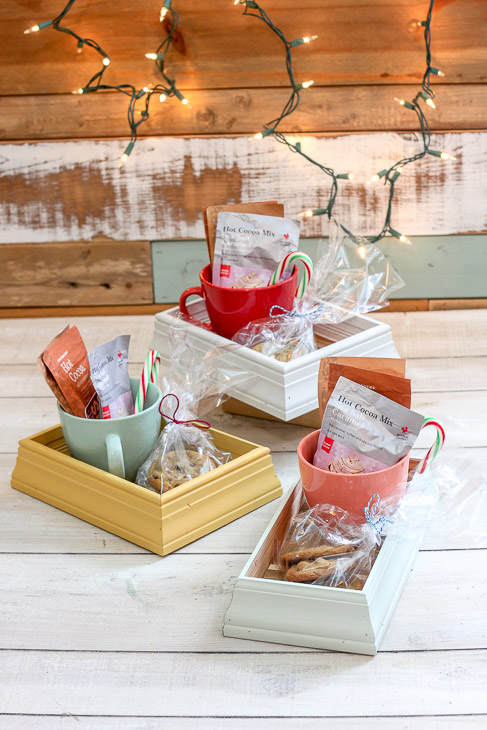
There you have it! These DIY Sheet Metal Gift Trays are easy to make, look great, and are an extra special and environmentally-friendly way to give gifts!

10. Add gifts and deliver!

I hope you love this project. Do you have other ideas for quick gift giving? Please share!

Want some more gift giving inspiration?

DIY Scrap Moulding Trays

scrap-moulding-trays

Make a Driftwood Gift Crate

Make a Driftwood Gift Crate | Pretty Handy Girl

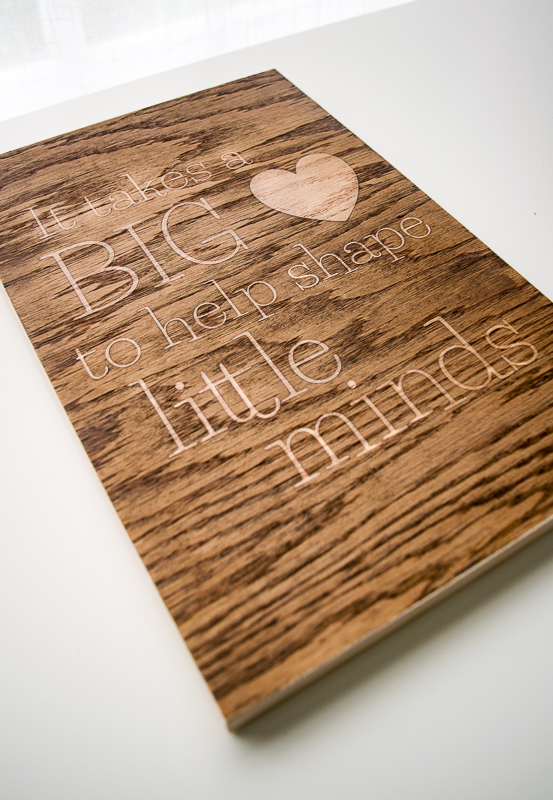
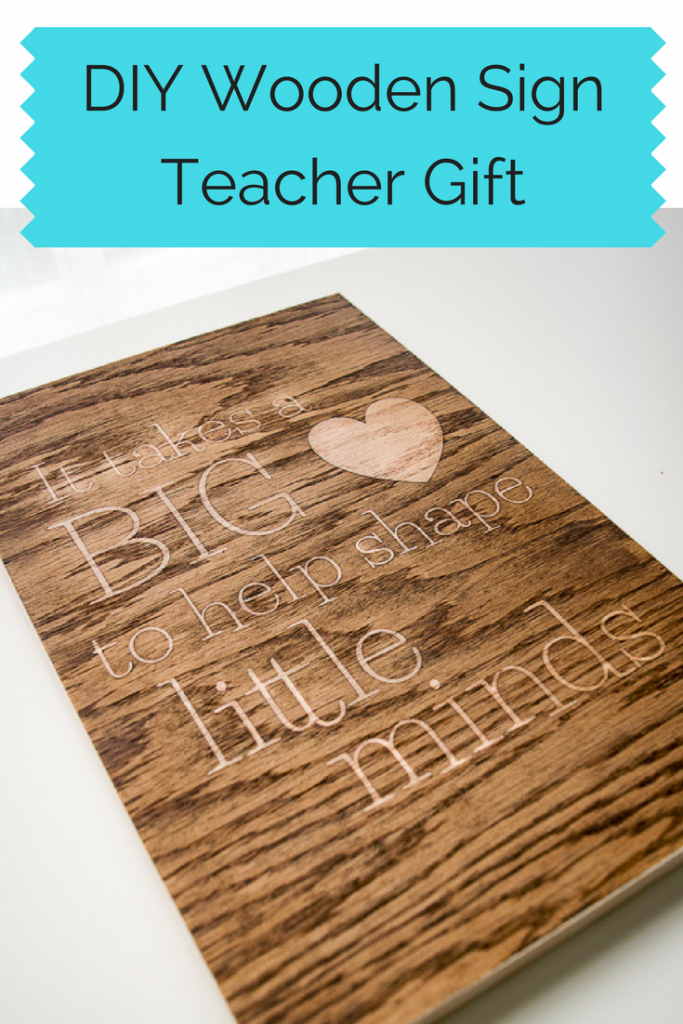
This teacher sign is the perfect end-of-year gift!

This wooden sign would make the perfect end-of-school-year gift for your child's teacher!

Hi everyone! It’s Vineta from The Handyman’s Daughter back with another fun project to share with you! It’s almost the end of the school year, and I’ve been racking my brain to come up with a nice gift for my son’s second grade teacher. Hopefully this little wooden sign will make its way into her classroom next year and reminds her of how much she means to her students.

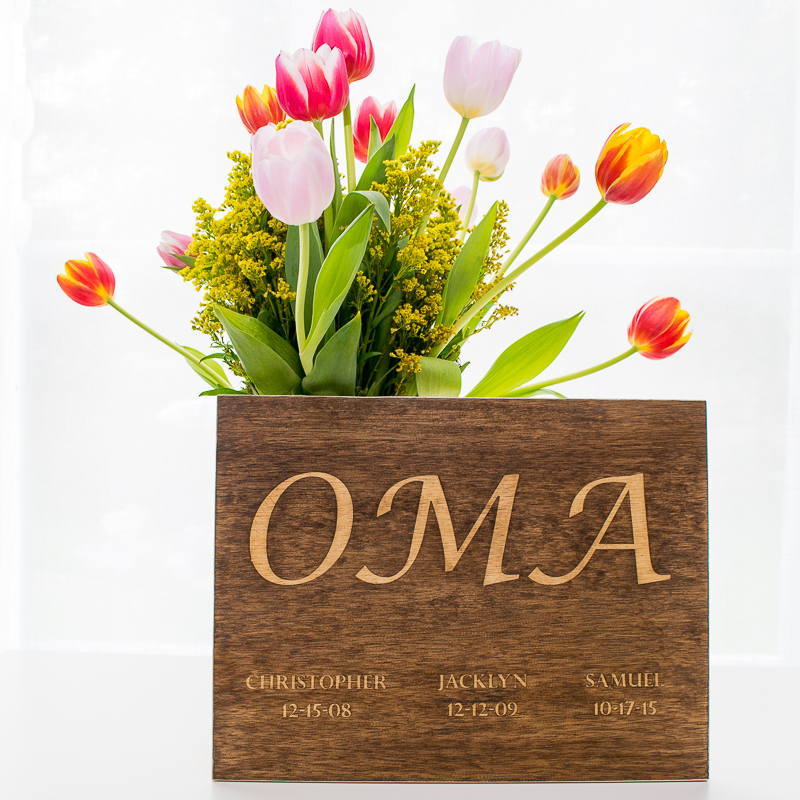
I used one of my favorite stencil techniques, on this family birthdate sign I created for Mother’s Day. The reverse stencil effect appears almost like magic when stain is applied!

This family birthdate sign uses the same staining technique as the teacher sign!

We’re going to use the same technique for this DIY Teacher Sign. Here’s how it works!

Materials:

(I’ve included affiliate links for your convenience. I earn a small percentage from a purchase using these links. There is no additional cost to you. You can read more about affiliate links here.)

Instructions:

I started by digging through my wood pile for some scrap plywood and unearthed a 9″ x 12″ piece that would work perfectly. Remove any dust from the surface with a tack cloth.

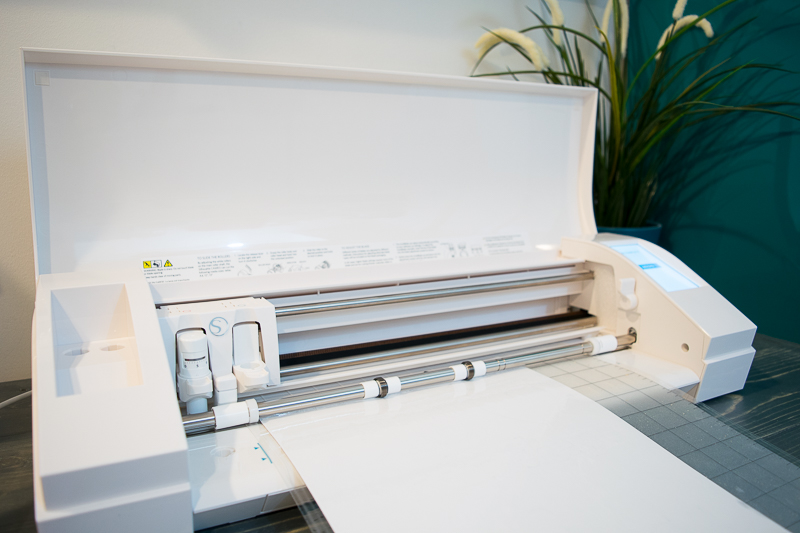
You can choose from one of the many designs in the Silhouette Store (I used this one), or design your own. Apply the white stencil vinyl to the cutting mat and let the machine do the cutting.

I used a Silhouette machine to cut the stencil for my teacher sign.

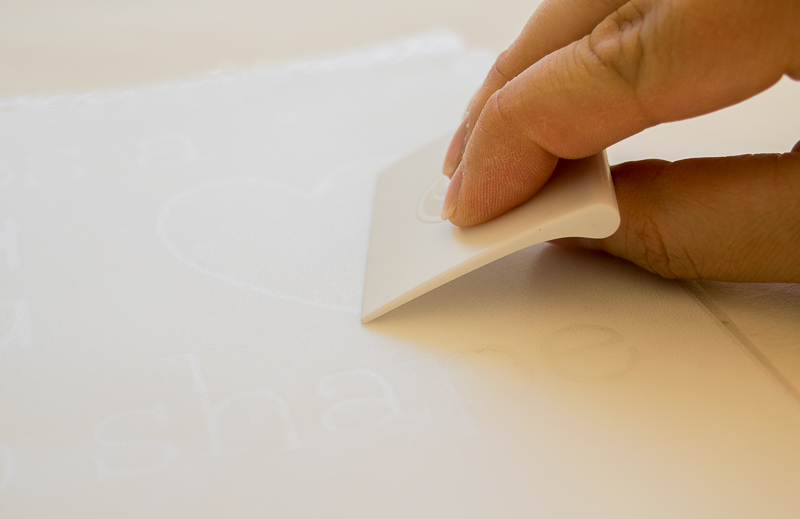
Weed out the letters and shapes, then lay the transfer tape on top of the design. Use the smoothing tool to push out any air bubbles and ensure that the stencil is on securely.

Apply transfer tape to the stencil to keep all the elements in place.

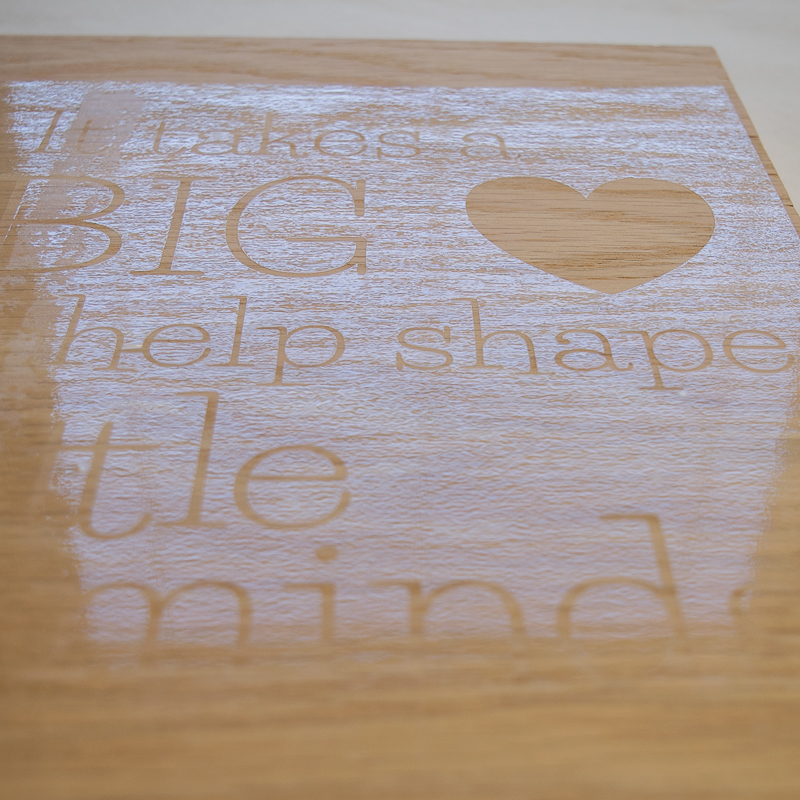
Peel up the stencil and transfer tape together. Apply it to the plywood. Smooth out any air bubbles, then remove the transfer tape. The stencil should remain. Give the stencil one last rub, concentrating on the edges of the letters and shapes.

Apply the stencil to the plywood for your teacher sign.

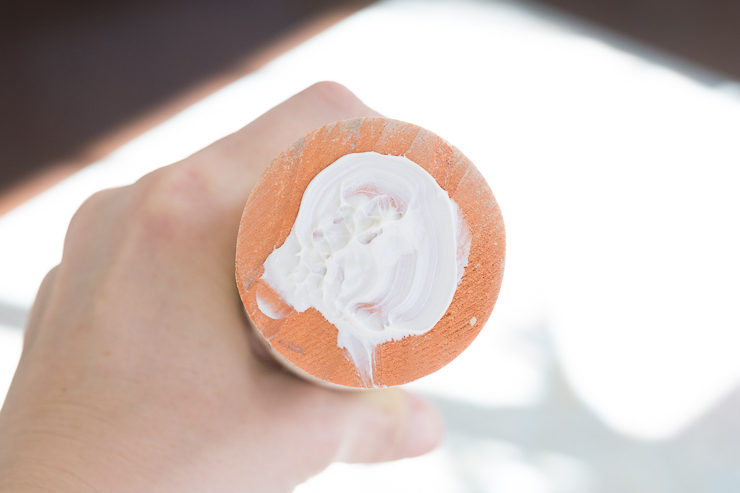
Here’s the trick to this stenciling technique: wood glue! Have you ever discovered a big blob of wood glue preventing stain from soaking into your project? We’re going to take advantage of that instead of fighting it!

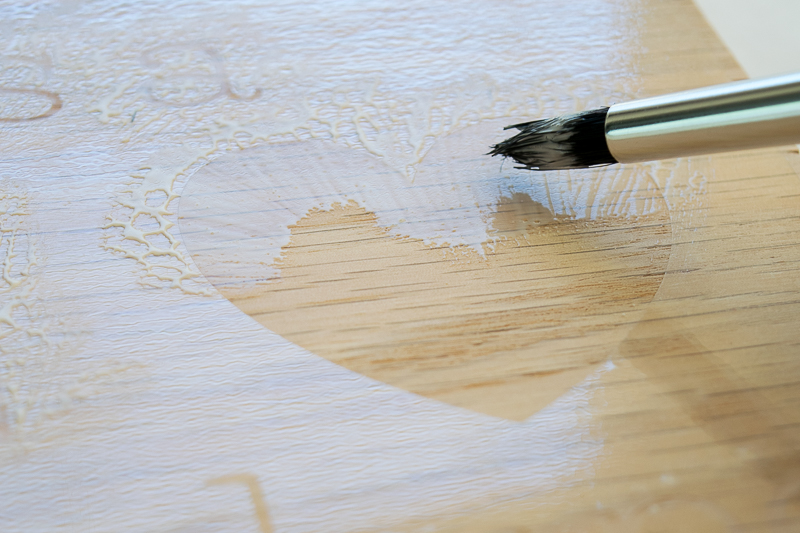
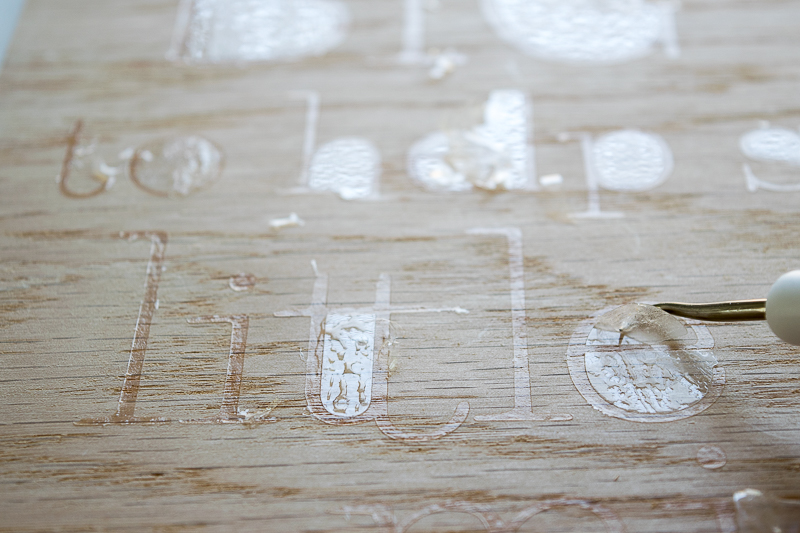
Dip your craft brush into the wood glue and carefully paint a thin layer inside the stencil. Move from the outside in, and try not to get any glue under the stencil vinyl. Allow it to dry for at least half an hour and the wood glue has turned clear.

Apply wood glue to the voids in the stencil, ensuring even coverage on all the letters of the teacher sign.

Carefully remove the stencil from the plywood. Some of the wood glue may flake off or stick to the letters. Use the fine grit sanding sponge to remove any excess. Anything with glue on it won’t take the stain, so make sure the edges are as sharp and clean as possible.

Remove any excess glue flakes from the stencil of the teacher sign.

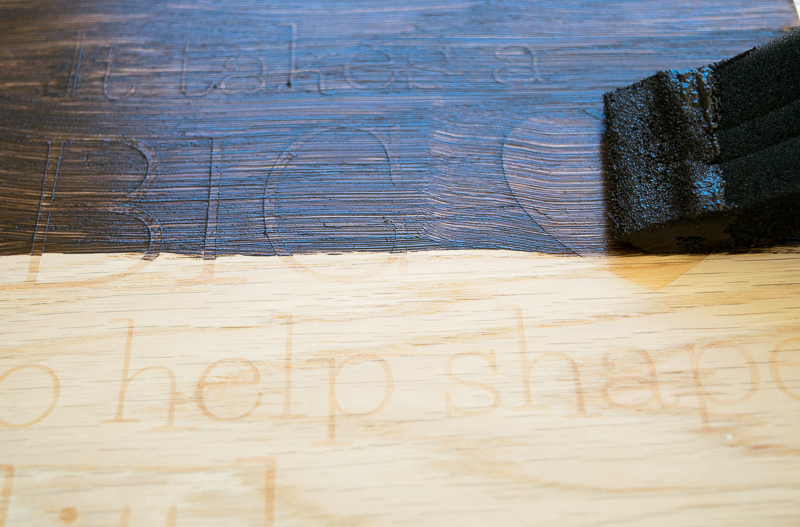
Using a foam brush, stain the surface of the sign. Gel stain works best for this technique.

Use gel stain over the glue stencil of the teacher sign.

After a few minutes, rub off the excess. I prefer to stick my gloved hand in an old sock to wipe off the surface. Like magic the letters pop against the dark stain!

Using an old sock, I removed the excess stain from the stencil.

If you prefer more contrast, apply a second coat of stain. I found that thicker fonts and dark stain show up best. Apply a coat of poly over the surface to protect the surface and give it a glossy finish.

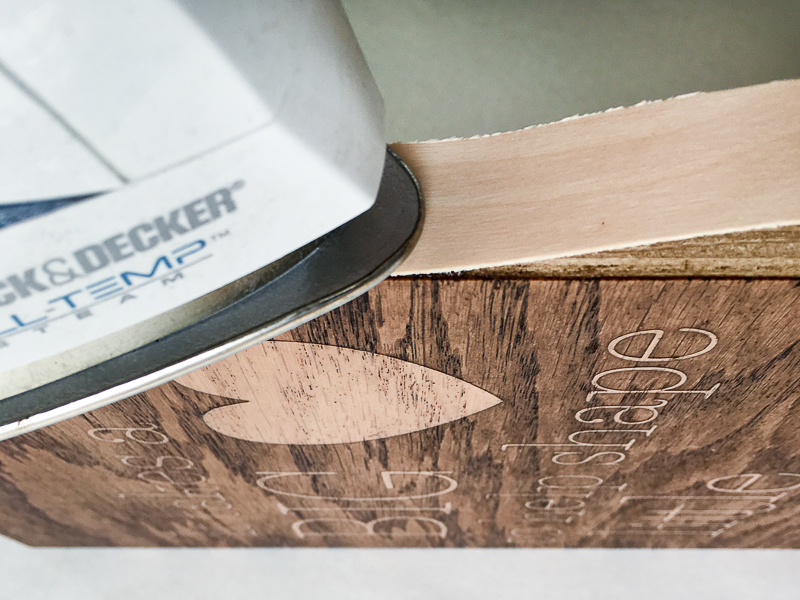
Use iron-on wood veneer edge banding to cover up the plywood edges and cut off the excess with a utility knife. Brittany has a great tutorial on how to apply edge banding. You could also create a simple frame using trim.

Iron on the edge banding to cover up the raw plywood edges of the teacher sign.

Your teacher sign is ready for the last day of school (although I’m not!)

This teacher sign is the perfect end-of-year gift!

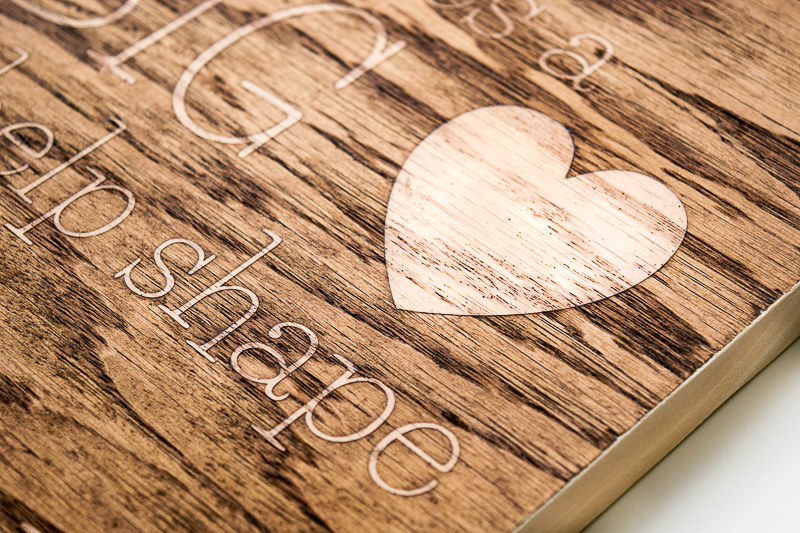
This stenciling technique really makes the lettering pop against the wood stain of this teacher sign!

Hope you enjoyed this tutorial! Don’t forget to check out all my other woodworking projects over at The Handyman’s Daughter!

Until next time!

 ~ view more of Vineta’s projects ~

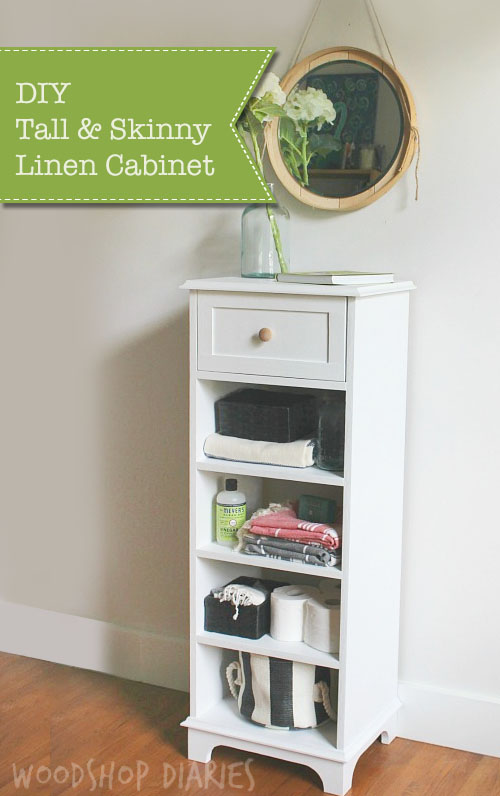
Tall & Skinny Storage Cabinet

How to Build a DIY Tall, Skinny Linen Cabinet

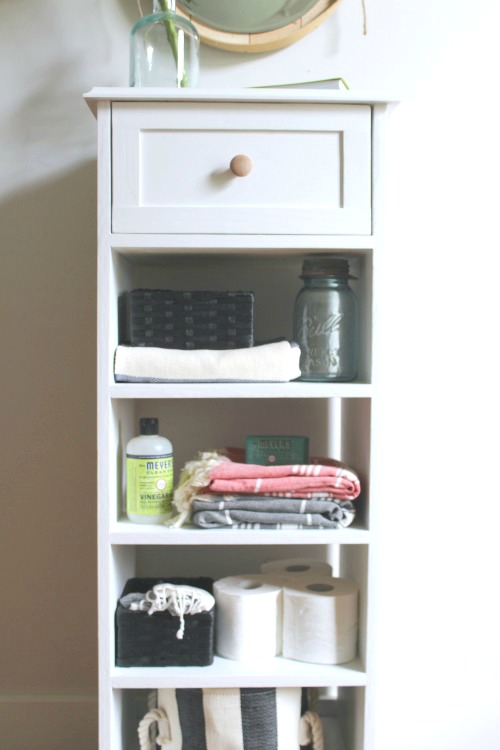
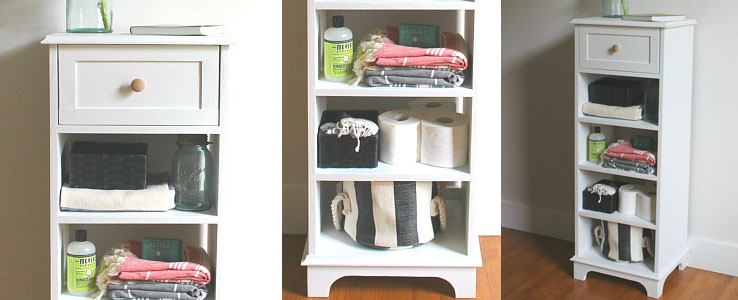
Hey everyone!! It’s Shara from Woodshop Diaries back to show you How to Build a Tall & Skinny Storage Cabinet. This storage unit works perfectly as a bathroom linen cabinet. Of course, it could work elsewhere besides a bathroom. An entryway would make another perfect spot for it.  I use mine in the bathroom because it is the perfect size for towels, toilet paper rolls, baskets, and cleaning supplies.

If you need something a bigger, you can check out this “whatchamacallit” cabinet that would be really cute for storing linens and such. Ready to learn How to Build a Tall & Skinny Storage Cabinet? Let’s gather a few items and get building.

Tools:

(I’ve included affiliate links for your convenience. I earn a small percentage from a purchase using these links. There is no additional cost to you. You can read more about affiliate links here.)

Materials:

Cut List:

For Cabinet:

  • (2) 3/4″ x 13″ x 40″ plywood
  • (5) 3/4″ x 13″ x 14½” plywood
  • (1) 3/4″ x 13″ x 16″ plywood
  • (2) 1″ x 4″ x 13″ (beveled 45 degrees on one end)
  • (1) 1″ x 4″ x 16″ (beveled on both ends)
  • Cove molding cut to fit

For Drawer:

  • (2) 3/4″ x 5½” x 12″ plywood (for drawer sides)
  • (1) 3/4″ x 5½” x 12¾” plywood (for drawer back)
  • (1) 3/4″ x 7″ x 14¼” plywood (for drawer front)
  • (1) 1/4″ x 12″ x 14¼” plywood (for drawer bottom)

Instructions:

Cut down your 3/4” plywood. I used a Kreg Rip Cut to help with this, but you could also use a straight edge with your circular saw, or skip the circular saw altogether and use a table saw.

Cut your plywood into two 13” wide strips. Then, cut two pieces at 40” long. You will also cut five pieces at 14 ½”. And finally, one piece at 16” long. Did you get all that?? Lots of cutting at first, but the rest is easy 🙂
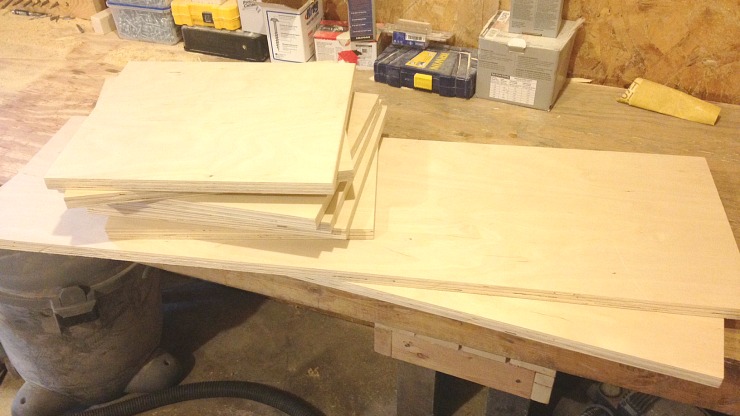
Cut plywood pieces to size

Drill pocket holes into both ends of all five of the 14 ½” pieces…
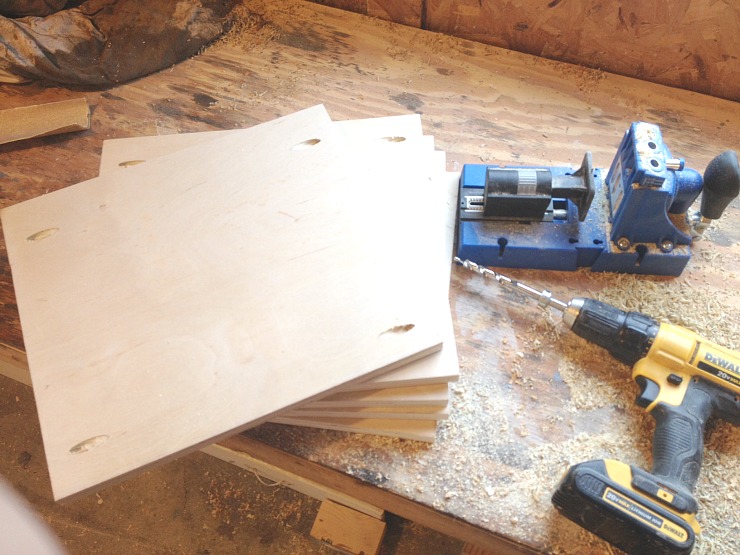
Drill pocket holes into the 5 shelves

…and into only ONE end of the 40” pieces.
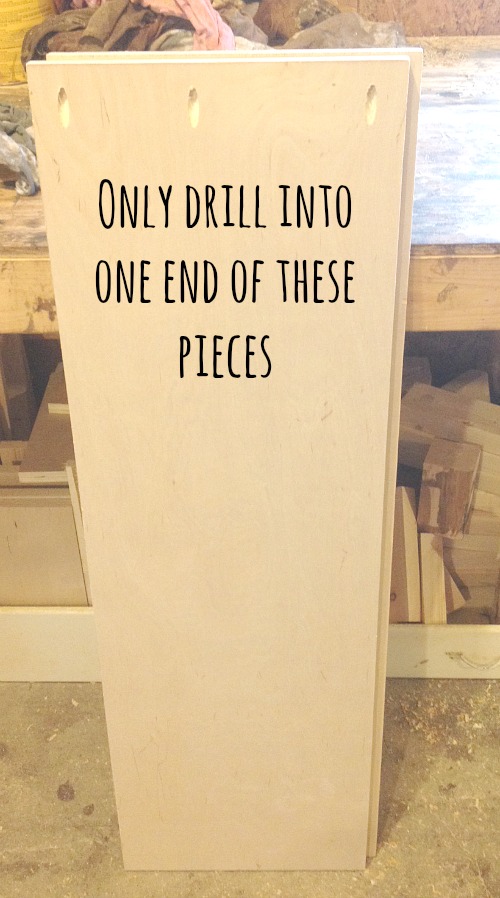
Drill pocket holes in the top of the side pieces

Assemble the Cabinet

Attach the shelves between the two 40” boards using 1 ¼” pocket hole screws. Make sure you attach the bottom shelf on the opposite end from where you drilled the holes on the 40” boards. Those are for attaching the top later.

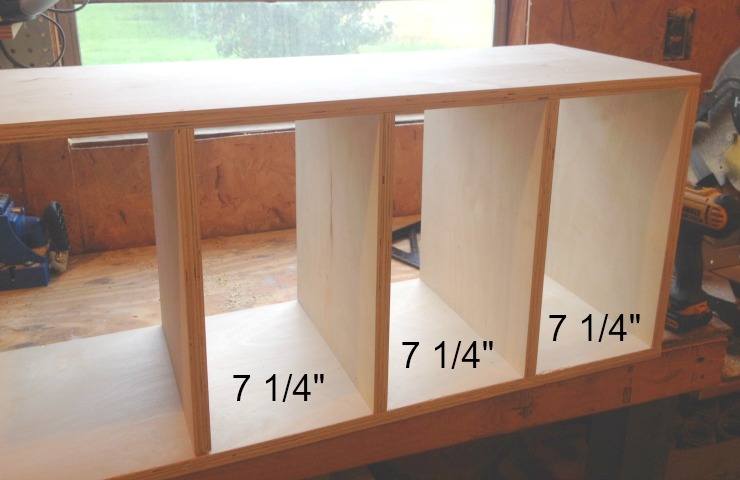
Space the shelves 7 ¼” apart. It helps to use a measuring tape and square to line them up.

Assembling the shelves of the cabinet

Space shelves evenly

Before you attach the last shelf, attach the top (the 16” long piece you cut in step 1 using 1 ¼” pocket hole screws.)
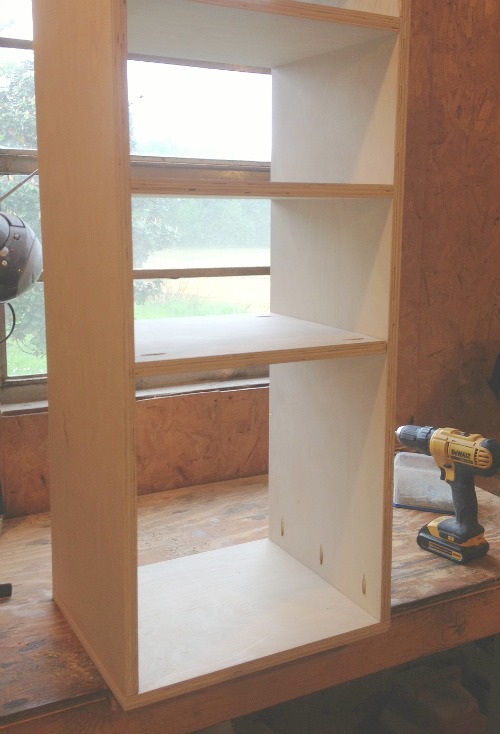
Attach top before the last shelf

Then, attach the last shelf in place.
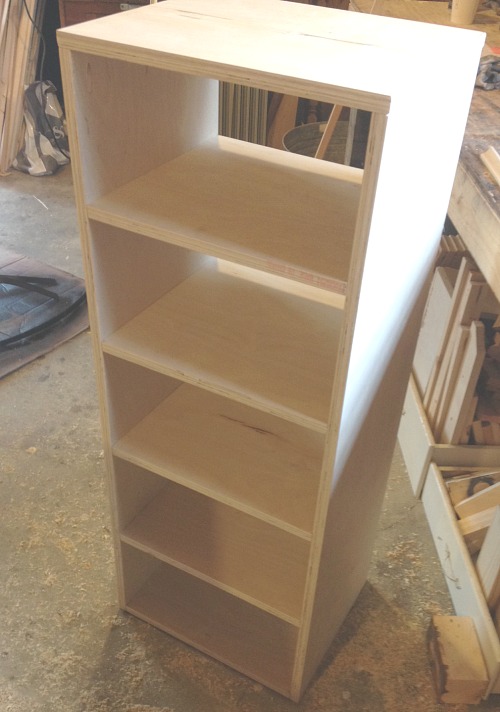
Assembled shelves and sides of linen cabinet

Add Trim:

Measure and cut the cove molding to fit along the top and bottom edges of the cabinet. Using wood glue and 1 ¼” brad nails, attach cove molding along the edges of the top and bottom.
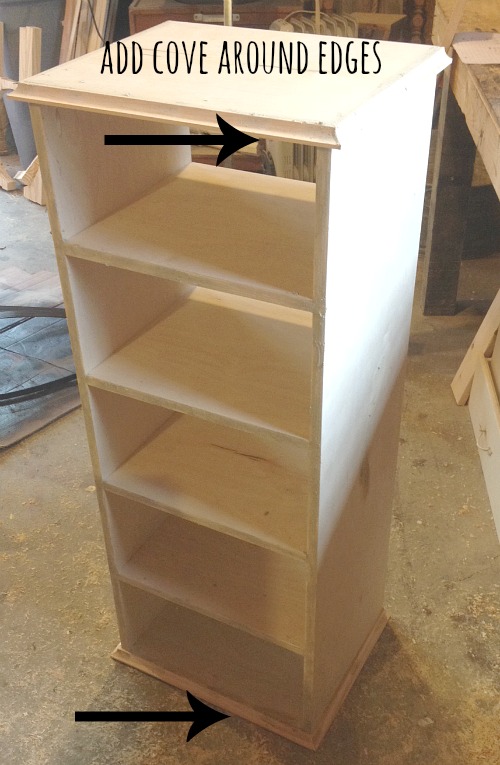
Add cove molding along plywood edges

Putty the nail holes and corners. Let the putty dry while you move on to the next steps.

Cut two pieces of your 1” x 4” board at 13” long and one piece at 16” long. Miter both corners of the 16” long piece at 45 degrees and miter one end of each 13” long piece.

Use a jig saw to cut out a decorative pattern in the pieces (if desired). I used a stain can to help me draw perfect curves.

Add decorative design to the legs

Sand all the pieces, then glue them together at the corners and use 1 ¼” brad nails to hold them in place.
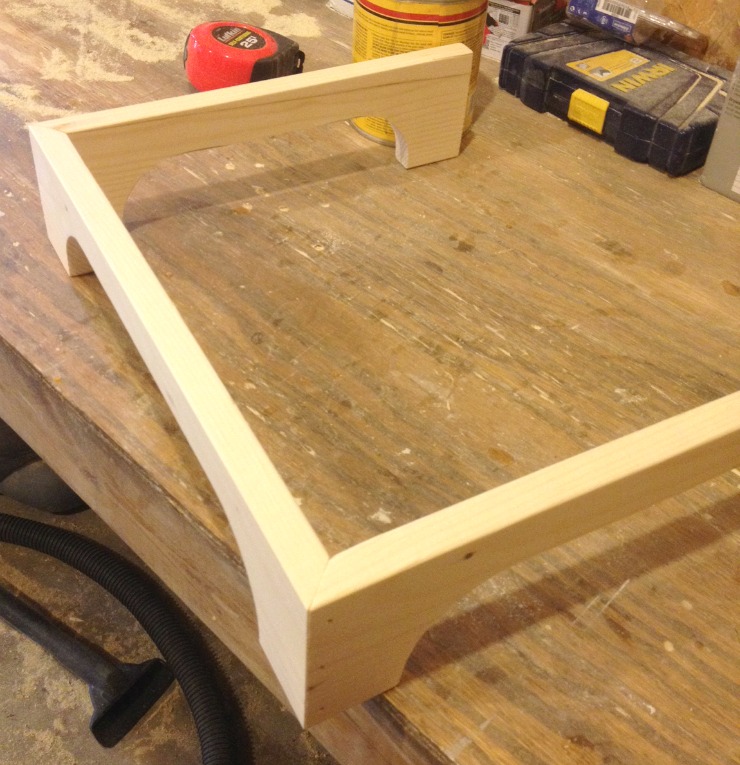
Attach legs together at mitered corners

Flip your cabinet upside down and glue this piece onto the bottom making sure everything is square and lined up nicely. You can use a heavy object or clamps to hold it in place until the glue dries.
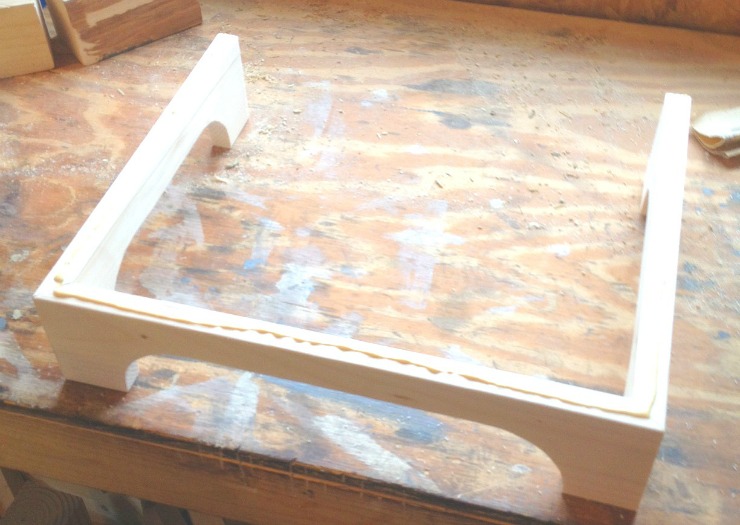
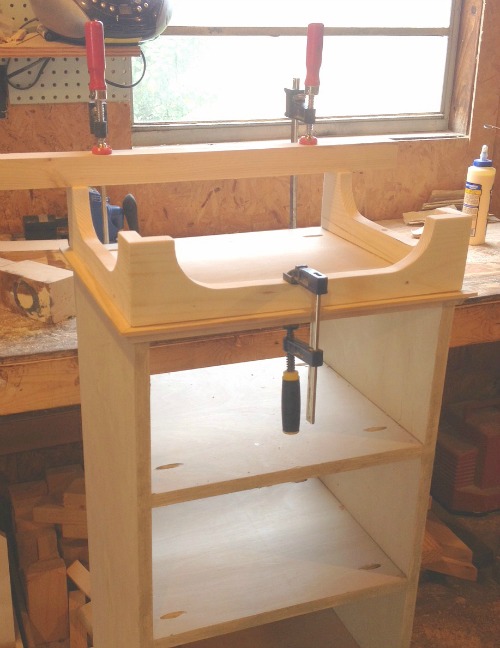
Add glue along edges of leg assembly

Clamp legs while glue dries

Construct Drawers:

You don’t necessarily have to add drawers. You could leave it open if you’d like. To see how to make drawers, check out my post about maknig drawers here.

You could cut a piece of ¾” plywood from the remaining sheet 5 ½” wide and then cut two pieces 12” long and one piece 12 ¾” long. Glue and nail the 12” long pieces onto the end of the 12 ¾” piece.

Cut a piece of 1/4” plywood to 12” x 14 ¼” and glue and nail it onto the bottom of the drawer box.

Then cut another small piece of 3/4” plywood 1/4” narrower and about 1/8 – 1/4” shorter. Making sure your box stays square, glue and nail this piece onto the front of the drawer. I added some thin wood strips to the front for decoration. That’s optional.
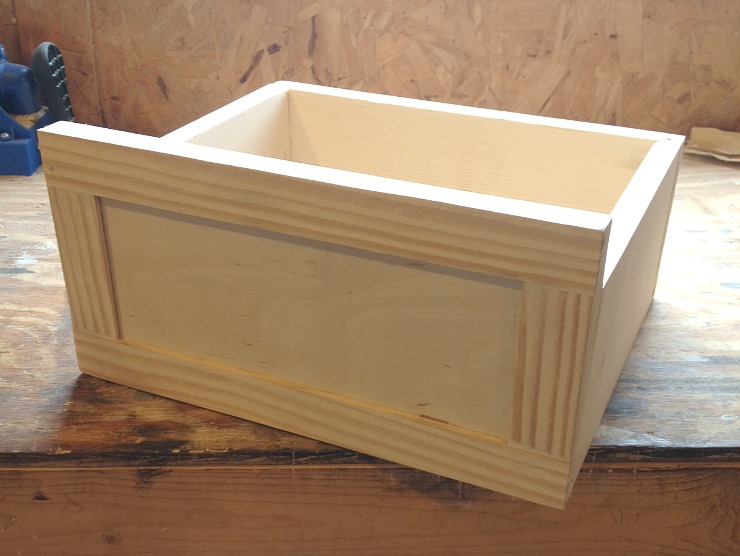
Make drawer for the linen cabinet

Finally, to keep the drawer in its place, glue and nail some small pieces of scrap wood onto the back to keep the drawer from sliding out the back side.

Add stops to the back for drawer

Putty and sand. You could add edge banding to the plywood edges if you plan to stain. Since I was painting, I just puttied and sanded the edges.

Once it’s sanded, prime and paint the piece any color you like. When the paint is dry, add a little knob to the drawer.

DIY Cute Bathroom Linen Cabinet

This is a great piece to add matching baskets to, or to leave open for storage.

DIY Cute Bathroom Linen Cabinet

DIY Cute Bathroom Linen Cabinet

If you’re looking for more linen and bathroom storage ideas, check out this storage from one 1″ x 8″ x 8′ board or  this gorgeous pantry cabinet.

Until next time, happy building!!

Shara's Signature

~ Find More of Shara’s Tutorials ~

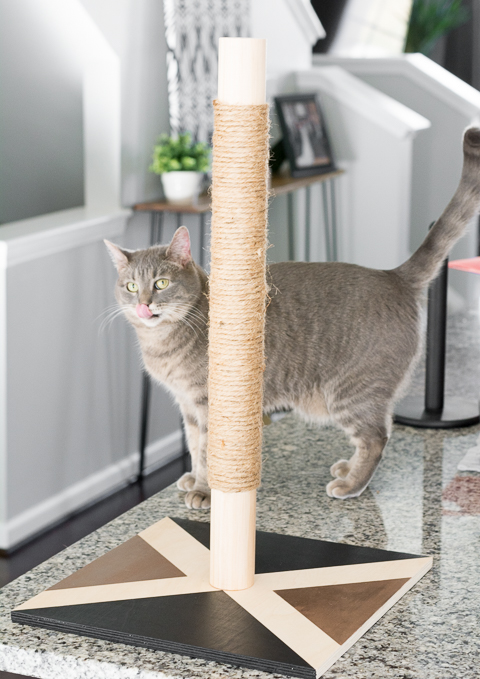
Modern DIY Cat Scratcher Post

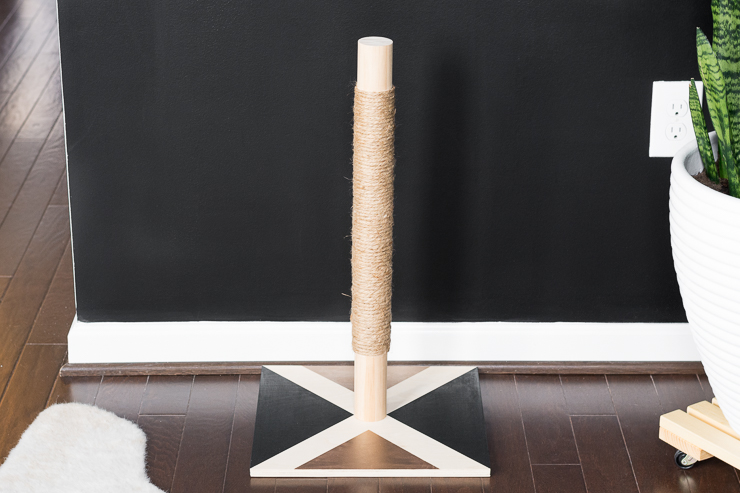
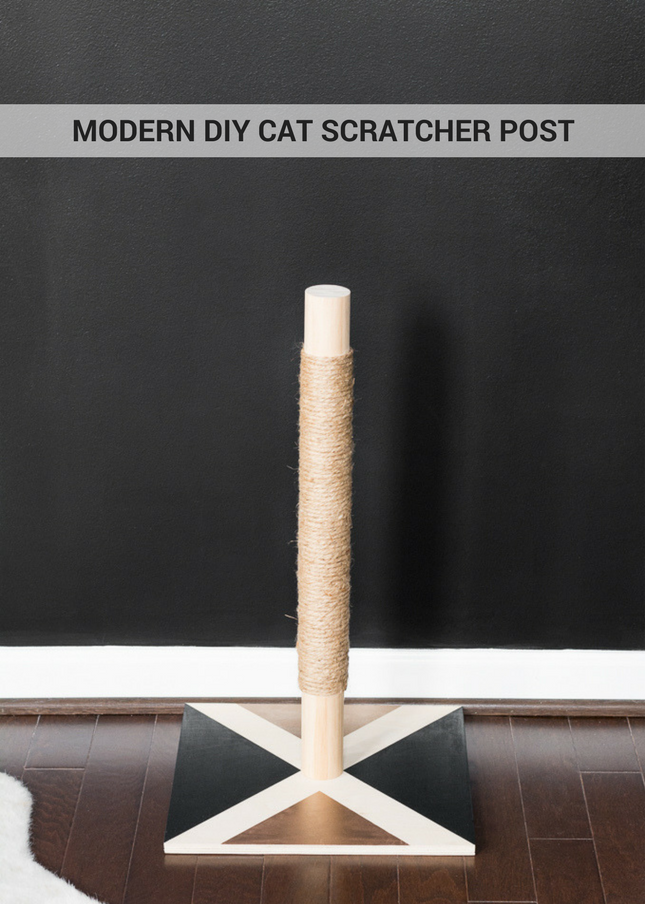
Learn how to make a modern DIY cat scratcher post!

Hello everyone, it’s Brittany again from by Brittany Goldwyn, and this month I’m back to share another pet DIY. Last month I shared a tutorial on how to make a raised pet feeder—this month I’m sharing a tutorial for a simple and modern cat scratcher! Yes, I do love my babies. 🙂

This DIY is simple. I tried to keep the tools and steps to a minimum. This would be a nice alternative to the more complicated tree branch cat tree tutorial I created a few years ago. This one can be knocked out in a few hours (including the time it took the paint to dry.)

Want to make a Modern DIY Cat Scratcher Post for your kitty? Read on!

Materials:

(I’ve included affiliate links for your convenience. I earn a small percentage from a purchase using these links. There is no additional cost to you. You can read more about affiliate links here.)

Instructions:

Step 1: Cut the base piece. 

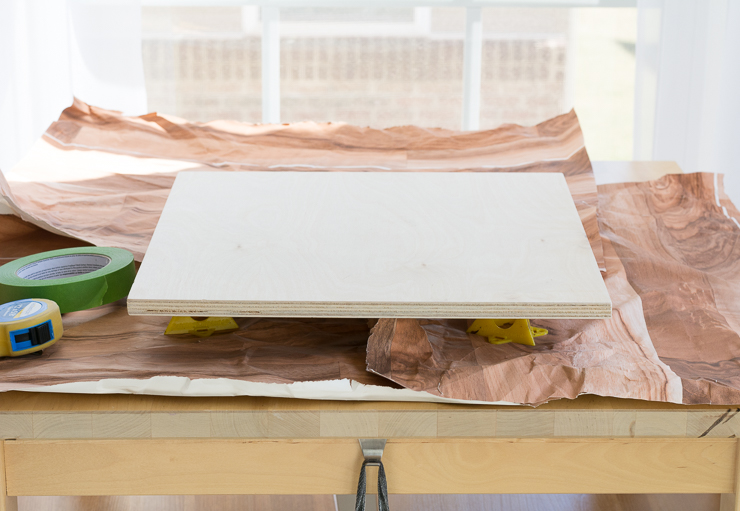
If you’re pulling from your scrap wood pile, find a piece that is large enough to make a stable base. (This one is 14″ x 14″, but something as small as 12″ x 12″ would probably be fine.) If you’re using a new piece of plywood, you can purchase a 2′ x 2′ piece of 3/4″ birch plywood at Lowe’s for about $10. They can help you cut it down to your desired size in store for free.

Modern DIY Cat Scratcher Post

(Note: 1/4″ or 1/2″ plywood will work. However, the added weight of the 3/4″ plywood will help stabilize the base while your kitty is getting some scratches in.)

Step 2: Cut the scratcher piece.

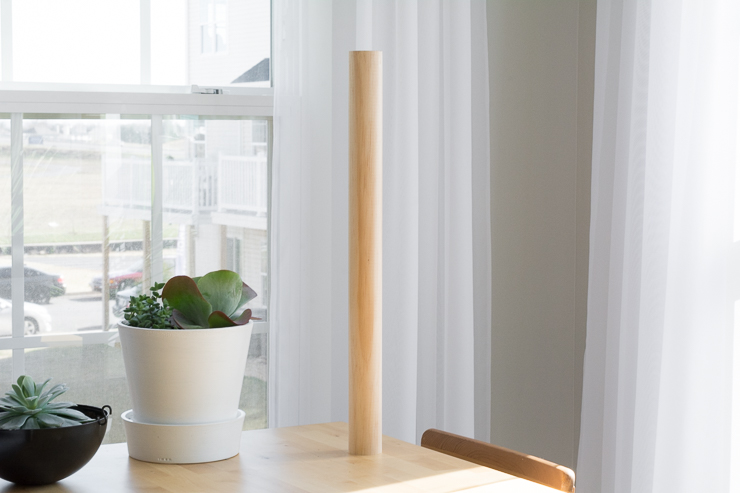
If you’re purchasing a 2″ wooden dowel from a big-box hardware store, it will probably come in a 48″ length. You can have the cutting station cut it in half for you.

Modern DIY Cat Scratcher Post

Step 3: Polish and paint the base.

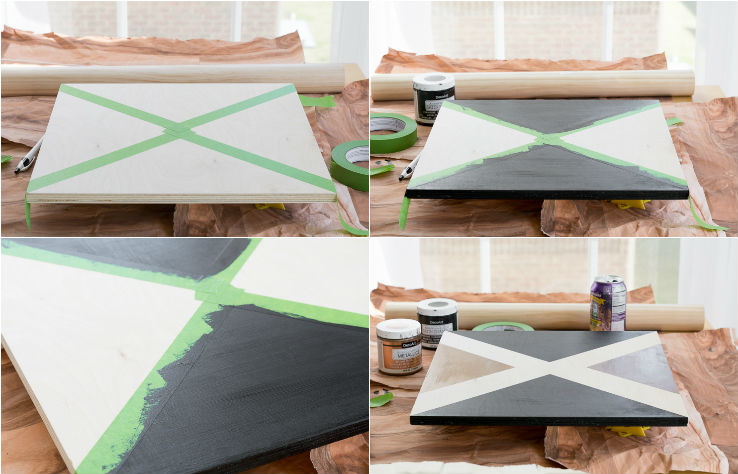
Grab your sandpaper or orbital sander and sand the edges. To customize the piece, you can use painter’s tape and craft paint to paint a design onto the base. (This step is optional but gives a nice personalized touch to the scratcher, plus you can customize it to match your decor. I used DecoArt Americana Decor Satin Enamels in Classic Black and Metallics in Antique Bronze.)

Modern DIY Cat Scratcher Post

Step 4: Start the scratching post.

While the base is drying, grab your jute or sisal, adhesive, and staple gun.

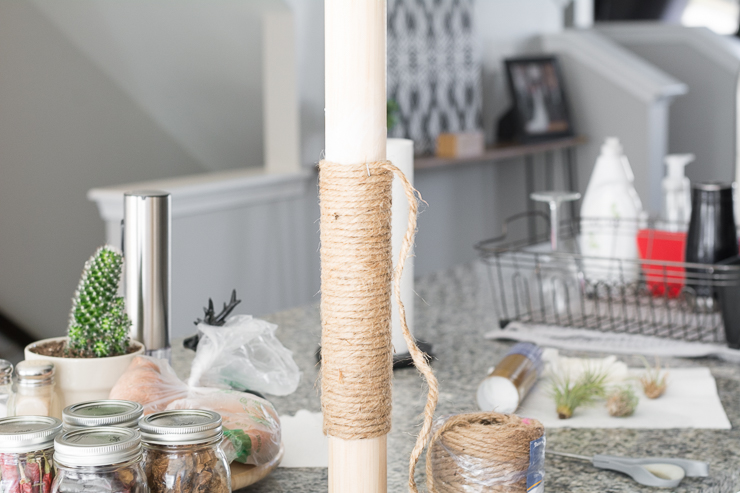
Put on disposable gloves and slather adhesive on the post where the rope will go. This is messy, but it’s the easiest way to ensure your rope remains firmly adhered to the post. Staple the end of the rope onto your post, making sure it is stapled over an area that has glue.

Begin wrapping the rope tightly around the post. stop every 30 seconds or so to ensure you’re not creating any gaps. Add an additional staple halfway through if you need to take a break.

Modern DIY Cat Scratcher Post

Step 5: Finish the scratching post.

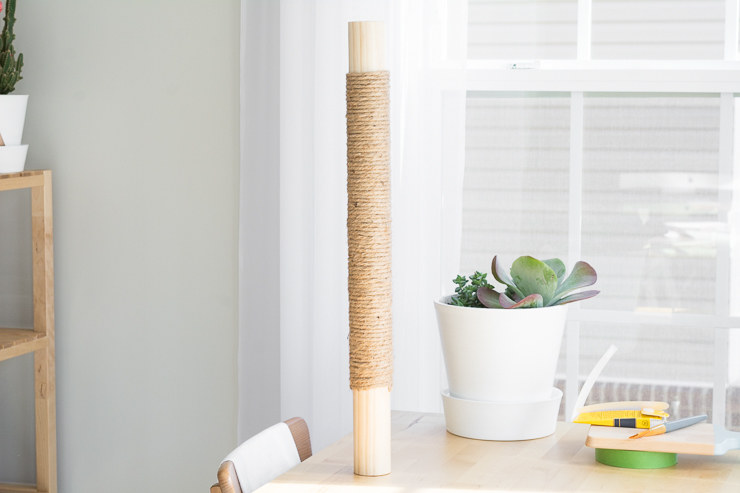
Add additional glue and continue wrapping until you’ve created your scratching post. You can wrap the entire post or just a portion of it as shown below. Secure the rope in place by stapling the end to the post.

Modern DIY Cat Scratcher Post

Once the glue has dried completely, use pliers to remove the staples. (You don’t want kitty’s claws getting caught on one.) If the ends pop up simply add a dab and re-glue.

Step 6: Attach the post to the base.

Dab adhesive on the bottom of the post. You want to use enough to ensure the entire base is covered, but don’t use so much that it will seep out when you press the post onto the base. Press the post into the center of the base and let dry. If possible, add a book or something else to the top of the post to apply pressure.

Modern DIY Cat Scratcher Post

Once the glue has dried completely, let your kitty check out the new digs and get to work tearing it apart!

Modern DIY Cat Scratcher Post

I tried to get a photo of my girl using the scratcher, but every time I pulled out my camera she stopped. I even tried to bribe them with catnip…but this is the closest I got to a good photo.

If you like this project, you’ll love these pet projects:

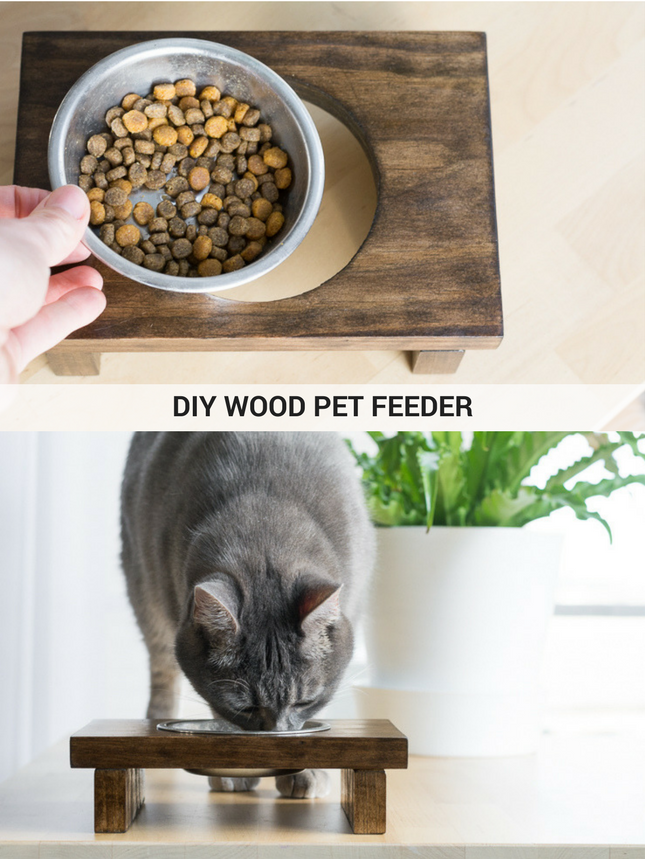
Learn how to make a wooden raised pet feeder.

DIY Pet Feeder

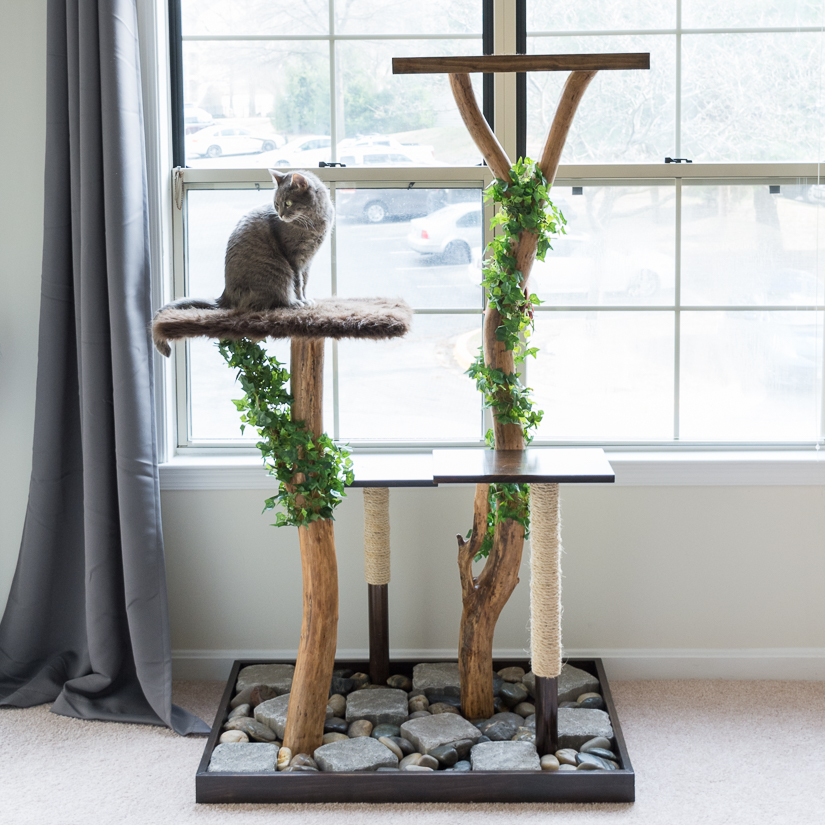
Cat Tree using real branches

DIY Cat Tree Using Real Branches

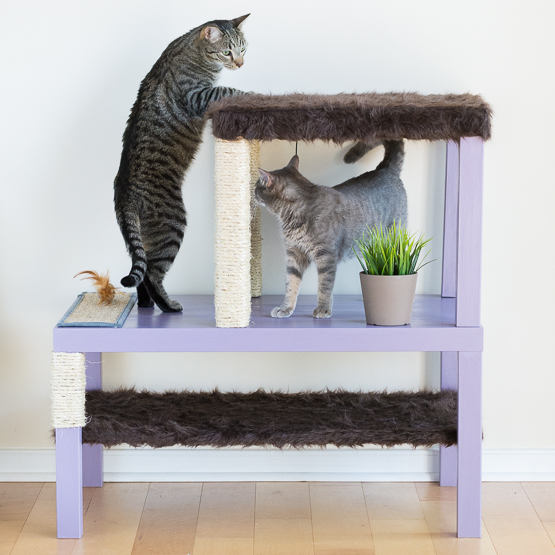
Ikea Cat Condo Hack

Easy DIY Ikea Hack Cat Condo

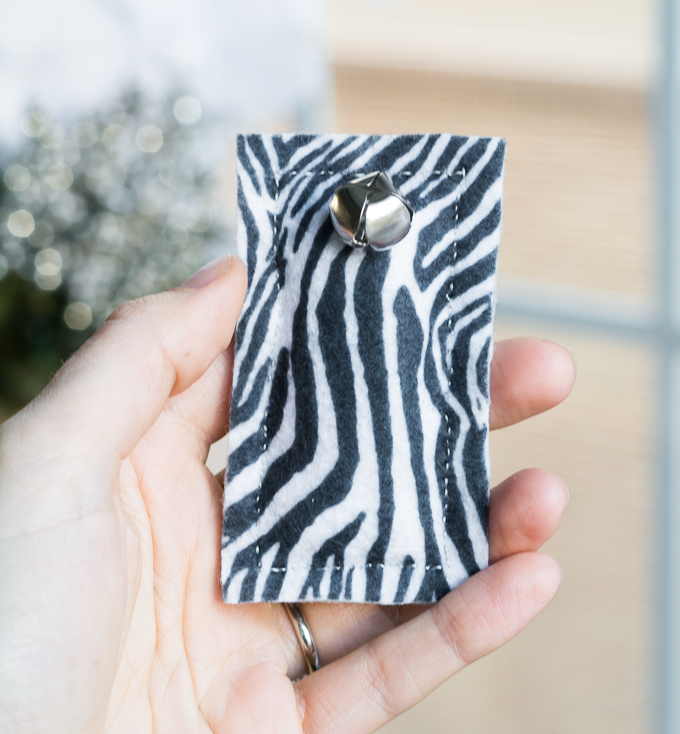
DIY felt cat toys

Easy Felt DIY Cat Toys & Petcube Camera Review

Read More of Brittany Goldwyn’s Tutorials ~