Curbside Vintage Step Stool Makeover

Curbside Vintage Step Stool Makeover

A few years ago, while driving back to work from my lunch break, I spied a very cool but sad looking vintage step stool sitting at the end of someone’s driveway next to their trash.  I passed by, but it didn’t take me long to circle around the block and come back to pick up the stool.  Unfortunately the step stool stayed untouched for at least 4 years.  This time it wasn’t in my garage, I left the sad step stool in the back room of my office. Good thing I’m the only one who goes back there!  I finally decided it was time to show this little vintage step stool some love. Check out this step stool makeover.

Curbside Step Stool MakeoverThe structure of the step stool was in fairly good condition, but COVERED in rust.  In some areas thicker than others.  I thought about using the old school method and hand sanding the stool like Jeff talked about a few weeks ago (Painting Metal Patio Chairs ) but decided if I tried this avenue I would be sanding for a few months.  I also considered using a sand blaster to remove the rust.  And while it is a fast effective method, it is not practical for everyone.  After much thought I finally decided on a 3M sanding disk that attaches to any drill. Let’s get to it shall we? Read more

Sofa makeover1

Have you ever been bored with the way a room looks?  For me, it was my living room. It houses the same sofa… The same lamps… The same golden frames surrounding the same prints we loved so much 13 years ago! I have a quick tutorial for giving your room a mini-makeover for not a lot of cash. This Easy Sofa Makeover will help you out.

living room with sofa with nailhead trim2 Read more

Look up there! It’s a bird, it’s a plane, no wait…it’s Madigan Made! That’s right, Shannon from Madigan Made is here and she leads a double life. She’s the Clark Kent of the blogging world. By day, Shannon is a pharmacist and by night she moonlights as a creative magician and blogger.  This creative genius casts magical spells on ordinary objects and turns them into extraordinary home furnishings and décor.

One thing I love about Shannon is that she never fails to amaze me with her transformations. They are always fresh ideas and the fact that she has the energy to complete DIY projects and hold a full-time job leaves me speechless. Check out just a sampling of her projects.

And now I see some sparks glowing in the distance. They are moving towards us at warp speed, which only means one thing…Madigan Made is in the house! Read more

We just got back from a very relaxing week at the beach. The weather was perfect and our boys really enjoyed playing in the surf. I think we brought back a bit too much of the beach with us (sandy sheets, hair and toes). But, at least we had fun!

My mom and I spent an afternoon shopping at the outlets in Myrtle Beach, but not before stopping at my favorite location in Ocean Isle Beach, NC.

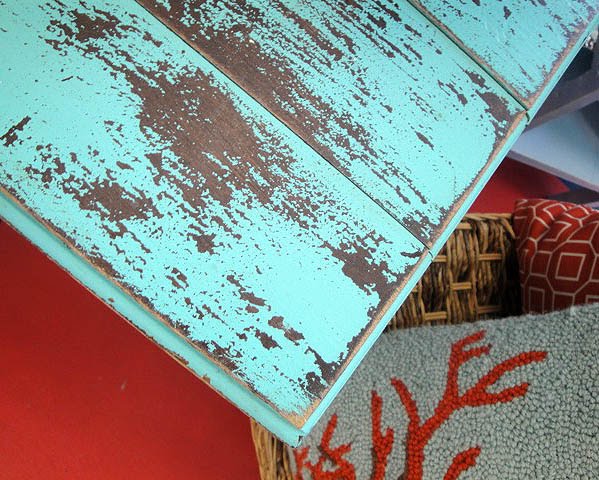
A place where I can look at lots of this:

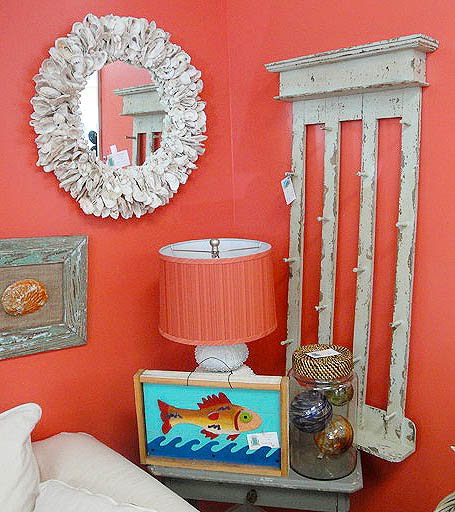
Admire plenty of this:

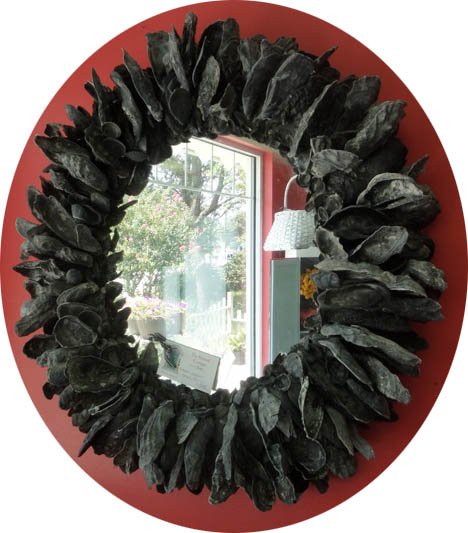
And go ga ga for this:

All these and more can be found at The Painted Cottage.

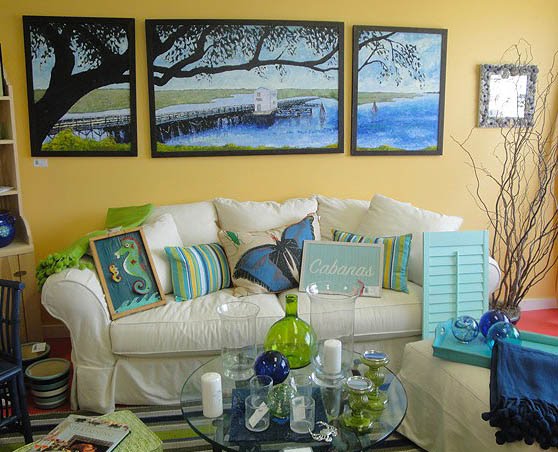
This eclectic shop is an adorable boutique with sherbert colored walls and oodles of antiques, art and shabby chic finds. I could spend hours browsing this store and still not see everything.

Here is just a sampling of what is inside:

Did you see that white oyster shell mirror on the wall?
How about the same mirror with black oyster shells?

Very chic in black, don’t you think?
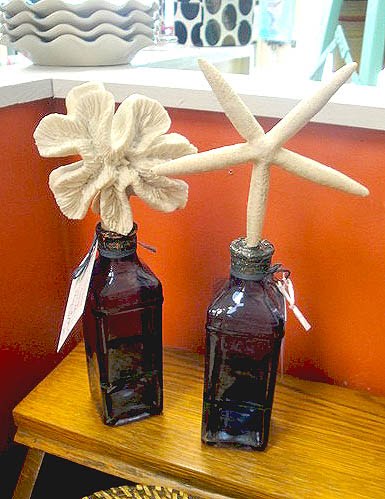
Precious blue bottles with coral and starfish lids

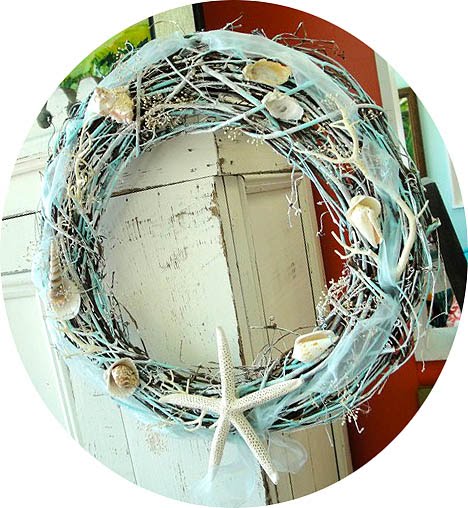
I just love this summery beach wreath spray painted light blue
and accented with ribbon, coral and shells.

Don’t you just love this red floral wingback chair with the starfish throwpillow?
(Realistically I know it would only last 2 minutes in my house before being plucked off
the pillow by my boys or crushed during wrestling matches.
But, I can dream about it, right?!)

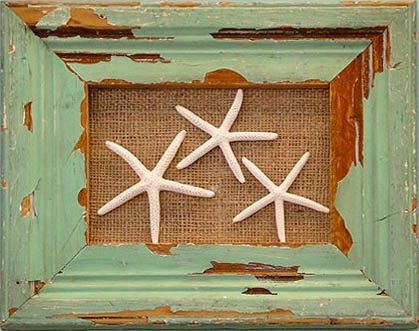
A Trio of Starfish on Burlap

Another unique way to decorate with an old window and wine corks!

Whoa! I just found Daisy’s twin? She looks fab in red.

Hey, another coincidence! A chair with the same P. Kaufmann fabric
as my daisy chair and bench in my guest room (only in a different colorway.)

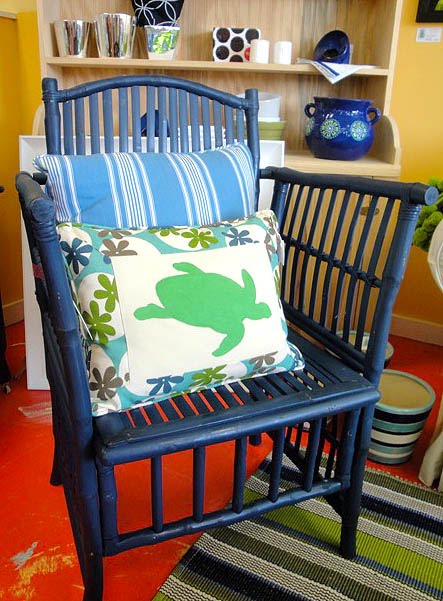
Let me tell you, The Painted Cottage has the best decorative chairs.
Like this blue rattan chair.

Or this shabby chic floral detailed chair
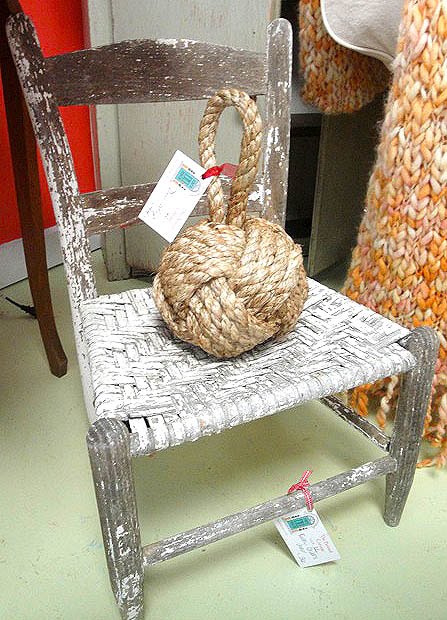
I’m crazy about this child size rustic chair with the monkey fist knot ball
And just the aqua color of this chair has me hooked
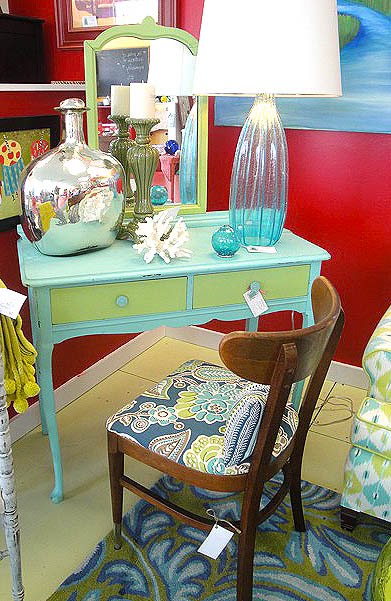
More aqua color on this vanity and clear glass lamp
Catching my breath as I spot this gorgeous aqua armoire!
I’m only pulled away from the armoire by these glass beauties.
Am I part magpie? Why am I so fixated on shiny shinies?
 
 This dresser pulled me out of my aqua fixation.
Beautiful sea foam green.
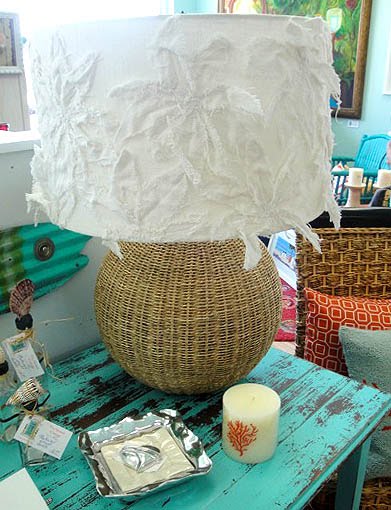
Will you look at this lampshade?! Fabric flowers sewn to the shade. Heavenly!
I can’t wait for one of you crafty readers to write up a tutorial on this.
or how about this lamp? LOVE IT, right?!
A beautiful hydrangea painting
Upon closer inspection, the flowers are actually cut magazine photos.
How clever!
The store has an abundance of signs with clever sayings.
“Barefoot is Bliss” so true!
“At the Beach we live by the currents and follow the sun”
“Dogs have owners, cats have staff”
That black bench under the throws is another headboard bench.
 This sign just kills me…get it? KILLs me. Okay, sorry, that was corny.
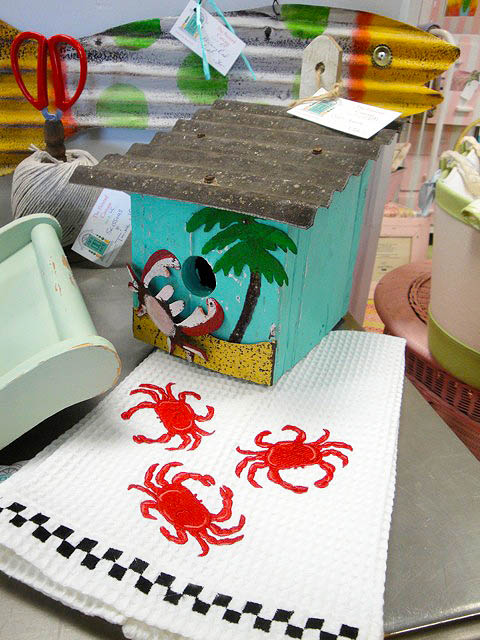
The crab shack
More artwork and accents

So, if you make your way down to the  southernmost beaches of North Carolina’s unique barrier islands, (or even if you are in Myrtle Beach). Take the time to stop by and visit The Painted Cottage at 6692 Beach Drive, Ocean Isle Beach, NC. (Phone ahead for hours and directions: 910-579-5995). Be sure to tell them that I sent you. (I am not paid by the Painted Cottage, I only hope they remember me next year when I go back.)

Best of all, if you haven’t had your fill of eye candy from this post, visit the shop’s website: thepaintedcottageonline.com or blog: thepaintedcottageonline.blogspot.com

If you are coming here from a link party, this is the final post on my Extreme Rattan Chair Makeover. Click HERE if you want to see the transformation from the beginning. This chair started out as an U-G-L-Y silver painted dining chair that I scored at a yard sale for $5! I handed over my Abe Lincoln and ran before the owner could change her mind. Let’s learn about adding nail head trim now.

Today I will show you how to upholster the front and back of the rattan chair, add nail head trim, and then you can see the final results! Can’t wait, can you?

Well, grab your tools and let’s get crackin’.

Materials Needed:

  • Nail Head Trim* (Purchased every third hole style trim. It cost $1.25 per yd. on Amazon.com)
  • Decorative Nails* 7/16″ x 1/2″ – French Natural (sold in bags of 50 nails for $1.70)
  • Rubber Mallet
  • Wire Cutters
  • Posterboard or Tracing Paper
  • Scissors
  • Batting
  • Cardboard
  • Spray Mount
  • Hot Glue Gun (with glue sticks)
  • Screwdriver or cordless drill

* Just a quick note that I measured the areas on my chair using a sewing tape measure so I knew how much trim I needed. Then made sure I had enough decorative nails to fill in every third hole. Always order a bit extra in case you make a mistake or if you miss measure. Plus, as I will show you, I had to end some sections early and add extra nails.

First thing I did was make a template for the back of my chair. I used a large sheet of poster board (the cheap kind you can buy at the drug store works great!) I used my finger to press hard on the paper and the edge of my chair back opening. When I removed the posterboard, you could see a faint score line. I then cut out the template. (You could alternatively tape several pieces of tracing paper together and draw around the chair backing.)

Then I fit my template into the back and made any cuts until my template was perfect. Next I traced my template onto thicker cardboard and cut out the cardboard for my chair back.

Now I could start cutting out my fabric. You will want to lay your fabric on top of the cardboard and play with the pattern placement until you are happy. Then trace about an inch outside the cardboard and cut out your fabric. This is where I wish I had followed Centsational Girl’s directions for her Cinderella Chair Makeover! She cut out a piece of batting that was the same size as her chair back fabric. She wrapped the batting around the cardboard and stapled it. Then she used the glue gun to attach her fabric to the cardboard. I didn’t see the need since I wouldn’t be resting my back on the back side of the chair. But, what I didn’t realize is that it would hide the folds in the cardboard. Oh well, live and learn. Luckily my chair back faces a wall so no one will see it.

So, next I pulled out my spray mount, after putting a tarp down on the garage floor that extended about 4 feet in every direction from my cardboard. (Did I mention that spray mount can also travel when airborne? Be sure to cover a larger area than you will be spraying and prop up cardboard or more plastic if you are spraying near something you don’t want the spray mount to adhere to.)

I sprayed a light coating on one side of the cardboard. Then laid it on top of the fabric (Next time I will replace the fabric with the batting – having learned my lesson.) Make sure your fabric (batting) is stretched out so there are no wrinkles. Now, if you are using batting, you will want to get your fabric and lay your cardboard sandwich on top of the fabric.

Now it is time to glue the fabric to the cardboard backing. Heat up your glue gun, and run a bead of glue along one edge of your backing. Fold the fabric over the back (being careful not to burn your fingers on the hot glue like I did) and press into the glue. Carefully fold the fabric around your edges.

At the top of my chair was a heart shape, which required that I cut a few slits into the fabric so I could fold the fabric into the cardboard notch.

You are almost ready to insert your backing into your chair. Before you insert the backing, run a line of hot glue all the way around the back of the chair where the rattan meets the chair frame. Then I set my chair back in place. This is where I realized that I should have added the batting. You can see two slight horizontal lines at the top and middle where the cardboard had a fold in it. So, I hope you can learn from my mistake. Although, I really don’t think it looks too bad (does it?)

Nailhead trim time – Make her glamorous!

I pretty much repeated the same process for tracing the back (pressing my finger on the edge of the rattan area.) The front of the rattan was wider than the back. The good news is that once you have your template cut out of posterboard, you can go right to cutting the fabric and batting, instead of cutting a cardboard backer. I used two layers of batting for extra cushion. But, I could have used more.


Cut your fabric about an inch wider than your template on all sides. Trace and cut your 2 + layers of batting to the exact size of your template.

Now you are ready to put your fabric and batting on the chair. I laid my chair down on its back so I could work with gravity holding down the fabric and batting. Starting in a corner, gently fold the excess fabric around the batting and lay your nailhead trim on the edge of the fabric. Use your rubber mallet to hammer in the first nail into the first hole in the trim. Continue along slightly bending your trim to match the curves on your chair.


When you reach a corner, you will need to cut your trim. If you can’t end with a nail hole at the corner, you will want to cut your trim at a hole and add a nail or two next to the hole to finish at the corner. This will ensure that you don’t have the excess trim popping up or catching on anything. Then I cut two extra nail head bumps off my trim so that I could start with a hole again.


Work your way around the whole back of your chair until you have completed the nailhead trim border. I also chose to add nailhead trim along the edge of my chair below the chair cushion. Why not?! At only $1.25 per yard, it has big bang (or should I say Bling!) for little bucks!


Now the moment you have all been waiting for. Time to re-attach your seat cushion to the chair. Lay your cushion back in place, and locate the four mounting screw holes underneath. Use your cordless drill (highly recommended over the screwdriver) to screw in the mounting screws.


Then, set your chair upright and swoon over your “ugly duckling turned into a beautiful swan!” Isn’t she lovely!

This concludes my Extreme Makeover of a Rattan Backed Chair. I hope you will check back soon as I show you some of our office renovation.

signature