WORX 56v Hedge Trimmer Review | Pretty Handy Girl

WORX 56v MaxLithium Hedge Trimmer Review | Pretty Handy Girl

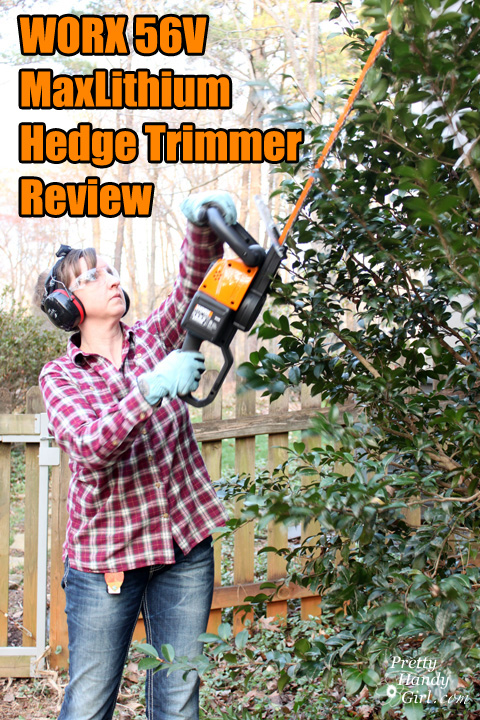
We have a very wooded and heavily landscaped lot with lots of mature bushes. Some of the bushes were starting to achieve monster proportions. Do you see the resemblance? Today we are going to be talking about this awesome hedge trimmer. Check out this WORX Hedge Trimmer review.

WORX 56v Hedge Trimmer Review | Pretty Handy Girl

This is why I needed a bad boy hedge trimmer on my side. WORX sent me the 56V MaxLithium Cordless 24″ Hedge Trimmer  to try out. It turned out to be the perfect tool for our yard. Previously I tried the 20V MaxLithium Cordless 20″ Hedge Trimmer, but it didn’t have the muscle I needed to power through our landscaping. The 56V WORX hedge trimmer definitely had the power to cut easily through all our shrubs and bushes. But, the extra power is the result of a large battery which does weigh more than its 20V sibling. However, I’d much prefer a little extra weight because the trimmer can cut through bushes and shrubs much faster (saving on arm fatigue in the long run.)

WORX 56v Hedge Trimmer Review | Pretty Handy Girl

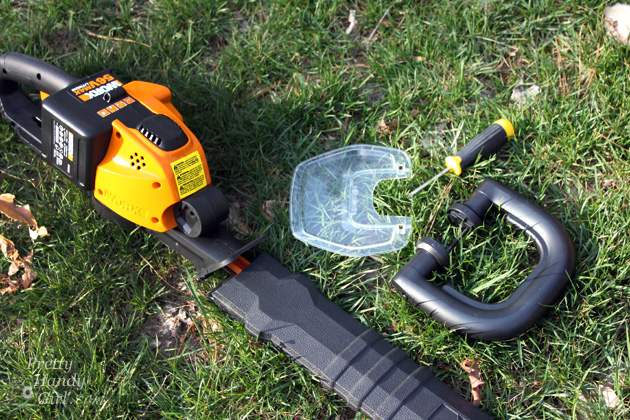
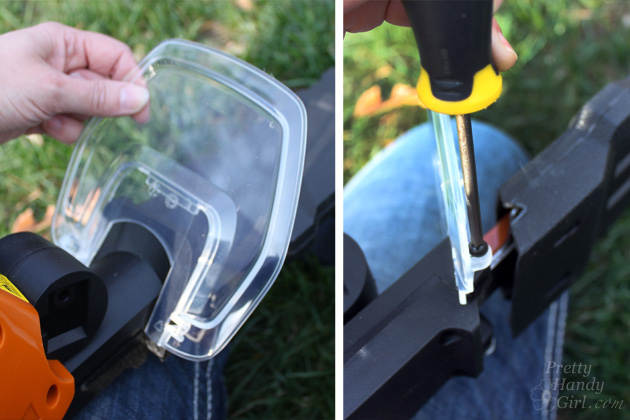
The WORX 56V MaxLithium Cordless 24″ Hedge Trimmer requires the assembly of the handle and shield when you first remove it from the box. You will need a philips head screwdriver.

WORX 56v Hedge Trimmer Review | Pretty Handy Girl

The battery pack should not be in the trimmer during assembly. Simply slide the shield into place (just above the blades) and secure it with the screws shipped with the tool.

WORX 56v Hedge Trimmer Review | Pretty Handy Girl

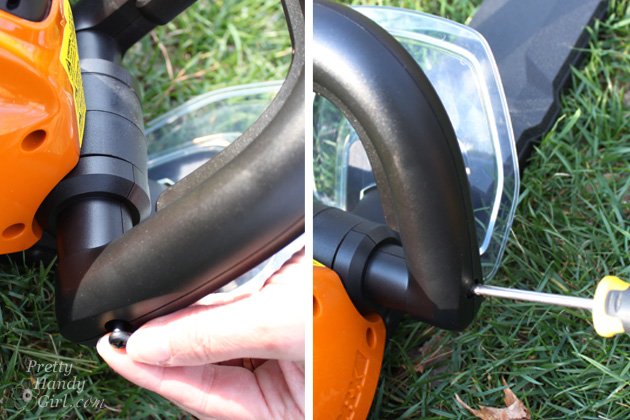
The handle requires some outward force to snap over the trimmer.

WORX 56v Hedge Trimmer Review | Pretty Handy Girl

The handle is secured with one bolt on one side.

WORX 56v Hedge Trimmer Review | Pretty Handy Girl

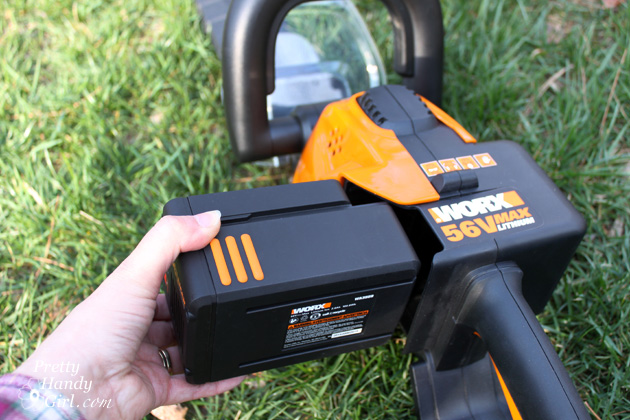
Snap the battery pack in place and you’re ready to tame that jungle you call your yard.

WORX 56v Hedge Trimmer Review | Pretty Handy Girl

Trimming the pampas grass used to be a tedious job using manual hedge shears and I inevitably lost the battle with lots of scratches. Read more

Shur-line Paint Edger Review | Pretty Handy Girl

Shur-line Paint Edger Review | Pretty Handy Girl

Last month I received a little care package from Shur-line. I opened the kit and assessed the products with speculation. As you probably remember, I don’t generally like new painting gadgets. I have my tried and true painting tools that I use and I rarely find new ones that I like better. As I was getting ready to re-paint the living room, I grabbed for the Shur-line Pro Paint Edger. Having been a fan of our old Shur-line edger, I really didn’t think that they could have improved much on the design.

Well, I was wrong, and this is my new favorite paint edger.

The biggest change they made was to add flip up edge guards. Why would you want this?

Shur-line Paint Edger Review | Pretty Handy Girl

It protects the wheels and the edge guard from getting paint on it when you reload the paint! Brilliant.

Shur-line Paint Edger Review | Pretty Handy Girl

In the past, I had to be careful not to dip the wheels in the paint when re-loading. And, I inevitably had to wipe off the wheels with a damp rag when I did. Now, they flip up and out of the way when you raise the little handle between the roller wheels. After the paint is loaded, flip the handle down and the wheels and edge guards are ready to edge. Read more

How to Refinish Wood Floors without Sanding | Pretty Handy Girl

How to Refinish Wood Floors without Sanding | Pretty Handy Girl
How to Refinish Wood Floors without Sanding

I love our antique heart pine floors! They are beautifully distressed. The round pegs and square nails securing them in place add loads of character. However, the square nails sit flush with the surface preventing us from ever being able to refinish them with a sander. The nails would tear up the sandpaper in no time. But, that’s no problem because I know a way to Refinish Wood Floors without Sanding!


How to Refinish Wood Floors without Sanding | Pretty Handy Girl

From time to time, our floors start to look dull…

How to Refinish Wood Floors without Sanding | Pretty Handy Girl

…and the scratches are more noticeable. This is when I know it’s time to refinish them.

How to Refinish Wood Floors without Sanding | Pretty Handy Girl

The first time I refinished our floors, it was several years ago when we were painting the office and dining room. I decided to try to refinish the floors because the rooms were already devoid of furniture. Several neighbors had recommended Bona® Hardwood Floor Cleaner and Bona® Hardwood Floor Polish. I was skeptical, but the results were beautiful floors that had luster, but still showed their beautiful age.

Before and After Finishing Wood Floors without Sanding | Pretty Handy Girl

The Bona® Hardwood Floor Cleaner did a fabulous job of cleaning the floor without damaging them. And, the Bona® Hardwood Floor Polish provided a strong finish without any waxy build up. The high gloss protective layer adds some shine, but isn’t overly shiny. The polish also fills micro-scratches, evening out the appearance of the floor.

How to Refinish Wood Floors without Sanding | Pretty Handy Girl

Fast forward to this past week when Bona asked me to write a sponsored post for them, I jumped for joy because I already use and love the Bona® Hardwood Floor Products! (Here’s my full disclosure: Yes, this is a sponsored post. No, I was not told what to write. And yes, I probably would have blogged about my experiences using Bona® Hardwood Floor Products at some point anyway. Win-win.)

I highly recommend trying the combo of the Bona® Hardwood Floor Cleaner and the Bona® Hardwood Floor Polish before spending huge amounts of money to have your floors refinished. (Bona® Hardwood Floor Cleaner & Polish will not work on floors that have an oil or wax coating. Test in an inconspicuous area to be sure it will work for your floors.)

Here’s how to Refinish Your Wood Floors without Sanding:

Materials:

(I’ve included affiliate links for your convenience. I earn a small percentage from a purchase using these links. There is no additional cost to you. You can read more about affiliate links here.)

Instructions for Cleaning the Wood Floors:

Remove all rugs and furniture from the room. If you have heavy furniture pieces that are never moved, you can leave them in place.

How to Refinish Wood Floors without Sanding | Pretty Handy Girl

Vacuum or sweep the floors to remove all dirt and debris.

How to Refinish Wood Floors without Sanding | Pretty Handy Girl

Assemble your Bona® Hardwood Floor Spray Mop as shown here: Read more

Quick Kitchen Cart Makeover with BB Frösh Chalk Paint Powder

Quick Kitchen Cart Makeover with BB Frösh Chalk Paint Powder

It seems I have a penchant for painting my late grandmother’s old furniture. You may remember the coffee table I wrote on of her’s. This kitchen cart was Grandma’s, but it had seen better days. It has been hanging out in my Dad’s kitchen for years now. My sister Caitlin decided to rope me into giving this kitchen cart a quick makeover over the holidays.

Quick Kitchen Cart Makeover with BB Frösh Chalk Paint Powder

It actually turned into the perfect opportunity to try BB Frösch Chalk Paint Powder. The powder is mixed with water first and then any flat latex paint to create a smooth, durable chalk paint that can be painted directly over any surface regardless of whether it is bare wood, metal, or previously painted. Primer is not needed! For a soft durable finish, you can add a coat of BB Frösch Clear Wax.

Quick Kitchen Cart Makeover with BB Frösh Chalk Paint Powder

I can’t wait to show you how this chalk powder works and how quickly you can give furniture a makeover.

Materials:

(I’ve included affiliate links for your convenience. I earn a small percentage from a purchase using these links. There is no additional cost to you. You can read more about affiliate links here.)

Quick Kitchen Cart Makeover with BB Frösh Chalk Paint Powder

Optional (for butcher block top):


Instructions:

Begin by wiping off your kitchen cart with the damp rag.

Quick Kitchen Cart Makeover with BB Frösh Chalk Paint Powder

To remove the butcher block top, turn the cart upside down and remove the screws holding the top in place.

Lightly sand the rest of the cart with a sanding block. It helps to enlist the help of one adorable niece for this step. Read more

3-DIY-book-giveaway

I love being able to peruse real bound books! Browsing through blogs and online is fine, but there is no substitute for the printed word in a book.

Lucky for you, I’ve reviewed three new home, garden and design books that I think you’ll love!

The first is Decorating for Real Life by Wendy Hyde (blogger at The Shabby Nest)

decorating-for-real-life-page

Blogger Wendy Hyde began writing her blog, The Shabby Nest in 2008. She has taken her online world of decorating and design knowledge and has created a book full of magazine worthy homes. The photos may seem unachievable at first, but she breaks each room down to help you get the same look in your own home. She holds your hand and points out what makes the room work design-wise. This 208 page hardcover book is full with color photos of almost every room in a typical family home. At the end, Wendy printed several pages of grid paper and typical furniture items to help you design your own room layout.

PostBreakblueThe second book is Cultivating Garden Style by Rochelle Greayer

cultivating-garden-style-page

Rochelle takes us into a diverse world of beautiful and inspiring gardens. Her book is filled with ideas and tips to create landscaping that reflects your style, your home or your dreams. This hardcover book has over 300 pages filled with twenty three unique garden styles and step-by-step DIY projects to complete your outdoor space. Whether you like modern, Asian, Cottage or any other style, you’re sure to find inspiration in Cultivating Garden Style.

PostBreakblue

Last but certainly not least is DIY Wood Pallet Projects: 35 Rustic Modern Upcycling Ideas to Personalize Your Space by Karah Bunde (blogger at The Space Between Blog)

DIY-Wood_pallet_projects-page

Karah takes her popular blog theme of upcycling and decorating using shipping pallets from the online world and into the pages of this book. She created 35 new projects using shipping pallets and gives you the step-by-step tutorial to complete each one. In the beginning of the book she discussed everything you need to know about the safety of wood pallets and how to harvest the wood from them. The rest is full of tutorials using pallet wood that will definitely be easy on your wallet.

PostBreakblue

PHGFancySign