Backyard Landscaping Plans | Pretty Handy Girl

Backyard Landscaping Plans | Pretty Handy Girl

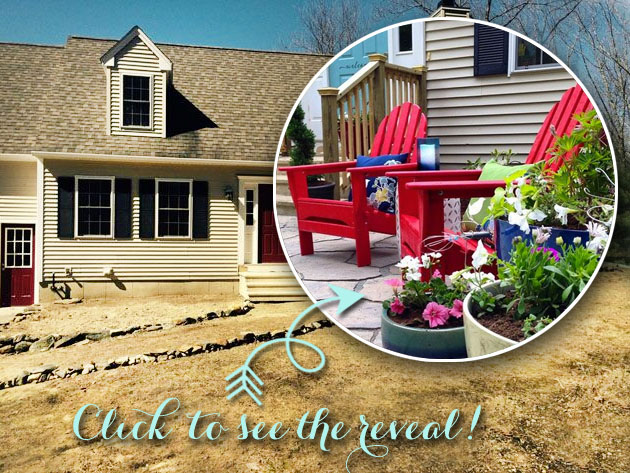
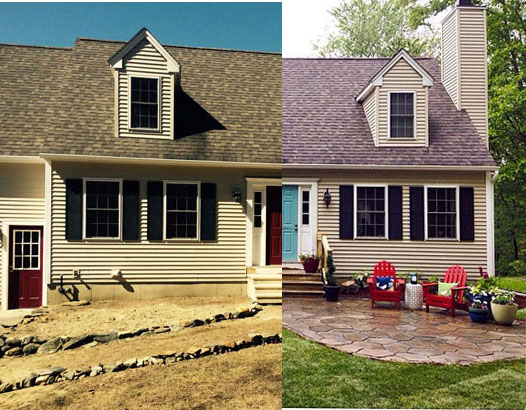
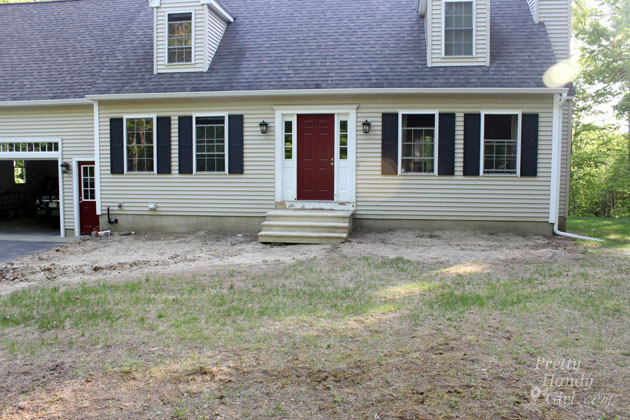
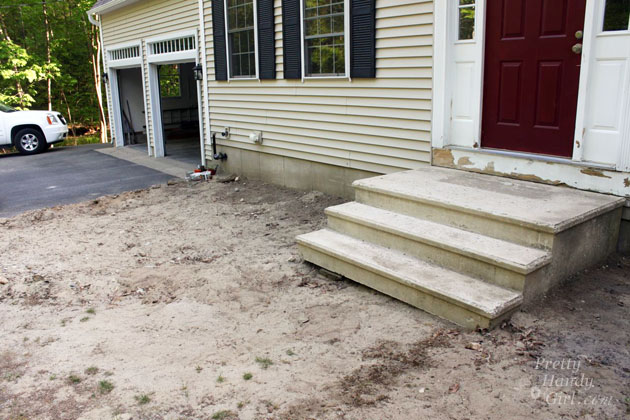
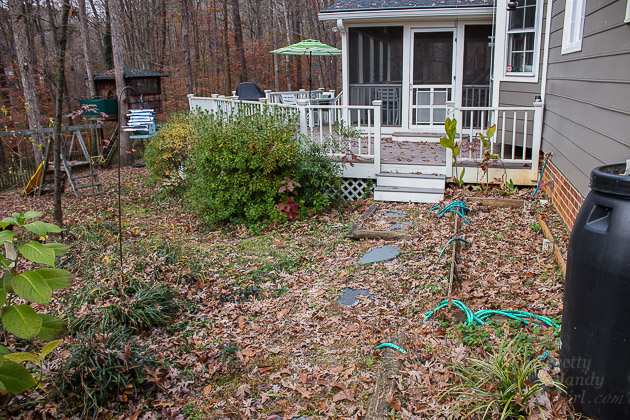
I know many of you come to my blog for exciting and inspiring ideas. I love showing you beautiful spaces and makeovers. Sadly, today I have to show you the ugly side of our house. Our backyard is quite a sight. It’s been on our “want to do” list for years. The landscape timbers that were previously a pathway have deteriorated more and more until the spikes that hold them in place are exposed and all the pea gravel has spilled out. We are in need of some major backyard landscape plans.

Backyard Landscaping Plans | Pretty Handy Girl

You can’t tell from this picture, but by the end of summer this pathway (if you can even call it a pathway) is a mini forest of weeds. It’s been an eyesore for so long. It’s best to avert your eyes.

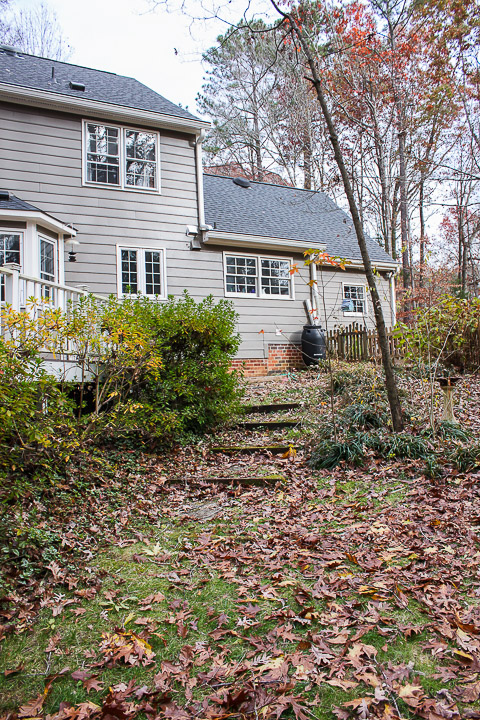
There are more rotted steps leading down to the backyard. It’s a disgrace back there.

Backyard Landscaping Plans | Pretty Handy Girl

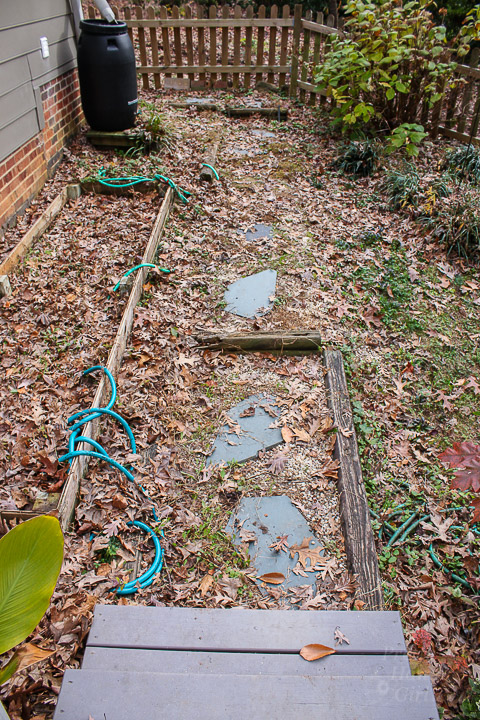
Beside the house there was a similar pathway, but the landscape timbers have long since rotted and disappeared. I usually add a few bags of pea gravel every year to give us a mud-free path to walk on when taking out the trash. This has been a band-aid solution, but not a permanent solution.

Backyard Landscaping Plans | Pretty Handy Girl

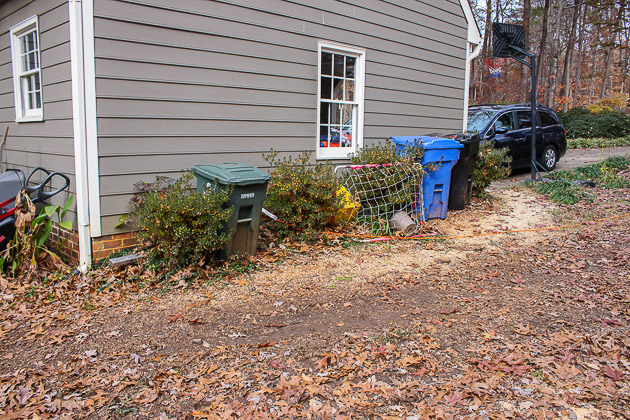
I am wincing at these photos because it shows how bad our yard really is. (The uncoiled hose adds to the “I could care less.” look.) It’s a wonder our neighbors haven’t notified the homeowner’s association about the situation.

Backyard Landscaping Plans | Pretty Handy Girl

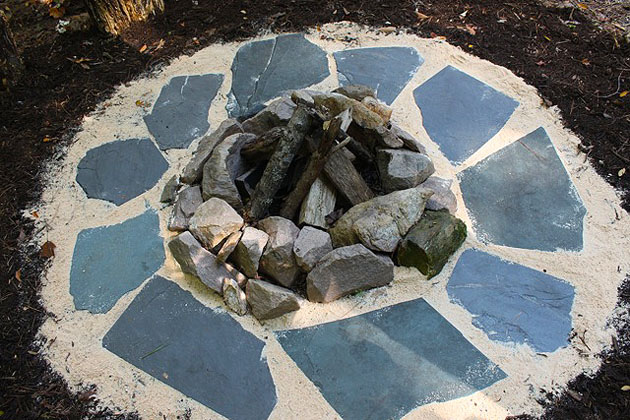
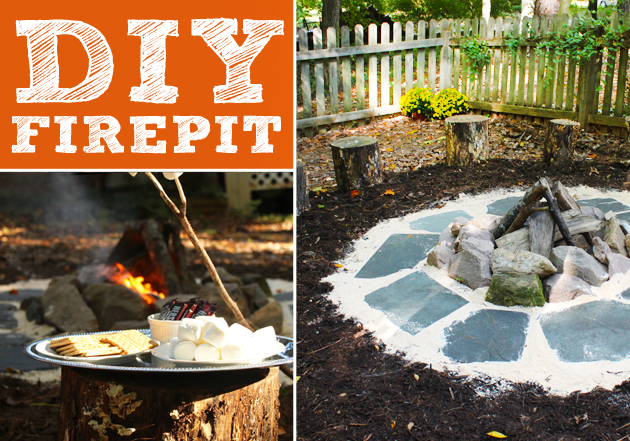
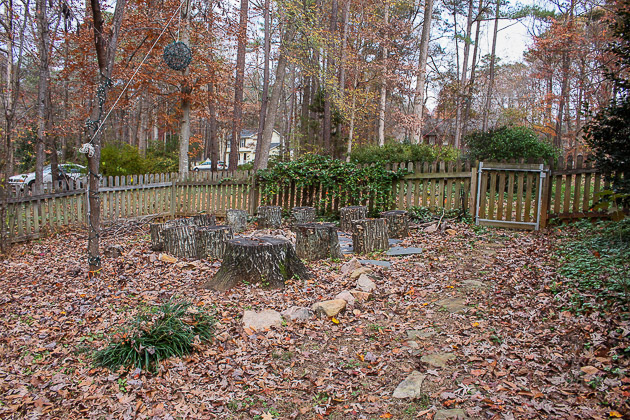
This explains why we only invite close friends over for s’mores and hot dogs at our fire pit. We feel safe knowing they probably wouldn’t sue us if someone tripped on that uneven fire pit circle.

Backyard Landscaping Plans | Pretty Handy Girl

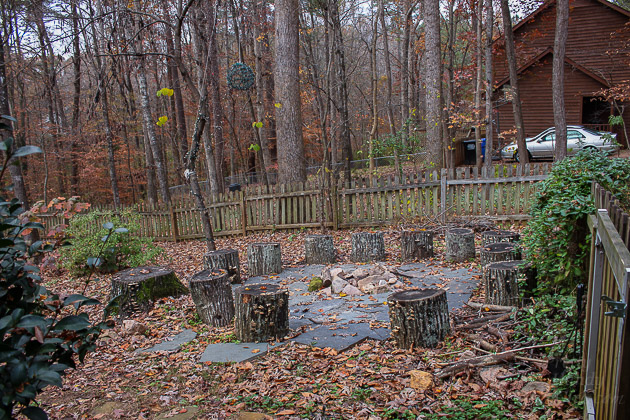
Plus, our friends are usually more forgiving when we tell them to tread carefully over the rocks and roots leading up to the fire pit.

Backyard Landscaping Plans | Pretty Handy Girl

The other side of the fence was previously a dumping ground for all the sticks and limbs that fall in our yard. A few years ago we had to take out two big trees. That gave us one thing our yard truly lacked: a big sunny spot!

Backyard Landscaping Plans | Pretty Handy Girl

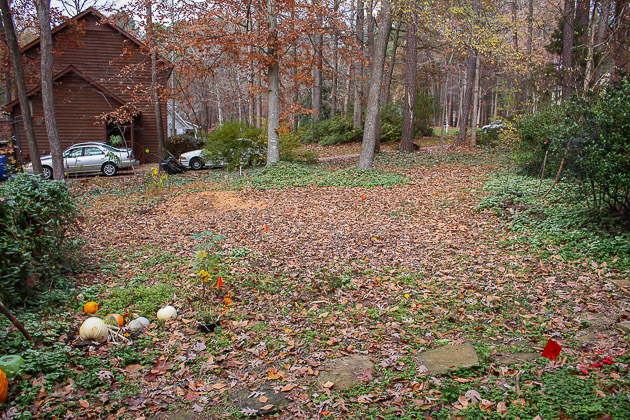
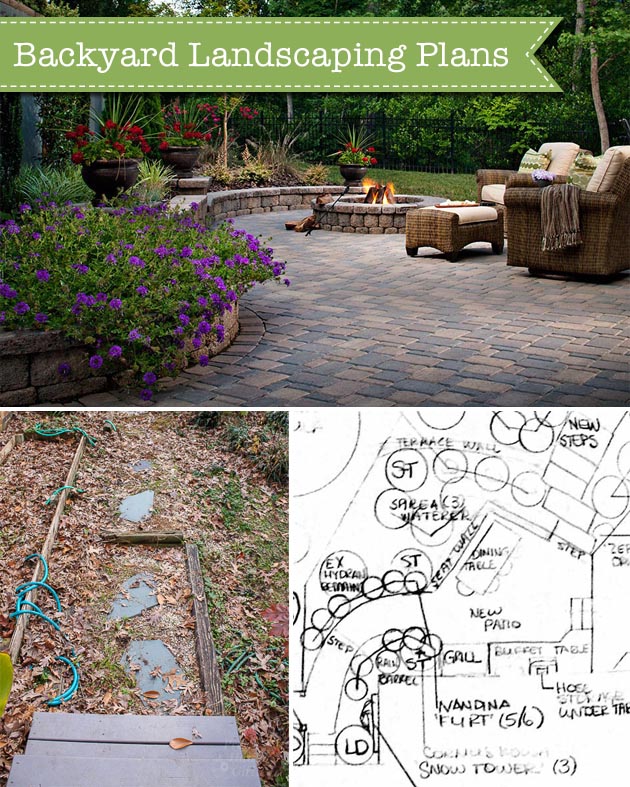
The thought of being able to finally have a place to grow fresh vegetables has me giddy and excited to get started soon! You can see some of the ideas I have for this garden space on my Landscaping Pinterest Board. Read more

Lowe's Spring Makeover Reveal Tour | Pretty Handy Girl

Have you been following all the Lowe’s Spring Makeovers? There were 10 in all, and each one is truly a miraculous transformation. If you remember, there were 10 bloggers who were sent to 10 different areas that were hardest hit by this past winter. We all combed through hundreds of applications to select 10 homeowners who deserved a fantastic makeover. There were challenges; there were lots of Lowe’s heroes who stepped up to help with those challenges; and there were lots of happy tears in the end. You’ll definitely enjoy reading each story and seeing the reveal!

If you’re ready to start the tour, grab a cold drink and head this way—>>> Read more

Lowe's Spring Makeover Reveal | Pretty Handy Girl

Lowe's Spring Makeover Reveal | Pretty Handy Girl

**This project and post has been sponsored by Lowe’s Home Improvement. They are a company that works hard to give back to the community. I am honored to have been given the opportunity to make a difference in one family’s life. Thank you, Lowe’s!**

You guys, there is one thing I love more than a beautiful makeover. That one thing is giving a beautiful makeover to a deserving family. Elizabeth and Jörg moved to this home in September. They had no family nearby and didn’t know a lot of people in the area. And then one of the harshest winters on record hit. For this family, the winter brought more than cold and snow. They also dealt with their youngest being hospitalized and a miscarriage.  Elizabeth’s sister, Sarah applied to give Elizabeth and Jörg a landscape makeover. As the oldest of three girls, I know how awful it feels when one of my sisters is hurting. And I know I’d do anything to help them.

That’s why it felt so good to give up four days (two travel and two work days) to give this young family a beautiful makeover.

If you remember, this is what the home looked like the morning we arrived. No landscaping.

front-yard-before

No pathway. No railings. No plants.

barren-landscape-bed-before

No grass or defined play space. In one respect, we had a clean slate, but it left us with a lot to do!

swing-set-before

And, I couldn’t have done it without all these heroes!

volunteers

After two days of non-stop working, we kicked the homeowners out of the yard, sent them inside and told them they couldn’t look at their yard for the last few hours of the makeover. When they came out, their reaction was priceless: Read more

Dragonfly Garden Decor using a Dollar Store Whisk and Skewer | Pretty Handy Girl

Dragonfly Garden Decor using a Dollar Store Whisk and Skewer | Pretty Handy Girl

Summertime is coming and I’m enjoying spending more time in our garden. I’m always looking for cute craft ideas that I can do with the kids while school is out. When I saw this great idea for making a wire whisk dragonfly on Morena’s Corner, I knew I had to try it. I altered Morena’s plans slightly using plastic beads and used a skewer for the plant stake. The cost and materials are minimal to make this Dragonfly Garden Decor using a Dollar Store Wire Whisk and Skewer. This craft can be done with the kids, but you’ll need to be the one to cut and bend the wires and watch out for the pokey edges with real little kids.

Dragonfly Garden Decor Materials:

Dragonfly Garden Decor using a Dollar Store Whisk and Skewer | Pretty Handy Girl

  • Wire whisk
  • Wire skewer
  • Beads
  • Needle-nosed pliers

Dragonfly Garden Decor Instructions:

Begin by bending the first wire loop out to the side to create a wing.

Dragonfly Garden Decor using a Dollar Store Whisk and Skewer | Pretty Handy Girl

Repeat with three more loops (2 on each side).

Dragonfly Garden Decor using a Dollar Store Whisk and Skewer | Pretty Handy Girl

Use the needle-nosed pliers to cut one wire loop into two short pieces as shown below. (You might need to twist the pliers back and forth to cut the wires.) Read more

DIY Firepit and Seating | Pretty Handy Girl

DIY Firepit and Seating | Pretty Handy Girl

Firepits are very popular right now. You can purchase a simple firepit at your local home improvement store, or put in a little sweat equity and create a DIY Firepit with Seating.

When we had several hardwood trees taken down in our yard, I asked the tree guy to cut some of the base pieces of the tree trunk into 18″ segments to use as stumps to sit on.

Then I set about creating a DIY firepit and seating in our back yard.

Materials:

  • Shovel
  • String
  • Stake
  • Stick
  • Rocks or fire ring
  • Sand
  • Bag of drainage gravel
  • Slate, stepping stones or pea gravel
  • Mulch or crushed stone
  • Stumps or seating
  • Wood to burn

Instructions:

Begin by locating a level location to build your fire pit. Take note of any overhanging branches and trim them away from the firepit area. Hammer the stake into the center of your firepit area. Attach string and make a loop in the string at 6 feet. Insert a stick into the loop and walk around pulling the string taut while dragging the stick in the earth to mark a 12 foot diameter circle. Create another loop at 4 feet and repeat marking an inner circle. Finally, create a loop at 1 foot and drag the stick to mark the firepit ring area.

DIY Firepit and Seating | Pretty Handy Girl

Dig a hole in the 2 foot firepit ring area. Remove any roots from the dirt. Dig about 12″ down. Fill the bottom of the hole with gravel. Add a layer of sand on top of the gravel. Line the 2′ firepit area with a fire ring or rocks (or both).

DIY Firepit and Seating | Pretty Handy Girl

Pour sand around the 8 foot diameter circle and set your stepping stones or pea gravel in this area. Read more