Pottery_barn_like_organizational_box

I love a challenge. If you hold an object up to me and ask me how it can be transformed, I can usually name a few different things. So, when the Elmer’s #Look4Less Challenge was introduced, I jumped at the opportunity!

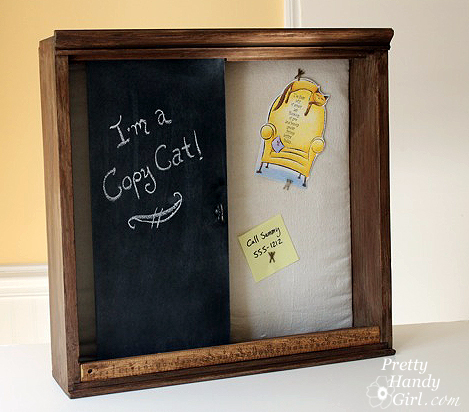
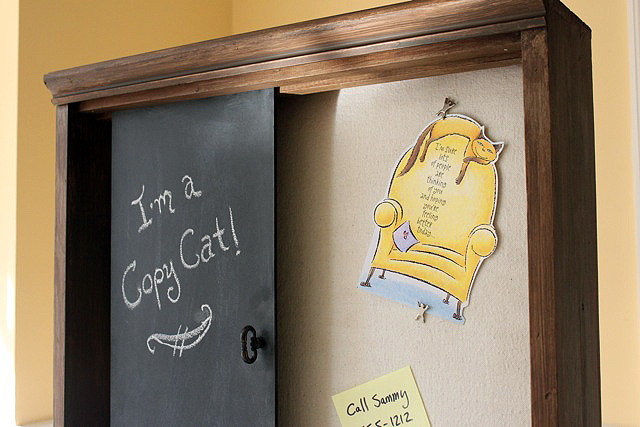
For this challenge I chose to recreate Pottery Barn’s Sliding Chalkboard Wall Organizer. I loved the idea of a sliding board and a bulletin board in the back. But, I especially loved the rustic wood look.

However, I wasn’t crazy about the price. (Obviously that didn’t stop the item from selling out!) So, if you want one for yourself, I’ll save you $100 and show you how to make your own!

My version cost approximately $30 (cost estimate based on materials used. If I used a 1/2 can of spray paint I calculated half the cost.) Personally, I spent about $10 out of pocket on this project because I had a lot of the supplies already. Plus, Elmer’s was kind enough to sent me some of the materials to make the project (shown as links below.)

Be sure to read the end of this post to learn how you can win your own Elmer’s materials!

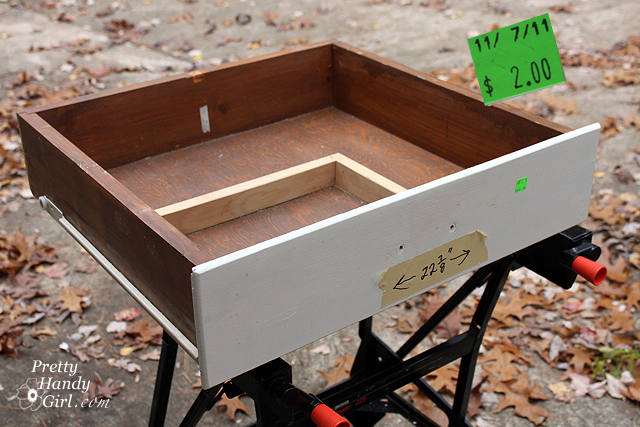
In addition to the new art supplies, I bought an old drawer to use for the structure of my organization unit. I paid — are you ready for this — two dollars at our local Habitat ReStore! Seriously, only $2 for the main component of my wall organizer unit.

Here is a list of the rest of the supplies I used:


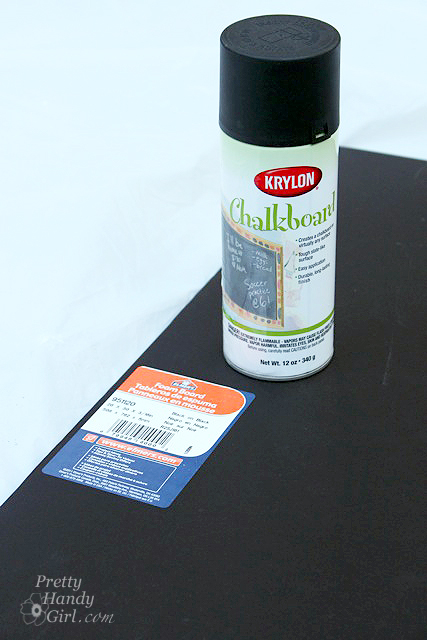
  • Krylon chalkboard spray paint
  • Drawer
  • Damp rag
  • Painter’s drop cloth
  • Batting
  • Wooden ruler
  • 1 Knob
  • Washers
  • Rustoleum brown spray primer
  • Behr glazing liquid
  • Valspar mocha glaze
  • Acrylic or latex paint (dark brown tester sample)
  • Acrylic or latex paint (light tan tester sample)
  • Wood putty
  • Saw
  • Hammer
  • Drill and drill bits
  • Handsaw
  • Brad nails
  • Finish Nail
  • Construction glue
  • Clamps
  • Pencil
  • Trim molding
  • 1″ x 1″ wood strips (or square dowels)
  • Duct tape

Prepping the drawer:

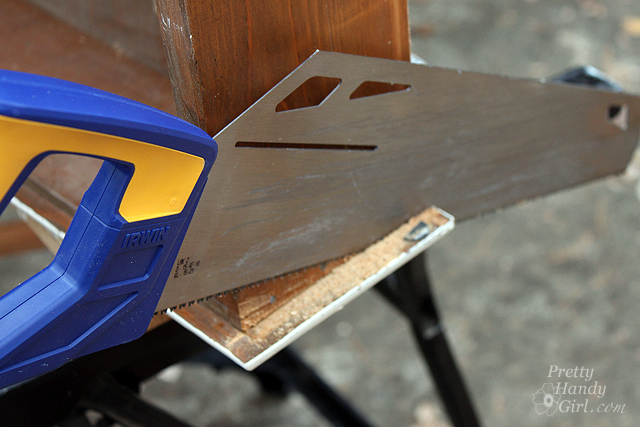
Remove any hardware from the drawer. Use a handsaw to trim off the sides of the face of the drawer. You want the sides to be flush with the sides of the drawer. The top and bottom of the face can extend beyond the drawer.

Orient the drawer so the face is now the bottom of the wall organizational unit. The rear panel of the drawer is now the top of the unit.

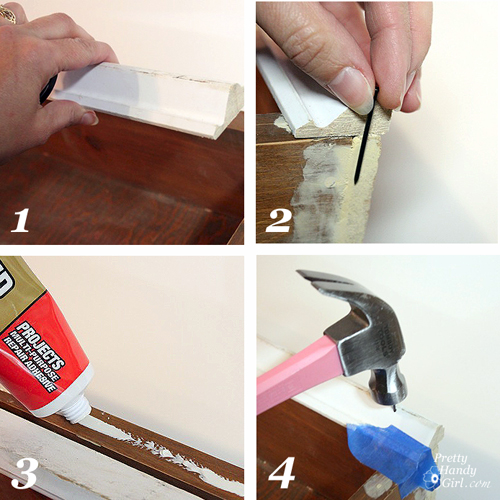
Add decorative trim molding to the top as shown:

  1. Cut decorative trim molding to the width of the top of the unit/drawer. (Check with your local Habitat Restore for inexpensive trim.)
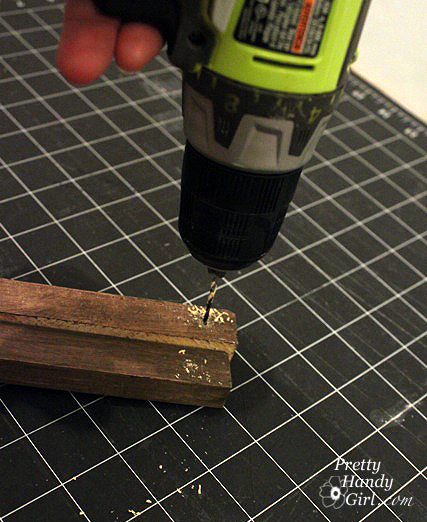
  2. Choose a finish nail that is long enough to go through the molding and into the drawer. Drill a few pilot holes into the molding (to avoid splitting the wood when you hammer a nail into it.)
  3. Run a bead of construction glue on the top of the drawer. Lay the molding on top of the glue.
  4. Use finish nails to hammer through the pilot holes and attach the molding to the drawer.

Wipe off the drawer/unit with a wet rag.


Faux painting the unit:

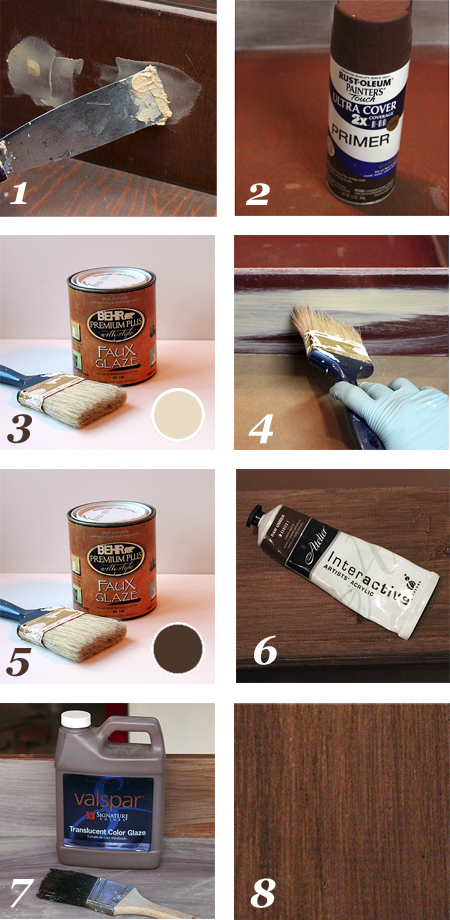
If you are dealing with a mixture of wood finishes (some paint, some stain), you will want to prime and paint your unit. I decided to give mine a faux rustic wood treatment (because I love that rustic wood look!) Here are the basic steps:

  1. Use wood putty to fill any holes or cracks. After the putty has dried, sand it smooth. Wipe off any dust from the wood using a damp rag.
  2. Prime the entire box (minus the back) with Rustoleum brown primer.
  3. Mix 1 part glaze to 2 parts light tan paint.
  4. Brush the mixture onto the unit using a tattered paint brush. Keep the strokes in long lines to mimic wood grain.
  5. Let that layer dry. Mix 1 part glaze to 2 parts dark brown paint.
  6. Brush it on the unit using the same technique as step 4.
  7. Finish up by brushing a coat of Vaspar Mocha glaze over the entire unit.


Creating the bulletin board:

After the glaze has dried, cut a piece of Elmer’s White Foam Board the dimensions of the inside of the drawer/unit.

Cut a piece of batting the same size as the foam board.

Cut a piece of painters’ drop cloth 2-3″ wider (on all sides) than the foam board.

Layer the drop cloth, then the batting and top it with the foam board.

Wrap the edges of the drop cloth around the foam board and secure it with duct tape.

Add a few Elmer’s CraftBond Glue Spots Pop-up Medium to the back side of the foam board and press the board into the back of the unit. Instant bulletin board!


Adding a graphic letter to the bulletin board:

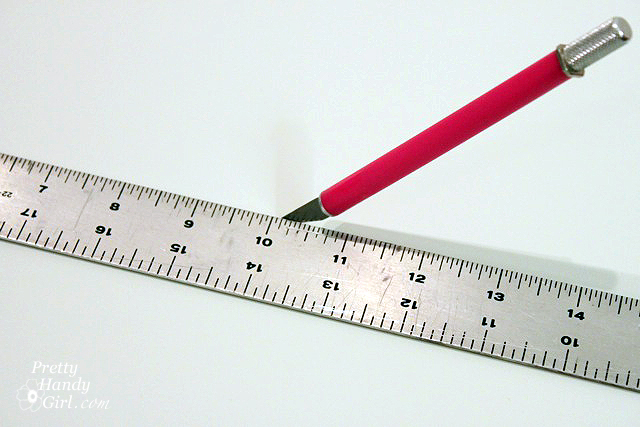
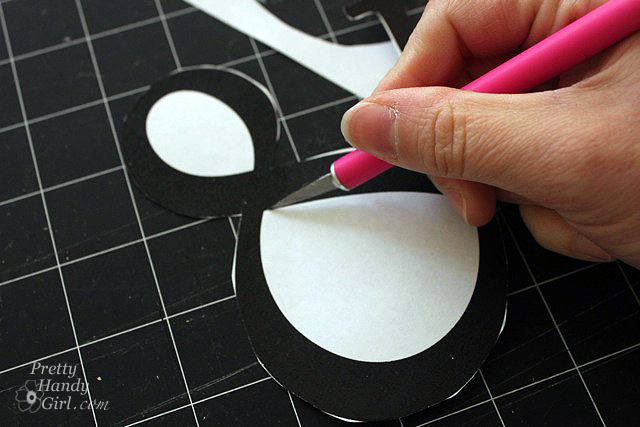
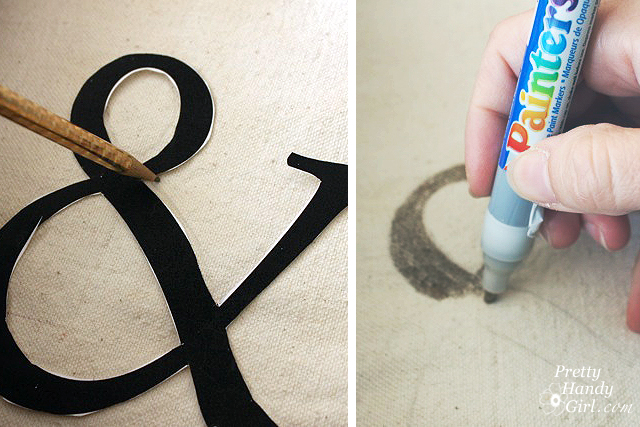
Print out a large letter, number or symbol. Cut out around the shape using an x-acto knife.

Position the cut out onto the bulletin board and trace around the edges lightly with pencil.Use an Elmer’s Painters gold paint marker to color inside the pencil tracing.


Creating the sliding chalkboard:

Cut the Elmer’s Black Foam Board the height of the interior of the drawer/unit and about 1/3 the width.

Spray the black foam board with the chalk paint. Add 1-2 more light coats per the directions on the can.

Measure the interior width at the top and bottom of the organizational unit. Cut two 1″ x 1″ strips of wood (or square dowels) for the top and 2 strips for the bottom. Drill a hole in each end of the strips.

Measure out 1″ from the bulletin board, on the bottom of the unit. Mark this location. Repeat for the top . Run a bead of construction glue onto the bottom of the wood strip and then adhere it to the bottom of the unit at the 1″ measurement mark.

Hammer brad nails into the predrilled holes. Repeat for the top of the cubby. (Two 1″ square strips are shown, but only install the back ones at this time.)

If the chalkboard paint has dried, rub a piece of chalk all over the board to season it. Wipe it clean with a dry cloth.

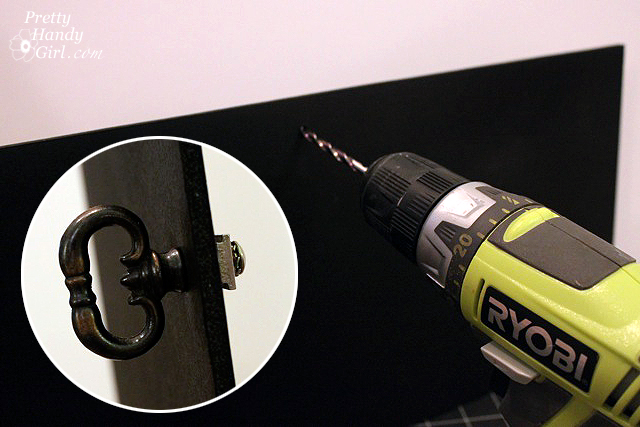
Drill a hole into the chalkboard where you want the handle. Feed the handle through. Add washers to the backside of the chalkboard if you need to take up some of the slack on the screw.

Insert the chalkboard into the wall unit and rest it against the first strip. Add the second strip in front of the chalkboard and attach it the same way you did above.

Be sure that the wood strips are not too snug against the chalkboard. The board should have enough freedom to slide back and forth freely.


Finishing touches:

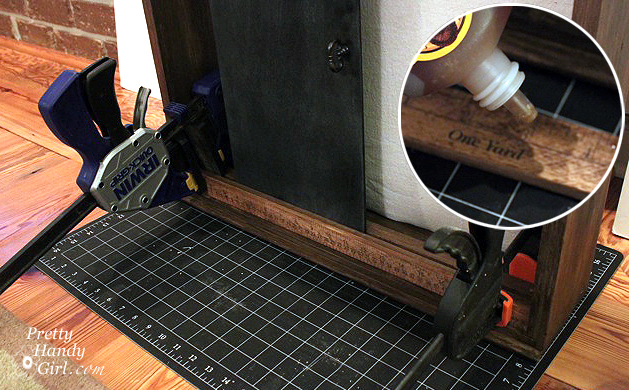
If you want to give your ruler some age, rub a walnut stain onto the wood. Let it dry. Glue the wooden ruler to the front of the wood strip on the bottom using construction glue.

Clamp the ruler in place and let it dry overnight.

Add your pushpins and a message to the chalkboard and enjoy your efforts! You just saved yourself $100!!! Woot!

If you want instructions for hanging the unit, check out this post on hanging objects on the wall (the right way) the first time.

I’m pretty pleased with my Pottery Barn copy cat. Not to be mean or anything, but I like mine better because of the ruler,

the decorative crown molding,

and most of all for the price!!!
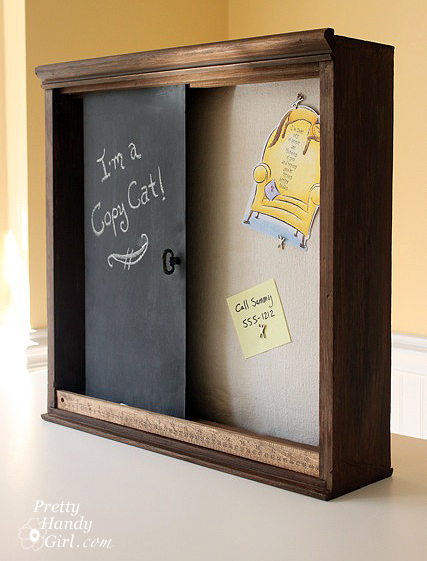

Do you like my Pottery Barn knock off? Or does it still look like an old discarded drawer to you?


Disclaimer: This project has been compensated as part of a social shopper insights study for Elmer’s #gluenglitter #collectivebias #CBias. I was paid a small fee and sent some Elmer’s products. However, the ideas and opinions expressed in this post are solely mine.

Sharing with Sawdust and Paper Scraps – Build{hers} Link Party

Did you like this post? Want to be notified when there are more fantastic tutorials by Pretty Handy Girl? Sign up to receive emails in your inbox:

Enter your email address:

Delivered by FeedBurner

Or follow me on Twitter or Facebook so you can be the first to know!


how to use a cordless drill

A cordless drill is an essential tool for any DIYer. If you don’t have one, stop reading this and go buy one! Seriously, a cordless drill is one of the most important tools for your toolbox.

how to use a cordless drill plus buying guide

How to Use a Cordless Drill

If you’ve been reading my blog for a while you know I use a cordless drill for almost every project. You could say, my drill is my right-hand man. Over the years, I’ve used many different brands with a variety of features. Today we’ll discuss how to use a cordless drill and a list of features you should look for when buying a new drill. Consider this your comprehensive guide to cordless drills.

(I’ve included affiliate links for your convenience. I earn a small percentage from a purchase using these links. There is no additional cost to you. You can read more about affiliate links here.)

These Tools are Not a Drill:

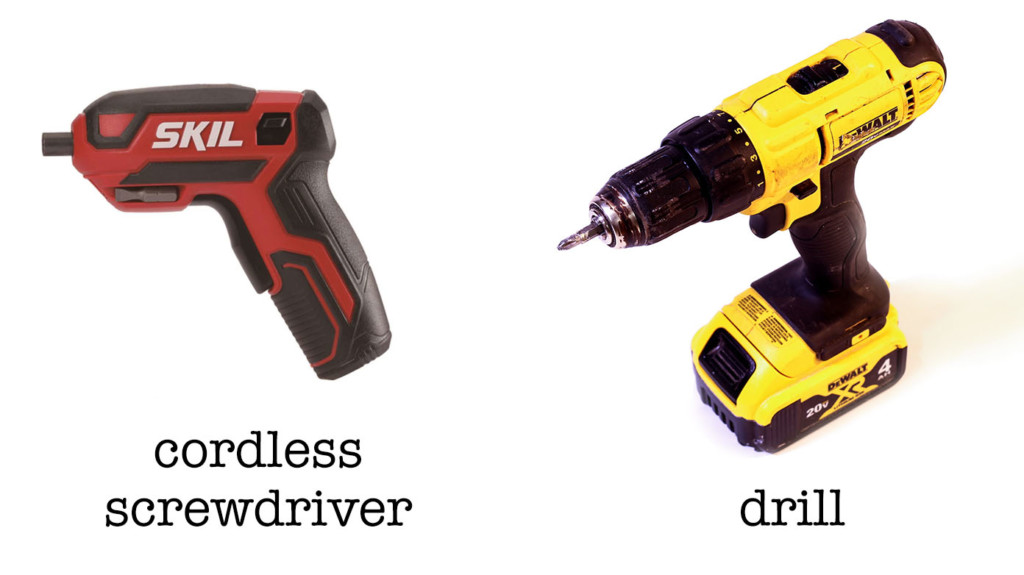
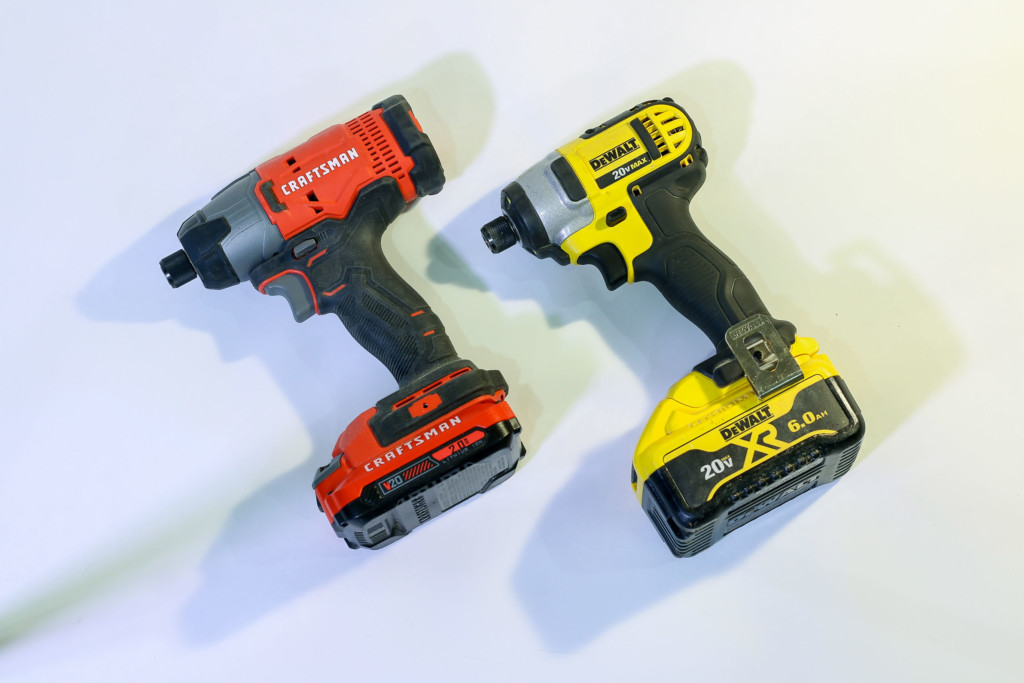
Before we talk about how to use a cordless drill, I want to explain to you the difference between a cordless drill, a cordless screwdriver, and an impact driver.  Although they may look alike, impact drivers and cordless screwdrivers are not drills.

Cordless Screwdriver:

Some may look like a drill, but a cordless screwdriver does not have the power or speed to drill holes, or drive screws into hard materials. It also has no torque or speed adjustments. In fact, a cordless screwdriver is strictly for loosening and tightening screws.

cordless screwdriver vs a drill

Impact Drivers:

impact driver

Although they also look like drills, impact drivers are solely meant to drive screws or bolts into tough material. But, can also be used with a quick change drill bit for small holes.  An impact driver has rotational force onto the sides of the bit giving more force when driving screws or bolts. Unlike a drill, the impact driver does not have torque adjustments or a twisting chuck to change bits.

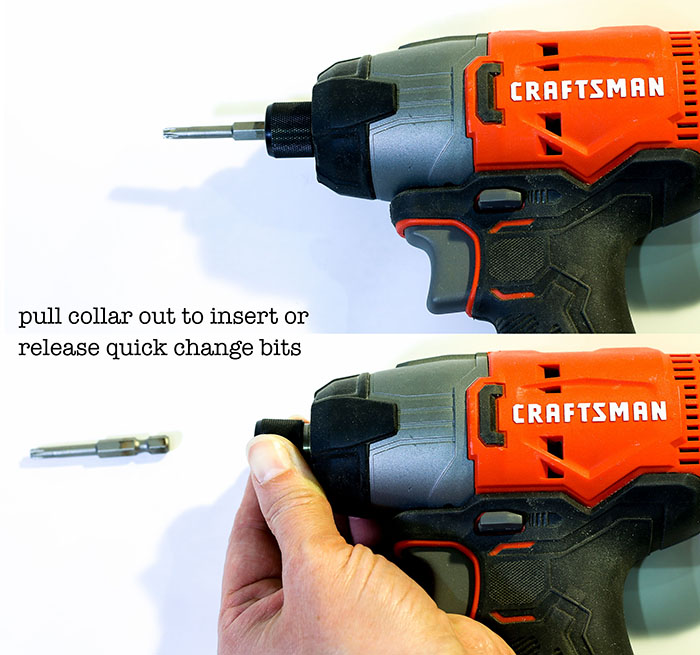
quick change bits

Impact drivers don’t have a chuck to hold the bit. They use a collet to hold bits. Impact drivers accept 1/4″ hex and quick change bits. The collet releases the bit when pulled away from the tool.

Now that you know the difference between a drill and a cordless screwdriver or impact driver, let’s talk about the features on a cordless drill.

About Cordless Drills:

When you first pick up a cordless drill, all the buttons and symbols on the drill may seem confusing. Have no fear, I’ll break it down and give you a little more information about torque, speed, and those symbols to simplify things.

variety of cordless drills

What is Torque:

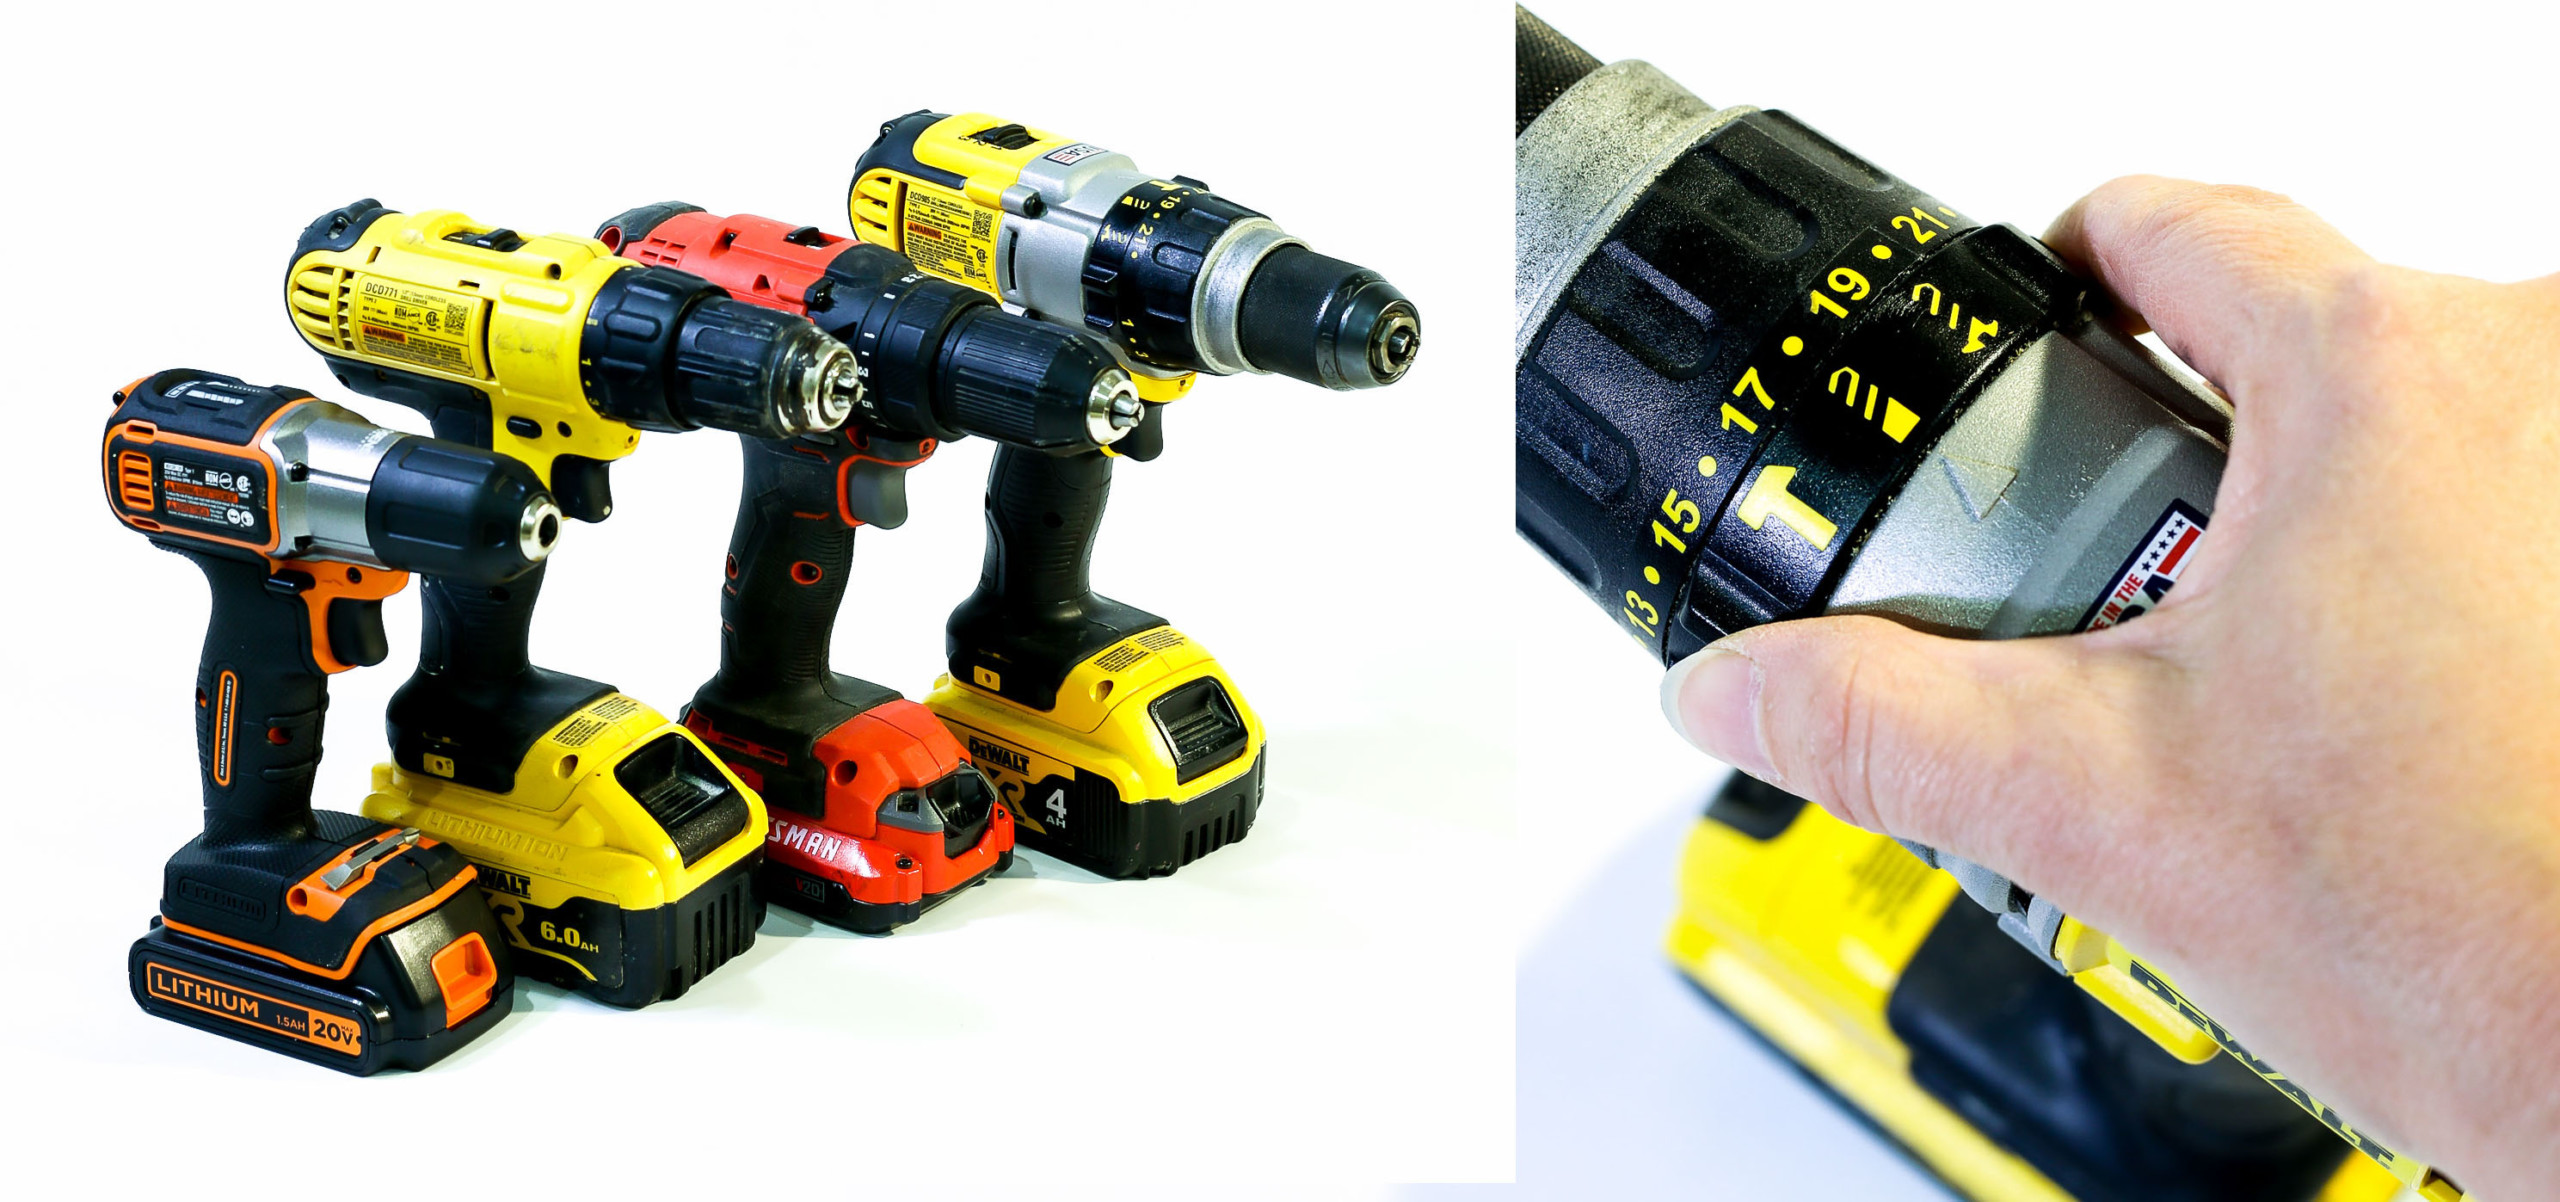
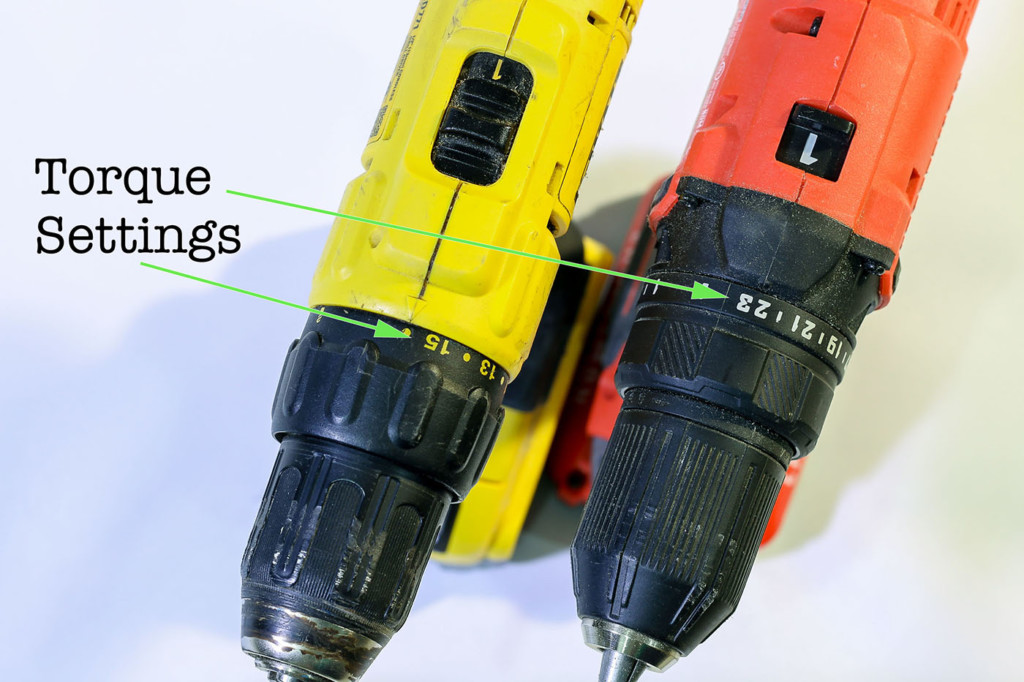
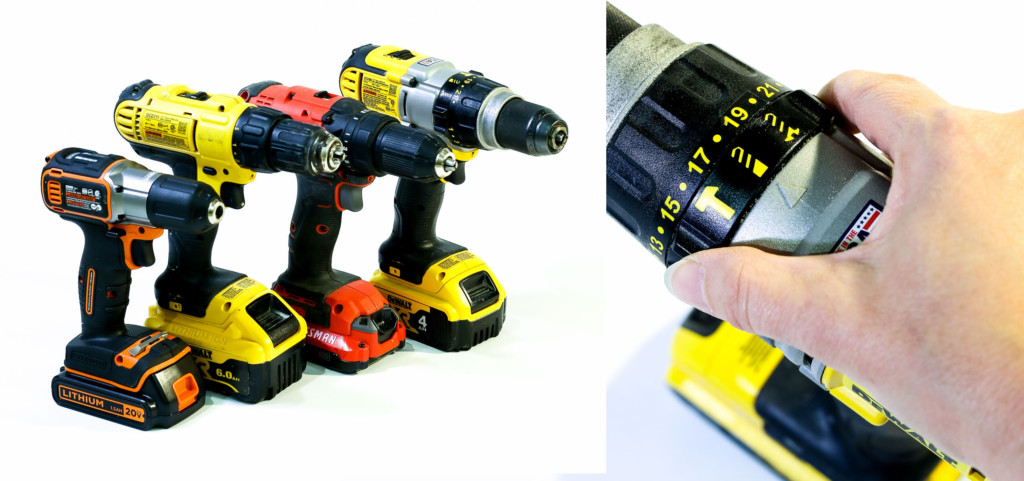
Torque is the amount of force your drill uses to turn an object (like a screw or drill bit.) All cordless drills have a clutch to change the torque setting. The clutch on your drill is the dial on the front of your drill just behind the chuck.

torque settings on drill

If you need more torque, use a higher number. But, if you are driving screws into softwoods, use a lower setting for more control and less likelihood of driving the screw too far into the wood.

Speeds on a Cordless Drill:

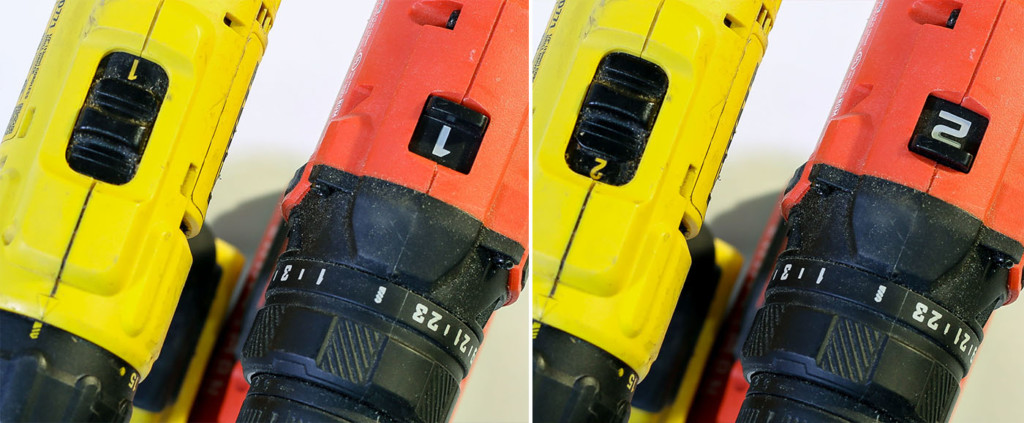
Some drills have an adjustable speed setting (or gear) switch on the top of the drill. Switching between one or two will give you access to more speed or less speed. Selecting the number two will produce higher speed and more power for drilling and driving bigger screws. This is a nice feature and helps when you need to switch from driving smaller screws into softwood vs. driving larger screws into hardwood or drilling.

speed setting on drill

Direction Selection:

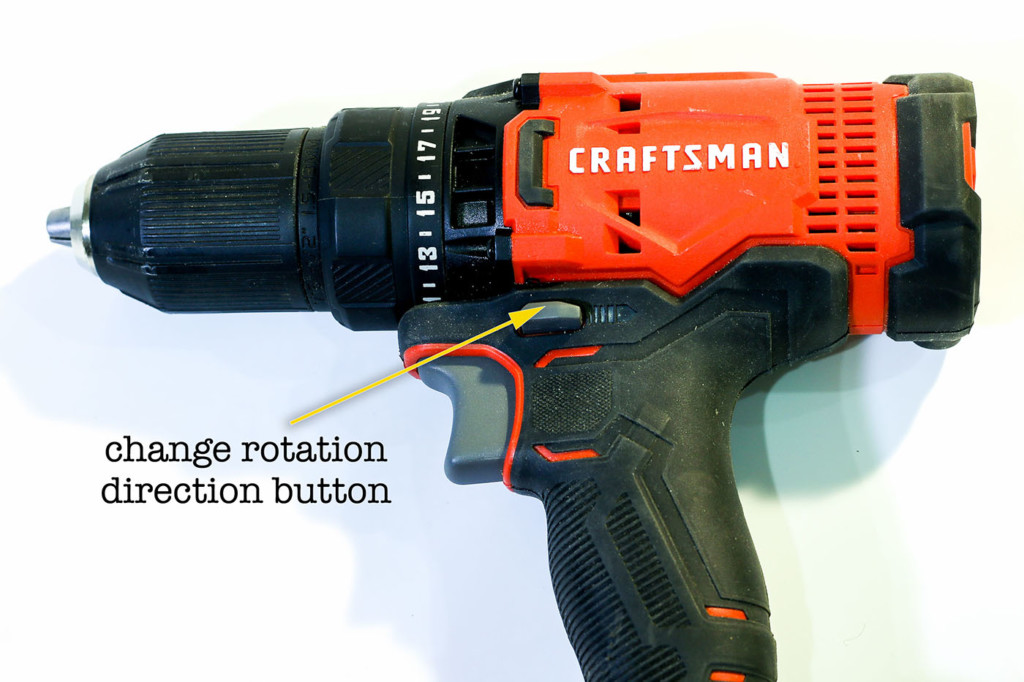
There is a button on each side of the drill just above the trigger that is used to change the drill rotation direction. Clockwise to drill and drive screws. Counter-clockwise to remove screws and bolts.

drill rotation direction button

Optional Features on a Cordless Drill:

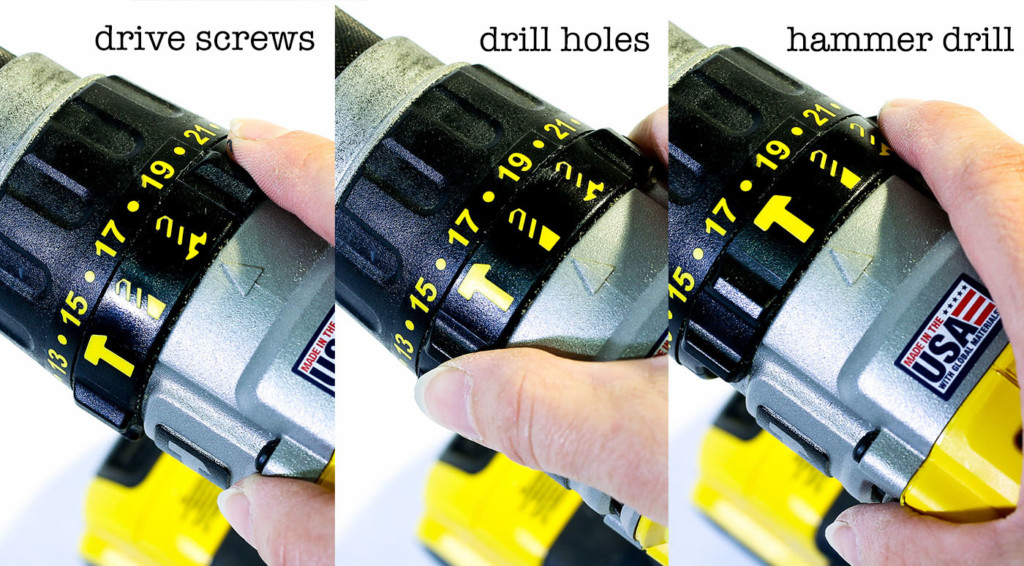
Drills come with a variety of features. Depending on your needs, you may be fine with a standard drill that drives screws and drills holes. But, if you are working on more difficult tasks, you may want a drill with a hammer drill setting.

settings on a drill - drive screws, drill holes, hammer drill

Task Selection:

  • Drive Screws: The first function is self-explanatory. Use the drive screws function to screw in fasteners or remove them.
  • Drill Holes: The hole drilling function runs at the fastest speed and is used for drilling holes with a drilling bit.
  • Hammer Drill: A hammer drill is useful for drilling holes or driving bolts into tough material. A hammer drill has a hammer action from the rear that pulses force directly onto the bit (like a small jackhammer.) In contrast, an impact driver has a rotational pulse on the sides of the bit. (See above for more information about impact drivers)

Light Up Your Task:

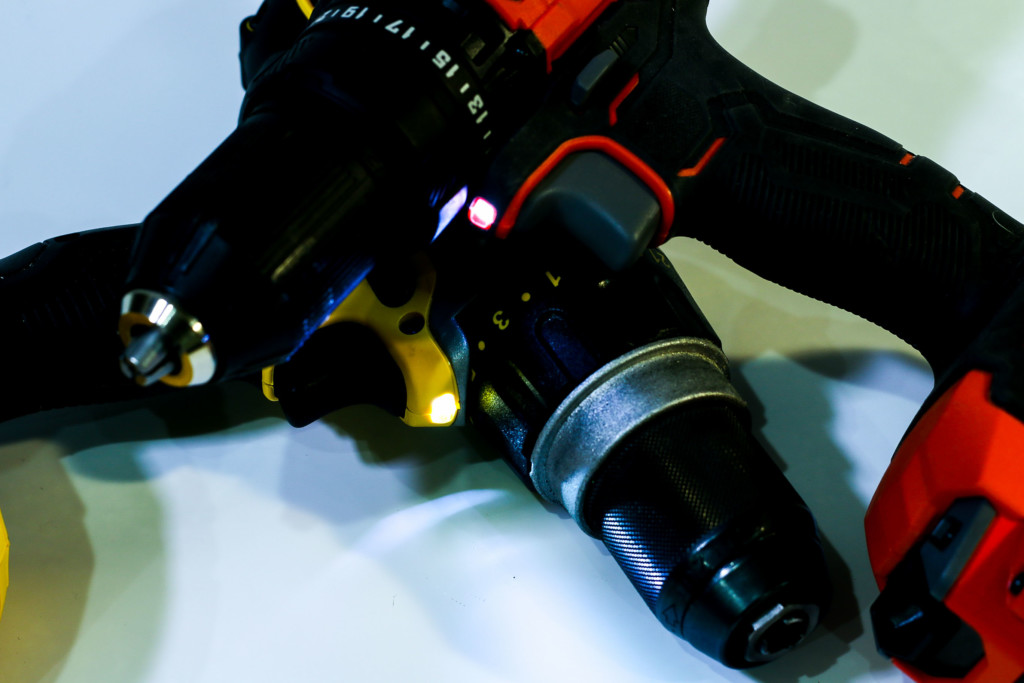
Another nice feature to have on a drill is a light. Most mid-range to upper range drills have a light that is activated when pulling the trigger on the drill. Although not 100% necessary, anyone who has tried to see inside a cabinet while using a drill appreciates the light feature.

lights on drill

Belt Clip:

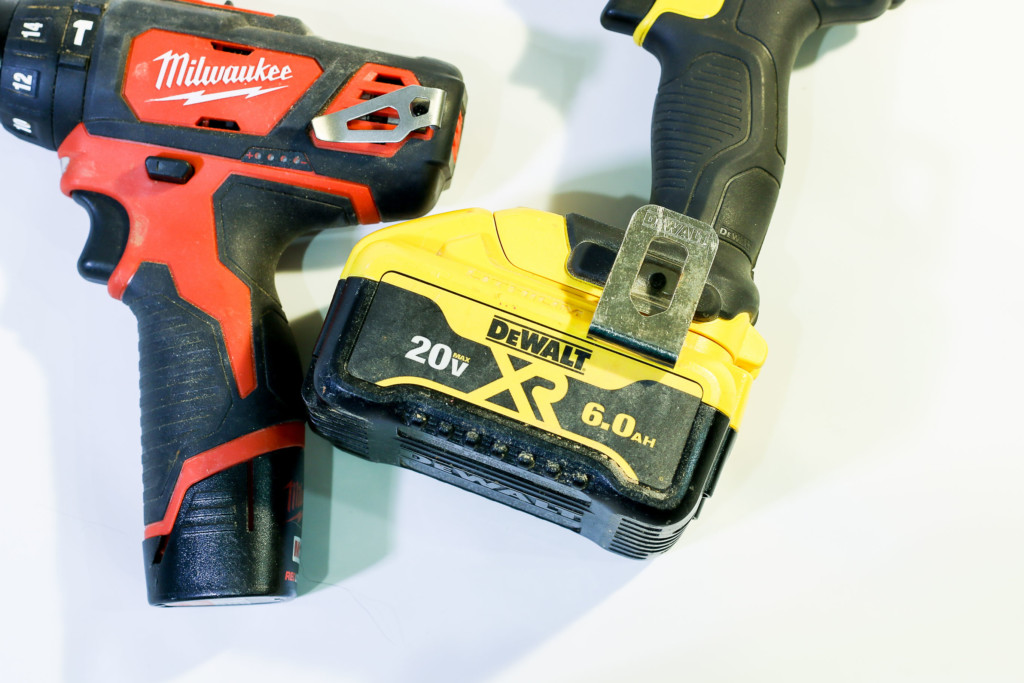
Having a belt clip on a drill is one of those features that a tradesperson finds exceptionally helpful when juggling tools on a ladder. Instead of setting the drill precariously on top of the ladder, it can clip onto your belt.

belt clips on cordless drills

Magnetic Holder:

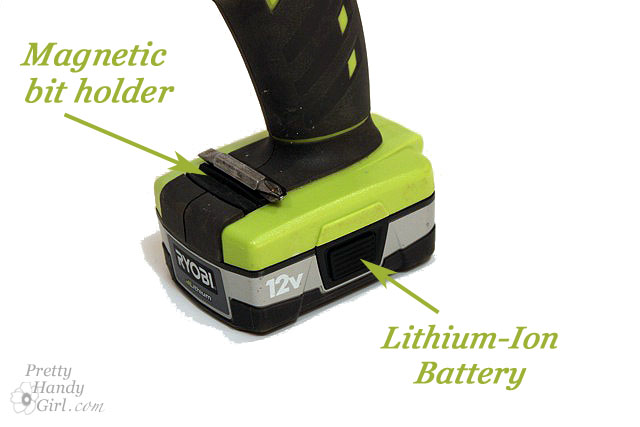
One of my favorite features on a drill is a magnetic bit holder. This is not standard on drills and frankly I have only seen a few drills with this feature, but I wish more were manufactured with it.

How to Replace Bits on a Drill

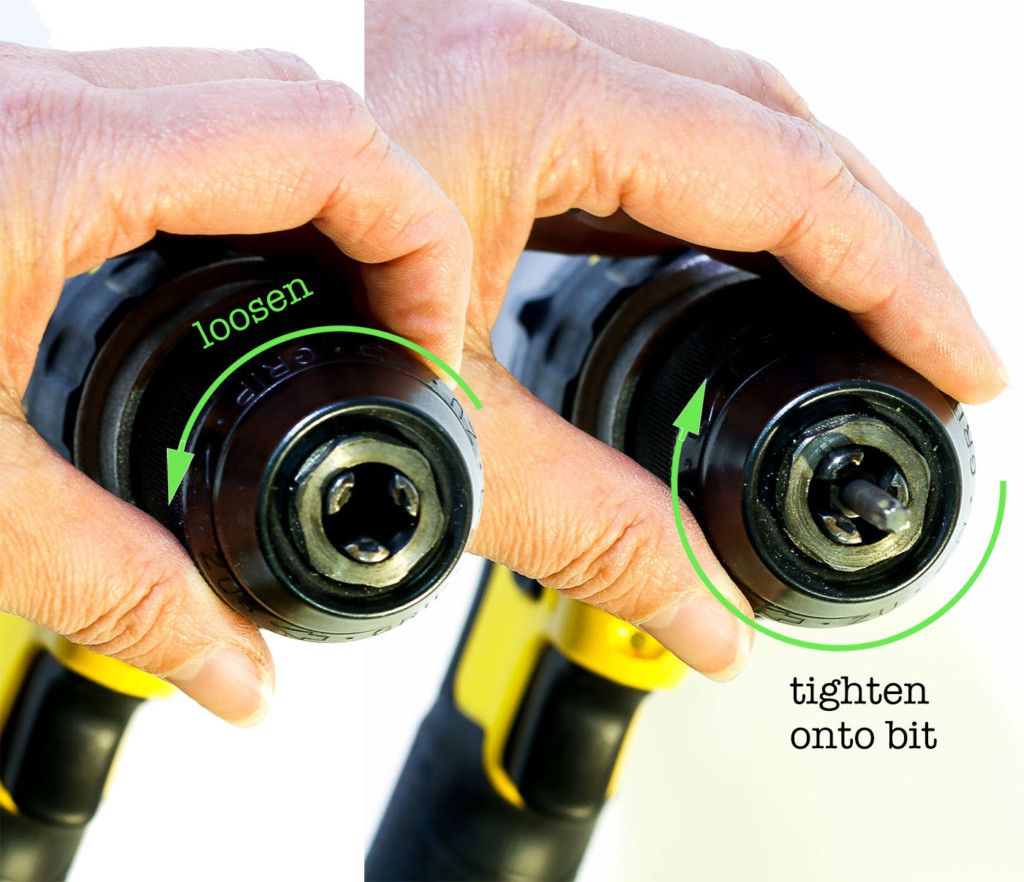
Cordless drills have a keyless chuck. To change the bits, simply turn the chuck counter-clockwise to loosen. Insert the new bit and turn clockwise to tighten onto the new bit (making sure the bit is centered in the claws of the chuck.)

counter clockwise loosen chuck, clockwise to tighten chuck

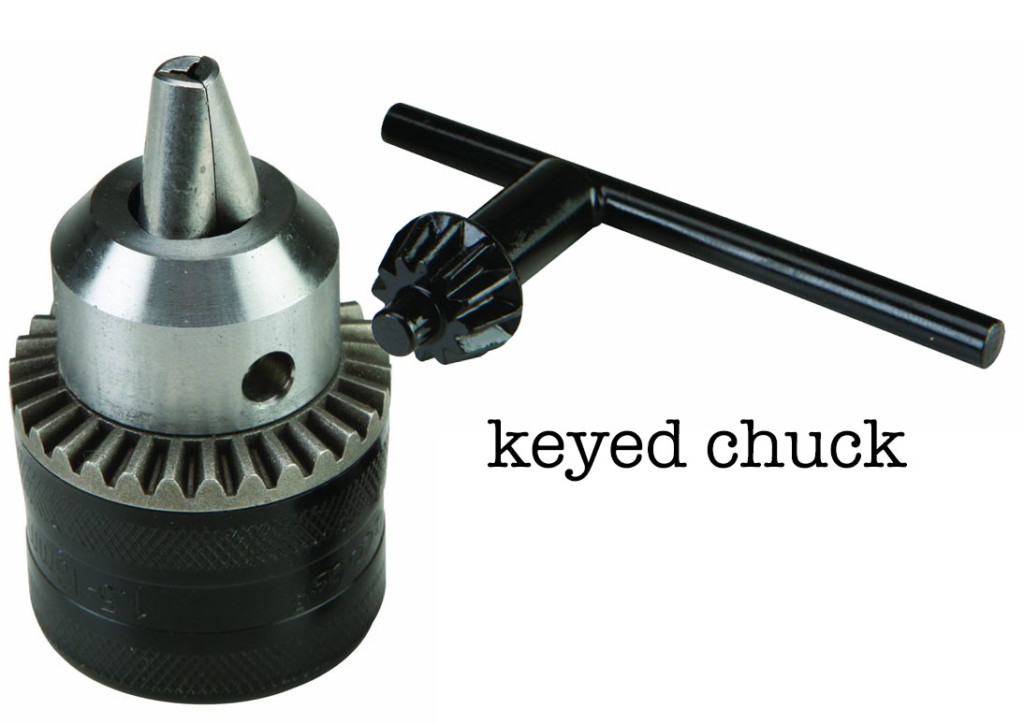
A keyed chuck is found on most corded drills. The key (black tool shown below) fits inside the hole on the side of the chuck and turns the gears on the chuck to loosen or tighten it.

key and chuck


Costs for a Cordless Drill:

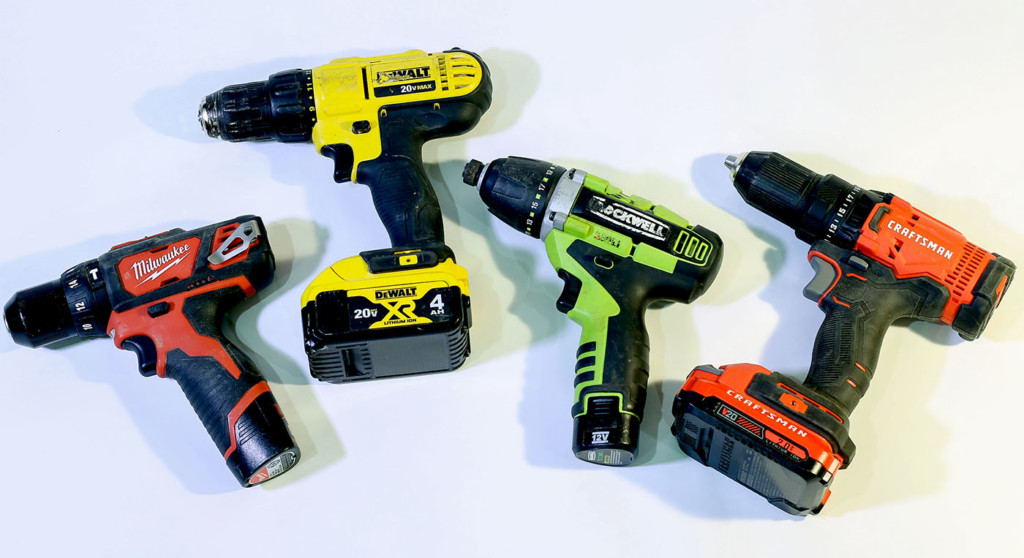
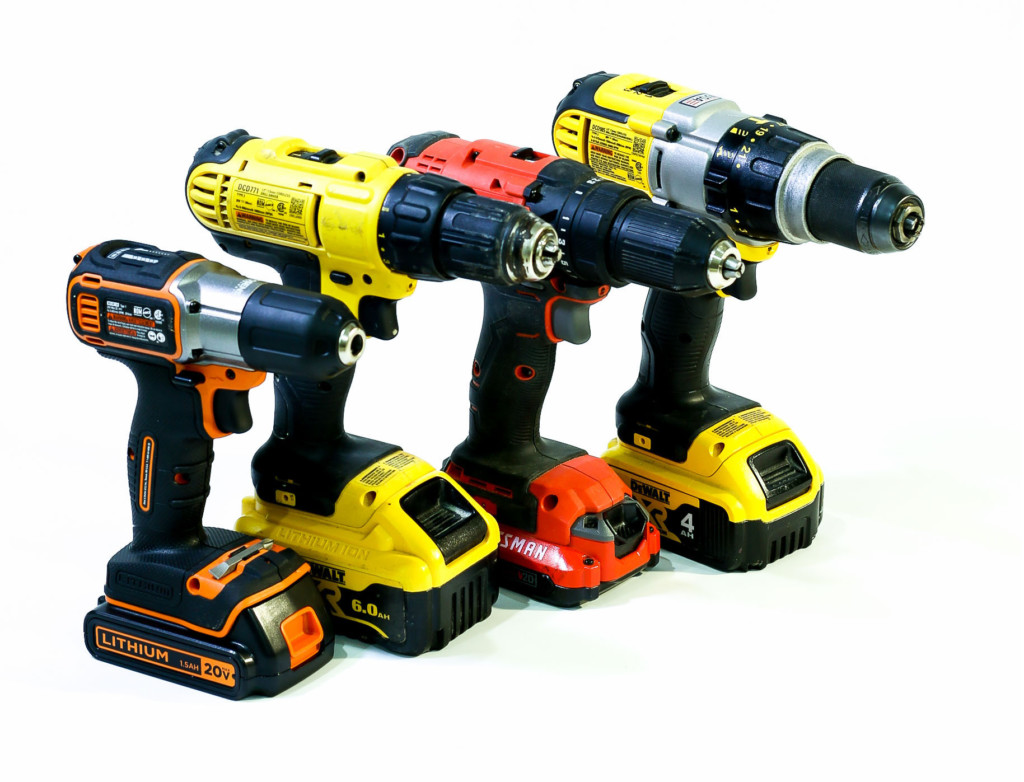
4 cordless drills, different brands

Brand and features factor into the price of a cordless drill, but typically a DIYer can expect to spend $50 – $150 on a drill.  My first drill was a Ryobi 12 volt Lithium Ion cordless drill, but I quickly upgraded to a more powerful Milwaukee Drill/Driver. Now I’ve switched over to a cordless DeWalt drill/driver set because most of my cordless tools are DeWalt cordless tools. Keeping all your cordless tools in one family will save you money, space, and the hassle of having too many different batteries in your toolbox. (Side note: DeWalt batteries are cross-compatible with most of their 20v tools? The exception is the 12v tools that will only run on the 12-volt batteries. And the 60V and 120V tools will need the stronger FlexVolt batteries.)

How Many Volts Do I Need?

You may be curious about what the volts mean on the drill you’re considering. In short, the volts equal the power of the drill. The higher the voltage, the stronger the drill. In all honesty, I would recommend purchasing an 18-volt drill if you plan to use it for multiple DIY projects. In the beginning, you might try a 12-volt drill, but as your projects grow you’ll find the 12 volts don’t have the power needed to muscle through hardwoods and other tough materials. The DeWalt drill I use now is a 20 volt, but I needed the power to muscle through old-growth lumber in the renovation I was working on.

Batteries: Ni-Cad vs. Lithium-Ion

When I first wrote this article, lithium-ion battery drills were just coming onto the market. Lithium-ion is the latest battery technology. Lithium-ion batteries will last through many more recharges than a Ni-Cad battery.  And, they don’t lose charging capacity over time. The lithium-ion batteries also maintain power as the battery runs low. As the battery loses charge, it will stop when the battery runs out.

Luckily over the years, lithium has become more the norm in the cordless department. If you are in the market for a new drill, be sure to make sure you are purchasing a lithium-ion battery-powered drill. Beware of used or inexpensive Ni-Cad battery drills. You will save money on one now but will need to replace the battery (or worse not be able to purchase new batteries) for it before long.

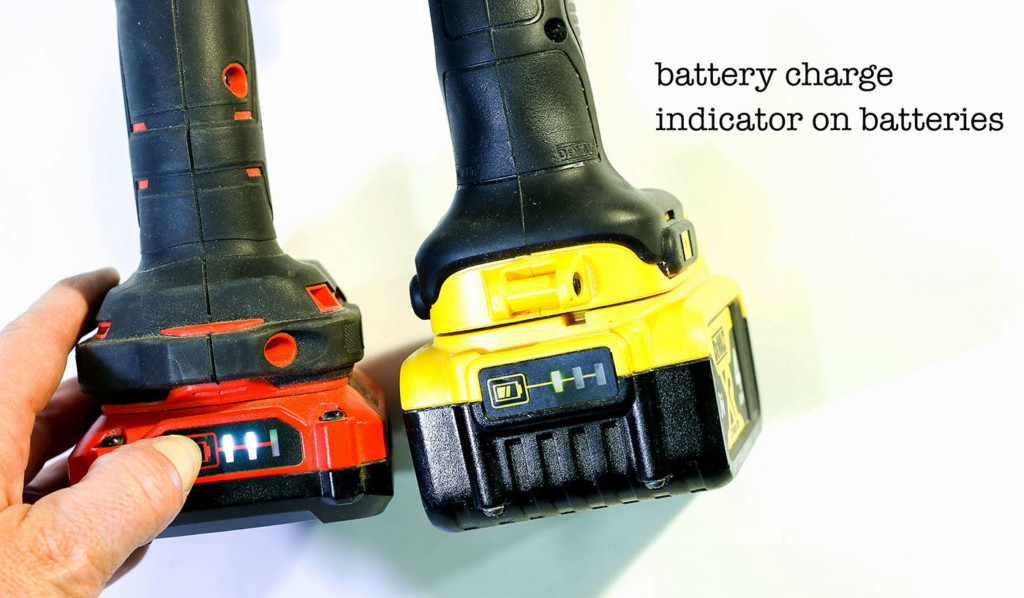
Speaking of battery life, I recommend choosing a cordless battery that has a charge indicator on it. There’s nothing worse than grabbing a battery you thought was fully charged only to realize it’s not.

battery charge indicator on cordless battery

Feel the Weight of the Drill:

Now that you are honing on in the features you want in a drill, let’s talk about weight and balance. I highly recommend trying a drill before you buy it. Go to the hardware store and ask to hold the drill with its battery inserted. Some drills (especially the higher voltage drills) will be significantly heavier than a smaller 12-volt battery drill and may cause wrist fatigue if you aren’t used to the heft. You also want to feel the balance of the drill in your hand. A nicely balanced drill can easily be held with one finger wrapped around the trigger and the tool resting balanced on your hand. A front or back heavy drill can put extra strain on your wrist.

How to Use a Cordless Drill:

Time to start using a cordless drill! This is a very user-friendly tool as long as you know a few simple safety tips.

how to use a cordless drill

Safety Tips:

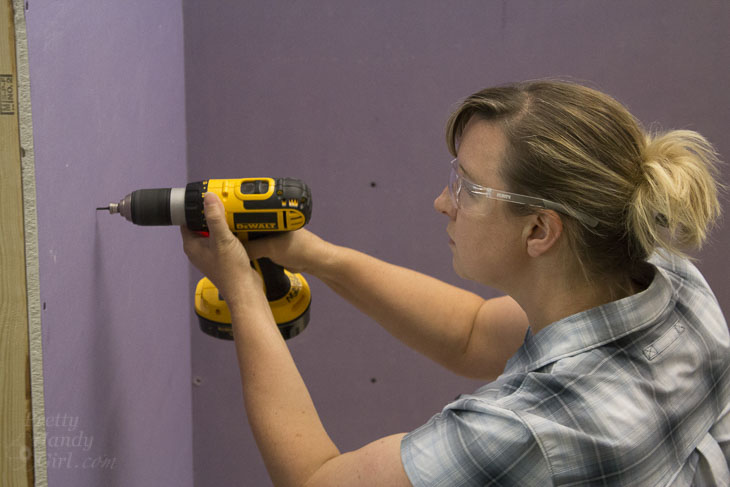
Never wear loose clothing or gloves when using a drill. Keep long hair tied back. You don’t want anything to catch and wind up into the drill. Always keep hands away from the drill bit, screws, or fasteners. Never put your hand behind the piece you are drilling into. Always wear safety glasses when using a drill. (Ear protection is a good idea when using the hammer drill function.)

To Drive Screws:

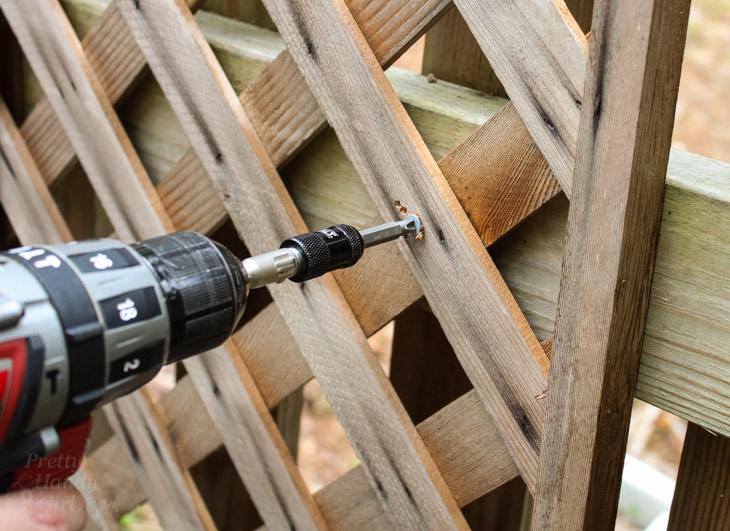
Set the drill on a low torque setting. Hold the screw perpendicular into the wood (hold it up at the top against the smooth portion of the screw if there is one.) Slowly squeeze the trigger to rotate the screw clockwise far enough into the material for the screw to start to grab. Remove your hand, keep pressure against the drill as you depress the trigger again and drive the screw into the wood. Stop when the screw is flush with the material (or slightly below the material).

Create a Living Wall Lattice Privacy Screen | Pretty Handy Girl

Troubleshooting Screw Driving Issues:

If the bit is spinning and not gripping the screw, try one of these solutions:

  • Apply more pressure against the back of the drill
  • See if your bit or the screw is stripped
  • Try lowering the torque
  • Check the bit size, if it’s too small or large it won’t grip the head properly.
  • DO NOT continue to let the drill bit spin on top of the screw. This will strip the head.

If your drill makes a loud sound and stops turning the screw, try changing to a higher torque or speed setting. This usually means, you need more torque for the task.

To Drill Holes:

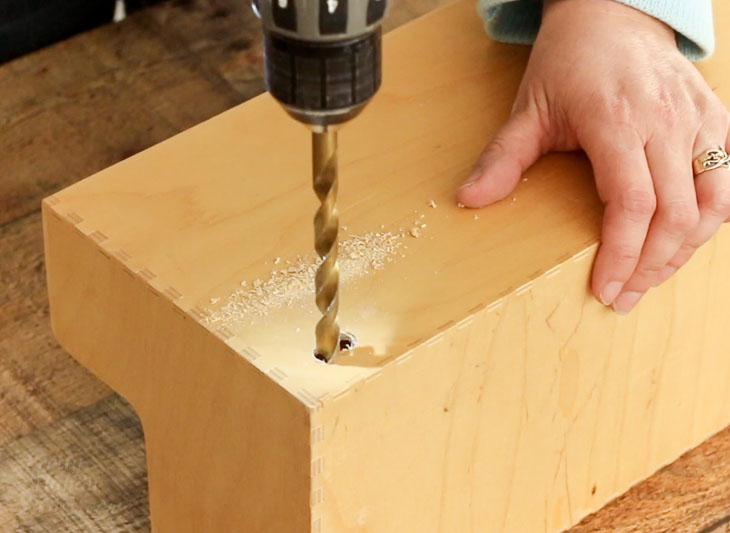
Measure and select the appropriate drill bit for the hole size you need to drill (and for the material you are drilling into.)  Insert the drill bit into the chuck and tighten, making sure the bit is centered in the chuck. Set the drill onto the drilling setting. When drilling into wood, gently depress the bit into the wood to create an indentation to keep the bit from sliding. If you are drilling a hole into metal or other slick surfaces, try using a piece of painter’s tape on top of the material to keep the bit from sliding.

Drill through back of organizer for plug

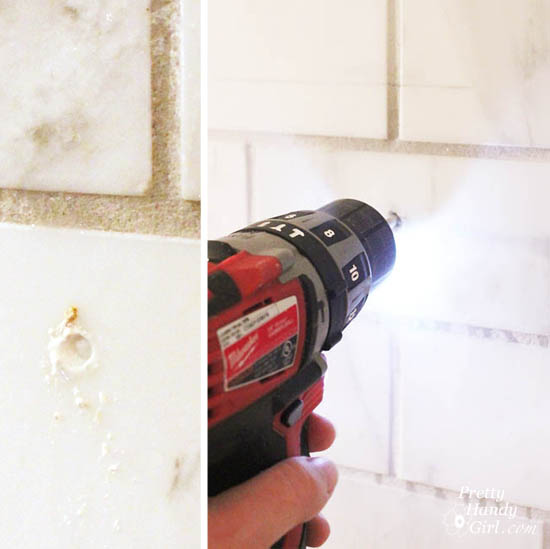
When drilling holes into masonry, ceramic, porcelain, and other hard surfaces, be sure to cool the bit occasionally with water.

How to Install Shelves on a Tile Wall (using Corbels) | Pretty Handy Girl

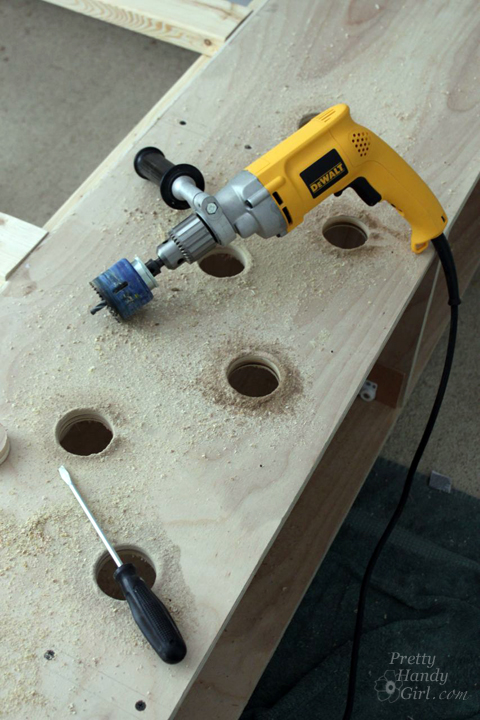
To drill large holes, use a hole saw or a Forstner bit. It helps to use a corded drill with more power for drilling large holes.

Modified King Size Farmhouse Bed with Storage Drawers | Pretty Handy Girl

Trick for Drilling Holes to a Certain Depth:

Use a piece of painter’s tape wrapped around the drill bit to the depth you want to drill to. Stop when the painter’s tape is even with your surface.

Trick for Drilling into Lumber at an Angle:

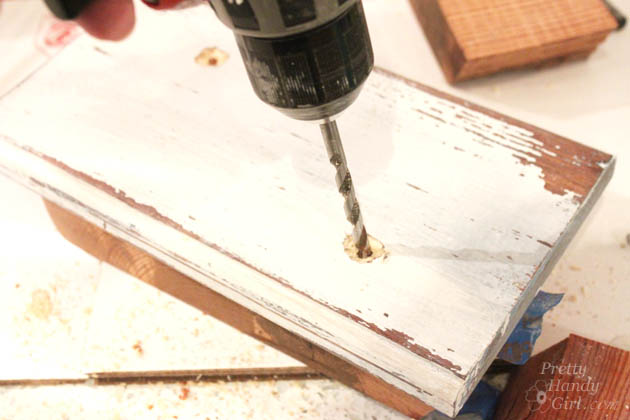
When drilling into wood at an angle, start by drilling into the wood perpendicular to the surface about one-eighth to 0ne-quarter of an inch. Then change to the angled direction. This will keep your bit from sliding on the surface of the lumber.

How to Install Shelves on a Tile Wall (using Corbels) | Pretty Handy Girl

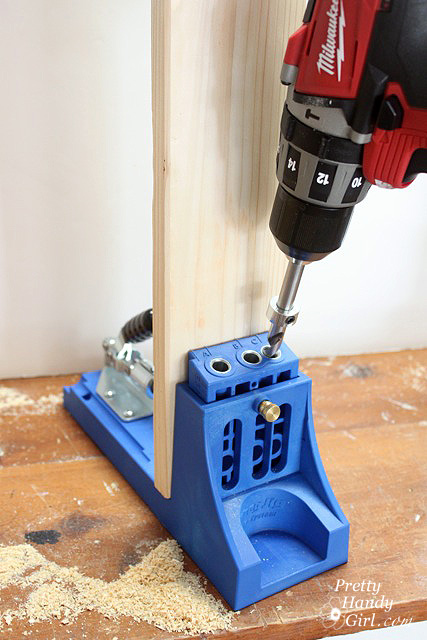
Alternatively, you can use a jig for drilling at an angle (especially helpful for drilling pocket holes.)

Various Attachments for Drills:

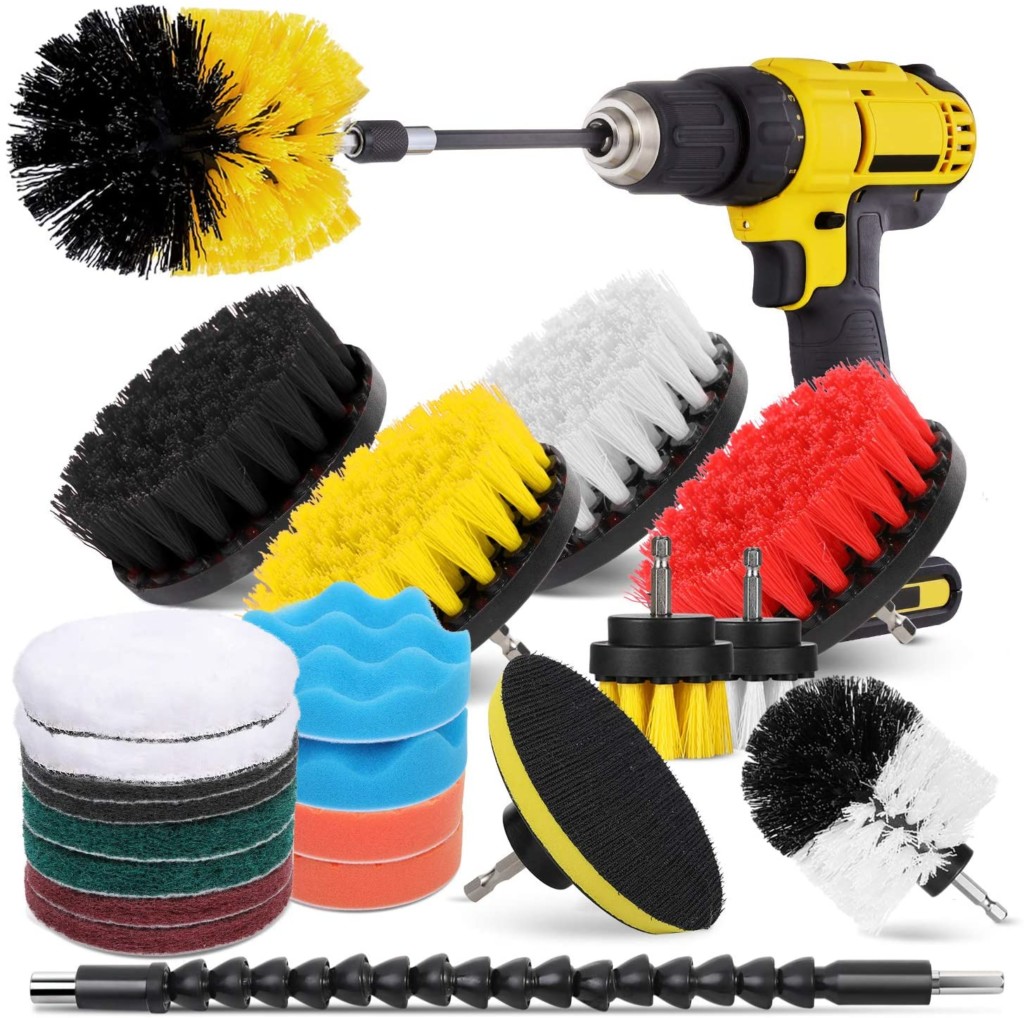
Did you know you can also clean with your drill? Yup! Check out this attachment set for cleaning a variety of things around your house and your automobile!

brush and buffing attachments for drill


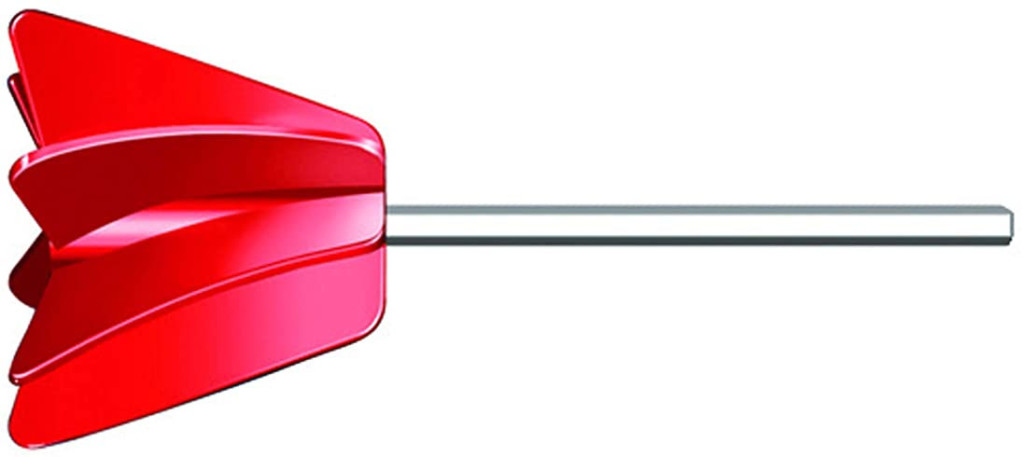
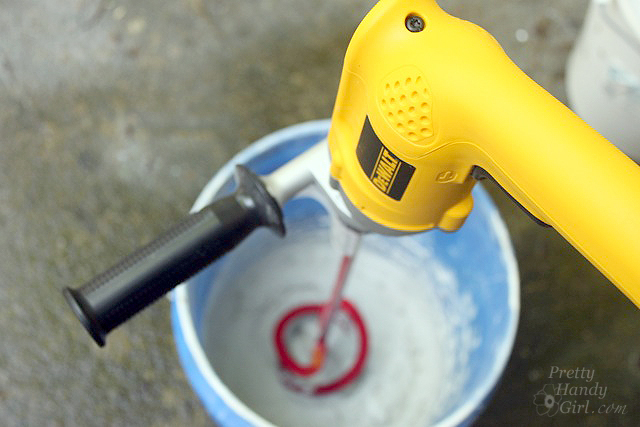
Besides the cleaning and buffing, you can also use a drill to mix paint! A paint mixer attachment can be used to mix up an old can of paint or mix new colors.

attachment for mixing paint with drill

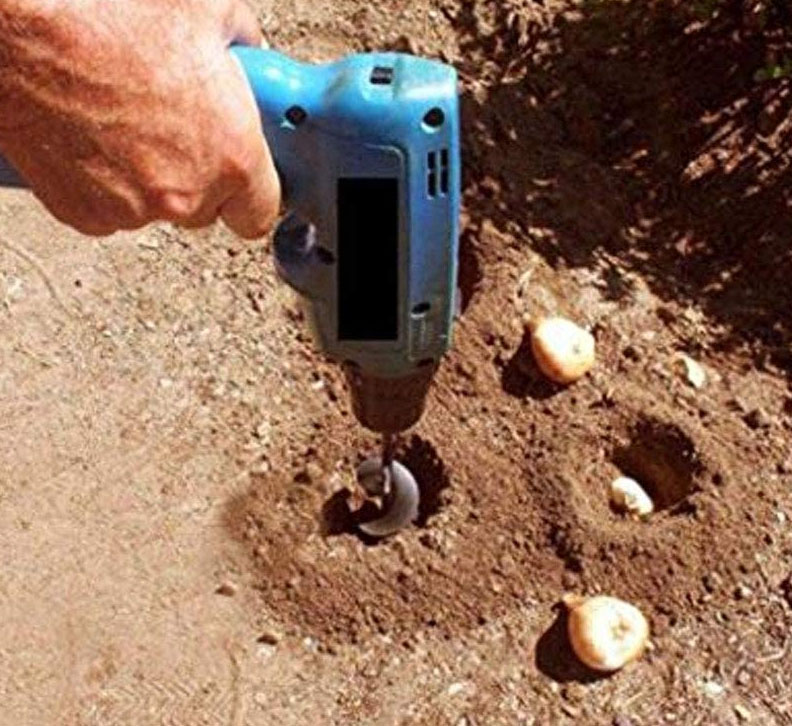
There is also an attachment for your drill that will dig holes in the ground when planting bulbs. I think this is next on my wishlist.

bulb planting attachment for drill

Can you Mix Mortar or Concrete with a Cordless Drill?

You may be able to mix mortar or concrete with a powerful cordless mixing drill, but chances are your standard cordless drill won’t stand up to the challenge. It either won’t have the power to mix, or you’ll burn out the motor. It’s best to use a corded drill to mix heavy mixes.

How to Install a Tile Backsplash (Tile setting) | Pretty Handy Girl

Video Tutorial on How to Use a Cordless Drill:

I hope the video tutorial helped you learn how to use a cordless drill. It’s definitely one of the most used tools in my toolbox.

How to Use a Pneumatic Finish Nailer and Air Compressor

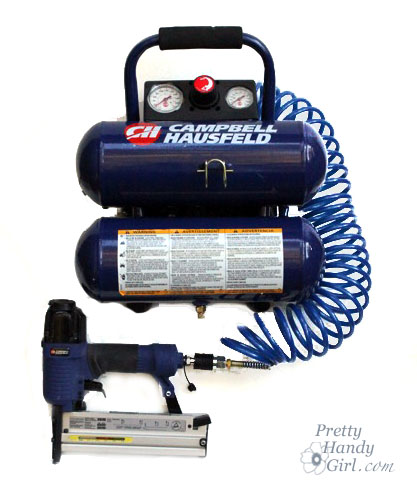
Welcome back for another Tool Tutorial Friday! Today I’m going to introduce you to a 2 gallon compressor and pneumatic finish nailer.  I use the Campbell Hausfeld 2 gallon compressor with Pneumatic Finish Nailer. I bought these as a kit when they were on sale at Lowe’s for $69! A good price on this set is $89. There are loads of other brands out there and I’m sure they have other features and capabilities, but frankly I’ve been happy with my set that I’ve had for 2 years. Other kits can cost up to $300. The only drawback with this set is that they can not be used for framing (building walls of a house structure.) But, so far I haven’t needed to do that.

The finish nailer works very well on moulding, trim, board and batten, wainscoting, and other small wood projects.

How to Use a Pneumatic Finish Nailer and Air Compressor

How to Use a Pneumatic Finish Nailer and Air Compressor

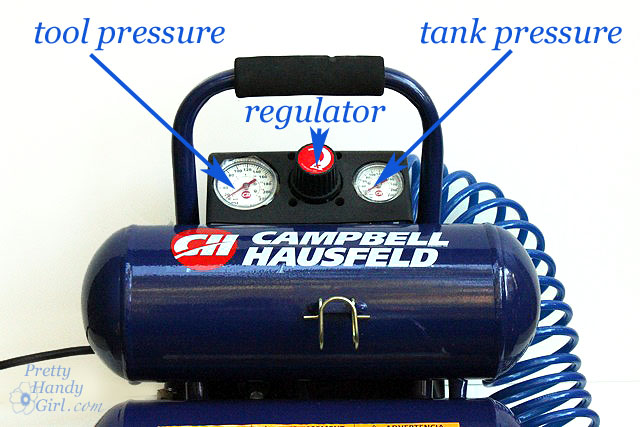
The compressor is a fairly simple tool. When turned on, air builds up in the chambers until it reaches the maximum 110 psi.

How to Use a Pneumatic Finish Nailer and Air Compressor

The pressure going into the air hose can be controlled by the regulator button. I typically use my compressor and nailer at about 90 psi. But, if the nails are going too far into the wood, I might turn it down to 80 psi. Or if the nails aren’t going in far enough I will turn it up to 100 psi. With continual use, the pressure will drop down. When the pressure is low enough, the compressor will start itself back up to raise the pressure again.

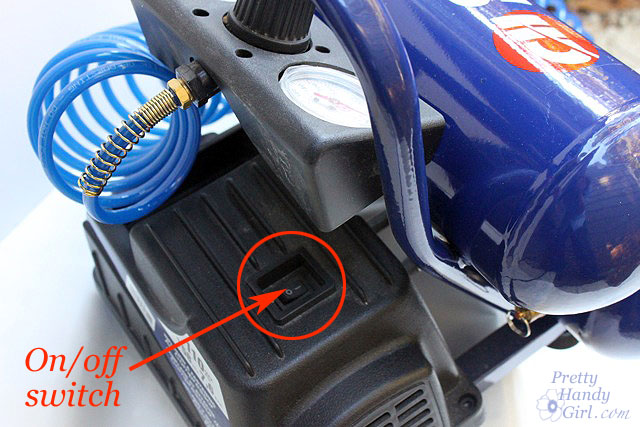
The on/off switch on my compressor is in the back.

How to Use a Pneumatic Finish Nailer and Air Compressor

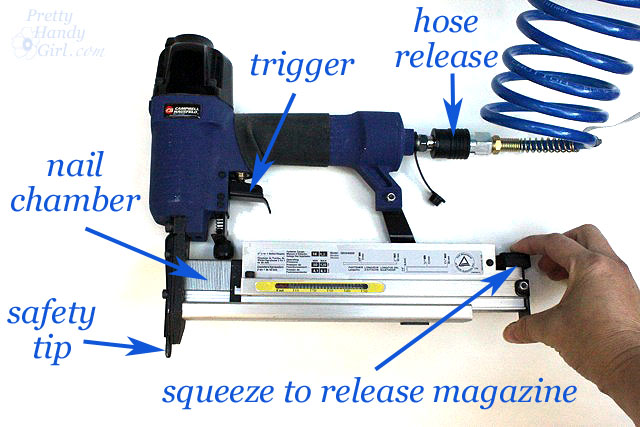
The finish nailer holds small brad nails up to 2″ in length and “U” shaped staples. They are held in the magazine. The safety tip on the nailer must be pressed into the wood before a nail will fire. Otherwise, the gun will not discharge.

How to Use a Pneumatic Finish Nailer and Air Compressor

While using the nailer and compressor it is very important to use safety goggles and ear protection.

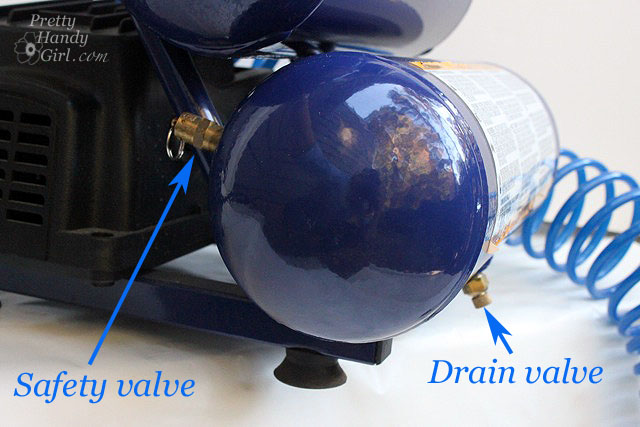
When you are finished using the compressor, it is important to release all the air from the compressor. If you don’t release the air, moisture can build up and rust the tank. Start by reducing the pressure by turning the regulator down. Then pull the safety valve ring. It will close automatically, so you will need pull it a few times or hold it open. I also unscrew the valve at the bottom of the tank to insure it is completely empty before storing. Then I screw the valve back in.

How to Use a Pneumatic Finish Nailer and Air Compressor

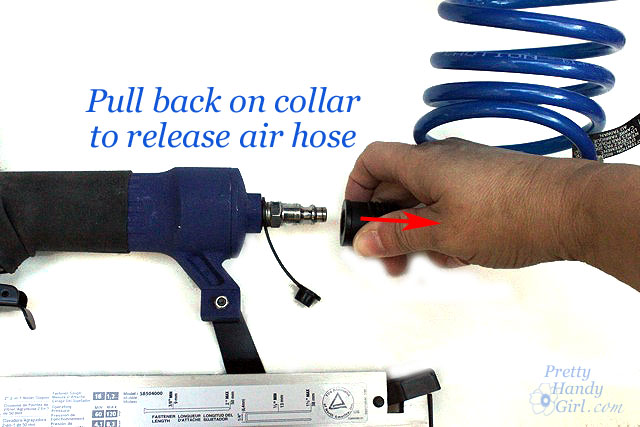
After the tank is empty, release the hose from the nailer. Add a drop or two of penetrating oil onto and in the air inlet on the nailer to keep it well lubricated. Cover the air inlet and then you can store your nailer and compressor.

How to Use a Pneumatic Finish Nailer and Air Compressor

DISCLAIMER

The viewer assumes all responsibility and liability associated with the hazards of woodworking. Pretty Handy Girl is not responsible for any errors or omissions that may be present in this tutorial. She also assumes no liability for any action or inaction of a viewer.

Please use extreme caution when using power tools. Read your tool manual thoroughly and wear protective safety gear. Take your time familiarizing yourself with a tool before using it. (If you are missing the manual, you can easily find it online by going to the manufacturer’s website or google your saw’s make and model + manual.)

Please recognize that I have tried to put together a basic finish nailer and compressor tutorial to get you started. I have tried my best to show the safest way to use them. That being said, I am not a professional (I only play one on this blog ;-) .)

Without further ado, here is the tutorial video:

How to Use a Pneumatic Finish Nailer and Air Compressor

How to Use a Pneumatic Finish Nailer and Air Compressor


I get a lot of emails asking me if I want to try XYZ or ABC product. If the products work with my blog or I think I can use them in a project, I accept. However, if I don’t like the product, you won’t hear about it here. So, when a Bogs representative contacted me, I was skeptical if I would be writing a review. Especially because I have a hurt big toe from a common malady: Cute Shoe Syndrome. That’s right, I found some cute boots and wore them until I think I did damage to my foot. Therefore I’ve switched back to my clogs and “healthier” shoe options for my feet. But who knew that I could have both cute and comfortable in one shoe!

I have another confession about my feet, well rather my ankles or lack thereof. It’s true, I am genetically cursed with cankles (you know, where your calf just ends into your foot leaving no cute thin ankles.) So, boots and some higher backed shoes don’t always fit my feet.

Sorry about all the whining, but I just wanted you to understand where my feet are coming from so you can fully appreciate these boots.

I think Bogs were designed by higher beings, because these boots are heavenly!

I wore them all weekend while working on my garage makeover. The temps were in the high 60’s so at the end of the day my feet were sweating a bit (truth be told I was sweating all over because I was doing some mad building.) BUT, my feet weren’t cold from the sweat.

AND, my feet weren’t sore; they weren’t tired; they were happy feet!!!

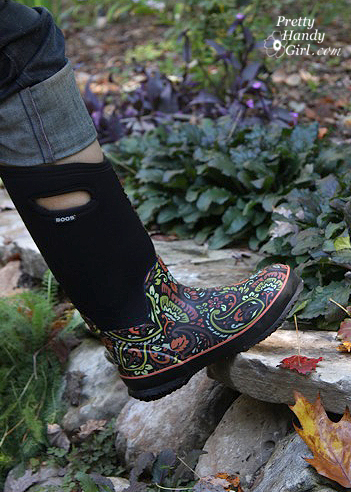
The boots I tried are the Classic High Tuscany boots. I wore them in the creek. I wore them while working in the workshop. I even wore them on a very cold and rainy Halloween night.

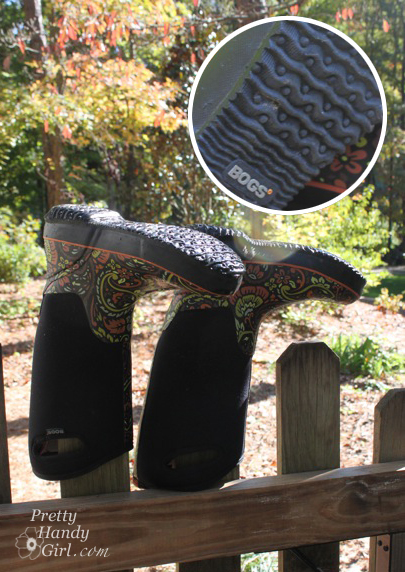
The Bogs tread is designed to wipe itself clean.

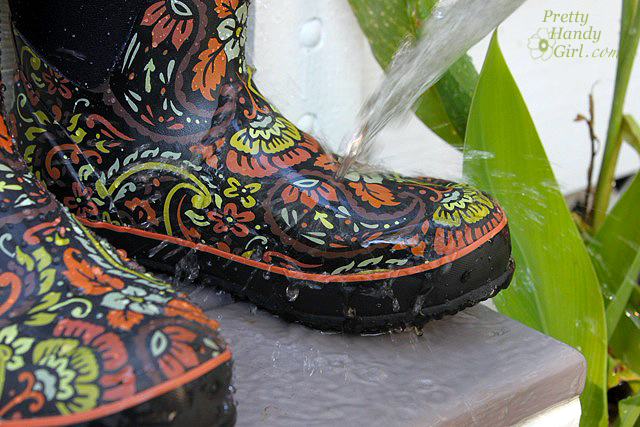
But, if they do get dirty, all they need is a little rinse and they are as good as new!

I didn’t have any chafing, no sore toe, and the boot doesn’t pinch or squeeze my cankles. 😉 In fact, they hide those unsightly things.

To walk in a pair of Bogs is like walking on clouds. The best analogy I can make about the Bogs is that they are like a very comfortable boot that wears and feels like a croc. Yet, you can look fashionable while wearing them. I’m wearing them every chance I get now.

There are many different styles to choose from! Bogs make shoes for your whole family! Small ones, tall ones, short ones, and stylish ones. I dare you to pick just one pair!

“It’s a Party and I’ll Paint if I Want to…Paint if I Want to… Paint if I Want To…You Would Paint Too if you had Scotch Bluuuueee!”
I think I’m going to call 3M ScotchBlue right now and suggest this as their new jingle. Kind of catchy isn’t it?!

Check out my project tutorial on revamping an old cabinet door below.

Go ahead, grab your paint and brushes — and don’t forget a roll of ScotchBlue painter’s tape!

I have been using ScotchBlue painter’s tape for a while and I really like it. I am not being paid to say this (even though they did send me a few free rolls of painter’s tape.) You’d know I like ScotchBlue tape if you have read the backlit bookcase post, painting the bamboo rug post and the painting like a pro post (where I share some tips for using ScotchBlue Painter’s Tape!)

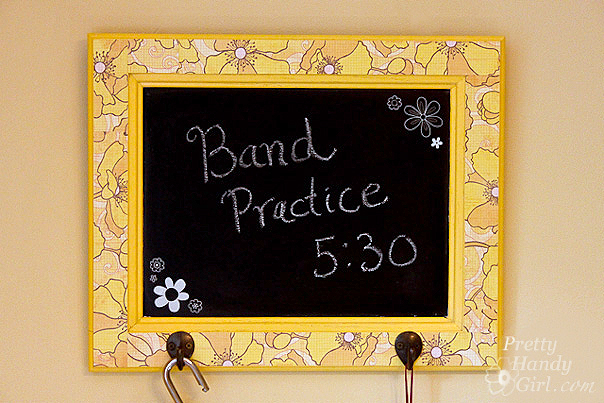
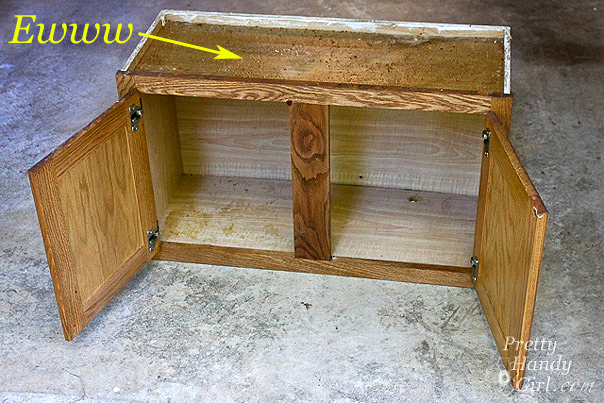
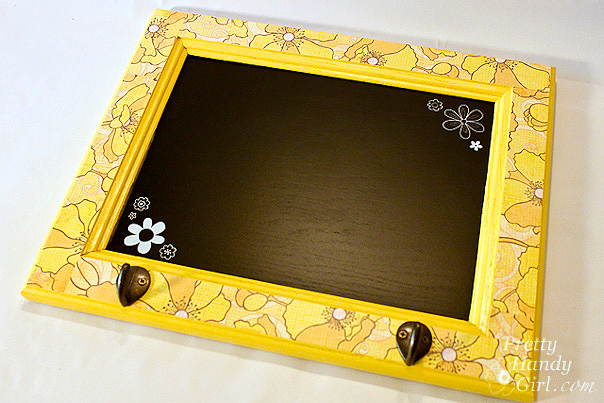
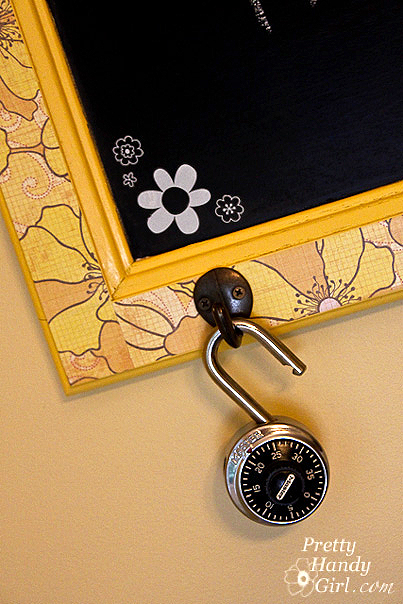
But, enough looking back, I want to share with you how to make something out of a disgustingly filthy grease covered discarded cabinet door. So, let’s hop to it! While building my mudroom bench, I took off the doors and kept them in the hopes of being able to use them another day. I’m working on a new bench for my Habitat ReStore demonstration, so I have more cabinet doors now! I devised a plan to reuse the doors in a creative way, a way that would be fun and yet help us keep track of our comings and goings. Meet my cabinet door turned into a chalkboard message board with hooks:
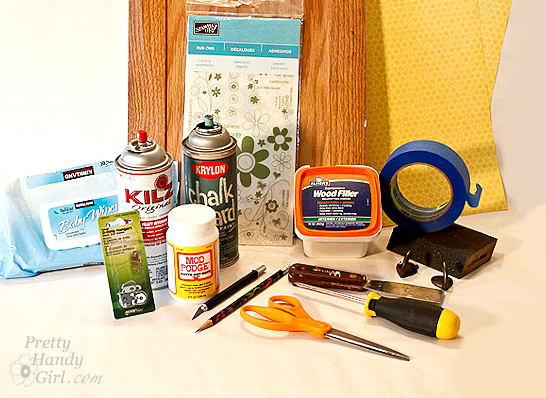
Materials:

(I’ve included affiliate links for your convenience. I earn a small percentage from a purchase using these links. There is no additional cost to you. You can read more about affiliate links here.)

Instructions:

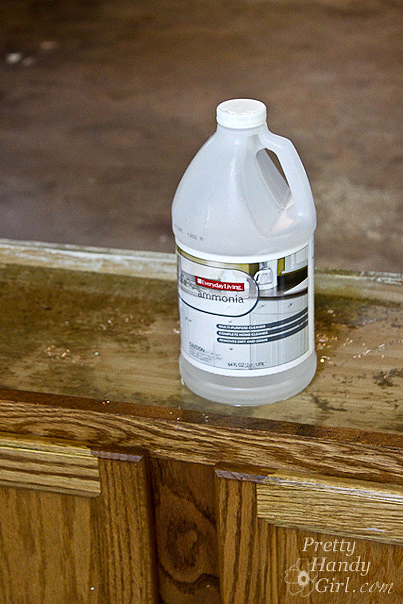
Clean the doors! If you have a cabinet that has finished it’s first life as a kitchen cabinet, and has so much grease on it that you could grease a pig…well, you need to clean it off. I experimented with several different techniques (GooGone, Dawn Detergent, Shakelee DeGreaser Spray, and Ammonia), but the one that worked best was inexpensive ammonia mixed with hot water.
 

I saturated the cabinet with the ammonia mixture. Let it sit for a few minutes and voila! The grease came off like butter (no pun intended.)
 

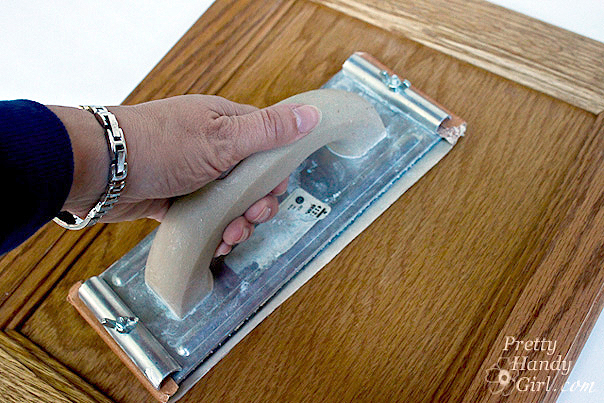
Dry the cabinets and gently sand all the surfaces to rough them up slightly. (Don’t rough ’em up too much boys, we need him to be alive. LOL! Spoken like a true Western character.)


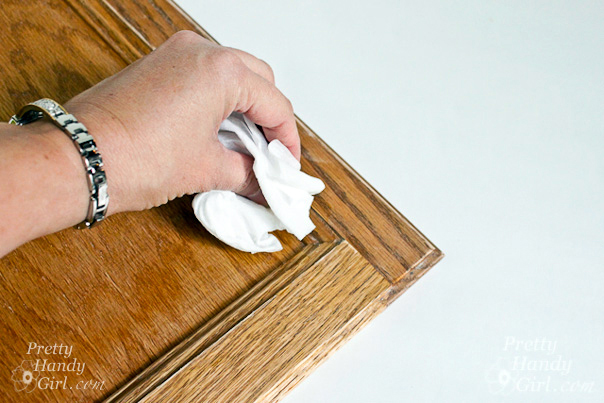
Wipe off the door thoroughly with a damp baby wipe.


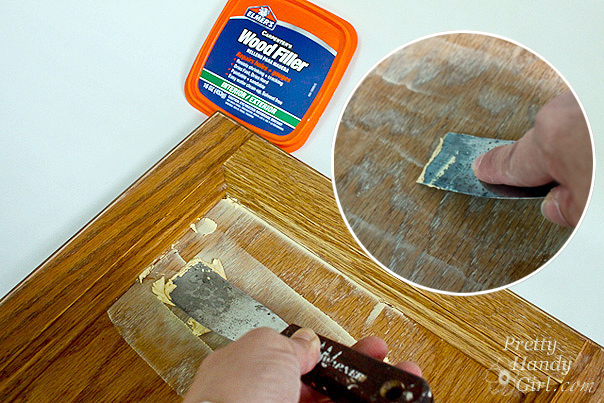
Use wood putty to fill in the wood grain on the middle panel of the cabinet. (You could also fill in the cracks on the frame of the cabinet too, but I have other plans for the frame.)


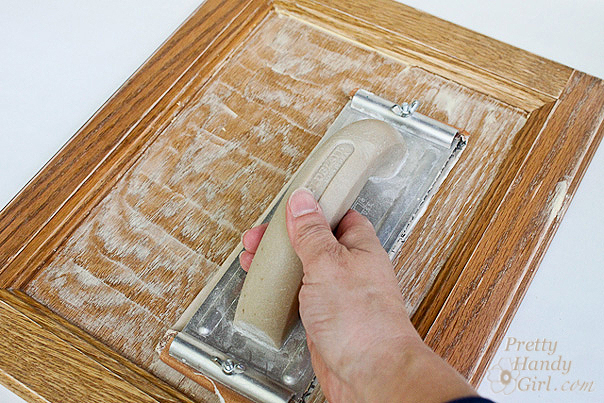
Let the putty dry for about 10 minutes. Sand the panel until it is smooth.


Wipe off the cabinet door again. Be sure to get all the sawdust off.

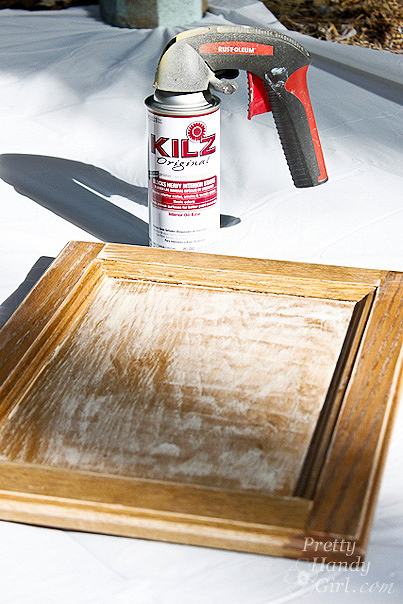
Spray your cabinet door with spray primer. One coat should be enough to cover the door. It helps to elevate the cabinet with a block or two underneath so it doesn’t stick to your drop cloth.


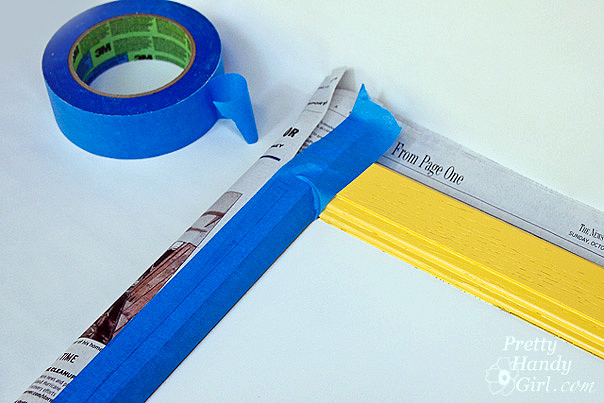
Mask off the middle of your door with newspaper and ScotchBlue Painter’s Tape. Press the edges down firmly by running a finger along the edge. (If your cabinet door is very textured, you can seal the edges by brushing matte medium where the tape meets the door.


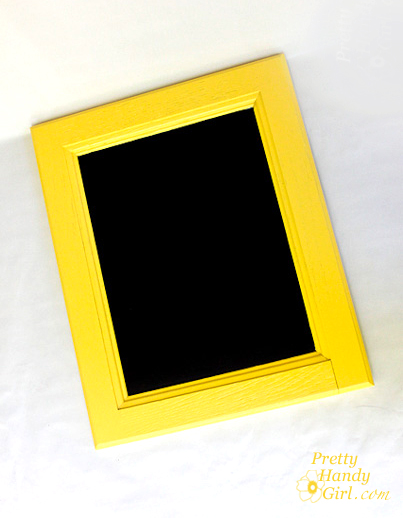
Spray the frame with 2 even coats of the summer squash yellow color (allowing the paint to dry between coats.)


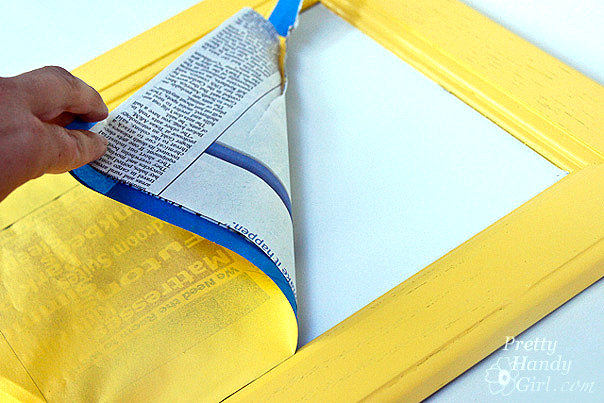
Remove the mask, now ooo and aaaa over that clean edge! Give the paint about an hour to cure before the next step.


Wrap newspaper around the back of the cabinet door and fold the edges up. Use ScotchBlue painter’s tape to tape the edges of the frame off (cover all the yellow with tape or newspaper.)


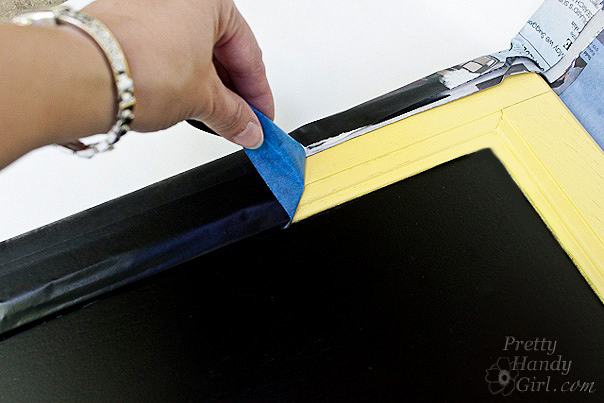
Spray the inside panel with 2-3 even coats of the chalkboard paint. Let it dry throughly before you remove the tape and newspaper mask.


It is starting to look rather purrrrdy, ya think?! Feel free to stop here and say that you are done…


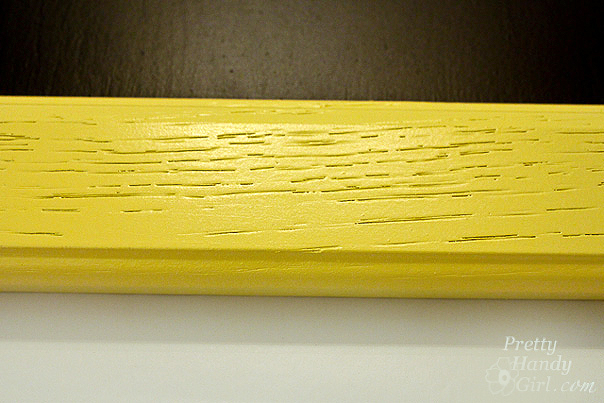
…or if you are a perfectionist (like me), you will want to cover the woodgrain on the frame with scrapbook paper.


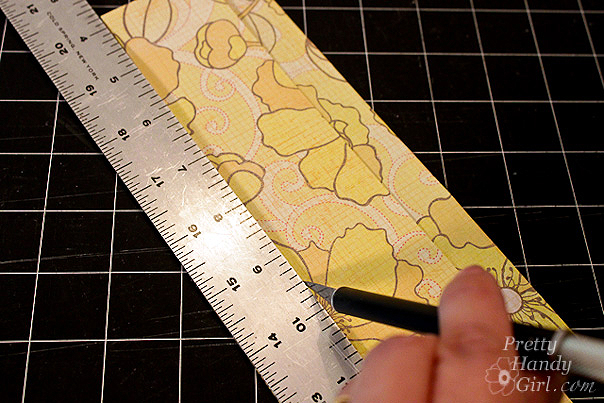
Simply measure your border and cut scrapbook sheets to that width. It is okay if your sheets aren’t long enough to fit on one length, you can tile them.


Brush one layer of mod podge onto the frame then lay the scrapbook paper on top of the mod podge. Press out all the air bubbles. Let the mod podge/paper dry for a few minutes.


Then brush 1-2 coats of the mod podge on top of the scrapbook paper borders to seal the paper.


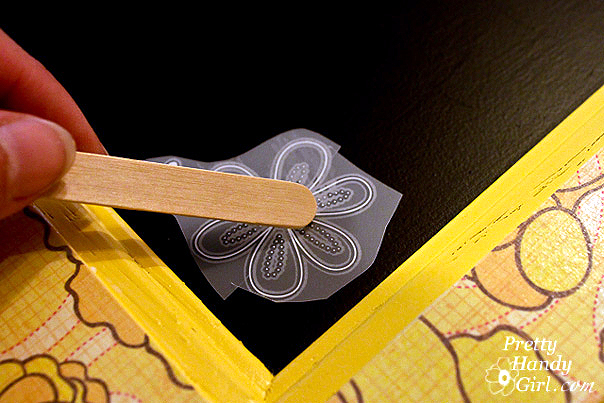
If you want to embellish your chalkboard frame, you can rub on transfer decals (or paint some decorations using white acrylic paint.)


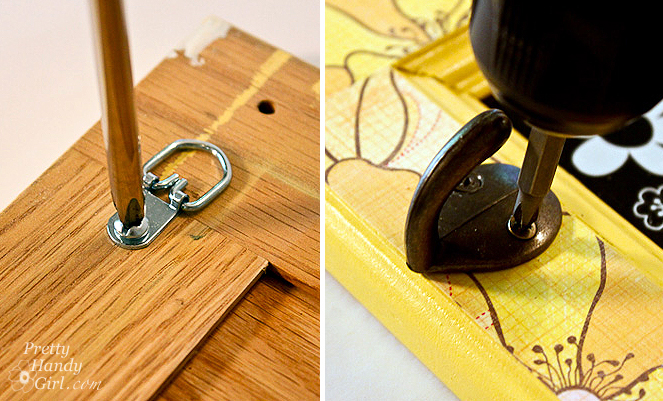
To make your chalkboard frame more functional, add 2 D-rings on either side of the back for hanging purposes. Then add some garment hooks to the front.


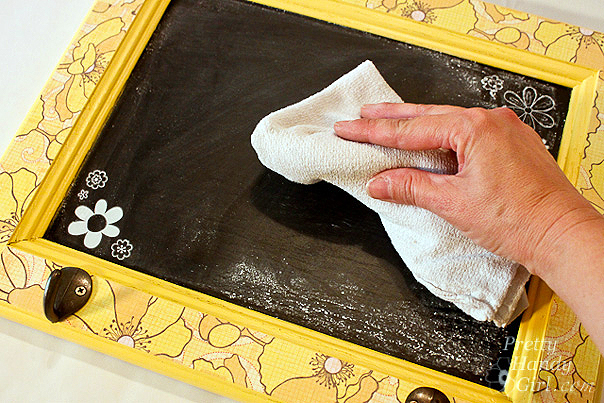
Don’t forget to season your chalkboard. (I prefer Old Bay seasoning…just kidding! I always wanted to say that.) Rub a piece of chalk on its side all over the surface and then wipe it off with a dry rag.


And that concludes the tutorial. Don’t you think the results are sweet! Especially because it is made from something that would have otherwise been discarded.


I envision a wall with several of these chalkboard frames lined up, one per family member. That way a message can be written to each person. I guess I better get busy and make 3 more.


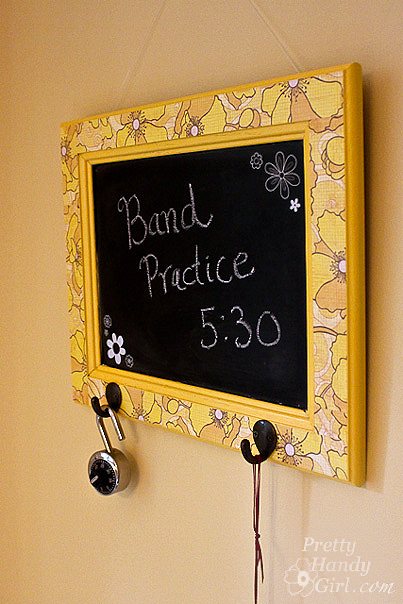
I love how the hooks add additional storage! Be sure to use two picture hangers (one for each D-ring hook.) If you have good eyesight you might have noticed my fishing line that is hanging the cabinet above. This was for photography purposes only. Unless you want your frame to rip the drywall and land on the floor the first time your child wants to hang something heavy on the hooks, do as I say, not as I do.


Awww, isn’t she just a perfect little slice of sunshine on a blank wall? She makes me happy.


You made it through another one of my insanely long tutorials! Congrats!


Disclaimer: I was one of the bloggers chosen to host a ScotchBlue Painting Party. I was not paid or compensated for this post. I was sent a few rolls of ScotchBlue painter’s tape, but I honestly can’t remember if it was 2 or 3 or 5 because they promptly got added to the collection of ScotchBlue tapes I already own.