Every year I try to come up with new and creative ways to wrap Christmas gifts for my friends and family. For me, making beautiful packages is almost as fun as opening the gifts Christmas morning. In fact, I usually invite a few friends over to wrap presents with me. We spend a few hours chatting, cutting paper and creating little present masterpieces.

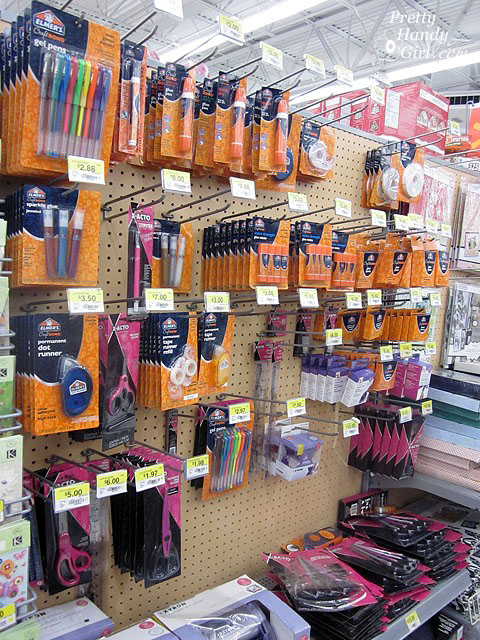
After last year’s get together, I needed to stock up on more gift wrap supplies. A quick trip to Walmart provided plenty of embellishments, paper, and exciting new crafting supplies.

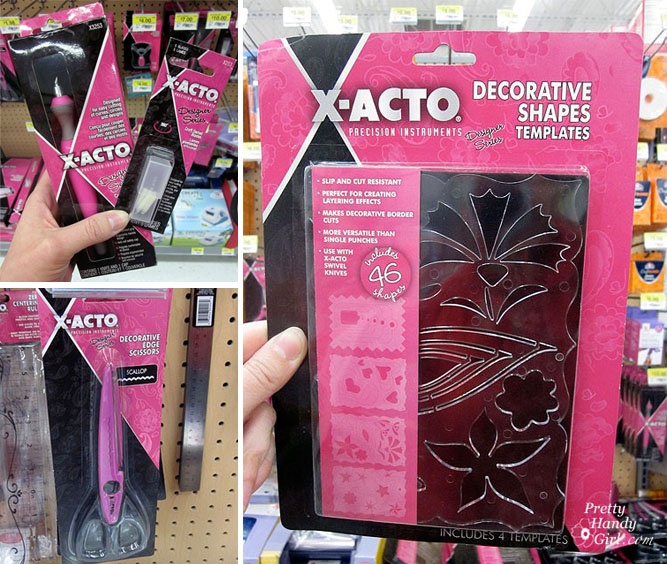
I was especially excited about trying the X-ACTO template, decorative edge scissors and the swivel knife. I’ve never seen these products before. Fun, fun, fun!

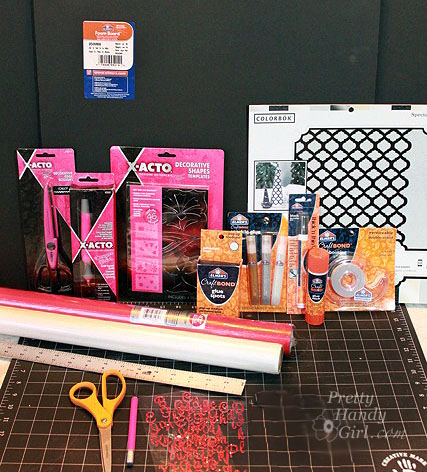
Want to join me for a little gift wrappity wrap party? Go ahead and grab these supplies and I’ll show you how I created my scrapbook inspired presents.

Materials:
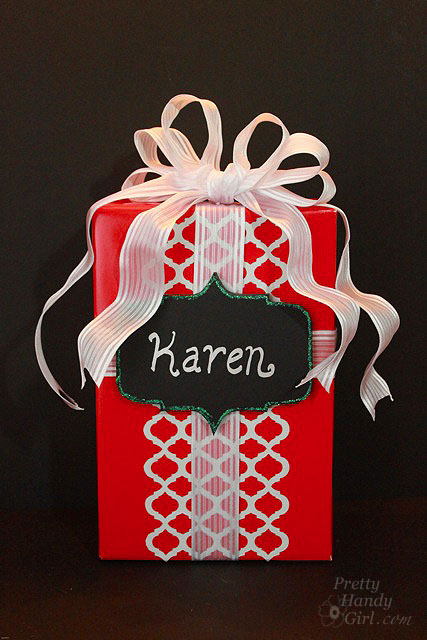
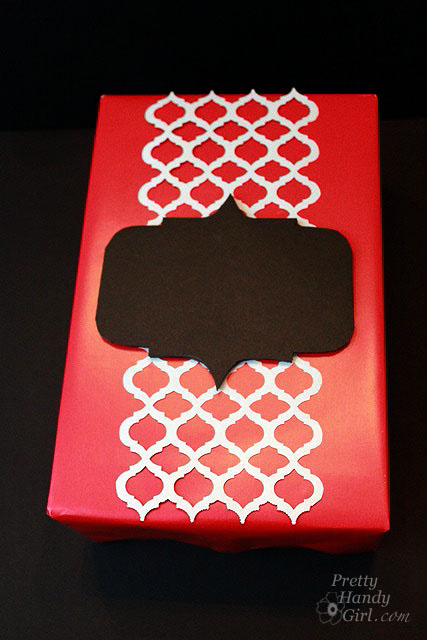
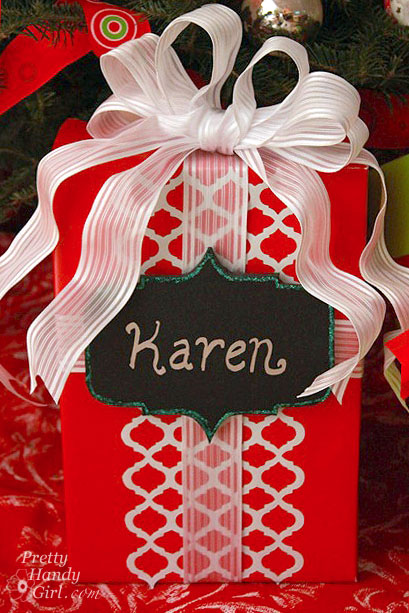
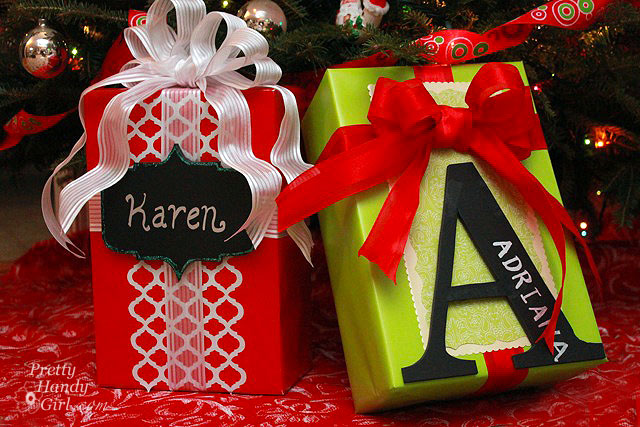
Let’s start with this red and white graphic shape gift.

Begin by wrapping the present with a solid color gift wrap.

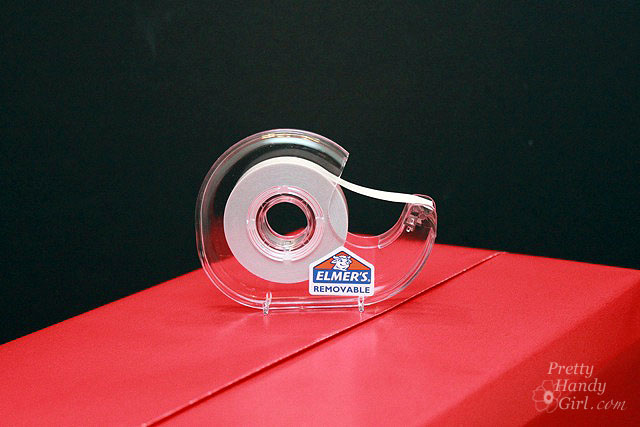
Use the Elmer’s double stick tape underneath the edges of the paper for a hidden (no tape lines) closure.

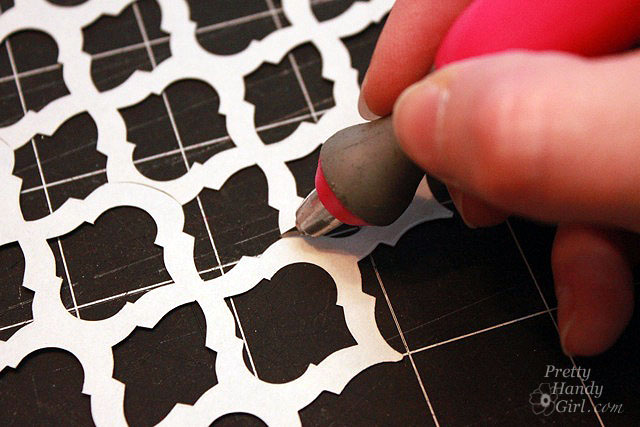
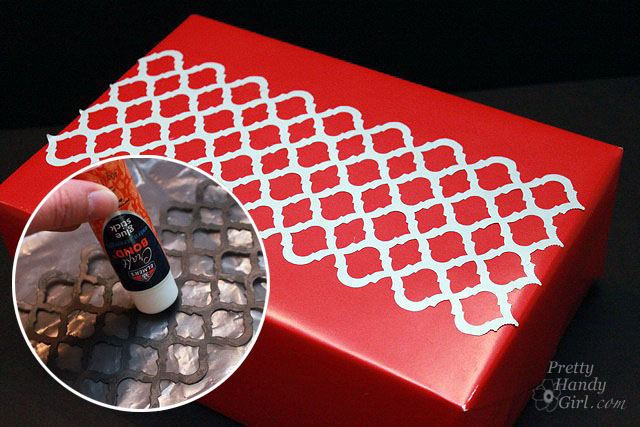
Cut a piece of the Colorbok decorative scrapbook pages (die cut lattice page) to the same height of the package and about 2/3 the width of the gift. Trim along the edges of the design using the X-ACTO swivel knife.

Rub the Elmer’s glue stick onto the back of the lattice pattern. Then flip it over and press it onto the gift.

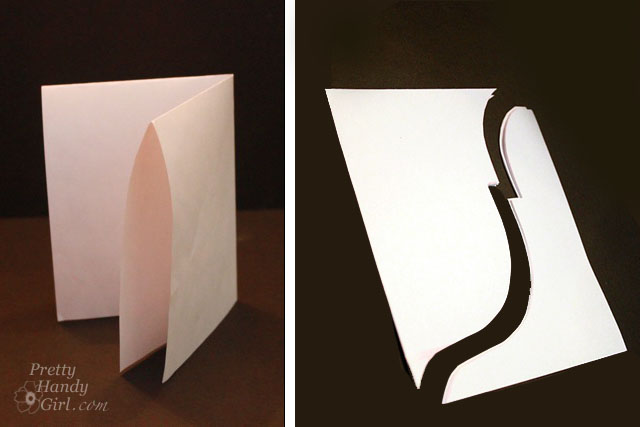
Fold a letter size sheet of paper into quarters. Draw one quarter of a decorative shape onto the paper (I tried to emulate the lattice hole design.) Make sure that your paper folds are in the center of the shape.

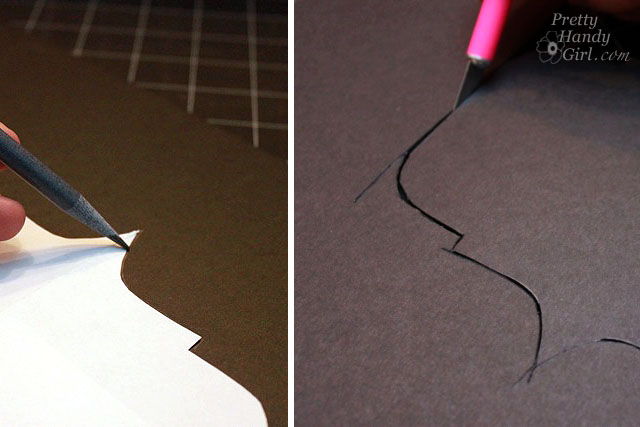
Cut out the shape you drew on the paper. Open the paper up and use it as a template to trace and cut the design out of black foam board.

Use the regular X-ACTO knife (and a brand new blade) to cut around the template. (Take your time with this task. You can make multiple cuts from different angles if you need to.)

Play with the layout of the graphic shape on your package. Mentally note where the graphic shape will go, then lift the black foam board shape off of the present.

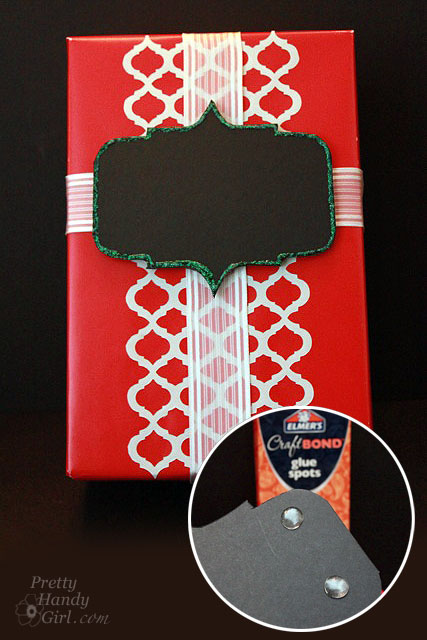
Wrap ribbon around the present forming a cross shape. The center of the cross should line up with the center of your graphic shape. Tape the ribbon to the back of the package.

Adhere the black foam board shape to the center of the ribbons. (I find the CraftBond medium glue dots are super strong and perfect for the task of gluing the foam board shape.)

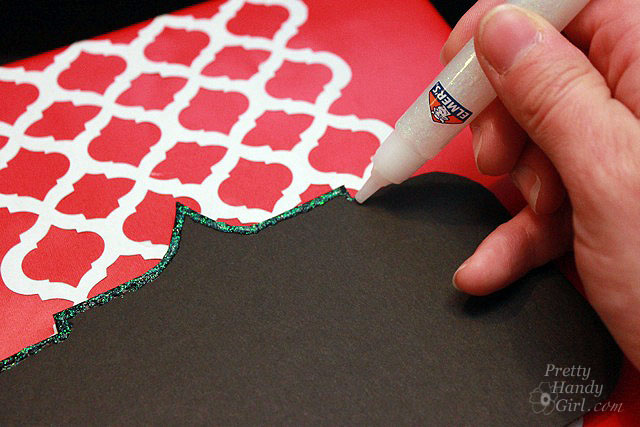
Dress up the black foam board graphic by outlining the shape with Elmer’s sparkle glue.

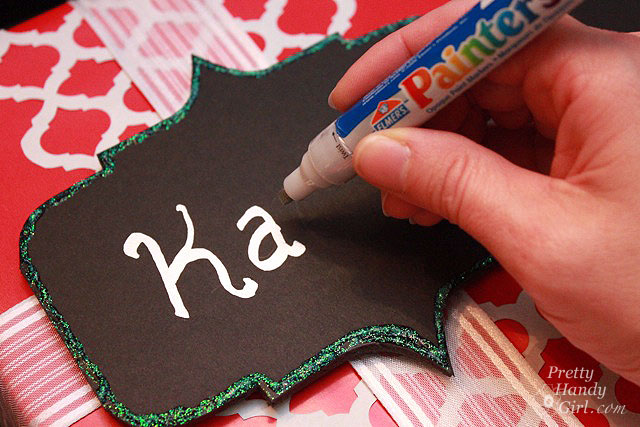
After the glitter glue has dried, write the recipient’s name using the silver Painters opaque paint marker.

Add  a ribbon to the top using another glue dot to hold it in place. You can learn how to make professional bows from Mural Maker & More.

And you are finished! Isn’t that beautiful? I really like the graphic shapes and the layers of textures.

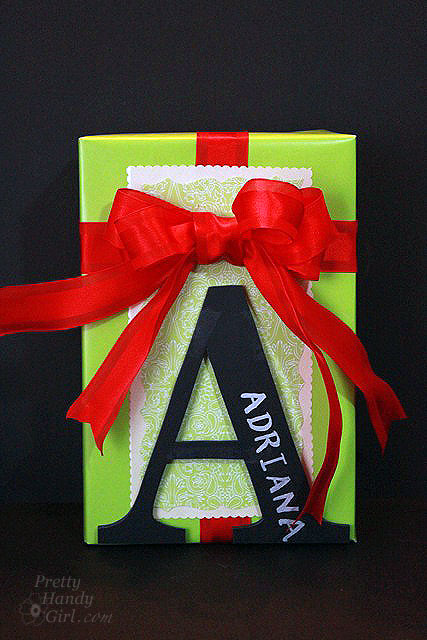
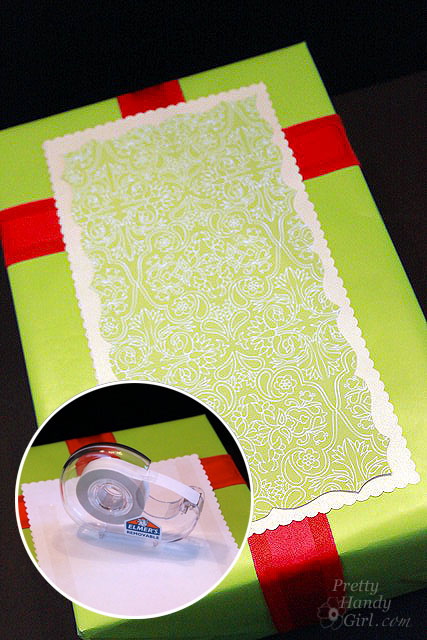
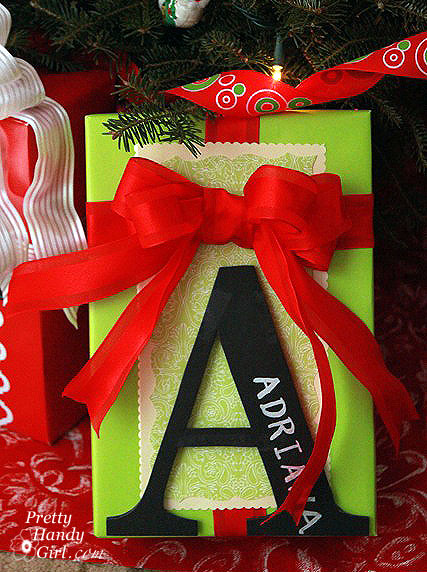
Let’s try another gift wrap design! This green and red gift with a monogram letter is just as easy to create.

Begin by cutting out a piece of scrapbook paper. Lay the X-ACTO decorative shapes template on top of the paper and carefully run the X-ACTO swivel knife around the edges. Be careful not to cut or chip the template edges. Because they are plastic, they can break. I “tiled” the template to create an elongated shape.

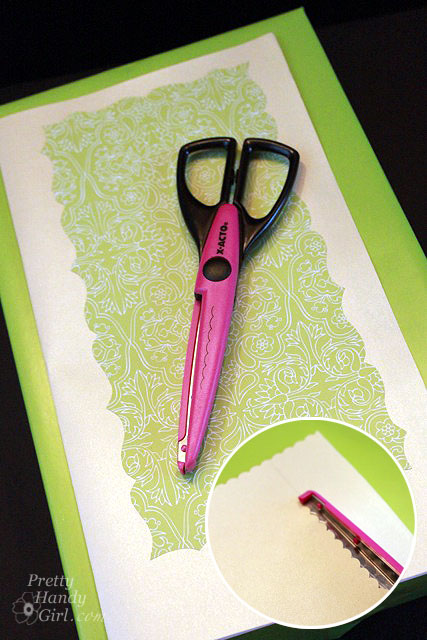
Lay the cut out scrapbook paper on top of another piece of coordinating scrapbook paper. For this 2nd sheet, I decided to use the decorative scalloped edge scissors to compliment the X-ACTO decorative shapes curved template. Cut out the second sheet about 1/2″ wider than the first one.

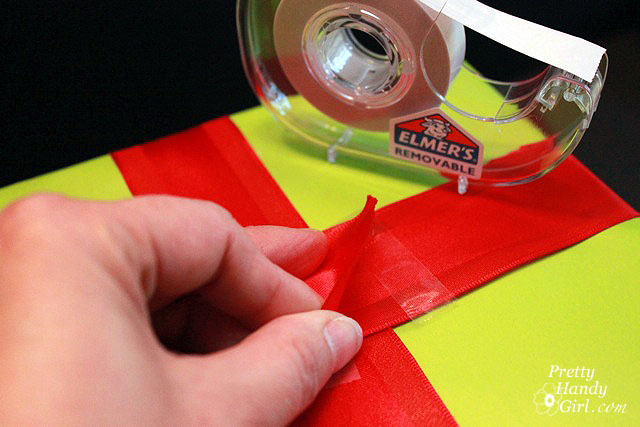
Remove the scrapbook papers and tape a ribbon around the present. By using the Elmer’s removable double stick tape you can hide how the ribbons are secured. Be sure to have the ribbons cross high up on the gift to allow room for the monogram.

Add some more double stick tape to the backs of the scrapbook paper. Center the smaller piece on the larger one. Then, adhere the papers on top of the ribbon using the double stick tape.

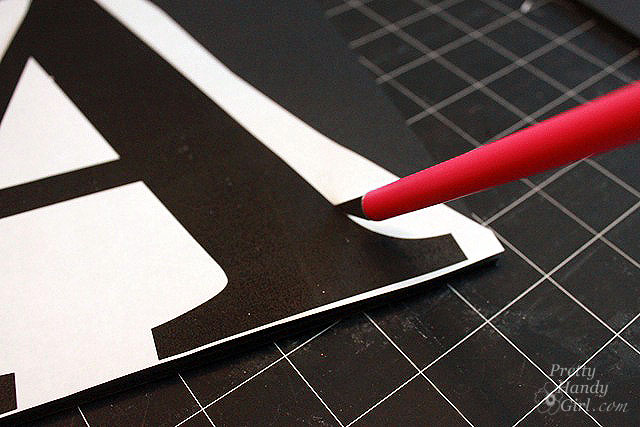
Print out a large letter from your printer. Trim some of the excess paper from around the letter. Lightly tape the letter printout on top of a piece of black foam board.

Using a fresh X-ACTO blade and knife, carefully cut out around the outline of the letter.


Use some Elmer’s Craft Bond Medium Glue Spots on the back of the foam board “A” and adhere it to the present.

Write the gift recipient’s name onto the letter using the silver Painters opaque paint marker. Tie a separate bow and then adhere it with more glue spots.

You now have an adorable monogrammed present for someone special.

These two Christmas presents are too beautiful to open. But, if you put them in front of five and seven year old brothers, they won’t hesitate for a second to rip into the frilly bows and lines of these presents. So, save these for someone special! 😉

How did you like this tutorial? Want to learn more ways to spruce up the presents under the tree? Check back everyday this week to see some more creative gift wrappings.


Disclosure: This project has been compensated as part of a social shopper insights study for #Elmersholiday #GlueNGlitter #collectivebias and #CBias. I was paid a small fee to shop at Walmart and use a selection of X-acto and Elmer’s brand products. The ideas, tutorial and opinions expressed in this post are solely my own.

 

Today I have a special guest with a special holiday project. Laura is going to show you how to make those adorable tree branch ornaments! But, first, let me tell you a little about Laura.

This is Laura with one of her four fur babies!

Laura writes about making on her blog Laura Makes. She writes about a variety of projects including crafts from knitting to making mosaics (and everything in between), food & drinks (mainly vegetarian), baking, and home improvement projects with a focus on healthy living and environmentally friendly projects. She even faux tiled the concrete floors in her home using soy based concrete stain. The results are nothing short of amazing!

Laura’s Stained Concrete Floors

Will you all please give Laura from Laura Makes a warm welcome!

Every year, I make some percentage of my gifts rather than buy them. At first I started out with grand ambitions and would pick one or two recipients to get a labor-intensive gift like a crocheted afghan. In the last few years, I’ve scaled my efforts back and now make small gifts for multiple recipients. I typically will make a handful of one style of gift to boost my holiday time efficiency.

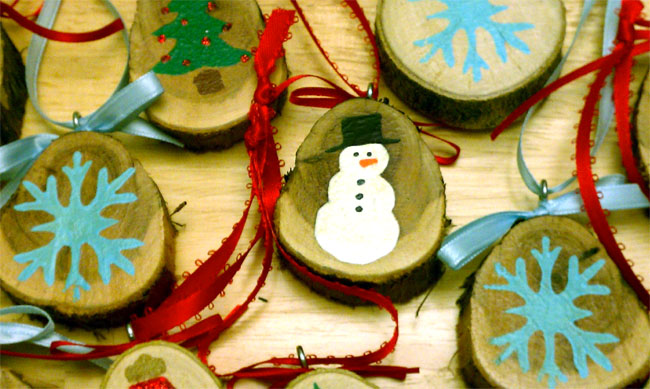
This year I started thinking about what type of ornament I could make from materials I had lying around. I settled on ornaments made from branches we cut off our trees a few years back. Basically, I cut thin slices of the branches, added a painted Christmas design and a ribbon for hanging and they are ready to go!

So you’re probably wondering how you can do this too… Well, you’re in luck because I’m ready to share!

Step 1: Cut your wood slices

Find a branch with a diameter of 2 – 3 inches (or large enough to fit your design) and cut thin slices. I used a reciprocating saw with a 9” wood blade on it to cut slices about an inch thick.  I just have a photo of the saw, but remember to securely clamp your branch before starting to saw it and to wear safety glasses while operating the saw.

Step 2: Sand your wood slices

The reciprocating saw left a rough finish so I used sanding blocks to create a smooth surface. I first used a very coarse grain sandpaper to get the surface level and then a fine grain sandpaper to create a nice finish. The sanding blocks were very handy – I held the block still while moving the wood slice to sand the surface.

Step 3: Drill holes for small eyelets

This is as easy as it sounds. Use a small drill bit to drill a hole in the top of your wood sliced and then screw in a small eyelet. This will allow your gift recipients to hang your ornaments. You can pick up small eyelets at any home improvement store.

Step 4: Create your designs

I like to create my own linocuts (a print-making method) so I decided to create reproducible designs by basically making holiday stamps for my wood slices. You could also simply buy stamps or paint a design if cutting your own stamps isn’t your thing.

I started by drawing my designs on paper – a snowflake, a Christmas light bulb, and a Christmas tree. I traced the outline of my wood slices so that I would be sure to create designs that fit on the slices.

After that, I transferred the design onto my carving blocks.

And then I used my speedball cutter to carve out my designs.

Step 5: Get that design onto your wood slice!

Whether you make your own stamp, buy a stamp, or paint your design free hand, it’s now time to get the design on to your wood slice. Because two of my designs were meant to have two colors, I used a paintbrush to apply my paint to the stamp before stamping the wood slice. Of course, before doing any stamping I first tested my carved stamps to make sure they looked how I expected and also tested the amount of paint that need to be applied.

The snowflake design only used a single color so I used a small brayer instead of a paintbrush to apply the paint.

I found that it worked best to lay the stamp on the table, place the wood slice on top of it, and press down with firm (but not hard) pressure. This helped transfer the paint to the wood even if some small ridges remained after the sanding step.

The trick is getting the right amount of paint on the stamp so I recommend practicing on paper for a while before moving on to the wood slices. If I painted the paint on too thick, I would first lightly place the stamp on paper to absorb some of the extra paint. Of course if you are just painting directly on the slices you can just jump to that step! I made one freehanded design of a snowman for a particular snowman lover in my life.

Step 6: Embellish your designs

Because I felt that my Christmas bulbs and trees turned out a bit plain, I broke out some leftover red glitter glue to embellish them. For the red bulbs, I painted on the red glitter glue. For the trees, I added little dots to signify tree decorations.

Step 7: Seal your ornaments

I wanted to add some sort of sealant coat to my ornaments for protection. I settled on Mod Podge because I had some at home. Experimentation taught me that I couldn’t use a sponge applicator to brush on the Mod Podge or it would smear the paint even though it was dry. Instead, it seemed that using a paint bush to dab the Mod Podge on top of the paint worked the best.  When first applied, it looks somewhat white but it does dry clear.

Before drying:

After drying:

Step 8: Add a way to hang those ornaments

I used ribbon to create a small bow at the top of the ornaments and also to create a loop so that the ornaments can be hung. Hooray! They are complete and ready to be gifted!

Don’t you just love her ornament idea?! I was watching Celebrity Holiday Homes on HGTV last night. And one of the designers who was decorating Jo Dee Messina’s home, glued her family photos to the center of a wood cut out and turned them into ornaments. I bet Laura inspired him!

Thanks for sharing your tutorial with my readers Laura!

Do you want to be a guest on Pretty Handy Girl? Go ahead and submit your idea! I love having people over.


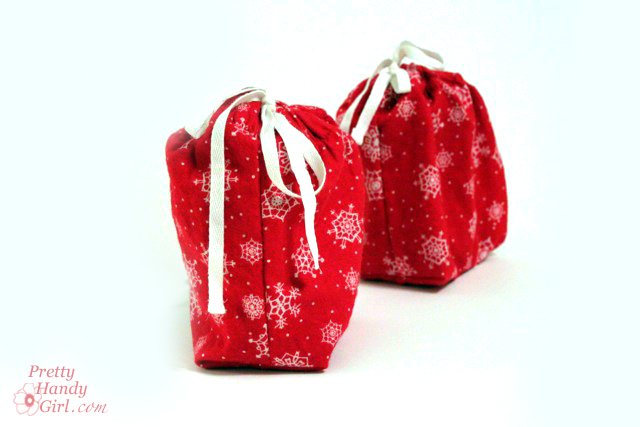
Gift pouches are super easy to make. You can use fabric, cloth napkins, or even a pair of pajama pants or boxers* (see bottom of this post)!

I made pouches using fabric that I stenciled with Martha Stewart stencils and the roller top paint roller. As promised, here is how to sew a box bottom gift pouch:

Materials:

  • Fabric
  • Thread
  • Scissors
  • Safety pin
  • Ribbon or cord
  • Pins
  • Sewing Machine
  • Iron (and ironing board)
  • Ruler

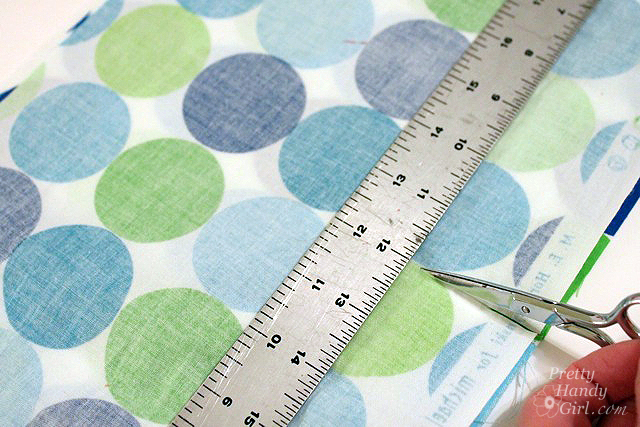
1. Start by cutting fabric into two 8″ x 12″ rectangles.

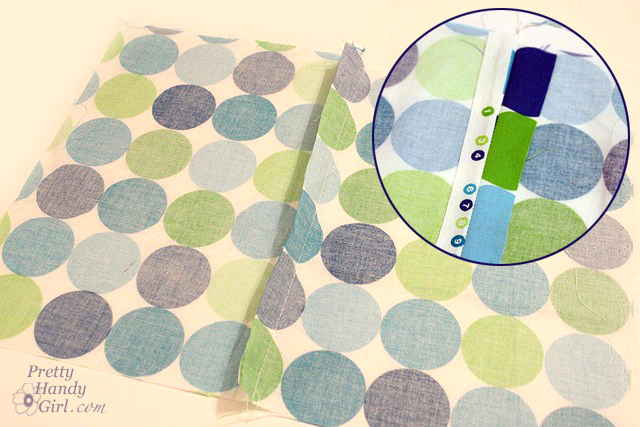
2. Pin right sides together and stitch along one length of the fabric (12″ side). Then press the seam open.

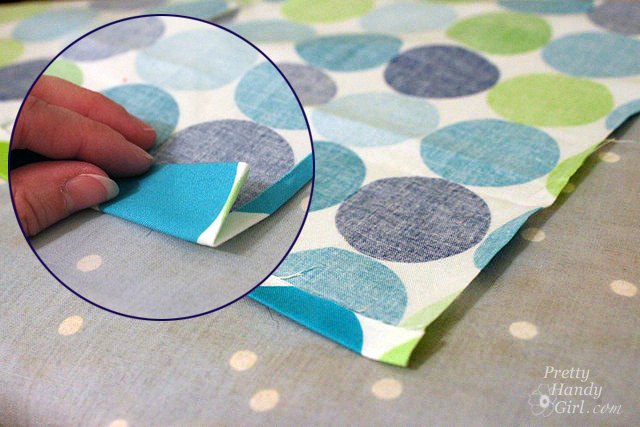
3. Fold over the top edge of the fabric 1/4″ then again about 1/2″. Press the folds with an iron. This will be the sleeve for the drawstring.

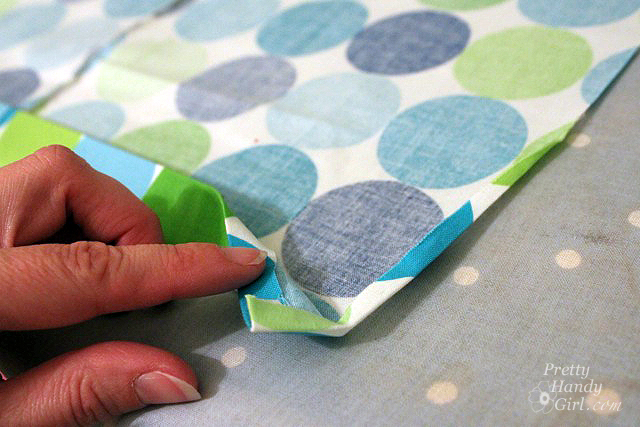
4. Fold in the sides about 1/4″ over. The fold should extend from the drawstring sleeve to about 3″ down the side to finish off the raw edge of the fabric.

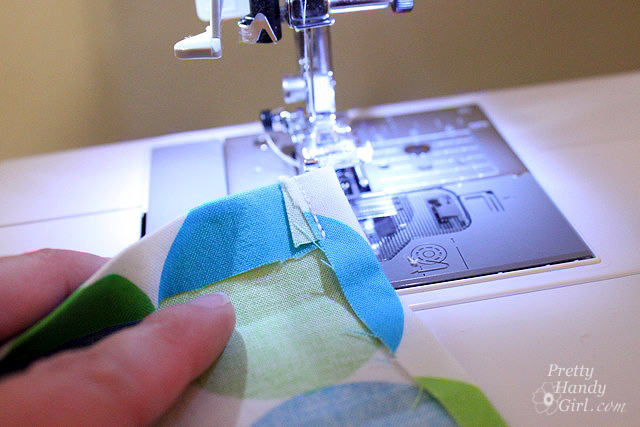
5. Stitch this fold at the very top ( inside the drawstring sleeve) to hold it in place.

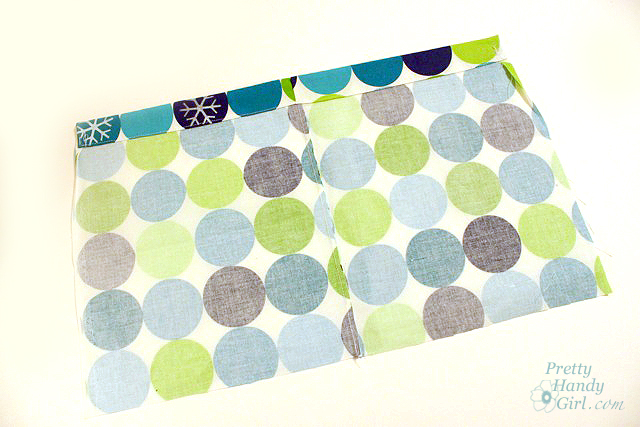
6. Sew the bottom folded edge of the drawstring sleeve. Stitch as close to the edge as possible.

Your pouch should look like this:

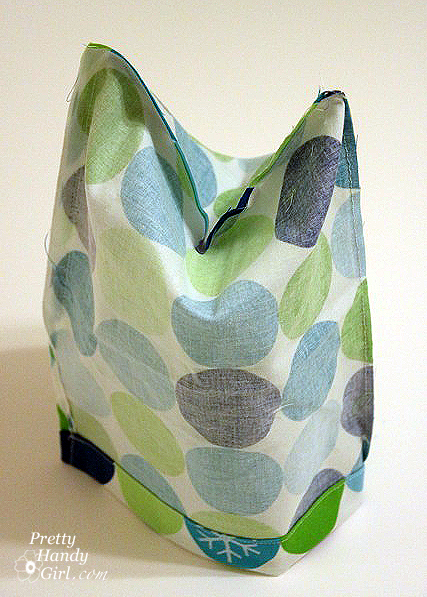
7. Fold the fabric in half lengthwise (right sides together). Start your stitches just below the drawstring sleeve. Sew along the open side of the pouch and across the bottom.

Your pouch should look like this:

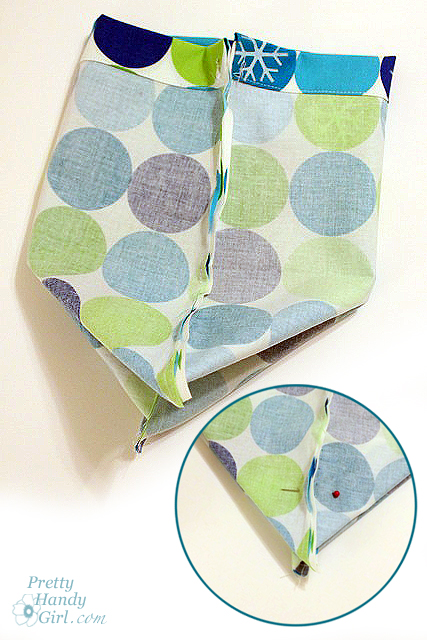
8. Grab the center of both sides of the pouch and pull them away from each other. The seams should be in the middle now and the base of the pouch makes a triangle.

9. Pin about 2 inches up from the point of the triangle.

Repeat on the opposite side. (The further up you pin the bigger the box at the bottom of your bag will be.)

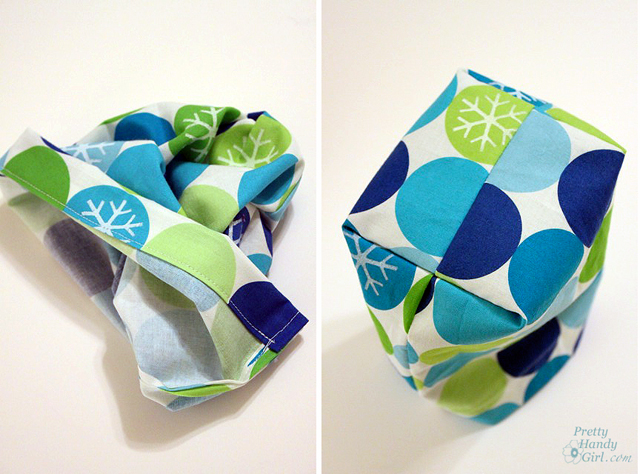
10. Stitch along the width of the pouch where you pinned.

Repeat for the opposite side.

11. Turn the pouch right sides out.

12. Cut a piece of ribbon long enough to feed through the pouch top and to tie a bow. Attach a safety pin to the end of the ribbon and feed the safety pin through the sleeve at the top of the pouch. When the safety pin exits the other side, pull the ribbon until the ends are even. Remove the safety pin and snip the ends of the ribbon if needed.

That’s it! Now you know how to make a super easy box bottom gift pouch!

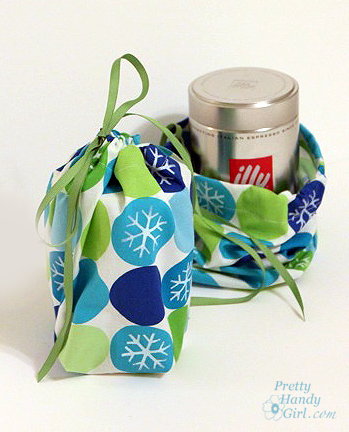
Put your gift inside and tie the ribbon. You now have instant gift wrap and a pouch that the receiver will love to keep!

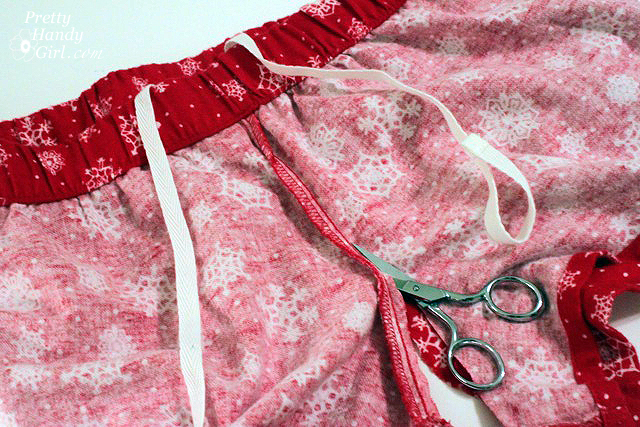
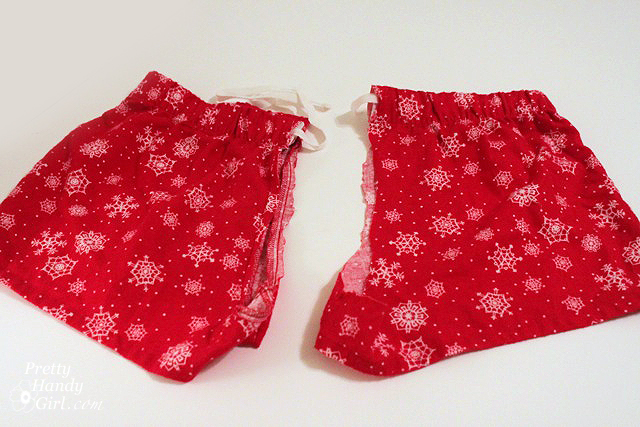
*If you find a cute pair of boxers or pajama pants at Goodwill, buy them! You can use them to make gift pouches as well. After washing the pants (of course), cut the two legs apart by cutting up the front and back center seam.

Separate the pants into two pieces. If your pants have a drawstring, you can use it for your gift pouch string (but you may have to cut the stitching around the tag if it has been sewn in.)

Square off the bottom of the legs by cutting across at a 90 degree angle.  Follow the directions above to make two more box bottom gift pouches!What do you think? Easy right?! Would you know that those were pajama shorts in a past life? Don’t lie, you only know because I showed you ;-).


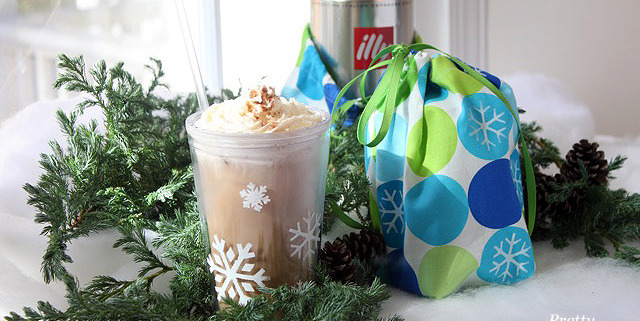
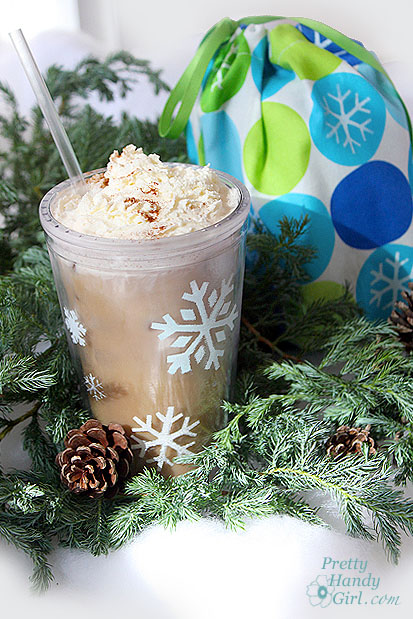
Looking for a gift for those hard to buy people on your list? Or simply an inexpensive gift for your child’s teachers? I found the perfect gift while grocery shopping. Our local Kroger had Illy ground coffee and tumbler sets on clearance. Naturally I shoved everyone aside and grabbed as many as I could (not really, but I would have!) For under $8 each, it was a real sweet deal.

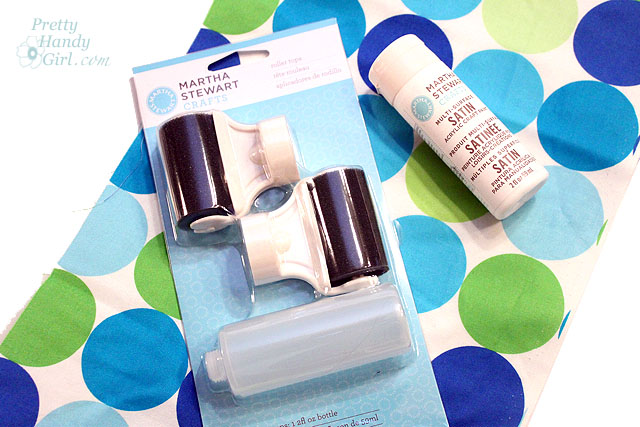
I thought the gift sets needed a little somethin’ special to give them holiday flair (or maybe I was feeling guilty that the gifts were just too easy and inexpensive.) With a little Martha Stewart multi-surface craft paint and Martha Stewart decorative snowflake stencils, I turned them into extra special holiday gifts.

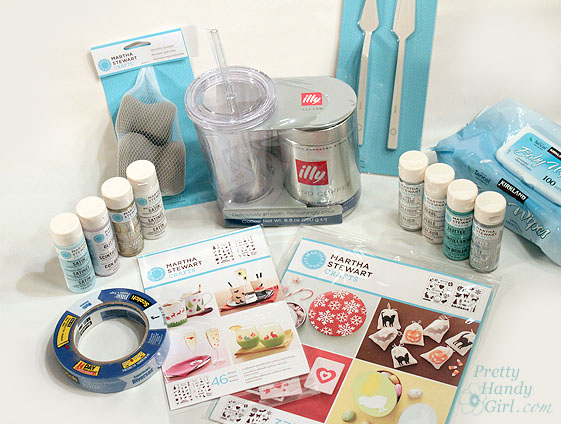
Materials:

(I’ve included affiliate links for your convenience. I earn a small percentage from a purchase using these links. There is no additional cost to you. You can read more about affiliate links here.)

  • Tumbler and ground coffee
  • Martha Stewart craft supplies:
    • Multi-Surface Craft Paints:
      • Mother of Pearl
      • Wedding Cake
      • Summer Haze
      • Metallic Sterling
    • Holiday stencils
    • Holiday adhesive stencils
    • Roller tops
    • Specialty sponges
  • 3M ScotchBlue painter’s tape
  • Paint brush
  • Fabric
  • Baby wipes or wet rag


Decorating the Tumbler:

Clean the tumblers with soap and water. Let them dry.

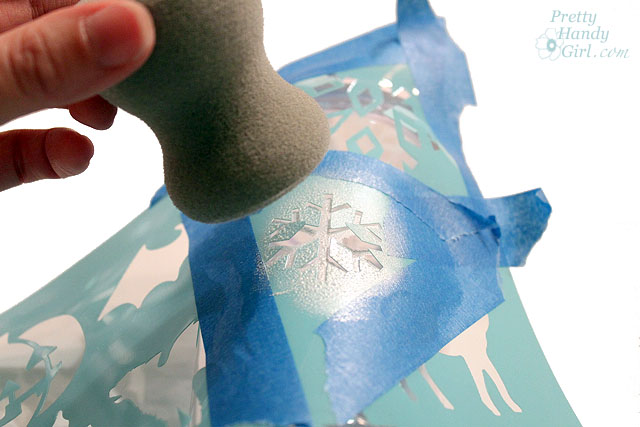
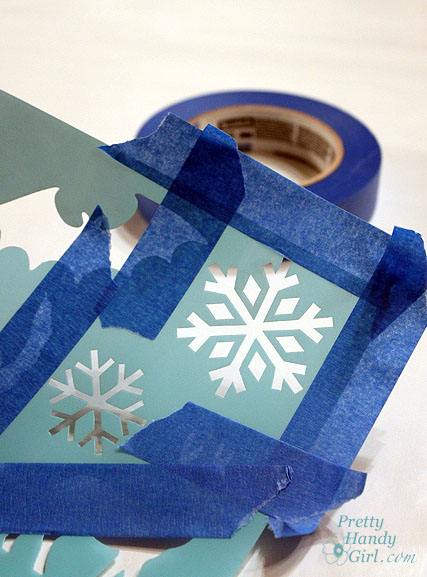
Tape off the areas of the stencil that you aren’t using. Add more tape to the outside edge of the stencil to hold it in place on the tumbler.

Wrap the stencil around the tumbler.

Dip a specialty sponge into the Martha Stewart  multi-surface craft paint. Dab off any excess paint.

Pounce lightly and straight onto the stencil. (If you come at it from an angle some of the paint may seep under the stencil or move the stencil.)

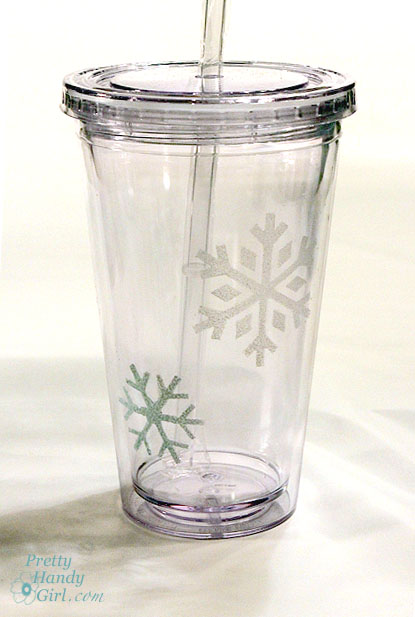
Gently remove the stencil and reposition it in another location on the tumbler. (Be careful not to overlap the first snowflake.)

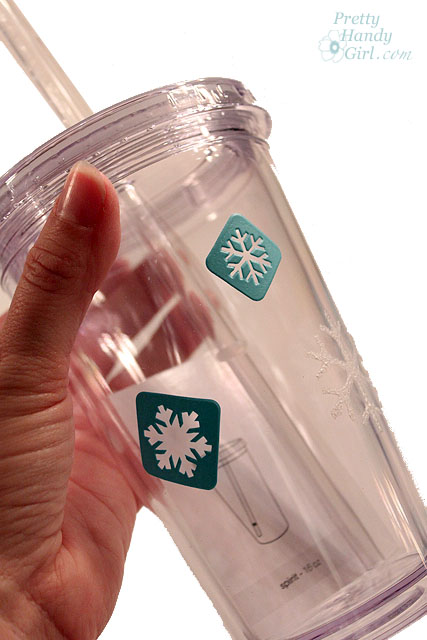
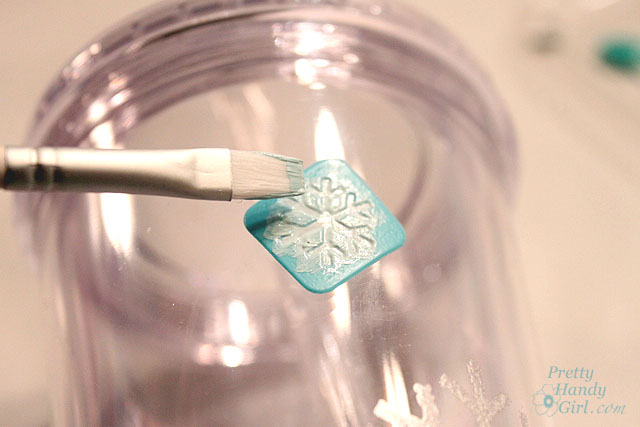
Fill in areas between the larger snowflakes with small self-adhesive stencils.

The specialty sponge is too big for these smaller stencils, but you can use a paint brush to paint inside the stencil.

Repeat until you are happy with your decorated tumbler.


Snowflake Gift Bags:

Squeeze some craft paint into a Martha Stewart roller top (best invention EVER!)

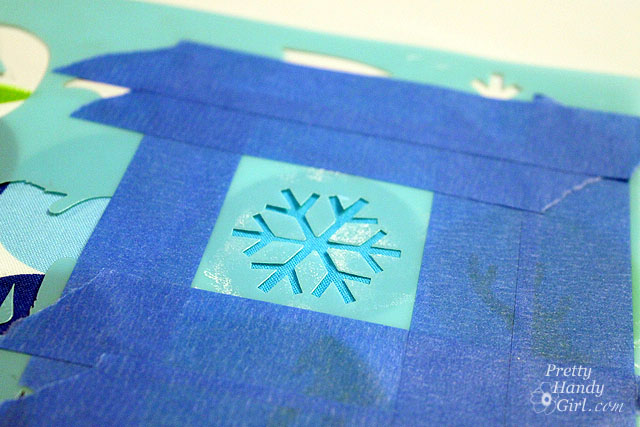
Tape the stencil onto your fabric.

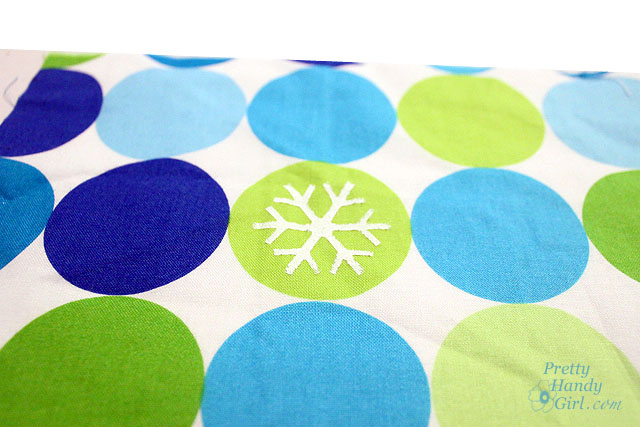
Gently roll the roller top back and forth over the stencil until the desired amount of paint comes out.

Remove the stencil and let the paint dry.

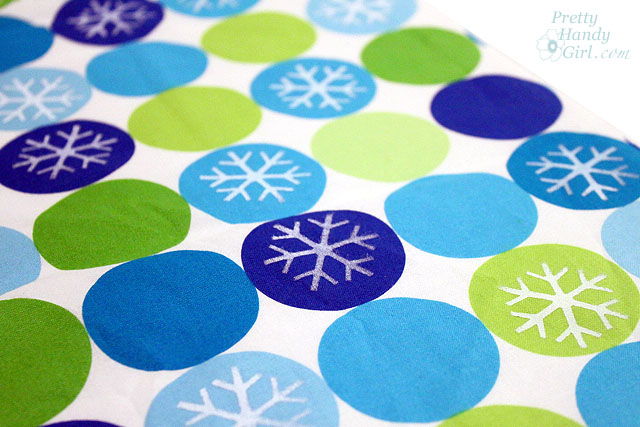
Repeat the snowflake design randomly throughout the fabric.

Sew a little box bottom drawstring gift bag, using the snowflake fabric. I think the snowflake themed coffee gift set will be a big hit! (Holiday decoration, thrifty, re-useable, and come on…who doesn’t LOVE coffee?!)


This was a very easy craft to create. You could decorate with any stencils you like. Think how cute a stenciled monogram would look on the tumbler.

I will probably include a note mentioning that the tumbler design will last longer if washed on the top rack of the dishwasher.


Disclosure: I was provided the craft materials and a small payment in exchange for writing this tutorial. The ideas, tutorials, and opinions are my own.
Sharing with:

Tip Junkie handmade projects

Make Your Own Terrariums


Terrariums are making a comeback in home décor. Gone are the octagonal mirrored terrariums. They have been replaced by sleak apothecary jars, tall cylinders and lidded glass vessels (to name just a few shapes.)

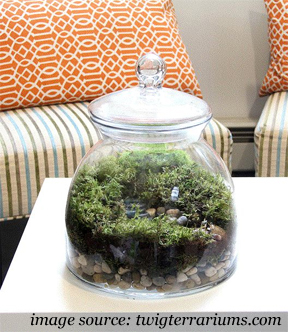
Twig Terrariums has an amazing array of beautiful ready made terrariums or DIY kits for sale! Some of them have stunning details, right down to a little miniature person inside the lush world. The terrarium below sells for $200.

If you want to create your own version that is a little more budget friendly, it isn’t hard to do. In fact you can get some plants from a local nursery or as close as your own backyard!

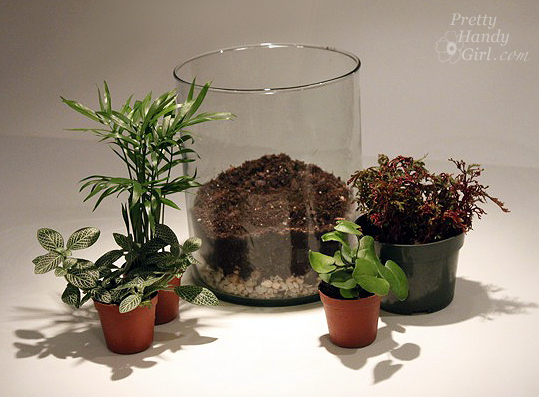
Materials:

  • Glass container (with or without a lid)
  • Small decorative pebbles or pea gravel
  • Potting soil
  • Live Moss
  • Terrarium plants (small shade loving plants)
  • Potting shovel
  • Water

1. Clean your glass container with soap and water and dry it.

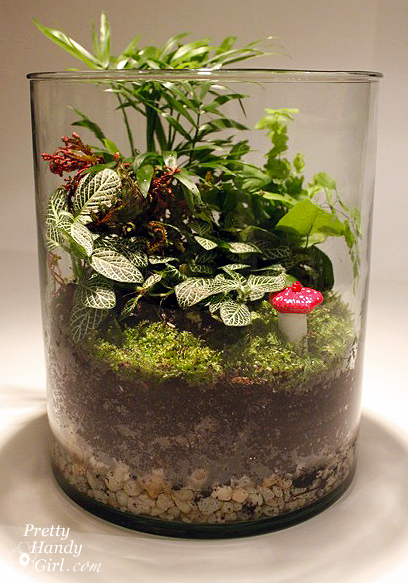
2. Add a layer of gravel or decorative pebbles to the bottom of your glass container.


3. Add a layer of potting soil. No need to level it.


4. Collect your plants and think through the plant placement in your head.


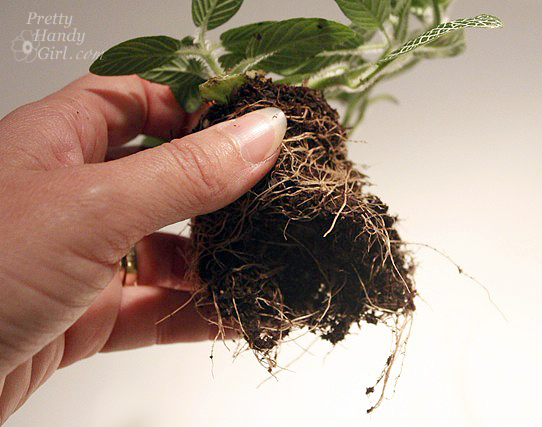
5. Gently remove a plant from the pot.

If it is root bound (all the roots are wound tightly around the bottom) gently tease some of the roots free and break apart the roots at the bottom of the plant.


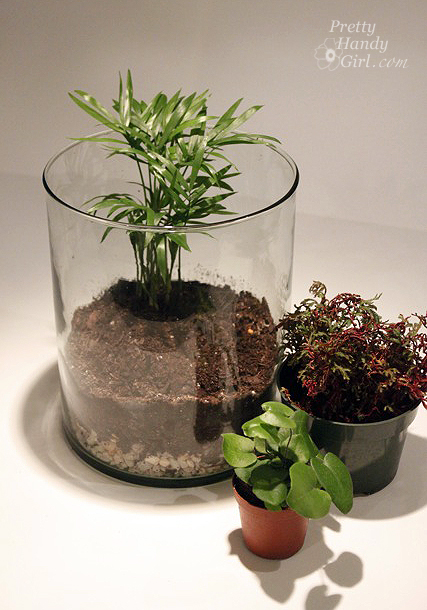
6. Insert your plants into the soil.

Put taller plants at the back and the shorter ones in the front so you can see all the plants.


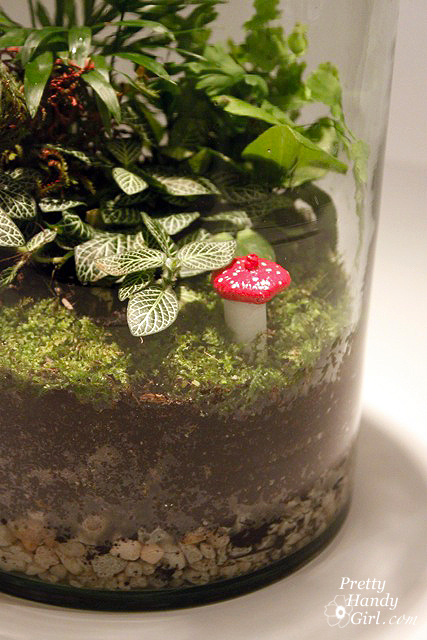
7. Cover the soil with moss. You can cut or tear pieces to fit flush with the edge of the terrarium.

8. Fill your terrarium and let the water soak in. The water should reach the top of the rocks. Check the water level a few times a week and be sure to refill when the water gets low. If your terrarium has a lid you won’t have to water as often as a lidless variety.


9. Add any decorative embellishments like these faux mushrooms (tutorial HERE)…

…or my sons’ favorite, a little plastic dinosaur!

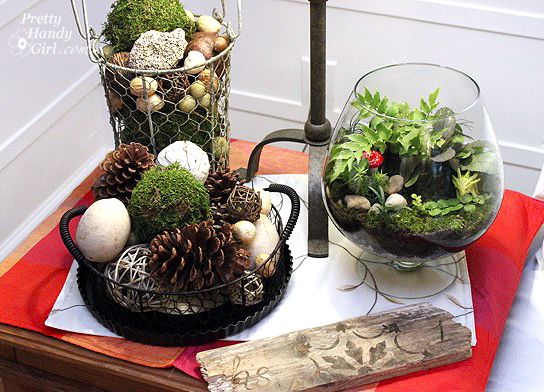
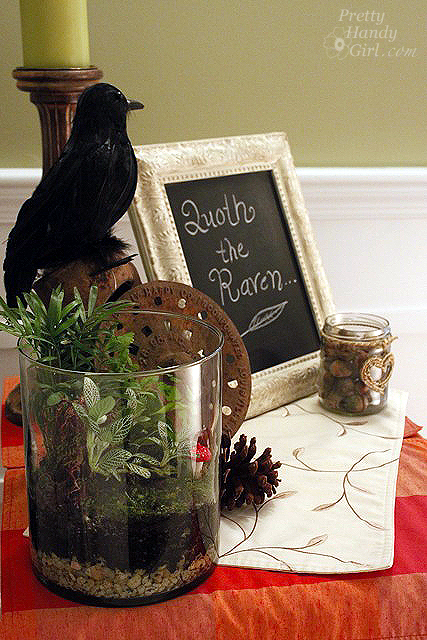
Terrariums make the perfect year round accessory. I have them prominently featured in my living room along with some other natural elements.

This version was made entirely with plants that I have growing in my shade bed. Small ferns, arugula and creeping ground covers. Plus, I added a few round pebbles for visual interest.

I might pick up a tiny person or two at a hobby shop next time I’m near one. Anyone seen any that look like the characters in “Land of the Lost” heh, heh, heh!


In the meantime, I’m loving my cost effective terrarium. Yes, terrarium singular, because the cylinder terrarium was a gift for our friends who dog sat for us.


I almost wouldn’t be surprised to see a fairy take up residence in one.

I’ve been busy working on some more projects to show you, so hang tight and check back soon! 😉 In the meantime, I hope you have a fabulous weekend and are enjoying Fall!