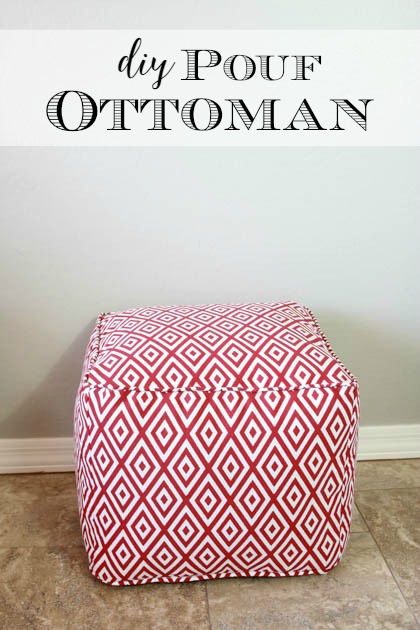
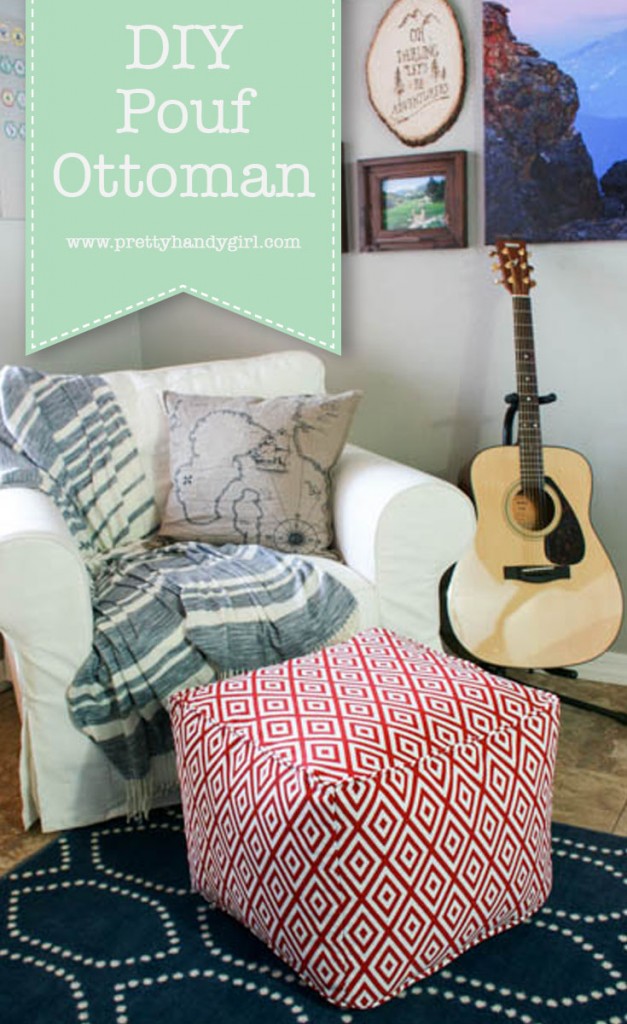
DIY Pouf Ottoman ~ Tutorial and Lessons Learned
Hey everyone! It’s Katie again from Addicted 2 DIY. Today, I have (1) a tutorial on how to make a fun DIY pouf ottoman and (2) a few lessons I learned while I was making mine that will help you out when making your own. I’m pretty certain it’s hard to miss the fact that pouf ottomans are everywhere right now. The problem is the price. These babies are expensive! I refuse to pay a high price for something that I can make myself. I bought some fabric and figured out how to make my own!
I’m no pro at sewing, so know that this is a tutorial for even a novice sewer! Sewing is not one of my chosen hobbies, but I do love the fact that I am able to save a ton of money when I make things myself.
Materials:
- 1 1/2 – 2 yards of fabric (I bought outdoor fabric on sale at JoAnn’s)
- Upholstery thread in a coordinating color
- 5 – 6 yards of Piping trim (optional). Tutorial to Make Your Own Piping
- 16″ zipper in coordinating color
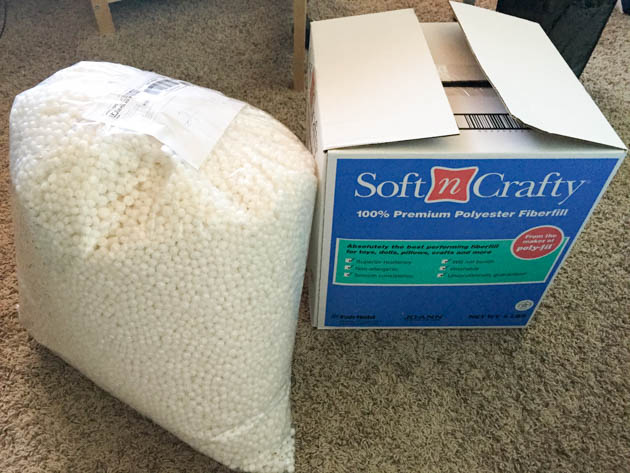
- 1 lb fiberfill
- 3-4 cubic feet of polystyrene beads (I purchased four cubic feet total)
Instructions:
Cut your fabric pieces. For the top and bottom of the pouf, cut two squares of fabric at 19×19″. For the sides, cut four pieces at 19×15″.
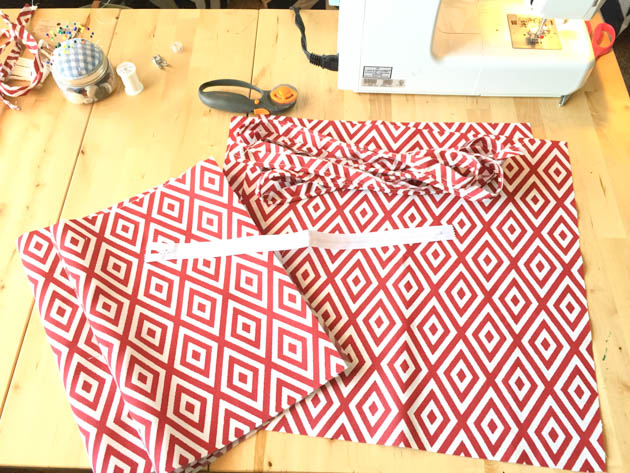
Sewing on the Zipper:
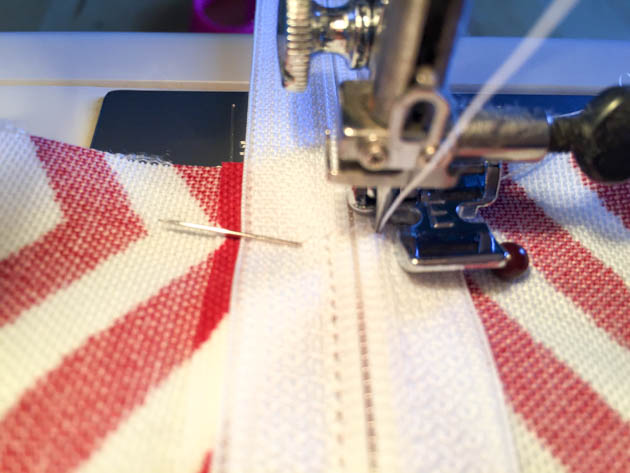
Sew two side pieces together (on the short sides) with a basting stitch. Press open the seam and place the zipper face down on the seam. Pin the zipper in place. (Note: You don’t have to use a zipper, and I didn’t on my first pouf, but it will make it difficult to sew together when it is stuffed because the polystyrene beads will try to fall out everywhere.)
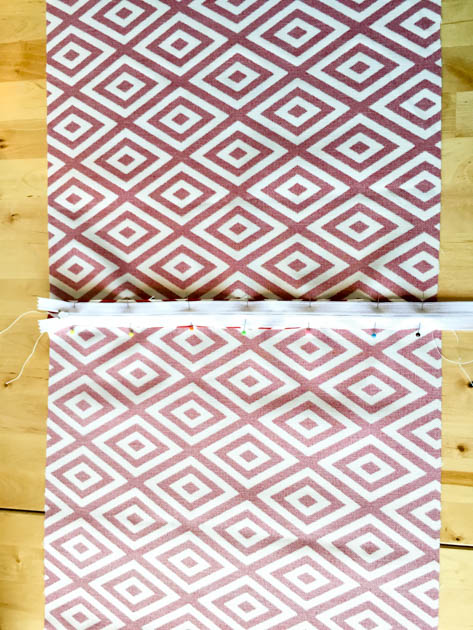
Using a zipper foot, sew the zipper to each side. Because the zipper is longer than the fabric, sew across the zipper near the bottom of the fabric to create a stop.
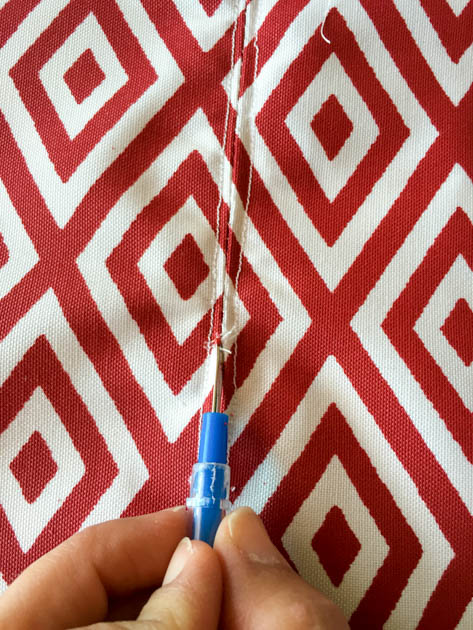
Once the zipper is sewn in, flip the fabric over and use a seam ripper to expose the zipper.
Sewing the Pouf:
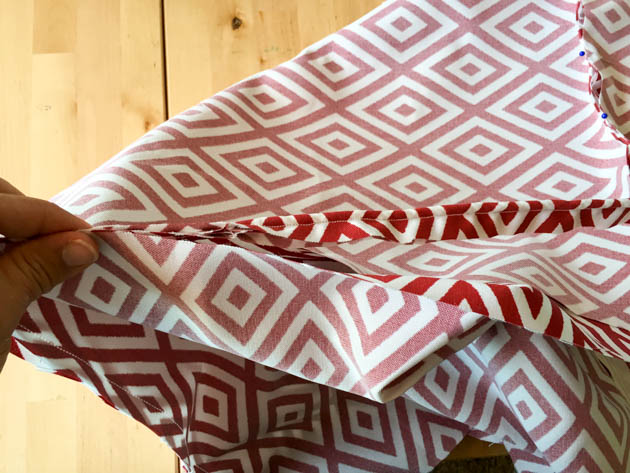
Using a 1/2″ seam allowance, sew the remaining sides of the pouf together until they join to form a tube.

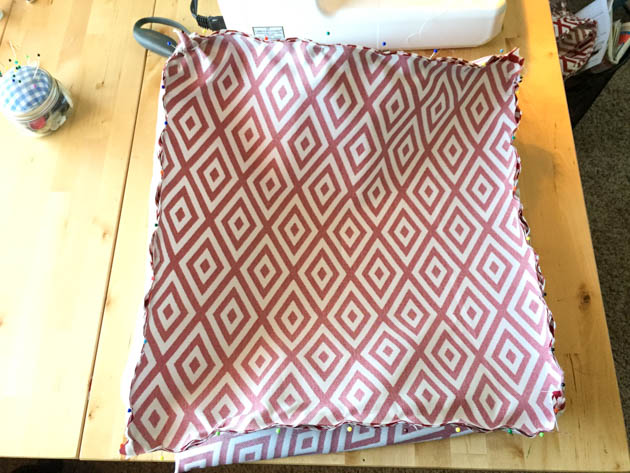
Pin the right sides of the top piece to the raw edges of the sides of the pouf. If using piping, be sure to pin the piping in between those seams at the same time. (Piping inside with the right sides, and raw edges out.)
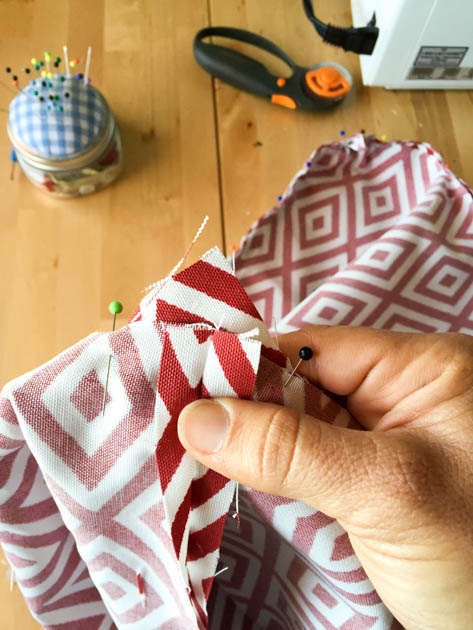
For the corners, match up the seam of the sides with the point on the corner. It is easiest to pin this on each side of the corner, then pin the center. The corners should look like this when you are pinning them. Sew it together using a 1/2″ seam allowance.
Pin and sew the bottom side of the pouf in the same way. Sew the bottom on.
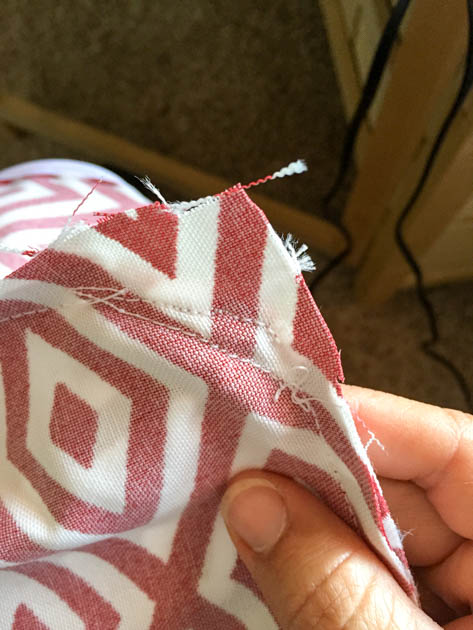
Once the pouf is sewn together, check your seams on what will be the outside of the pouf. In the corners, sometimes the piping likes to wander a bit and will not be tight against the seam. It is easy to fix by just sewing another seam against the piping. It also acts as a reinforcement for the corners. Trim the corners with scissors.
For the filling, you can use polystyrene beads by themselves, or a combination of fiber fill and beads. The beads take some patience as they want to spill out everywhere, but they give you a nice, light, and dense pouf that is sturdy enough to put your feet on or to sit on.
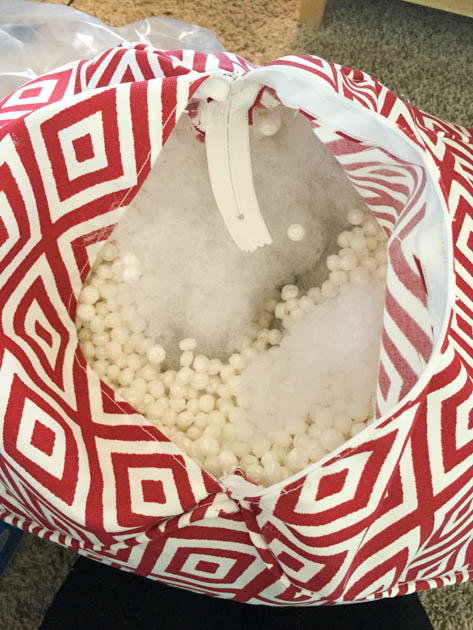
When filling the pouf, try to fill it as full as possible with the beads and fiber fill (if using). Carefully zip the zipper closed and fluff the pouf into shape. I used a combination of beads and fiberfill. (I was looking for dense but a bit fluffy at the same time. I would have preferred it to be a bit more dense, so my next pouf will definitely have less fiber fill, if any.)
I made two poufs using this method. The first pouf I made (on the left) was filled using the “recycling” method of grabbing old clothes and towels to stuff it, along with fiberfill. It ended up being super heavy, and not dense enough at all. Plus it just wouldn’t hold its shape. I’ll be ordering another bag of polystyrene beads (2 cubic feet) and re-stuffing it with those instead.

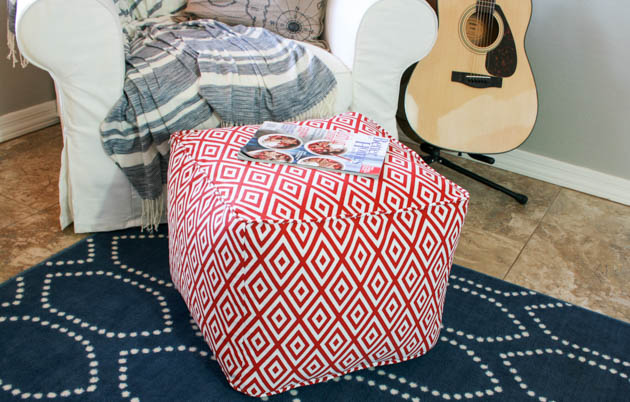
The finished pouf looks great in my newly made over den! Now I’ve got a place to prop my feet up when I’m sitting in my cozy chair, or my boys have a spot to sit when they want to read a book or play on the iPad.

I spent around $35 to make this pouf. A huge savings compared to purchasing one, plus I got to make it with the fabric of my choosing.

Pin for later!


Hide your fabric stash inside. Great storage!
Hi Katie, I am curious about how much height shrinkage you’ve seen in your poufs? The sides you cut were 15″, minus the seem allowance, your poufs should be 14″ tall but you can see they push out on the sides. I’d love to find out how tall they stand especially after use.
Thank you!
-Keli
Hey Brittany, Thanks for this great tutorial!
I’m curious, how tall is the pouf sitting on the floor? How much did it slouch compared the the original height of 15″?
-Keli
Thanks for the tutorial! I made one but after a bit using it the seams are starting to fray on my outdoor fabric!? Any tips on how to stop this?!
You might have to use a wider seam allowance and don’t trim too close to your stitching.
You could use a zig zag stitch around seem allowance
Thanks for much for the tutorial. I followed it to make two poufs for my outdoor patio. The instructions were easy to follow and the tip about the zipper was a lifesaver. I would have spent days trying to keep those tricky little beads from escaping!
Your fabric looks great!
I love you tutorial. I can’t wait to try it in my new house. Thanks for sharing
I just made my pouf just like yours. Found a pattern online. It did cost $35.00 with piping. The Pouf measured 25×13. Home decorative fabric 2 yards
45 inch wide 1 @ 2.1/2 yard package regular piping
Cut 2 pieces 25 x25
Cut 4 pieces 25×13
Scooped the beads in with a plastic strainer with a handle it was easier.
Filled with 2 bags of beads cost $12.50 @ JoAnns on sale from $24.99.. it was super easy to make took just 2 hours.
I also made 8 large pom poms sewed on each corner and in between.
I’m definitely making more.
I see this was published in 2015 – well I just made some this summer! Yay for the internet! I used outdoor fabric and filled it with beads to use outside by the pool (stuffing would get soggy outside, but the beads are ok). I ended up buying the beads at Amazon, and then found a better price (when I needed more) at Walmart. So far they have held up fine, but they do not get heavy use. In general, polystyrene beads do tend to flatten, but you can just add more if it goes flat (this is where the zipper comes in handy). Look for bean bag filling on Amazon and read the reviews. Filling can be messy – I made a big funnel out of cardboard and enlisted my son in helping me stuff it. Thanks for the tutorial – it was great and easy to follow.
This was posted 2015—how did it hold up? I bought something similar, but it only held its shape for about a year (mostly filled w/ the beads)…wonder if yours did the same.
Can you provide more specifics for the type of polystyrene beads you used. Are the beads the same you would use for stuffing a bean bag chair? The exact name on the box or bag you bought would be helpful. Thank you
Hi I loved the poof but how do you do the piping?
Thank you bought fabric today and anxious to make mine. I really appreciated showing us the difference in the way to stuff them. Nice job I hope mine turns out well.
This is a great tutorial. My daughter is expecting our first grandchild later this year. We both expressed how much we like poufs, but the cost made the prohibitive. I also love the zipper idea of doing that first! Ingenious!
Wow only $35 to make this? It really looks comfy, I wish I knew how to sew so I could make one for me. Fantastic job Katie.
This is really a simple project. It is all straight lines. This pouf is a good beginners project. You can do it! Give it a try!
Love it! Great project.
Thanks!
This is fabulous! What a great idea. I’ve never used this type of filling before. thank you!
I hadn’t either, but it works so much better than stuffing it full of clothes! 🙂
Thanks for the “contrast and comparison” with the filling of the “poof”. I will have to keep my eyes open for those polystyrene beads. My hubby has a “pool noodle” filled with them, and it is far superior to the typical foam pool noodles, as it squishes. I can see that it will need replacement at the end of our pool season and now I can keep my eyes open for the right kind of fabric to make a replacement. I have a leather “poof” that I brought home from Turkey and use poly fill to stuff it. It is too flimsy, and again, those beads might solve the problem. I love your fabric choices. Excellent tutorial. Love that you put the zipper in first, before you did anything else. (Me…I would have screwed up the whole project when I got to the zipper).
I bought mine on Amazon and you can buy different amounts.
I really need to learn how to sew so I can make one of these – and pillows. I always want new pillows but hate spending the money on them. Great job on the pouf. It looks awesome.