egg placecards

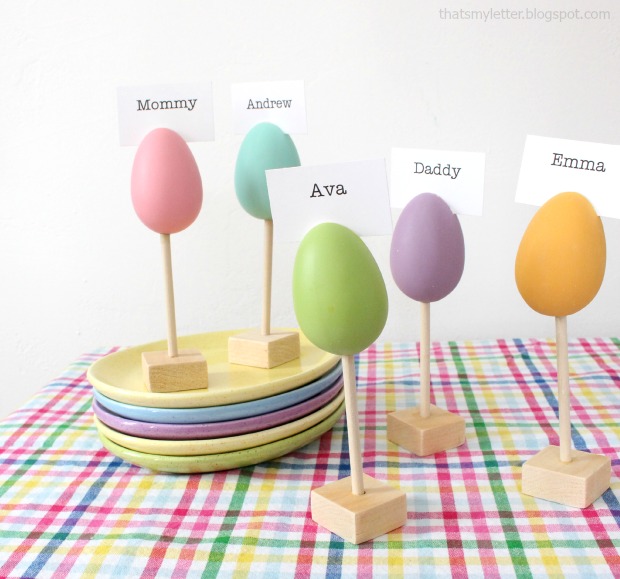
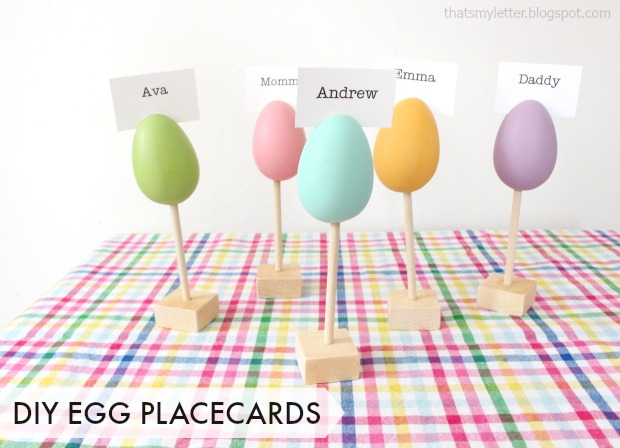
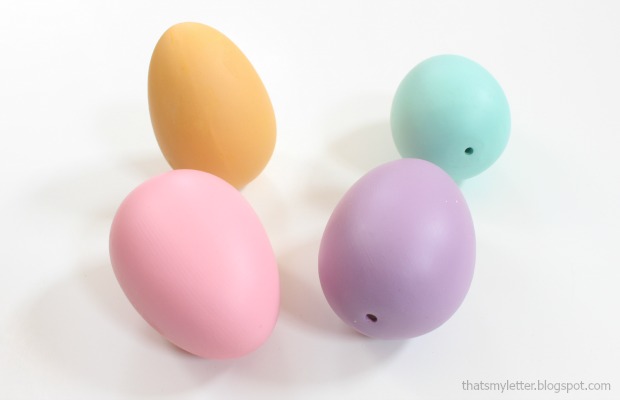
Finally Spring is on the way!  Hello Pretty Handy Readers, I’m Jaime from That’s My Letter here to share a simple DIY project for your Easter table: DIY Egg Place Cards.

Or as my kids like to call these: eggs on a stick.  These egg place cards add a touch of Easter charm to your place settings with a little height and color to boot.

egg placecards 2

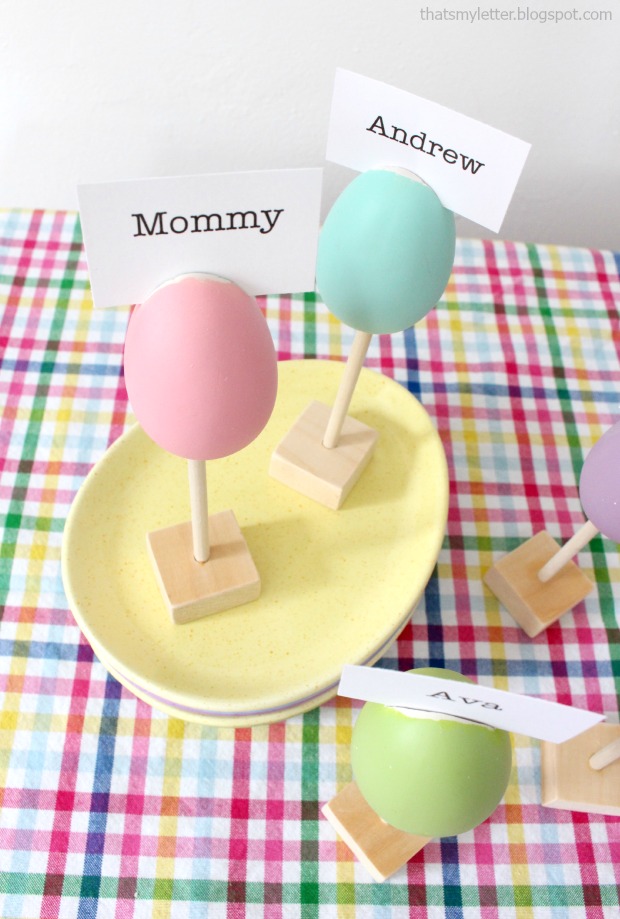
You can simply print the names onto heavy white cardstock and cut them into small rectangles to fit into the eggs.

egg placecard name slot

Follow along to see how to make these egg place cards with a few simple tools.

Supplies:

egg placecards supplies

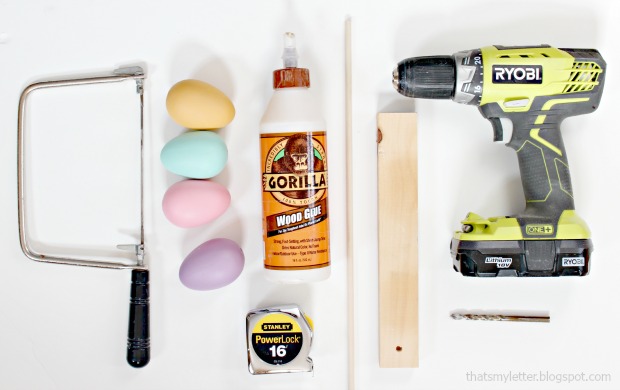
  • craft eggs (I used ceramic painted eggs.)
  • 1/4″ wood dowel (4″ per place card)
  • 1 x 2 pine board cut @ 1 1/2″l (per each place card)
  • drill and 1/4″ drill bit
  • sandpaper
  • measuring tape
  • pencil
  • wood glue
  • coping saw or other small hand saw

Instructions:

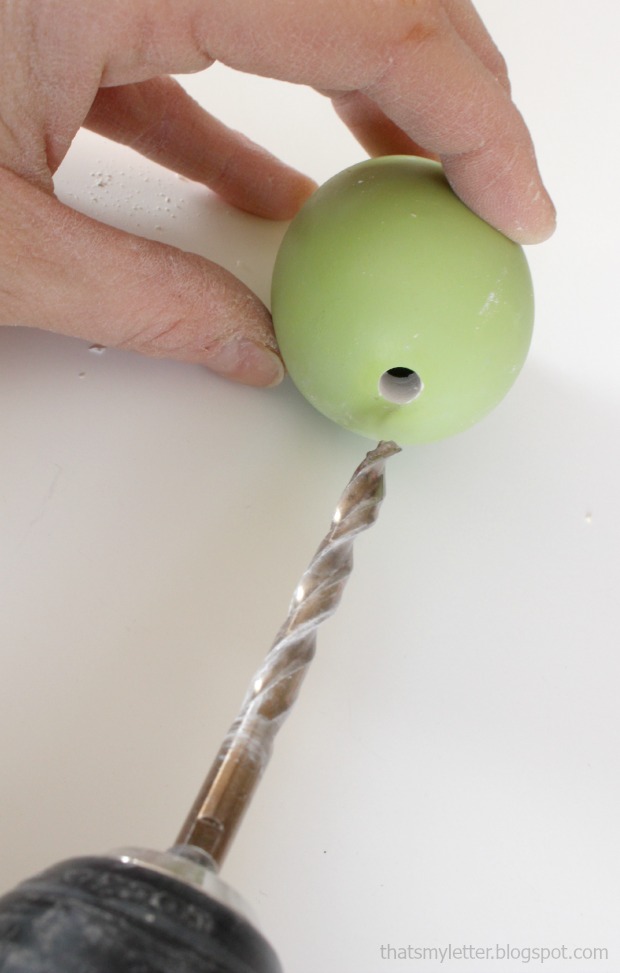
Step 1: The ceramic eggs I used already had a small hole in the bottom but not big enough to fit the wood dowel.

egg placecards eggs

Using gentle pressure enlarge the hole to 1/4″ with the drill bit.

egg placecards step 1

Step 2: Make the slot for the cardstock in the top of the egg with a coping saw.  Because my eggs are ceramic they did chip a tiny bit. Not a big deal, just sand smooth. Read more

Family Organization Door | Pretty Handy Girl

Family Organization Door | Pretty Handy Girl

It’s hard to stay organized when you are a DIY blogger, Mom, wife, cook, cleaner, taxi driver, and a student (taking evening classes for the general contractor exam.) I’ll be the first to admit that I’ve dropped a few balls in this massive juggling act. But, I strive to improve and part of that effort involved hanging a Family Organization Center Door next to the refrigerator.  Did you know there was such a thing? Ha, me either until I saw this half window door at our local Habitat ReStore.

Family Organization Door | Pretty Handy Girl

A vision of a place to plan meals, keep track of chores and keep reminders became clear in my head when I first saw it. Want to see how I took this old door and turned it into a family organization center? Hang around for a few minutes to find out.

Materials:
(contains some affiliate links)

Optional:

Instructions:

After finding a door for your organization center, you may need to trim down the sides to fit your space. I had to trim an inch off each side of my door to fit on the side of our refrigerator cabinet. Use a circular saw to trim the door. Using a Kreg Rip Cut will help keep the saw straight.

Family Organization Door | Pretty Handy Girl

For extra stability, you may want to add a caster on the bottom of the door (opposite the hinge side). This is not necessary, but will add extra support.

Family Organization Door | Pretty Handy Girl

Cut scraps of coax cable to fit into the tops of the windows. Read more

Laundry Room Sink Skirt | Pretty Handy Girl

Laundry Room Sink Skirt | Pretty Handy Girl

Having a utility sink in the laundry room rocks! Having everything that we store underneath it on full display isn’t so rockin’. It was time to create some Hidden Storage Under our Laundry Room Sink.

Laundry Room Sink Skirt | Pretty Handy Girl

In the previous incarnation of our laundry room I had hot glued a skirt onto the sink. But, it was awkward to access the trash can underneath.

AfterSinkandBasket

When the new sink was installed in the laundry room I wanted to find a better way to hide the storage under the sink.

Materials:
(contains some affiliate links)

Instructions:

If you have something solid on each side of the sink (in our case the dryer and a wall), you can use a small shower curtain tension rod. Follow the directions on the shower curtain rod package, but basically you’ll twist the rod until it is tight against the surfaces you are mounting to.

Laundry Room Sink Skirt | Pretty Handy Girl

Slip the rod off the wall for a minute and slide the grommet topped curtain onto the rod.

Laundry Room Sink Skirt | Pretty Handy Girl

Fold under the excess and pin where the curtain meets the floor.

Laundry Room Sink Skirt | Pretty Handy Girl

Measure 5″ up from the pinned edge. Cut the excess off. Fold over 1/2″ at the raw edge and fold again to create a 4 1/2″ hem.

Laundry Room Sink Skirt | Pretty Handy Girl

Iron the folded hem.

Laundry Room Sink Skirt | Pretty Handy Girl

Stitch along the 1/2″ fold.

Laundry Room Sink Skirt | Pretty Handy Girl

Slip the curtain back onto the tension rod and adjust the rod an inch away from the sink (to allow room for the curtain to accordian.)

Laundry Room Sink Skirt | Pretty Handy Girl

When we need to access the trash can or mop bucket, the grommets slide smoothly along the rod.

Laundry Room Sink Skirt | Pretty Handy Girl

Easy hidden storage under a laundry room sink!

Laundry Room Sink Skirt | Pretty Handy Girl

It’s so nice not seeing the bucket and trash can. Speaking of mop bucket, that’s a fancy Mopnado you’re seeing under the sink. If you haven’t heard of the Mopnado, they make moping a lot more fun! The mop head fits in the top and spins to release excess water. You can see how fancy it is in this video:

(Yes, they sent me a complimentary Mopnado to try. No I was not paid or sponsored to mention it.)

What do you think of this quick and easy tutorial to create hidden storage under a laundry room sink? Do you have a utility sink that can use this trick?

Laundry Room Sink Skirt | Pretty Handy Girl

Have a great weekend y’all! I’m headed to Dallas for a little fun project with Thompson’s WaterSeal. Follow me on Instagram to see what I’m up to on my trip.

PHGFancySign


Pin for later!

Keep your laundry room looking tidy with this tutorial for hidden under-sink storage from Pretty Handy Girl! | DIY storage | Home organization #prettyhandygirl #laundryroom #laundryroomstorage #homeorganization

How to Mount Antlers

How to Mount Antlers

Hello! It’s Jessica from Decor Adventures.  One very popular home decor item that we are going to get pretty handy with this month is antlers. If you love rustic or outdoor style, this project is perfect for you. You’ll see all kinds of animal antlers on walls or holding jewelry or scarves. They can be both functional and practical. Antlers can be found at flea markets or second hand stores if you are lucky. They come in all sizes and shapes, plus you can paint them any color to match your style.

It’s much easier than you think to mount antlers on your own. You don’t need a degree in Taxidermy or any special tools, a drill will do!

Materials

  • Antlers
  • Long bolts
  • Nuts to fit bolts
  • Drill and drill bits
  • Hanging hardware
  • Paint (optional)
  • MDF or wooden board

Instructions

I mounted two sets of antlers that I got at a yard sale. One was a one-piece set and the others were two separate pieces. Most antlers you get will have some of the bone attached to the end of the antler. This is the part you will attach to a board to mount them. If you find them second hand they may already have holes drilled in them from when they were previously mounted.

One set I painted white and the other gold. It’s easy to spray paint antlers, so pick your favorite color or leave them natural if you like.

How ot Mount Antlers1. First, prepare the board you’ll mount the antlers on. These can be found at craft stores or you can cut your own from MDF. It should be slightly larger than the base of the antlers you’ll mount. You can paint the board if you would like. The silver one below already had the mounting holes drilled in it when I took this picture, but you can get an idea of the size board you need.

Read more

Cute Sock Snowmen | Pretty Handy Girl

Cute Sock Snowmen | Pretty Handy Girl

I have a very special guest for you today. This woman is a very talented artist and art instructor in Northern Virginia. She is the one responsible for my artistic genes and half the equation for my DIY passion. This woman is my fabulous mother, Shari! (She’s also affectionately referred to as Grammy Mac in our household.)

grammy-mac

Please give my Mom a warm welcome here. She was kind enough to put together her first blog tutorial showcasing these cute sock snowmen that she made with her students (she teaches private art lessons after school.)

Take it away, Mom!

page_break_2

Snow Days! Here in Northern Virginia we have already had too many! The most disappointing part about this is that we haven’t had enough snow to make a snowball let alone a real snow person. In an attempt to make the kids happy, we headed to my studio to make snow people from tube socks. Perhaps if we make enough of them, they will bring on the real deal!

Materials:

(Shopping at the dollar store makes this project much more economical.)

  • 1 White tube sock (Adult Size 9-11)
  • Rubber bands
  • Rice (1/2 to 3/4 cup per person)
  • Polyester fiberfill stuffing
  • Buttons, pompoms, sequins, orange felt
  • Tacky glue
  • Brown pipe cleaners (to make stick like arms)
  • Black acrylic paint
  • Acrylic paint in your favorite colors for tie-dye hats and scarves
  • Cotton Swabs (a good tool for painting dots for smiles)
  • Faber-Castell Gelato pigment stick Bubblegum Shade  (if you can’t find this, you can use watered down pink craft paint)

Optional: 

  • Kitchen towels, fabric or ribbon cut into strips to make the scarves

Instructions:

Tie Dying the Hat & Scarf:

Cut the foot off your sock. (This will be the hat.) You may leave this white, or paint it.

Cute Sock Snowmen | Pretty Handy Girl

Fold the foot part of the sock accordion style, like a fan. Secure the folds with three rubber bands.

add-rubber-bands-to-accordian-sock

Pour your acrylic paints into a small tray or paper plate. Water the paints down slightly. Wet the wrapped sock in water, and roll it into two or three of your favorite colors.

Cute Sock Snowmen | Pretty Handy Girl

Let dry. Unroll the sock to reveal the beautiful colors. Cut off a 1” piece of the raveled end of the sock to make a matching scarf. Read more