fabric & wood coasters

Pretty Handy readers we are nearing ever so close to the big day!  Jaime from That’s My Letter here today to share a quick and easy last minute gift idea.  These fabric and wood coasters add just a touch of holiday cheer to any coffee table and you just might already have the supplies on hand to make them!

fabric & wood coasters wrapped

All stacked up and tied together they make a great hostess gift or a charming diy gift anyone is sure to appreciate.

fabric & wood coasters 3

The plaid fabric is completely on trend this year as we are seeing plaid and tartan everywhere!  You could use nearly any fabric, this plaid happens to be a thicker woven cotton.

fabric & wood coasters 1

Below are the step-by-step instructions to make your own fabric and wood coasters.  Always use all safety precautions when operating power tools.

Materials:

  • 4×4 wood post scrap (1/2″ thick for each coaster)
  • miter saw
  • measuring tape & pencil
  • sandpaper
  • fabric (4″ square for each coaster)
  • mod podge
  • paint brush
  • rotary cutter & self healing mat

Instructions:

Step 1: Mark the 4×4 post for a 1/2″ cut.  I recommend setting up a stop block (the 2×4 on the right in the picture below) and clamp it to your saw.  This stop block allows you to make multiple cuts of same length without having to re-measure and mark your wood every time.

fabric & wood coasters step 1

fabric & wood coasters cut complete

Step 2: Sand the edges of the wood cuts smooth.  Apply a generous layer of mod podge onto the wood and press fabric in place smoothing any wrinkles.  Let dry. Read more

three-book-recommendations

I’m thrilled to share with you a selection of 3 DIY books this holiday season. If you are looking for ideas for someone on your gift list who: has children who love to create; loves rustic metal decor; or wants some simple ideas to love the home they are living in…I have the book for you!

Let’s start with C.R.A.F.T – Creating REALLY Awesome Free Things (affiliate link). This book by Jamie Dorobek was not a book I had originally planned on reviewing. But, when I opened the envelope and set the book on the counter it was instantly whisked away from me. My boys took the book and read it from front to back!

C.R.A.F.T. Book Review

Within 30 minutes, my oldest (a middle schooler) had already cut up a cereal box and was working on his own puzzle.

C.R.A.F.T. Book Review

C.R.A.F.T. Book Review

The next day, my 3rd grader had a playdate at our house. He and his friend asked for the materials to make their own Emoji masks. Read more

50+ DIY Gift Ideas

50+ DIY Gift Ideas

Hello again, it’s Colleen from Just Paint It with another fabulous homemade gift collection. Today we have 50+ DIY Gifts for practically everyone on your list! This is a diverse group including painting, quick crafts, woodworking and so much more. I’m sure you’ll find plenty of inspiration.

Have fun checking these DIY Gifts out!

Washi Tape Gift IdeaWashi Tape Gift Idea


Spraypainted Bottle VasesSpraypainted Bottle Vases


easy_pounded_Flower_Gift_ideasjpg
Easy Pounded Flower Gift Ideas


Spoon Tealight CandleholderSpoon Tealight Candleholder


DIY Sconce HookDIY Sconce Hook


Wood Block Floating Picture Frames | Pretty Handy Girl
Wood Block Floating Frames Read more

Personalized Rustic coasters sawdust2stitches for www.prettyhandygirl.com

Today I have the ever fabulous and always vivacious Corey on stage. She will be sharing how to make these Personalized Wood Slice Coasters.

Rockstar DIY Series

Corey is the rockstar designer behind Sawdust 2 Stitches. As if you had any doubt, this girl is multi-talented with her building and sewing skills! You’ll definitely want to check out her amazing gallery of tutorials.

Hey, I think I hear a chainsaw? Take it from here Corey!

page_break_2

Hey all, this is Corey from Sawdust 2 Stitches. I am one of THOSE people, that when I get an idea, I run with it… and I run fast. One day I decided that I didn’t like the tree in our front yard. Long story short, I had a small supply of wood logs at my disposal.

As the Holiday Season is quickly approaching, I decided to slice up the stump and use them in a plethora of festive decor. One such idea was Personalized Wood Slice Coasters. These are great for anyone attending and/or hosting a holiday dinner! This little tutorial will have you prepared to make the atmosphere absolute perfection. Or if you are attending an event these would make thoughtful hosts gifts.

Rustic coasters sawdust2stitches for www.prettyhandygirl.com

Materials:

  • Log or Wood Slices
  • Pencil
  • Fine Tip Sharpie
  • Poly Acrylic
  • Foam Brushes

Instructions:

As I stated earlier, I had wood logs at my disposal and I chose to slice them about 1/4″ thick on my compound saw. One thing to consider, if you are using fresh wood they will be undergoing a drying process for a few weeks, and they can crack! I had some of mine do this, but truth be told, I kind of liked it. It added a little character. However, if you would prefer them not crack-less variety there are ways to lessen the possibility. I have been told that if you store the wood slices in in a double bagged brown paper sacks, it will prevent them from drying to quickly. Simply open the bag every day to let in fresh air, and then reseal it.

HOWEVER if you don’t have time for that, many craft stores have wood slices available and ready to use.

wood slices

Once the slices are ready to use, I began by drawing on my design with a pencil first. ( If you hate your handwriting you can always use a stencil or transfer paper. ) Read more

Canvas Halloween Door Decor TodaysCreativeLife.com

Today I have a special guest rockstar for you! Kim is here to show you how to whip up the quickest Canvas Halloween Door Decor.

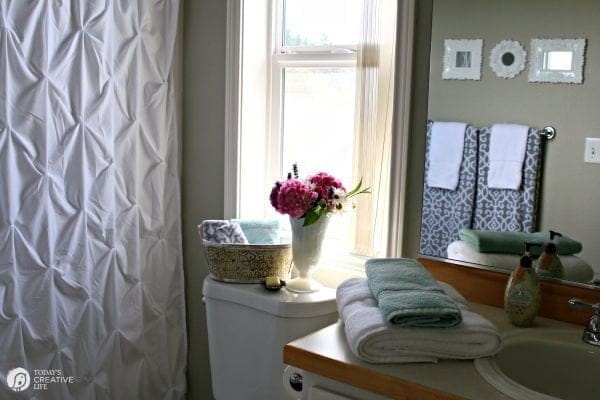
Kim is the creative goddess behind Today’s Creative Life. She truly has an eye for the awesome. I mean have you seen her bathroom makeover for $110?

She effortlessly pairs colors and textures together in the blink of an eye. Get ready to learn how to make holiday decor as quick as a guitar riff.
Rockstar DIY Series

Welcome Kim, our next Rockstar to take the stage!

page_break_2

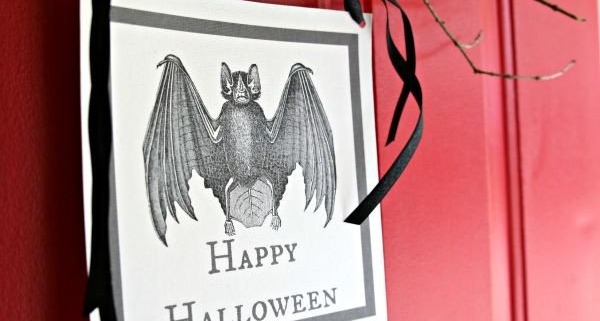
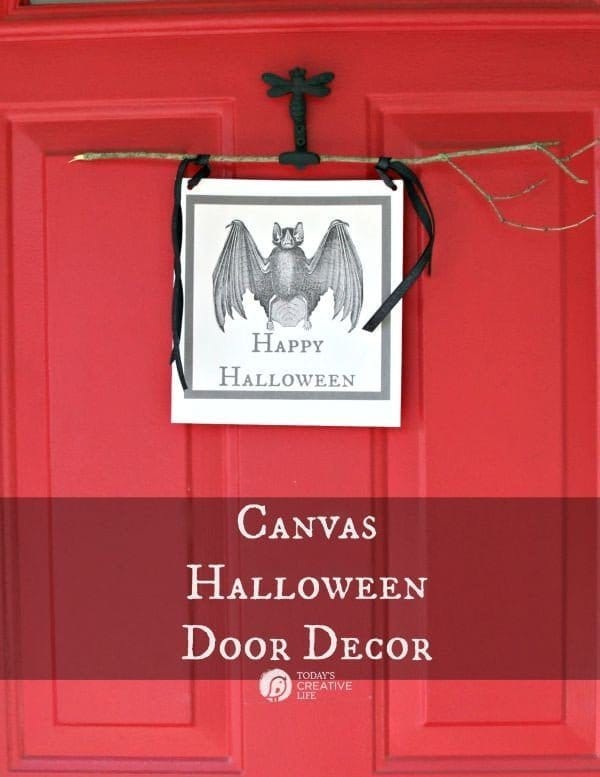
Hello Pretty Handy Girl readers! I’m thrilled to be hanging out at Brittany’s place today sharing a quick and original way to decorate for Halloween with this DIY Halloween Canvas Door Decor.

DIY Halloween Canvas Door Decor

Canvas Halloween Door Decor TodaysCreativeLife.com

If you follow Today’s Creative Life (formally Today’s Creative Blog), then you know I’m not talented like Brittany in the ways of building, but I sure do love me some quick and easy ways to bring more creativity to my home!

I share DIY Decor, DIY Projects and Recipes for families. You’ll find easy to follow tutorials for bringing creativity to your home and a lot more for holidays!

I’m always looking for something a little out of the ordinary for decorating my door for Halloween. Sure, I could just slap a wreath on the door and call it good, but that would be way to sensible.

Last year, I created a fun Halloween wreath from a ceiling medallion.

Fall Halloween Porch TodaysCreativeBlog.net

I love the way it turned out and may use it for my Halloween mantel this year.

This year, my ideas kept coming back to using fabric or canvas somehow. My first idea was to use Iron On Transfers with the fabric from a drop cloth and then, I remembered I had some printable cotton canvas that was printer ready.
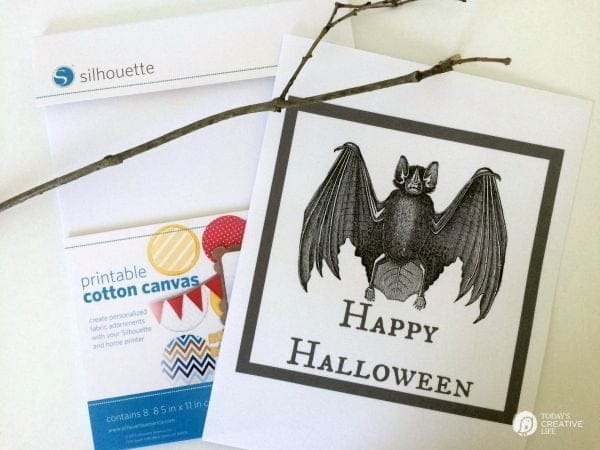
Halloween Door Decor

Materials:

  • Printable Graphic (I used The Graphics Fairy)
  • Printable Cotton Canvas
  • Ribbon
  • Stick
  • Paper hole punch
  • Paper Trimmer

Instructions:

1. I found and downloaded the image I wanted from The Graphics Fairy, as I do for all my iron on transfer projects. She has just about any image you’d ever want for any time of year. Such a great resource.

2. I used PicMonkey to create the text and frame, but any photo editing tool would work. Of course you could just print the image only and keep it really simple.

3. I printed it on printable cotton canvas. This particular paper ended up having a self adhesive backing, so I just left the protective paper backing in place.

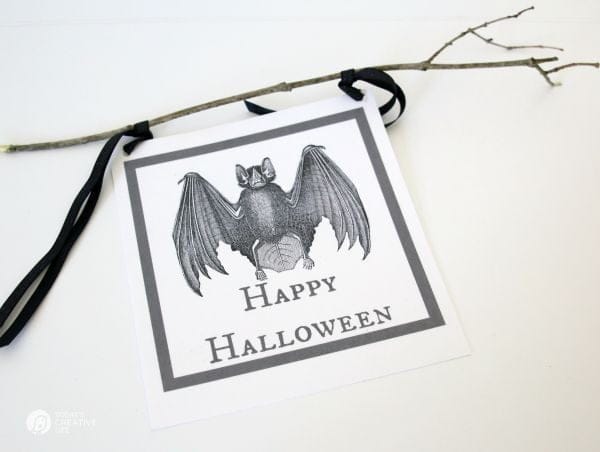
4. Using a paper trimmer, I trimmed the bottom.

5. I punched a hole in each upper corner with a paper hole punch.

6. I tied a coordinating ribbon to a stick from the yard (actually I broke it off my lilac bush) and called it good!

diy door decor for halloween

After I got it hung up and looked at it for a day or so, I think I may try to age it a bit for an older distressed look. You can do that easily by brushing on brewed tea and lying it out to dry.

diy halloween door decor

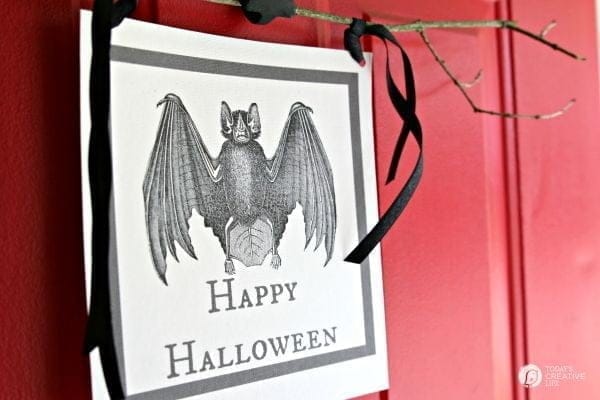
I like the way it looks. It’s original and can be used anywhere in the house. The possibilities are plenty!
divider

Here’s more creative Halloween ideas from Today’s Creative Life.

Halloween Table Centerpiece | TodaysCreativeBlog.net

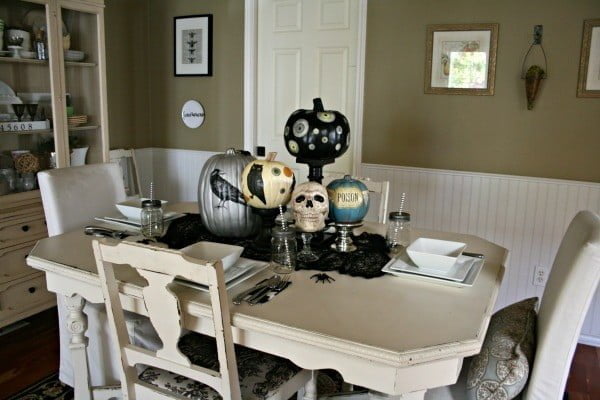
DIY Halloween Table Decor

Halloween Spirit DIY Halloween Decorations | See more on TodaysCreativeLife.com

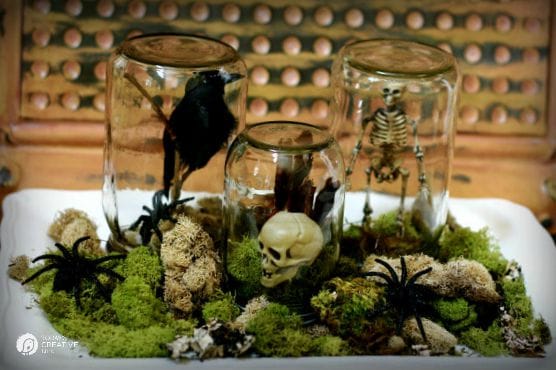
DIY Halloween Terrarium


Silhouette Cameo Halloween Decor | Easy DIY Home Decor projects on TodaysCreativeLife.com 
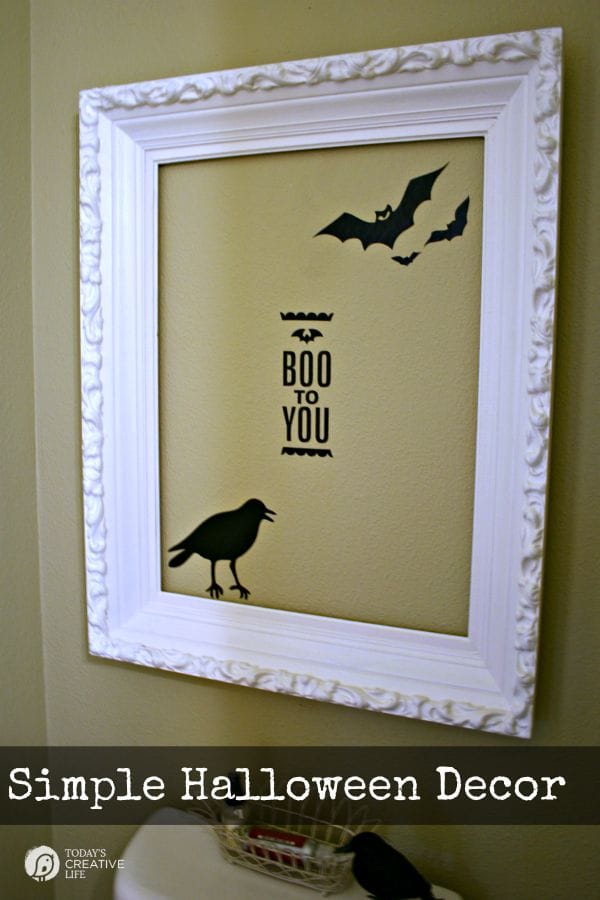
Simple Halloween Decor

page_break_2

Are you running off to make your own Halloween decor now? Me too! I hope you are enjoying the Rockstar DIY series and are ready for more talent next week.

Rockstar DIY Series