How to Cut in Without Using Painter's Tape

How to Cut in with a Paint Brush

I’m back with another great video from my friend Lindsay. She’s going to be giving us a ton of tips on how to cut in with a paintbrush in today’s post.

Lindsay from Makely School for Girls

She worked with Glidden to create a series of short videos to help DIYers like yourself tackle your own paint projects.

Painting a room like a professional means having straight lines where the wall meets doors, windows, ceilings and baseboards. To achieve crisp lines you can tape around all these spots.

How to Cut in with a Paint Brush

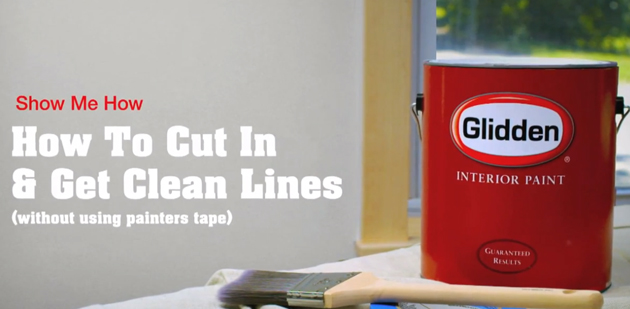
Anyone who has ever taped a room knows it takes FOR-EV-ER! Have you ever wondered how the pros can paint around doors and windows without using painter’s tape? Well, wonder no more. Lindsay is here to save the day (and your time) with tips to cut around your trim with a paintbrush.

Looks pretty easy, right? Next time you have to paint a room, you should try it for yourself. Hey, if worst comes to worst, just have a damp rag nearby to wipe the paint off. Speaking of saving time, you might want to head over to Glidden’s My Colortopia and learn more tips from Lindsay with 5 Tips for Speeding Up the Painting Process!

Get more tips, tricks and tutorials for your next painting project at Glidden’s new Show Me How website!

Disclosure: This is a sponsored post for Glidden brand paint. I was compensated for my time to write this post but the thoughts and opinions expressed are my own.

Tres-frugal-party

At the end of every year I’m struck by how much money is spent on holiday gift giving. There are so many people to buy for! As an answer to the age old question, “What should I get _______?” I’m teaming up with several bloggers to bring you Trés Frugal in November.

We’ll have 30 beautiful, useful, inspirational, and fabulous DIY gift ideas complete with the tutorials to make your own. I hope you’ll join us, get creative and save a little cash to spend on yourself this holiday season!

I know November seems to be such a long time away, so I decided to give you a little taste to whet your appetite. I’ve given Tidy Mom a new tutorial to make this Vintage Coat Hook Wall Vase, which would make a nice gift for anyone who loses their keys or the dog leash from time to time (totally guilty of that myself!)

Vintage Coat Hook Wall Vase | Pretty Handy Girl Guest Post

Head over to Tidy Mom to read the full tutorial. And remember to follow along in November for more DIY Gift Ideas!

PHGFancySign

View all the Trés Frugal projects here.

You may also want to check out my 15 Minute DIY Gift Ideas from last year!

10 Days of 15 Minute DIY Gift Ideas


How to replace decorative trim on furniture.

How to replace decorative trim on furniture.

I found a cute nightstand at an antique mall a while back.  As usual it sat in the garage for some a few years time and then I decided it was time to re-finish the piece.How to replace decorative trim on furniture.

The nightstand had been painted multiple times and needed some paint stripping.

How to replace decorative trim on furniture.

Rather than use any chemicals I opted for a heat gun and it worked great … How to replace decorative trim on furniture.

…until I got to the delicate trim on the front of the nightstand drawers.  Every time I would try to get the paint off it would gouge the trim.  I knew that I had two options: try and repair the damage or replace the trim with new trim that wasn’t caked with 40 years of paint.  I had a few trial runs with various trims and various cutting methods but rather than dwell on wasted time I’ll just tell you all about what worked best for me!

Materials: Read more

DIY Room Divider King Headboard

I’m still working on my bedroom re-do, it’s been a long process but it is slowly coming to an end with the decorative part.

After painting the room, my big question was how to make the bed or that whole wall where my bed is going to be located, the focal point in the room.  At first I was thinking about installing wall paper with a nice design, then I thought about using a stencil since its a more economical choice. A painted stencil would also be easier to change later on.  Then, I received a stroke of luck! I scored a cabinet in the FREE section of Craiglist! When picking it up, the owner asked me if I also wanted this room divider:

DIY Room Divider King Headboard

“Of course!” I said and run out of there before he had time to change his mind!  That thing is super heavy! It looked really nice after a good cleaning, up close not that much, something was sprayed on it 🙁 there were lots of spots all around.

DIY Room Divider King Headboard

That’s why I decided to paint it and use it as my bedroom’s headboard.

The materials and tools you will need: Read more

Easy Fall Wreath Tutorial

Easy Fall Wreath Tutorial

Who’s too busy to spend more than 5 minutes creating a new wreath for Fall? {Raising my hand high!} Well, I’m about to give you the Easiest Fall Wreath tutorial…EVER!

Do you have one of these store bought wreaths? Pretty, but maybe a little lacking in color. Or maybe you’re just sick of looking at the same store bought wreath going on ohhhh six years now?

Easy Fall Wreath Tutorial

Quick! Go grab these five things:

Easy Fall Wreath Tutorial Read more