
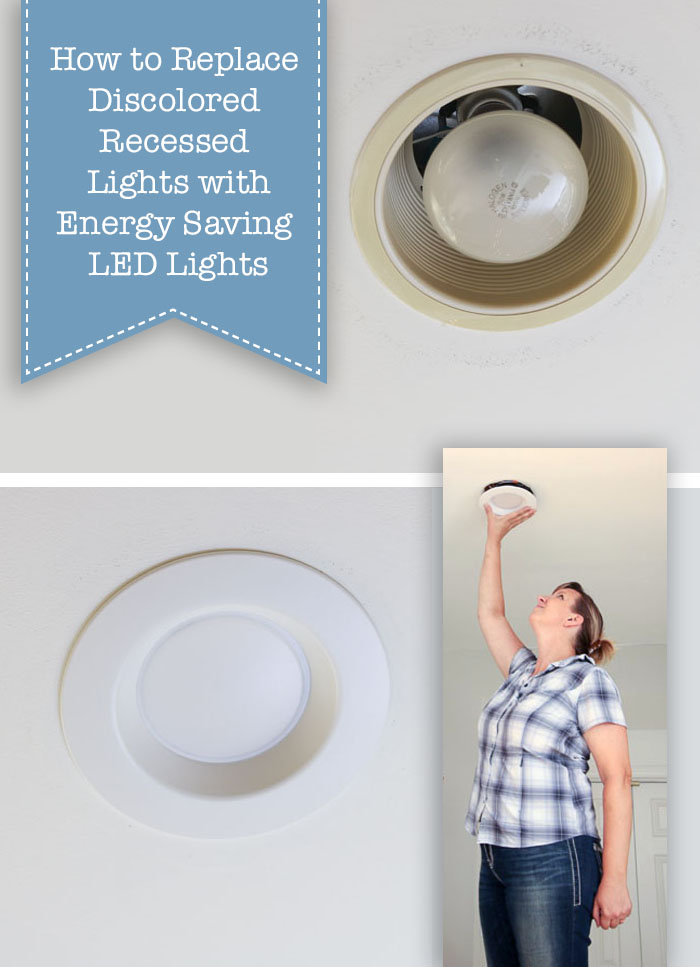
How to Update Ugly Recessed Can Lights with Energy Efficient LED Lights
Do you have those old discolored recessed can lights in your home that use big hot flood bulbs? If so, it’s time for an upgrade!
How to Update Ugly Recessed Can Lights with Energy Efficient LED Lights
Today I want to show you how to update ugly recessed can lights with energy saving LED recessed lights. This process is quick and easy, not to mention the new lights will look better, last longer, and save you money on your energy bill! What more could you want? Change out all your ugly recessed lights in no time by following this simple tutorial.
Materials:
(I’ve included affiliate links for your convenience. I earn a small percentage from a purchase using these links. There is no additional cost to you. You can read more about affiliate links here.)
- 6″ LED Recessed Dimmable Retrofit Downlights
- Ladder or step stool
- X-acto knife (optional)
Instructions:
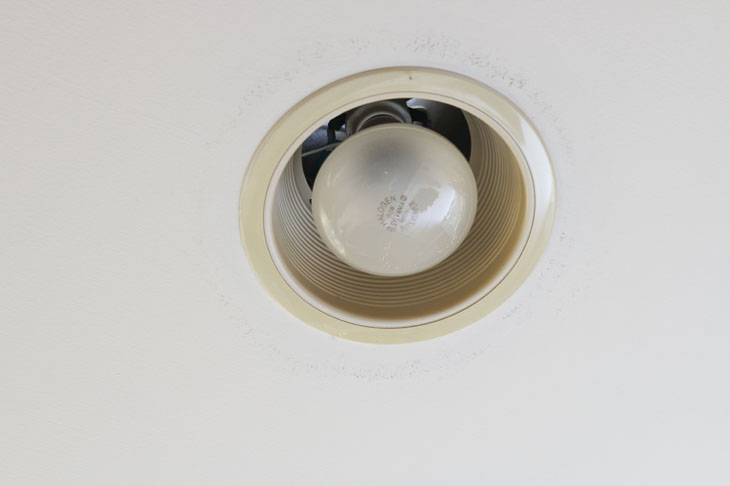
Here is what my old lights look like. Not only are they ugly, but they use the large flood light bulbs that use too much energy, radiate heat, and burn out quickly. I don’t know about you, but I am tired of changing these burned out bulbs.
Want to see how quickly you can change out your lights? Here’s a one minute video (that’s how fast you can do it):
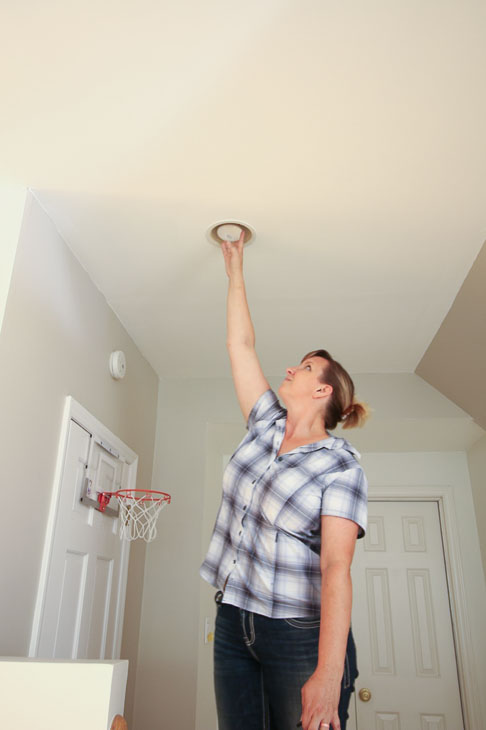
The first step to replacing these recessed lights is to remove the light bulb by simply unscrewing it from the socket. Unless you’re extraordinarily tall, you’ll probably need a step ladder for this project.
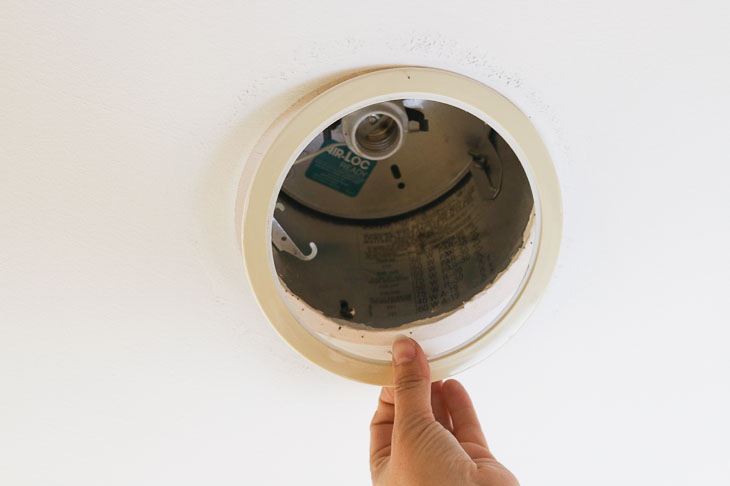
Next, find two small springs inside the baffle, as shown in photo below. They look like a wire with a loop in the center. Pull up and out on the springs to release the baffle inside your can light.
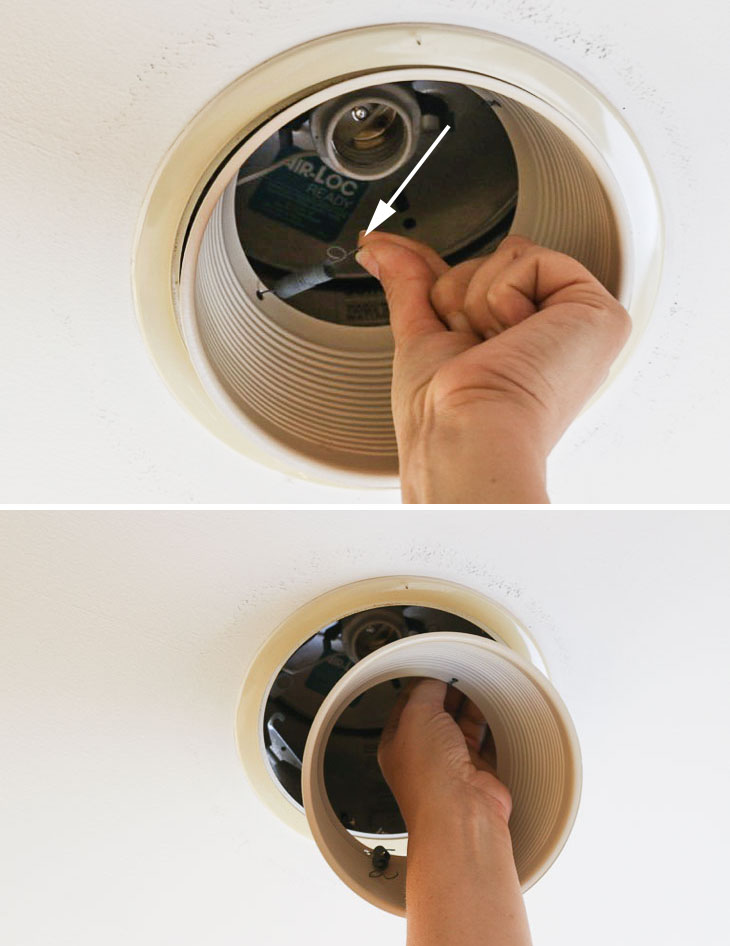
Remove the trim by simply pulling it off the ceiling.
Grab your new retrofit LED recessed light and screw the adapter into the light bulb socket, exactly as you would screw in a light bulb. It’s that easy!
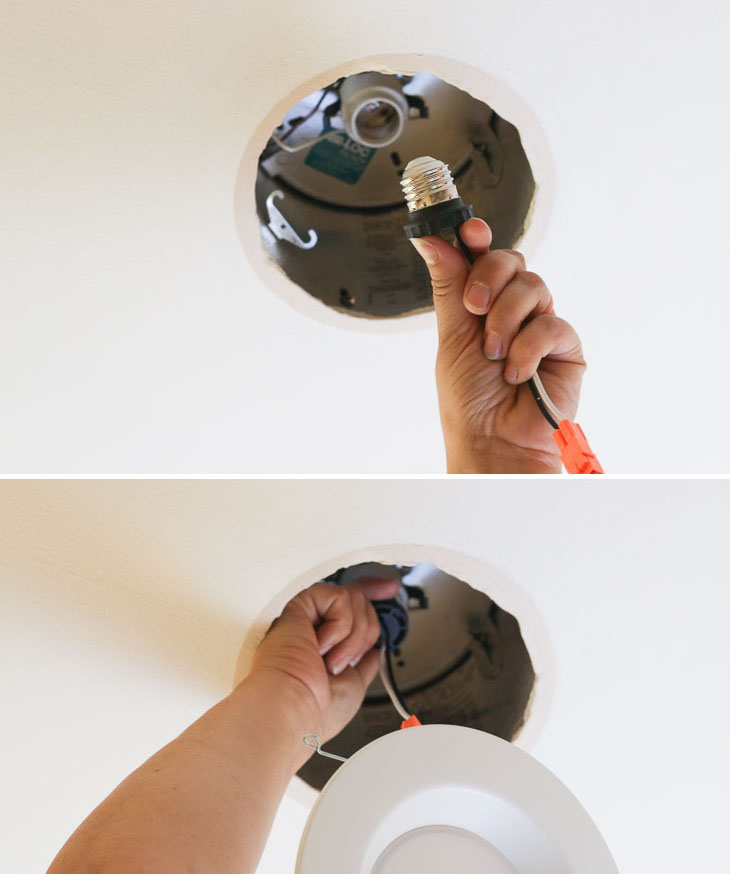
Inside the opening, find two metal clips. Squeeze the spring hinges on your LED light and insert them into the clips inside the old recessed can. These will hold the light in place.

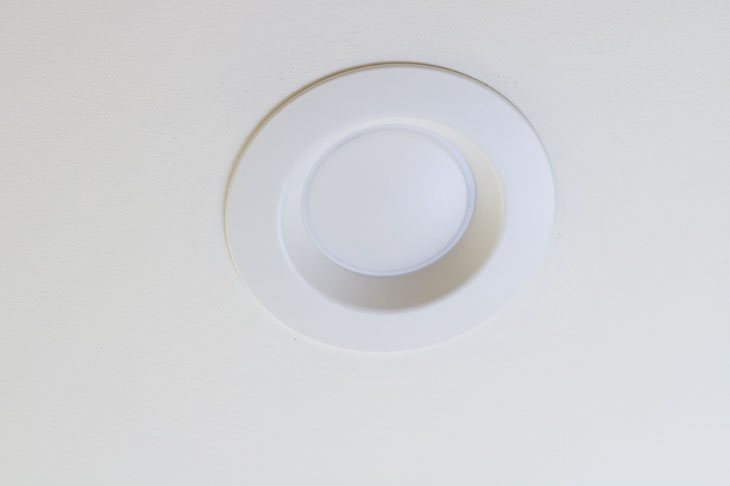
Finally, gently push your light up into the ceiling. Believe it or not, you’re done!

Now you have a beautiful, white, and energy-efficient LED recessed light. Take some time to admire it.
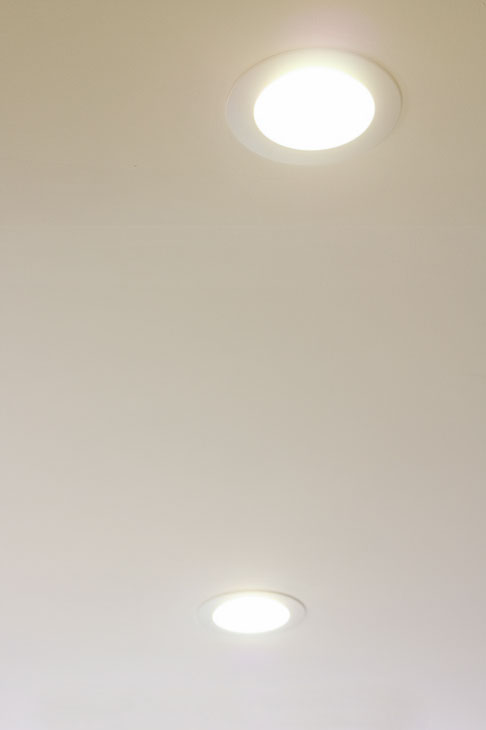
Now you can easily change out all the can lights in the room and voila, your lighting is upgraded! This is such a quick, easy, and inexpensive project. There is no point in putting it off any longer.
I hope you enjoyed this tutorial. Feel free to share any questions or thoughts in the comment section below. Thank you for reading!

Liked this project? I know you’ll love these other lighting upgrades:
Change Out a Dated Hollywood Strip Light
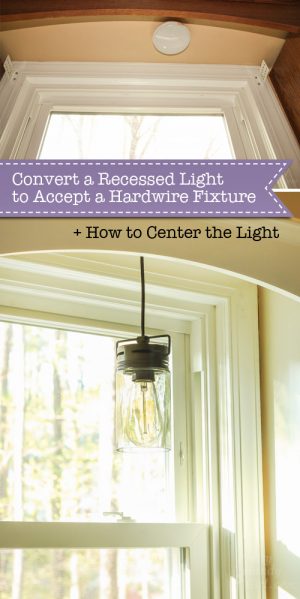
How to Convert a Recessed Can Light to Accept a Hard-Wired Light


some of the old cans do not have those horn shaped tabs. What do you do for those cans?
those horn shaped tabs inside the can-where do you get those if your can doesn’t have them?
They come with the original fixture.
I have recessed “eyeball” lights. Can these be changed out for the new LED lights? They are 30 years old.
Thank you
I think so, but can’t tell without looking at it myself. But, I would attempt to do it and keep the receipt for the new fixtures in case they don’t work.
I am trying to install my led lights in the can but the can does not have metal clips. What do I do?
need a suggestion for this too – i am having the same problem – no clips to hook those springs into – thinking about silicone gluing them to the ceiling!!! – should I
Hi Brittany,
I am looking to do this in my house but I am thinking my might be a larger light. What do you measure to know yours was 6 inches? The hole in my ceiling is about 8 inches but the inside of the housing is 5 inches.
Thanks so much, I am so looking forward to completing this in my bathroom!
The diameter of the can (not the trim)
Looks super easy but in general all the new LED light is quite ugly. It’ produces a cold wash of light, even if you step those new can replacements to 2700 (warmer). It actually is uncomfortable to my eyes to look at, like old fluorescent lighting–which is true for many people.
I’m waiting until they figure out how to make the light more pleasing and much less harsh than it currently is. Sad to see incandescents and halogens go. They are much more comfortable and flattering light for indoor and outdoor.
Sheree, the newer LED lights I use more recently are 3000K and almost look like incandescent lighting. Trust me I am very particular about light temperature.
I ordered 8 lights and installed them myself on Saturday. I love them – everything looks brighter. Thanks for the recommendation.
Hooray! So glad you found this tutorial helpful.
Thanks so much. Ordered and can’t wait to install 👍
Thanks so much, I just placed order.
Which brightness level do you reccommend? 3000, 4000 or 5000? Thank you
Kathy, sorry it took me so long to reply. I used 4000 in our house. I like it, but it is definitely cooler than incandescent bulbs. If you like a warm glow, choose 3000k.
the only thing bad about those light is if they burn out or don’t work then you have to bring them back to the store because there is no way to fix it
In my experience we haven’t had any issues with the LED lights. And they are easy to purchase new ones as needed.
Wow, thanks so much for this tutorial! I recently bought a house with 24 (!!) of those ugly recessed can lights and thought I’d need to hire an electrician to replace them. So excited to get started on this project!
Brilliant! I wanted to change mine out because, like you, I’m TIRED of changing them so often!! But, I didn’t want to mess with electrical, so these screw-in lights are perfect. Thanks for the great tutorial!
Brittany, this post is so useful; I wish I had read it a year ago! I had these lights all over my old condo, and they were everything you claimed: energy suckers that heated up my condo and were constantly burning out. I bought a 24 pack of bulbs simply because I went through them so quickly. I had no idea they could be so easily updated! I’ve since sold the condo, but I’m totally pinning this for when I come across these lights in the future!
Awesome. I did that as soon as I bought my townhouse in May. Changed all the lights to LED, as well as the home I sold in Ca. I changed every light first. So my Can Lights in the kitchen don’t have that snazzy “cover” your have, nor do they have the springs in the baffle. The only thing I have is the trim. My lightbulbs came right out like regular bulbs. Do I need to buy covers for these lights? IDK if they had them at one time. Thanks!