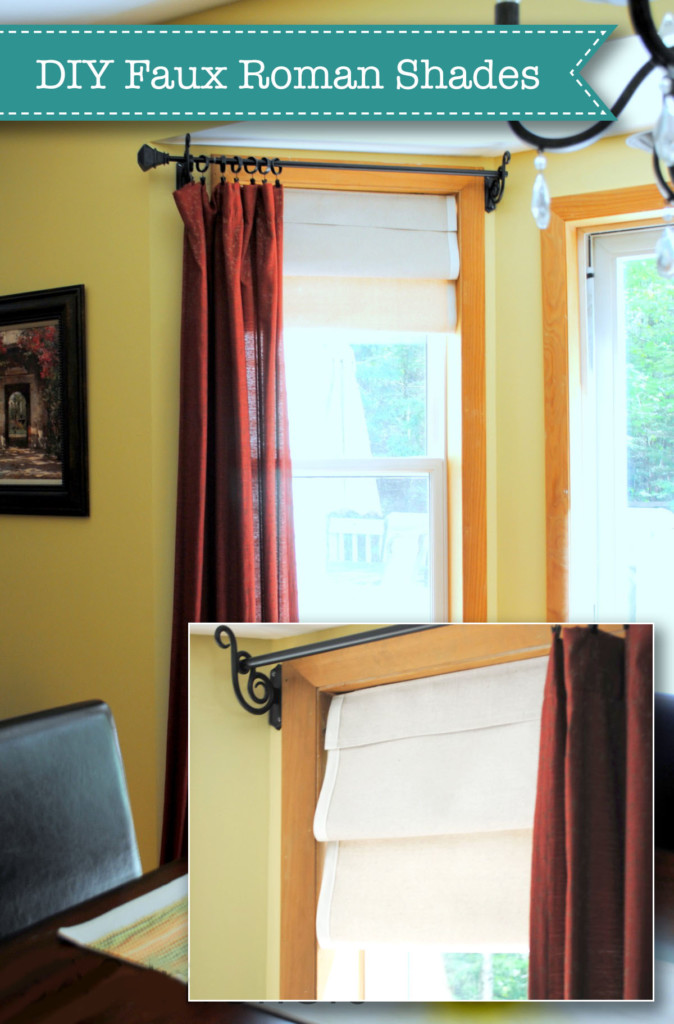
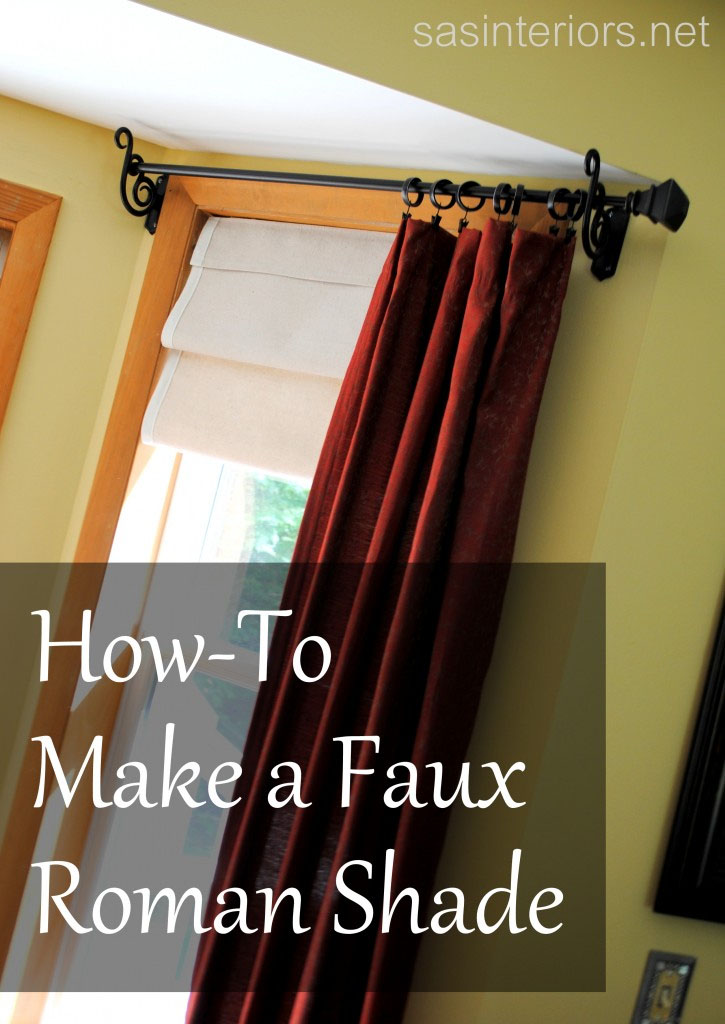
Learn how to make these designer-looking Faux Roman Shades to elevate your window appearance.
I’m honored to have Jenna from SAS Interiors on the blog today. She is an interior designer, blogger and Mom from upstate New York. This is one busy gal! Please put those hands together and give Jenna a warm welcome.

Thanks so much Brittany for having me guest blog today at Pretty Handy Girl! I’m Jenna and I am an Interior Designer & Home Decor Blogger of SAS Interiors.


My home has a lot of warmer tones and for the past year, I have slowly been transitioning to a more casual aesthetic with cooler hues. With updated fabrics on the pillows and windows, and some stylish new accessories and repurposed pieces, my interior is changing into my desired style.
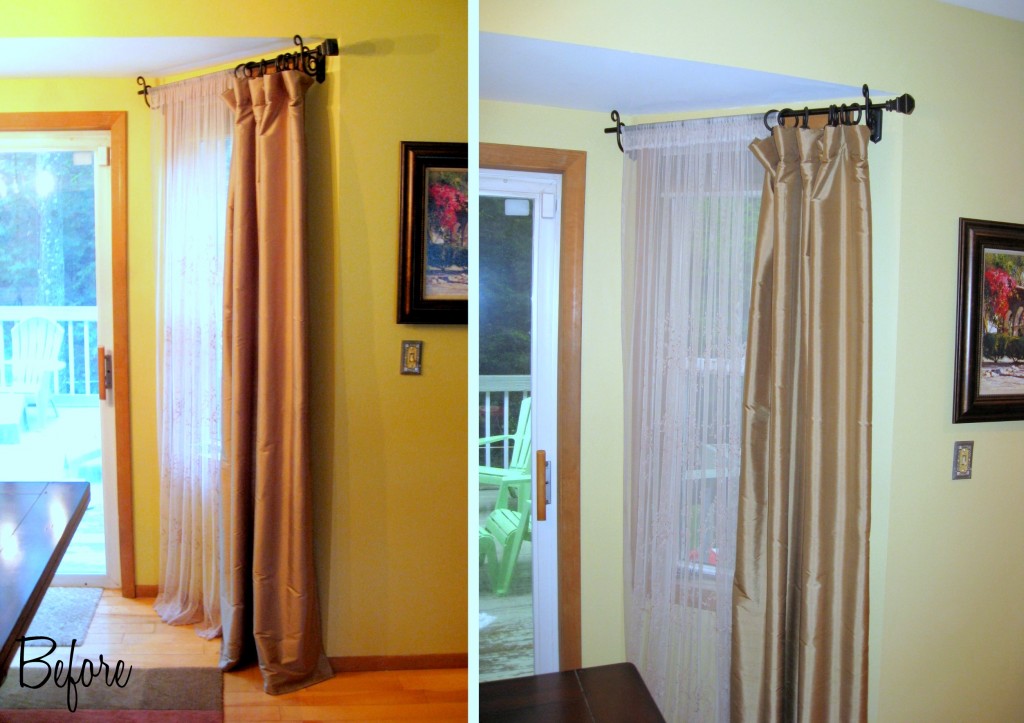
One DIY project that I created to transition into this new look was to use drop cloth material to make faux roman shades for my dining room windows. I am a little crazy-in-love with drop cloth material. And not for it’s intended use of covering furniture while painting, but instead to create DIY projects with. Drop cloth is truly simple, affordable, & stylish, as well as durable, chic, and a great neutral palette for any accent color.

With that, check out how I made my faux roman shades…

These faux roman shades are not functional (I’m not that good, hehe), but are a great neutral backdrop to complement the long drapery side panel.
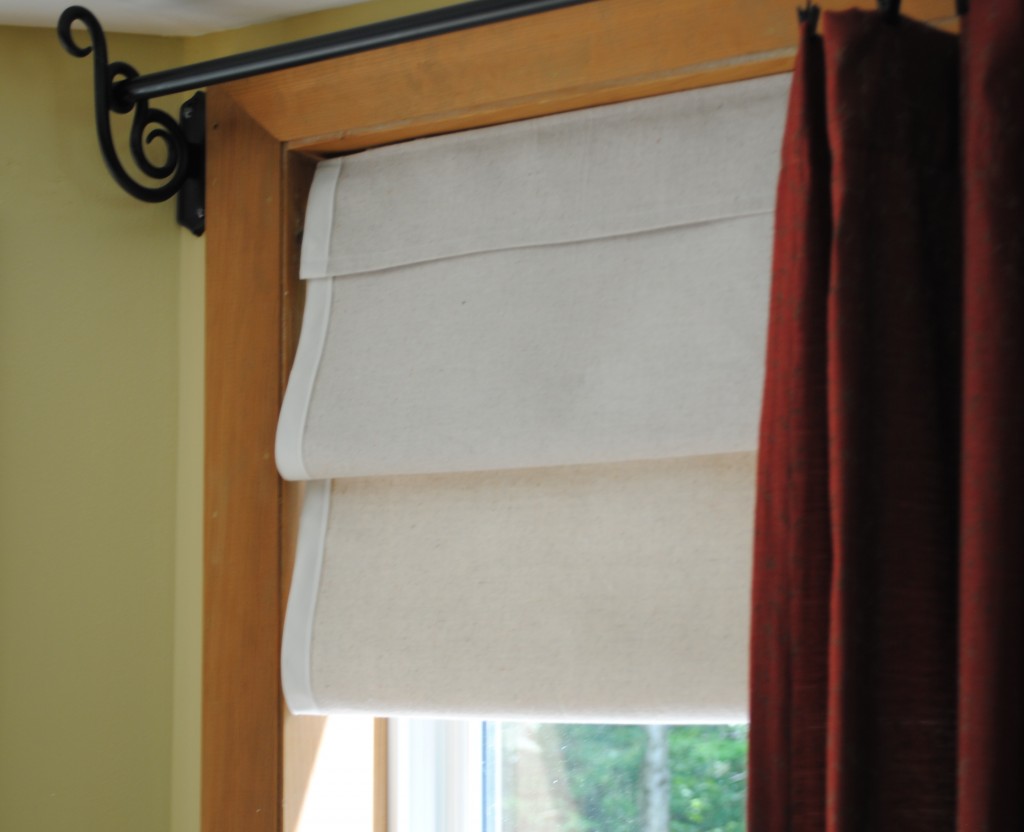
These are some of the suggested supplies to make the faux roman shades:

  • Fabric of choice (obviously I prefer drop cloth, but any heavy weight fabric will do)
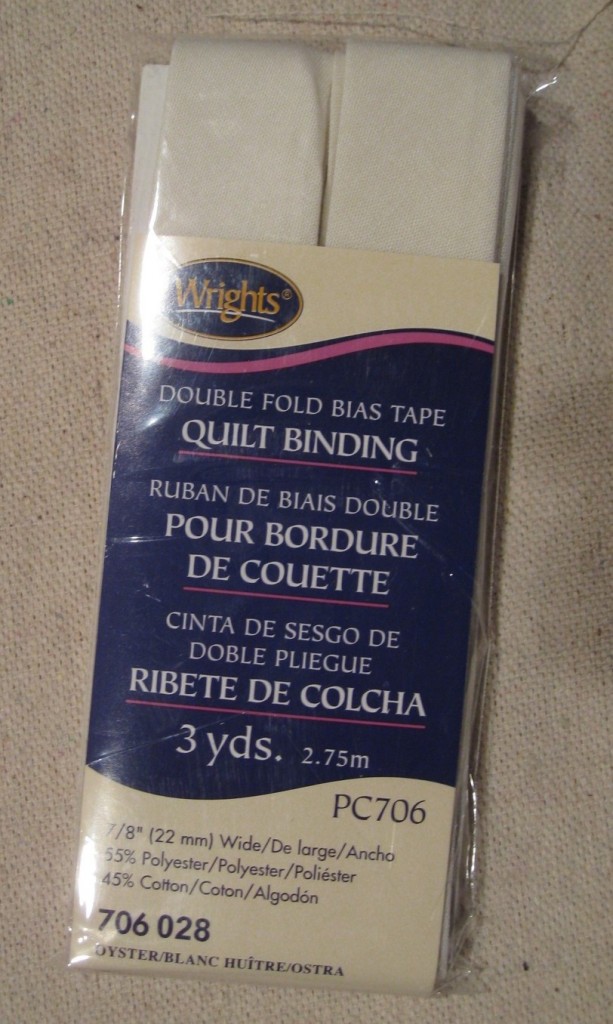
  • Double Fold Bias Tape
  • Sewing Machine
  • Typical sewing supplies (pins, scissors, measuring tape, etc)
  • Velcro

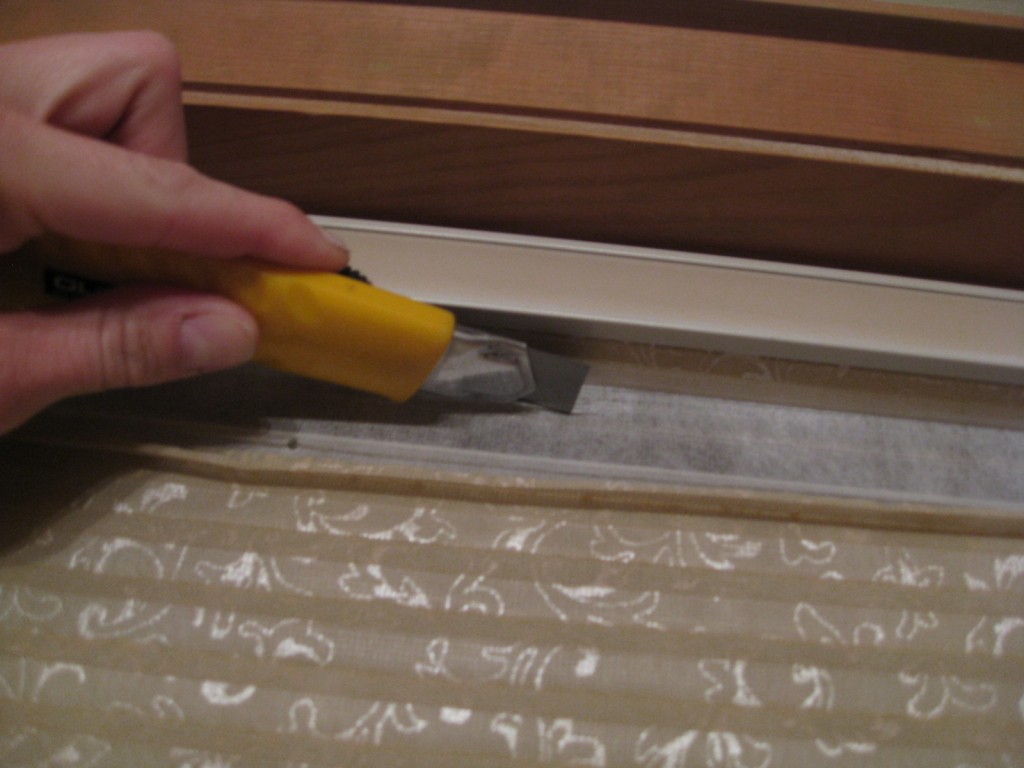
Before I begin the tutorial, I wanted to mention there was an existing honeycomb-style shade where I wanted to install this new faux roman shade. I removed the fabric shade using a straight edge but left the bar in place. This is what I later used to attach the faux roman shade with the Velcro. **If you are starting from scratch, you could put the Velcro directly on the window OR get a tension rod and Velcro the shade to it.
Here is the step by step:

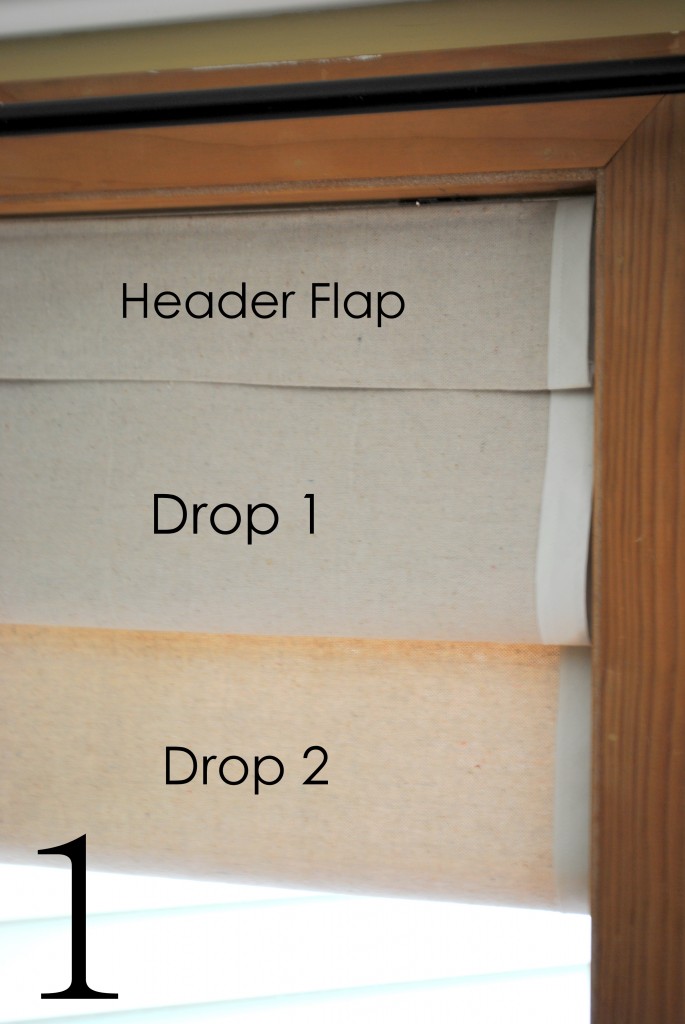
1. Decide how many ‘drops’ you want for your roman shade. I decided on 2 drops, and then I added a Header Flap on the top. Each drop is 5-1/2” and the top flap is 3-1/2”.
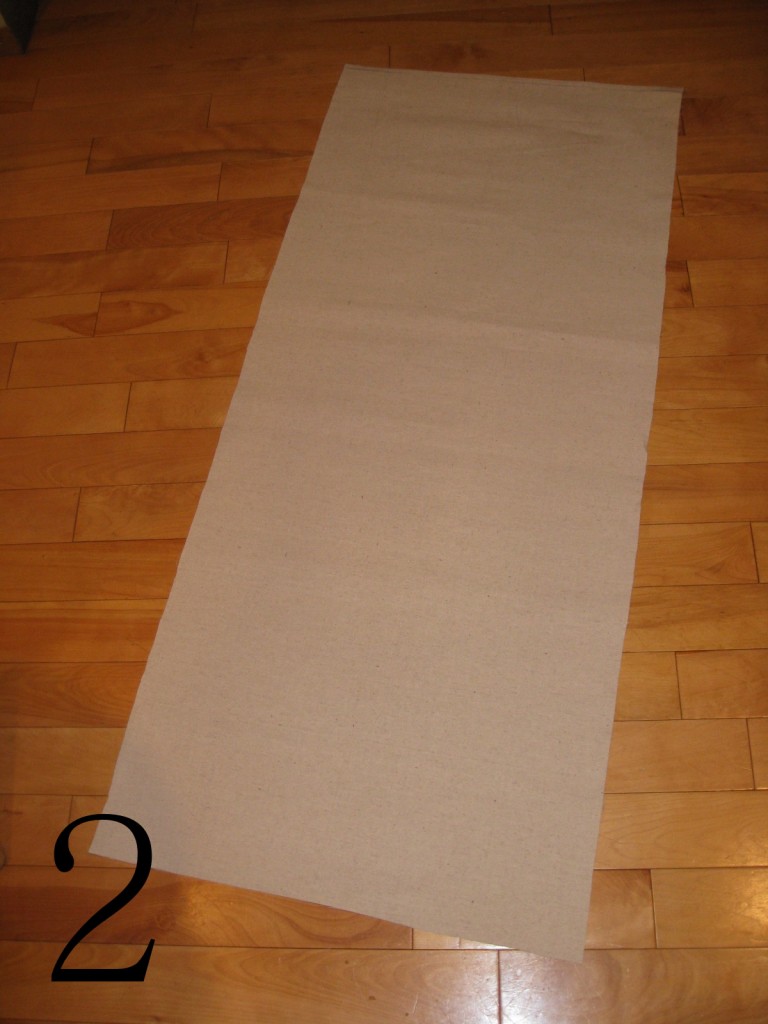
2. Measure the width of your window and cut your material. With regard to the length, I cut my material to be about 36” long. It’s important to leave a lot of extra material on the length, so you have enough to create the drops. (Read on and it’ll help you determine your length).
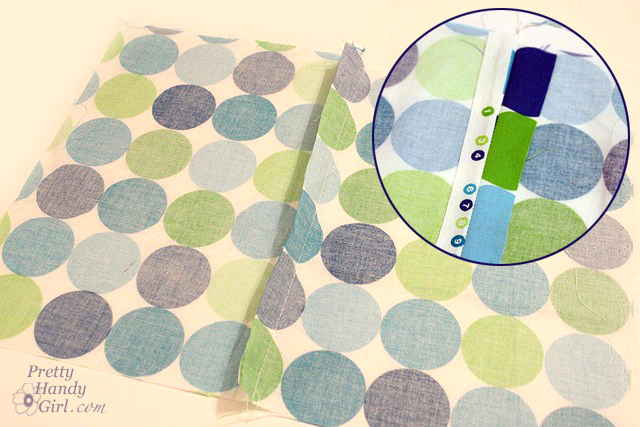
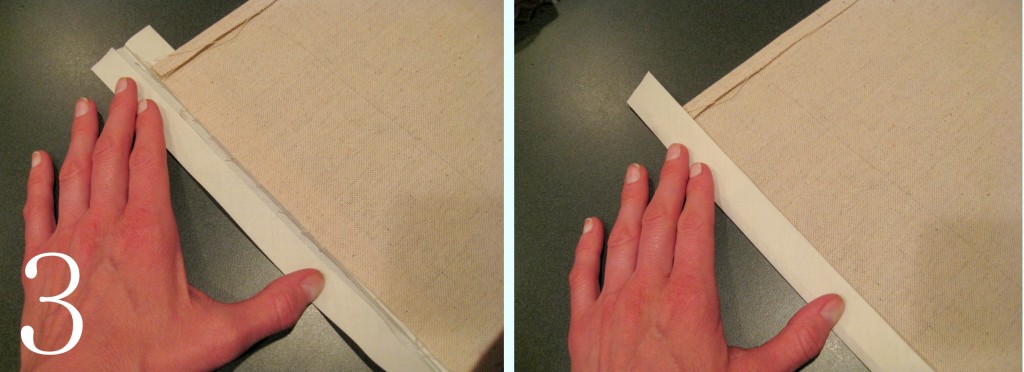
3. Take your Double Fold Bias Tape and edge the length of the roman shade.
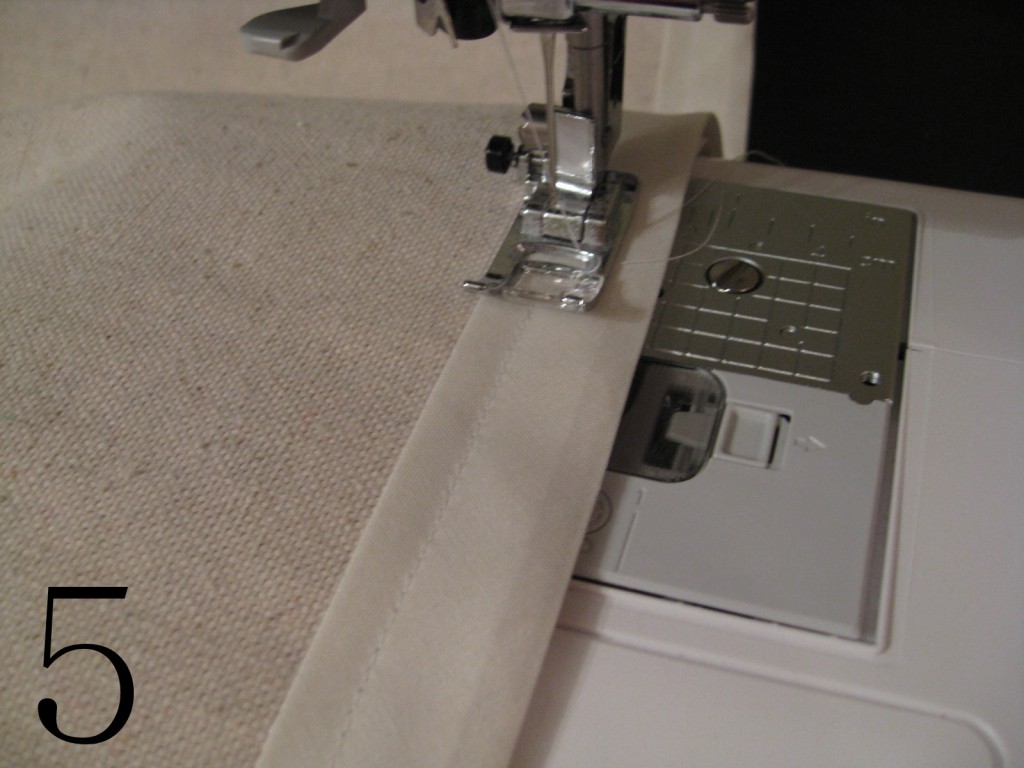
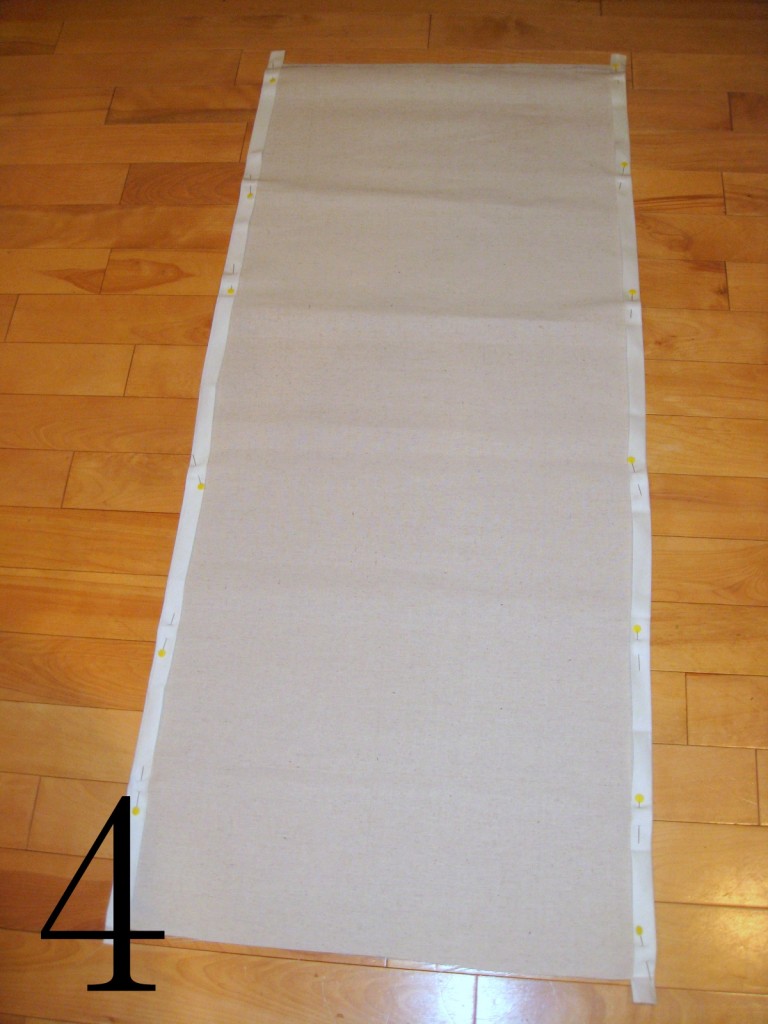
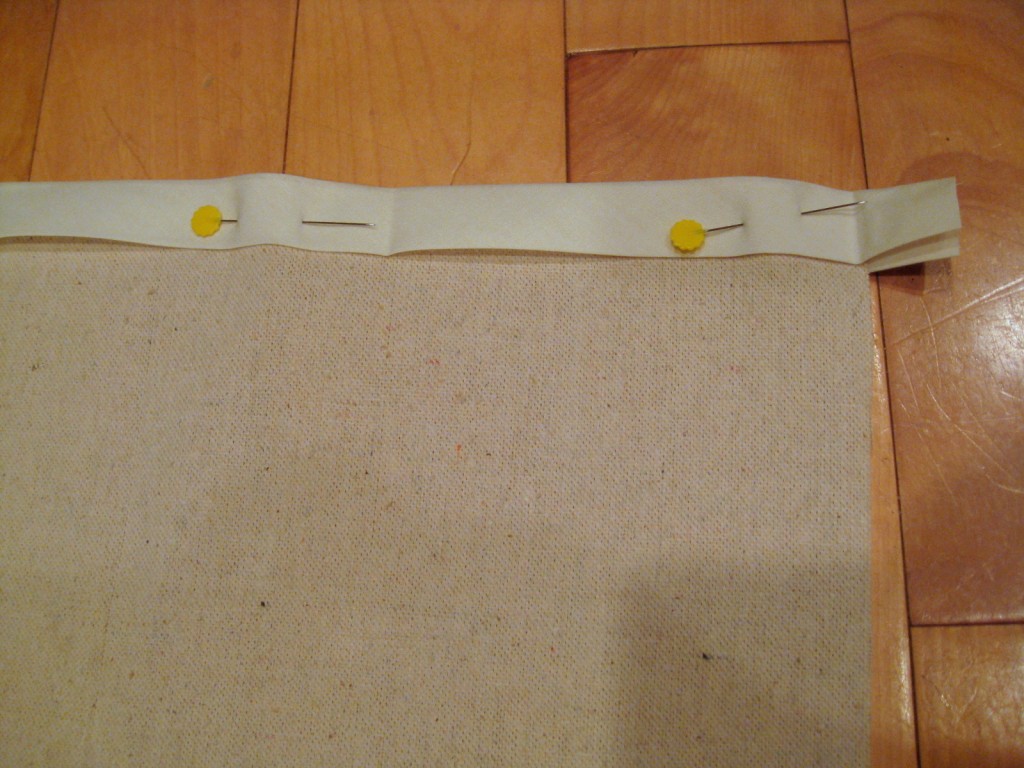
4 and 5. Pin and Sew the bias tape onto your fabric. If your top edge is not finished, fold over and sew, so you have a finished edge.
6. Fold over your fabric to create a 3-1/2” Header Flap; Iron the edge and sew along the top with a ½” inseam.
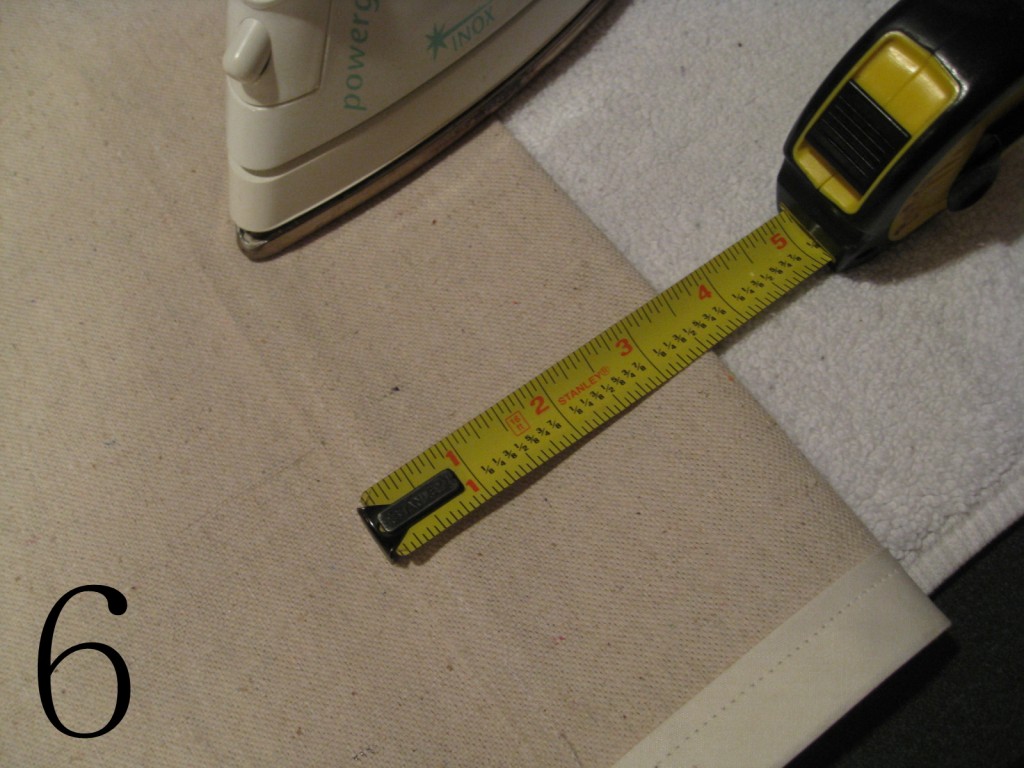
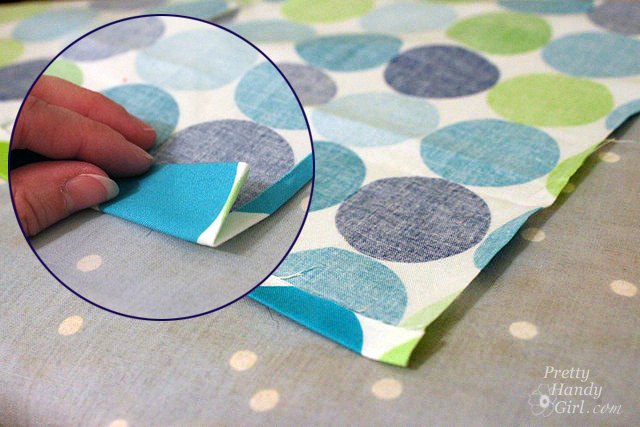
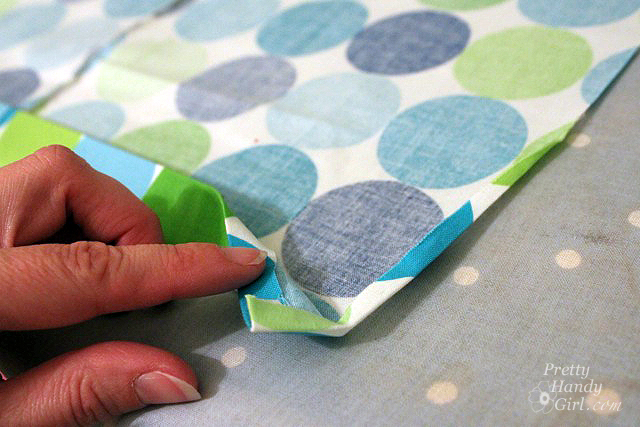
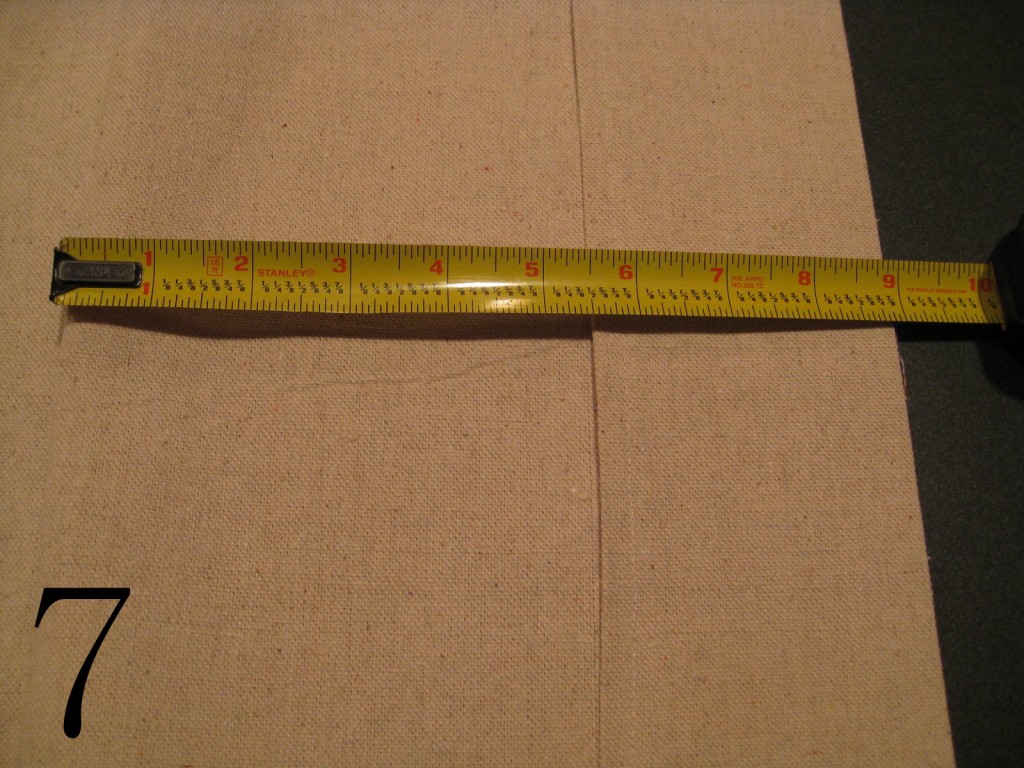
7. It’s time to start your first drop: Measure 9” from the top (3-1/2” for the Header Flap + 5-1/2” for the drop) and then fold the fabric under to create the drop of the roman shade. Bring the fabric all the way to the top of the back.
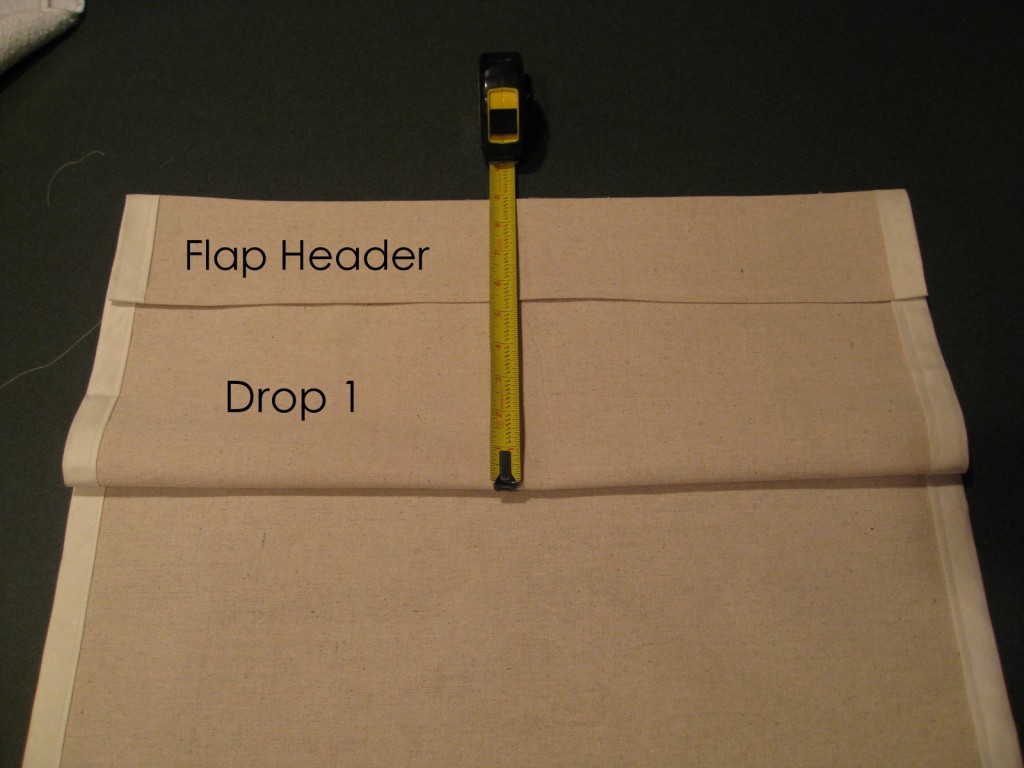
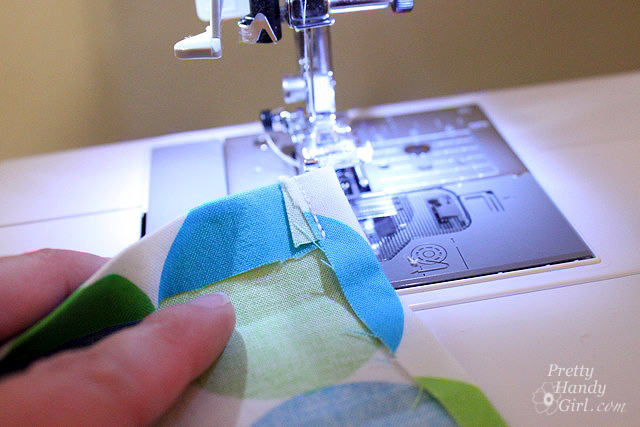
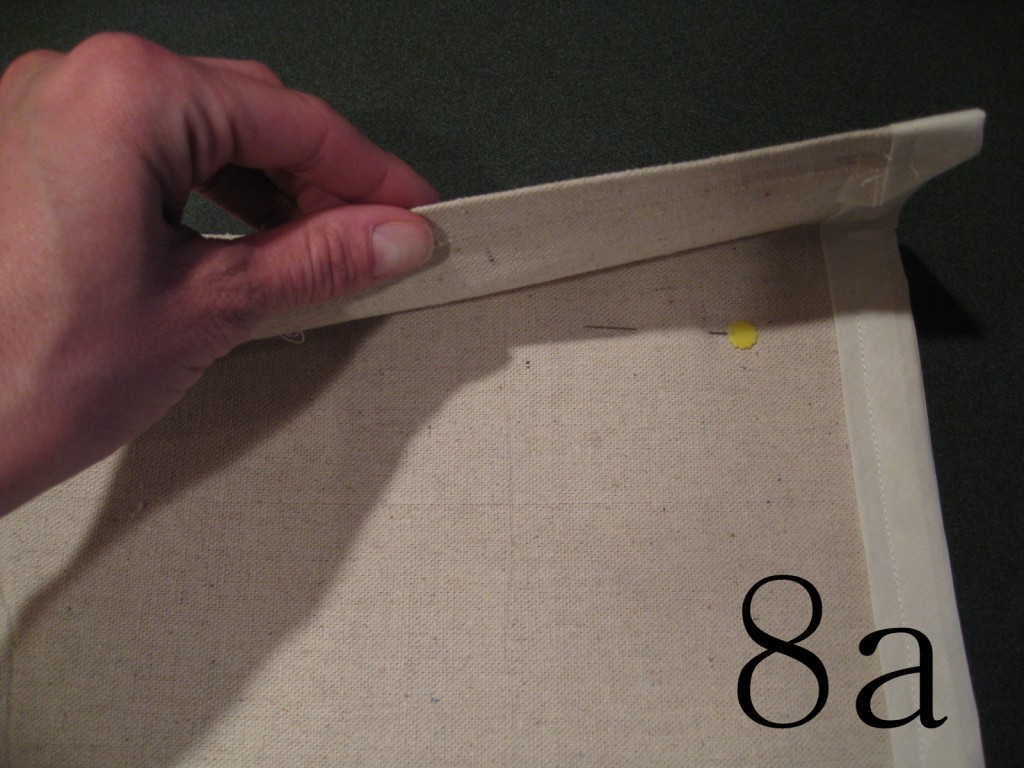
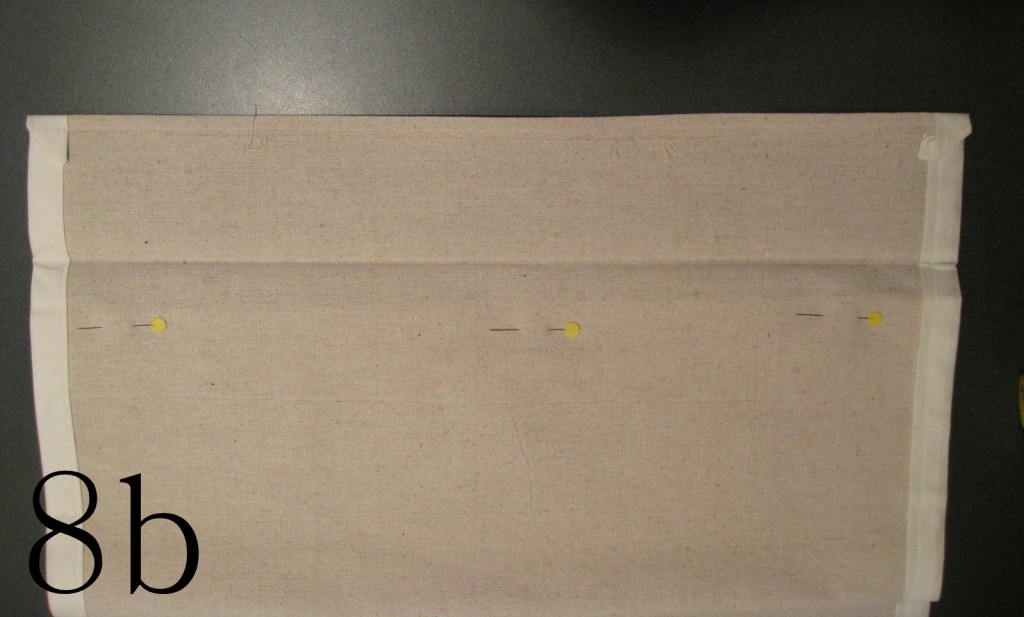
8a and 8b. Flip over the Header Flap. Pin the drop and sew the fabric underneath the flap (along the pinned line as shown in the picture).
9. Onto the second drop: Measure another 5-1/2” for the next drop (which is now 14.5 from the top). Repeat step 8.

You can make as many drops as you’d like to create a longer roman shade. 2 drops worked perfectly for my size window.

10. When you are complete with your roman shade, flip it over and attach the Velcro to the top edge of the shade.
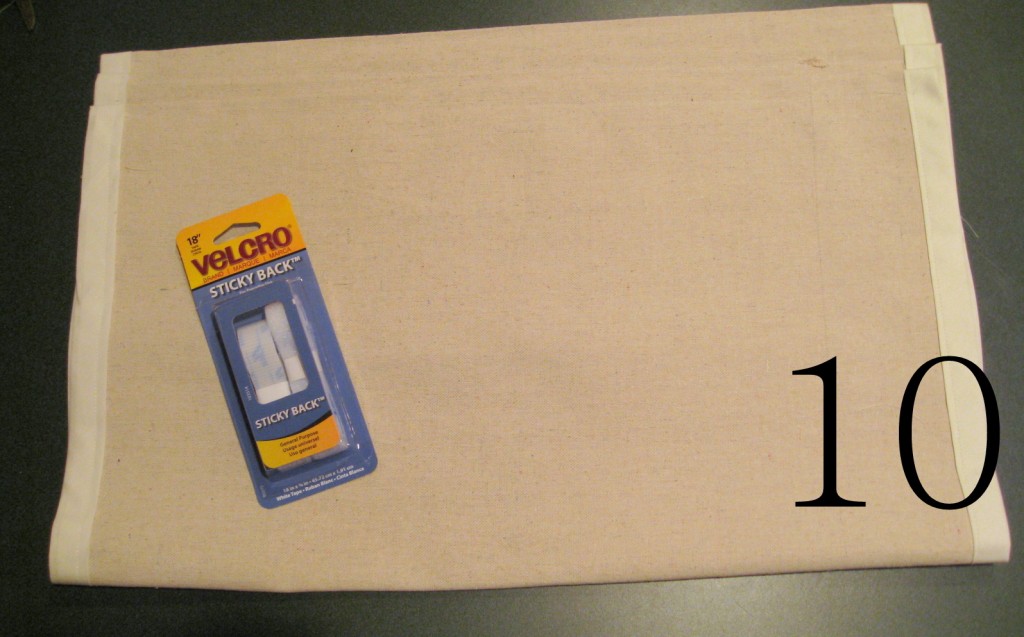
11. As I mentioned above, I used the existing bar that was already in place. If you are starting new, you can either attach the Velcro right to the window or use a tension rod and attach the Velcro to it.
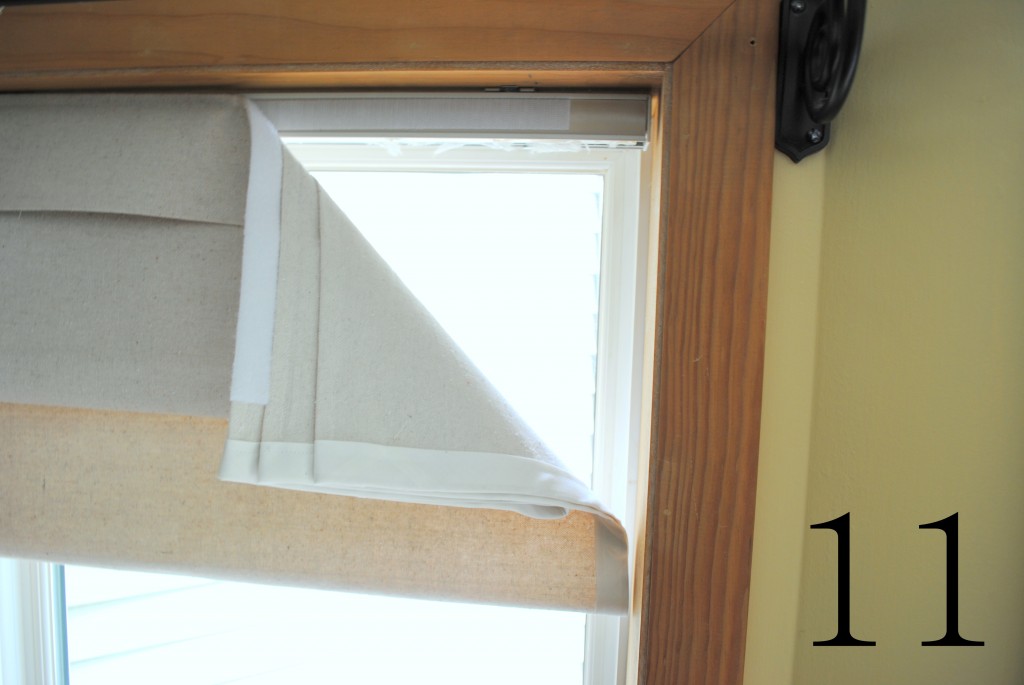
The faux roman shade is complete!
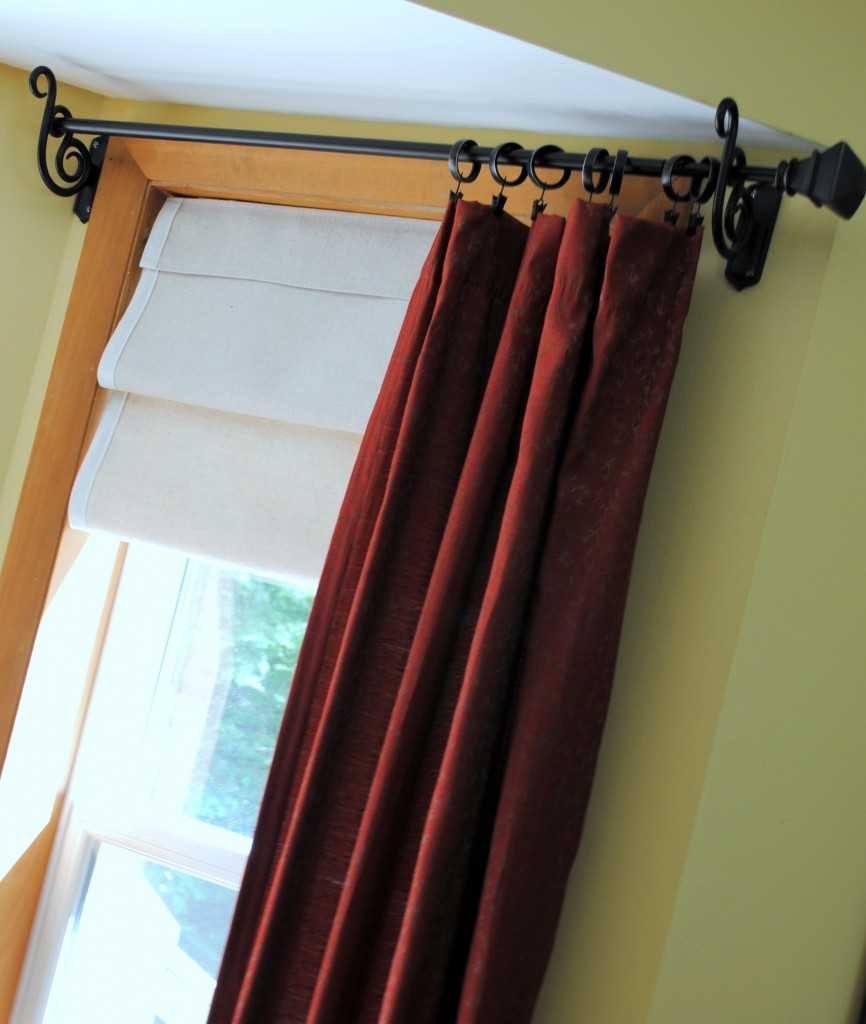
And here is the overall space.

So much lighter and brighter than before, plus the linen-like look of the drop cloth material gives the space a finished, tailored look. If you want to see more DIY projects or decorating ideas & tips, visit me at SAS Interiors. Thanks again Brittany for having me here today – it was so enjoyable to share this project with your readers!

What talent! Thank you SAS Interiors for a great tutorial. I’m so excited to use this technique to sew my laundry room curtain. Anyone else rushing off to the fabric store right now? I’ll see you there.

Brrrr! Anyone else experiencing the dipping temperatures? I really don’t like the cold unless it is going to snow. If it snows, I’ll put up with the sub-zero artic blast because I know we couldn’t have snow without the cold. But, if it isn’t going to snow, you can take your cold temperatures and get the heck out of here!

For this reason, I thought we needed to give Mother Nature a little hint, hint, nudge, nudge, and then a boldly displayed sign:

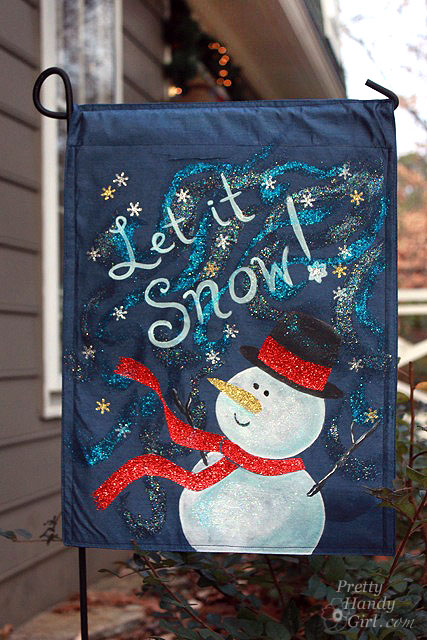
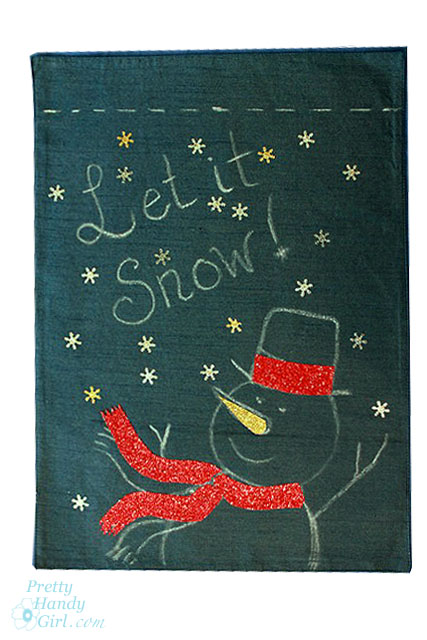
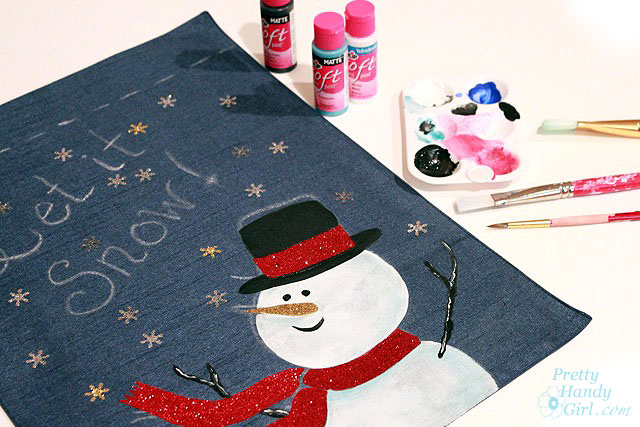
Cute garden flag, don’t you think?! Would you believe me if I told you that the flag is made from Dollar Tree placemats? Yup, I wouldn’t lie to you. I bought two because I wanted to decorate both sides and only one side of the placemat has a sheen to it. But, for $1 each, who can complain.

Stick around and I’ll show you how I made the flag. But, first, I have a confession to make…

…Do you secretly loathe glitter? Me, too!

When Pretty Handsome Guy sweeps up errant glitter from the kitchen floor, he’ll say, “The person who invented glitter never had children.” Then we both laugh. We were both in the camp of Glitter Haters Anonymous and detested any bedazzled art projects that came home from school. But, this week I snuck out of the camp under the radar and tried out a new product: Tulip® Fashion Glitter™ Shimmer Transfer Sheets and  Tulip® Fashion Glitter™ Shimmer Fabric Paint. Pretty Handsome Guy doesn’t know yet, but I think I’m changing my tune about glitter thanks to Tulip Shimmer products.

Why you ask? It is elementary, my dear Watson. The glitter stays put on the transfer sheets and in the fabric paint! No more sweeping up underneath the glittered project. No more random speck of glitter on the tip of my nose like a Rudolf wanna be. The shimmer products hold their glitter!

Materials:

Instructions:

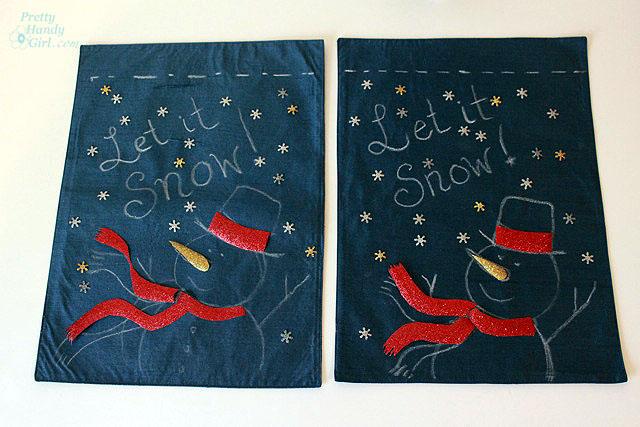
Mark  a line 2″ from the top of the “flag” placemat using the chalk (this will be your stitching line for the rod pocket. Then draw your design below the pocket line.

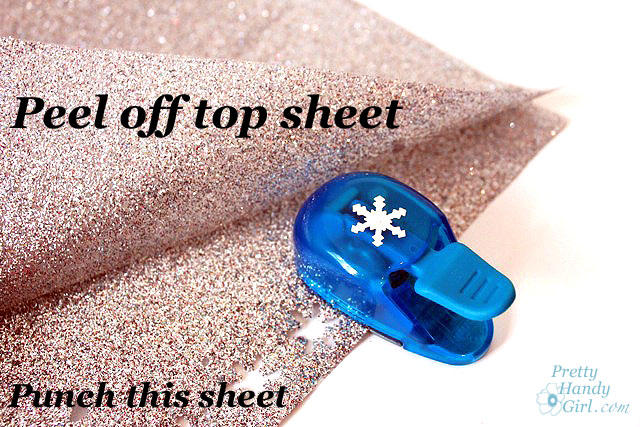
Punch out snowflakes from the Tulip Fashion Glitter Shimmer transfer sheet. Because the sheets are thick, it is easier if you peel up the top sheet and only punch through the transfer sheet.

Cut out the rest of your design (you can leave the top sheet on if you are cutting with scissors.) After the designs are cut out, remove the top sheets.

It can be confusing to determine which pieces you removed the top sheet from, so look at the pieces from an angle and look for any reflection or shine on the top sheet of plastic.

If you pull the top sheet off too quickly, it can pull the glitter with it (see below.) Go slow, and if it does happen — don’t stress it — just cut a new one.

Position all the snowflakes and any other transfer sheet pieces on top of the flag. Pay attention to make sure the glitter side is up and the glue transfer side is down. 

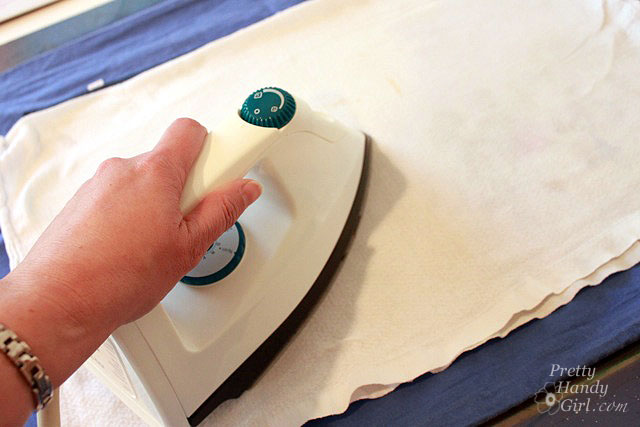
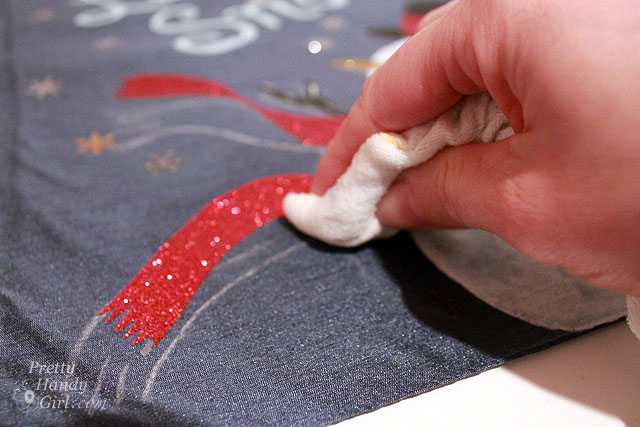
Lay a clean rag on top of the pieces and iron the design onto the placemats according to the directions. (The placemats I used are polyester, so I used that setting on my iron. And it took about 30 – 40 seconds to get the transfer sheet glue to heat up enough to stick to the placemats.)

Remove the cloth and check to make sure that the design is adhered to the flag/placemat.

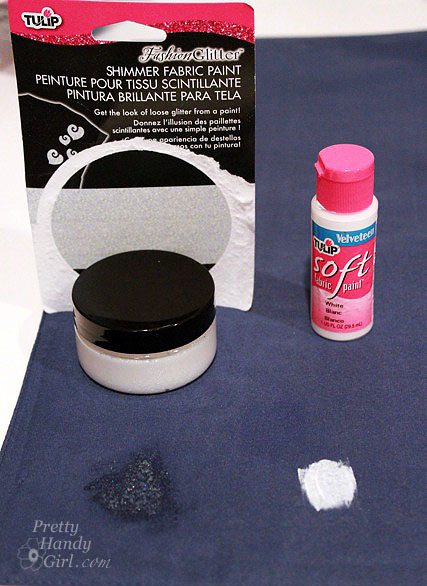
Before painting my snowman, I did a little test on the backside of my placemat to determine if the Tulip Fashion Glitter Shimmer fabric paint was transparent or opaque. It is transparent, so I chose the Tulip Soft fabric paint to fill in the snowman.

Paint your snowman, arms, hat, eyes and mouth using the Tulip Soft fabric paint. Using the smaller brush, paint the words too.

After the fabric paint has dried, dampen a clean cloth and gently wipe off the chalk.

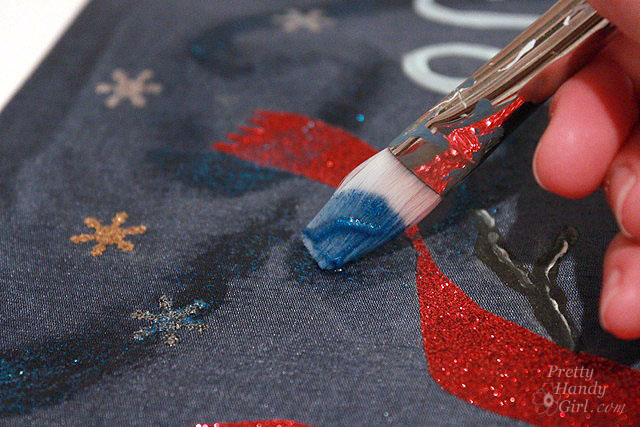
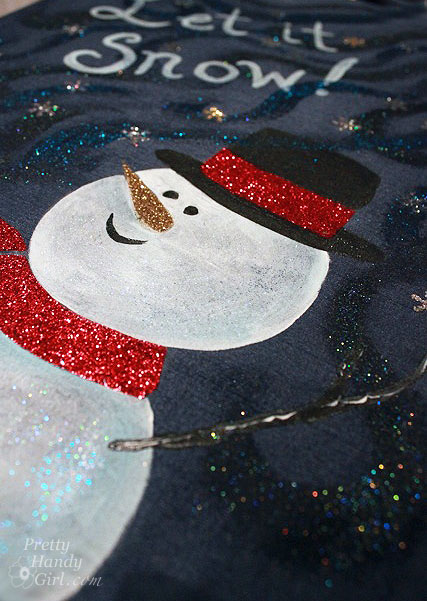
Now is the time to add the Tulip Fashion Glitter Shimmer Fabric Paint magical glitter dust! I call it that because it really looks magical and the gel slowly disappears as it dries and leaves the glitter trail behind. Tinkerbell would be proud. Brush on curves and curly-q’s. You can brush on top of the words and the snowman because it will dry transparent.

Look at that beautiful magic glitter dust!

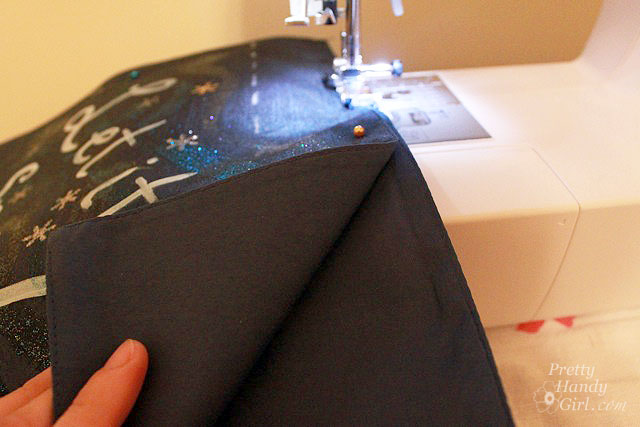
When the Tulip Fashion Glitter Shimmer Fabric Paint…ahem…I mean magical glitter dust has dried, pin your two placemats together rights sides facing out.

Stitch one line across the top. Stitch a second line across the marked pole pocket.

Leave the two sides of the pocket open and stitch down the sides and across the bottom (as shown.)

Thread the flag onto a standard sized decorative flag bracket.

And then challenge Mother Nature to “Bring it on!” (Be prepared, you might have to do a snow dance too. But that is a whole other tutorial!)

I have to tell you that the Tulip Fashion Glitter Shimmer products really surprised me. I truly loathe loose glitter, but these products really held the glitter in place. There might be a few pieces of glitter that are dislodged when you peel the transfer paper top sheet off, but honestly I didn’t notice and I never found any on me. I highly recommend these products. Especially if you have kids that love glitter!

You can find the Tulip product line at these retailers. Selections may vary per store.


Disclosure: This post has been sponsored by Tulip Products,  iLoveToCreate®, a Duncan Enterprises Company. I was sent some samples of the Tulip® Fashion Glitter™ Shimmer Transfer Sheets and Tulip® Fashion Glitter™ Shimmer Fabric Paint. I already owned the Tulip Soft Fabric paint. I was also paid a small fee in return for writing a post about my experience using the products. The ideas and opinions are strictly my own. I will never let any compensation (monetary or free product) keep me from giving you (the reader) a straight up and honest review.


Gift pouches are super easy to make. You can use fabric, cloth napkins, or even a pair of pajama pants or boxers* (see bottom of this post)!
I made pouches using fabric that I stenciled with Martha Stewart stencils and the roller top paint roller. As promised, here is how to sew a box bottom gift pouch:
Materials:

  • Fabric
  • Thread
  • Scissors
  • Safety pin
  • Ribbon or cord
  • Pins
  • Sewing Machine
  • Iron (and ironing board)
  • Ruler

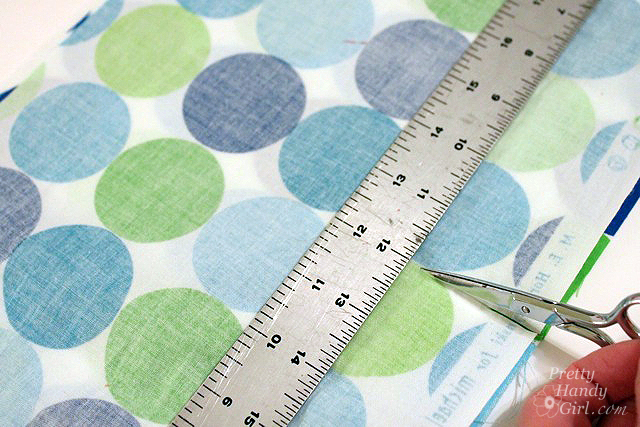
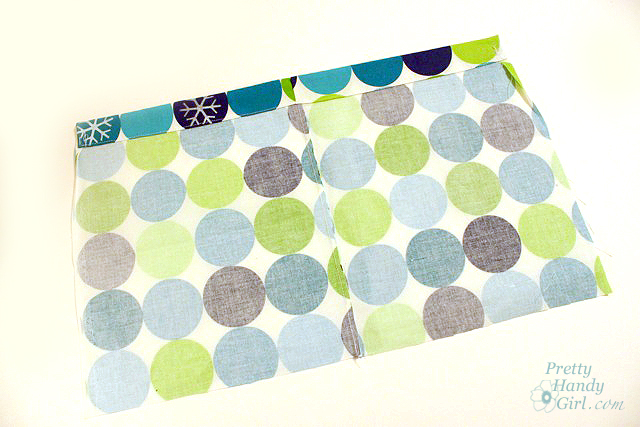
1. Start by cutting fabric into two 8″ x 12″ rectangles.

2. Pin right sides together and stitch along one length of the fabric (12″ side). Then press the seam open.

3. Fold over the top edge of the fabric 1/4″ then again about 1/2″. Press the folds with an iron. This will be the sleeve for the drawstring.

4. Fold in the sides about 1/4″ over. The fold should extend from the drawstring sleeve to about 3″ down the side to finish off the raw edge of the fabric.

5. Stitch this fold at the very top ( inside the drawstring sleeve) to hold it in place.

6. Sew the bottom folded edge of the drawstring sleeve. Stitch as close to the edge as possible.

Your pouch should look like this:

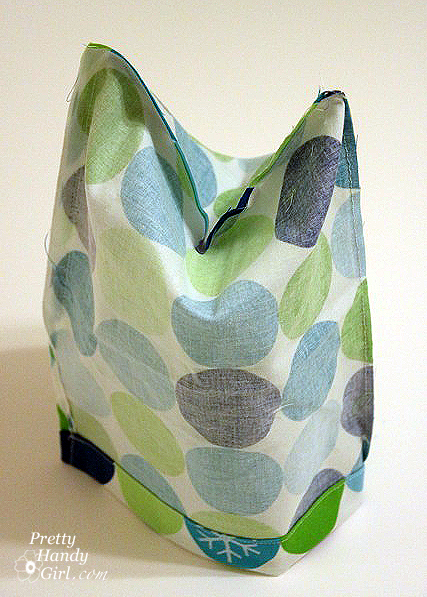
7. Fold the fabric in half lengthwise (right sides together). Start your stitches just below the drawstring sleeve. Sew along the open side of the pouch and across the bottom.

Your pouch should look like this:

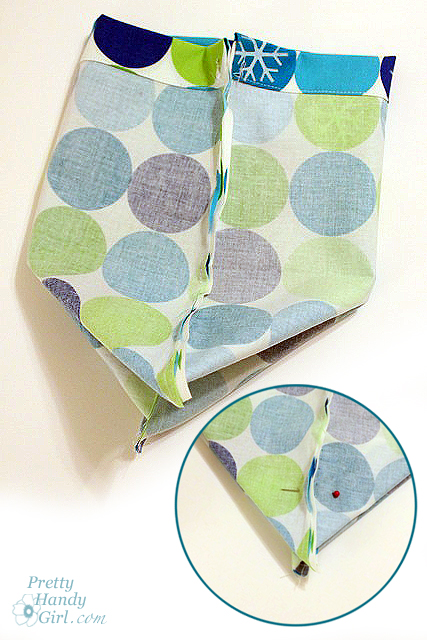
8. Grab the center of both sides of the pouch and pull them away from each other. The seams should be in the middle now and the base of the pouch makes a triangle.

9. Pin about 2 inches up from the point of the triangle.

Repeat on the opposite side. (The further up you pin the bigger the box at the bottom of your bag will be.)

10. Stitch along the width of the pouch where you pinned.

Repeat for the opposite side.

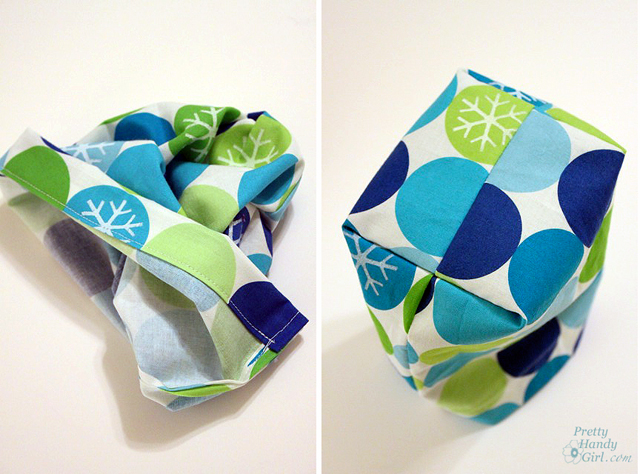
11. Turn the pouch right sides out.

12. Cut a piece of ribbon long enough to feed through the pouch top and to tie a bow. Attach a safety pin to the end of the ribbon and feed the safety pin through the sleeve at the top of the pouch. When the safety pin exits the other side, pull the ribbon until the ends are even. Remove the safety pin and snip the ends of the ribbon if needed.

That’s it! Now you know how to make a super easy box bottom gift pouch!

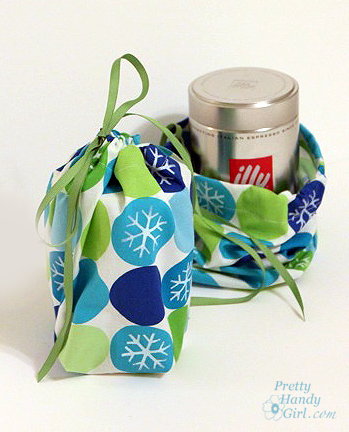
Put your gift inside and tie the ribbon. You now have instant gift wrap and a pouch that the receiver will love to keep!

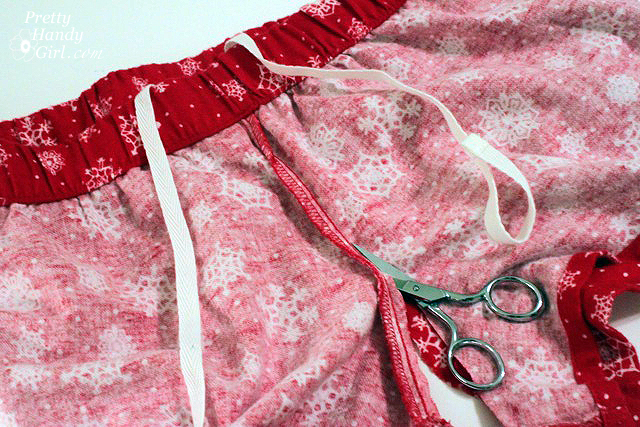
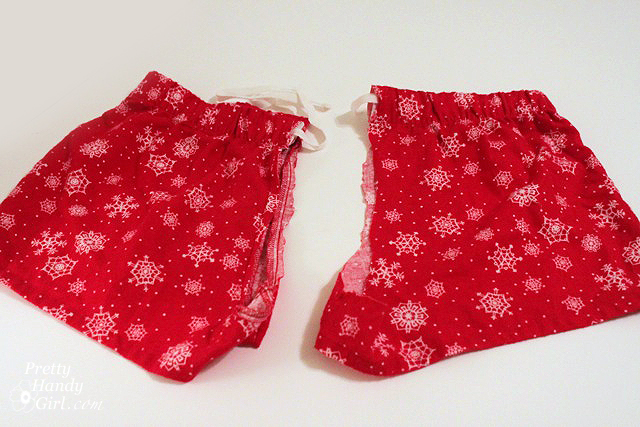
*If you find a cute pair of boxers or pajama pants at Goodwill, buy them! You can use them to make gift pouches as well. After washing the pants (of course), cut the two legs apart by cutting up the front and back center seam.

Separate the pants into two pieces. If your pants have a drawstring, you can use it for your gift pouch string (but you may have to cut the stitching around the tag if it has been sewn in.)

Square off the bottom of the legs by cutting across at a 90 degree angle.  Follow the directions above to make two more box bottom gift pouches!What do you think? Easy right?! Would you know that those were pajama shorts in a past life? Don’t lie, you only know because I showed you ;-).


10 Minute Tooth Fairy Pouch


Things happen fast in my family. So fast that I can barely keep up. If you follow me on Twitter or Facebook, you probably saw that I spent Tuesday and Wednesday in the hospital with my youngest son. I looked away for an instant and he managed to climb 6 feet up the outside of the slide. As I turned my gaze back to him I watched as his body fell to the ground. There was no doubt that he was broken and in severe pain. Hours later confirmed that he had broken three bones in his arm (one at his elbow, and both forearm bones at his wrist.) He ended up having surgery, five pins inserted into his arm, and an overnight stay at the hospital. Needless to say, my week has been fraught with worry and concern for him and his pain level. I think for Christmas I’m going to make him a bubble wrap suit!

Just last night my seven year old lost his first tooth! Yup, it has taken him a while to push that little baby tooth loose. But, low and behold he lost it last night in his sleep. Pretty Handsome Guy tracked the runaway tooth down this morning only to have it go missing again tonight when we needed to present it to the tooth fairy. We searched high and low but can’t find it. Do you think the tooth fairy came early to our home?

My son informed me 30 minutes before bedtime that I needed to sew a pouch for the tooth (and the money that comes with a lost tooth.) I said “okay”(because Mom always has to deliver when a little one has a request.) Then I asked how big and what color. He showed me with his hands and said that the pouch should be red.

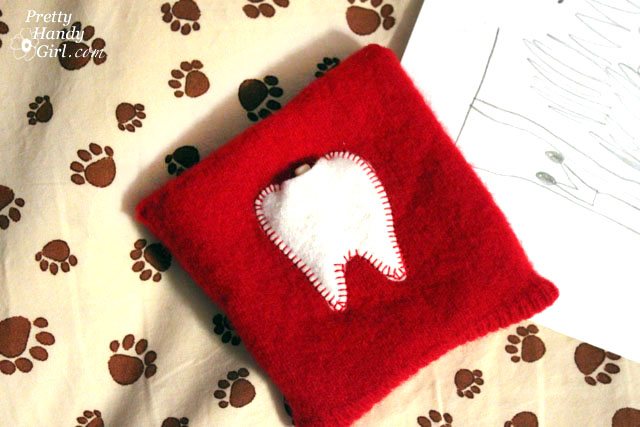
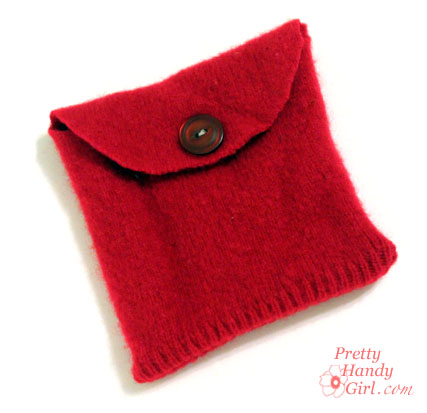
After a quick scan of my craft supplies I grabbed a red sweater that I had already felted in the dryer, a piece of white craft felt and a red button. Then I whipped up a little tooth fairy pouch in 10 minutes!

Materials:

  • Felted red sweater
  • White craft felt
  • Red thread
  • Red button
  • Scissors

Cut the sleeve off the sweater at about 7″.

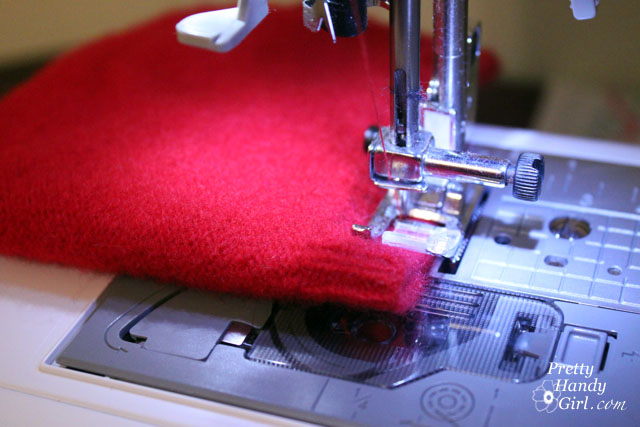
Turn the sleeve wrong side out and stitch the bottom of the sleeve together.

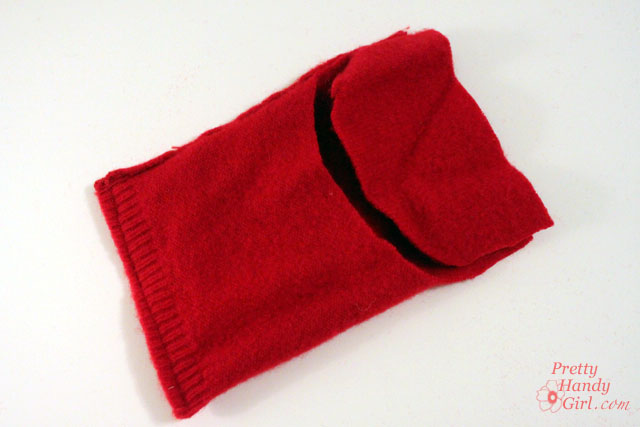
Turn it right side out and cut a “U” shaped notch out of the sleeve on one side.

Flip the sleeve over and round the corners of the longer side of the sleeve.

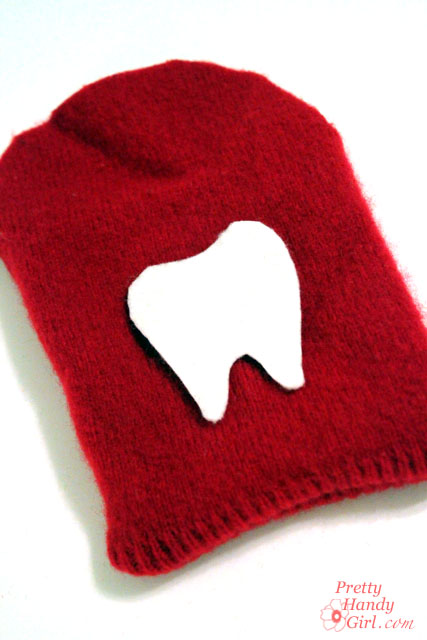
Cut a tooth shape out of the white felt.

Pin the felt tooth onto the center of the sleeve (on the long side.)

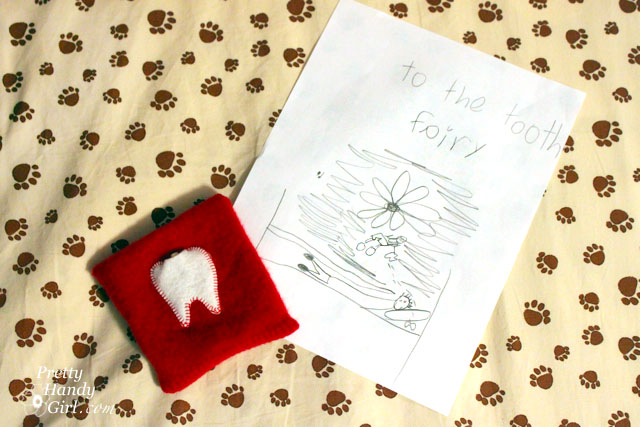
Carefully move the short side out of the way and stitch the tooth onto the sleeve using a blanket stitch or another decorative stitch. Leave a small opening at the top of the tooth.

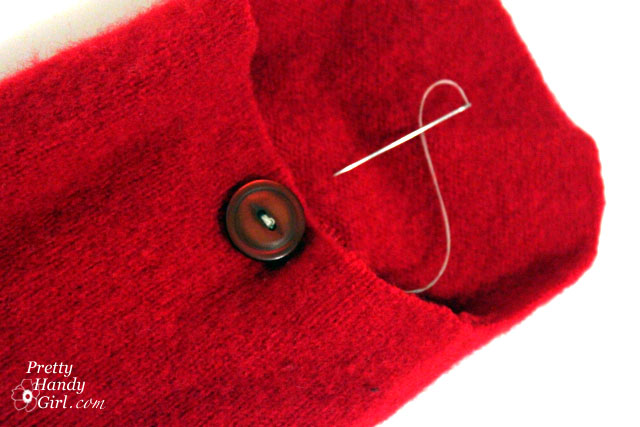
Hand stitch a button onto the other side of the pouch.

Cut a small slit into the rounded flap of the long side and slip it over the button.

Slip your child’s tooth into the tooth pocket on the front.

The tooth fairy will dutifully leave money (and maybe a note) inside the red pouch while your child sleeps.

My son told me that he heard the tooth fairy leaves more money if you draw her a picture. I’m not sure how much she leaves for non-existant teeth though. I hope we find that tooth!


Sharing with:
Tip Junkie handmade projects

Make a Back Pillow Gift

Okay, no over 40 jokes! Yes, I use a back pillow, and without it my neck hurts. Sadly I lost my way too expensive memory foam back pillow on the airplane trip to Ca. I couldn’t bring myself to buy another one, so I decided to see if I could make one.

This is definitely an easy project. Plus, it is sure to improve your posture!
Materials:

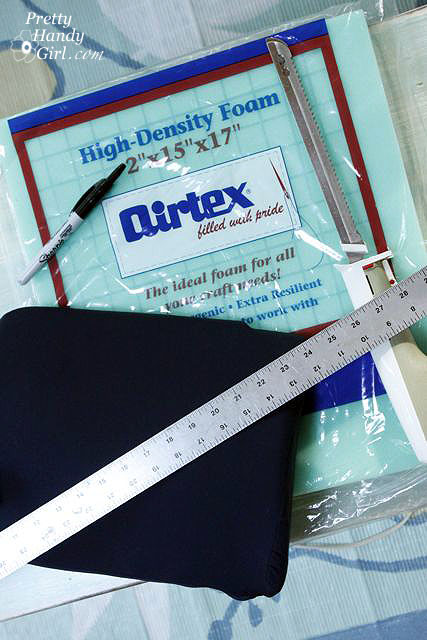
  • 2″ thick foam cushion
  • Batting
  • Fabric
  • Sharpie or fabric marker
  • Coordinating thread
  • Velcro
  • Pins
  • Sewing machine
  • Electric carving knife

Instructions:

I used another back pillow as a guide to create the shape for my DIY back pillow:

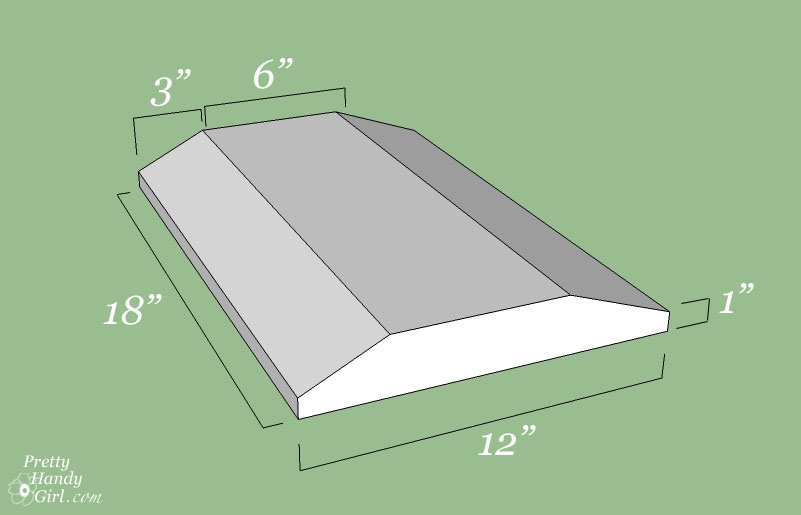
Here are the dimensions I used for my pillow.

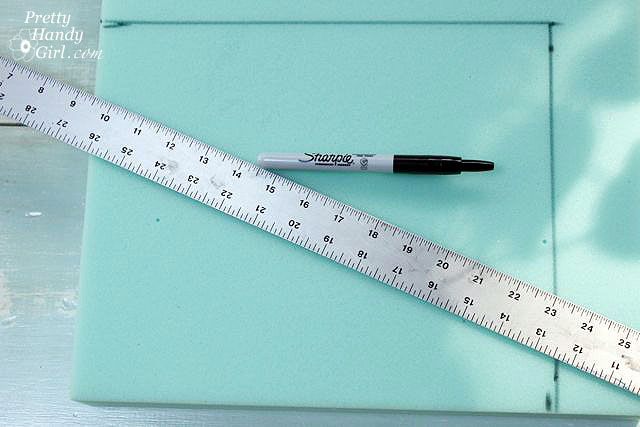
1. Mark the outer dimensions onto your foam.

2. Cut the shape out using an electric carving knife (you can try scissors or x-acto knife, but nothing cuts through foam “like butter” than an old fashioned electric carving knife.)

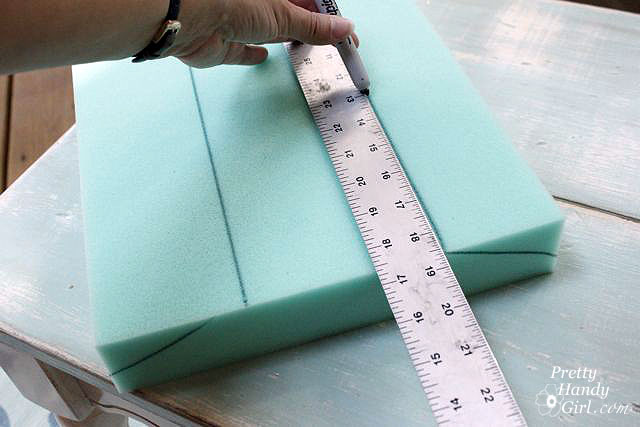
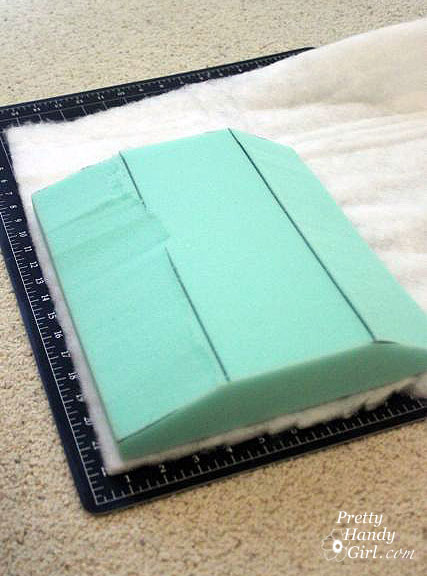
3. Mark 3″ in from the side on top of the cushion and 1″ up from the bottom on the side. Connect the dots with a diagonal line. Repeat on the opposite side. Then draw a line connecting the points on the front of the cushion.

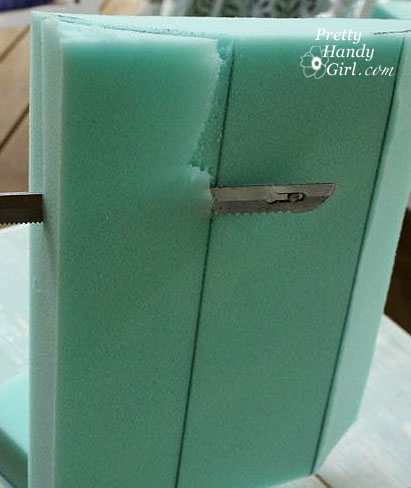
4. Use the carving knife to cut off the diagonal shapes.

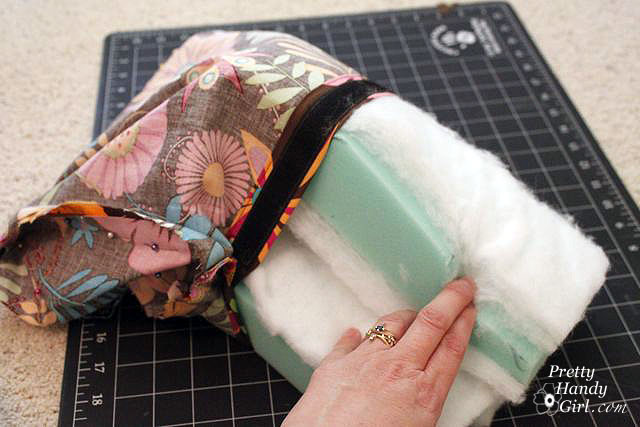
5. Lay the foam cushion on top of the batting.

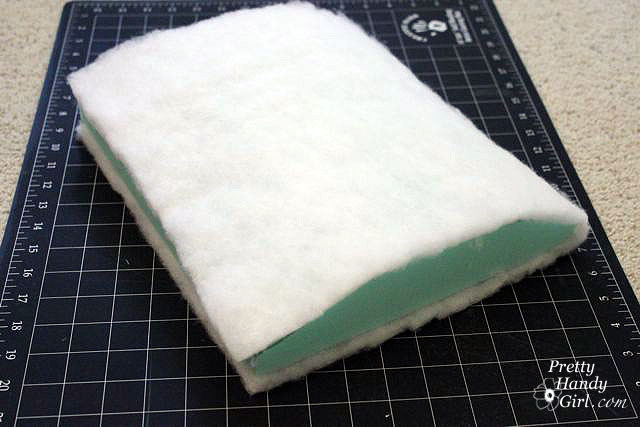
Use the foam as a guide to cut enough batting to wrap around your pillow form as shown:

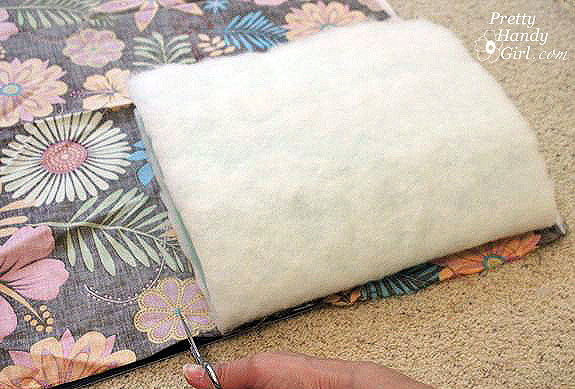
6. Cut a piece of fabric that will also wrap around the cushion and and leave an extra 5″ on the length. Also, allow an extra 3/4″ for seam allowance on the sides.

7. Fold over one end two times for a hem. Make sure the hem is large enough to accommodate the width of the velcro. Iron the hem to hold it in place.

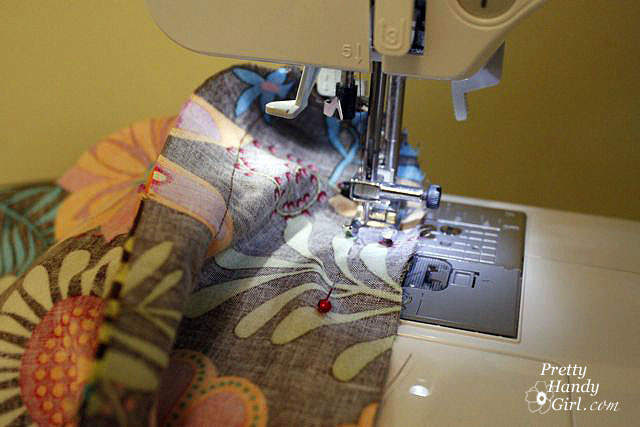
8. Sew the hem.

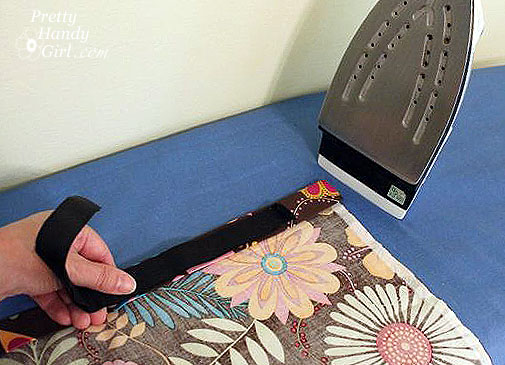
9. Pin the velcro onto the hem you just sewed.

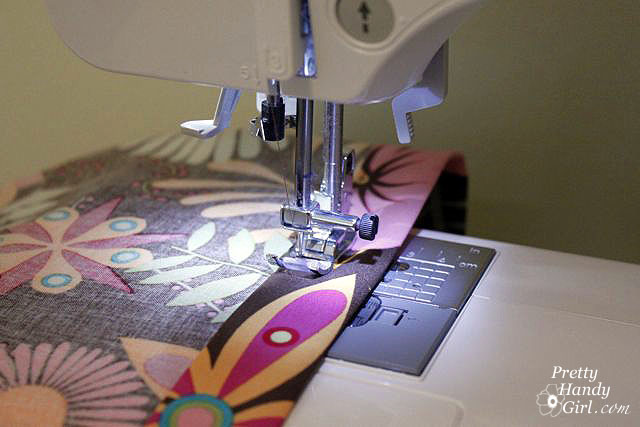
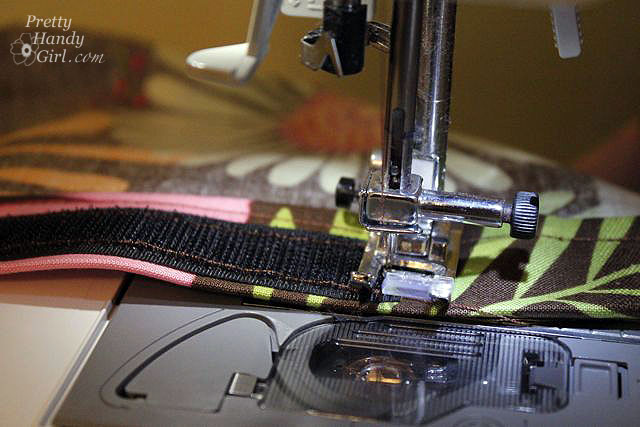
10. Stitch the one velcro strip ont0 the right side of the fabric.

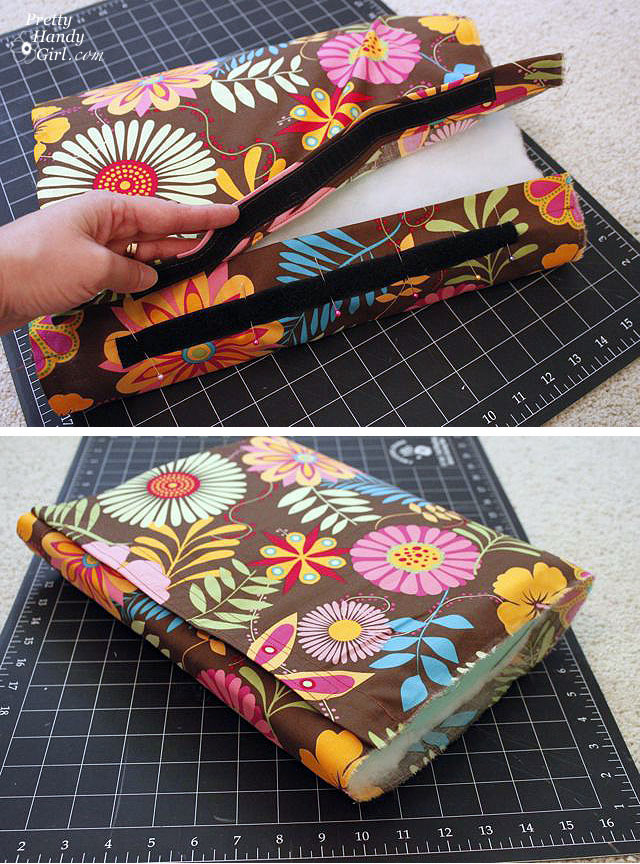
11. Figure out where the other strip of velcro needs to sit and pin it in place. Fold over the raw edge and sew the hem. Then stitch your 2nd piece of velcro in place.

Test the fit to make sure the fabric is pulled snug over your cushion when the velcro is secured.

12. Time to add the sides. Stand your cushion up on its end and draw around the shape, allowing at least 3/4″ seam allowance. Cut two identical pieces (one for each side).

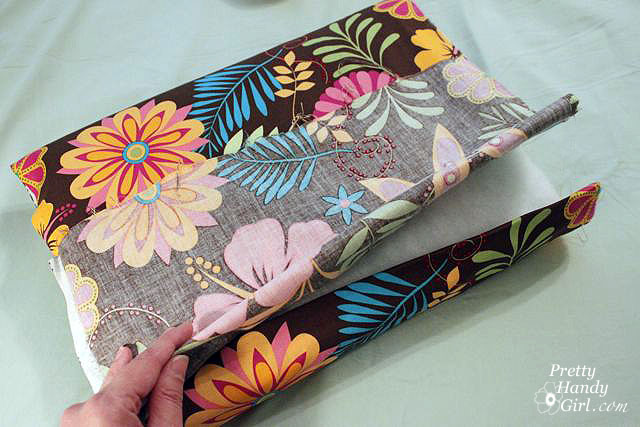
13. Put the cover on the cushion inside out. And pin your end shapes inside the cover.

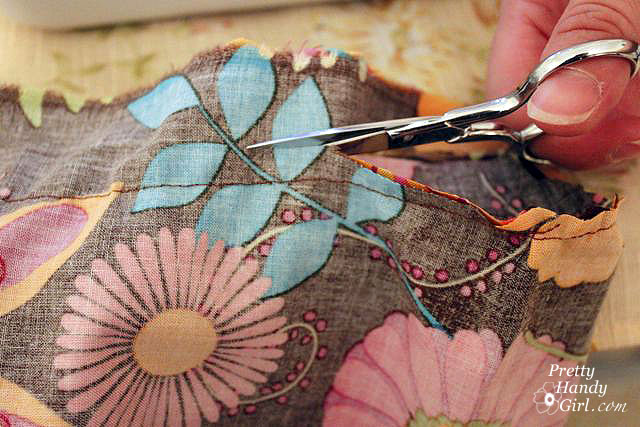
Cut small slits to fringe the ends of the tight radius turns. Do not cut past where your stitching will go.

14. Carefully remove the cushion from the cover.

Stitch the ends onto the body of the cover.

Trim the excess fabric off the seams.


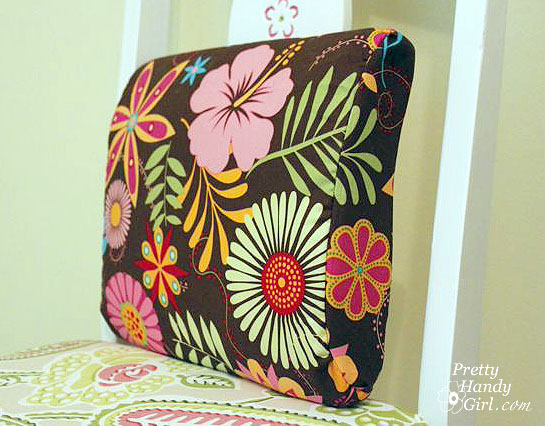
15. Turn the cover right sides out and insert your cushion into the cover. Hooray! You are done!


I actually use this cushion in the car for driving. It fits perfectly between the sides of the seat.