So you’ve decided to renovate your kitchen and you want to continue to stay in your house. Have you given any thought into how you’ll survive without a kitchen during the renovations?

How to Survive without a Kitchen during Renovation
I’ve been asked many times how we’re surviving without a kitchen. And I have to admit, there were a few weeks of adjustment for us, but now things are humming along relatively easily. Besides the obvious choice of getting carryout, we decided to try to create a makeshift kitchen and a dishwashing set up that allows us to cook at home and continue to prepare healthy meals.
From the start, I felt like living without a kitchen is a bit like being on SURVIVOR. If you can survive, you get a beautiful new kitchen as your prize. With that in mind, I set about creating a temporary kitchen we could use during renovations.
Come on in, and I’ll show you the behind the scenes peek into our lives and share some tips to help make your kitchen remodel a little easier should you choose to take on the challenge!
Alternate Kitchen Plans
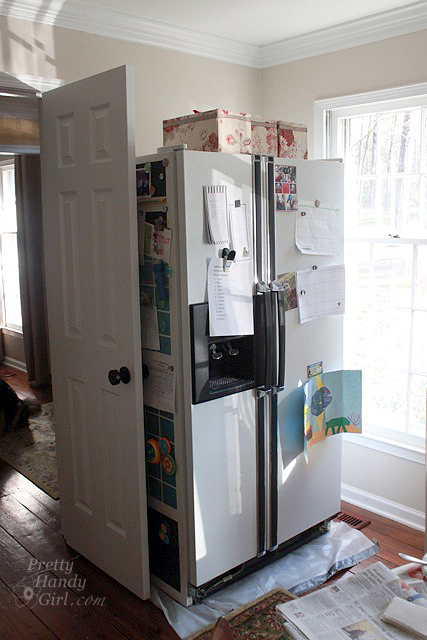
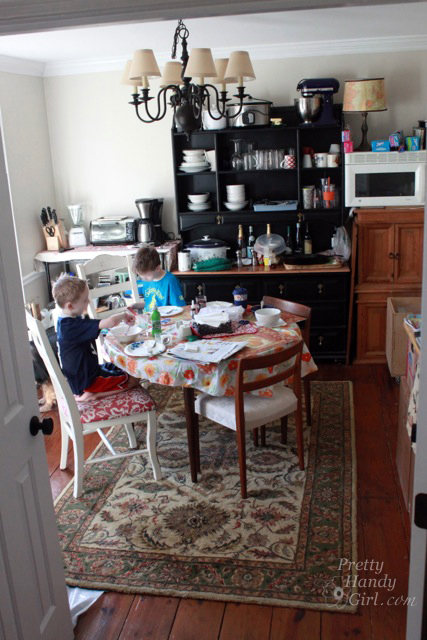
Before emptying your kitchen, plan a spot for your alternate kitchen. This spot should be large enough to accommodate your refrigerator (or at least a dorm style fridge) and a microwave, and/or a toaster oven. And if you have a space large enough to also accommodate a small table and chairs, you will be set! Within this room, have a plan for storing your basic dishes and create some counter space. For us, the perfect spot was the dining room, which normally doesn’t see a lot of use. In fact, my sons remarked that it felt like it was a holiday when we first started living out of our dining room because we only ate in there on holidays before the kitchen renovation project.
Take time the to consider planning where everything will fit in this new space. Measure the fridge and see where it will fit. Feel free to use graph paper or painter’s tape on the floor to help you visualize the alternative kitchen plans. If something (like the fridge) won’t fit, try to locate it as close to the makeshift kitchen as possible.
Moving into the Alternate Kitchen
Collect all your daily necessities from the kitchen (dishes, pots, pans, small appliances, etc.) Be brutally honest when it comes to these necessities. You really want to have the bare minimum in your makeshift kitchen. This is not the time to have your specialty pans and spices at hand. Box up all the non-essentials from your kitchen and label the boxes with the contents on the sides (in case you absolutely have to get to something in there.)
Move everything out of your kitchen, one thing I’ve learned during renovations is you want as few things in the way of the contractors as possible for two reasons.
- Less items in the construction zone makes it easier and faster for the contractors to work.
- Anything in the way is at risk of being damaged.
- Everything in the construction zone will get dusty and you don’t want to have to clean anything more than you have to at the end of the project.
You may be able to leave your range in the kitchen for use, I’ll explain more later.
Alternate Dishwashing Area during Construction
Living without a sink is definitely the hardest adjustment when you are surviving a kitchen renovation. Having a convenient location to wash your dishes is key. But, first, you’ll want to create a dirty dish area. A dish pan or tray makes a good place to stack dirty dishes until you can clean them.
We have a tray that sits in the makeshift kitchen. During and after mealtimes we fill the tray with dirty dishes and then transport them to the dishwashing station, eliminating multiple trips.
Where can you wash dishes during construction?
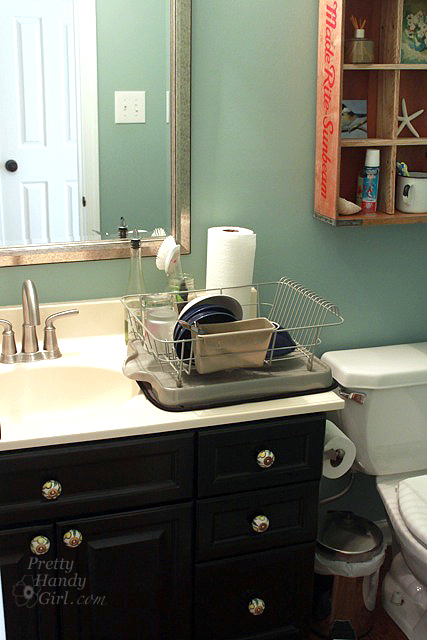
We washed dishes in the bathroom sink for a little while, but that proved a huge pain in the butt. It just wasn’t deep enough and it took forever to wash them. Plus, there was very little space for a drying rack and frankly there was something a little gross about going to the bathroom next to your clean dishes. Plus, it’s not a good long term solution and will result in clogged drain pipes after a while.
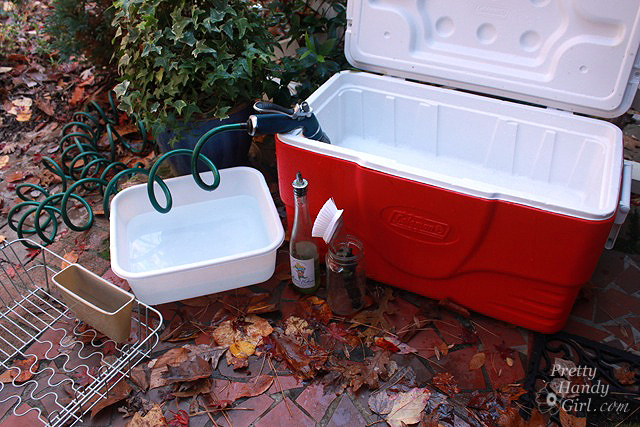
A step up from the bathroom sink is what I call the DIY Farmhouse sink. I discovered that a Coleman cooler makes a really fabulous farmhouse sink! Fill the cooler with warm soapy water from inside the house. Wash your dishes in the cooler and empty the soapy water by pulling the plug. If you have a garden hose nearby, you could spray the soapy water off the dishes and then stack them in the drying rack to bring inside. To save your back, put the entire set up on a picnic table (do as I say, not as I did.) This works as long as you have sunny and dry weather. If weather isn’t on your side, move your station inside. You could use your garage, a bathtub, or a laundry room (the best solution for us).
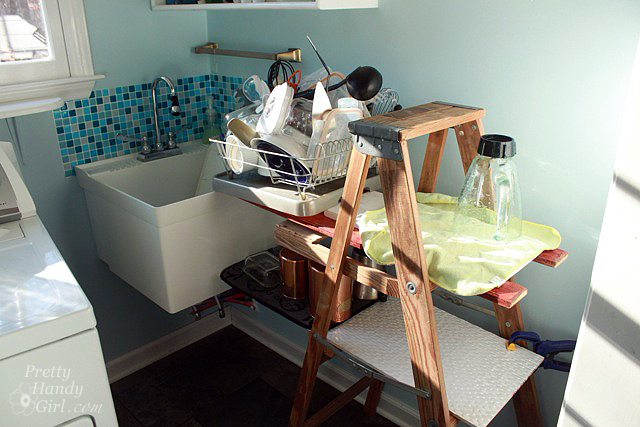
If you have a utility sink in your laundry room, you can set up a dishwashing station in there. This has proved to be the best solution for us. No more bending over, and the sink is large enough to set a small plastic dishpan inside to wash and rinse dishes.
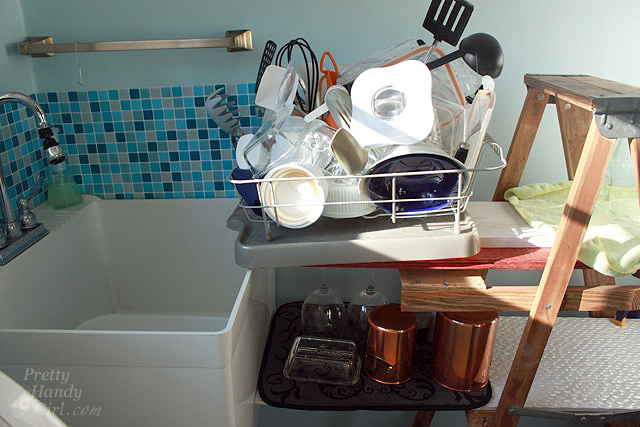
I also set up a small ladder and some scrap boards to create a larger drying rack because we don’t have any base cabinets or a countertop in our laundry room.
After your dishes dry, bring them back to the makeshift kitchen for use again.
Water Source in the Makeshift Kitchen
This isn’t a necessity, but having water accessible in your makeshift kitchen is a bonus. A water cooler with bottled water has been a huge convenience during our renovation. If you ever wanted one, use this as an excuse to buy one while you are renovating.
Countertops and Prep Space
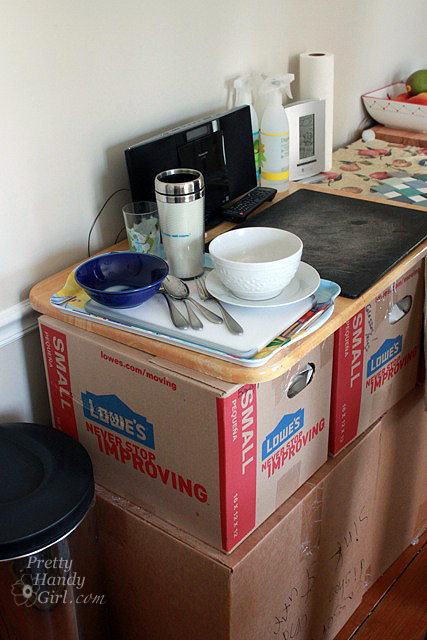
Not having a space to spread out your meal preps is another inconvenience. But, you can set up makeshift counters by utilizing the moving boxes you used to pack up your kitchen. I mean, you’ll have to store the boxes someplace anyway. Stack them up and use scrap boards or folding tables for a temporary countertop. Make clean up easier by covering the boards with plastic or oil-cloth table cloths. Have one or two cutting boards set up for chopping and food preparation. If you really want to get fancy, you could purchase some storage shelving or bins to use in your temporary kitchen.

How Do You Cook During a Kitchen Renovation?
Ahhh, the biggest question everyone has is, “How are you cooking while your kitchen is being renovated?” Unlike most people who plan to take on a kitchen renovation, we found ourselves in the midst of one after we had a water leak. In the beginning while we were still in shock, I did accept offers of help from friends in the form of meals. This was huge, because neither of us could think clearly (especially with all the HEPA filters running 24/7.) But, as the meals dwindled, we became more resourceful and were ready to get back to being self-sufficient.
Useful Appliances when You Have No Kitchen:
- Grill – cooking outside on the propane grill is great for everything from the usual burgers and hot dogs to shish-kabob and grilled pizza (I’m seriously in love with this Corn Pesto Grilled pizza.) You can also use the grill like a regular stove top by leaving the lid open and setting your pans on the grate.
- Microwave – The microwave gets a daily work out for heating meals like soups, reheating leftovers and making scrambled eggs (put the scrambled egg mixture in a microwave safe bowl and stir every 30 seconds of cooking until they are the desired consistency.) You can also boil water for pasta in the microwave. We had the built-in microwave removed and moved into our makeshift kitchen instead of buying another countertop microwave. Here are 6 ideas for microwave cooked meals. And I’m sure you can find many more by googling “Microwave Meals”.
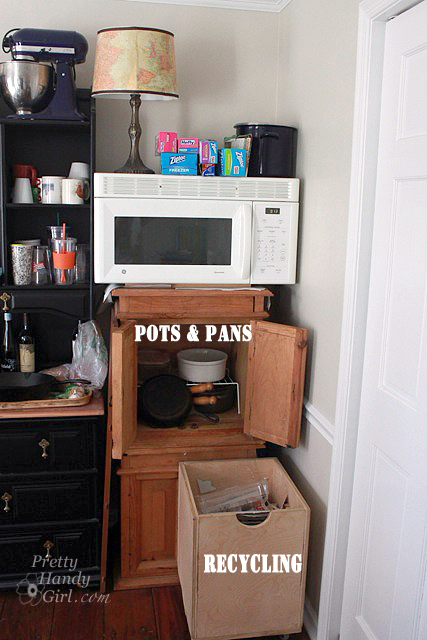 Just a peek at some of our storage spots. We stacked side tables and shelving to maximizing storage space in our makeshift kitchen.
- Crockpot – I haven’t used the crockpot as much as I should, but this is the easiest way to cook when you are kitchenless. There are numerous crockpot recipes online. Here’s a link to a few in my Pinterest board of crockpot recipes.
- Toaster Oven – If you have a decent sized toaster oven, you can use it as a mini-oven. Ours is big enough to bake nuggets or reheat two slices of pizza.
- Instant Pot – Put that appliance that has been collecting dust to work. Plan meals using your Instant Pot.
- Air Fryer – While we don’t have one (yet), I know a lot of friends that use their air fryers to cook meals.
- Hot plate – Having a hot pot or electric griddle for frying can be helpful, just be aware of the dangers of cooking without an exhaust fan.
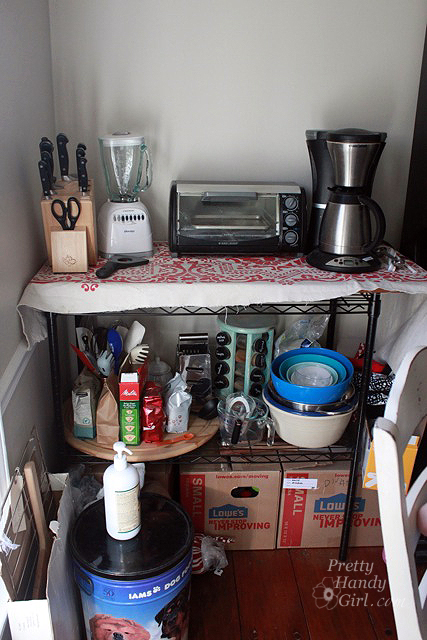 We put all our small appliances in one spot. More storage is available underneath. Plus, a lazy susan puts utensils and other necessities in an easy to reach location.
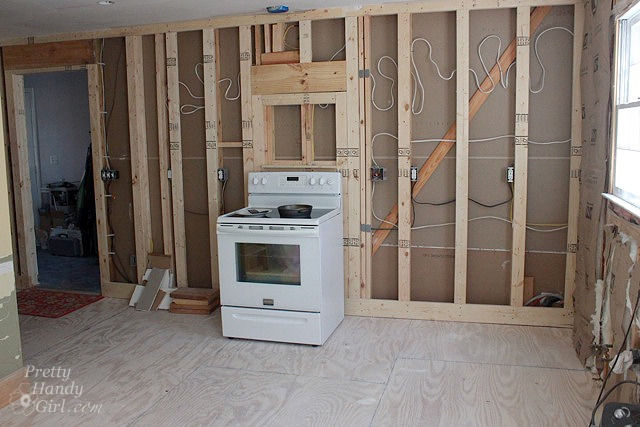
- Oven/Stovetop – If you can keep your range in your kitchen, that will help a lot with cooking. Be sure to discuss this with your contractor. You’ll need to make sure the range can stay connected to power and gas (if you have a gas stove). Ideally, you’d use your old range if you are planning on upgrading soon. During the day, cover the range with plastic or a moving blanket when not in use. Although you’ll still have to wipe off drywall dust from the top every night, it’s worth it to have an oven and cooktop again.
Easy Meals to Make without a Kitchen
Pre-made meals – While using a makeshift kitchen you want to keep meal prep and dishes to a minimum. Buying pre-made meals is a huge time and effort saver. Recently, I picked up a few pre-made meals like salmon, shrimp and stuffed peppers at Costco. Of course, TV dinners and freezer meals are also easy to make, but they aren’t the healthiest choice in the long run.
 Cilantro Lime Shrimp from Costco with spaghetti noodles added makes for an easy to make dinner.
- Carryout – in the beginning we did eat carryout more than usual (2 times a week.) But, our waistlines and our wallets were being negatively impacted by all the restaurant food. We quickly moved back to cooking ourselves using the resources above.
- Meal Delivery Services – if you’ve always wanted to try a meal delivery service like Home Chef, Blue Apron, etc. now might be the time to try them. The portion sizes are smaller so you don’t have a lot of extra groceries to contend with. But, you’ll still have some prep work.
- Grilling – Our grill got a lot of use during kitchen renovations because it was easy to throw some meat and veggies on the grill and have a cooked meal with less clean up involved.
How to Choose and Store Dishes and Utensils
Before our kitchen was packed up, I grabbed 8 place settings (enough for two meals for each person in our family of four.) We also stocked up on paper plates and paper products, but if you’re concerned about the waste, you will want to use these sparingly.
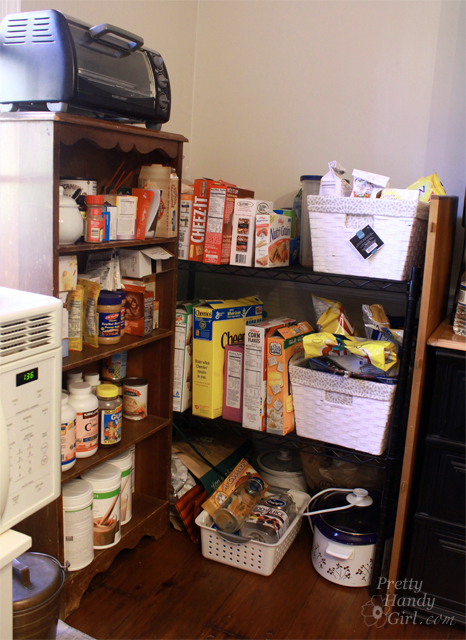
Alternative Pantry
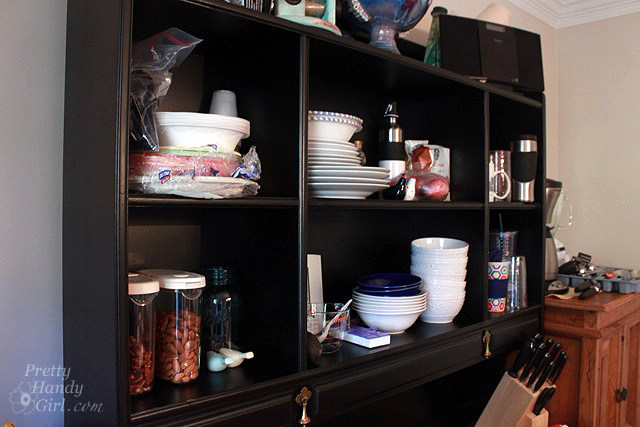
Hopefully you have space to set up an alternative pantry to keep stocked and accessibly during renovation. If not, plan on setting up temporary shelving for your food. If you have pets that might get into your food, pay attention to how accessible your food is to them or put up a barrier to keep them away. Wire shelves and small bookcases make a great space for pantry food storage. Wicker baskets or bins work wonders to corral snacks and like items.
Where to Eat During Kitchen Renovations
Set up a small table in your makeshift kitchen if you have the room. Taking the leaves out of a larger table can make it a more manageable size that will work in your space. A folding card table could also be helpful in your temporary kitchen. This may sound like a no brainer, but turning the table so the chairs are diagonal to the walls can allow more room to walk around your alternative kitchen.
Containing the Construction Dust
During renovations, ask your contractor to set up plastic sheeting in the doorways of your kitchen while it is under construction. Things WILL get messy and you want to contain the dust as best you can. In order to keep your air quality as clean as possible, change your air filter often (especially after dust-heavy work days. Definitely use higher quality and higher MPR air filters to catch the small particles. I prefer the MPR 1500 filters with a paper filter during construction, but be sure to change them often to extend the life of your HVAC system.
My Best Advice for Surviving a Kitchen Renovation
Start by vetting your general contractor with these tips for How to Hire Great Contractors. Having a great contractor will prevent headaches and help you get through the process of a renovation quicker.
Establish a routine early on so everyone gets used to it. Show children (or your spouse) where to stack their dishes and where everything is so they can adjust. Bring your pet’s food and water into the makeshift kitchen if it was in the kitchen before. Show your animals where their food and water is to minimize stress on them. Most importantly, be prepared to roll with the punches. Renovations rarely happen without a snag or hiccup here and there. And they almost never finish early. Make sure you take time to relax and de-stress. Get out of the house to clear your mind. And focus on the finished product.
I have been equating our experience to winning the Survivor game. I have to put up with less than desirable conditions and challenges of a kitchen renovation in order to win the kitchen of my dreams.
Good luck to you and remember you are going to have a beautiful new kitchen when this is done!
 You can read more about our kitchen renovation in these updates:
Pin for later!