Learn how to make this White-Washed Patriotic Flag Sign and hang it with pride in your home.
White-Washed Patriotic Flag Sign Tutorial
The other day I was at the fabric store but after not finding that perfect fabric for one of my projects, I went to the other section of the store to take a break from it all. While there I saw a little sign that read:
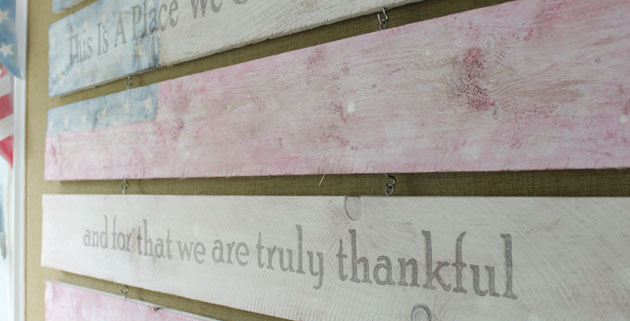
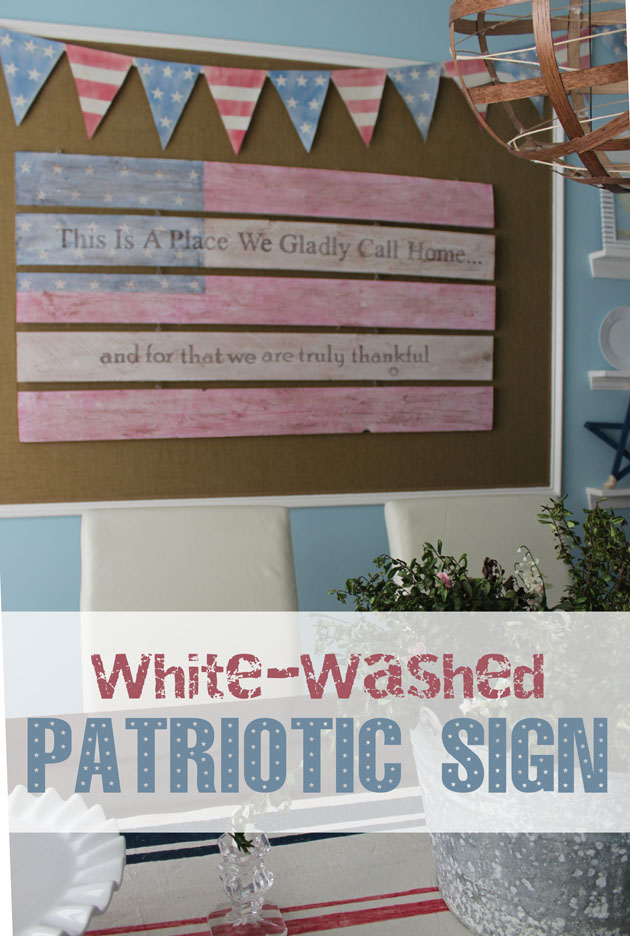
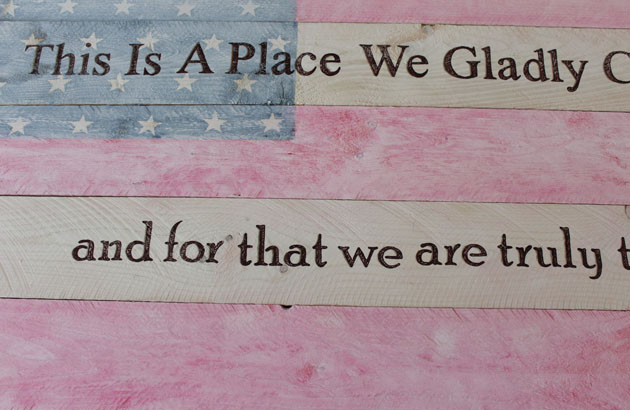
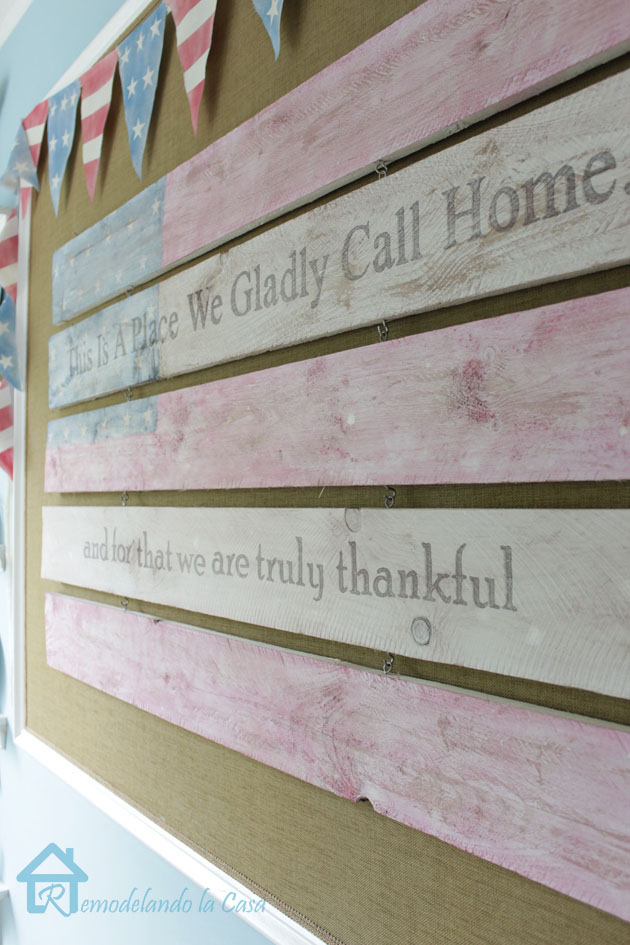
This Is A Place We Gladly Call Home…
and for that we are truly thankful
Those words totally spoke to me! I didn’t buy the little sign but I came home thinking about how to create my own version. The sign was more expensive than the materials to make my own sign ten times bigger!
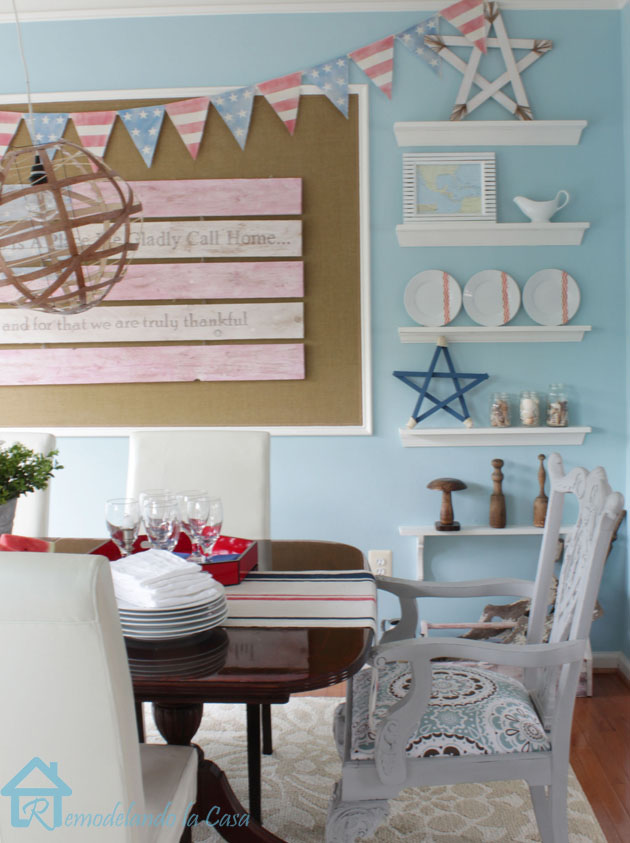
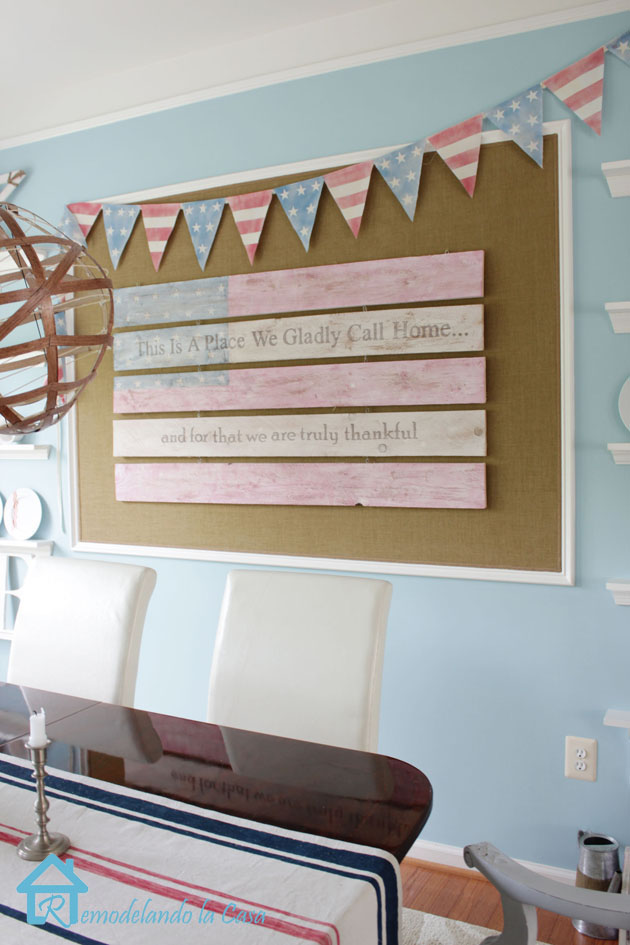
My sign came out beautiful, especially with the large American flag on the background. I’m happy to show you how to create your own White-Washed Patriotic Flag Sign! Let’s make this sign.
Materials:
(I’ve included affiliate links for your convenience. I earn a small percentage from a purchase using these links. There is no additional cost to you. You can read more about affiliate links here.)
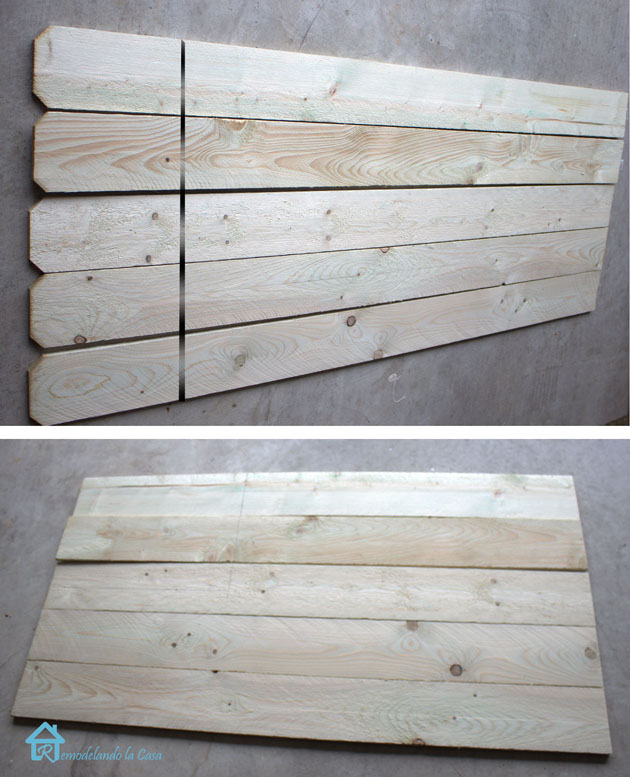
- Five boards – 1x6x6 or use pallet wood (6 ways to remove pallet wood)
- White, Red & Blue acrylic paint (or leftover latex paint)
- Star stickers
- Pencil
- Ruler
- Graphite paper
- Sander
- Sandpaper
- Brown Sharpie marker
- Dark brown stain
- 8 Cup hooks
- 10 Screw eyes
Optional: Gold Sharpie marker
Instructions:
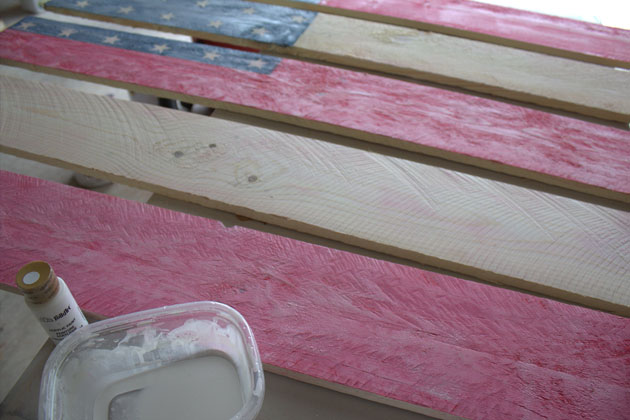
Cut off the tops to get rid of the “dog ears.” Mark the area for the blue square on the flag.
Add star stickers inside the square. Paint over the star stickers with blue paint.
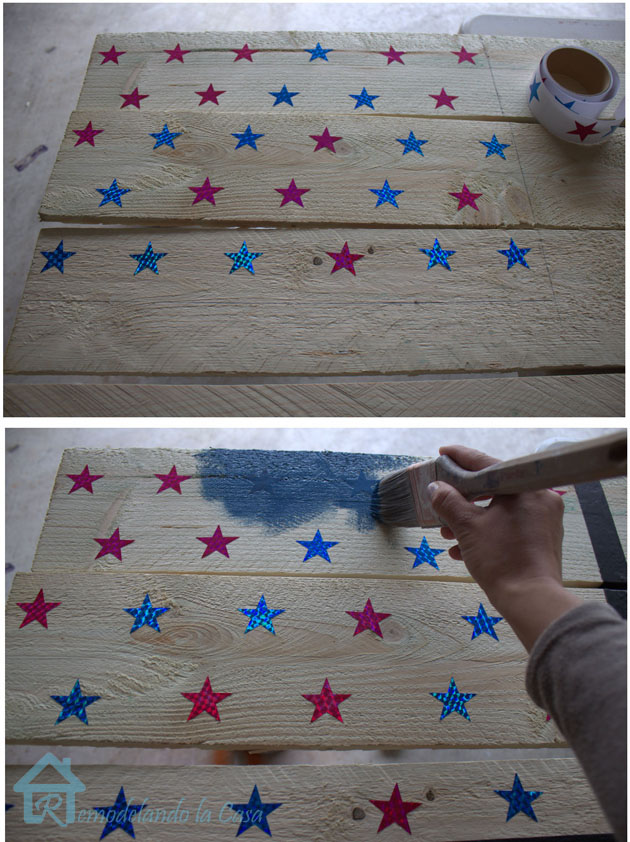
Paint the red stripes next. After the paint dries, remove the star stickers. Give your boards a light sanding.
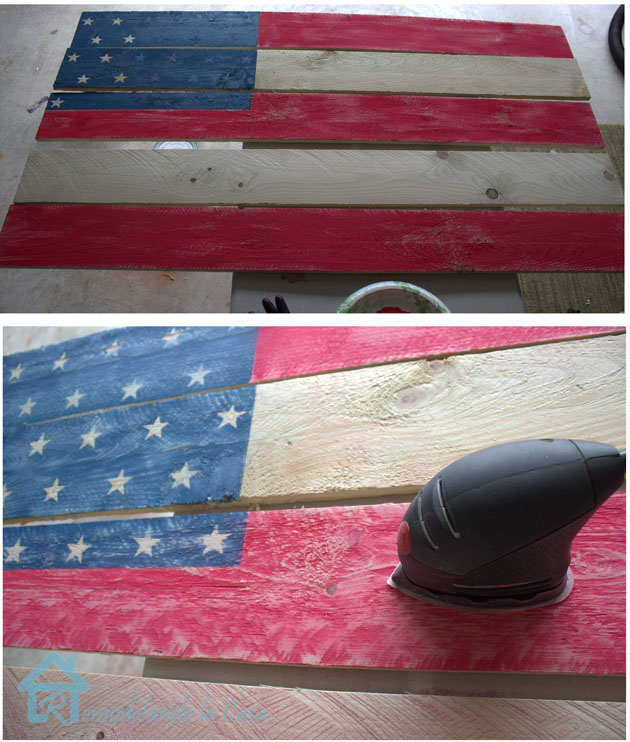
You can leave your patriotic sign like this or if you want to give it the white-washed look, continue.
White acrylic paint and water is mixed at a 50-50 ratio to create a white-wash. Apply three coats of the white-wash. Wait for the paint to dry between coats.
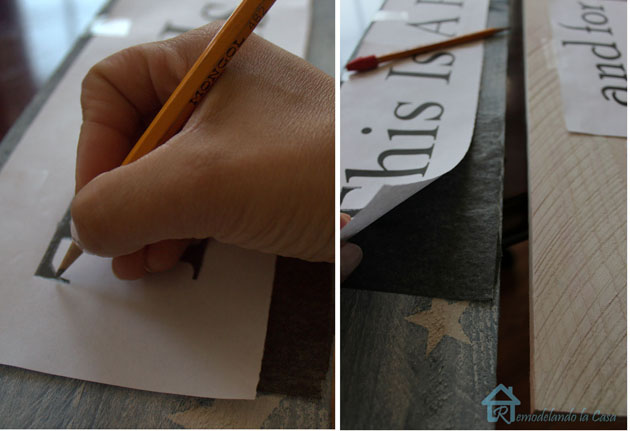
Print out your quote on the computer:
This Is A Place We Gladly Call Home…
and for that we are truly thankful
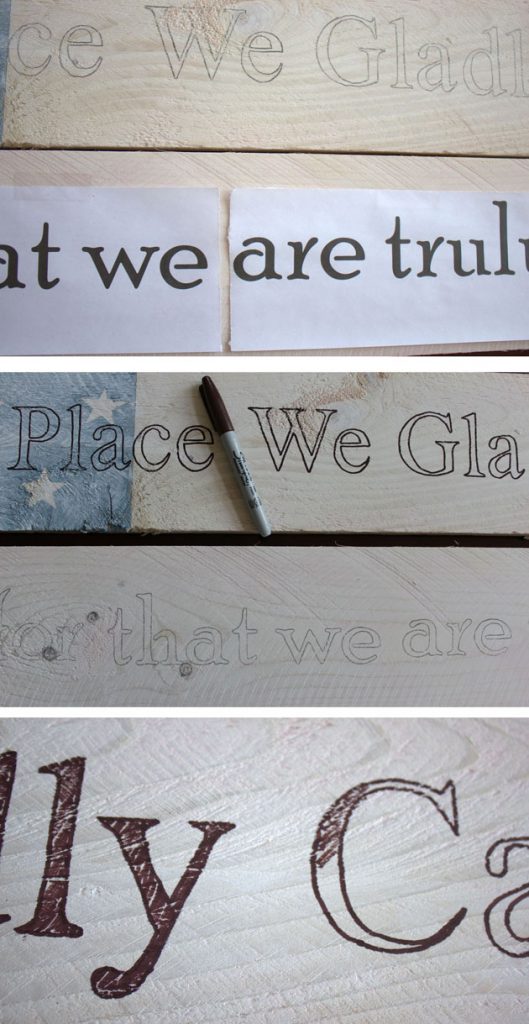
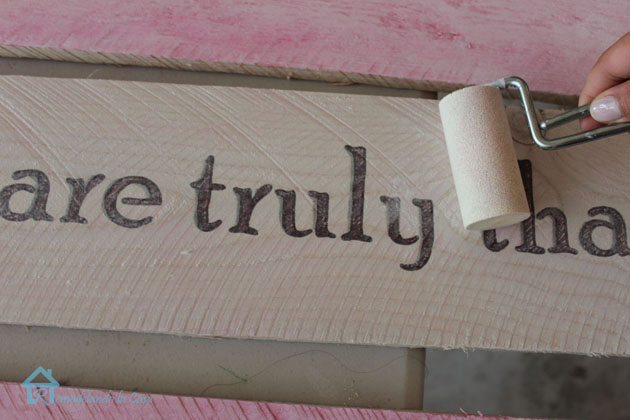
Transfer the lettering onto the boards using graphite paper.
Using a brown Sharpie, trace the letters and fill them in.
Do you want them a bit fancier? Use a gold Sharpie to create shadows.
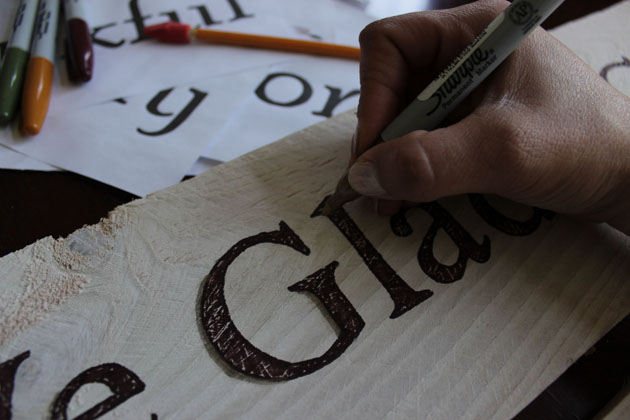
After the letters are filled in, it will look like this:
Give the letters an extra two coats of the white-wash to make them blend better.
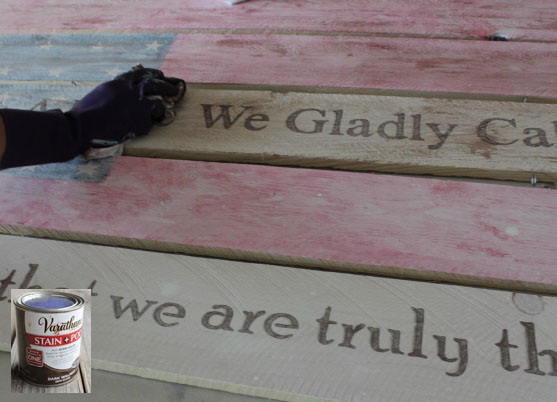
Lightly rub stain on the entire sign.
We’re finished making the White-Washed Patriotic Flag Sign. Now it’s time to assemble and hang the sign.
Assembling the Sign:
To hold the boards together, attach cup hooks and screw eyes between the boards. (I chose to paint mine silver since I only had gold.)
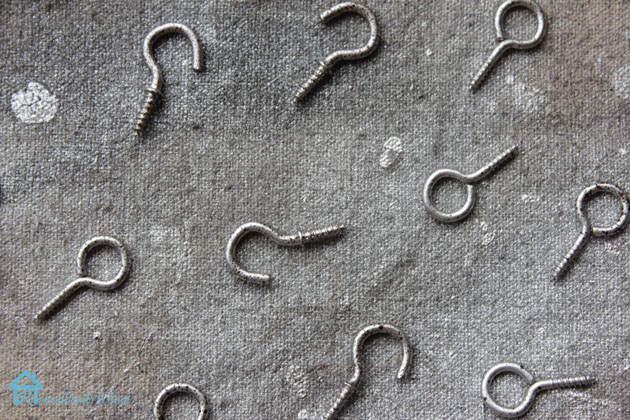
No need to pre-drill, the boards are fairly soft so the hooks and screw eyes will go in easily.

Attach two extra screw eyes to the top to hang it onto the wall.

This was a very easy way to put the sign together, hang it, and… it doesn’t take much space when it is time to store it away!
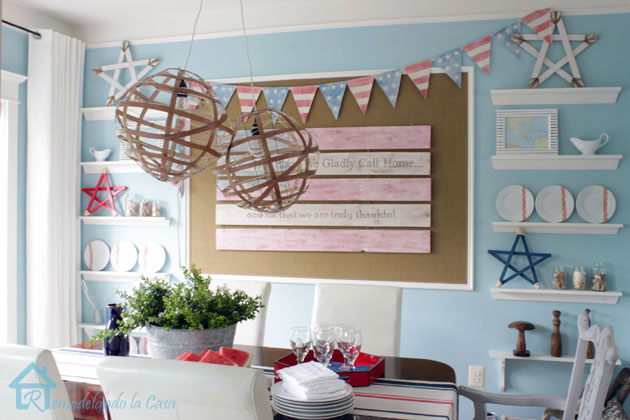
I hung some more patriotic decorations and our dining room is ready for a celebration!
What do you think of this White-Washed Patriotic Flag Sign Tutorial?
Thanks so much for stopping by!