Is Your Home Ready for Winter? | Pretty Handy Girl

Is Your Home Ready for Winter? Insulation Install Tips | Pretty Handy Girl

The folks at Duluth Trading Company want you to stay warm and comfortable this winter. They have sponsored this post to help you get your home ready for winter.  And to help you stay warm and comfortable while taking on these energy conserving tasks.

Winter is fast approaching and now is the time to check the condition of your insulation. If you have a crawlspace and/or an attic, take a few minutes to check for any fallen or missing insulation. Last summer, my neighbor’s cat had a field day in our crawlspace. Luckily I found him before he was harmed. But, unfortunately he had done a fair amount of damage to the insulation in our crawl space.

Tips for Installing Insulation to Warm Your Home | Pretty Handy Girl

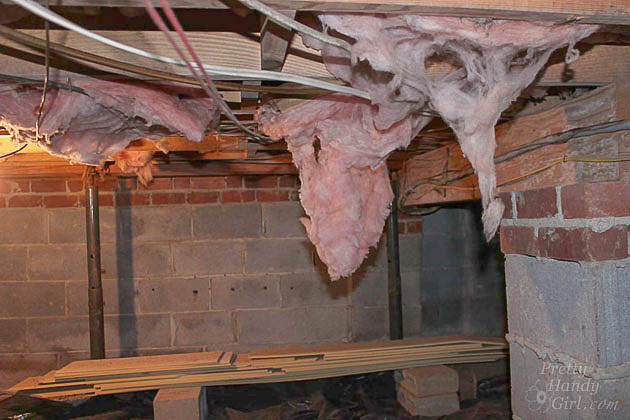
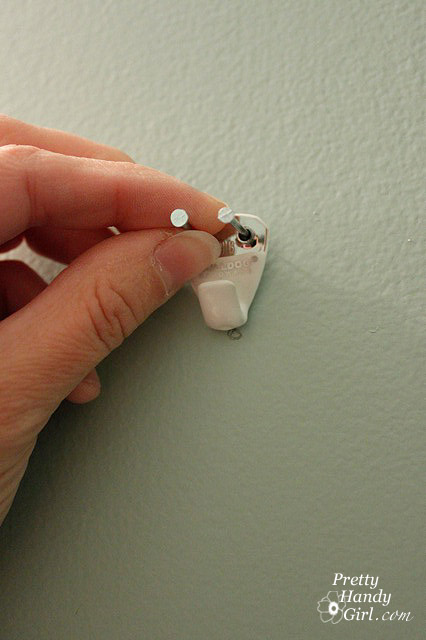
Not a big deal, I was able to fix and replace the insulation within half an hour. I’m no stranger to our crawlspace.  I have my go to gear when I need to go under the house.

Tips for Installing Insulation to Warm Your Home | Pretty Handy Girl

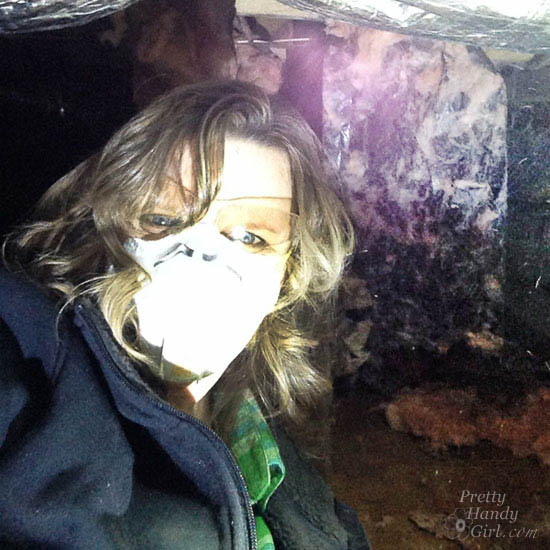
I know a lot of people would sooner poke their eyes out than venture under the house. But, I can honestly tell you that I’ve only seen one creature underneath our house and he was eager to run away from me. If it makes you feel better you can prepare before you go. Here are a few things you’ll want to have and wear:
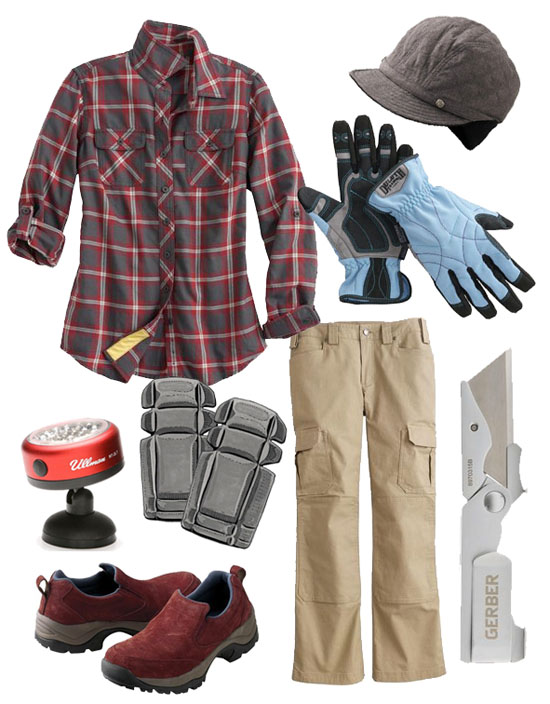
Duluth Trading Work Clothing and Tools | Pretty Handy Girl

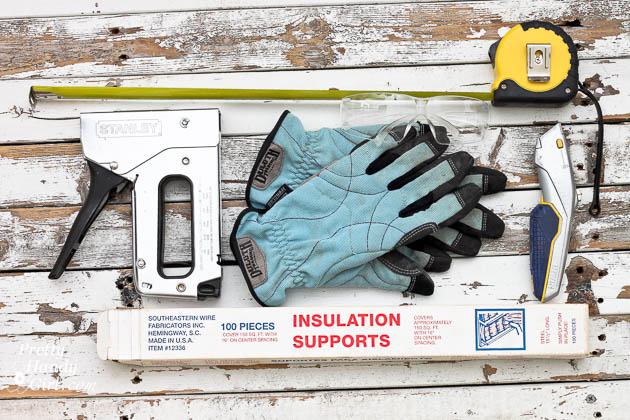
Materials for Installing Insulation:

(I’ve included affiliate links for your convenience. I earn a small percentage from a purchase using these links. There is no additional cost to you. You can read more about affiliate links here.)

Tips for Installing Insulation to Warm Your Home | Pretty Handy Girl

About Insulation and R-Values: Read more

Pros and Cons of 4 Types of Picture Hangers

Pros and Cons of 4 Types of Picture Hangers

Hello! It’s Jessica, from Decor Adventures and I’m back this month with some very handy tips to help hang items up on the wall. Do you ever wonder which picture hanger to use? Did you know there are several ways you can hang things up? From curtains to art and mirrors to lightweight decorations — there are many options for hanging (and sometimes you don’t even have to put a hole in your walls.)

I live in a 115 year old house that has both plaster and drywall, and I’ve experimented with many types of ways to hang items on the walls. Today I’ve compiled The Pros and Cons of 4 Picture Hangers.

1. Picture Hooks and Nails:

This is probably the most common way to hang up items. Simply mark where your item will go and hammer in your nail and hanger. Brittany shows you how to hang up items when putting together a gallery wall here.

insert-nails-into-hanger

Pros:

Hooks and nails come in many lengths so they can work well in most walls and are easy to use. They are also affordable and go into a wall quickly. All you need is a hammer.

Cons:

Hooks and nails don’t always work in every wall type and can rust. They can’t be used in plaster walls. When hanging heavier art, you need to find a stud to nail into. Read more

Easy! How to Install a New Showerhead | Pretty Handy Girl

Easy! How to Install a New Showerhead | Pretty Handy Girl

Raise your hand if you have a sad excuse for a shower head! Is it drippy, rusty or clogged? If you answered yes to any of those questions, I’m about to show you why there is no excuse for you being able to install a new shower head yourself! It’s super easy.

Easy! How to Install a New Showerhead | Pretty Handy Girl

Materials:

(I’ve included affiliate links for your convenience. I earn a small percentage from a purchase using these links. There is no additional cost to you. You can read more about affiliate links here.)

Easy! How to Install a New Showerhead | Pretty Handy Girl

Easy! How to Install a New Showerhead | Pretty Handy Girl

  • Optional: Shower arm & flange, rag to protect new shower arm

Instructions:

1. Remove the old shower head by unscrewing it from the pipe arm. Use pliers to help get it started.

Easy! How to Install a New Showerhead | Pretty Handy Girl

2. Unscrew the old shower arm if it is rusty or won’t match the new shower head. Remove that rusty flange (now is the time to do it! Don’t put it off any longer.)

unscreEasy! How to Install a New Showerhead | Pretty Handy Girlw-old-shower-arm

3. Replace the old shower arm with new one by screwing it into the plumbing pipe in the wall. Then slide the new flange over the arm.

Easy! How to Install a New Showerhead | Pretty Handy Girl

Wrap the end of the shower arm with plumber’s tape (wrap it clockwise to keep it from bunching up when you attach the new shower head.)

Easy! How to Install a New Showerhead | Pretty Handy Girl

4. Screw the new shower head onto the end of the shower arm. Hand tighten the head. Then put the rag over the spot base of the shower head and use the pliers to tighten it 1/4 turn.

Easy! How to Install a New Showerhead | Pretty Handy Girl

5. If your shower head has an extension hose, attach that at this time by screwing it onto the shower head and attaching the other end to the body sprayer.

Easy! How to Install a New Showerhead | Pretty Handy Girl

Turn on the water and test the spray! Beautiful! No drips or clogs? If you have some leaks anywhere, give an extra 1/4 to 1/2 turn to tighten it the shower head or hose.

I installed the Delta In2ition shower head in the Topsail Beach Condo we renovated. I’ve been intrigued by this shower head and after trying it out, I love it!!!

Easy! How to Install a New Showerhead | Pretty Handy Girl

Because who wouldn’t love a shower head that sprays from the top even when you want a body spray too?

The interior head is fully removable and nests back into the outer ring when done body spraying.

Easy! How to Install a New Showerhead | Pretty Handy Girl        

The only initial drawback I found was getting used to setting the body sprayer back into the ring. Once I realized you have to push it in and down firmly, there was no problem.

Wasn’t that easy? Go on and replace your shower head today if you’ve been putting it off!

PHGFancySign

Disclosure: No disclosure necessary. I wasn’t paid or provided with the Delta In2ition shower head. My stepmom paid for it to be installed in the beach condo. I chose this shower head because I wanted to try it out.  


Pin for later!

How to Easily Install a New Shower Head

Reinforcing You Door is Easy

Reinforce an Entry Door

Burglar proofing your home is easy. Especially f you have a gazillion dollars to hire security guards, attack dogs and a web of lasers. Ahh, to dream a dream. But, for those of us who actually have a budget there’s a quick solution. And it’ll help you sleep a lot easier at night.

Having a home invasion is nerve wracking to say the least (yes, I’ve experienced this), I understand the fear many homeowners face:

A  passionate desire to keep our family safe from all the badness in the world.

Think about this, in many instances the only things stopping a robber from kicking open your front door are 1/2 inch screws, some thin metal (in the form of hinges and  strike plates), and at best a wimpy 1 inch piece of wood called your door jamb. Um, I think my 74 year old dad could kick open most people’s doors.

Today I’ll walk you through the installation of EZ Armor (affiliate link). And How to Reinforce an Entry Door and Make it Burglar Proof!

EZ Armor is a door reinforcement kit you can buy for $69. You need limited tools and 15 minutes.

Here’s a supply list to help you get started:

(I’ve included affiliate links for your convenience. I earn a small percentage from a purchase using these links. There is no additional cost to you. You can read more about affiliate links here.)

I promise you’ll boost your home’s safety by leaps and bounds by using EZ Armor. It only take a few minutes to understand why.

The EZ Armor kit I bought came with the following accessories:

  • Jamb shield (1)
  • Hinge shields (2)
  • Door shields (2)
  • 2 1/2 inch screws (4)
  • 3 1/2 inch screws (17)

Reinforce an Entry Door and Make it Burglar Proof

Okay, if you’re an excitable DIYer like me you might dive right into the installation. You can watch the video or read the photo tutorial below:

Read more

How to Clean Your House Exterior without a Pressure Washer or Ladder

Is your home ready for Halloween? I don’t mean decorating. I mean is it so grimy and dirty that you don’t need to decorate to scare off the trick or treaters?

How to Clean Your House Exterior without a Pressure Washer or Ladder

Umm, yup, that was my house. But, a few weeks ago I was introduced to my new CBFF (Cleaning Best Friend Forever.)

Krud Kutter Exterior Clean Up

Krud Kutter Original - My Cleaning BFF

Seriously, you can ask my sister and stepmom! I was toting around a bottle of Krud Kutter this past weekend while working on renovating a VERY dated beach condo. What? You didn’t know I was doing that?!

Pretty Handy Girl Instagrams from Topsail

Well, you NEED to follow me on Instagram to get the latest deets of my DIY life!

Anyway, back to Krud Kutter. The folks at Krud Kutter couldn’t believe I’d never used their products before. So, they offered to send me some to try. But, before I agreed, I checked with a few DIY friends like Holly.  And, they all agreed, “Oh yeah, that stuff ROCKS!” Holly says she uses it to clean grimy furniture before painting it. I figured if she likes it, I might.

Within a few days, a box containing some Krud Kutter Original and Krud Kutter House Wash showed up on my VERY dirty doorstep. I’m sure my UPS driver thinks our stoop is a disgrace. I had contemplated buying a pressure washer to clean it.

How to Clean Your House Exterior without a Pressure Washer or Ladder(That white grout you see at the top of the picture was protected under the door mat for years.)

You can imagine my skepticism that a little plastic bottle could do the same job as a pressure washer.  But, I was shocked at what happened next.

Read more