How to Fix a Wobbly Chair or Side Table | Pretty Handy Girl

How to Fix a Wobbly Chair or Side Table | Pretty Handy Girl

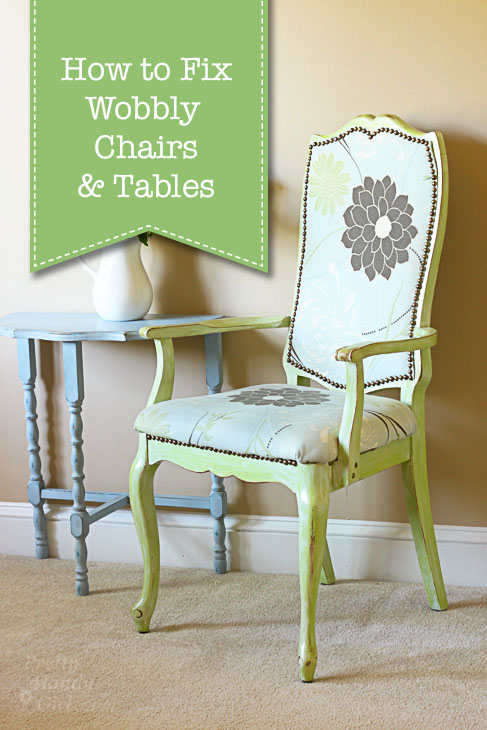
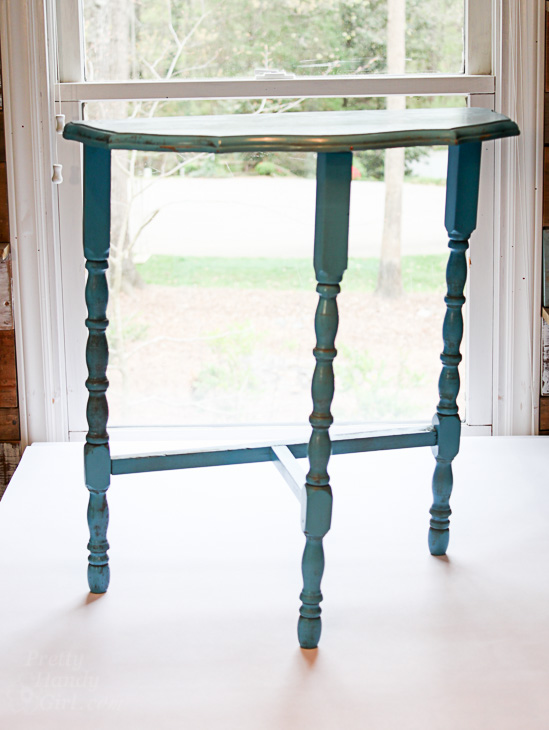
Do you have a wobbly chair or table? Don’t throw it away because today I’ll show you How to Fix that Wobbly Chair or Table!
How to Fix a Wobbly Chair or Side Table | Pretty Handy Girl

You’ll only need a few supplies for this project and it won’t take you very long, so let’s get fixing!

Materials:

(I’ve included affiliate links for your convenience. I earn a small percentage from a purchase using these links. There is no additional cost to you. You can read more about affiliate links here.)
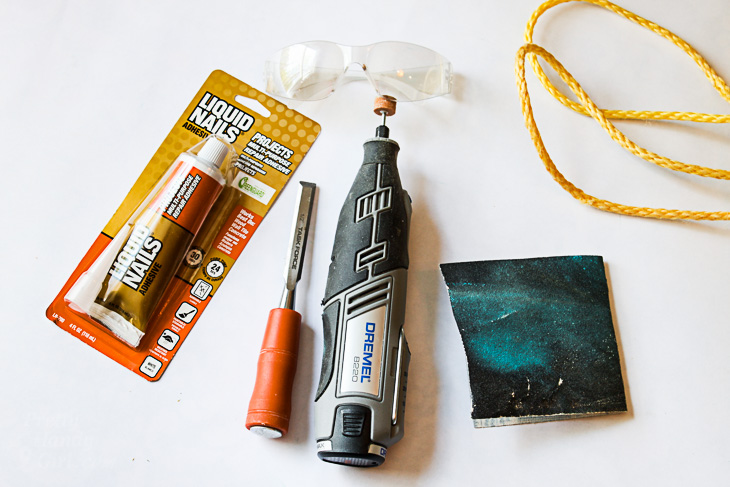
How to Fix a Wobbly Chair or Side Table | Pretty Handy Girl

Optional:

Instructions:

Take apart your chair or table. Twist the legs to break any remaining glue.
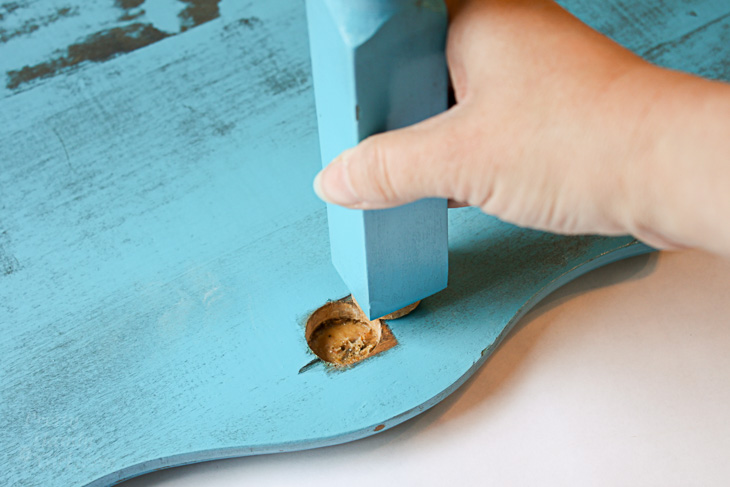
How to Fix a Wobbly Chair or Side Table | Pretty Handy Girl

As you remove each piece, label where it came from (i.e. BR = Back Right, FR = Front Right, etc.)
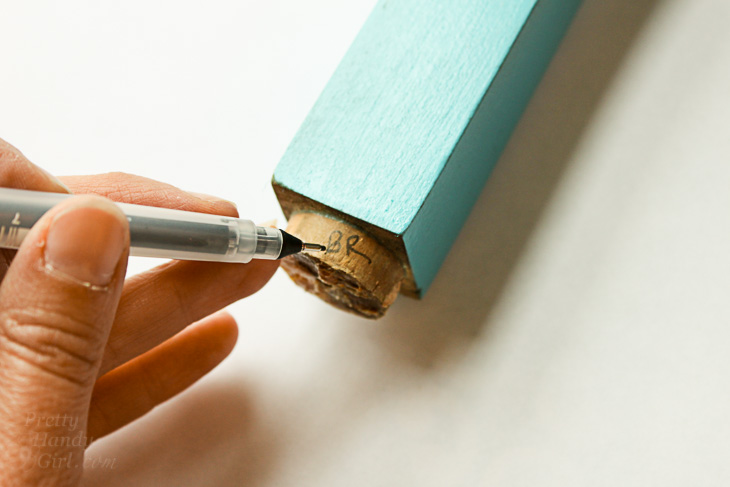
How to Fix a Wobbly Chair or Side Table | Pretty Handy Girl

Continue until all the legs and cross pieces have been removed.
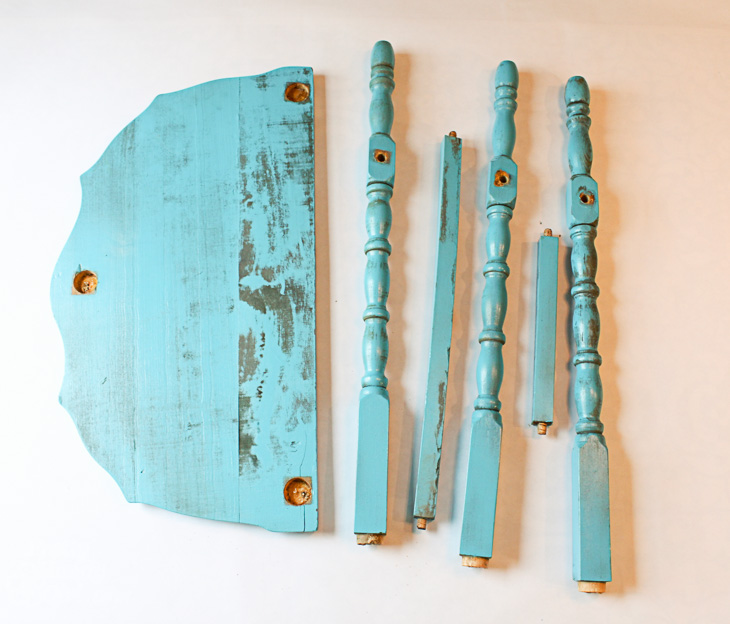
How to Fix a Wobbly Chair or Side Table | Pretty Handy Girl

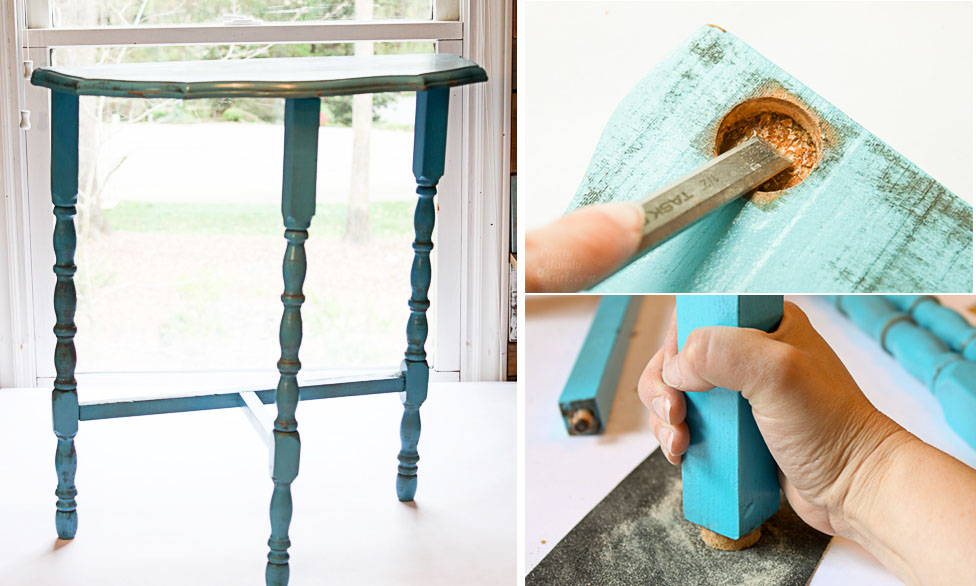
Use a small chisel to chip out any old glue.
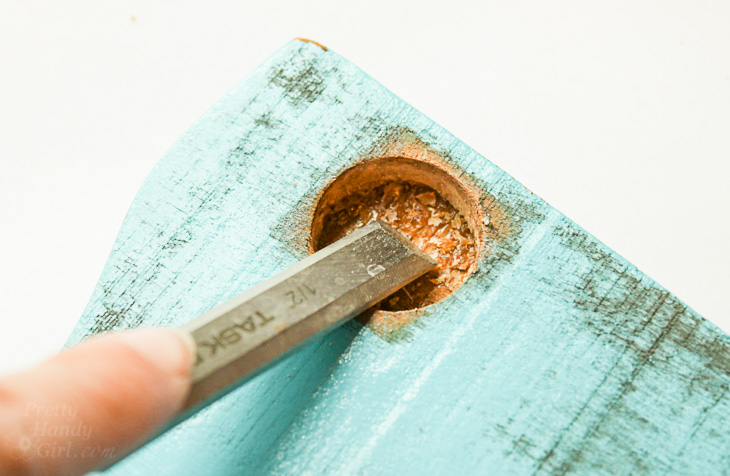
How to Fix a Wobbly Chair or Side Table | Pretty Handy Girl

Use the Dremel to clean out all the holes and smooth the surface. (It’s important to expose the raw wood before re-gluing.)
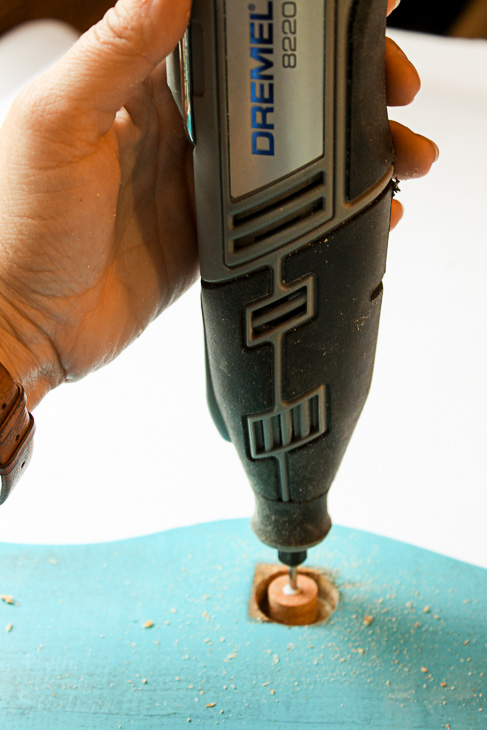
How to Fix a Wobbly Chair or Side Table | Pretty Handy Girl

Sand the ends of the legs to remove any additional glue.
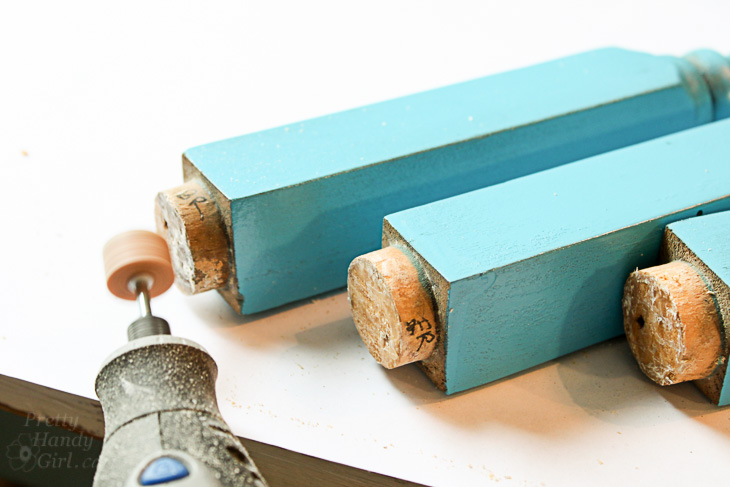
How to Fix a Wobbly Chair or Side Table | Pretty Handy Girl

If you don’t have a Dremel, you can use sand paper.
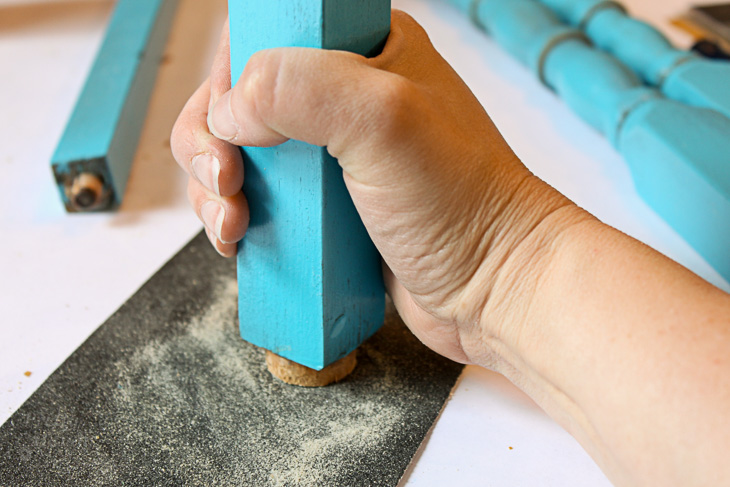
How to Fix a Wobbly Chair or Side Table | Pretty Handy Girl

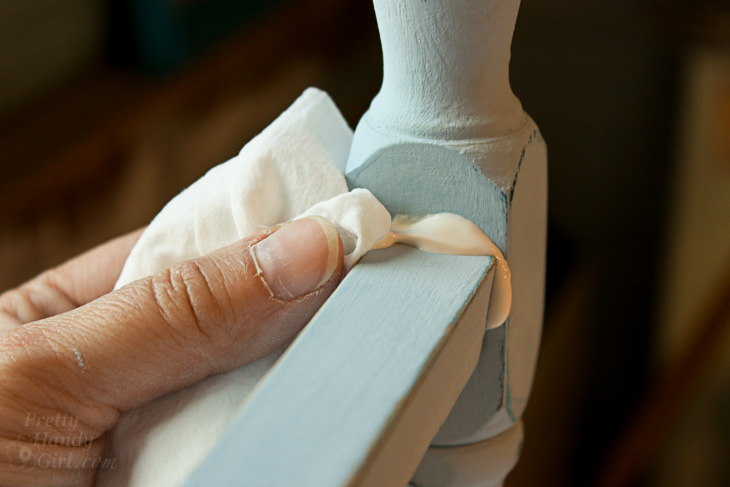
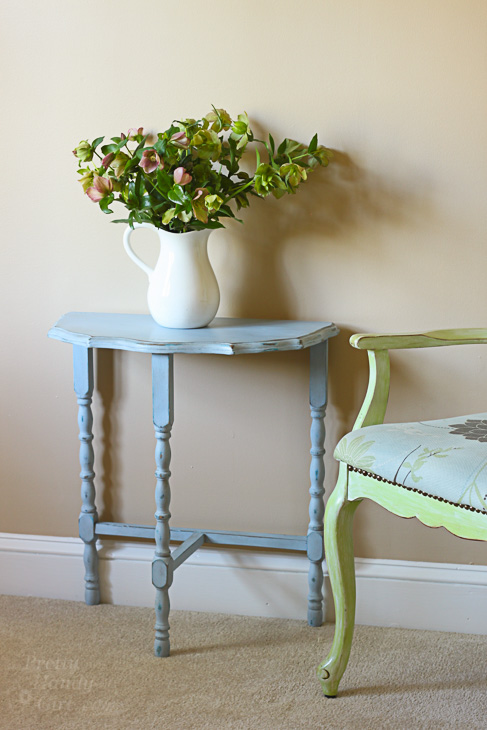
Wipe off any sanding dust. Add a generous amount of glue to all the holes. (You eagle eye, you! Yes, I painted the table before putting it back together. But, it’s the same table, honest!)
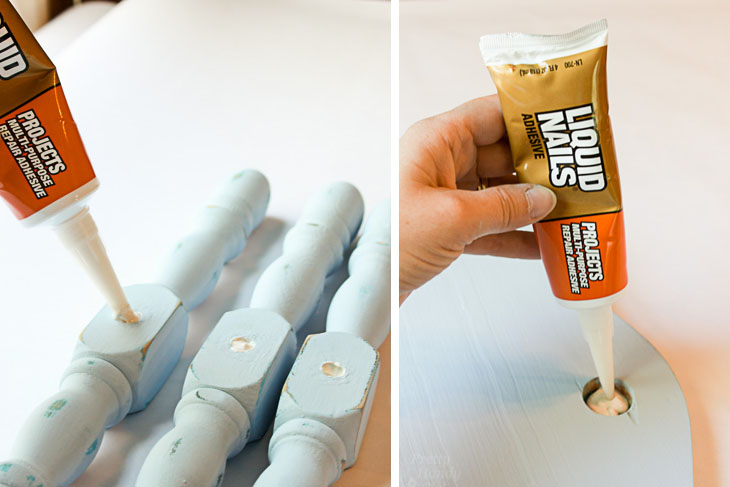
How to Fix a Wobbly Chair or Side Table | Pretty Handy Girl

Press the legs and supports back into place.
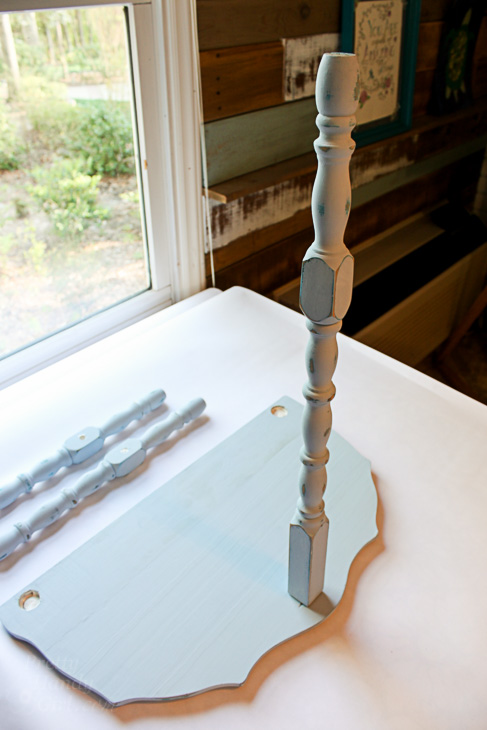
How to Fix a Wobbly Chair or Side Table | Pretty Handy Girl

You might need to gently tap any stubborn pieces in with a hammer.
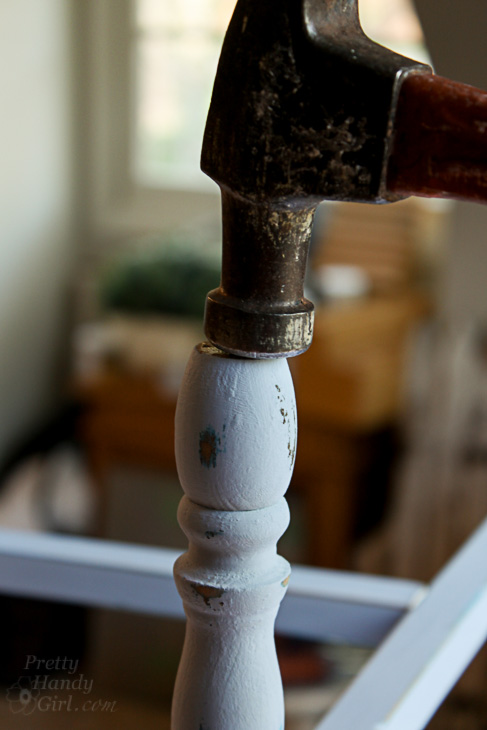
How to Fix a Wobbly Chair or Side Table | Pretty Handy Girl

Wipe off any excess glue.

How to Fix a Wobbly Chair or Side Table | Pretty Handy Girl

Make sure all the legs are perfectly plumb and all the pieces are where you want them. Use rope to “clamp” the table and hold it in place while the glue dries.
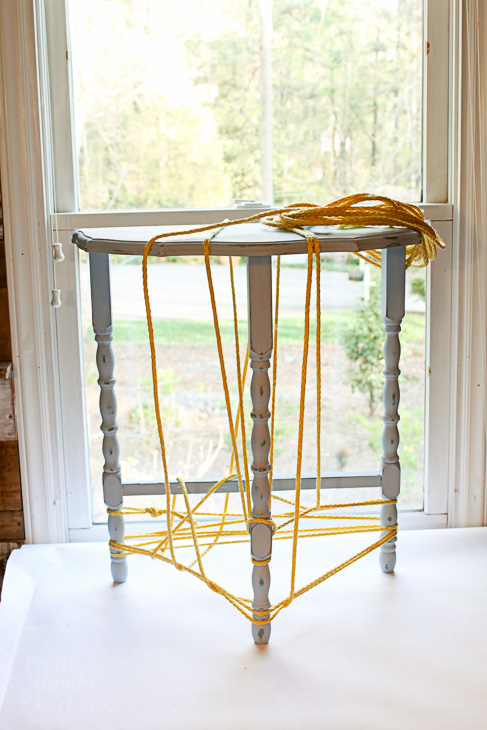
How to Fix a Wobbly Chair or Side Table | Pretty Handy Girl

After the glue dries test to make sure it is sturdy. If there is any movement, you can drive screws into the joints to help secure the legs better. Position the screws underneath or on the inside so they won’t be as visible.
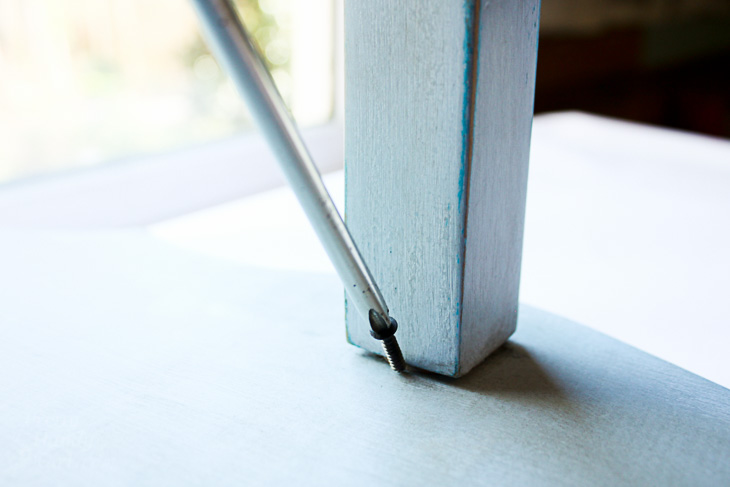
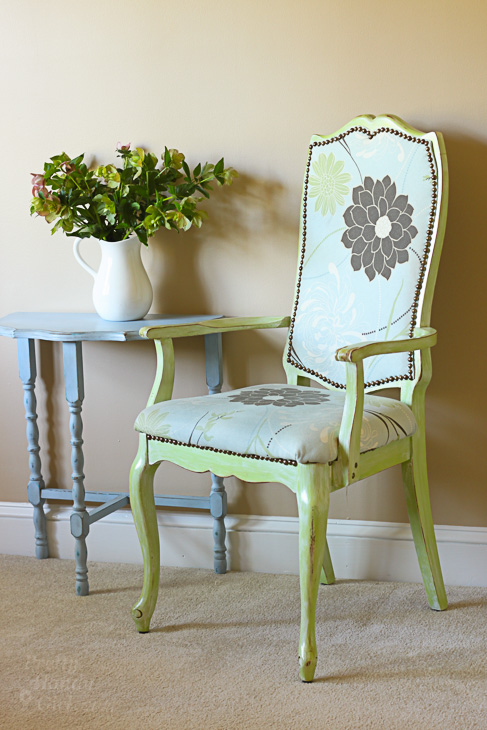
Enjoy your sturdy chair and/or table! It wasn’t that hard to fix that wobbly chair or table was it?
How to Fix a Wobbly Chair or Side Table | Pretty Handy Girl

That’s what I thought! Enjoy.

How to Fix a Wobbly Chair or Side Table | Pretty Handy Girl

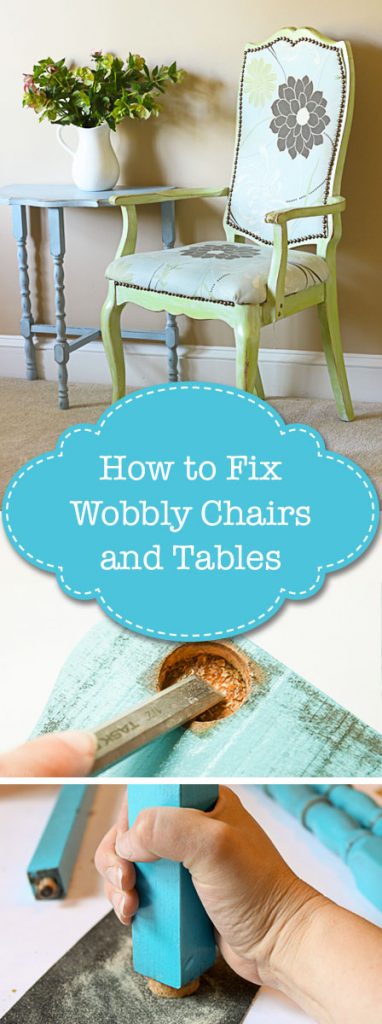
Be sure to pin this post. All wobbly chairs and tables deserve a second chance!
How to Fix a Wobbly Chair or Side Table | Pretty Handy Girl

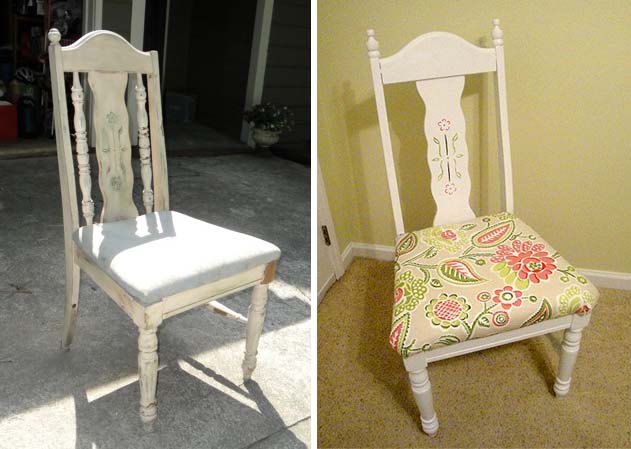
Like this tutorial? You’ll get a kick out of how I saved this broken chair that was rescued from the trash:
Rescued Trash Chair

Have a great weekend.
How to Make an Old Water Heater More Energy Efficient | Pretty Handy Girl

How to Make an Old Water Heater More Energy Efficient | Pretty Handy Girl

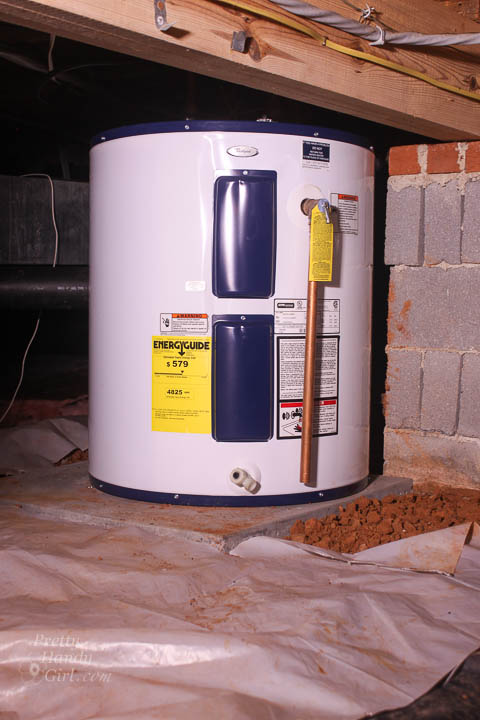
At the beginning of 2016 government standards dictated that new tank style water heaters must be more energy efficient. In response, manufacturers added internal insulation to new heaters. Unfortunately for those of us with tiny crawlspace water heaters, it meant we had to give up 10 gallons in storage to accommodate the added insulation. For a family of four, that is a big deal when our tank only holds 50 gallons to begin with.

In anticipation of the new rules, I purchased one of the last “less energy efficient” models to replace our 15 year old unit.

How to Make an Old Water Heater More Energy Efficient | Pretty Handy Girl

Although it’s true that an older water heater has less insulation, you can help your tank be more energy efficient. How? Simply add a water heater insulation blanket. It’s an easy DIY home improvement you can accomplish in thirty minutes or less. Want to learn How to Make a Tank Style Water Heater Energy Efficient? Great, let’s get cozy.

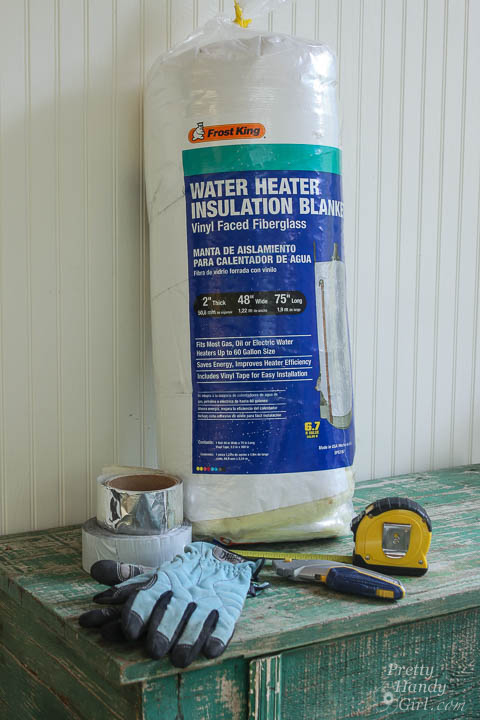
Materials:

How to Make an Old Water Heater More Energy Efficient | Pretty Handy Girl

(I’ve included affiliate links for your convenience. I earn a small percentage from a purchase using these links. There is no additional cost to you. You can read more about affiliate links here.)

Preparation:

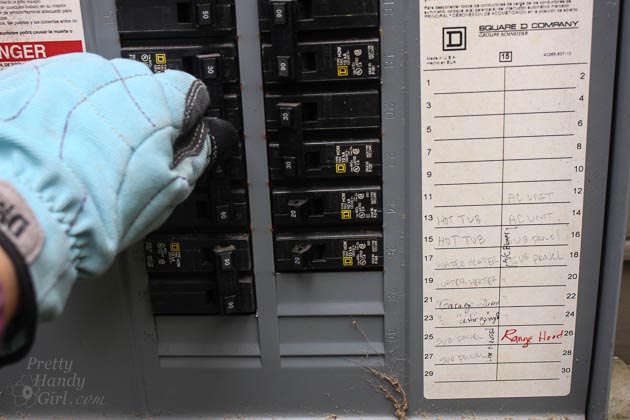
For your personal safety, turn off the power supply to your water heater.

How to Make an Old Water Heater More Energy Efficient | Pretty Handy Girl

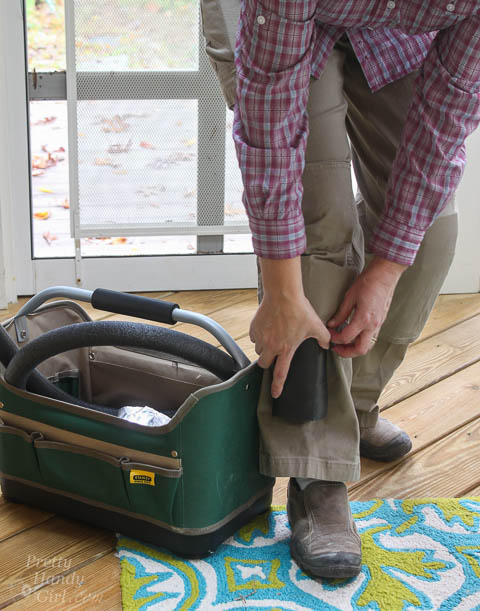
Suit up if you have to go into a crawlspace. I always wear work pants and knee pads because even the most pristine crawl space might have an occasional rock or dropped nail or screw that you don’t want to kneel on.

How to Make an Old Water Heater More Energy Efficient | Pretty Handy Girl

Instructions:

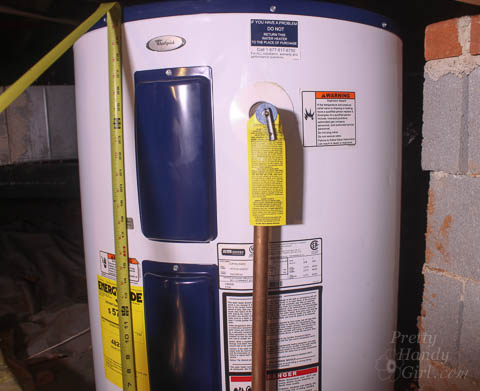
Measure the height and circumference of your water heater.

How to Make an Old Water Heater More Energy Efficient | Pretty Handy Girl

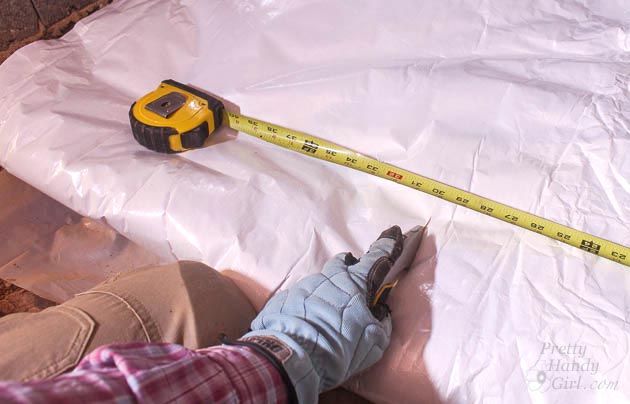
Transfer the measurements onto your insulation blanket and cut to size*. (The low boy water heaters that fit in crawlspaces are usually wider than their taller cousins, so you may have to rotate the blanket or piece it together to make it fit.)

*As a side note, I didn’t have enough to go all the way around with the Frost King water heater insulation blanket I used. After reading reviews, I realize I wasn’t the only one. Therefore, I linked to another insulation blanket with better reviews in the materials list.

How to Make an Old Water Heater More Energy Efficient | Pretty Handy Girl

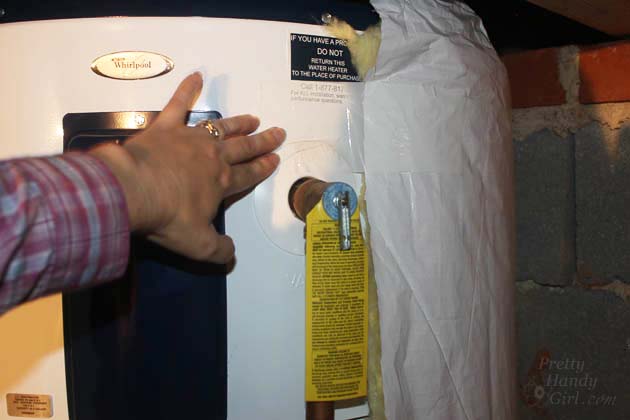
Add some tape to the tank to secure the insulation blanket (the fiberglass insulation side facing in.) Then wrap it around the tank.

How to Make an Old Water Heater More Energy Efficient | Pretty Handy Girl

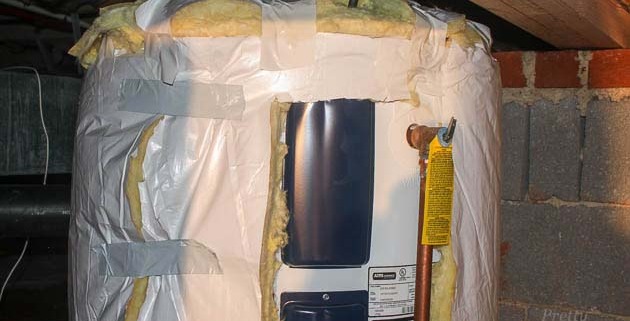
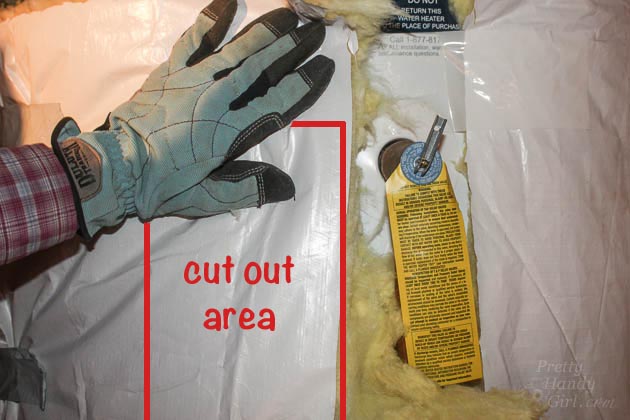
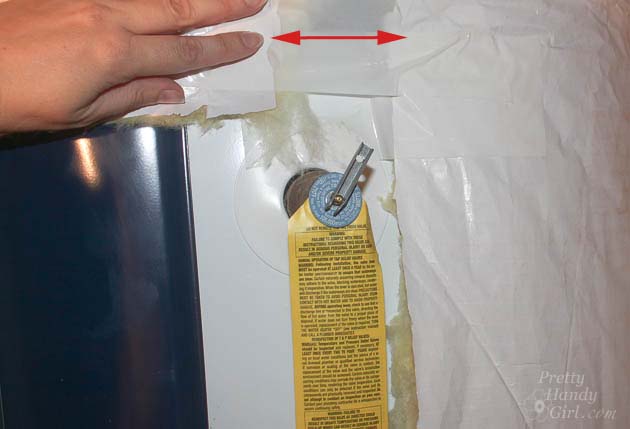
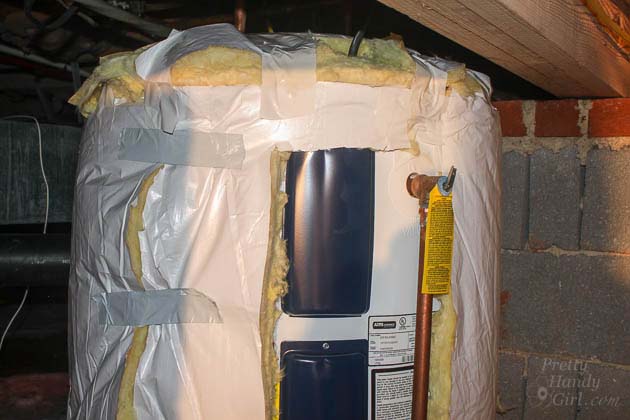
You must keep the access panel and pressure release valve uncovered. Cut those sections out of your blanket.

How to Make an Old Water Heater More Energy Efficient | Pretty Handy Girl

Add duct tape to secure the blanket around the water heater.

How to Make an Old Water Heater More Energy Efficient | Pretty Handy Girl

If you have additional insulation blanket material, cut a piece and attach it to the top of your heater (only for electric water heaters.)

How to Make an Old Water Heater More Energy Efficient | Pretty Handy Girl

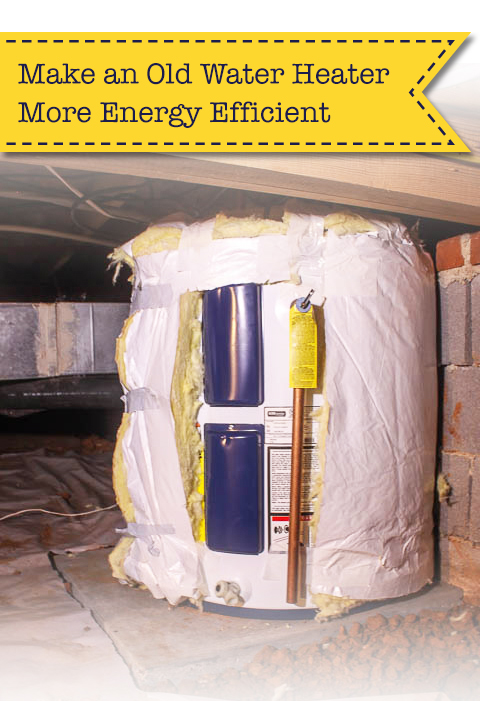
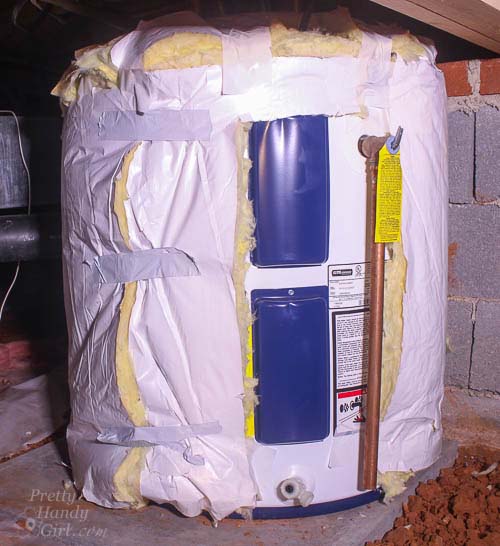
Doesn’t your water heater look cozy and warm? It may not be the prettiest makeover, but it will save a pretty penny! 😉

Don’t forget to turn the power back on and enjoy hot water on demand.

Hope you have a great weekend and check out some of these home maintenance repairs you can do yourself!

How to Replace a Wheelbarrow Tire in 5 Minutes | Pretty Handy Girl

How to Replace a Wheelbarrow Tire in 5 Minutes | Pretty Handy Girl

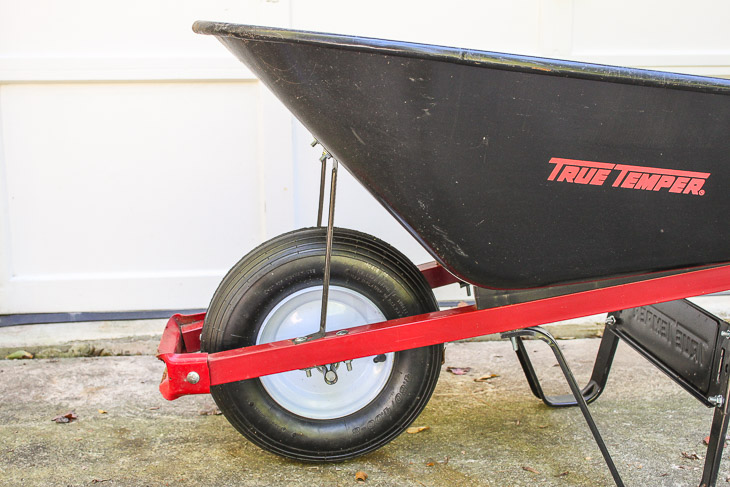
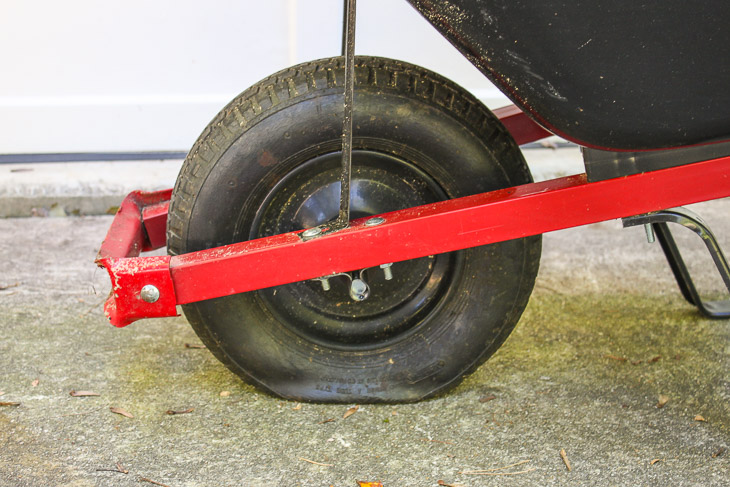
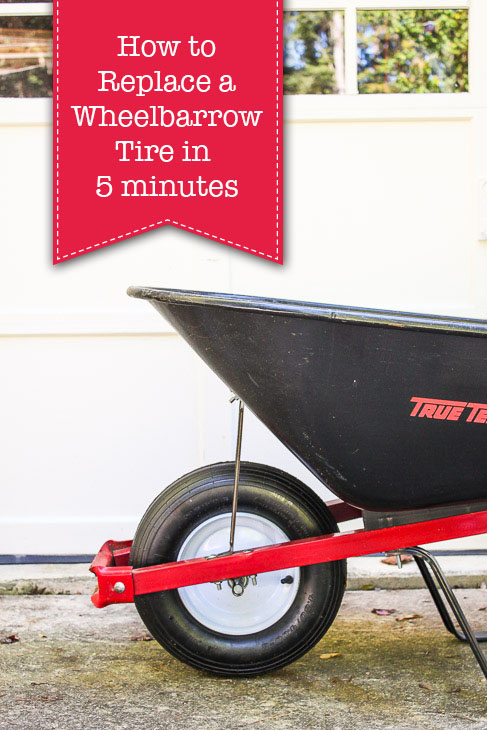
What happens when you are ready to do some work in the yard and discover your wheelbarrow has a flat tire? You pump it up. But, then you realize the tire is dry-rotted and no air will stay in the wheel. Trust me when I say you don’t want to muscle the tire off to replace it (because that is a pain in the “you know what” and it’s much faster to replace the whole wheel.) Have no fear, I have a tutorial for How to Replace a Wheelbarrow Tire in 5 Minutes!

How to Replace a Wheelbarrow Wheel in 5 Minutes | Pretty Handy Girl

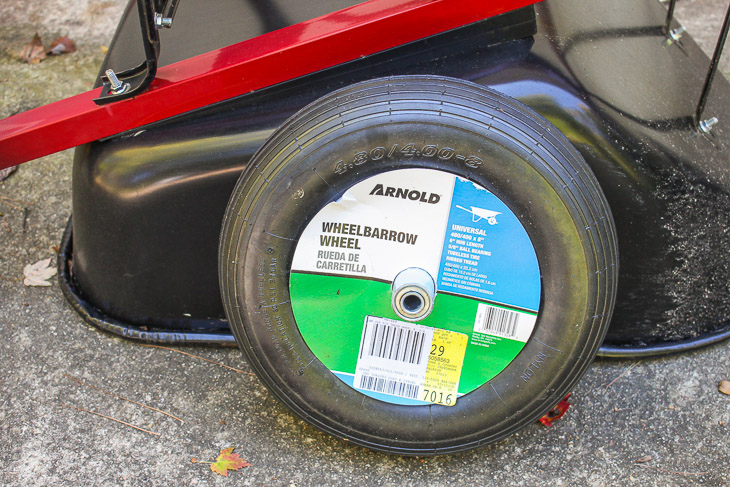
Grab two items and let’s get to it.

(I’ve included affiliate links for your convenience. I earn a small percentage from a purchase using these links. There is no additional cost to you. You can read more about affiliate links here.)

Materials:

How to Replace a Wheelbarrow Wheel in 5 Minutes | Pretty Handy Girl

Instructions:

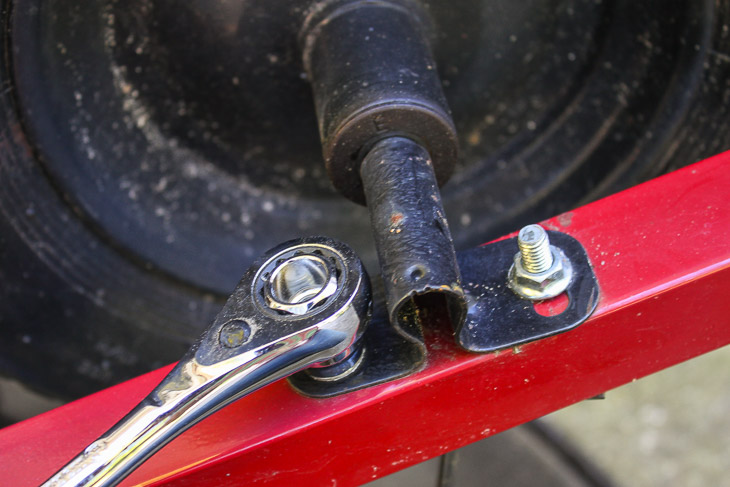
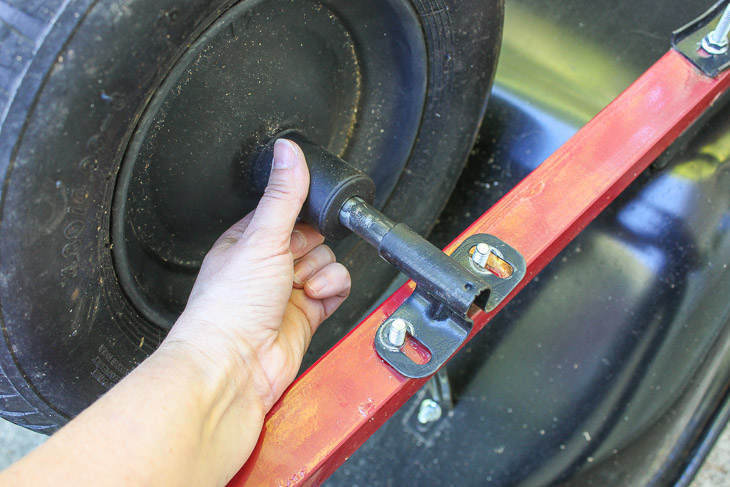
Flip the wheelbarrow over and loosen the nuts on the axle bracket.

How to Replace a Wheelbarrow Wheel in 5 Minutes | Pretty Handy Girl

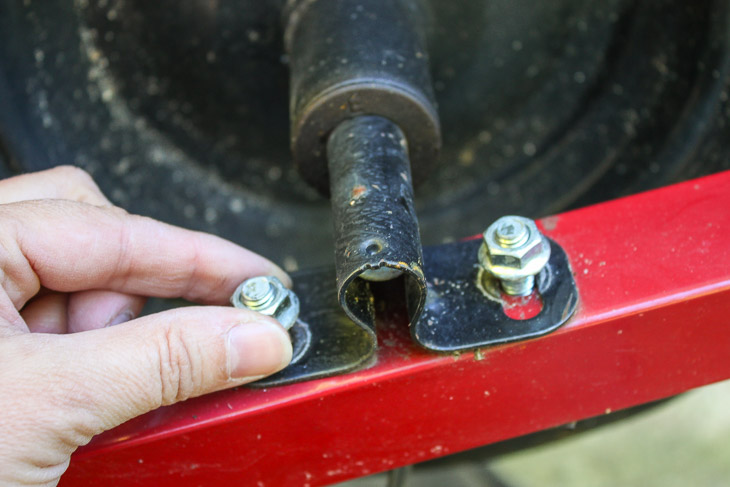
Remove the nuts from the bolts. Repeat for the opposite bracket.

How to Replace a Wheelbarrow Wheel in 5 Minutes | Pretty Handy Girl

Lift the wheel off the wheelbarrow frame.

How to Replace a Wheelbarrow Wheel in 5 Minutes | Pretty Handy Girl
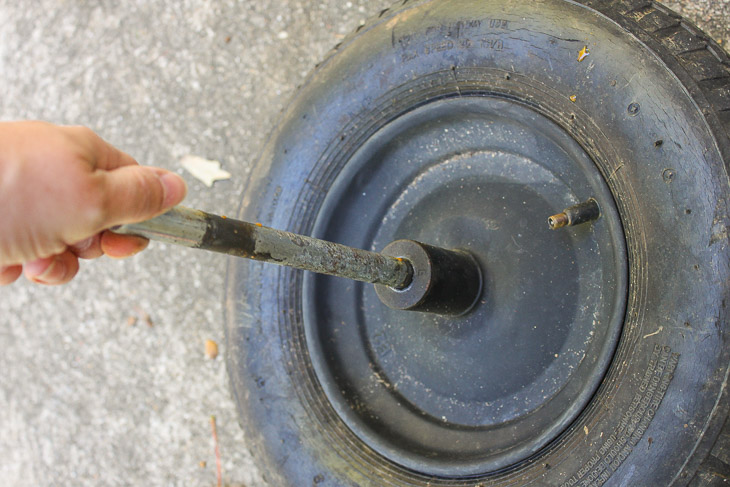
Remove the axle from the old wheel.

How to Replace a Wheelbarrow Wheel in 5 Minutes | Pretty Handy Girl

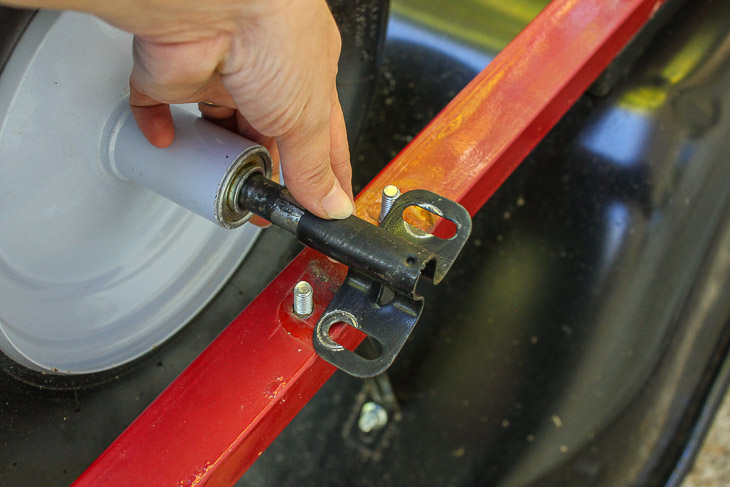
Slide the new wheel onto the axle.

How to Replace a Wheelbarrow Wheel in 5 Minutes | Pretty Handy Girl

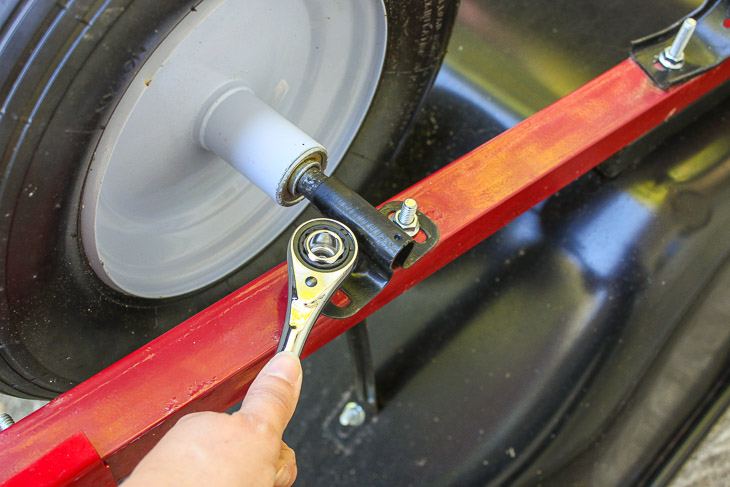
Set the wheel back onto the frame, replace the bracket and the nuts. Tighten the nuts.

How to Replace a Wheelbarrow Wheel in 5 Minutes | Pretty Handy Girl

Flip the wheelbarrow back upright and get to work!

How to Replace a Wheelbarrow Wheel in 5 Minutes | Pretty Handy Girl

And that’s the easiest way to replace a wheelbarrow flat tire in 5 minutes or less.

PHGFancySign

What No One Tells You About Farmhouse Sinks | Pretty Handy Girl

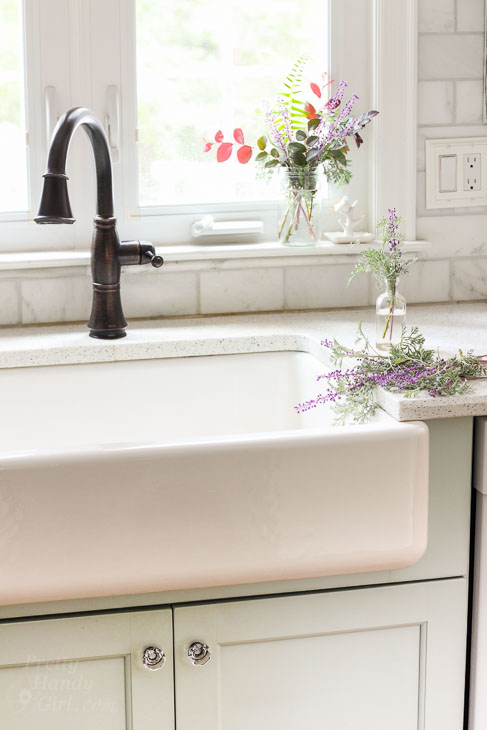
When we bought our farmhouse sink, I naively thought I wanted one because they looked so beautiful in photos of farmhouse style kitchens. Now that we’ve had our farmhouse sink for three years, I want to tell you What No One Will Tell You About Farmhouse Sinks, especially cast iron sinks.

Fact #1:

You will chip dishes and break glasses if you aren’t careful. It happens. We’ve lost two dishes and two glasses in our sink. Cast iron sinks are made tough to prevent chipping. Honestly, it’s cheaper to replace a glass or dish than the entire sink.

Fact #2: 

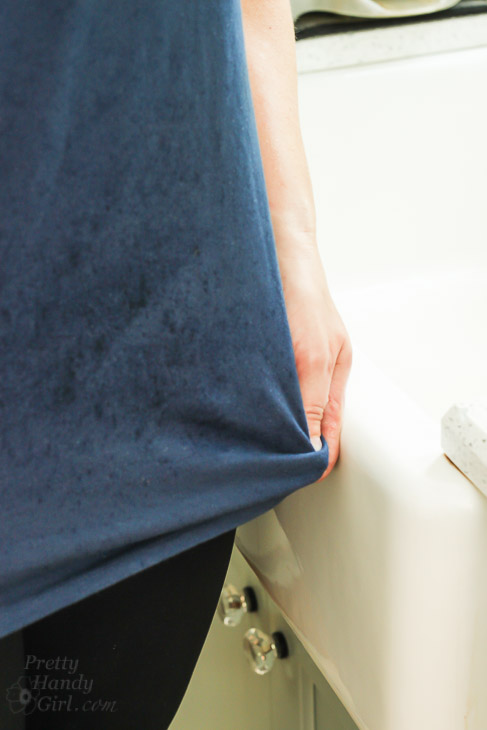
You may get wet. We’ve found that when our faucet is on the spray setting it spatters us. I’m not sure if this is a factor of the sink design or the sprayer. We didn’t have this issue with our old two basin sink. To solve the problem we use stream most of the time and put the water on low when spraying.

splashed-shirt

Fact #3: 

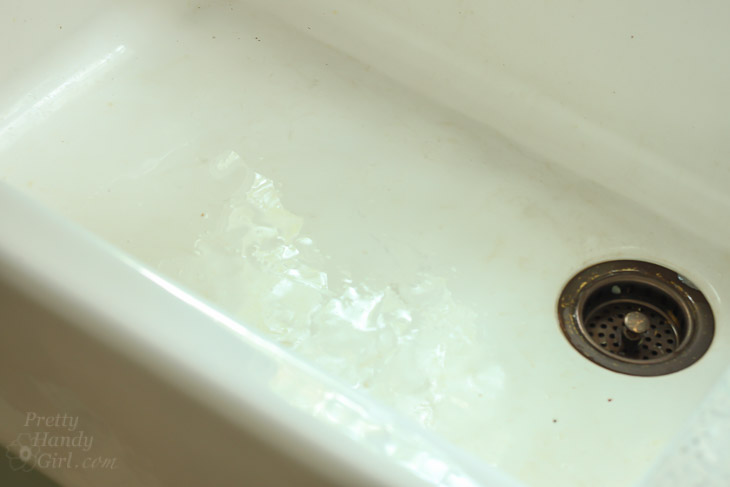
It will get dirty. A white sink will definitely show dirt and grime.

dirty-farmhouse-cast-iron-sink

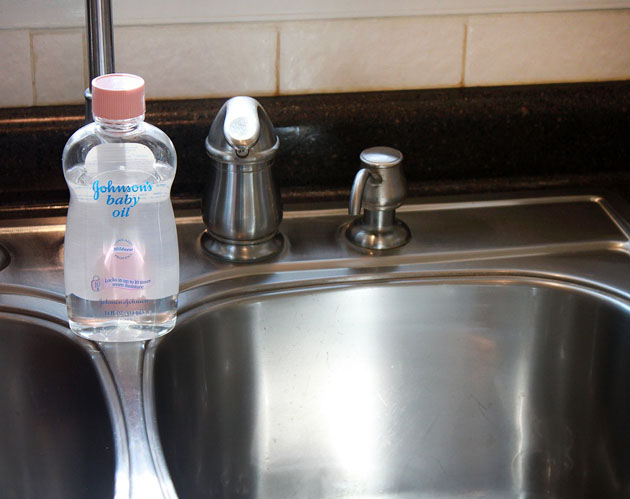
This was a bit of a bummer, as someone who had to constantly shine the surface of our old stainless steel sink with baby oil to hide the hard water spots. But, I’ve come to terms with it and only have to clean it once a week to keep it looking like new.

baby oil shine stainless steel

Fact #4:

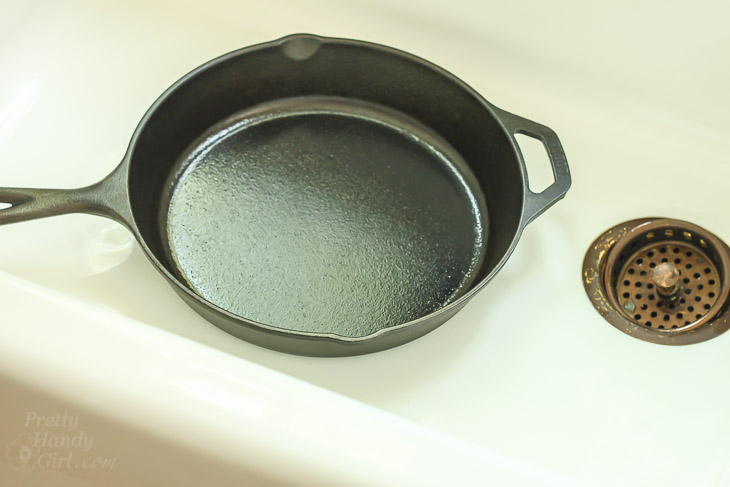
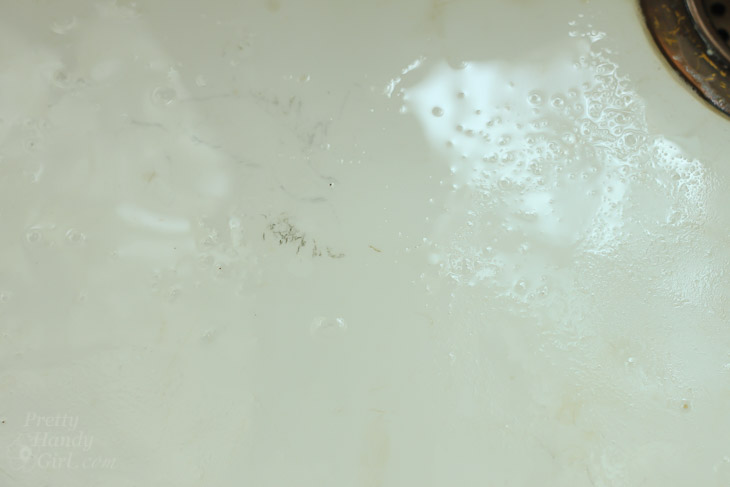
It will get scratched. Cast iron sinks will scratch, but I expected as much since we cook almost daily using heavy cast iron pans. Honestly I’m surprised we haven’t chipped the sink yet. It’s held up to a lot of abuse. In three years we have yet to chip our sink, but the marks and scratches have happened.
How to Clean a Cast Iron Sink or Tub | Pretty Handy Girl

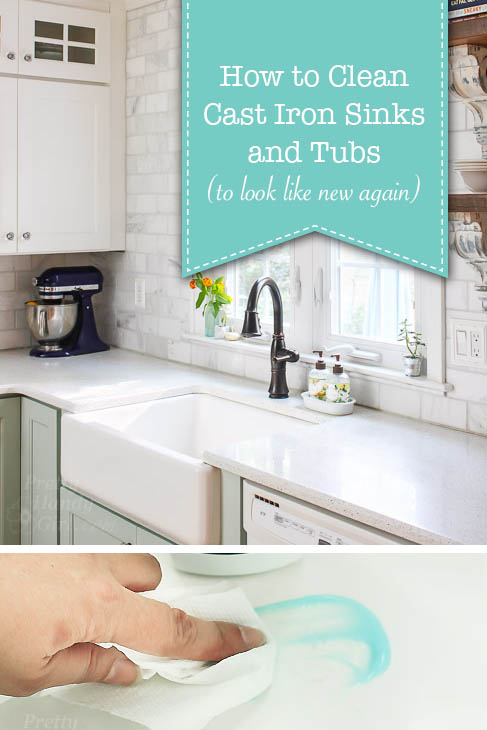
Luckily, I have the perfect solution to clean a cast iron sink (or tub) to help it look new again.

How to Clean a Cast Iron Sink or Tub | Pretty Handy Girl

Before:

dark scratched cast iron sink

After:

How to Clean a Cast Iron Sink or Tub | Pretty Handy Girl

Fact #5:

You can’t wash dishes on one side and set the clean ones in a dish drainer in the second basin. With one large sink, all the dishes in it will get wet. This was the one change that was less of an issue for us. We simply put our dish drainer on the counter. When we have company, I put the drainer out of sight under the sink.

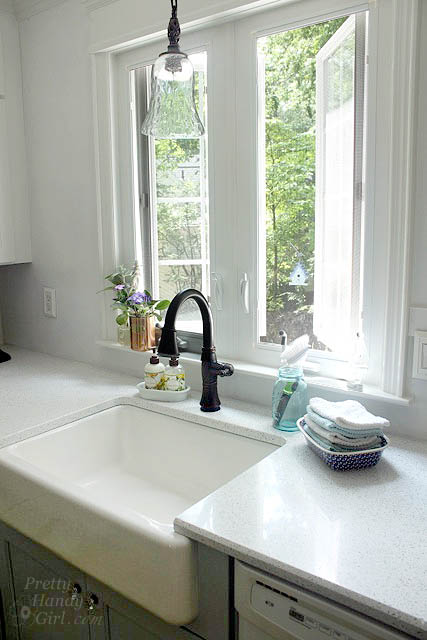
casement window over sink

Conclusion:

If we were to go back in time and do it again, would I buy a farmhouse sink again?

Absolutely! I still love the look. Cleaning the scratches every few weeks is no big deal. I absolutely hated our stainless steel sink because of hard water deposits and spots. Scratches are much less noticeable than the hard water deposits.

I LOVE having a big sink to clean dishes in. I feel a bit like Elaine enjoying the extra wide driving lanes Kramer created. Who doesn’t like a little more elbow room?

Best of all, I can hide dishes in it. Little known fact, my coffee mug and a knife were in the sink when I took this photo:

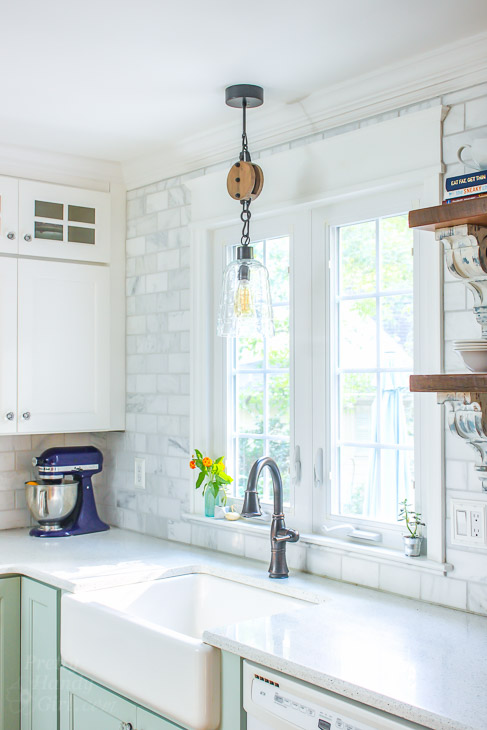
What No One Will Tell You About Farmhouse Sinks

The apron front farmhouse sink we have is this one. (affiliate link) If you decide to buy one, I think you will love it, as long as you are okay with those 5 Things No One Will Tell You About Farmhouse Sinks!

farmhouse sinks

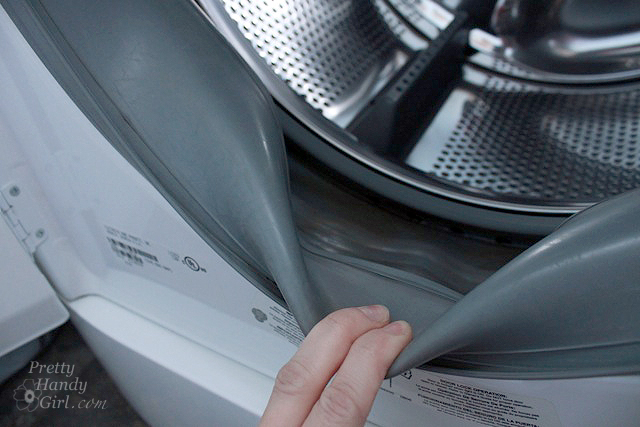
Does your HE Washer stink? Here’s what you can do about it:clean front load washer


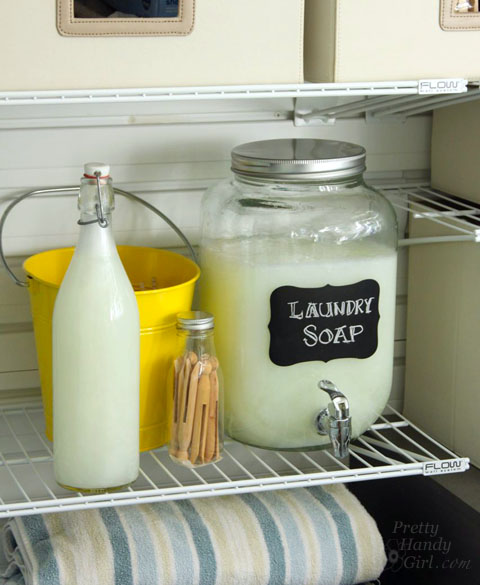
Want to save hundreds of dollars a year? Make my tested and approved DIY Laundry Detergent!DIY Laundry Detergent | Pretty Handy Girl


4 Ways to Remove a Broken Light Bulb | Pretty Handy Girl

4 Ways to Remove a Broken Light Bulb | Pretty Handy Girl

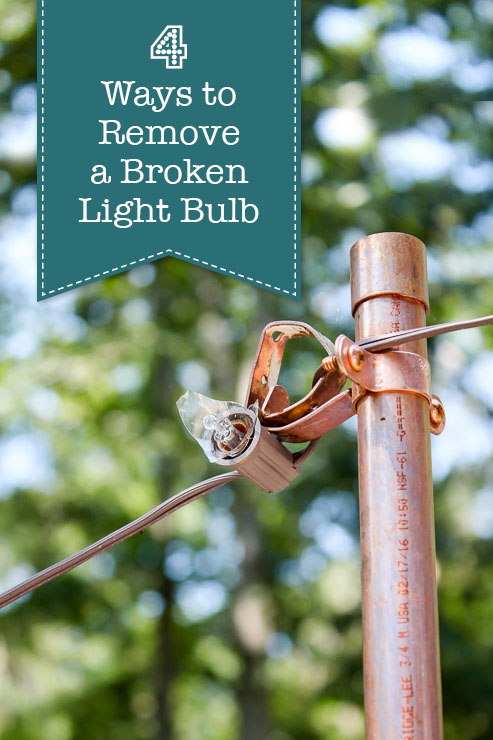
Have you ever found yourself staring down the base of a broken light bulb? You must resist the temptation to reach up and unscrew it with your fingers. Not a smart idea. Instead you can safely remove it using one of these 4 Ways to Remove a Broken Light Bulb.

Let’s get to it! Before you begin, make sure the light switch is turned off or the power has been turned off to the light.

The Potato Method:

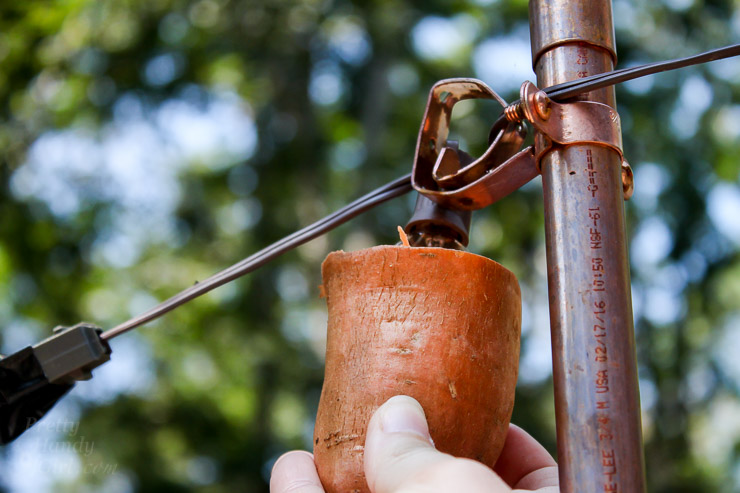
4 Ways to Remove a Broken Light Bulb | Pretty Handy Girl

The old method that has always been touted as the best way to remove a broken light bulb has been to use a potato. Push the potato onto the broken shards and turn clockwise to remove. This works well if there’s enough shards, but if the glass is gone you’ll need to try another technique.

The Sponge Method:

4 Ways to Remove a Broken Light Bulb | Pretty Handy Girl

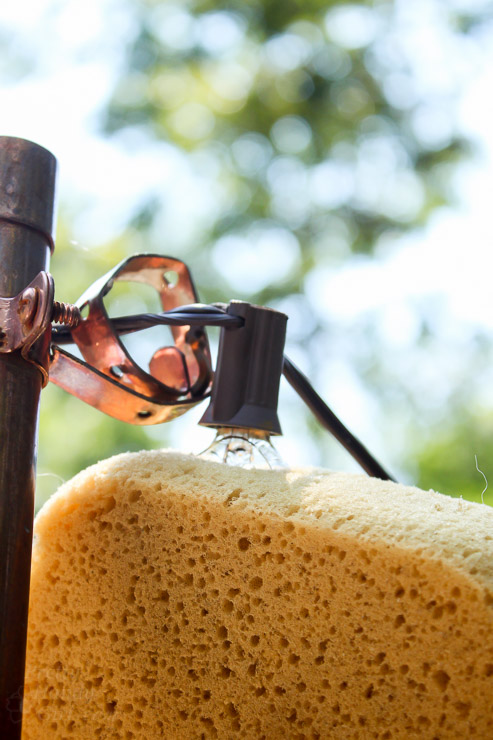
Similar to the potato method, if you have some shards showing, simply push the sponge onto the broken bulb and turn counter-clockwise. Depending on how tight the bulb is, the sponge may just tear.

The Newspaper Method:

4 Ways to Remove a Broken Light Bulb | Pretty Handy Girl

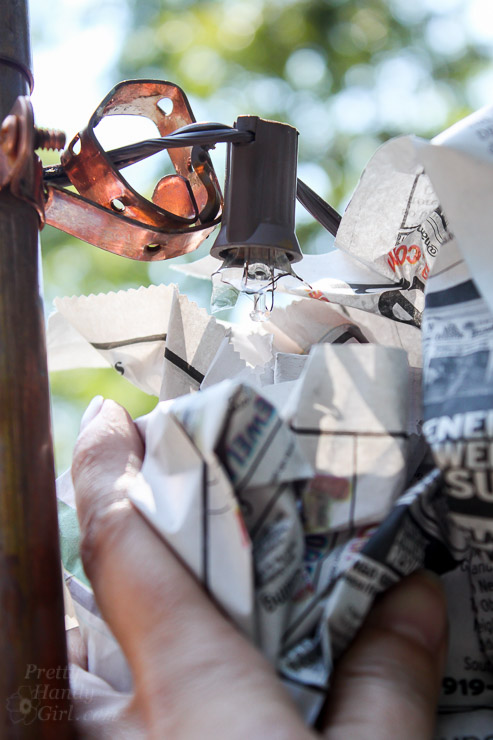
The newspaper trick works well for bulbs that have short or long shards. Ball up a wad of newspaper and grasp the bulb through the newspaper. Then turn counter-clockwise to unscrew the bulb. Then ball up the glass inside the newspaper and discard.

The Needle-nose Pliers Method:

4 Ways to Remove a Broken Light Bulb | Pretty Handy Girl

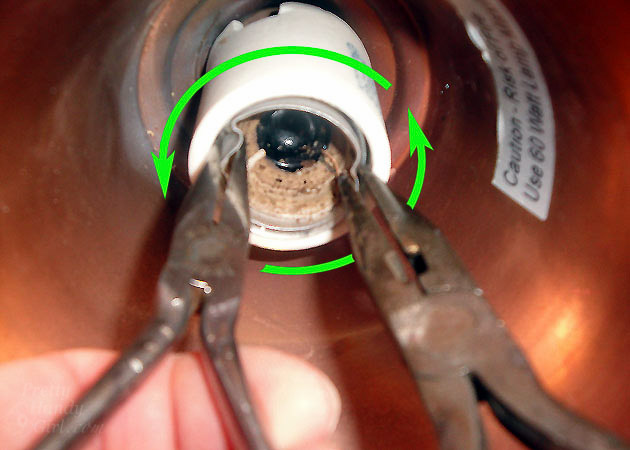
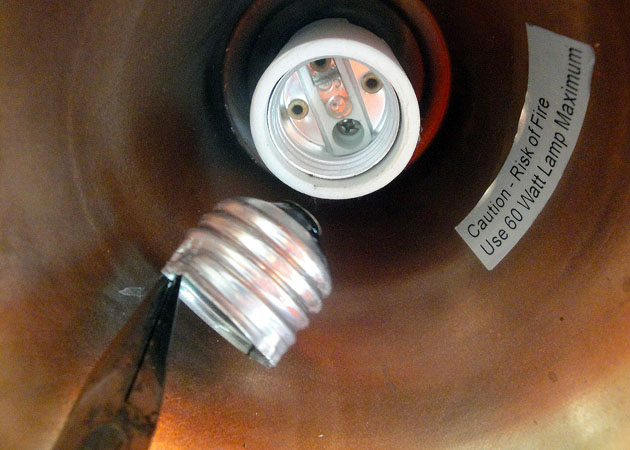
Finally, if all else fails (or you don’t have any shards), you can use the needle-nose pliers method. You must remove any glass carefully with the pliers. Then grasp opposite sides of the bulb base. Gently twist each base to bend the metal. Then turn both pliers to remove the broken bulb base.

Removed-bulb-end

Hope these tricks help! If you have any other tricks for removing a broken light bulb, I’d love to hear them.

PHGFancySign

Like this tip? You might find more useful tips in my 31 Days of Handy Home Fixes!