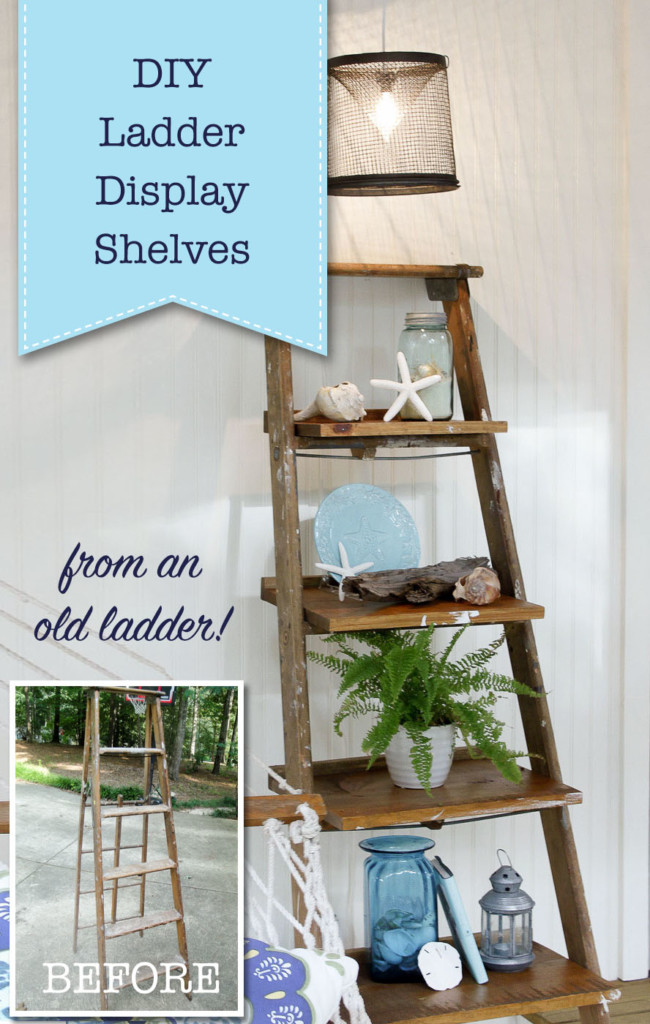
One of the easiest storage solutions is to create your own DIY ladder display shelves using an old ladder for the frame. Not only will you save time, but the money saved makes this project a winner in my book!

DIY Ladder Display Shelves

DIY Ladder Display Shelves

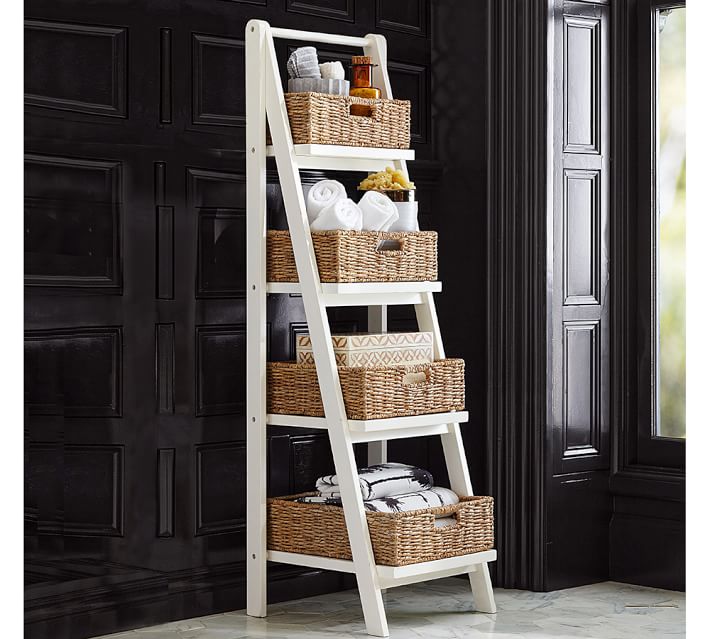
If you’ve been around for a while, you know these ladder display shelves start at $99 and go up depending on size. But, today’s tutorial shouldn’t cost you much and the result will be more personalized to your style (depending on how you finish it.)

pottery barn ladder display shelves
I know you’ve seen them, those adorable ladder display shelves, I really wanted one.  But, the price tags were enough to send me running from the store with my purse gripped tightly in my hands. I mean, really? The one above from Pottery Barn costs $229! I don’t know about you, but I really don’t like spending more than $50 on something I can build myself.

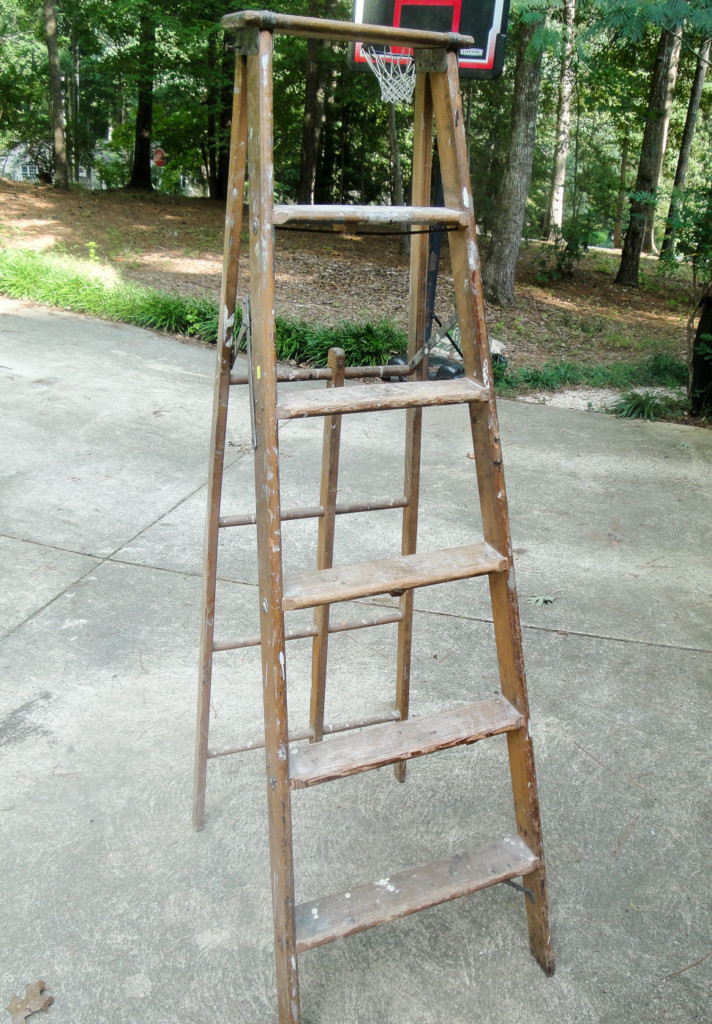
Fast forward a few weeks, and when I saw this ladder at the Habitat ReStore for $15, I knew it had the potential to fulfill my ladder display shelf dreams.

old rickety ladder
The skeptical cashier tried to persuade me not to buy the ladder, warning me not to climb on it because it was too rickety. But, who cares about rickety, I was in love with the paint splashes all over it!

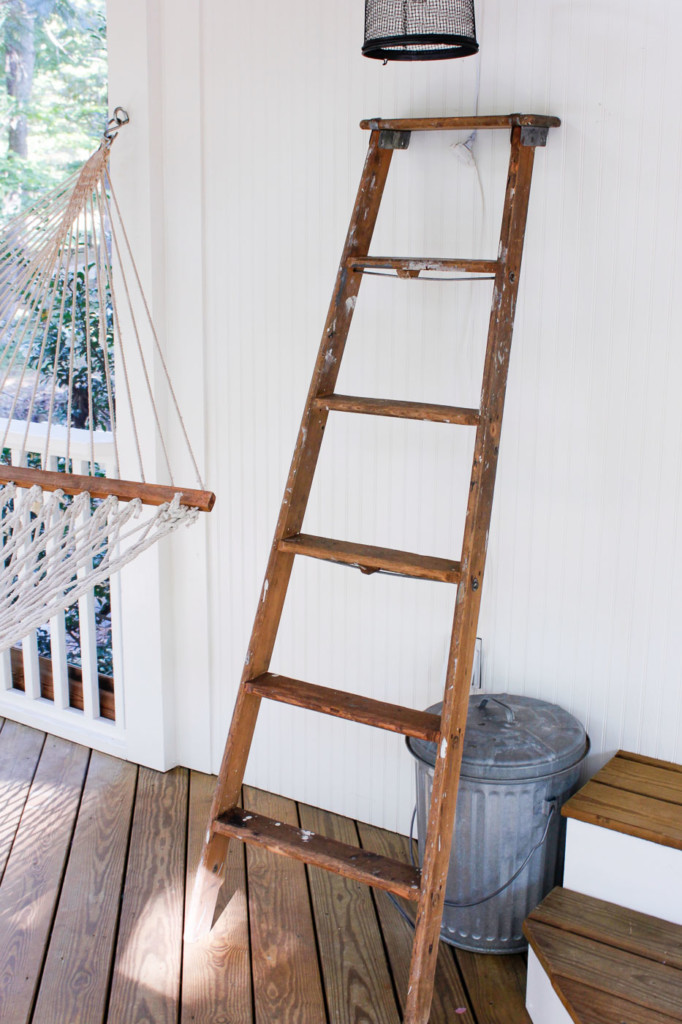
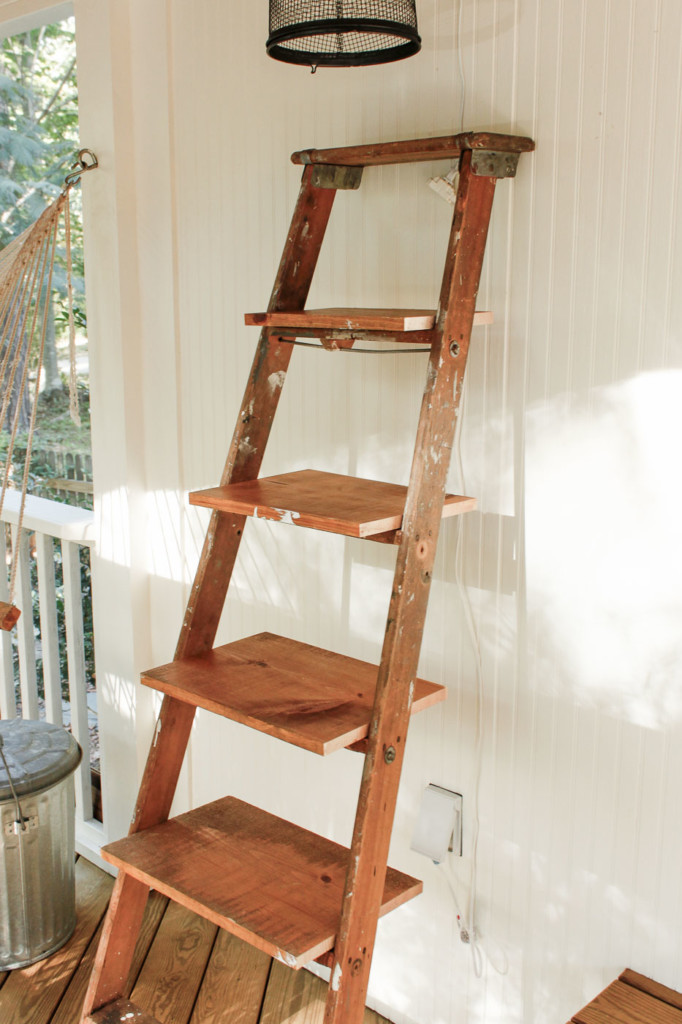
old ladder resting against white porch wall

So, I hauled the old ladder home (and received funny looks along the way because it was hanging several feet out the back of my car.) Little did they know that I was about to transform that old ladder.

Materials:

(I’ve included affiliate links for your convenience. I earn a small percentage from a purchase using these links. There is no additional cost to you. You can read more about affiliate links here.)

Instructions for Building DIY Ladder Display Shelves:

For this project, you can leave the back of the ladder intact, or pry off the top rivets to separate the front from the back. This gave me the ability to make two things from one ladder. (Be sure to read to the end to find out what I made with the backside!)

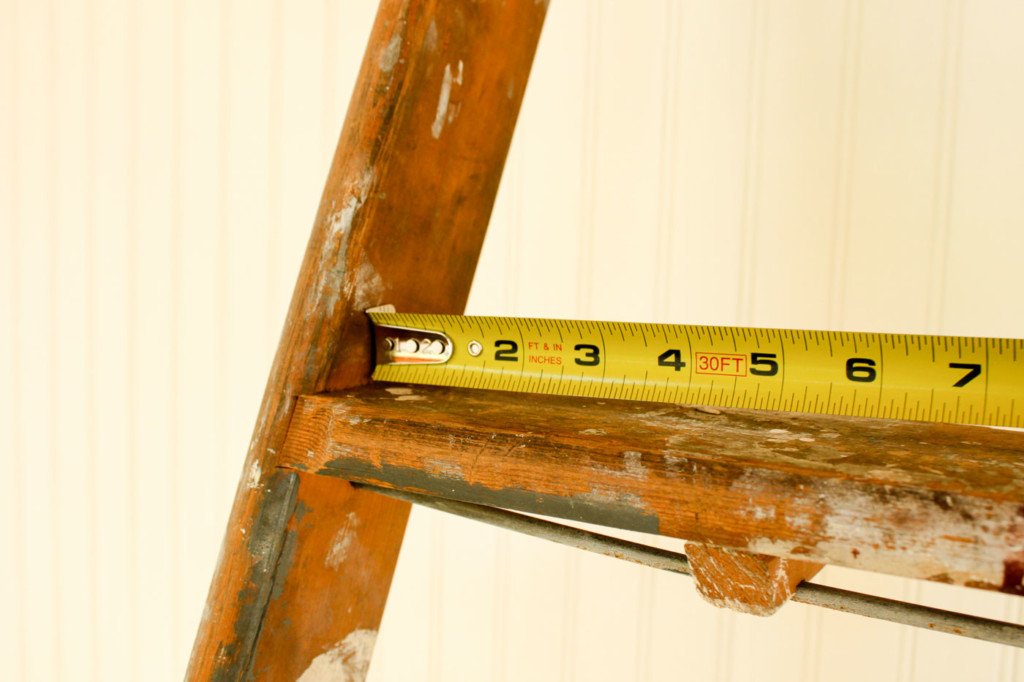
Start by measuring the width of each step (and subtract 1/8″ to account for the slant of the ladder.)

measure width of ladder steps

Use 1″ x 12″ pine boards or any size you choose. (I had some leftover shelving material I bought from a yard sale, so it was already pre-finished.)

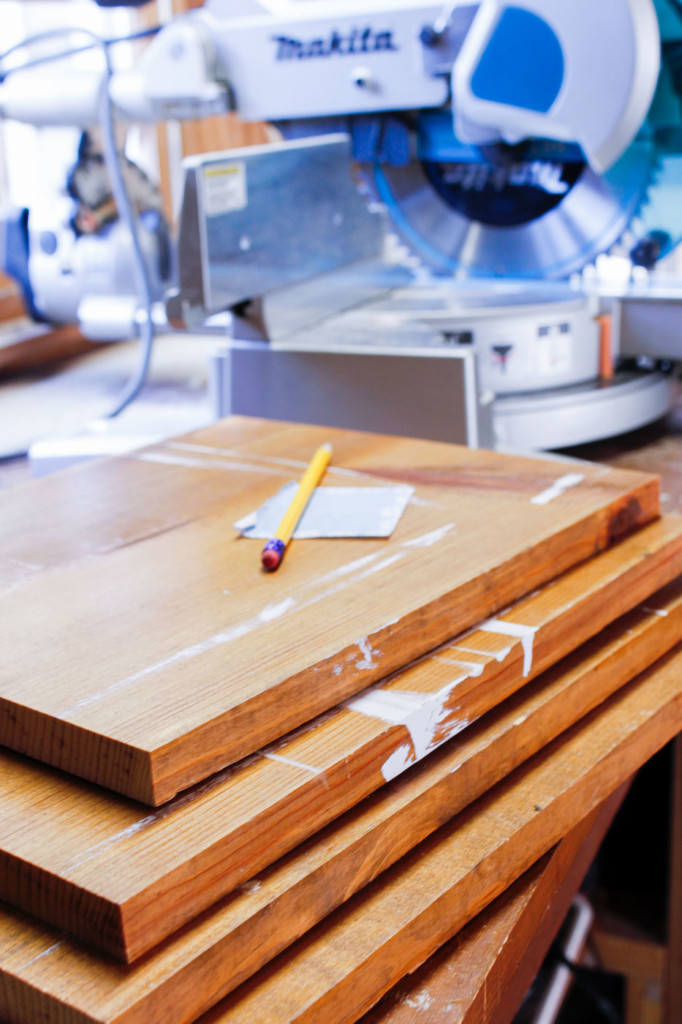
Cut the boards to the appropriate width on a miter saw or ask the lumber store to cut them for you. Yes, it was a total coincidence that my boards were covered in paint splotches too!

stack of 1x12 boards

Dry fit the boards to make sure they fit your ladder. My heart was thumping now because I could really see the project taking shape!

dry fit shelves on ladder

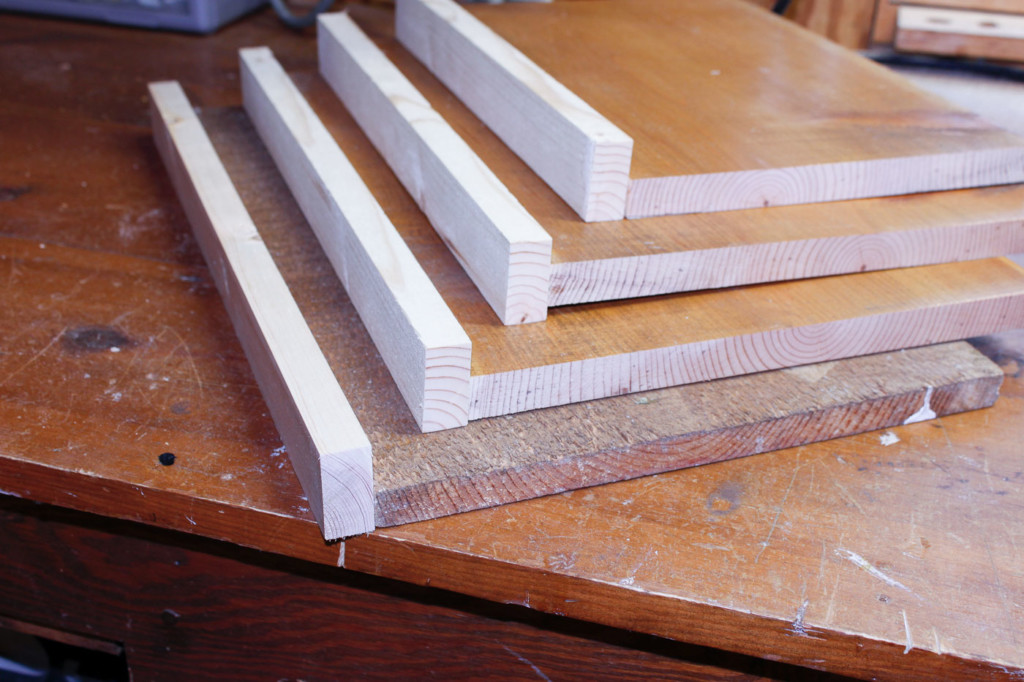
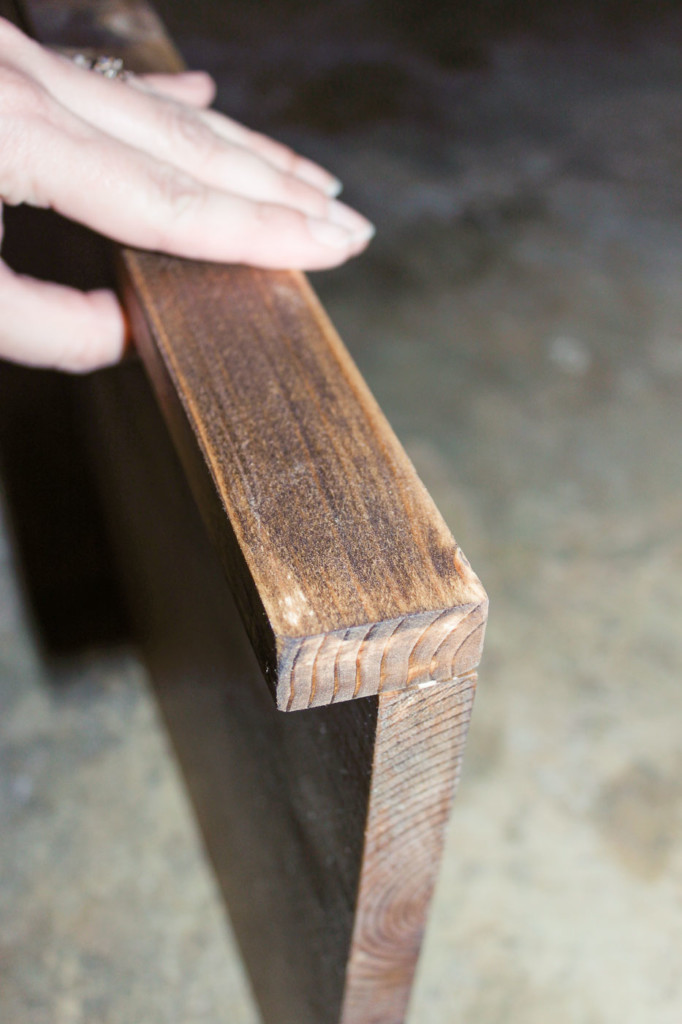
Next cut some 1″ x 2″ strips the same width as each shelf. These are for the backs of your shelves. If necessary stain your shelves or paint them to match your ladder. Or paint the entire ladder and shelves with chalk paint or a paint plus primer.

dry fit 1x2's to front of shelf boards

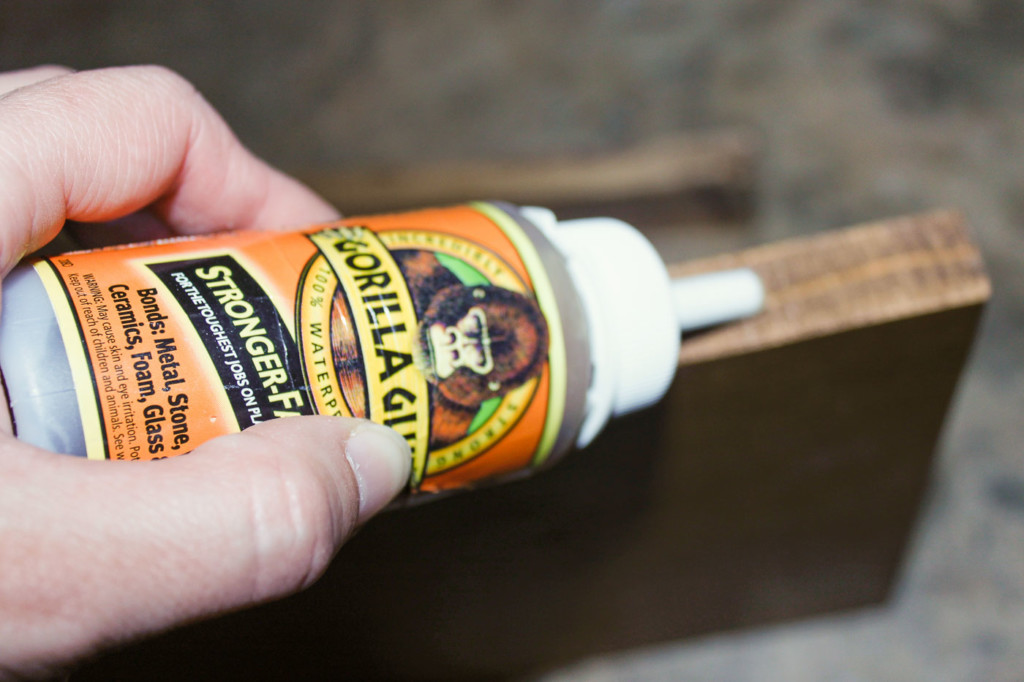
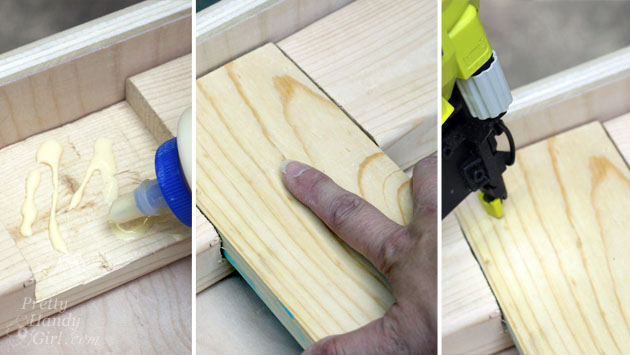
Attach the 1×2 strips to the back of the shelves, using wood glue.

adding wood glue to front of shelf

Hold until the glue has gripped the trim piece.

attach shelf front

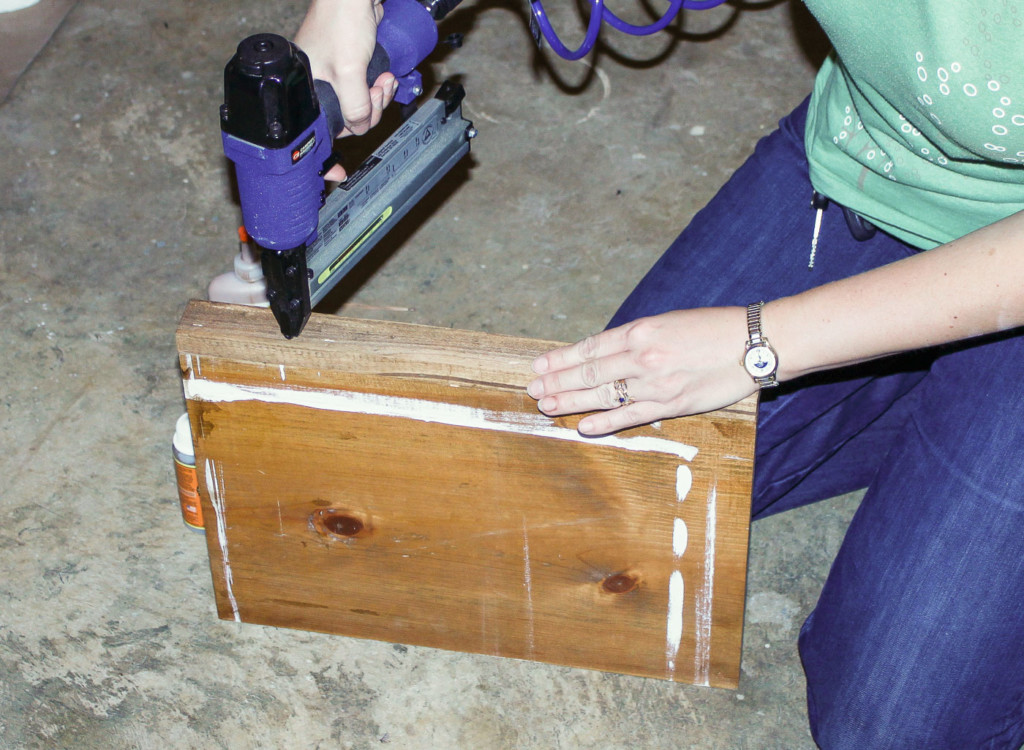
Or nail the 1″x2″ pieces to the shelves.

attach front of shelf using brad nailer

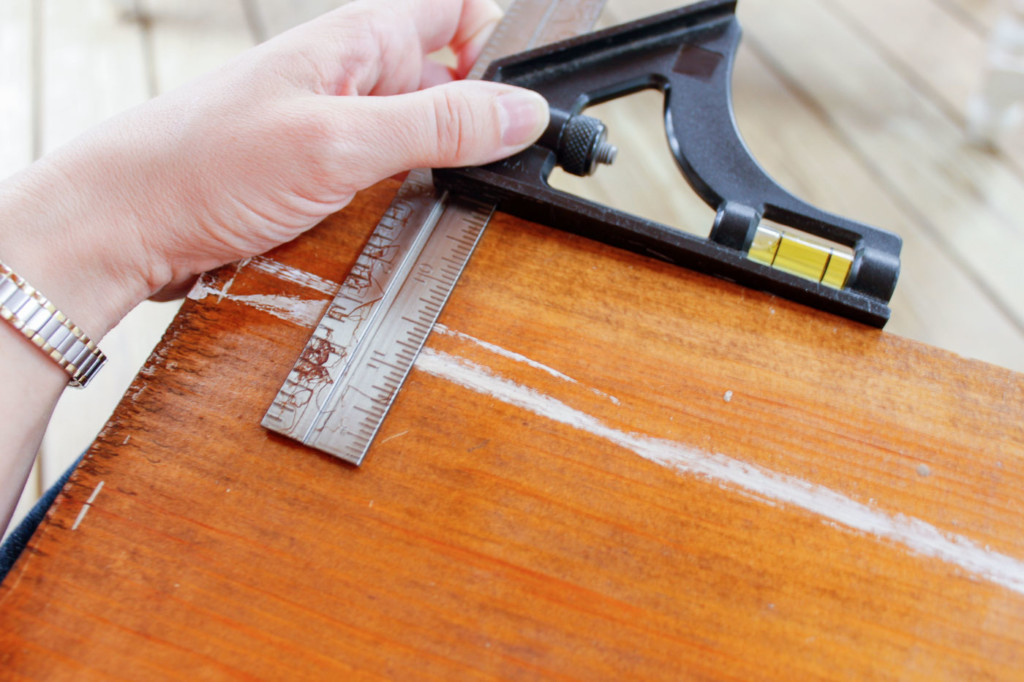
Choose how far back you want your shelves to rest on the ladder steps. Using a combination square or ruler, mark a line on all the shelves. (I chose a 3″ setback.)

using carpenter square to measure depth of shelves

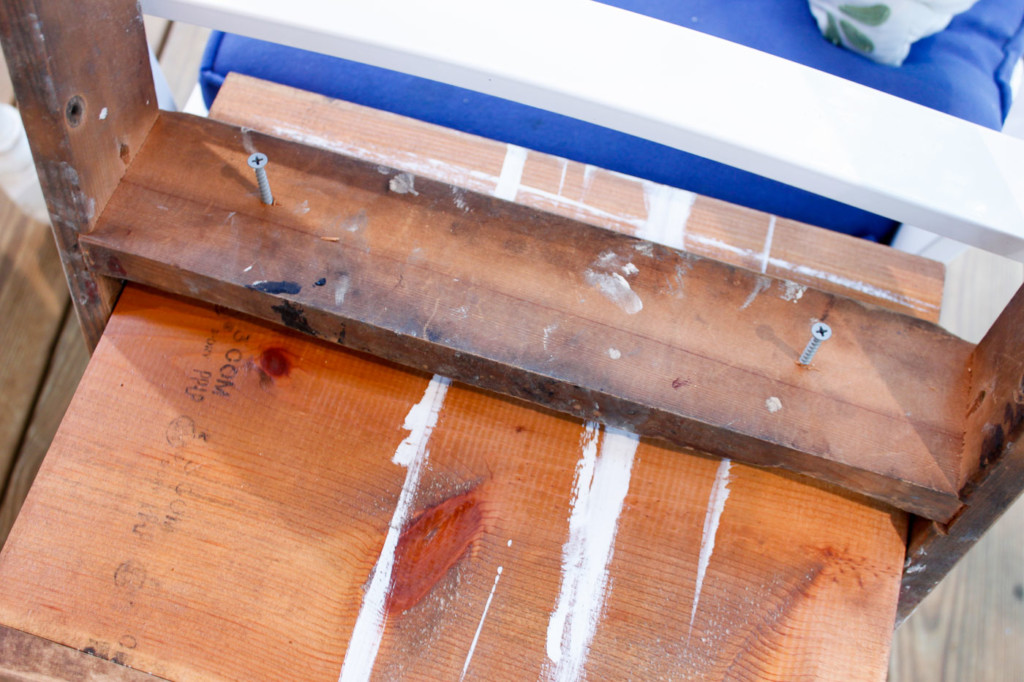
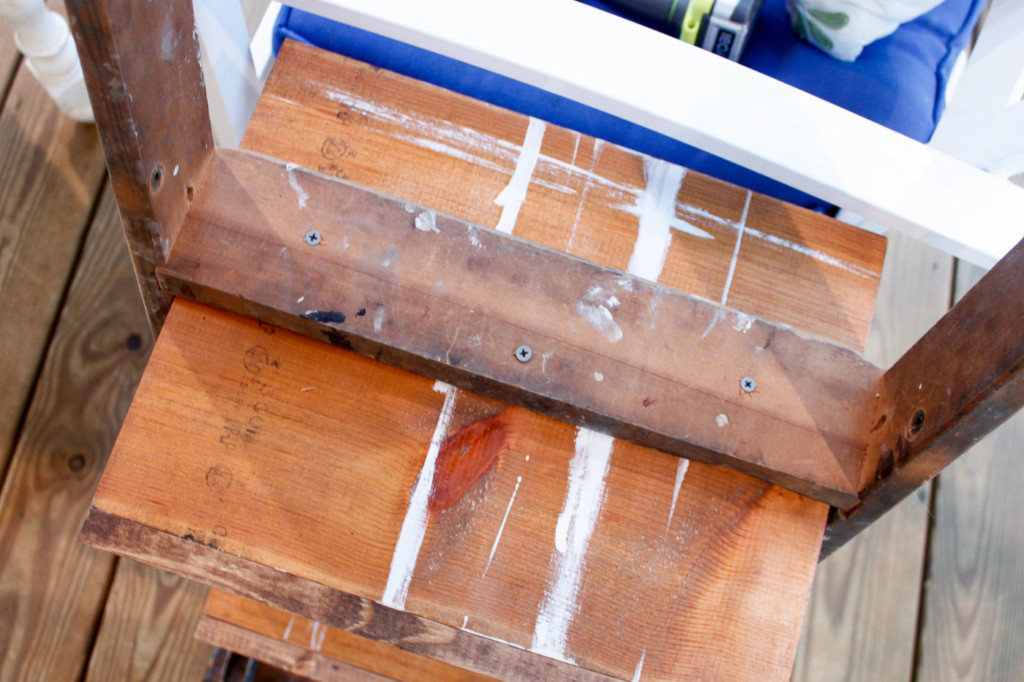
Pre-drill the location for the screws on each ladder step. Turn your ladder upside down and set the screws inside the holes. Line up your pencil lines on the shelf to your ladder step.

2 screws under ladder step into shelf

Clamp the shelf, or get a buddy to hold the shelf as you drive the screws into the bottom of each. Repeat the process for all the shelves.

3 screws under ladder step into shelf

Then flip the ladder back over and admire! My total cost was $15 because I had the other materials on hand. But, even if you have to buy the screws and lumber, it should cost a lot less than a Pottery Barn shelving unit at $299!

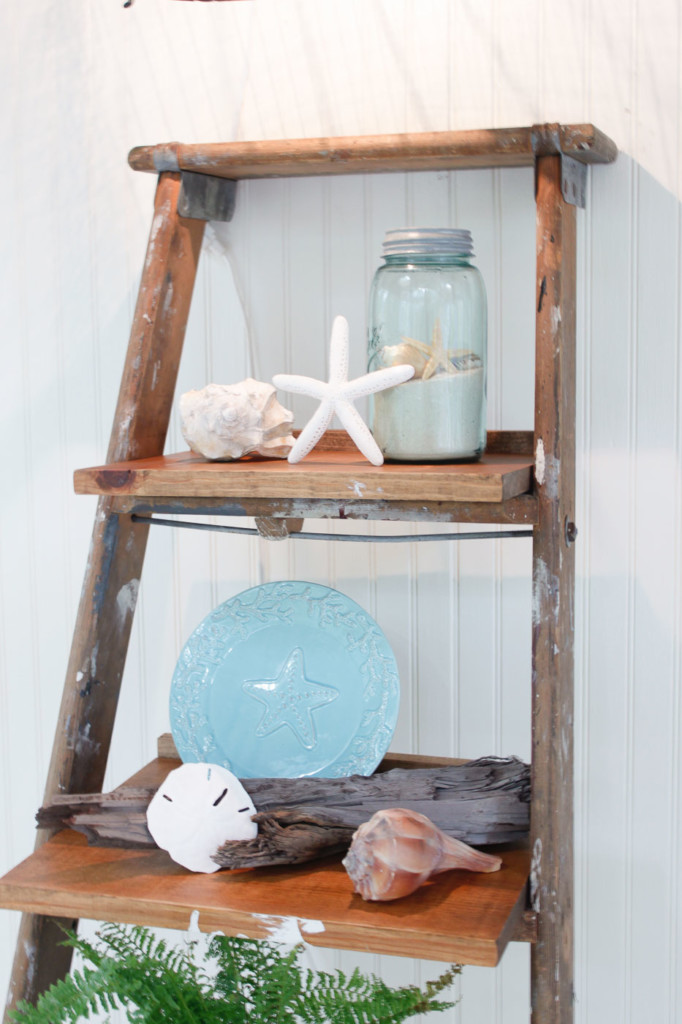
My favorite part about this shelf is the paint splashes.

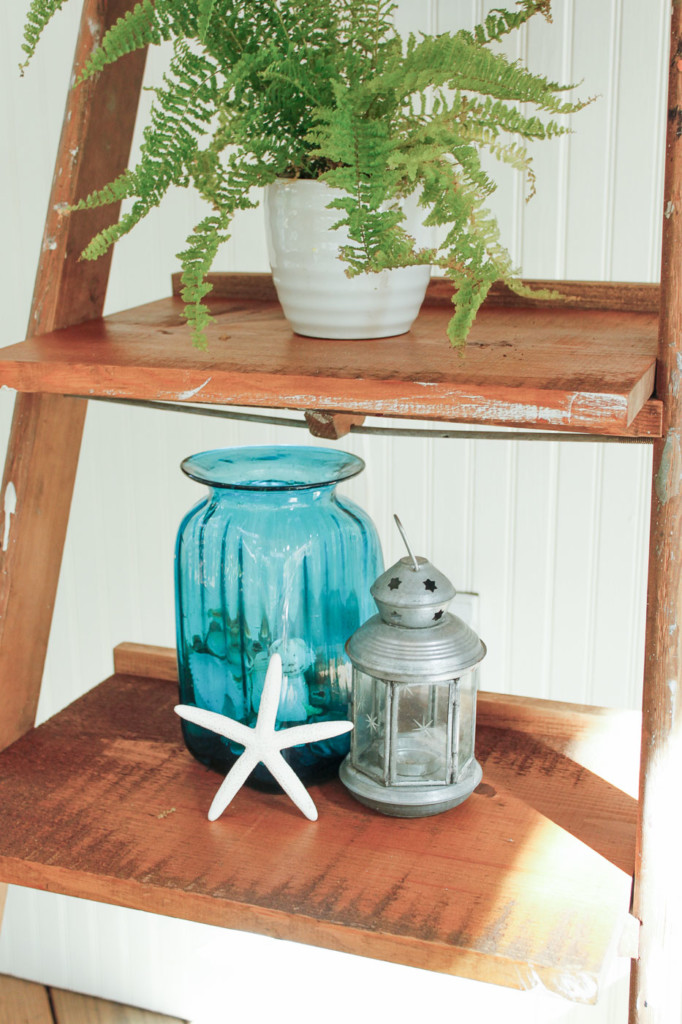
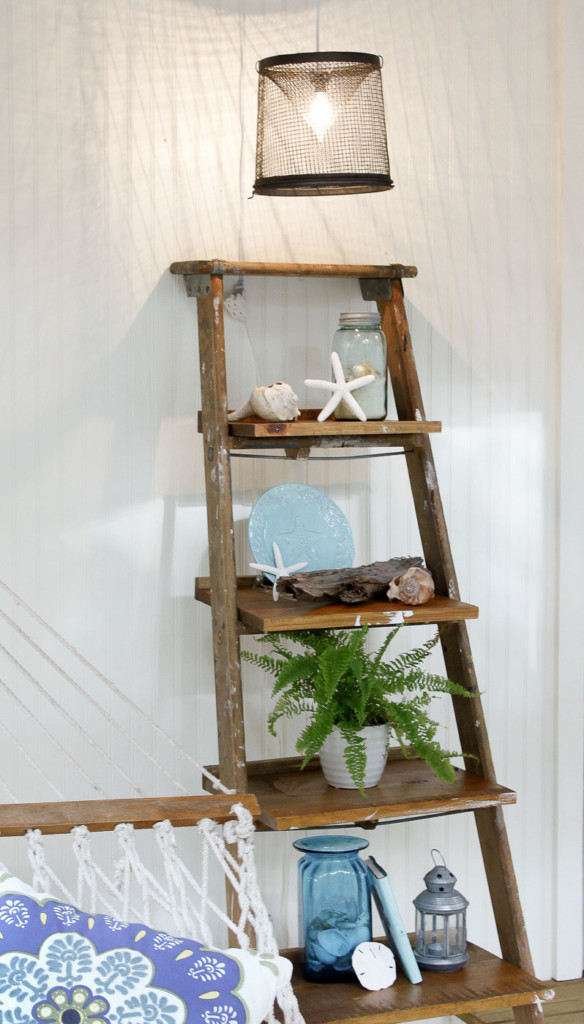
This DIY Ladder Display Shelf sits on our screen porch. But, this beauty would look good anywhere in your home.

close up ladder shelves decorated with coastal decor

I’m contemplating making one for my new master bathroom.

close up rustic ladder shelves

The minnow trap hanging pendant light is also an easy DIY project.

ladder display shelf resting against wall

So what do you think? Do you like it? I bet you could build one of these ladder display shelves for yourself in an hour or two.

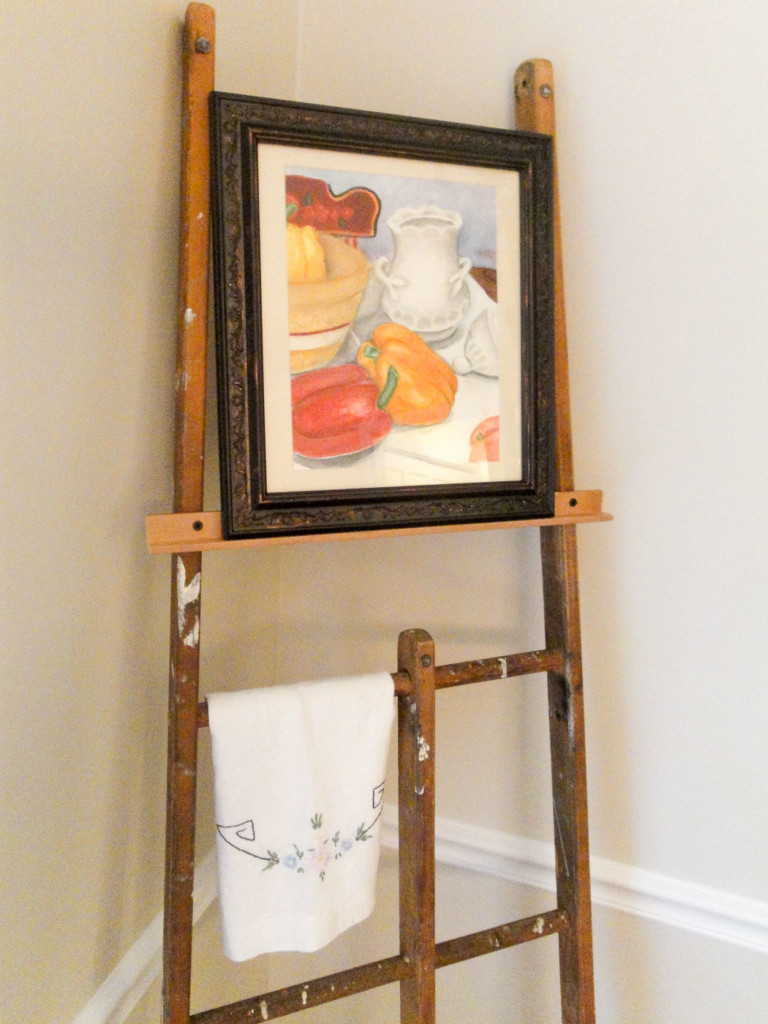
Oh, I almost forgot, if you are wondering what I did with the back of the ladder. You can see how I gave it a quick makeover turning it into a display easel.

ladder easel

Have a great week and I’ll see you soon.

signature

Pin this project to save it or share with a friend!

DIY Ladder Display Shelves

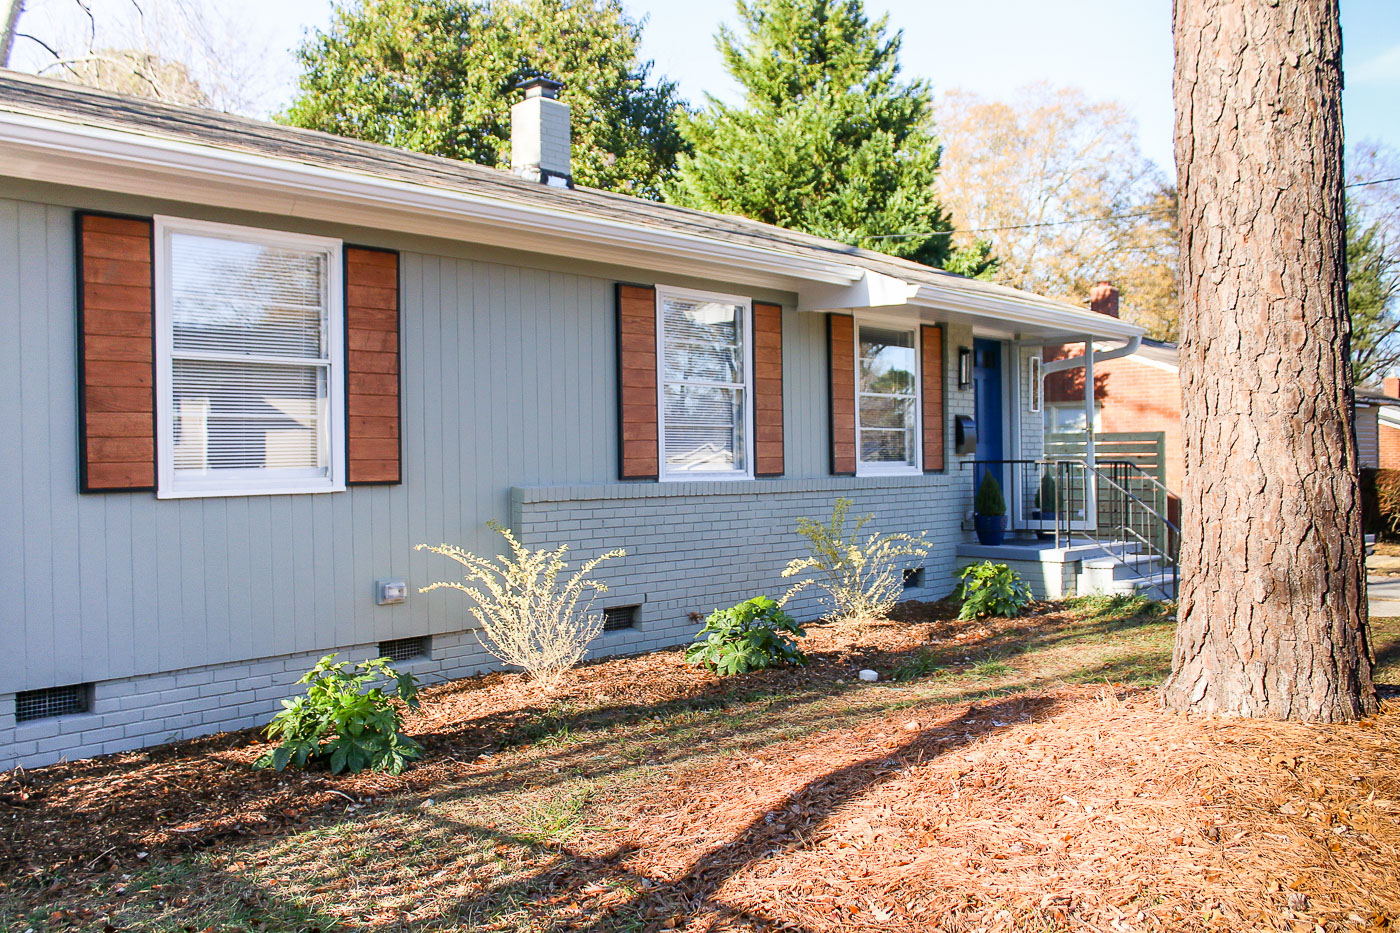
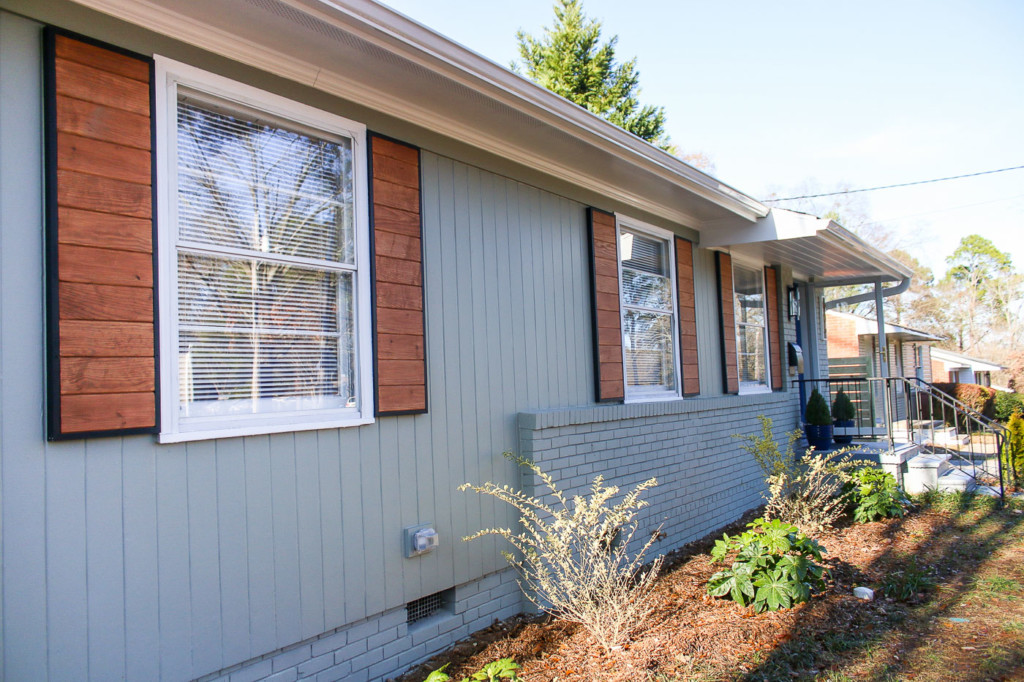
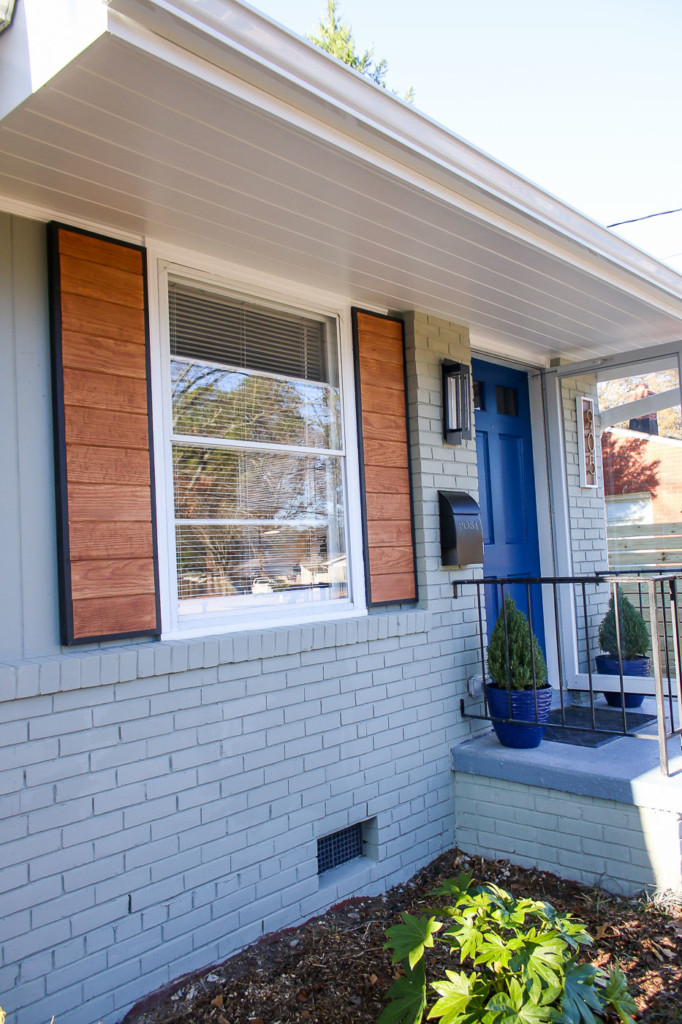
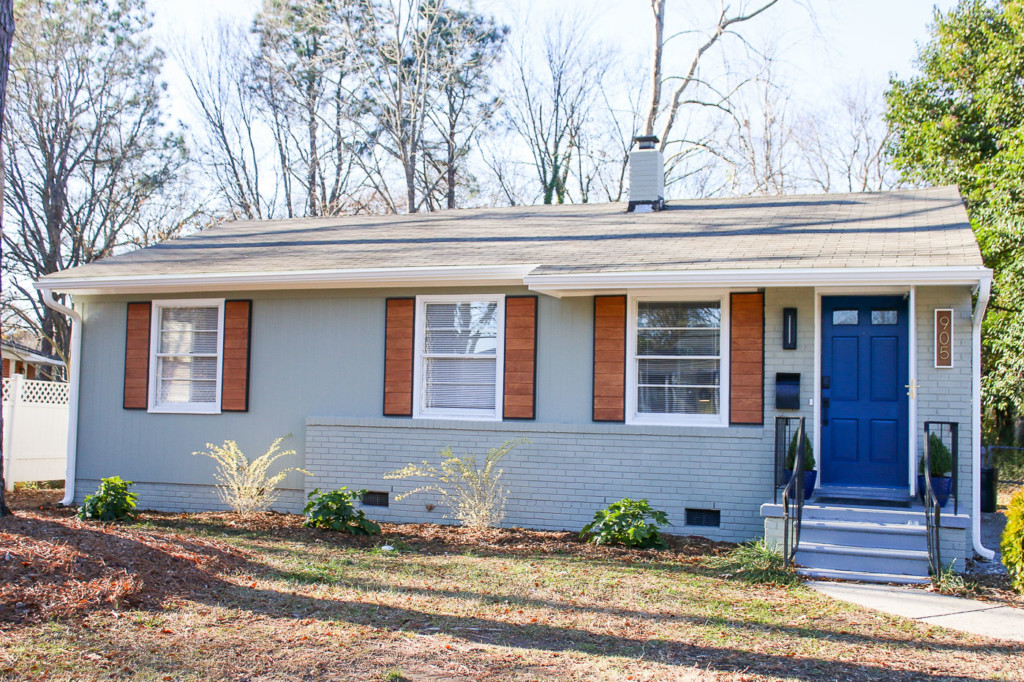
1905's ranch with modern wood shutters

It’s time to reveal how to build custom wood shutters! I designed these easy to build wood shutters for the Millie’s Remodel project and now I can’t wait to share the tutorial with you! It’s a super simple DIY project.

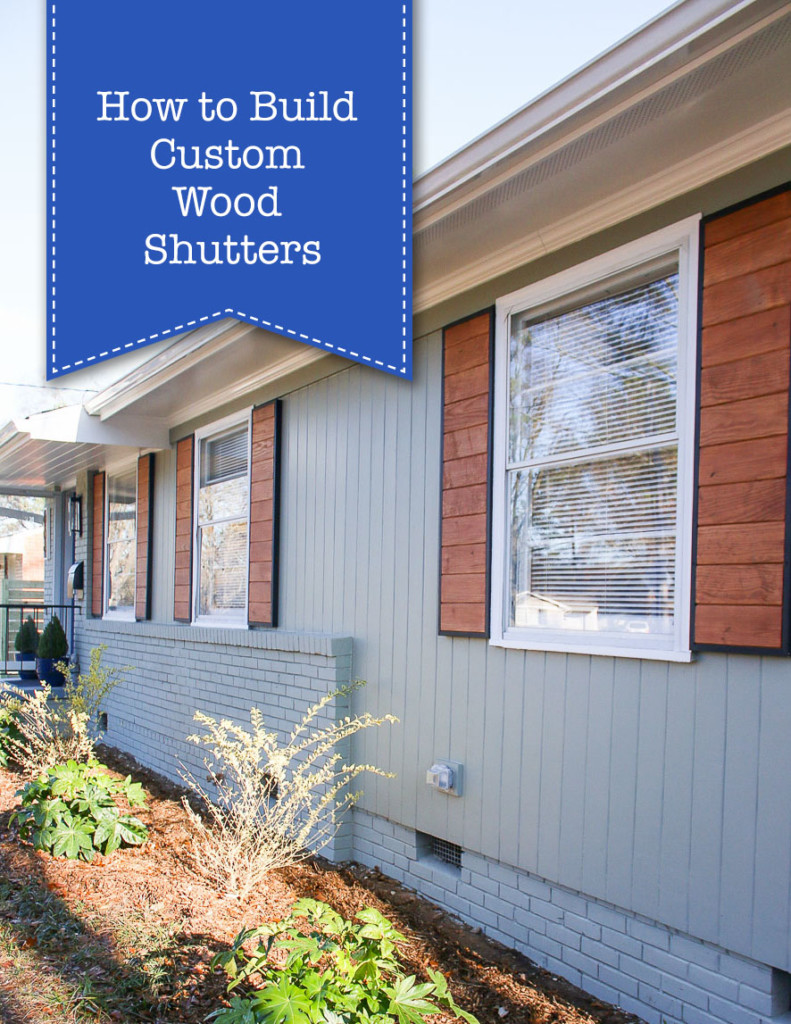
How to Build Custom Wood Shutters – A Super Simple DIY

When I decided I wanted to build shutters for the Millie’s Remodel house, I thought they had to be difficult to make or everyone would be building their own shutters. I was definitely wrong! That being said, there are other shutter styles you can build that are also super simple. But today I’m going to show you how to build these modern shutters (but if you like the farmhouse look, you’ll be surprised how quickly you can alter the look by flipping these shutters over! Be sure to read to the end to see this quick change.)

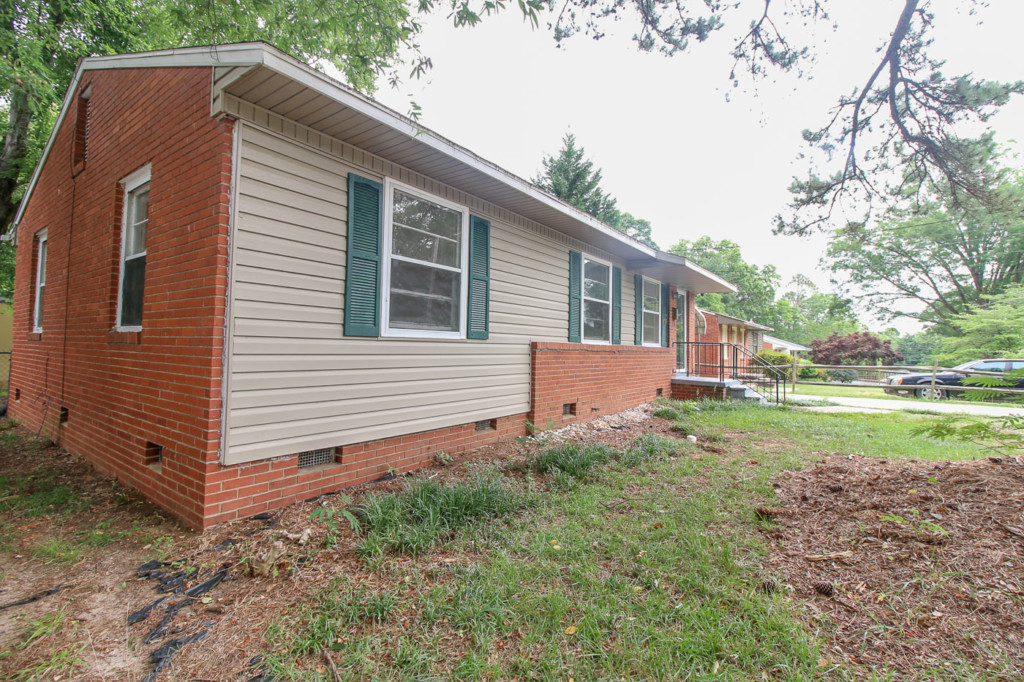
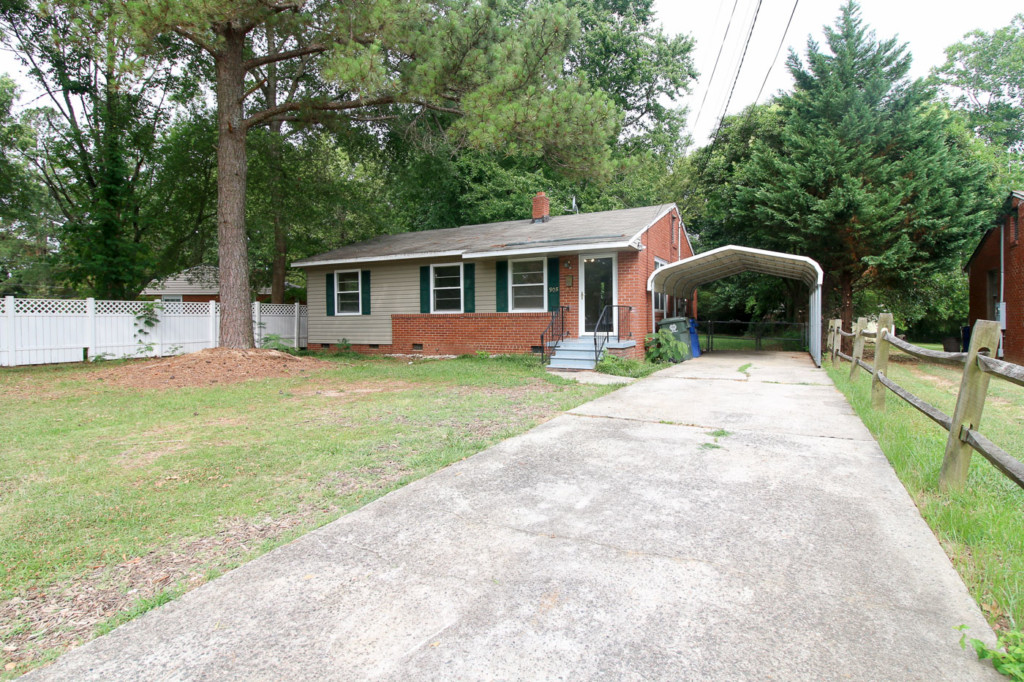
Let’s back up real quick. When I bought the Millie’s Remodel house, it came with these awful vinyl hunter green shutters. They just weren’t doing anything for the curb appeal of this house. I knew they had to be replaced or we’d be stuck in the 90’s with those hunter green shutters. Sure, I could have tried painting them, but I didn’t like the curved top, nor did I like that the shutters were a little too narrow for the windows.

The new shutters are slightly wider than the vinyl ones. That’s because shutters should be at least one half the width of my window. (Not that I’ll ever close them.) They should look wide enough to cover the window when closed.

1905's ranch with modern wood shutters

See what I mean? These shutters look much more proportional to the window size, don’t you agree?

Design Inspiration:

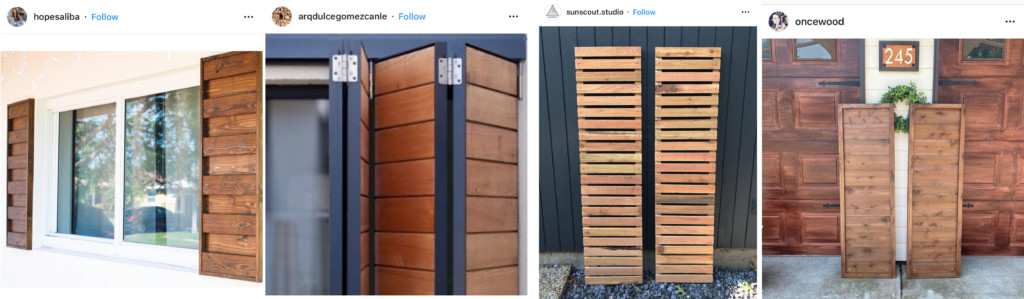
I’d be remiss if I didn’t mention that I scoured Instagram for some shutter design ideas that would fit the modern style of the house. Luckily I stumbled upon these Instagrammers with some stylish shutters. I’ll link to their accounts in the description below if you want to follow them.

modern wood shutter inspiration

@HopeSaliba | @ArqDulceGomezCanle@SunScout.Studio@OnceWood

Exterior Progress:

As you saw, when I bought the house it had khaki vinyl siding and green vinyl shutters.

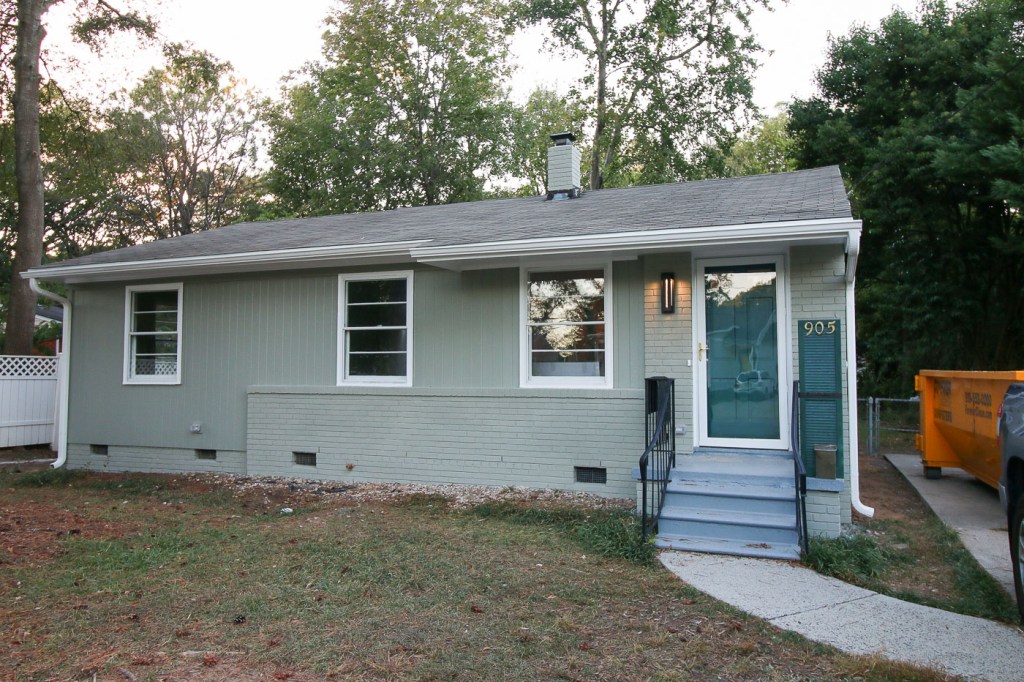
We removed the vinyl siding to discover the original wood siding underneath in pristine condition! Then my painter performed his magic by painting the exterior with a specific paint made for masonry. You can see more of the exterior transformation and learn about the paint we used here.

painted brick house Sage Advice by Romabio

Will you look at how naked the house looks, it’s definitely time to build those new custom wood shutters.

How to Build Custom Wood Shutters

Let’s get building and you’ll see how simple it is to create your own modern wood shutters!

1905's ranch with modern wood shutters

Materials:

(I’ve included affiliate links for your convenience. I earn a small percentage from a purchase using these links. There is no additional cost to you. You can read more about affiliate links here.)

Stain Colors:

Instructions:

The best way to see how to build these shutters is to watch the video and then follow the steps below. Here’s that video tutorial to watch:

Safety Gear:

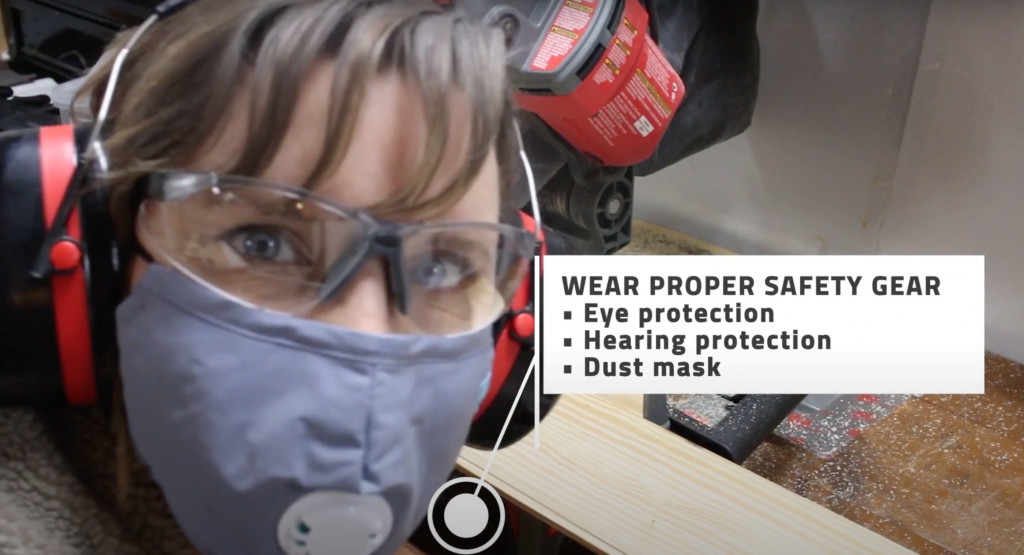
Before we get building, let’s break out some appropriate safety gear.

Be sure to wear a dust mask, safety glasses, and hearing protection. Now let’s get busy.

Safety When Ripping 2×4 Studs:

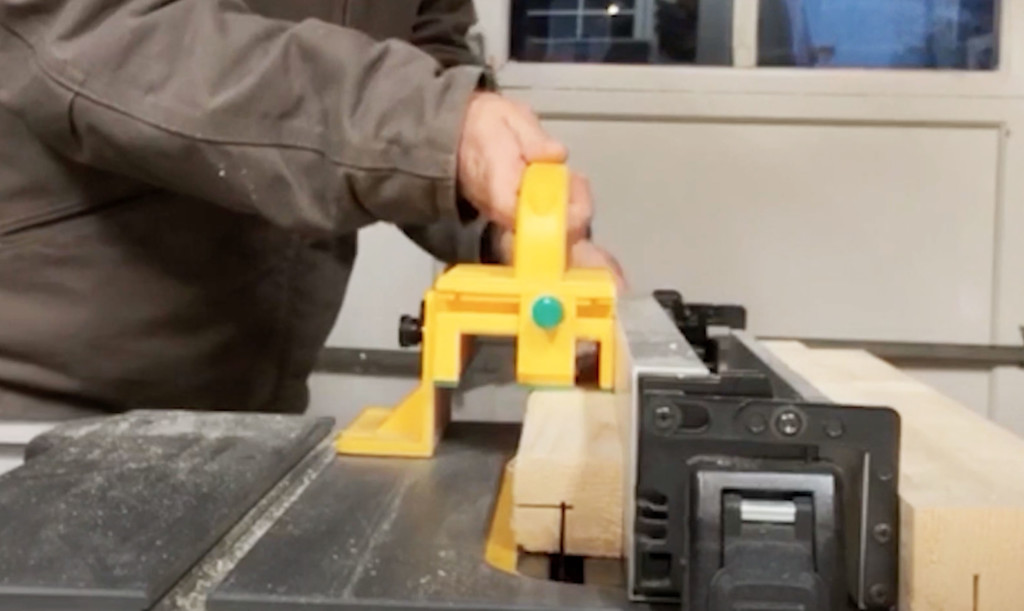
To make these shutter frames, I chose to rip 2x4s in half. I’ve found it’s easier to get straight 2×2’s this way, but if you prefer not to rip studs, go ahead and purchase 2x2s. If you decide to rip 2×4’s in half, make sure you know these safety tips.

  1. Never force the lumber through the saw.
  2. Never wear gloves or jewelry that can get caught on anything.
  3. Use a push block as you feed the lumber through the saw. This keeps your fingers away from the blade and gives you more control of the board.
  4. Never reach over the saw blade.
  5. Use an outfeed support to catch and support your lumber as it exits the saw.
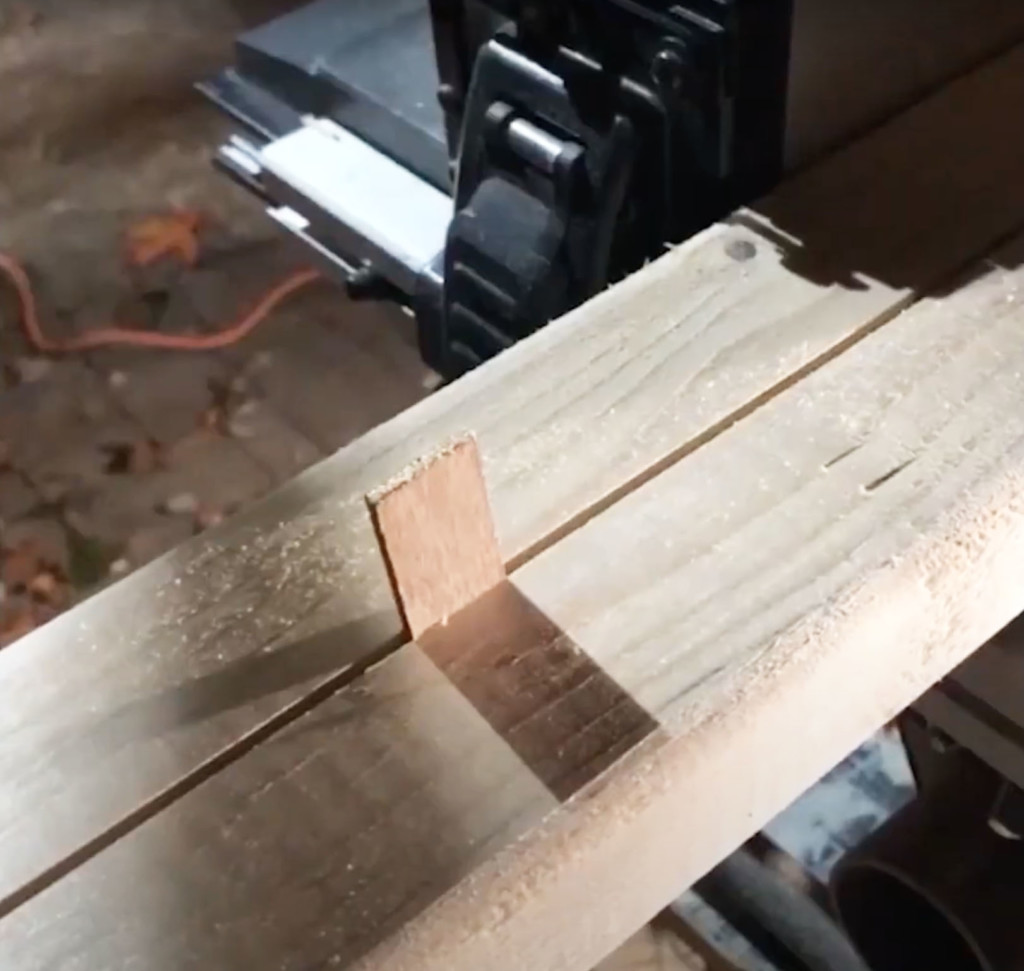
  6. As the blade cuts through the 2×4 lumber, the wood may have a tendency to pinch the back of the blade (especially if you are ripping longer boards.) To prevent pinching and make cutting easier, stick a shim or wedge into the cut after it exits the blade. You can see this more clearly in the video.

For more table saw safety tips, read this Table Saw Guidelines post.

Cutting a Rabbet Channel on the Frame:

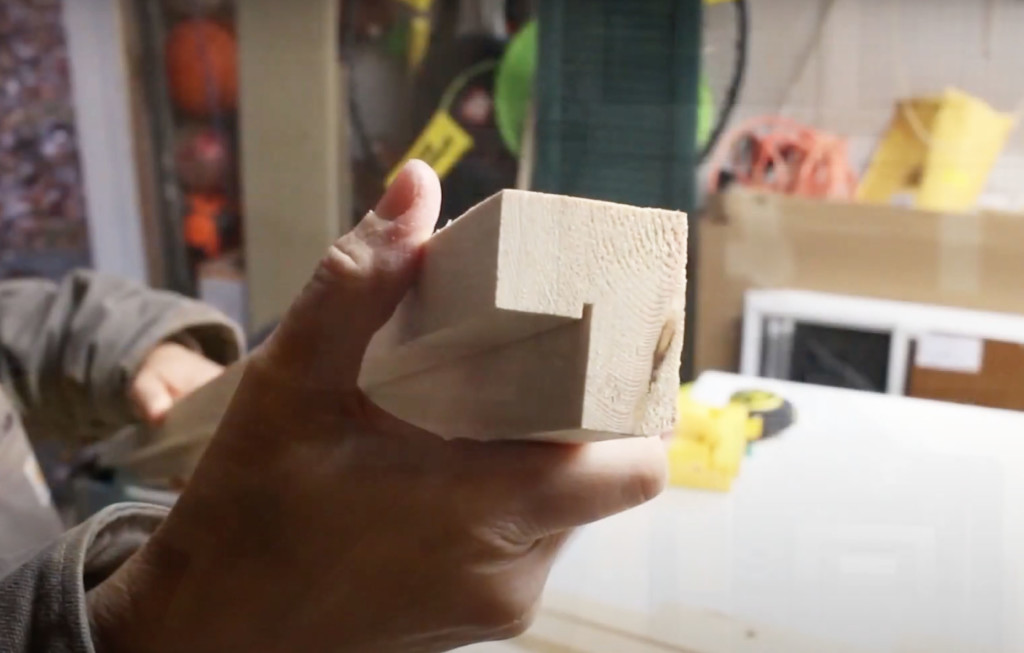
After ripping the 2x4s in half, you may want to square off the edges (removing the rounded edges.) Now it’s time to cut a rabbet channel into the corner of the 2×2.

To cut the rabbet, center your table saw blade on the 2×2. Raise the blade to slightly more than ¾ of an inch. Then run the 2×2 through the table saw. Rotate the 2×2 ninety degrees and run it through the table saw again. This will leave you with a rabbet channel on the corner of your 2×2.

Body of the Shutters:

Determine the width of your shutters. Ideally, the width of your shutters when finished should equal ½ of your full window width. To get the width of the tongue and groove body pieces, Subtract the width of your frame (about 3/4″ in width x 2) from 1/2 of your window width. Use this measurement to cut your tongue and groove pieces to size.

The shutter height should be the same height as your window. Layout the tongue and groove planks together fitting them together. Then determine how many you need to make your shutter. You may have to rip one or two on the table saw to get your desired height.

Building the Frame:

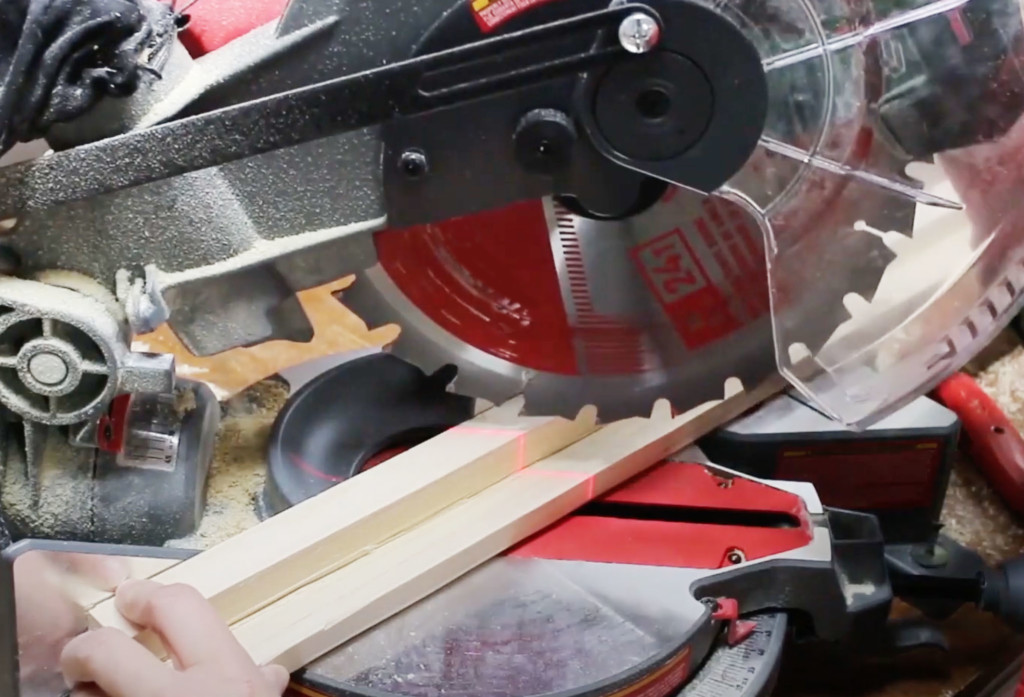
Cut one end of your 2×2 at a 45-degree angle (the short side will face in toward the rabbet groove.)

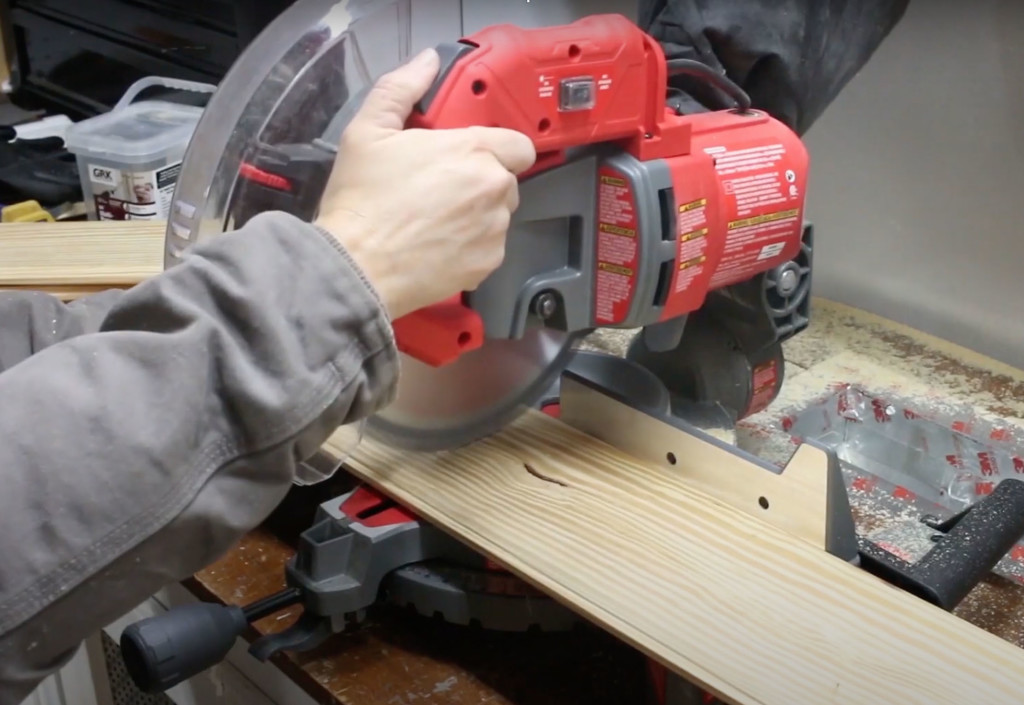
Line the inside edge of your frame piece up with the end of one of the tongue and groove boards. Mark on the opposite side of the frame where the tongue and groove board ends. Now cut the frame piece to length on the miter saw.

Time to check your fit! If the frame fits tight against the tongue and groove board, use the top frame piece as a template to cut an identical one for the bottom frame piece.

Time to cut the side frame pieces. Figure out the height of your shutters and cut the sides to size.

After all the frame and body pieces are cut, sand them to remove any rough spots. I like to sand once with 180 grit sandpaper, then switch to 220 grit.

Stain the Shutter Pieces:

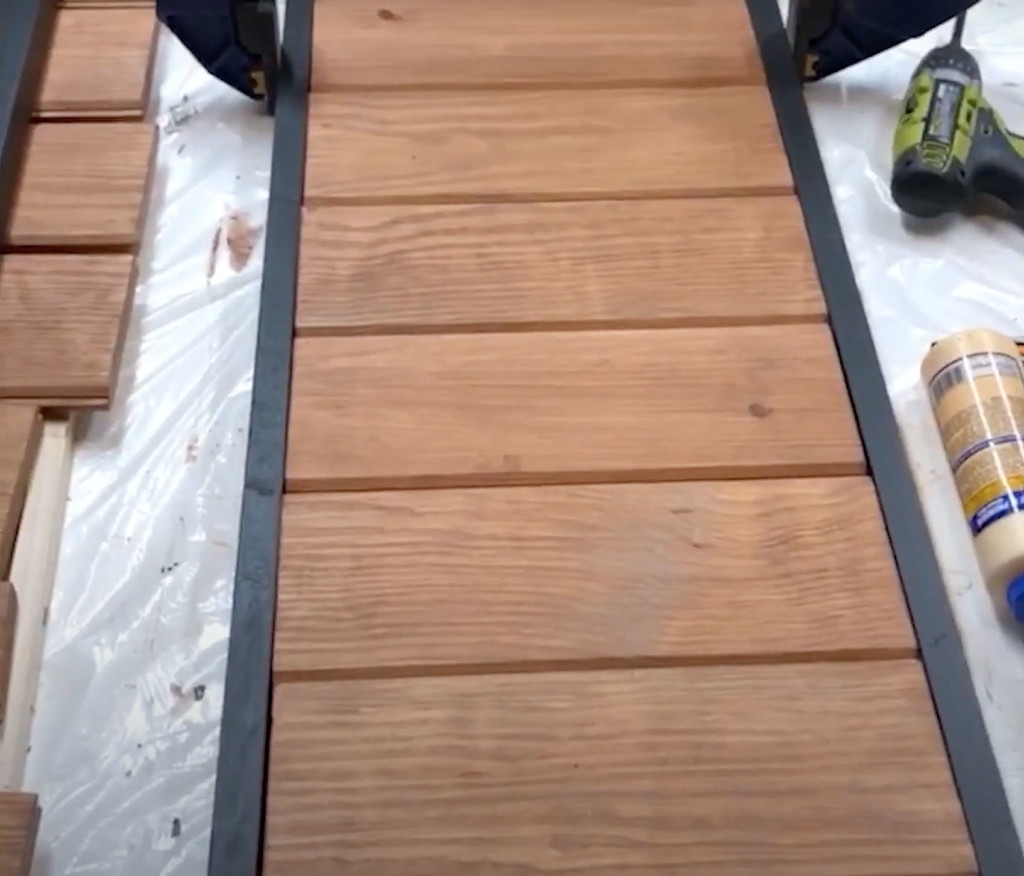
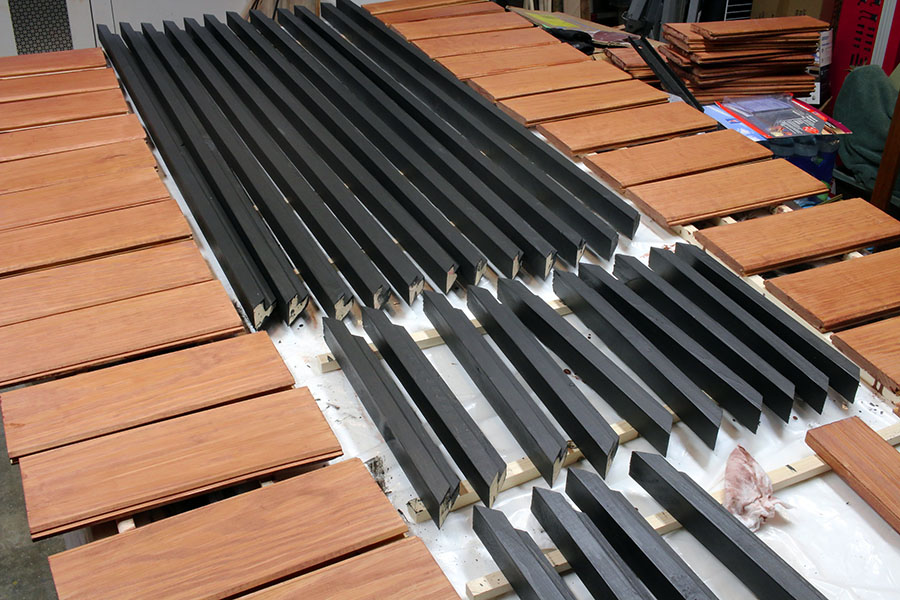
The frame and body pieces get two coats of stain. For better coverage, coat once and allow the stain to dry. Then brush on the second coat.

wood shutter pieces after staining

Assemble Shutter:

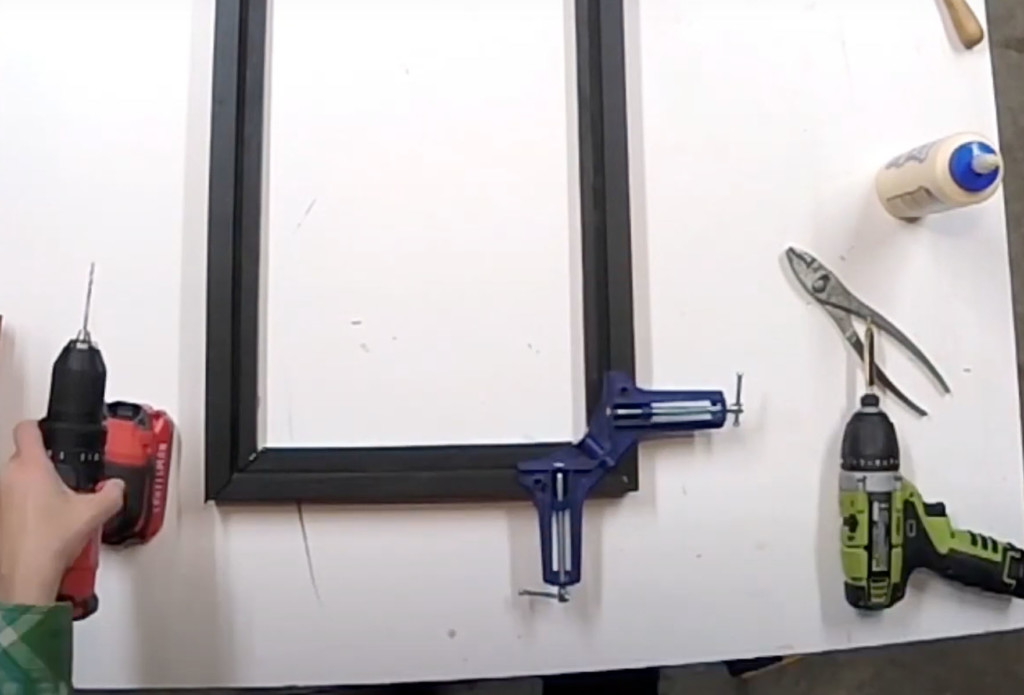
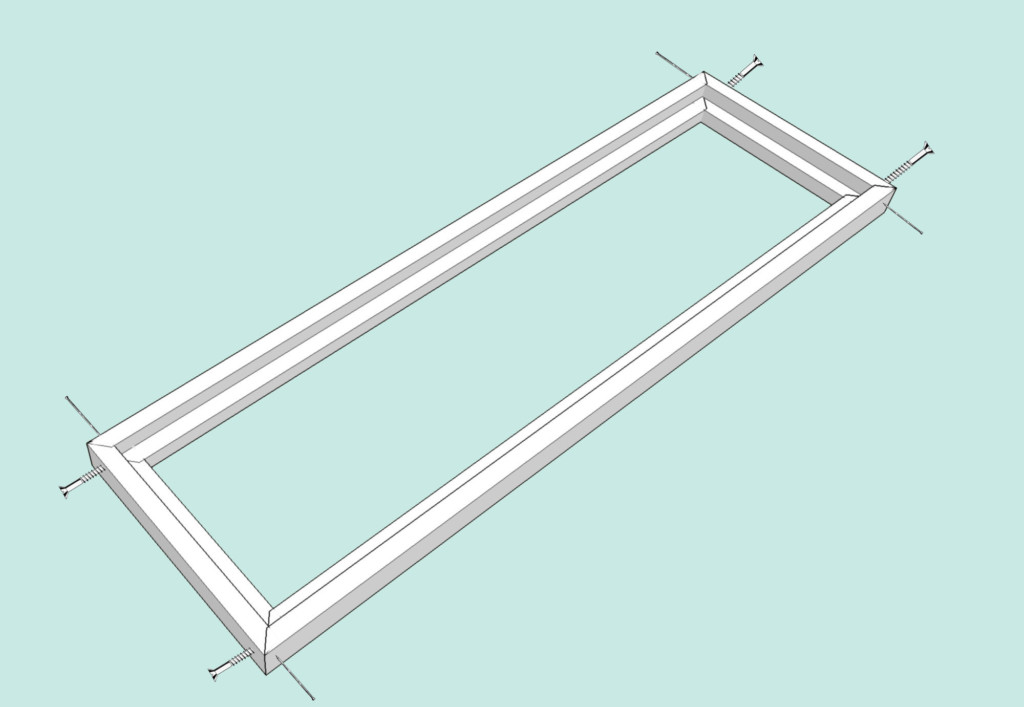
Time to assemble these shutters. Add a dab of wood glue to the mitered ends, then use a 90 degree corner clamp to hold the pieces square.

Pre-drill into the bottom of the shutter frame and drive a wood screw through the bottom and up into the sides of the frame. Add a nail or two to the side into the top and bottom pieces for additional hold. Repeat for all four corners as shown below.

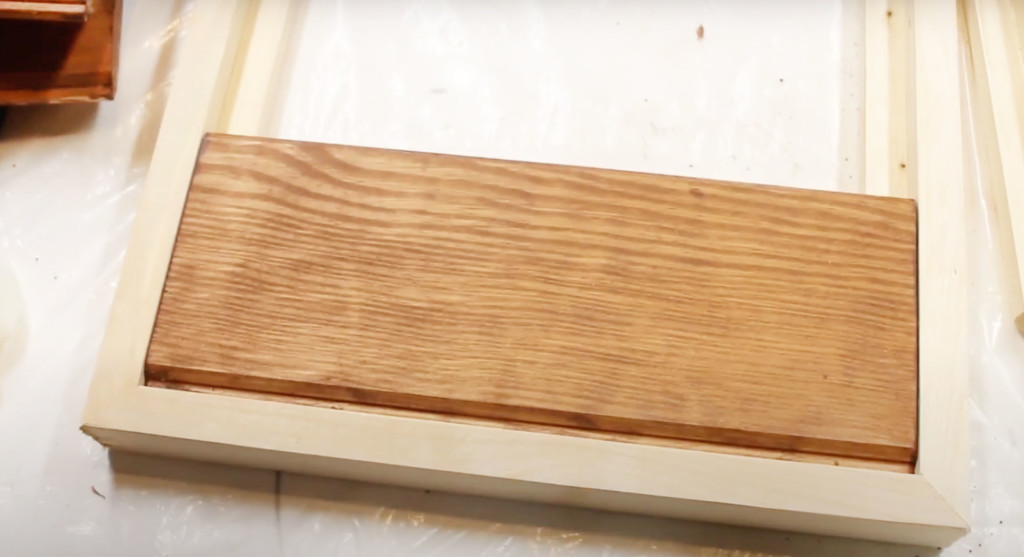
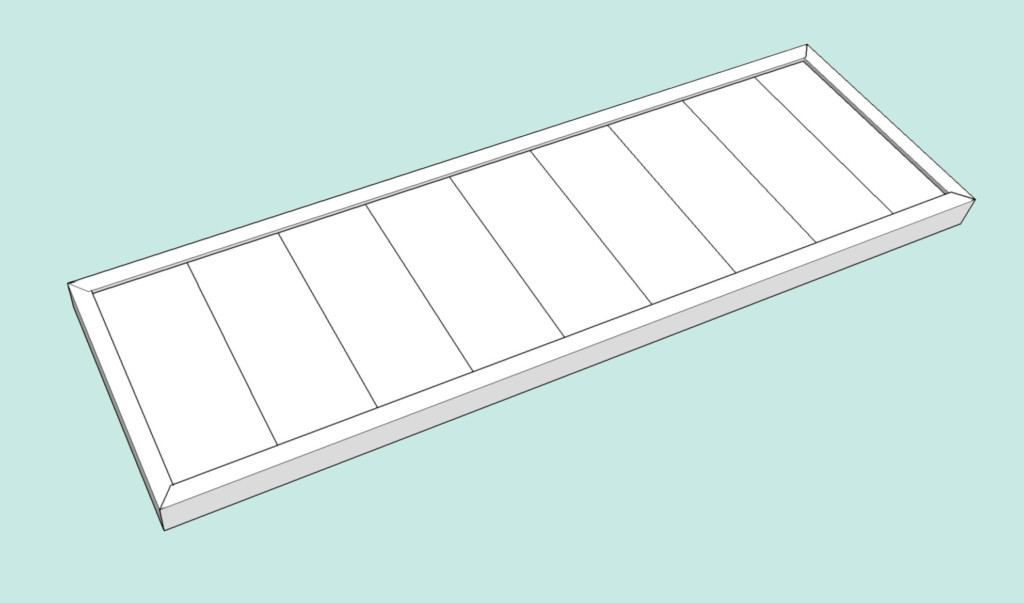
Lay the cut tongue and groove boards into the frame. Make sure everything fits perfectly and make any adjustments necessary.

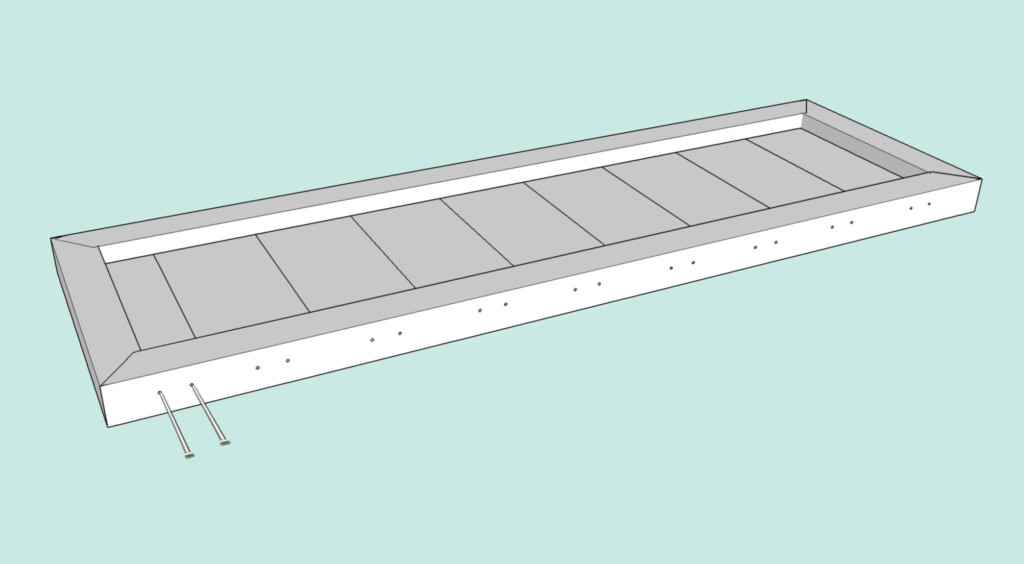
Then flip your shutter over so the tongue and groove pieces are upside down. Remove the frame and add a bead of glue around the perimeter of the tongue and groove pieces where the frame touches them. Then lay the frame back on top of the tongue and groove pieces.

Finally, secure the pieces with two long trim nails through each side of the frame and into the body pieces as shown below.

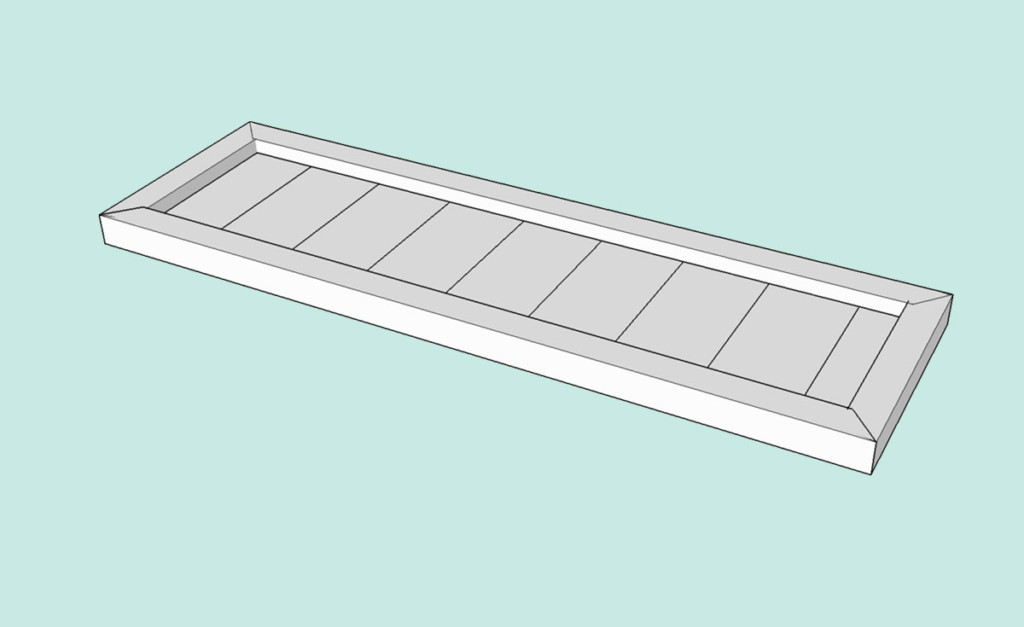
Flip your shutter over and admire your new custom wood shutters. Use wood putty to fill any holes and touch up with appropriate colored stain.

One Shutter with Two Looks:

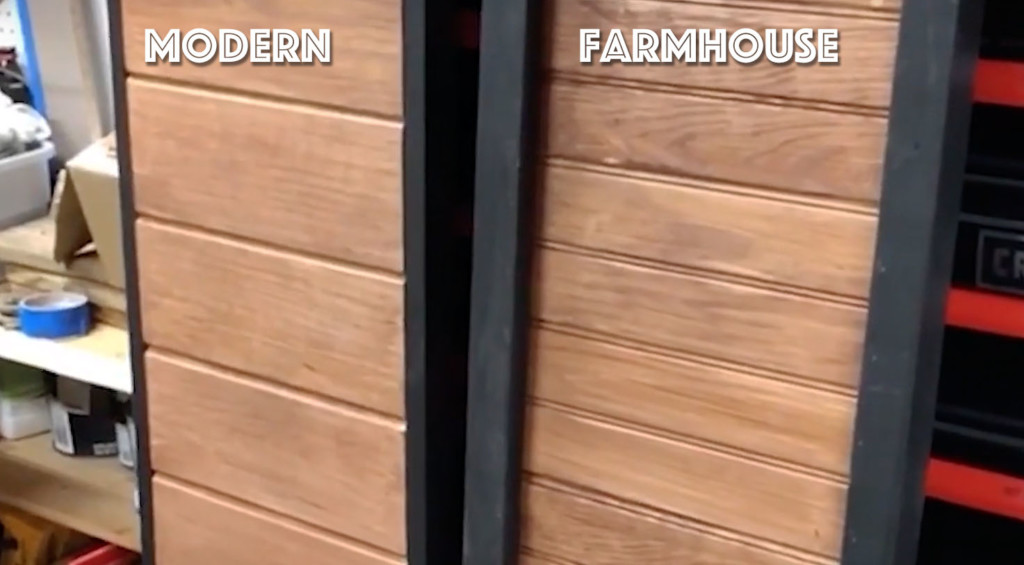
I wanted to create modern-looking shutters for this house, but the beauty of the tongue and groove planks is the opposite side has a beadboard stripe. When you turn the shutter over, you get a more farmhouse or cottage look.

My assistant and I hung the shutters on the house using exterior screws through the shutter frame and into the siding.

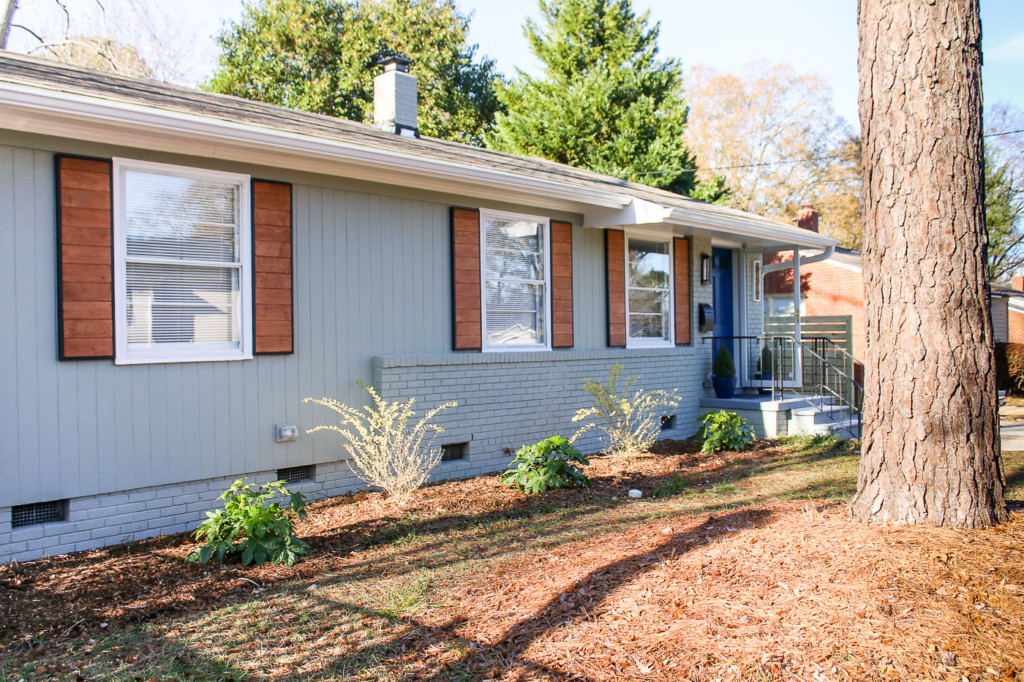
1905's ranch with modern wood shutters

It’s unreal how different this house looks from the day I bought it!

It doesn’t even look like the same house! And you should see the inside, it’s looking so good. Stay tuned for more updates.

1905's ranch with modern wood shutters

Folding Laptop or Writing Desk

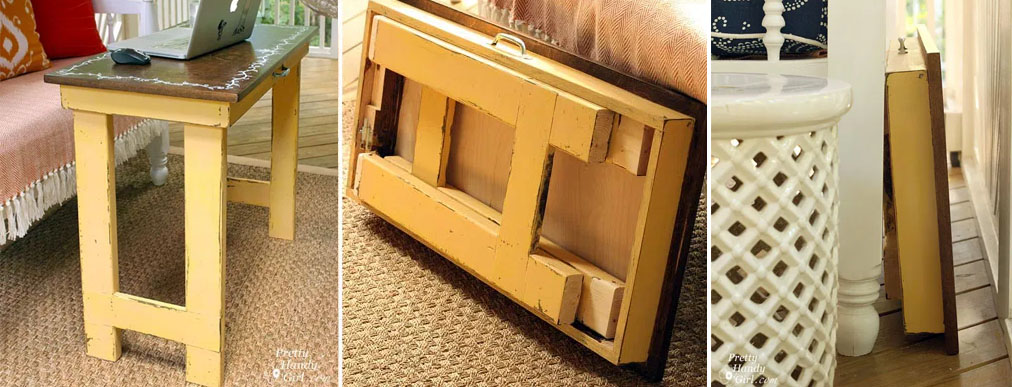
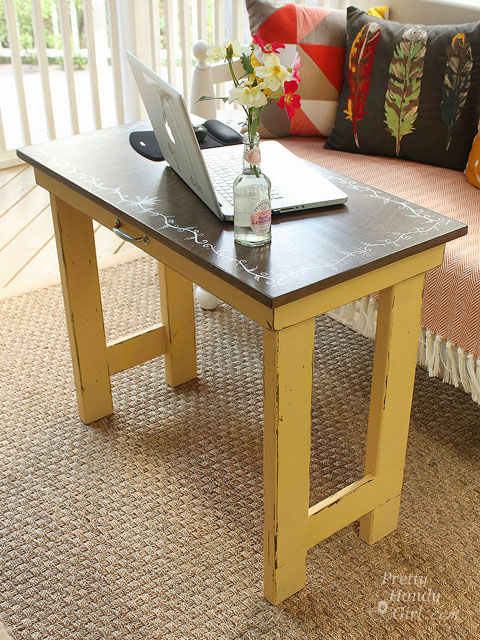
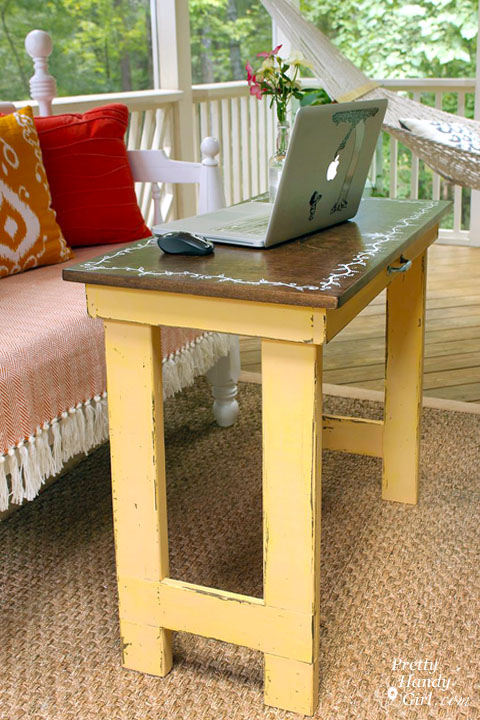
With more of us working from home and needing to create a space to work, this folding laptop and writing table is just the thing you need to make any room into an office!

Folding Laptop Writing Desk | Pretty Handy Girl

Folding Laptop and Writing Table Tutorial

My favorite place to write my tutorials is outside on our screen porch when the weather is pleasant. I love listening to the birds and feeling the breeze blow through the screens. Up until this weekend, I was using an old card table as a desk. But, it was large, awkward, and not the correct height for my needs. I wanted a table that was the perfect height and that could fold and store away when not in use. Enter the idea for thus folding laptop and writing table!

Folding Laptop Writing Desk | Pretty Handy Girl

I enjoyed the challenge of designing plans for this simple farmhouse style folding laptop/writing table. The materials are simple 2 x 4’s and 3/4 inch plywood. The majority of the steps can be done using simple handheld tools like a drill, multi-tool, and a circular saw. (Feel free to use other tools or alter the plans to fit your size preferences.)

Materials:

(I’ve included affiliate links for your convenience. I earn a small percentage from a purchase using these links. There is no additional cost to you. You can read more about affiliate links here.)

Cut list:

Folding Laptop Writing Desk | Pretty Handy Girl

Top:

  • 3/4″ finish grade plywood cut to 18″ x 36″

Apron (use 1″ x 3″ boards or you can rip excess plywood):

  • 2 – 1″ x 3″ cut to 14 1/2″
  • 2 – 1″ x 3″ cut to 34″

Legs:

  • 2 – 2″ x 4″ cut to 28 1/4″
  • 2 – 2″ x 4″ cut to 26 3/4″
  • 1 – 2″ x 2″ cut to 14 1/2″ (if ripping a 2″ x 2″ yourself, remember actual size is 1.5″ x 1.5″)
  • 2 – 1″ x 4″ cut to 14 3/8″

Hardware:

Tools:

Additional materials:

Instructions:

Cut your lumber per the above cut list.

Building the Apron:

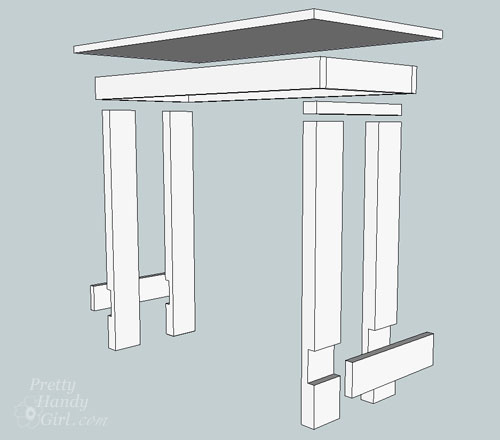
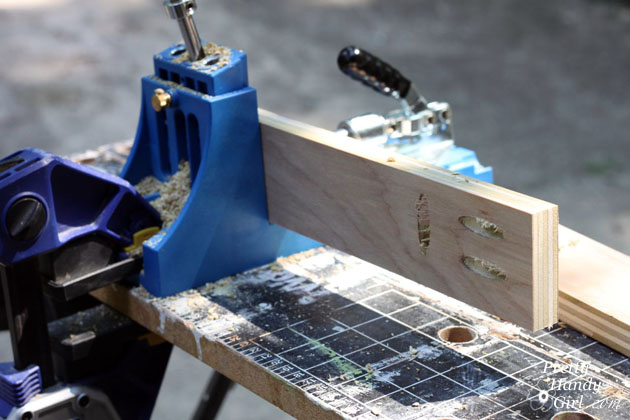
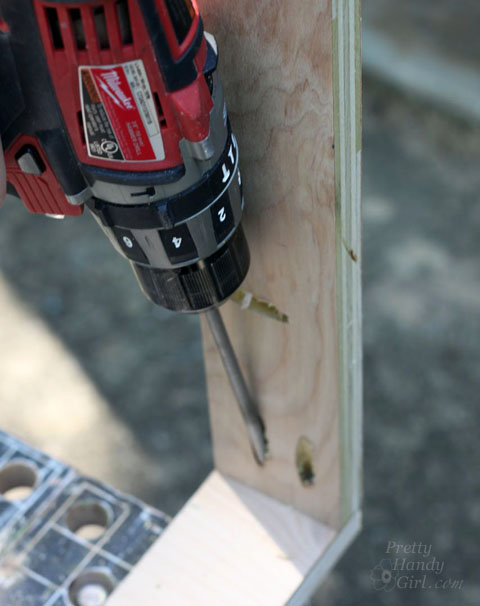
Drill two holes in the ends of the front and back pieces of the apron. Drill pocket holes into the top of all the apron pieces (spaced approximately 8″ apart.)

Folding Laptop Writing Desk | Pretty Handy Girl

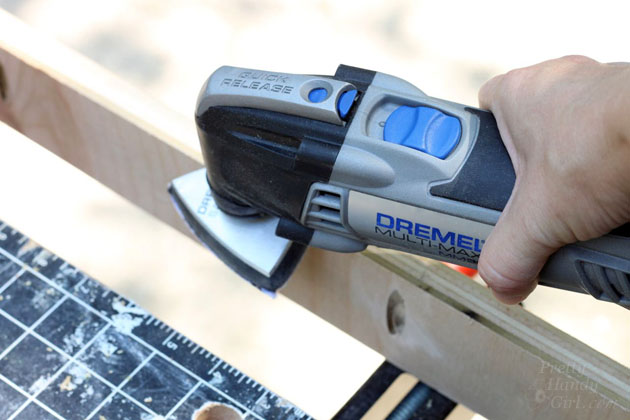
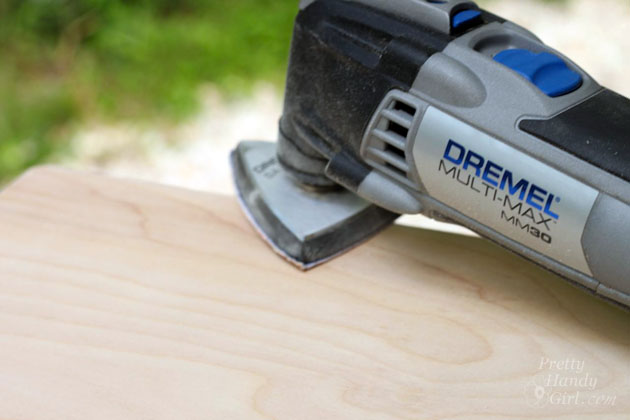
Sand all edges and pocket holes on the apron pieces with a 60 grit sandpaper on the Dremel MultiMax.

Folding Laptop Writing Desk | Pretty Handy Girl

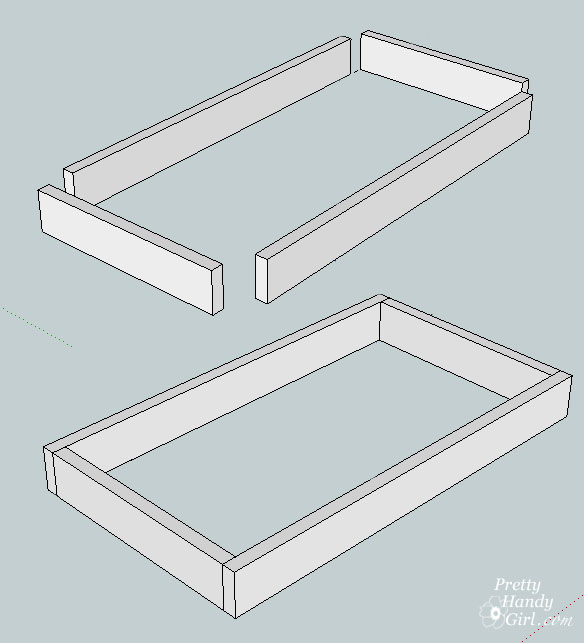
Assemble the apron pieces. Pay attention to make sure all the pocket holes are facing the same direction to attach to the underside of the tabletop. The sides of the apron should be set inside the front and back pieces as shown below:

Folding Laptop Writing Desk | Pretty Handy Girl

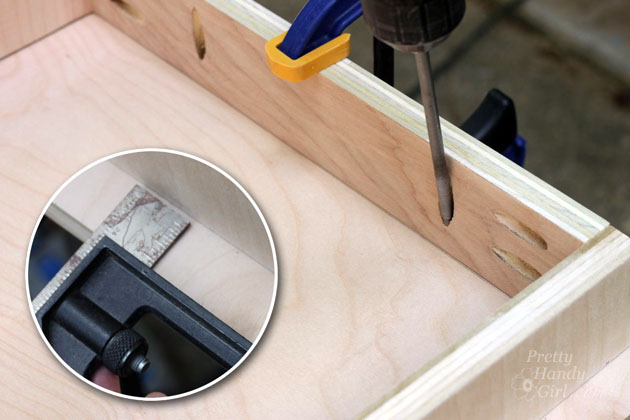
Secure the apron pieces with pocket hole screws.

Folding Laptop Writing Desk | Pretty Handy Girl

Center the apron on the bottom side of the tabletop. Measure all sides to make sure they are even. Attach the apron to the tabletop with pocket hole screws.

Folding Laptop Writing Desk | Pretty Handy Girl

Notching the legs:

Line up all four legs next to each other. Use a carpenter square to square up the bottoms. Mark 4″ up from the bottom of the legs. Line up the 1″ x 4″ with the mark and trace the other side onto the legs.

Set the combination square to the depth of the 1×4″ board (it should be 3/4″). Mark this depth on the sides of each leg to denote the area that needs to be removed.

Folding Laptop Writing Desk | Pretty Handy Girl

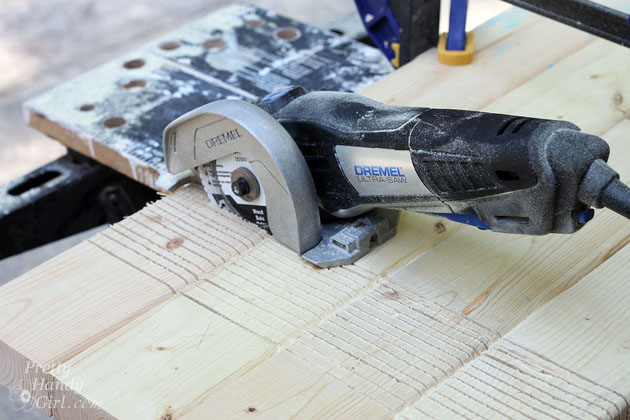
Set the depth of your circular saw (or Ultra-Saw) to 3/4″ deep.

Folding Laptop Writing Desk | Pretty Handy Girl

Cut stripes inside the guidelines you made on the legs with the Ultra-Saw.

Folding Laptop Writing Desk | Pretty Handy Girl

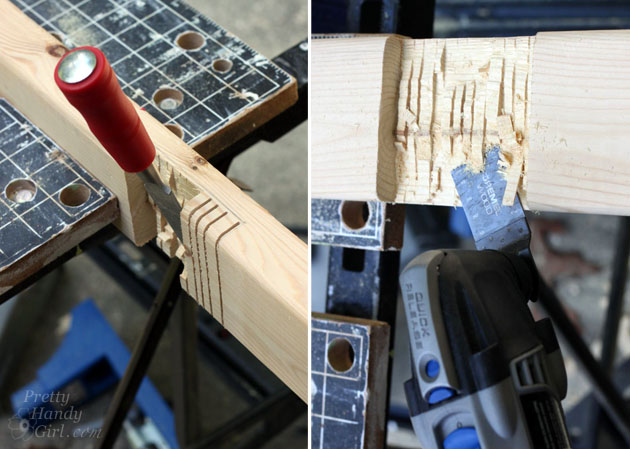
Use a hammer and chisel to knock out the strips. Use your oscillating multi-tool with a wood flush cut blade to clean up the edges of the notch.

Folding Laptop Writing Desk | Pretty Handy Girl

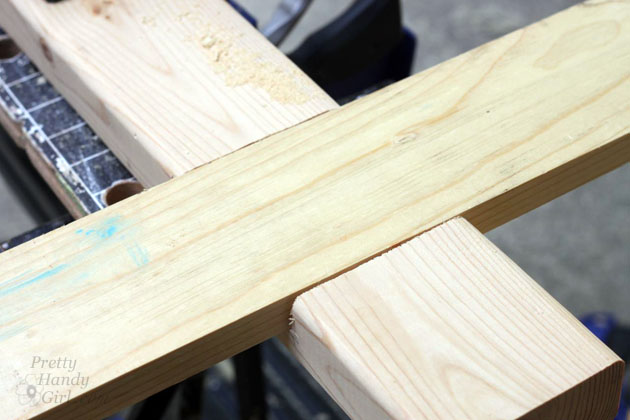
Test fit the 1×4″ boards into the legs. Shave off more if needed with the Multi-Max (or circular saw).

Folding Laptop Writing Desk | Pretty Handy Girl

Set the 1″ x 4″ boards into the leg notches.

Folding Laptop Writing Desk | Pretty Handy Girl

Secure the 1″ x 4″ boards with wood glue and finish nails.

Folding Laptop Writing Desk | Pretty Handy Girl

Secure the cross piece 1″ x 4″ from the back side with one wood screw into each leg.

secure-cross-piece

Connecting the Legs:

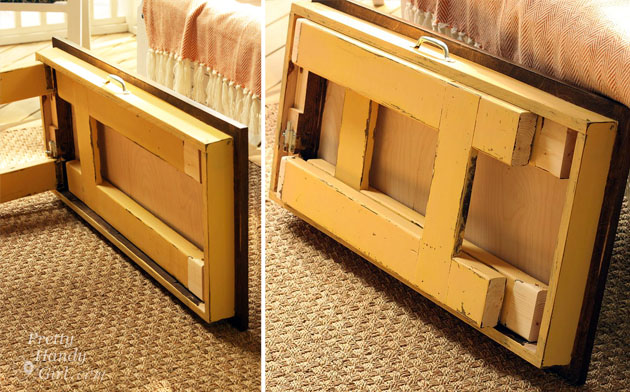
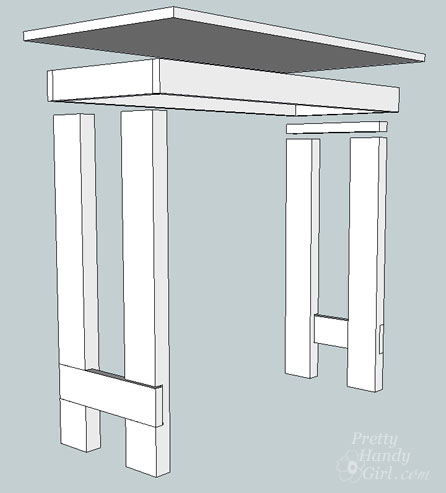
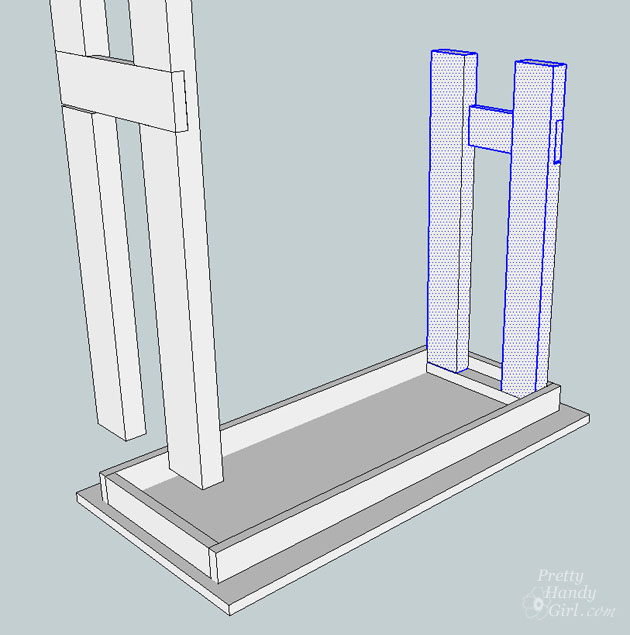
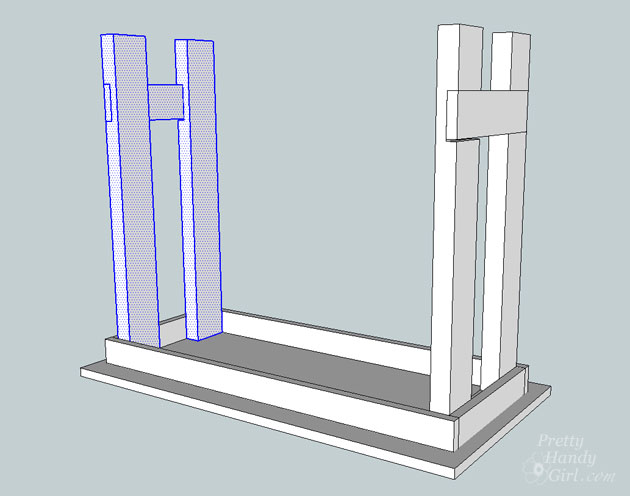
To allow the legs on the desk to fold neatly, one side has to be raised up to fold on top of the other legs. Use the 2″ x 2″ board you cut for this purpose.

Folding Laptop Writing Desk | Pretty Handy Girl

Drill a pocket hole into each end of the 2×2″ board. Add wood glue where the 2×2 will rest. Tap the board into place.

Folding Laptop Writing Desk | Pretty Handy Girl

Secure the board into the table apron with pocket screws.

Folding Laptop Writing Desk | Pretty Handy Girl

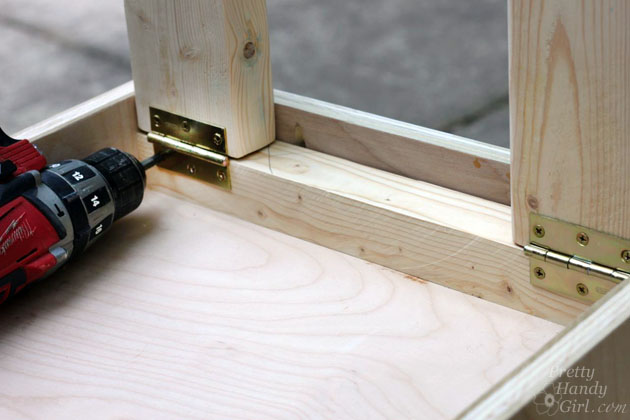
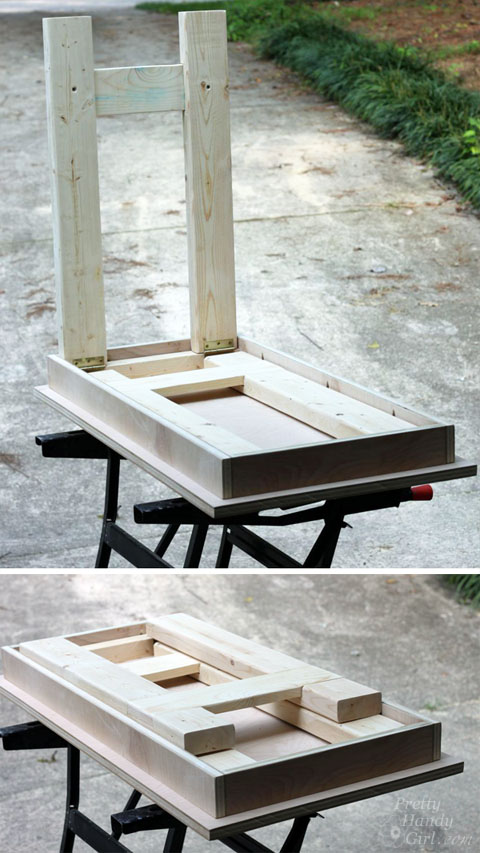
Rest the shorter legs on top of the 2×2 board. Clamp or support the legs in place.

Folding Laptop Writing Desk | Pretty Handy Girl

Attach the utility hinges to the top of the legs and the 2×2 support.

Folding Laptop Writing Desk | Pretty Handy Girl

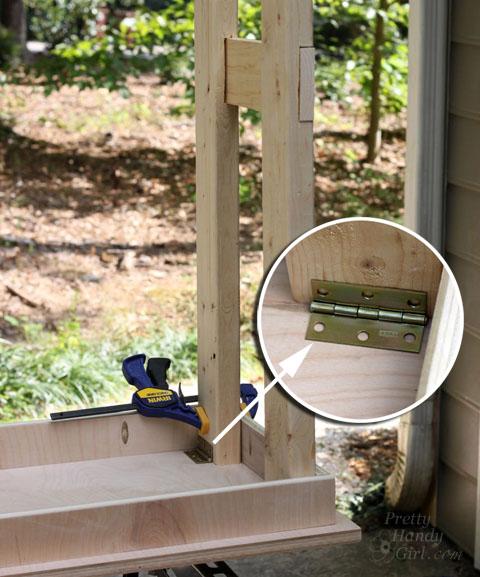
Rest the longer legs in place.

Folding Laptop Writing Desk | Pretty Handy Girl

Attach the remaining two utility hinges to the top of the legs and the underside of the tabletop as shown below.

Folding Laptop Writing Desk | Pretty Handy Girl

Test fold the legs to make sure they fold neatly and don’t rub on the sides of the apron. Make any adjustments to the hinges or sand the legs to eliminate rubbing now.
Folding Laptop Writing Desk | Pretty Handy Girl

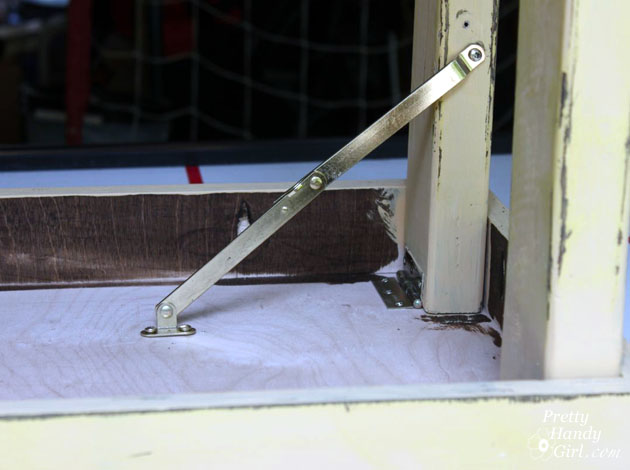
Add the lid support hinge to the bottom folding legs (the longer legs). Follow the directions on the package of the lid support for proper installation.

Folding Laptop Writing Desk | Pretty Handy Girl

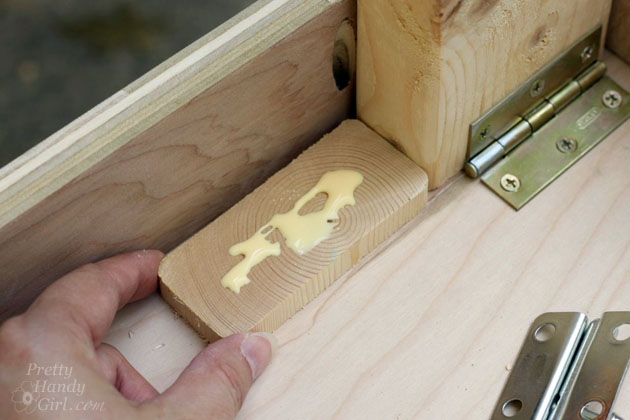
The opposite side will not accommodate a lid support. You need a barrel bolt to keep the legs from folding accidentally. Glue and nail a scrap of 2×4 to the inside of the table apron next to one of the legs (I added a barrel bolt to both sides, but you only need to add it to the one side when using the lid hinge support.)

Folding Laptop Writing Desk | Pretty Handy Girl

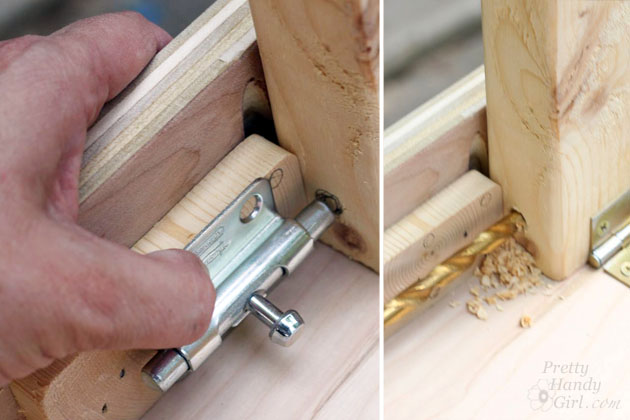
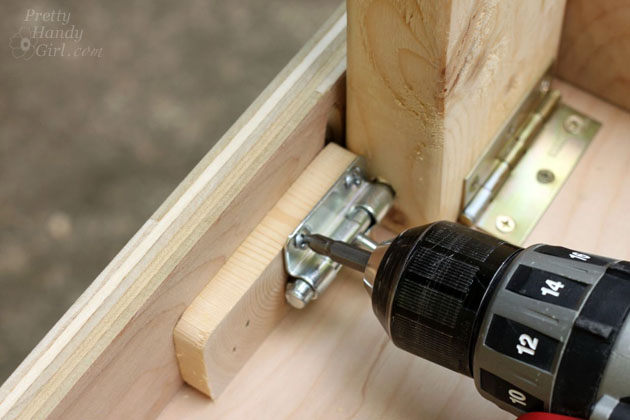
Rest the barrel bolt onto the scrap wood. Mark where the bolt hits the leg. Drill a hole into the leg to accept the bolt.

Folding Laptop Writing Desk | Pretty Handy Girl

Attach the barrel bolt to the scrap wood with the provided screws.

Folding Laptop Writing Desk | Pretty Handy Girl

Sand all parts of the desk starting with 80 grit sandpaper, then 120 and finish with a 220 grit sandpaper.

Folding Laptop Writing Desk | Pretty Handy Girl

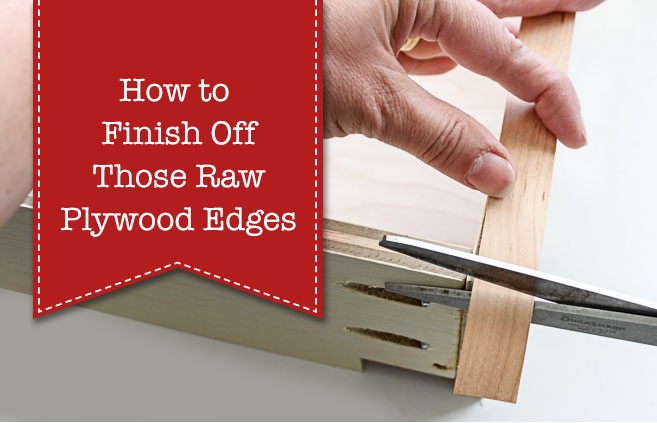
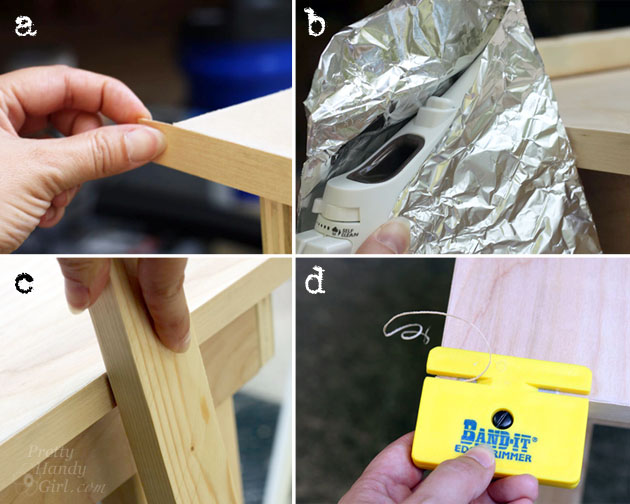
Add edge banding to the plywood top. You can watch my video below to learn how to finish off plywood edges!

It’s not hard and edge banding is a great way to finish off plywood to make it look like a more expensive board.

Folding Laptop Writing Desk | Pretty Handy Girl

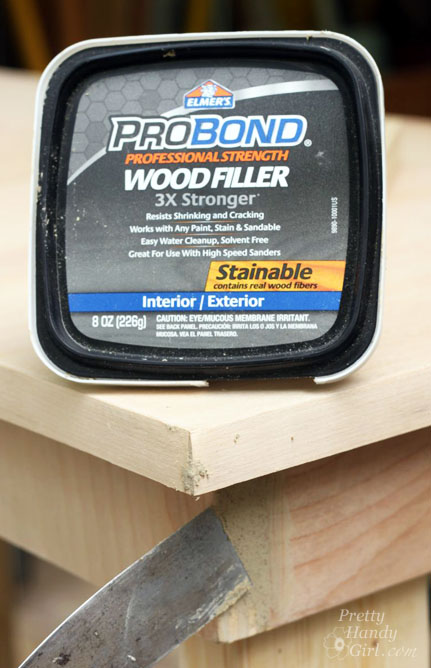
Fill any holes or seams with wood putty. Sand and wipe off the desk before staining or painting.

Folding Laptop Writing Desk | Pretty Handy Girl

Finishing touches:

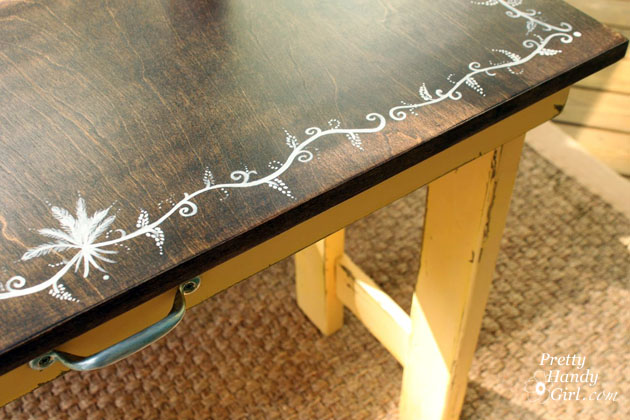
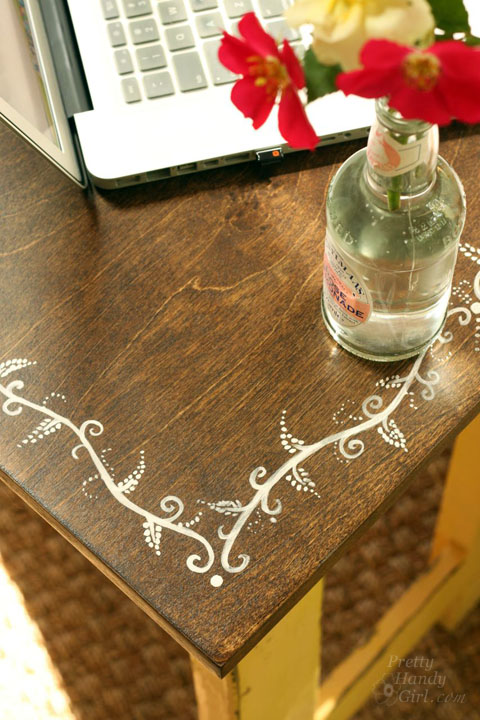
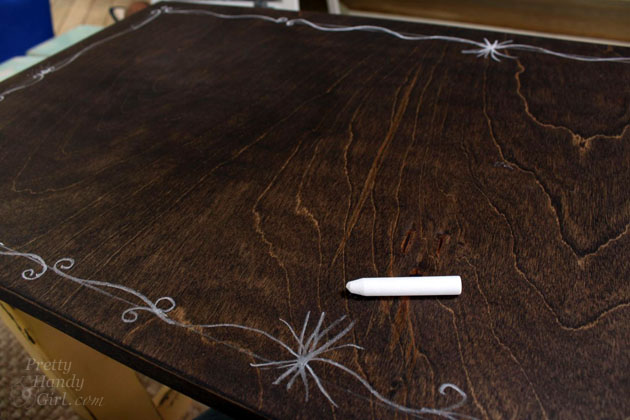
I stained my desk with Minwax Dark Walnut. After the stain dried, I added a hand-painted vine border. First, I sketched the design in chalk.

Folding Laptop Writing Desk | Pretty Handy Girl

Then I painted the design using a watered-down white chalk paint.

Folding Laptop Writing Desk | Pretty Handy Girl

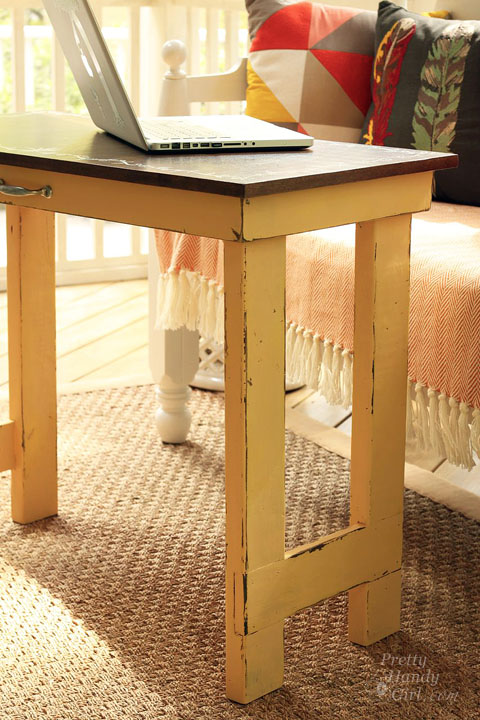
The apron and legs received a mixture of chalk paints in a yellow color. The edges were sanded off to reveal the dark stain beneath.

Folding Laptop Writing Desk | Pretty Handy Girl

Finally, the desktop received several coats of General Finishes High Performance water-based topcoat in the flat finish. The legs and painted areas were waxed.

Folding Laptop Writing Desk | Pretty Handy Girl

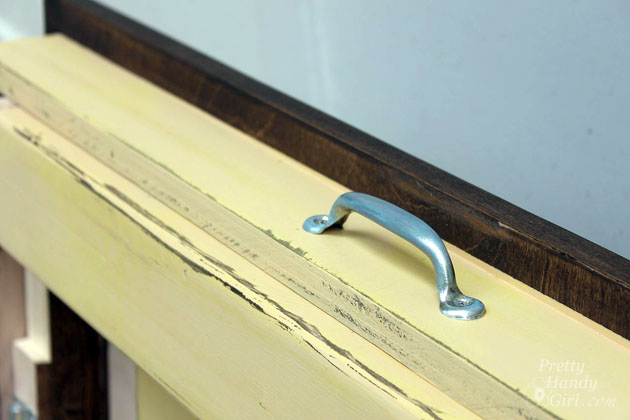
Add a handle to the center of the desk apron if you want to be able to transport it easily.

Folding Laptop Writing Desk | Pretty Handy Girl

This table can be used anywhere! It’s sturdy, but doesn’t take up much space.

Folding Laptop Writing Desk | Pretty Handy Girl

I can fold it up and bring it inside and work in front of the TV. Or it can be used as a small sewing table, crafting table, or just an extra buffet in the dining room.

Folding Laptop Writing Desk | Pretty Handy Girl

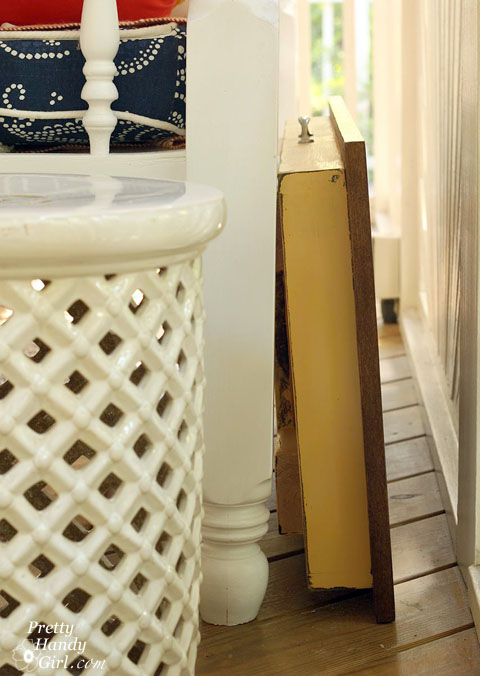
When I’m done, it folds up and stores behind a bench or sofa.

Folding Laptop Writing Desk | Pretty Handy Girl

If you like this tutorial, be sure to pin it for future use or to share! Cheers!

Folding Laptop Writing Desk | Pretty Handy Girl

I’d love to hear if you make your own folding laptop and writing table!

PHGFancySign

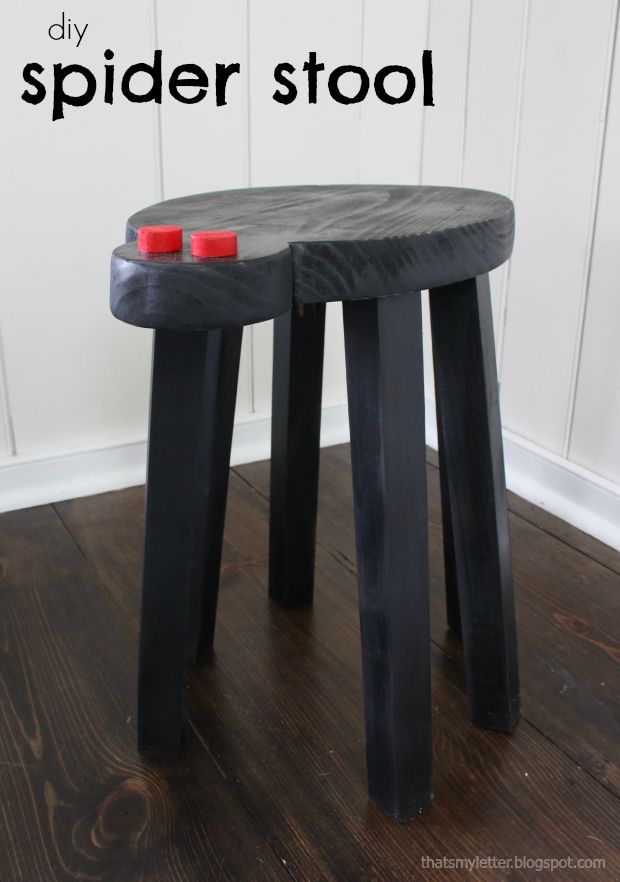
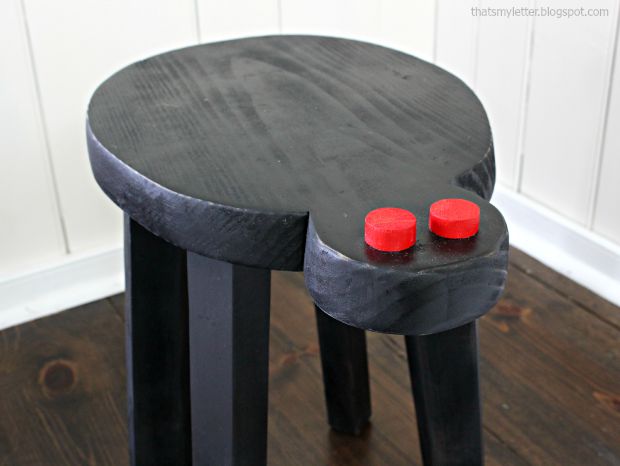
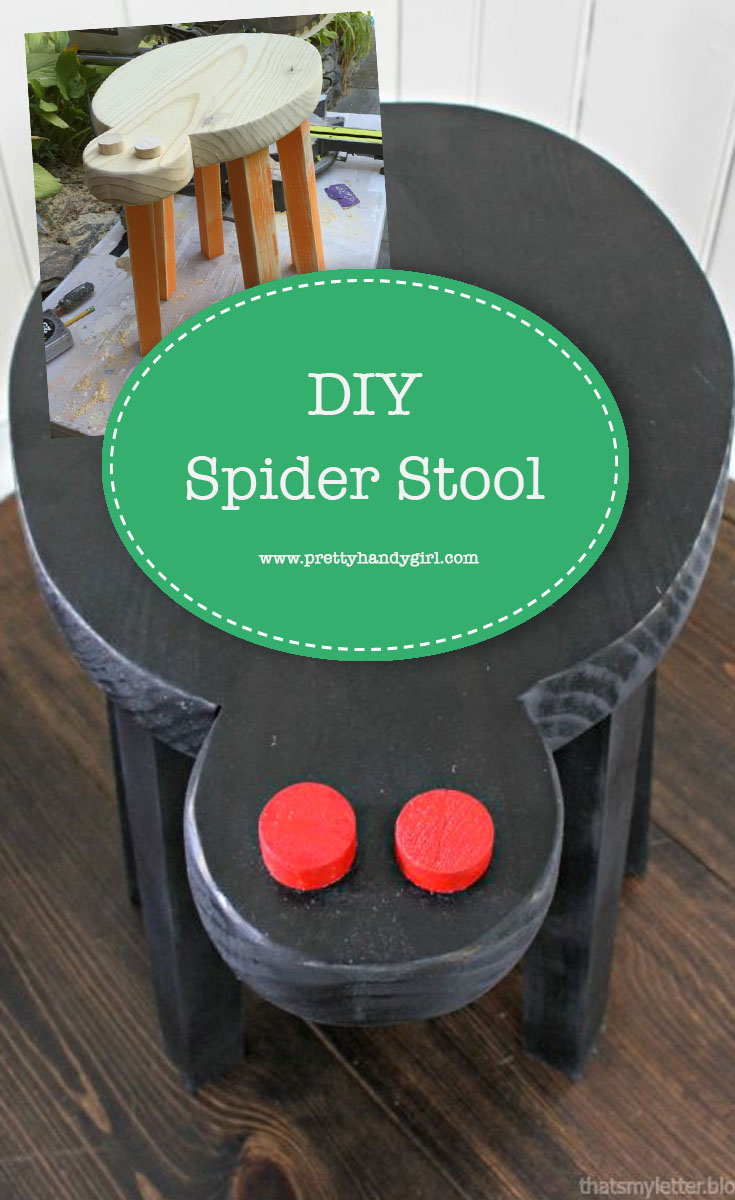
Halloween is lurking around the corner like a stray black cat. Luckily I’m here with the perfect project for Halloween that will use up some of your scrap wood pieces. Let’s make a DIY Spider Stool!

spider stool title

DIY Spider Stool

I have a spooky little spider project today being that Halloween is on the horizon.  I’m Jaime from JaimeCostiglio.com and I’m here to show you how to build this cute little spider stool.

spider stool 1

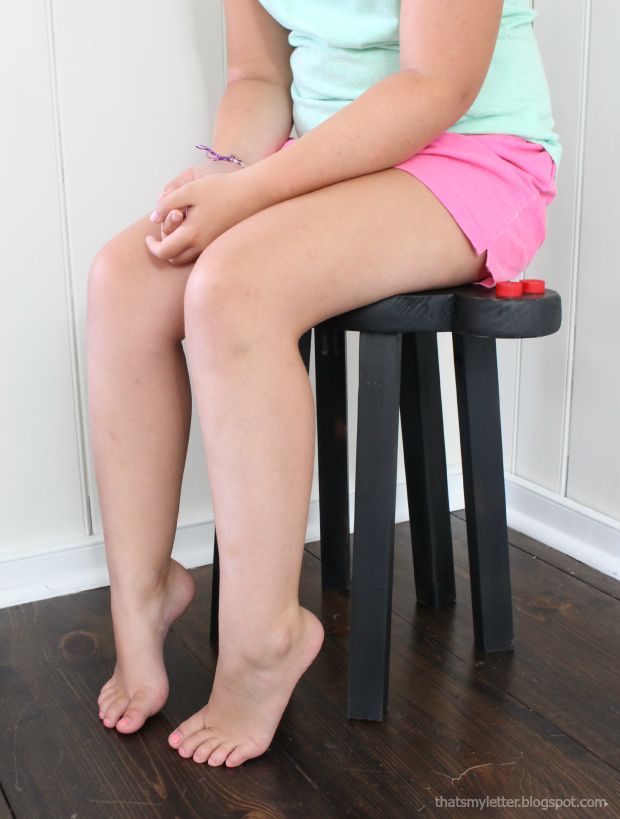
We all know Miss Muffet sat on a tuffet, when along came a spider —but, this time we’ll turn that nursery rhyme on its head. Let’s sit on that spider instead! This little stool is perfect for adding some themed decor to your kid’s playroom or a great spot to rest the treats near the front door on Halloween.  This spider stool is fairly simple to make and although most spiders have eight legs this one only has six. Shhh, don’t tell anyone. If you truly have an aversion to spiders,  you can always paint the body red with black spots and it would make a cute little ladybug stool.

spider stool with kid

Materials:

(I’ve included affiliate links for your convenience. I earn a small percentage from a purchase using these links. There is no additional cost to you. You can read more about affiliate links here.)

Instructions:

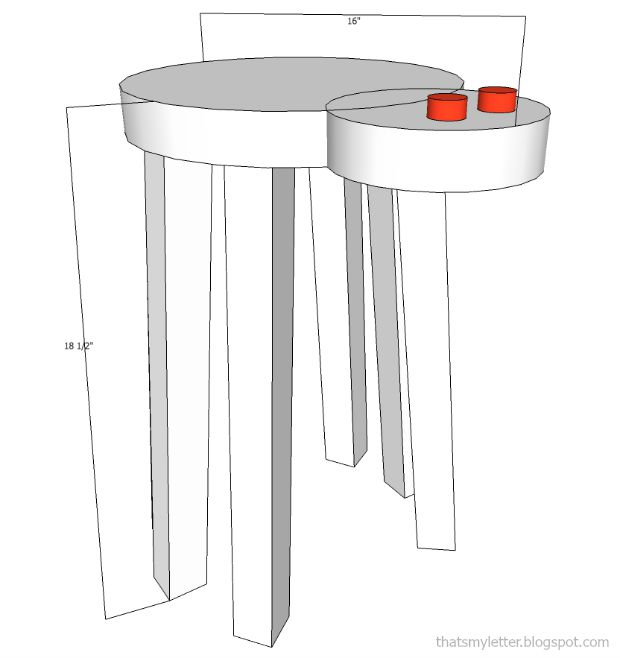
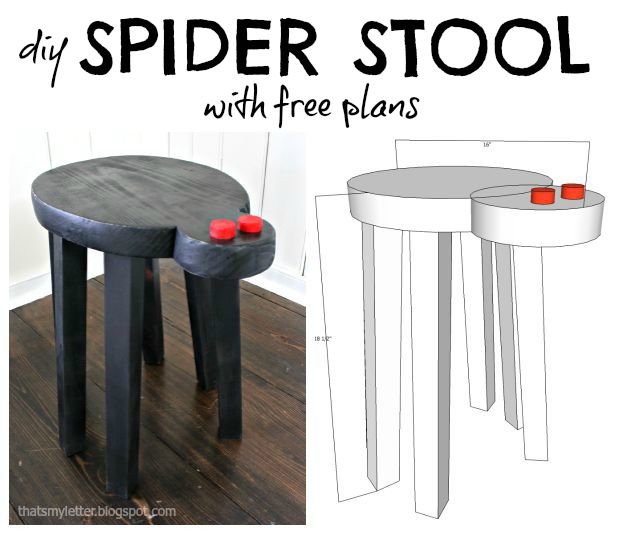
spider stool dimensions

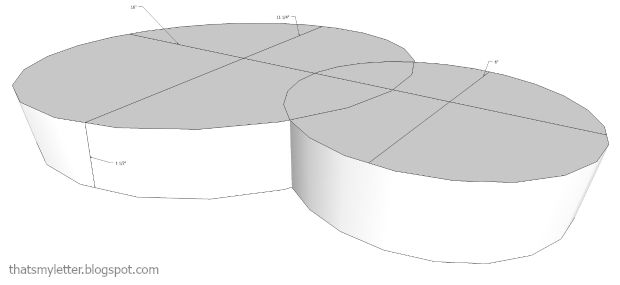
spider stool body

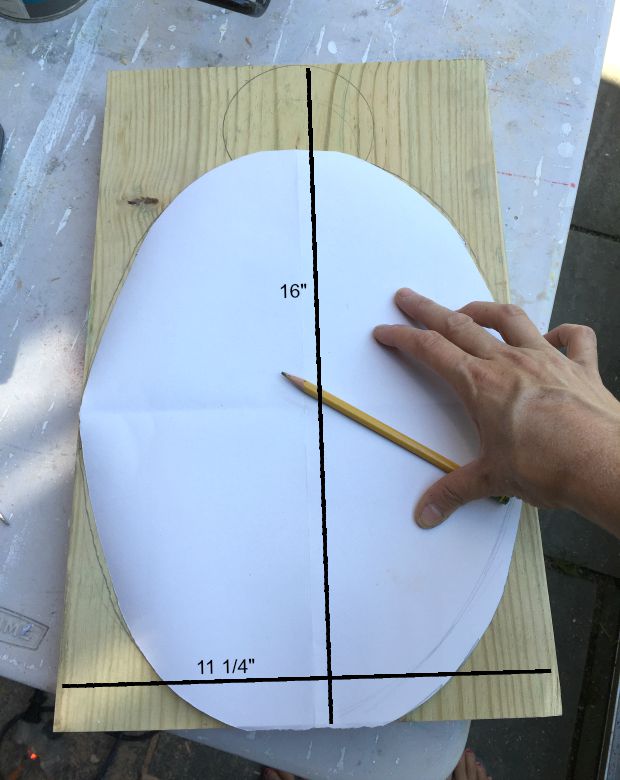
Step 1: Sketch the spider body shape on the 2×12. You can draw a large oval for the body and trace a drink glass or can for the head. The full length of the body and head equals 16″. The width is 11 ¼”.

spider stool layout

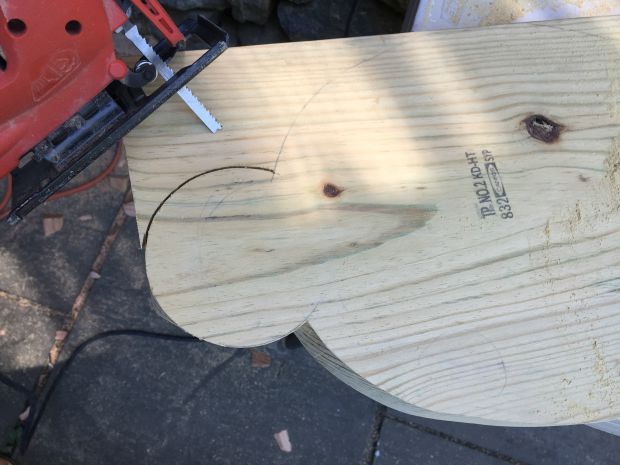
Step 2: Use a jigsaw to cut out the spider body.  Go very slow through the 1 ½” thick material and flip over to refine your cut if necessary.

spider stool cutout

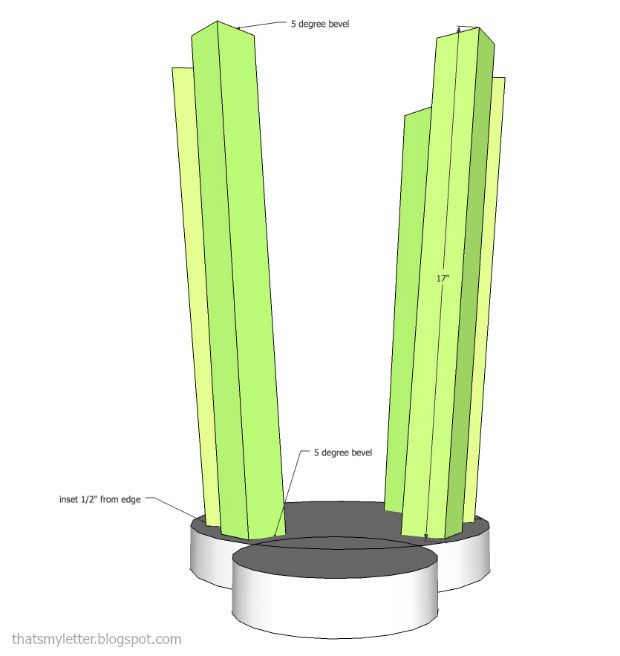
Step 3: Cut 6 legs with 5-degree bevel at both ends, parallel measuring 17″ from end to end.

spider stool legs angles

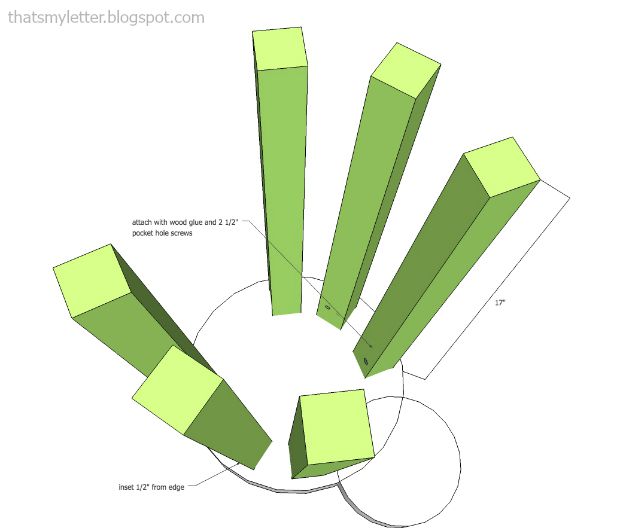
Layout the legs on the underside of the body inset 1/2″ from the edge.

spider stool legs

Apply wood glue to the top of each leg and attach legs using 2 ½” pocket hole screws.

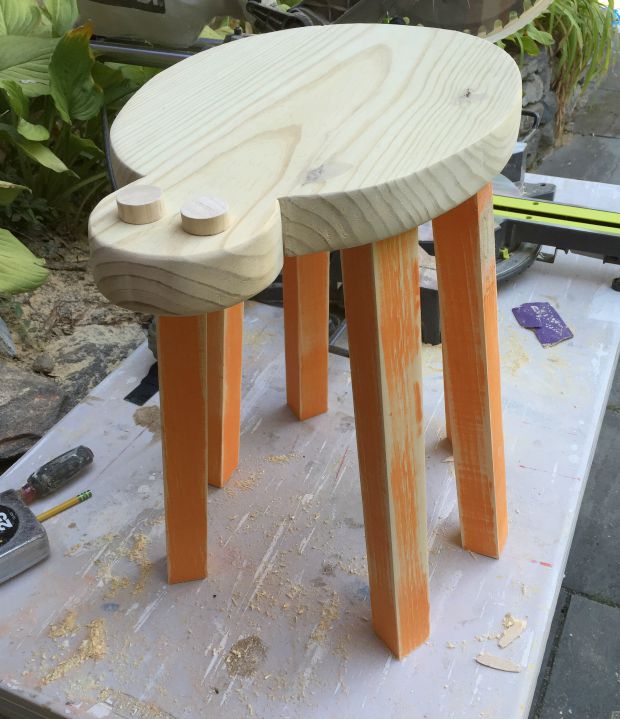
spider stool unfinished

Step 4: Sand the stool, then finish with black spray paint.

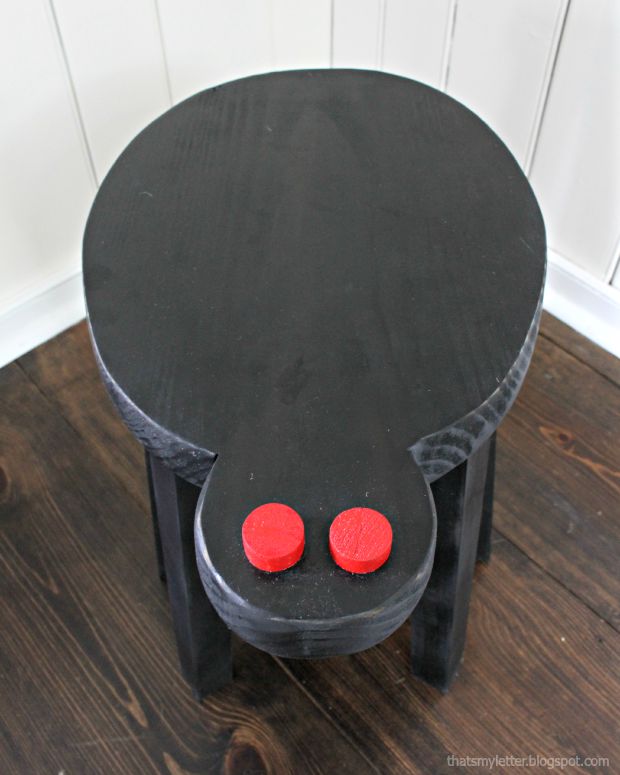
spider stool top

For an extra spooky factor paint 1″ circular dowel pieces bright red and glue onto the head portion.

spider stool collage

Hope you enjoyed this fun spider stool project! If you have more scrap wood, why not make some more spider friends or insect friends for your DIY Spider Stool!

Jaime signature

Jaimes_headshot

Hi, I’m Jaime and I write JaimeCostiglio.com, a DIY project focused blog with an emphasis on building, painting and sewing.  All my life I’ve been painting, drawing, crafting and making things.  I grew up in Minnesota and then majored in Studio Arts at a liberal arts college on the East Coast.  While there, I worked in the costume shop for the theater department, met my now husband of 18 years and then went on to work for an interior design firm in New York City.  We have 3 young children and now that they are all school age I have shifted my focus to do what I love – build, paint and sew.  The real turning point came when we renovated our kitchen in the summer of 2010.  One project led to another and I started blogging about all my projects one by one which has ultimately led to a small business.

My goal with each project is to work smart, efficient and economical.  I love a good challenge whether it be designing a build to fit the space (entry locker unit), solving a logistical solution (portable lego tray), constructing a craft using unconventional supplies (plastic tablecloth rosette garland) or just a simple makeover with paint (front door makeover).  And I firmly believe you can do it too which is why write a majority of my posts as tutorials in an effort to share my experience with readers.

You can connect with me on Facebook, TwitterPinterest, YouTube, and Instagram.

Read all of Jaime’s Pretty Handy Tutorials.

Pin for later!

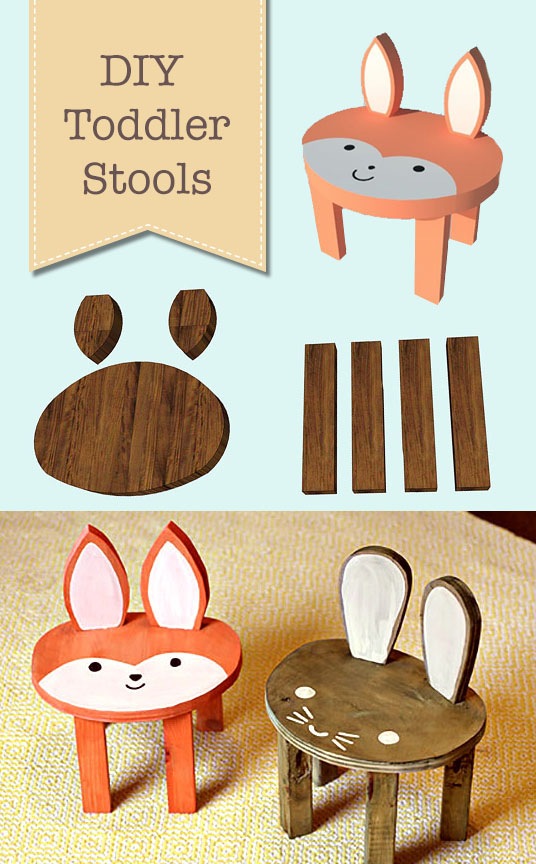
If you liked this tutorial, you’ll probably also love these cute little DIY toddler stools:

Cute DIY Animal Toddler Stools | Pretty Handy Girl

DIY Platform Bed

Build this simple DIY platform bed for your home!! This platform bed is a minimalist’s dream and it fits in perfectly with the new and trending BoHo decor style.

DIY Platform Bed

DIY Platform Bed

Hey everyone, this is Kristen from In Her Garage and I am going to show you how to build an adorable platform bed. This is the bed I built for my daughter in about an hour and a half.  In my home, we are once again changing my girls’ bedrooms (because why wouldn’t I take down the uber-cute loft beds I just built them back in March?! )My kiddos are lucky I’m a sucker for building furniture. Be sure to follow me on Instagram if you want to keep up with all my furniture building adventures!

Since my girls are moving into separate bedrooms we decided each would have a queen size mattress. We purchased a queen mattress without the box spring in the interest of saving money.  But, all the platform bed frames I found were either too expensive or too short. I still wanted her bed to be at a standard height so I decided to throw together this really simple platform bed.

The simplicity and natural look of the popular BoHo style pairs really nicely with the bedding for my daughter’s room. I used the more expensive pine boards from the local big box store (less knot holes and higher quality) to construct the bed legs and frame.  These boards are so pretty and I love the color so I chose not to paint, stain, or topcoat them.  This is why you won’t find a “Finish” step in this tutorial.  But, feel free to finish your bed however you like! Let’s make it!

How to Build a DIY Platform Bed

Materials:

(I’ve included affiliate links for your convenience. I earn a small percentage from a purchase using these links. There is no additional cost to you. You can read more about affiliate links here.)

Tools:

Cut list:

Bed legs:

  • 8 – 1″ x 4″ @ 12″
  • 4 – 2″ x 2″ @ 13 ¼”

Bed Frame:

  • 2 – 1″ x 4″ @ 60″
  • 2 – 1″ x 4″ @ 80″
  • 2 – 1″ x 2″ @ 75 ¼”

Slats and center support:

  • 10 – 1″x 4″ @59 7/8″
  • 1 – 2″ x 4″ @ 78 ½”
  • 3 – 2″ x 4″ @12″

Instructions:

Step 1 – Build the Platform Legs

The legs for this bed are meant to provide a base for the bed frame to rest on and attach to. Attach two  1″ x 4″ x 12″ boards at a 90 degree angle to each other with a 2″ x 2″ x 13 ¼” board glued into the center for added support as shown below.
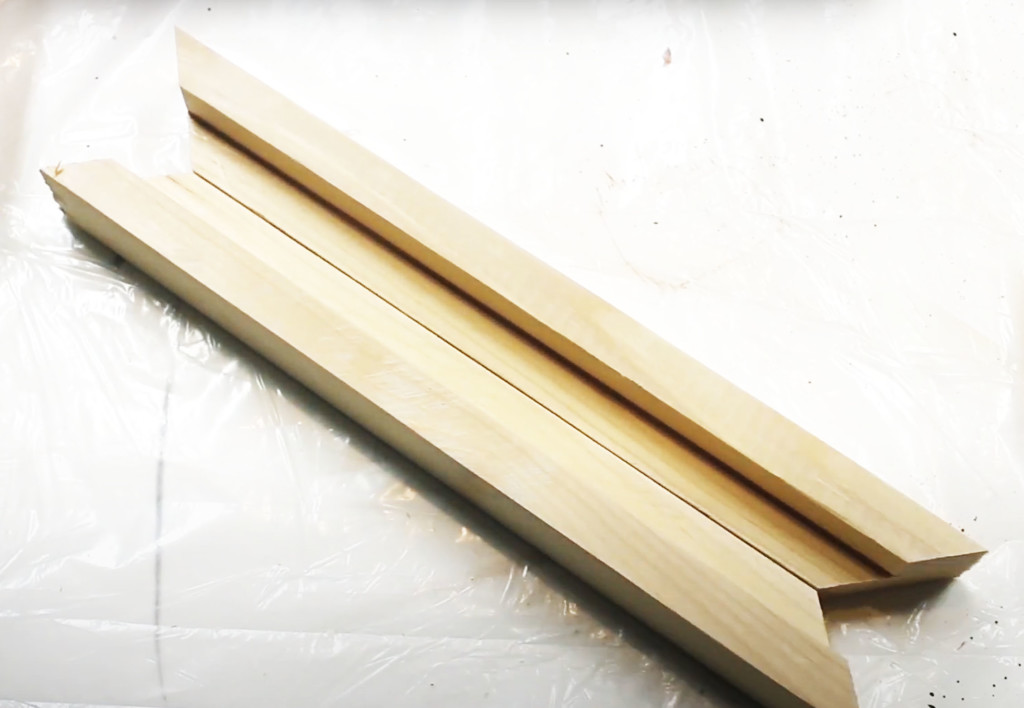
I chose to use my table saw and cut the 1″ x 4″ x12″ boards at 45 degrees along one long edge to create a miter joint between the two boards. This creates a cleaner look but you are more than welcome to use a butt joint instead. Look at the pictures below to see the difference.

If you are also choosing to bevel the corners of the bed legs then continue reading to see how I put this joint together with ease. If not, go ahead and assemble the legs using the butt joint, wood glue, and brad nails.

Mitered Joint Leg Assembly:

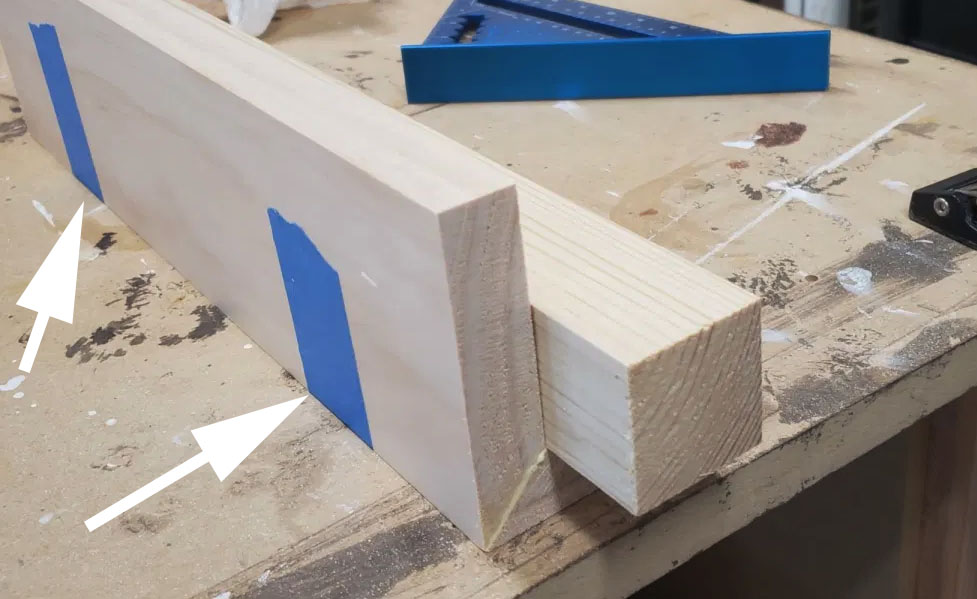
After cutting all eight 1″ x 4″ x 12″ leg boards to 45 degrees, add two pieces of painters tape to the back of the board running perpendicular to the beveled edge.

Set the board down on your work surface, sticky side of the tape facing up, and place another leg board with the beveled edge touching the first board’s beveled edge, also being sure to align the top and bottom of the boards. Press down firmly so the tape sticks to both boards.

Add an even bead of glue to both beveled surfaces and then lift one board as if closing a book. The two beveled edges will meet and the tape will hold it in place.

Now place your 2″ x 2″ x 13 ¼” board in the corner of this joint using wood glue. Shoot the brad nails through the 1″ x 4″ into the 2″ x 2″ to secure in place. No need to use screws here as there is plenty of surface area for the wood glue to create a strong joint (once cured).  Congratulations, you completed one leg for the platform bed frame to rest on!

Repeat these steps for the other 3 legs. After the legs are built, use wood putty to fill in the brad holes and sand smooth.

Step 2- Building the Bed Frame Components

Let’s build the side rail supports for the bed slats to rest upon. Start by marking the center of the 1″ x 4″ x 80″ board and the center of the 1″ x 2″ x 75 ¼” board.

Lay the 75 1/4″ board along the bottom of the 80″ board and align the two center marks. Using wood glue and 1 ¼” wood screws fasten the 1″ x 2″ x 75 ¼” board to the 1″ x 4″ x 80″. Repeat for the other side rail support.

Step 3: Building the center support

The center support will run parallel to the side rails (and perpendicular to the bed slats) in the center of the bed. Therefore, it will run between the headboard and footboard of the bed frame.

Pull out your 2″ x 4″ x 78 1/2″ board (this is your center support). Now pull out the 2″ x 4″ x 12″ pieces and evenly space them under the 2 x 4 center support.  Use 2 ½” wood screws to secure the 2″ x 4″ x 12″ legs under the center support).

Note: You might notice in later pictures that my center support looks a little different than what is shown below. I accidentally cut my legs too short and had to add another 2 x 4 to the bottom of the legs to raise it to the correct height.  Oops!
diy platform bed

Step 4: Assembly Time

Pre-drill 2 holes into each end of the 1″ x 4″ x 80″ side rails where you will attach the headboard and footboard. (If you don’t have much room to work, you can do this step shortly after building the side rails. This will make assembly easier when you’re up in a small bedroom.)
Carefully bring all of the components up to the bedroom. Don’t forget to grab your drill, 1 ¼” wood screws, and brad nailer.

Assemble the bed frame by attaching the side rails to the headboard and footboard pieces. Drive the 1 ¼” wood screws through the pre-drilled holes you made.

(Note: You may have noticed the scrap 1″ x 2″ boards attached to my headboard and footboard below. I did this extra step for my bed because I like using up all my scrap pieces as much as possible, but structurally it doesn’t really make a difference. If you do this added step be sure to allow for this additional thickness when building the center support.)

Lift the frame and place a leg into each of the four corners of the bed frame. Attach the frame to the legs using 1 ¼” wood screws. You should use 2 screws per leg (one on each side of the corner). This will secure the legs in place firmly and prevent any rotating.

Set the center support in the middle of the bed frame.

Lay your 1″ x 4″ bed slats on top of the side rail and center support. Evenly space the slats across the bed frame. Attached the slats to the center support using 2 brad nails for each. (Or to be able to disassemble the bed easier in the future, pre-drill holes through the end of each slat and into the side rail support board. Then drive a screw in to hold it in place.)

Step 5: Sanding the corners

Hand sand the bottom two corners of the frame to avoid any injuries to shins, legs, and bedding.

Step 6: Make the Bed

Lay the mattress onto the bed frame. Then make the bed and get ready to watch the new owner get a good night’s sleep.

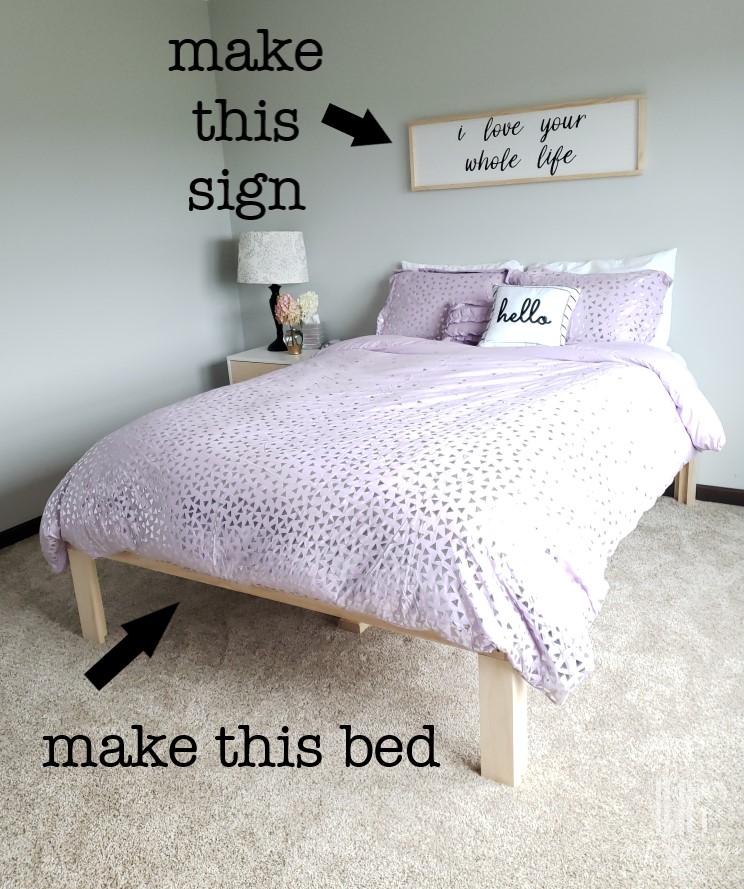
See the “I love your whole life” sign on the wall? You can learn how I make my own signs! Click over to view my tutorial for making a DIY Quote Sign. I even have a trick for adding faux-shiplap detail.

If you’re not ready to make the bed right now, pin this image for later!

DIY Platform Bed

If you liked this build, you’ll also like Brittany’s Farmhouse Style King Bed with Storage drawers:

Modified King Size Farmhouse Bed with Storage Drawers | Pretty Handy Girl

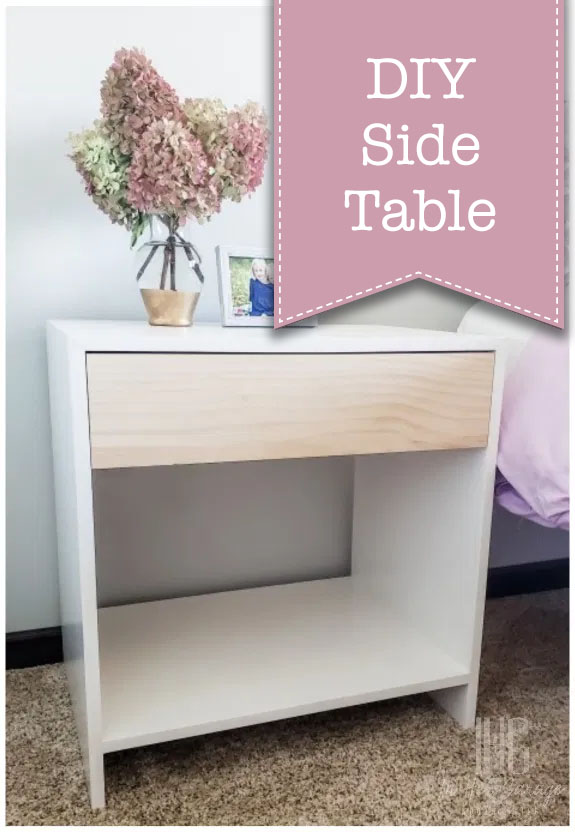
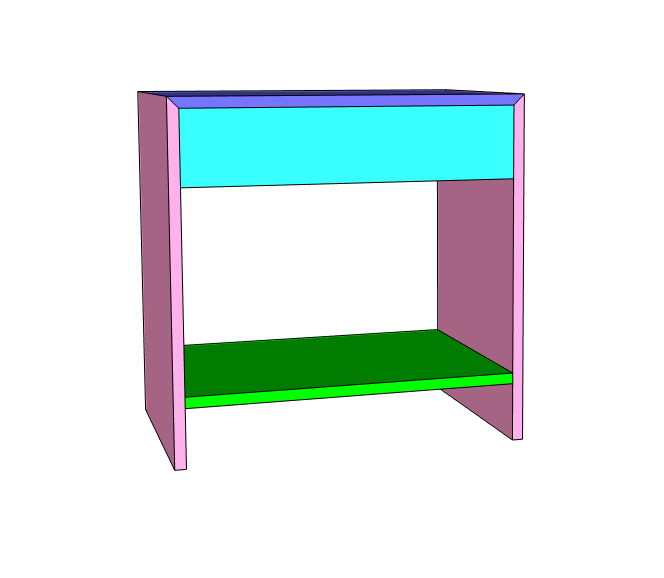
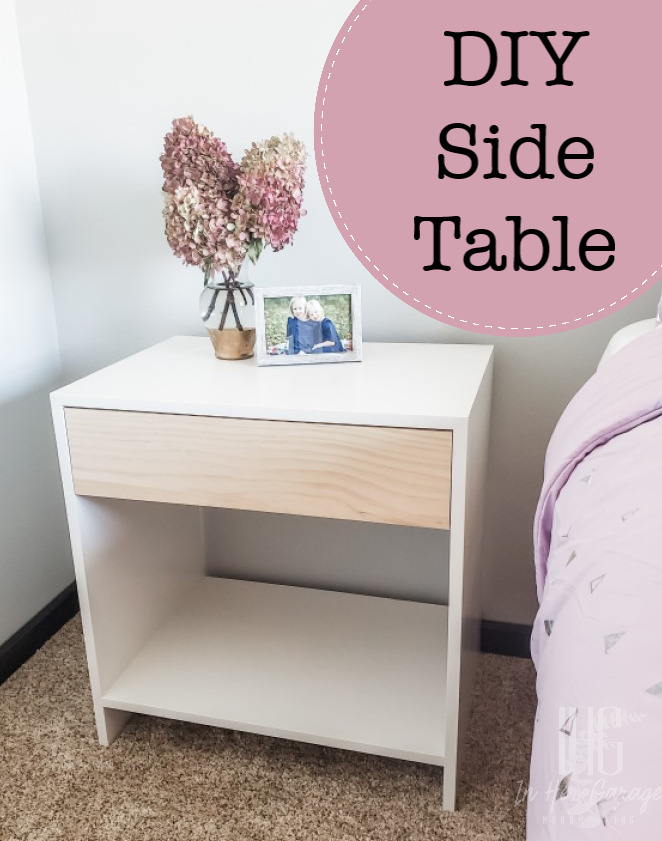
Stay tuned as I bring you more tutorials for the furniture that I am creating for my girls’ bedrooms! The adorable side table pictured alongside the platform bed is coming next month.  Thanks for building with me.

Hi! I’m Kristen, from In Her Garage, and I am a self-taught woodworker and DIY fanatic from Minnesota where I live with my husband and our two daughters. Between being a wife, mom and, registered nurse, I try to make as much time for DIY as possible. My love for building came after our family built our current home in 2015. After we moved in, we needed furniture and instead of spending massive amounts of money to order the pieces we wanted I decided that I would build them myself. I started with a buffet table plan from the fabulous Ana-white and quickly set out to remodel my entire home office.

Since then I have started a side business building furniture for the people in my community. I love hearing my clients talk about the pieces they wish they had whether it be a rustic buffet table, a one drawer side table, or a toy box and then making it a reality for them. While starting my small business it made perfect sense that I would document my building journey so I simultaneously launched the In Her Garage blog and I love sharing my plans, tips and tricks.

Making something beautiful with your own two hands through a little preparation and determination is an amazing feeling and I hope to bring inspiration and know-how to those looking to tackle a big or small project.
I am so glad that you found me here and please feel free to connect with me on PinterestInstagram, Facebook, and Youtube to see what I am working on right now.