Hi, y’all! I’m enjoying an absolutely gorgeous weekend at the beach. We are staying on Topsail Island in NC. Not to gloat, but it is wonderful living only a few short hours from the beach. But, I wish you were here too. The weather is cool, but not too cold. We spent Saturday exploring the southern most tip of the island. There are no roads leading to it. However, if you own a 4WD vehicle you can get a permit to drive on the beach to park and fish. Honestly, because we were walking, seeing the beach used as a parking lot kind of ruined the view.

But, no worries, we went exploring around the point and found plenty of beautiful vistas!

Like this frame worthy gem!

What do you think? I love having vacation photos to display and remind me of the wonderful time we had.

I have been thinking about getting several of my photos enlarged and reproduced via UPrinting.com.

UPrinting is an online printing company. Visit their website and find various printing services like canvas printing and more.

I have a little tip for you: Having your pictures printed on a rolled canvas is a more cost effective way of dealing with photo enlargements. For one, you don’t have to buy a frame! And two, you don’t pay the excess charge for stretching or the higher shipping charges.

When your rolled canvas arrives you can stretch it yourself! It really isn’t difficult. You can buy canvas stretcher bars at any art supply store. They come in almost any whole inch length. And as you can see, the prices are inexpensive.

I found this YouTube video that shows how easy the canvas stretching process is.

After you’ve stretched it, why not try one of these creative ways to display your canvas(es)?

Get an extra large printed canvas and use it as your headboard.

Photo source: Anemi Hotels

View this tutorial by The Sassy Pepper to create a hanging triptych of canvases.

Photo source: The Sassy Pepper

The Sassy Pepper also shows how to dress up the edges of the canvases. Cute, huh?!

Photo source: The Sassy Pepper


Disclaimer: This post is sponsored by UPrinting. Thanks to companies like UPrinting, I am able to continue blogging and bring you great tutorials. I hope you take a moment to view the products that Uprinting has to offer. Photo canvases are only one of the products you can have printed through their website. Business cards, letterhead, calendars and greeting cards are just a few more.


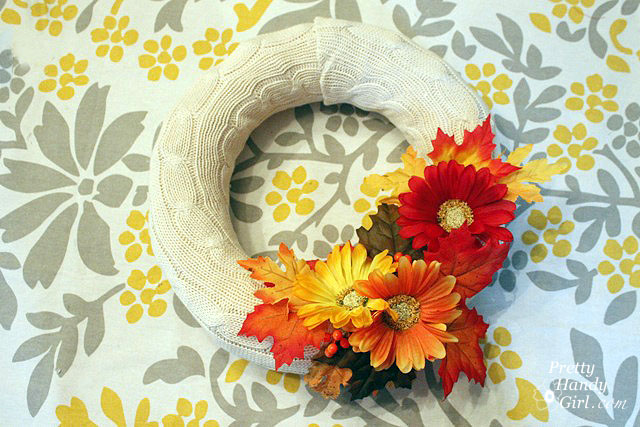
According to my facebook and twitter friends, I am not the only one who gets burned EVERYTIME I use a hot glue gun. For this reason, I typically will hand sew, nail, or E-6000 something before I will use a hot glue gun. But, every once in a while, there is just no substitute for hot glue. For example, when working with faux flowers and moss, nothing beats hot glue.

So, this week I decided to put an end to hot glue gun burns!  I googled “Hot Glue Gun Safety” last week and learned a few tips about using a glue gun. If you are like me, you may do a head slap and feel pretty stupid after reading this post. If you are already the intelligent being who never gets burned when using hot glue, well then you can close your browser and I now bequeath you with a “genius” award. Now scram! For the rest of us, keep reading.

Dedication: I dedicate this blog post to my dear friend Sarah VMK! She and I were discussing all the burns I tend to get while using a glue gun and she remarked, “You really need to do a post about this.” So, here it is Sarah!

Remember to use EXTREME caution:

The most important thing to know about using a hot glue gun is that it is dangerous! Never mind that you can buy one for $5 or less and some of them look like they were made by the same company that makes McDonald’s happy meal toys.

Or that most of them do not come with instruction manuals. Treat this little “gun” like a power tool and use extreme caution when using it. Don’t let those dual temp glue guns fool you. “Low” temperature is still hot enough to burn you. Listen up y’all so we can say goodbye to glue gun burns FOREVER!

photo courtesy of HelloHayley

Proper tools:


When you get ready to use a hot glue gun, be sure you have these things close at hand.

(I’ve included affiliate links for your convenience. I earn a small percentage from a purchase using these links. There is no additional cost to you. You can read more about affiliate links here.)

  • Heat resistant mat – a foil wrapped piece of cardboard, silicone mat or a cookie sheet will work fine
  • Needle-nosed pliers or tweezers for holding small objects
  • Popsicle sticks for pressing the glue down – Keep the popsicle stick in your hand so you won’t be tempted to use your finger
  • Bowl of ice water
  • Clean dry washcloth
  • Hot glue gun with dual temp (use it on low setting)
  • Extra glue sticks

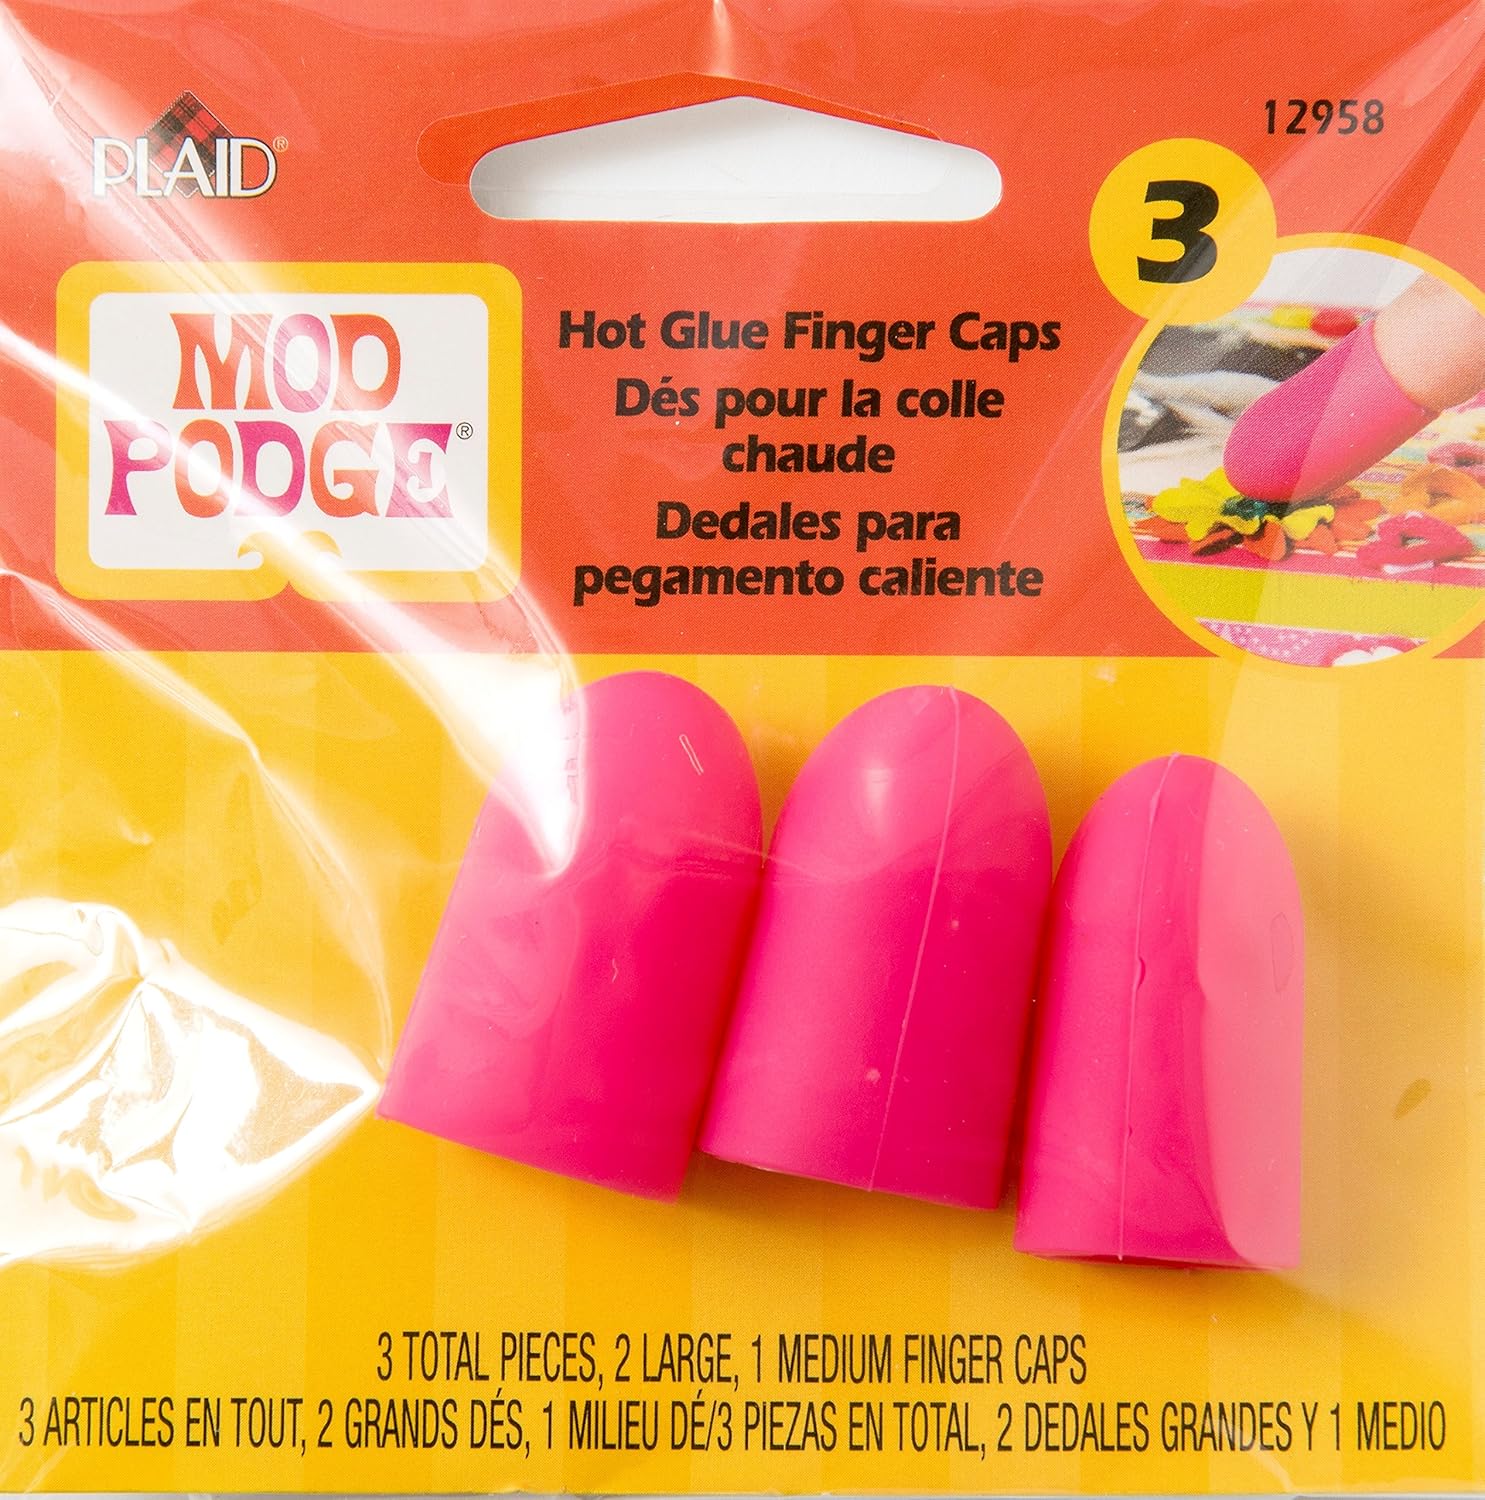
There are also finger caps sold to protect your fingers if you are really concerned about safety.

Long vs. short power cord:


The power cord on my glue gun is not very long. It barely reaches to the nearest outlet. Don’t allow your cord to dangle in mid-air for someone to snag or trip on. Get an extension cord so that it can lay flat on the floor while you are working. This will also give you more reach while working with the glue gun.

If the cord does get snagged and your glue gun starts to fall over, resist all the temptations to grab it. Just let it fall (and hopefully it won’t land on you or anyone else.)


Your glue gun at rest:

Ideally, you want to rest your glue gun upright on a flat heat resistance surface. I use mine on this foil wrapped piece of cardboard. But, inevitably the gun falls over sideways. I used to instinctively try to stop it from falling. But, that is a burn hazard waiting to happen.

Now I just lay the glue gun on its side making sure that the hot tip is not touching anything. No more tipping glue gun.


Working with your hot glue gun:

Gather all your craft pieces together and make sure that they are within reach so you don’t have to lean over your glue gun to retrieve anything. Make sure all distractions, children, pets, etc. are out of your way. Remember, this is a dangerous tool!

Think about your project before you start. Are you going to put glue on the object or press the object into glue. What is the best procedure that keeps your fingers the furthest from the hot glue.

Squeeze hot glue onto the object you want to glue. For decorative moss balls, I decided it was best to drizzle hot glue onto a piece of moss.

Roll your ball or light bulb onto the moss. (That’s right, I mossed a light bulb! Hey, I had to find something to do with these bulbs leftover from the hollywood light fixture.) Be very careful to keep hands away from the moss.

Use a popsicle stick to press the moss to the ball (or lightbulb.)

As the bare spots get smaller, you may decide to add hot glue to the ball (err, light bulb.)

Lightly set the moss into the glue, then use a popsicle stick to press it firmly into the glue.


As long as you face the bulb base away from the viewer, no one would ever guess that it was actually a light bulb!

When working with smaller objects, DO NOT hold them with your fingers. It is best to put glue on the larger object and press the smaller ones into the glue. Pick up your small object with needle-nosed pliers or tweezers.

Place it, then use your popsicle stick to firmly press the small object into the glue.

If you absolutely have to put glue on a smaller object. Do not use your fingers or hands! Use the tweezers or pliers to hold it while you add the glue.

Okay – and I know – sometimes there is no substitute for using your fingers. If you decide to take the risk of putting your fingers in mortal danger, let the glue cool for a few seconds, then you can gently reposition the object as long as there is NO glue near your flesh.


If you do get burned:

Even the most careful preparation and concentration will not protect you from an occasional accident. So, think like the Boy Scouts, be prepared.

Keep a bowl of ice water nearby. If you burn your finger tips, dunk them in the ice water as soon as possible. Keep a washcloth at hand in case you burn your arm, leg or something that can’t be dunked in the bowl. Then you can wet the washcloth and apply it to the burn. It is crucial to cool down a burn as soon as possible to reduce the damage.


After your project:

Unplug your hot glue gun as soon as you are done with your project. Pick the cord up off the floor so no one can accidentally tug on it. Let your gun cool COMPLETELY before storing it away.

Inspect your glue gun periodically for signs of splits or breaks or signs of wear and tear. As soon as you discover any problems, discontinue using the hot glue gun and discard it. Remember, they are cheap and can be easily replaced! Your fingers will thank you.


Most people would have probably walked past this plain jane wool purse.

I almost did, but then the price tag caught my eye. THREE DOLLARS! Immediately I pictured dressing it up with a few fabric rosettes.

With fall on the horizon, I decided to work with some orange fabric scraps I had lying around. Within an hour I had a stylish new fall purse!

Materials:

  • Fabric scraps
  • Hot glue gun and glue sticks
  • Felt
  • Safety pins
  • Scissors
  • Foil covered cardboard or other work surface

Pick out your fabrics and rip them into 3″ – 4″ strips.


It may help you visualize what colors to use by laying them on your purse.

Start by rolling one end of the strip.

Add some hot glue and keep rolling the fabric strip.

Fold and twist the fabric for more interest and to hide the raw edges.

Finish by folding the end over and gluing it to the rosette.

Cut a piece of felt in a circle shape slightly smaller than the rosette.

Check to make sure the felt circle doesn’t extend beyond the edges of the rosettes.

Snip two holes in the felt circle and feed a safety pin through.

Put some hot glue onto the back of the rosette…

…and glue the felt circles and safety pins to the rosettes.

Pin the rosettes onto the purse. Adjust them until you like the arrangement. Feel free to add more or less rosettes.

Personally, I like odd numbered groupings.

The best part about this project is that I can swap them out and add different colored rosettes depending on the season!

Do you like? What other colors do you think would look nice on the brown? I thought about creams and whites for winter. Hmmmm. You could also add felted wool roses instead of fabric.

And now it is time to announce some lucky winners! If you know one of these people you might want to ask them to send you some of their lucky vibes.

The 3M Product Giveaway goes to:

Lisa! Her translation was:
He says: Don’t watch, you’re making me nervous.
He means: I don’t have a clue as to what I am doing.
I hope you enjoy the 3M product packet as much as I did.

And the two winners of the Wagner PowerPlus Paint Sprayer and the DeckMate stainer are:

Rhonda Jones!
Her comment was: Brittany, this is the BEST tutorial I have ever read! You did an amazing job explaining how you did this project. I must say, I really liked how you used your phone to show the amount of time each step took. You have inspired me to get to work on several pieces of furniture that I have that needs to be painted! I am headed to prowl around your blog now! Your entire blog is amazing! I am your newest follower…I am a fairly new blogger. I hope you will come visit me sometime! ~~~rhonda~~~ \ABlissfulSpirit/

Monique!
Her comment was: I’ve always wondered about using a sprayer. Do you think there would be less overspray if something more substantial (with less openings) such as a chest or buffet was painted? I’m looking forward to reading about your next spray painting project. Thanks for the giveaway!
Congratulations to all the winners. Stay tuned this week I have another giveaway for you on Wednesday ;-).

Today I am going to show you how to Make Your Own Fall Wreath. If you’ve been following me for long, you were witness to my one wreath with many different looks for one year. Well, I’m ready for a change. So, I decided to create something completely different.

When I think of fall, I think of cooler weather, sweaters, autumn leaves and flowers. This wreath encompasses all those elements.

Lucky for me I had all the materials on hand. Especially the XL cable knit sweater that I picked up at Goodwill thinking I could make sweater vases out of it.

Materials:

(I’ve included affiliate links for your convenience. I earn a small percentage from a purchase using these links. There is no additional cost to you. You can read more about affiliate links here.)

Instructions:

Start by cutting off the sleeve of the sweater.

Cut, the sleeve in half lengthwise. Then put the right sides together.

Stitch the ends together (try to line up the stripes or cable knitting.) Trim off any excess.

Open your sleeves up to give you one long length of sweater material.

Preheat the hot glue gun. Lay the wreath form on top of the sweater material.

Put a bead of hot glue on the back side of the wreath form and glue one edge of the sweater material to the wreath.


Squeeze out another bead of hot glue, wrap the other side of the sweater material up and glue it against the already glued piece.


Realistically, this is the backside of the wreath, but if you have a see through door like I do, you will want to roll under your raw edges to hide the seams.


Work in 3-4″ sections, adhering one side and then the other until you reach the end of your wreath. Cut your sweater material slightly longer than you need, then roll under the raw edge and glue it down.


Your wreath should resemble something like this:


Hot glue some leaves onto the wreath covering one of the seams.


Then add some flowers. And more leaves, and more flowers, until you have burned your fingers to smithereens!


Next tie one loop of ribbon to cover the top seam.


Tie more ribbon to the loop to give your wreath a more “substantial” bow.


And now you have a warm, cozy and colorful fall wreath! What do you think? I just want to snuggle up to it every time I walk through the door.


Have you started to decorate for fall? Do you have your wreath yet? I’d love to hear about your unique wreath project. And if you need more ideas, enjoy these 24 more Fall wreath ideas:

24 Creative Fall Wreaths | Pretty Handy Girl
Y’all have a fabulous weekend!


Are you as nutso about paint chip projects as I am? I’m semi-worried that I might get arrested next time I’m pulling samples at my local paint department. Is there a law against taking too many?* Okay, so let’s just say that I have collected many samples over the years while contemplating room colors (which is true!)

*Paint chips may be free, but please use consideration when taking paint chips. Try not to take more than 2-3 of each color and definitely don’t take the last of a color. It might be a good idea to ask permission from the paint store employee if you need to take more than a dozen.

But, what do you do with all those left over paint chips once you have decided on your color? It seems a shame to throw them away, doesn’t it.

Why not use them to make a lamp shade?

I actually saw this lamp shade on JossandMain.com last week and thought, “Ooo Ooo Oooo! This gives me an idea of what to make with all those paint chips!”

Materials:


  • Lamp shade (best if it isn’t tapered)
  • Paint chips
  • Clear packing tape
  • White paper tape (low stick)
  • X-acto knife
  • Cutting surface
  • Metal ruler
  • Hot glue gun and glue sticks

Tutorial:

Start by laying out your paint chips side-by-side and organize them any way you like.

To judge how many strips you need, rest the seam of your lamp shade on the end of the paint chips and roll it until you reach the seam again. If you still have paint chips under your shade, then you have enough! I had one small gap leftover, so I added two of the same colored chips together so the small strip wouldn’t be as noticeable.

Butt the paint chip strips tightly together. Put paper tape on top of the chips to hold them together.

Gently turn them over and tape the seams with clear packing tape.

Once all the strips have been taped together, trim off the excess tape.

Measure the height of your lampshade and trim your paint chips to the same height.

Test fit your paint chip roll.

Use your hot glue gun to run a line of glue on the seam of your lamp shade. Glue the end of the paint chips to the shade.

Run a line of hot glue on the top and bottom edges of the lampshade and roll the paint chips around the shade. Secure the end by hot gluing it to the shade.

And that is it! A super easy and very colorful home decor project.

I think it is beautiful whether the light is off…

…or on.

When choosing the paint swatches you wish to use, try pulling colors from a painting or use colors that are compliments to your wall color.

What?! You still want more paint chip home décor ideas?! How about a whole round up of them? Go ahead and scoot your index finger on over to Parentables for 11 Paint Chip Projects to see 9 more amazing paint chip projects:

I guarantee, you’ll never pass through the paint department without grabbing a few paint chips again!