Faux Zinc Painted Chalkboard File Cabinet

Faux Zinc Painted Chalkboard File Cabinet
This summer I was thrifting with a few friends and stumbled across an ugly cabinet at the Goodwill. The metal chest had extra wide and deep storage, but the worst colors imaginable! The hot pink and mint green were disguising the true potential of the chest, but like a color-blind dog, I was able to see beyond its garish appearance. In my mind, I pictured a vintage metal cabinet with a faux zinc side and chalkboard drawer fronts.

I scooped it up and brought it home. Then the poor chest sat in our garage for months and months until I had a chance to work a little spray paint magic and turned it into….this thing of beauty:

Yes, that is the same chest of drawers! You could do the same transformation.
Materials:
(I’ve included affiliate links for your convenience. I earn a small percentage from a purchase using these links. There is no additional cost to you. You can read more about affiliate links here.)
- Gray Automotive primer
- Rust-oleum Black chalkboard spray paint
- Rust-oleum metallic hammered metal spray paint (silver)
- Craft paper
- Painter’s Tape
- Rubber gloves
- White chalk
Instructions:
Clean off the drawers. Remove any dirt or debris (I actually had to use a little Goo Gone to get rid of some sticky residue. But, lemon essential oil will also work for this task.)

Remove the drawers from the chest. Tape over the drawer glides and slides. Mask off the drawer sides and insides by covering the drawers with tape and craft paper, leaving only the drawer fronts exposed.

Spray paint the chest and drawers with automotive primer. (I prefer the automotive primer because it sticks to metal and can withstand a lot of abuse.) Let it dry.

Spray paint the drawers with chalkboard paint. (Use three fine coats of paint instead of one or two heavy coats.) Set them aside to dry.
Adding a Faux Zinc Texture:
This is the most exciting part of the tutorial. I created this technique by trial and error and I’m excited by how well this method works for creating a faux zinc texture.

Getting a faux zinc texture is really easy. Just have some gloves on and use a crumpled up piece of craft paper. (A loose crumple works best.)

Spray paint the chest with a thick coat of the hammered silver spray paint, (but not so thick that it runs). Let the paint get tacky by waiting a few seconds. Then use the crumpled piece of craft paper to blot into the wet paint.

Work in small 1 foot sections and pounce the paper a few times. (Too much pouncing and you’ll lose the large textured pattern.)
Let the cabinet dry thoroughly.
Insert the chalkboard drawers back into the cabinet frame.

Add chalkboard art to your drawer fronts.

This metal chest of drawers is the perfect size for my large tablets of art paper.

The cabinet has a wonderful texture now.
I have the flexibility to move my art supplies around and just change the chalkboard label.

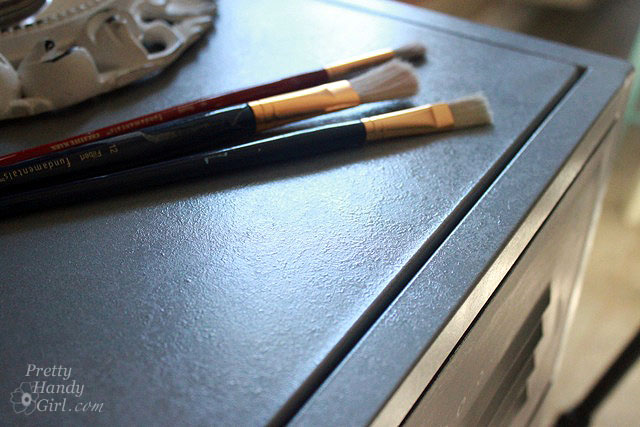
Did I mention this little chest is the perfect height to rest my palette on while painting.
I’m soooo thrilled with the results!


That is about the coolest chest EVER. I seriously love it, thanks for sharing! I ‘d be boring right now with a Lowe’s gift card. New house day four around here (after truck arrived) and I need things like toilet paper holders that aren’t awful and new light switch covers……. zillions of curtain rods. Stuff like that. Not exciting but necessary! 🙂
LOve the cabinet!! It’s beautiful now. I have some (lots) of painting to be done around the house!
Hi PHG,
I just bought a round dining table off of Craig’s List that I’ll be repainting, so I need lots of Lowe’s supplies. The number one thing on my list, though, is that handy dandy spray paint adapter!
Thanks for the giveaway…
Hi –
I have a very ugly lamp that needs to be painted and my dogs chewed thru the cord of another lamp so I need to replace that. It was unplugged at the time so no doggies were harmed!
I’m working on a sofa table. I love working with wood!!!
I’m in the process of making cute little doggie beds to sale.
I have ripped up the carpet on my stairs and the gift card would go a long way in getting the hardwood installed!
I think you snagged a great find! I have so many projects going, I could use the gift card for any of them! I’m in the middle of reupholstering a chair, but first need to figure out how I want it painted.. Let’s see, um.. I have a vintage cabinet in need of paint, and my kitchen chairs need a coat of paint. Whew!! That’s only the tip of the iceberg!!
Keep on crafting!
Love everything on your website! You are a girl after my own heart! I have always been a diy person even before it became popular – just grew up in that kind of household. You are so talented and have to say this is one of my favorite blogs. Not sure how I would use the gift card – too many projects going on – lots of painting, fixing kitchen sink etc. Thanks so much
Boy do I have a garage full of stuff, but I’d really like to get started on a vanit I would like to take apart and make two nightstands out of. I need paint, hardware, etc;)
I’m looking to build a small coffee table for the basement using one of Ana White’s designs! This would be my first attempt at building something and I can’t wait!! PS We just finished our entire basement using all materials, including carpeting, from Lowe’s. We made lots and lots of trips there! 🙂
My husband just moved bats of insulation from our garage into our attic (they had been there for…a long time…while he rewired our house himself). Now that we have more room in the garage, I would love to build him a simple workbench so he has dedicated space to work on future projects.
I’ve got about 5 projects going on! Winning the gift card would allow to buy the supplies to finish up some of those projects 🙂 Thanks for the opportunity.
Would love a gift card to get plywood to build more furniture, Thanks for this chance!
I would use the gift card to buy the supplies to redo an old dresser and vanity I scored at a yard sale!