
Saving Etta: Upstairs Room Reveals
Saving Etta: Upstairs Room Reveals
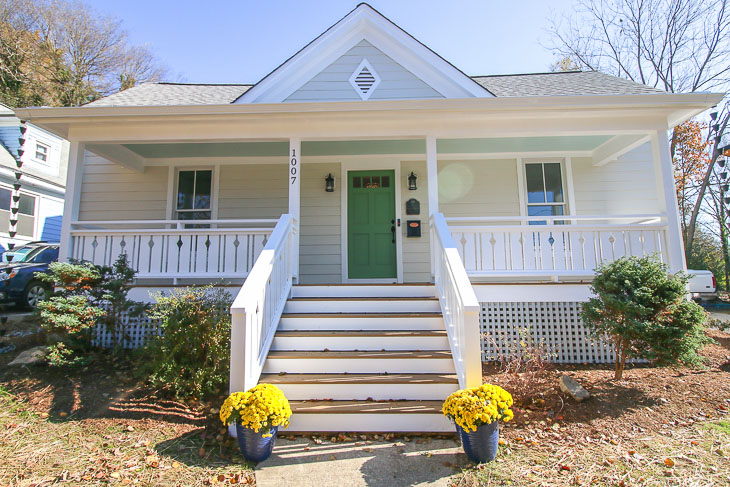
We’ve come to the end of the Saving Etta room reveals. It’s been fun, but it’s time to move on to a new project. If you were here for the last Saving Etta reveal, you saw my announcement that I’ve purchased another house to renovate. The Millie’s Remodel project is starting soon and I can’t wait to share the transformations with you. But for now, let’s head up those stairs to see the Saving Etta: Upstairs Room Reveals.
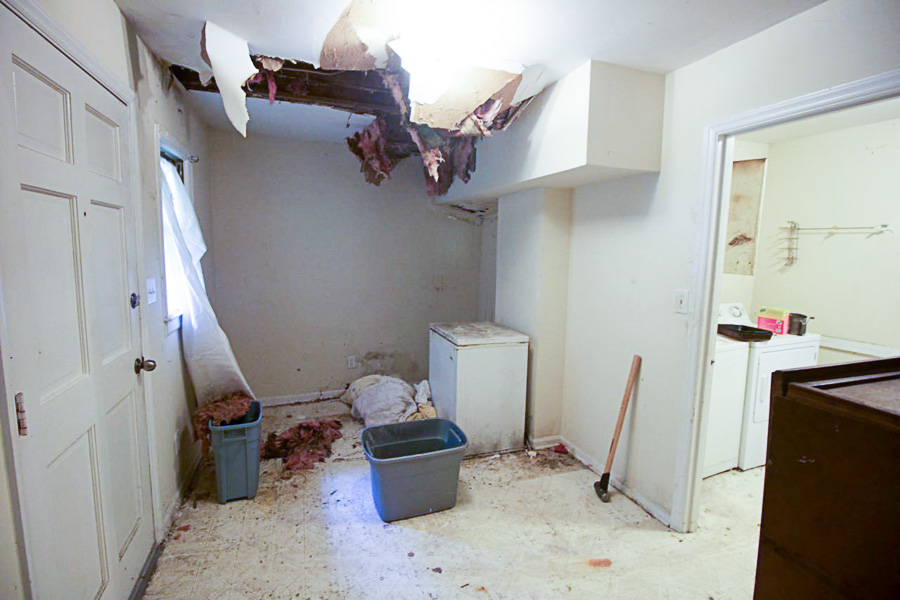
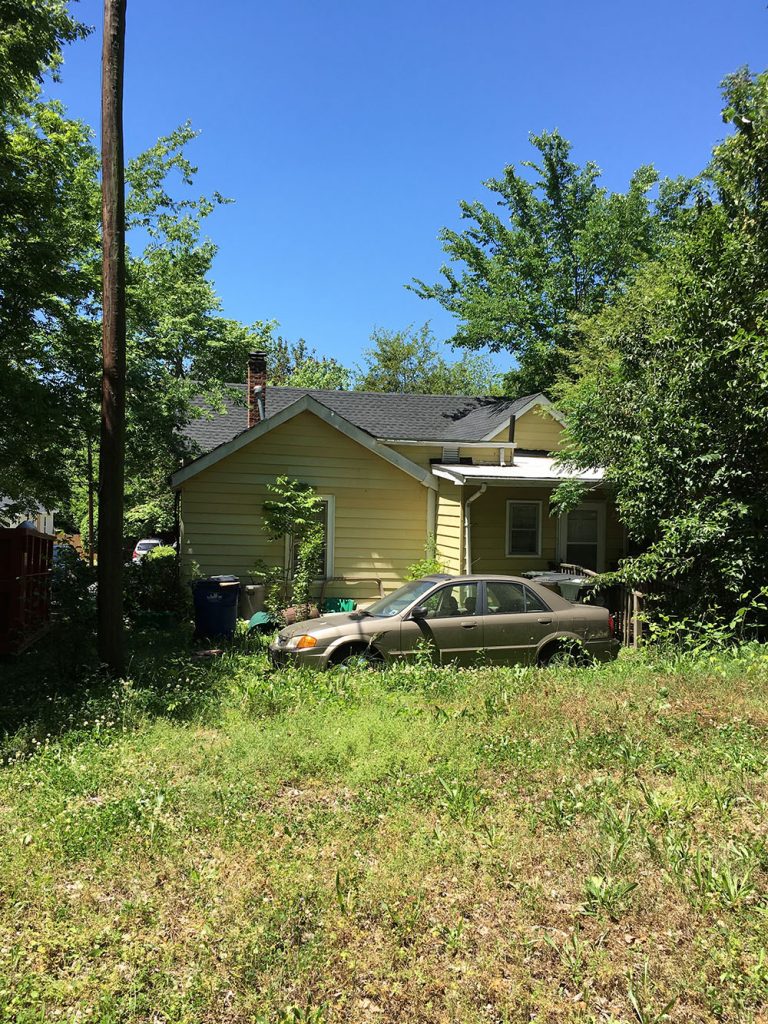
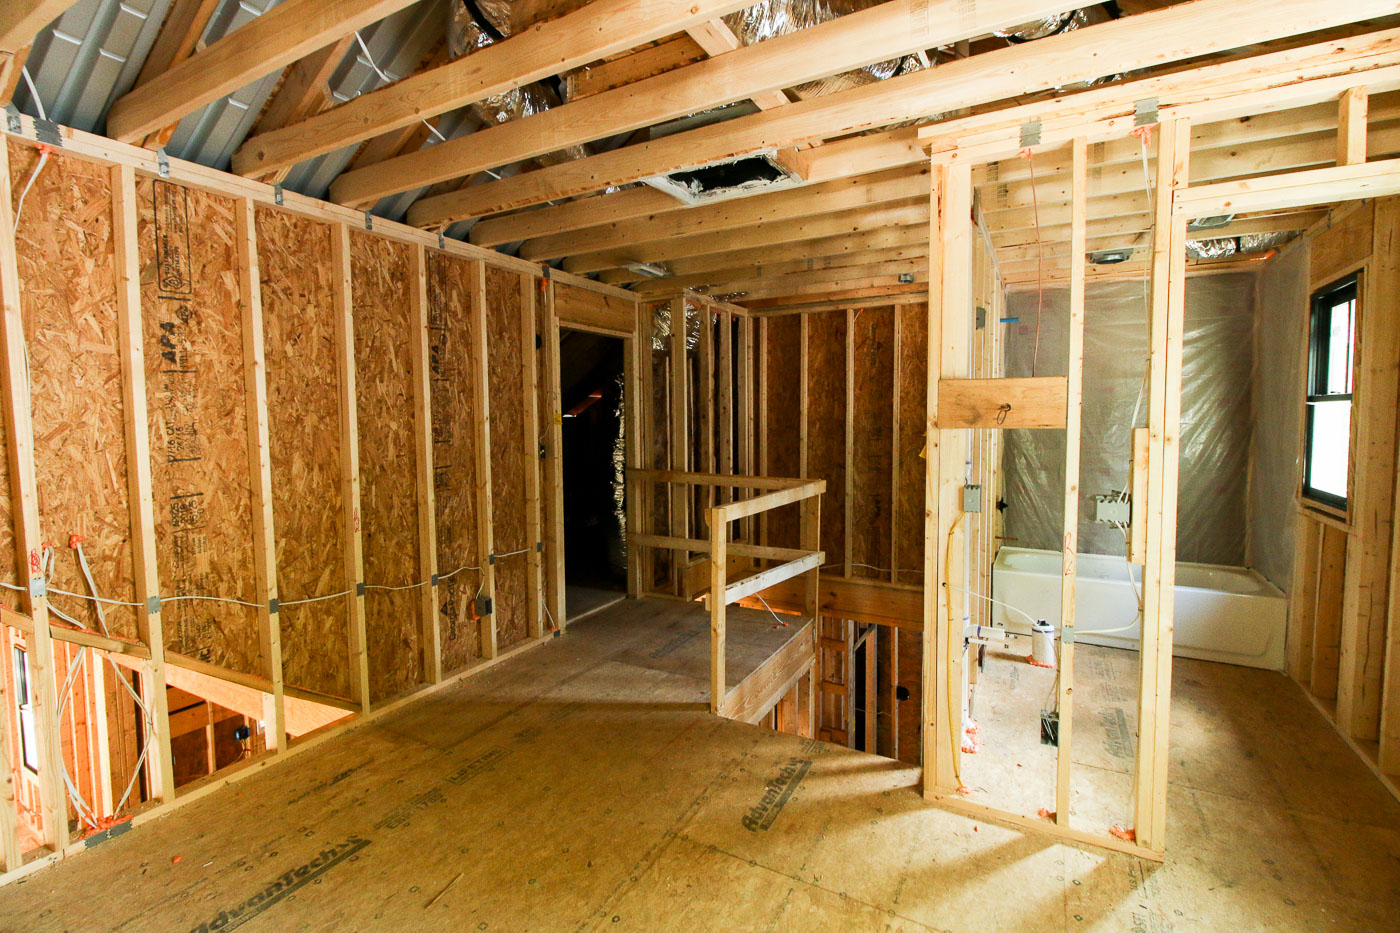
The original Saving Etta house didn’t have an upstairs, but after climbing onto the roof one day, I couldn’t resist the view and was determined to add a small second-floor room. I had climbed onto the roof to investigate for roof leaks. What I found was a host of issues: from a flat roof with no pitch to nail heads exposed. It was no wonder the ceilings inside were pocked with black mold and some spots had so much damage, the sheetrock had collapsed in places.
If I had to completely rebuild the roof, I wanted to find a way to add a small loft or second-floor room to look out onto the beautiful backyard.
Which is basically how the idea of adding a second floor came to happen (but in a more round about fashion). After mentioning to my architect that I wanted to build one roof over the back and add a small loft, she got silent. Then she measured her words and said, “I know you’ll need time to process this, but you need to tear off all this mess in the back and rebuild. It only took me 30 seconds to agree with her because I lost so much sleep trying to figure out how to fix the roof leaks, and dig a crawlspace where the floor joists rested on the earth.
Back of the House Plans
Luckily my architect came up with the brilliant two-story plans for the back of the house, and I couldn’t be happier with the results.

Look at all those glass windows and doors taking in the view of the yard. And, lest you think it looks like a giant addition, from the front sidewalk you’d never know there was a second floor addition. We both agreed it was important not to take away from the original look of the 1900 portion of the house.
Before I get ahead of myself, I’d like to thank all the Saving Etta sponsors. They are all near and dear to my heart for their support and patience. When it comes to selecting products, tools, and clothing, these are the brands I select time and time again.

Progression of the Upstairs Rooms:
Once the framing was done, I knew the upstairs was going to be a nice little retreat for the new owners. With a private bathroom, bedroom, and an open room, this space could potentially be rented out, become an office, or a kids’ wing.
The Upstairs Reveal:
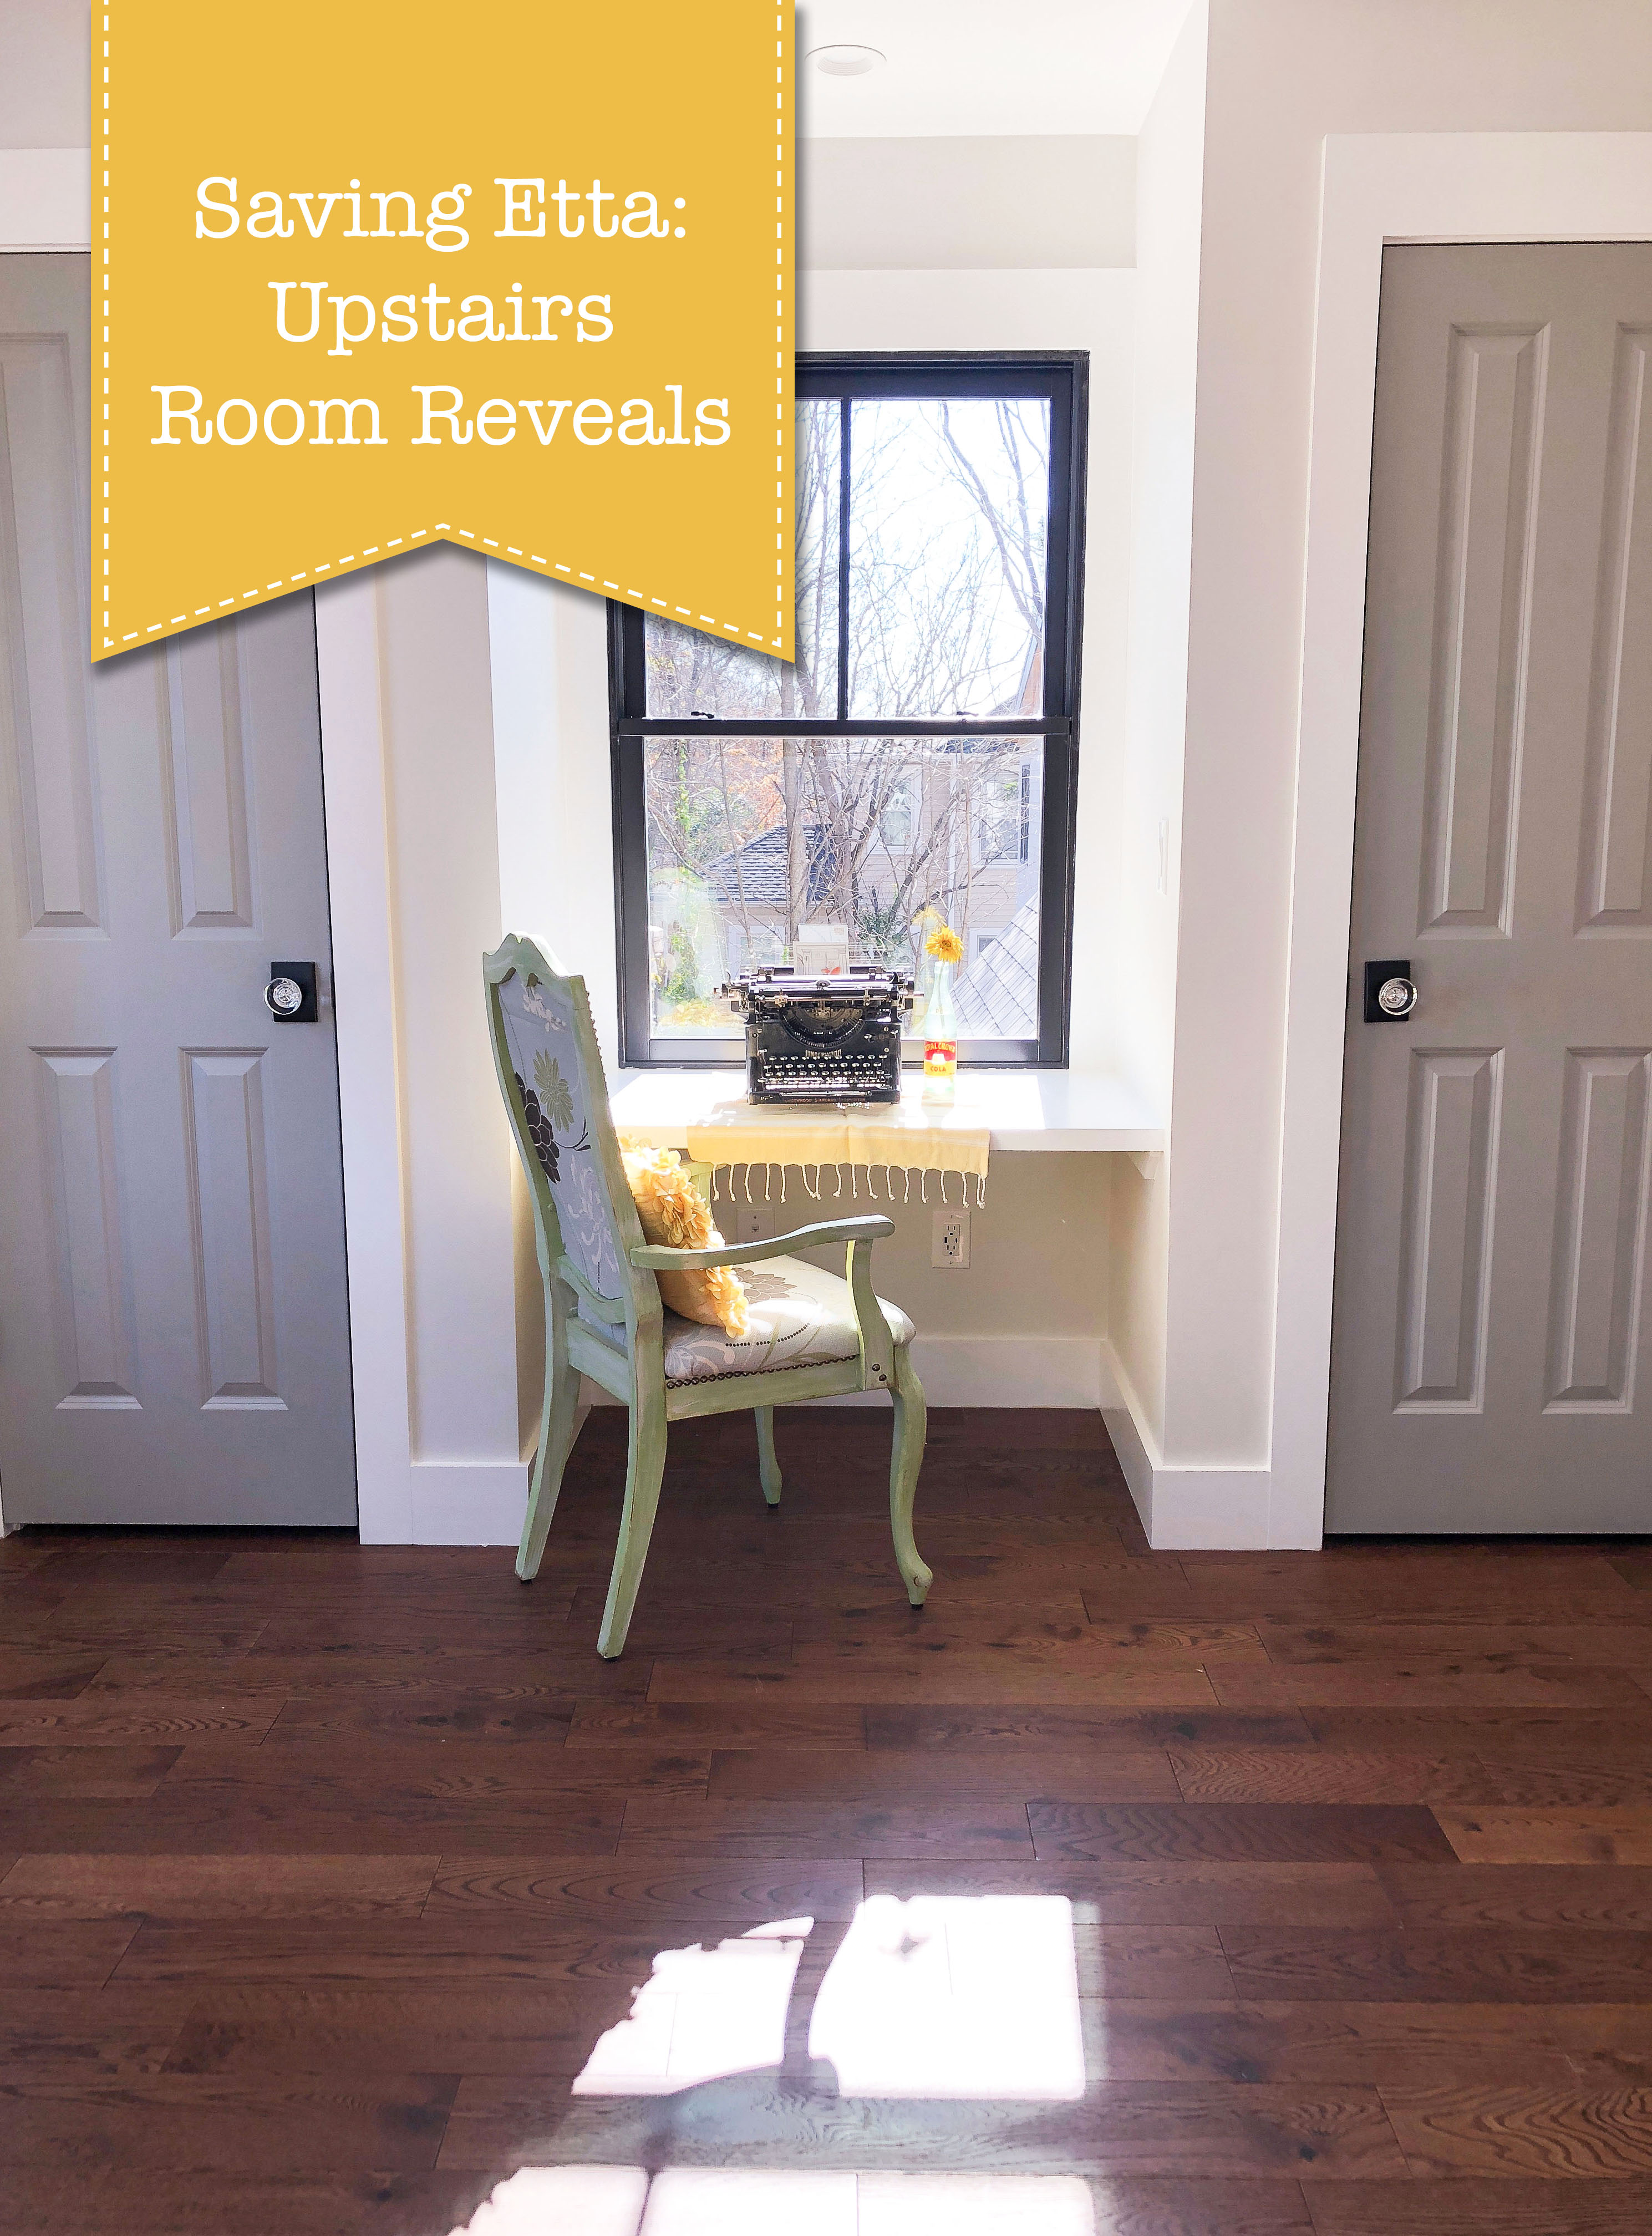
Upstairs consists of a bathroom, an open room at the top of the stairs, the attic access door (shown in the picture below), and a bedroom.
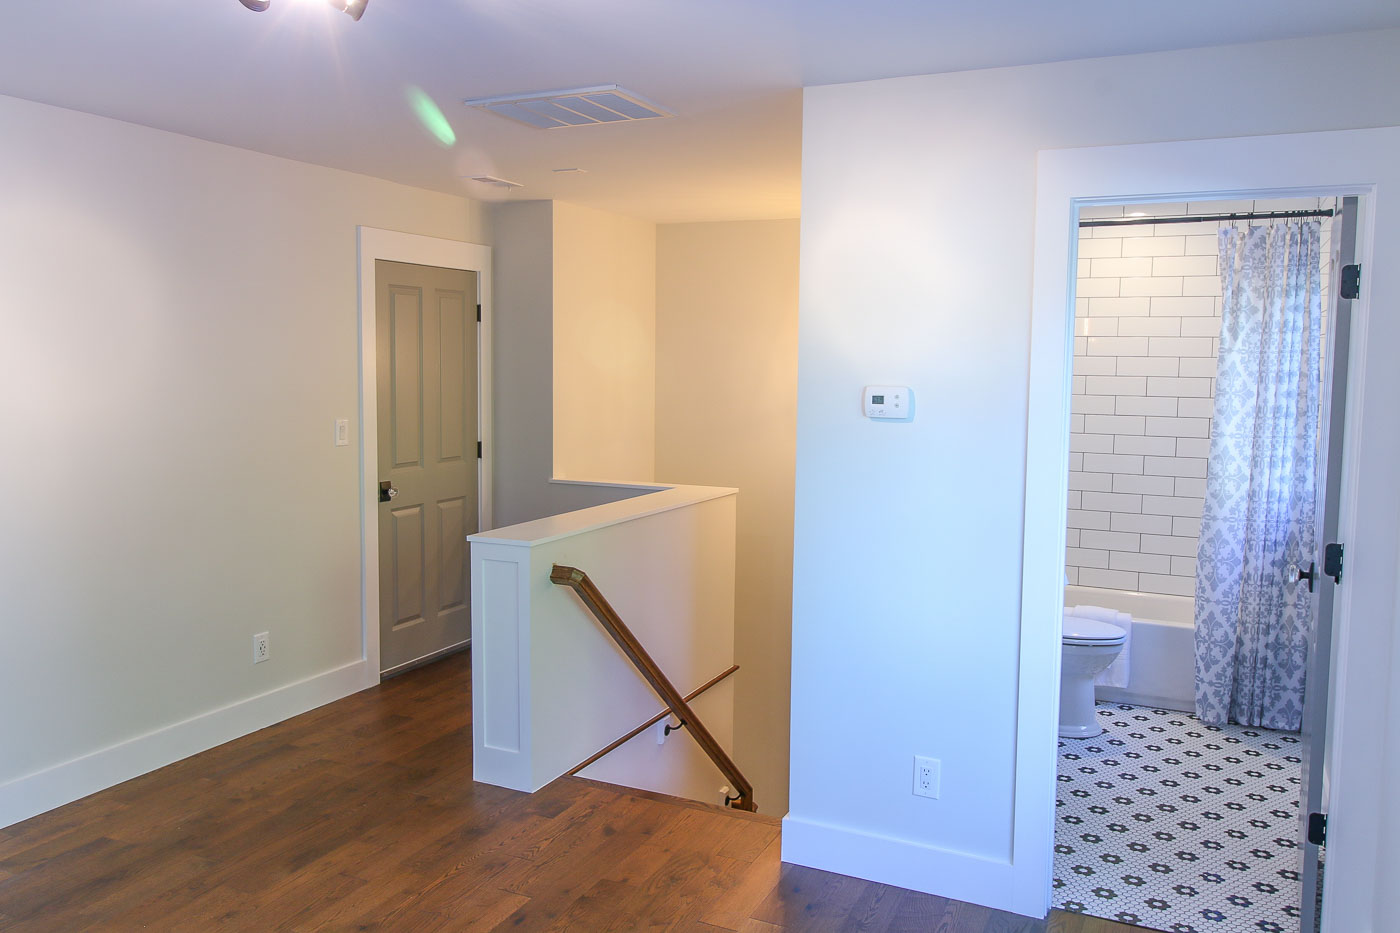
At the top of the stairs, I debated for a while about what style railing to put outside the attic access door. I couldn’t find anything I really liked.
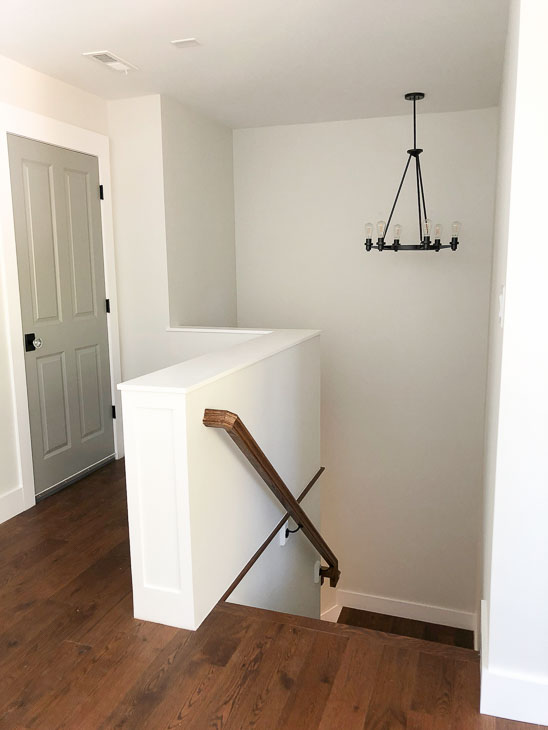
One night I had a stroke of genius. Why do we have to put a railing there? Let’s put some more storage. That’s how I decided to have my trim carpenter build a little bookcase there. I’m very happy with the decision.
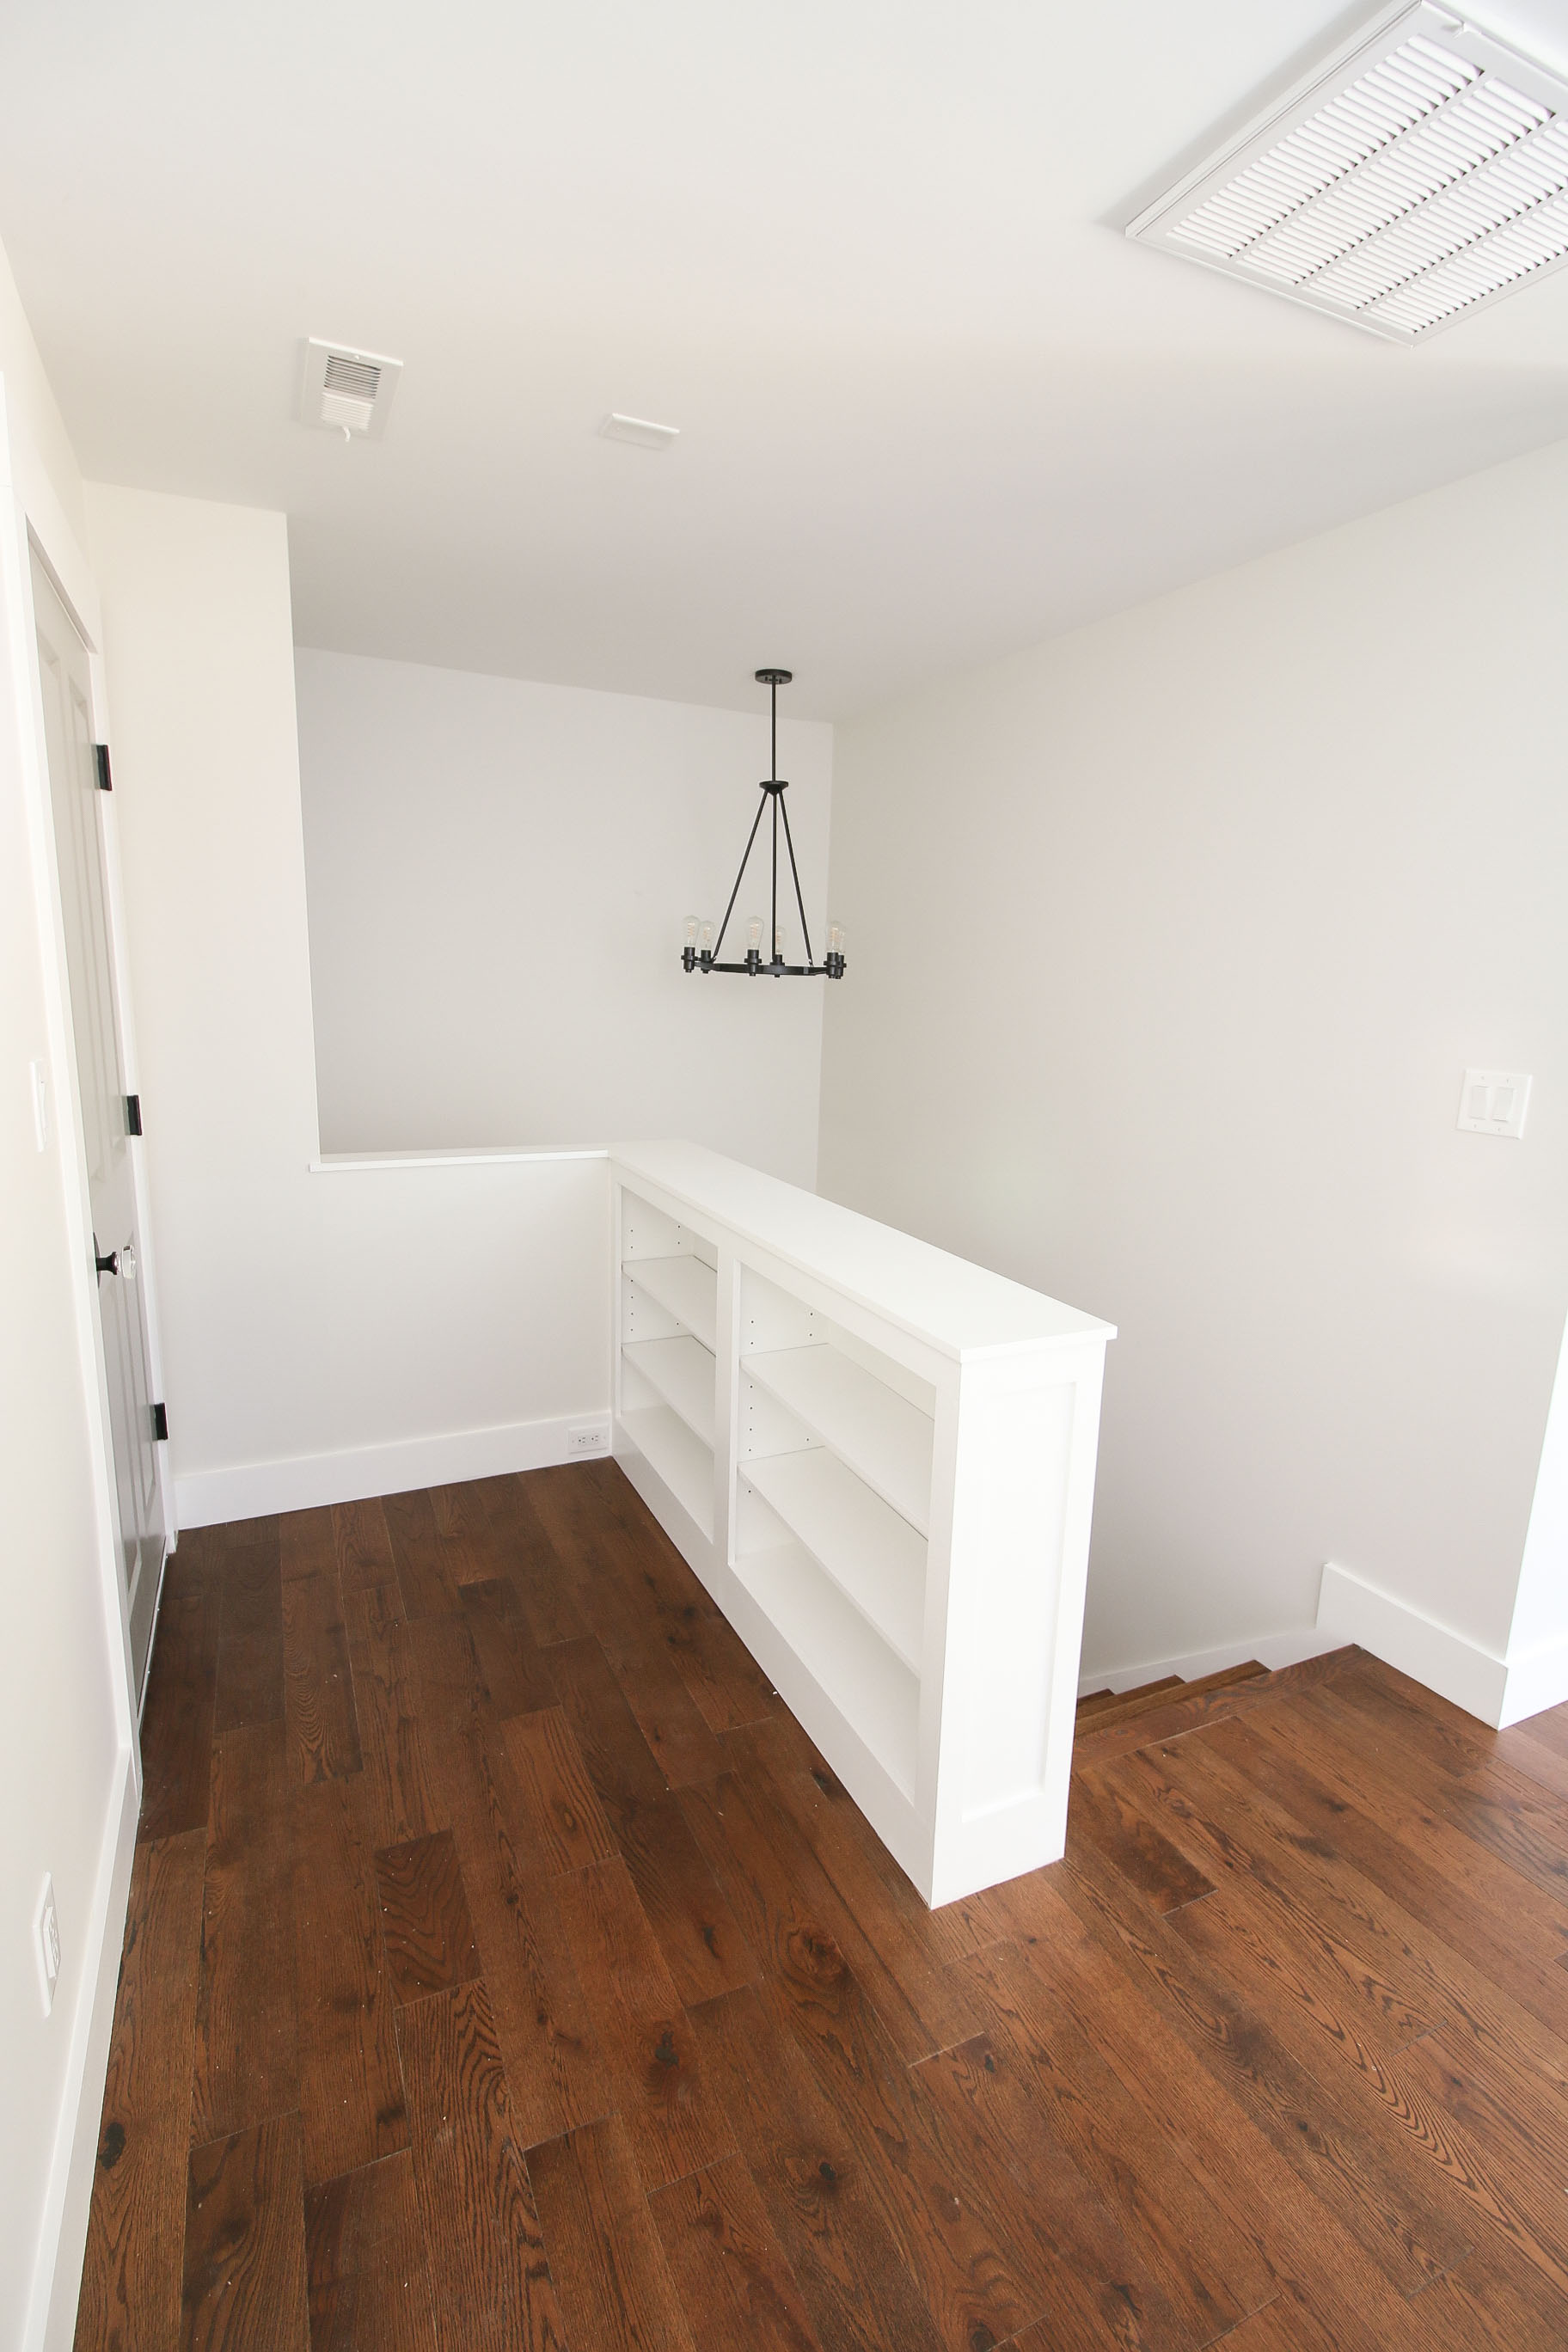
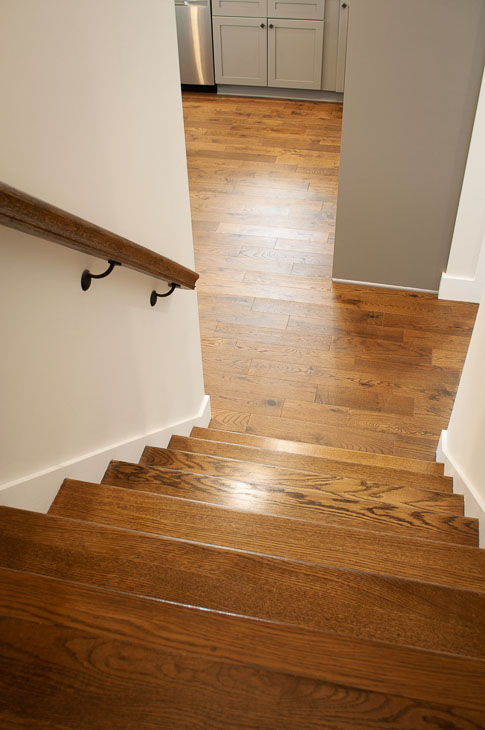
The Elegance Series Impressions Flooring continues upstairs. I love the aged look of this floor!

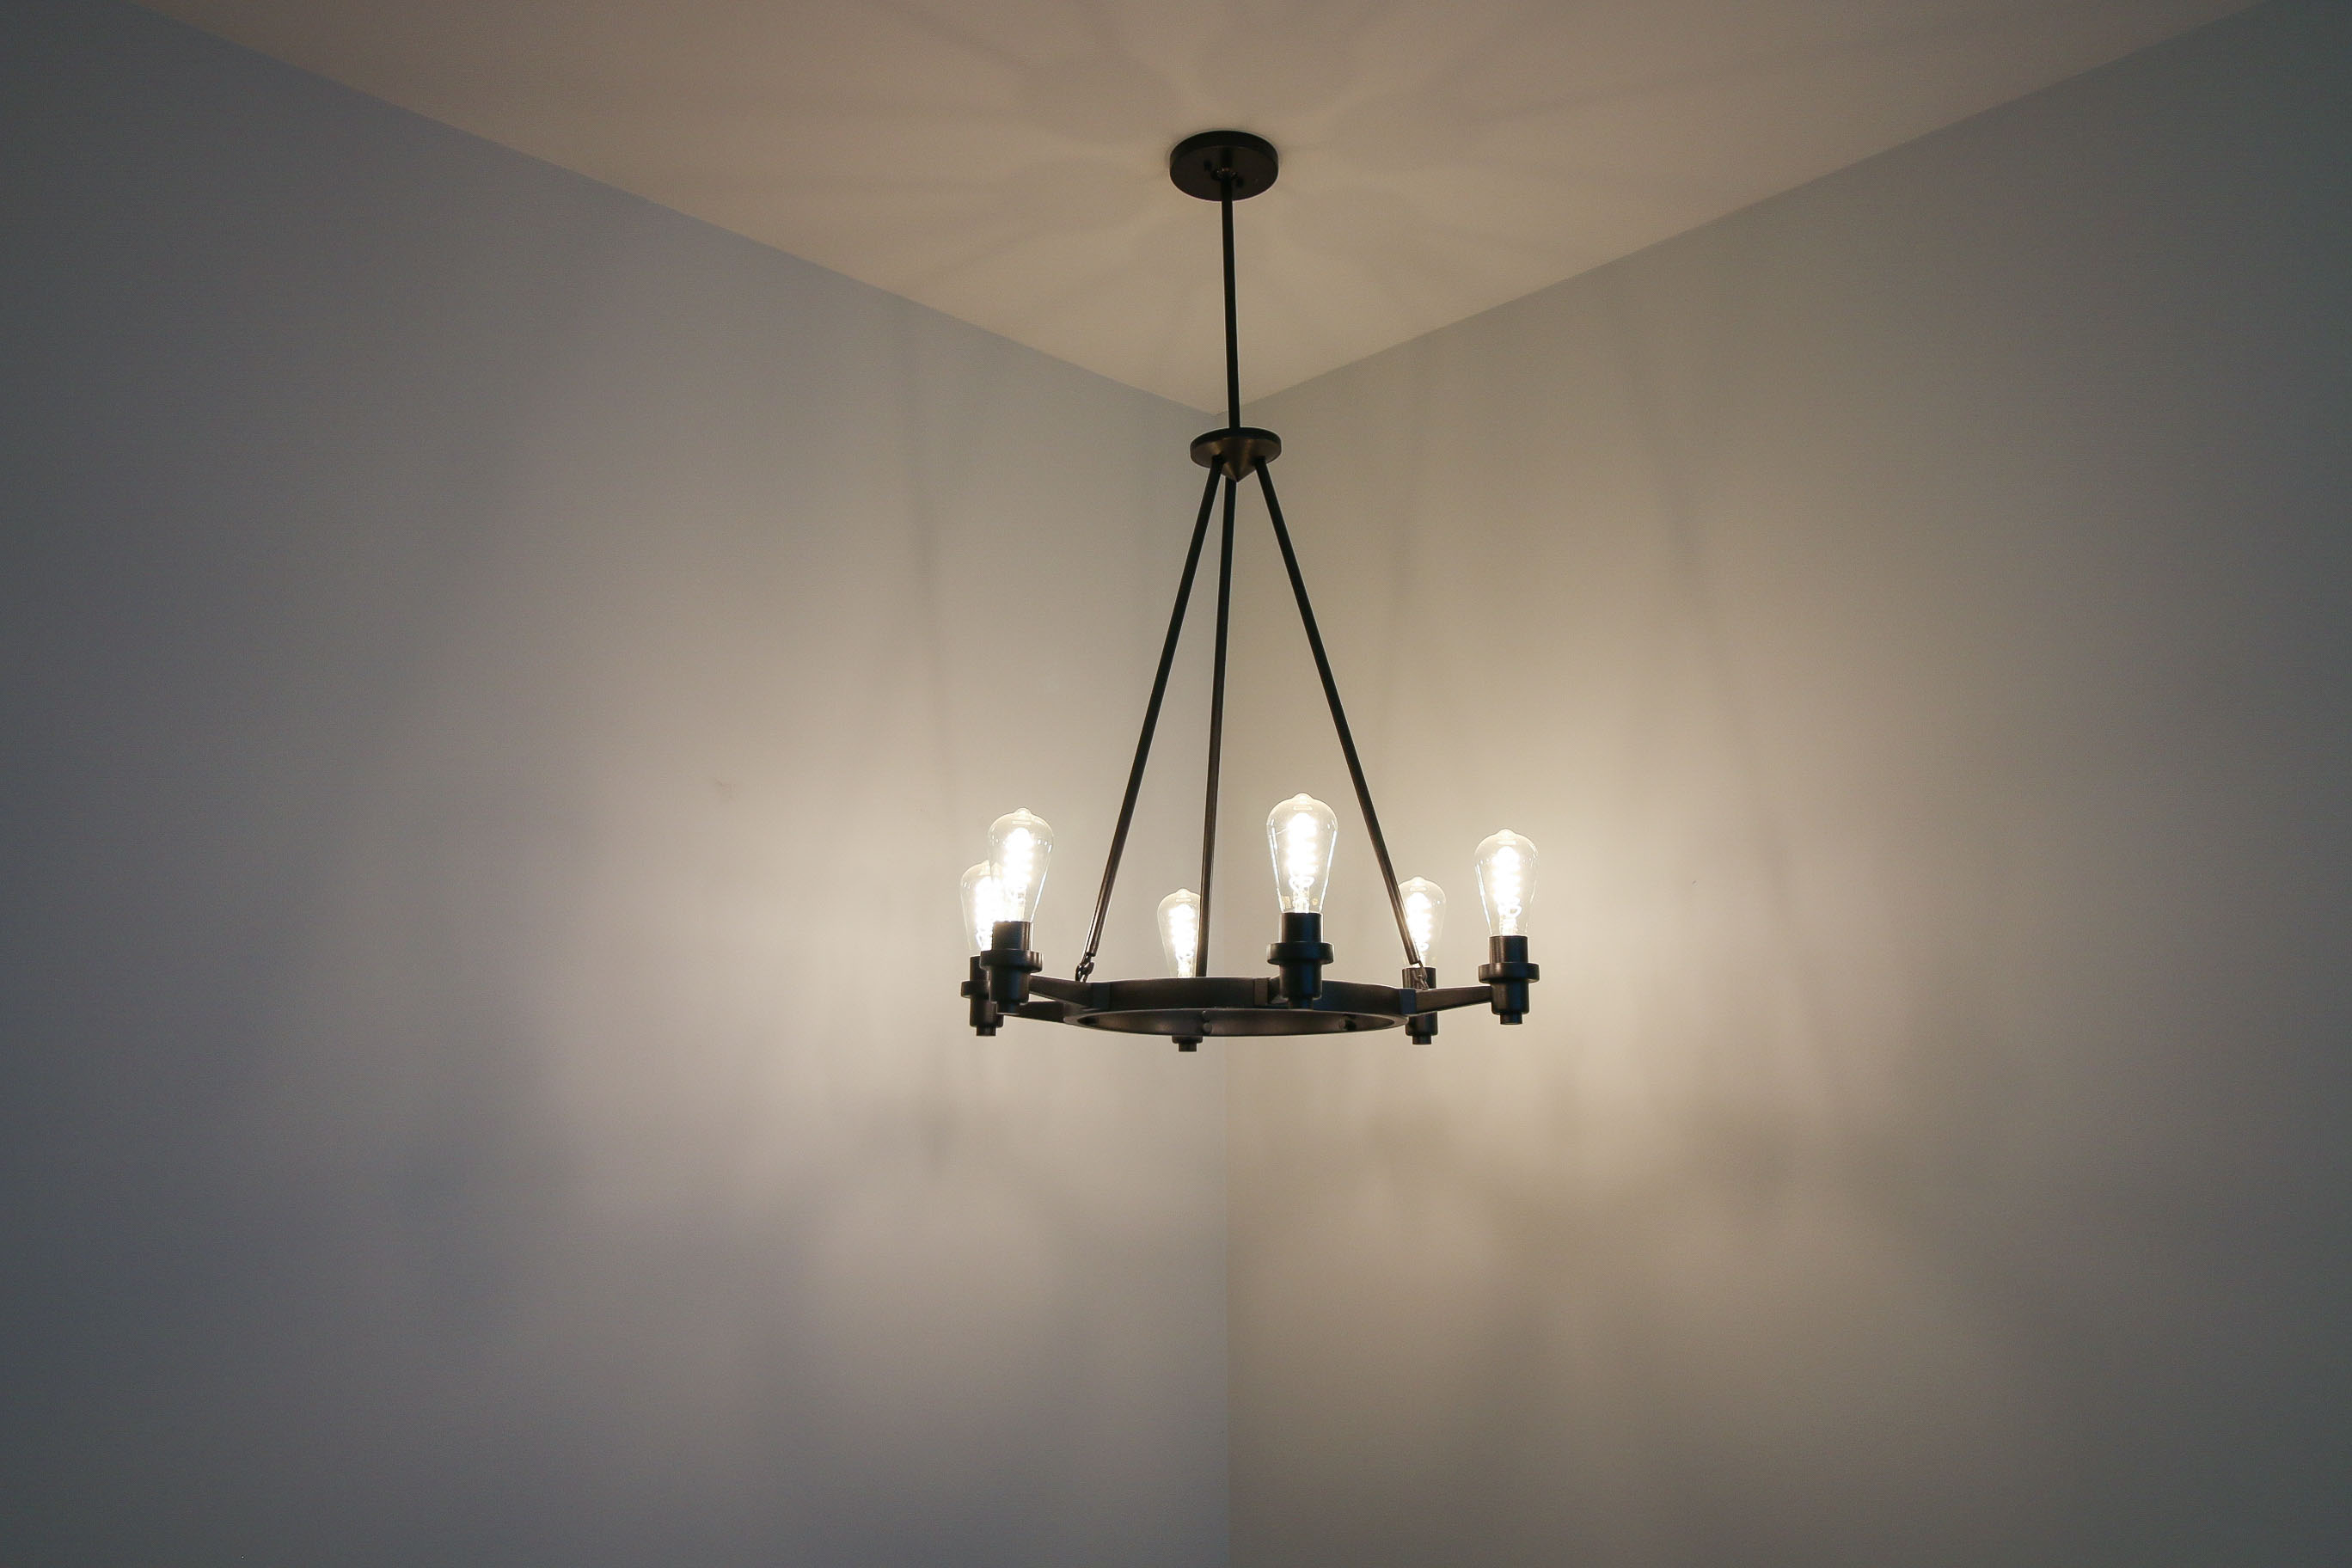
Above the stairs was one of the cheapest light fixtures I could find. No for real, I found it on the side of the road! My neighbor was throwing away the chandelier. It used to be satin nickel, but I gave it a face lift with some oil rubbed bronze spray paint and removed the cylinder light shades to give it an industrial vibe.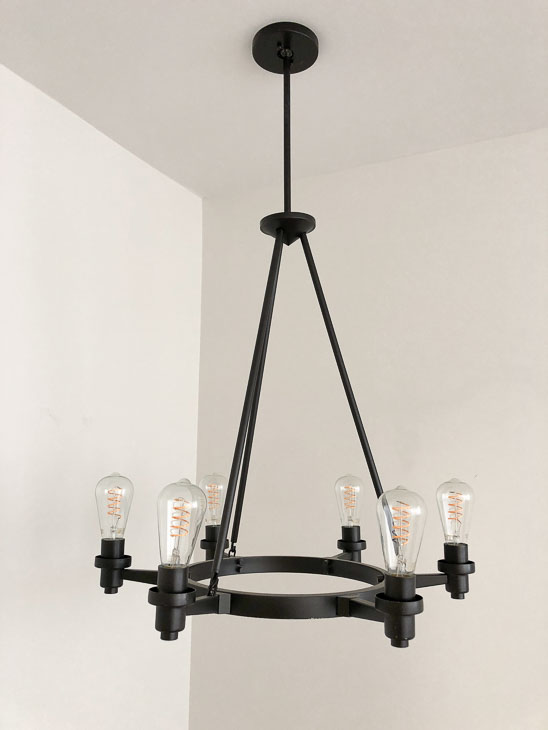
The LED Edison bulbs give a vintage vibe but also provide long lasting light bulbs without the need to change them.
The Upstairs Bedroom
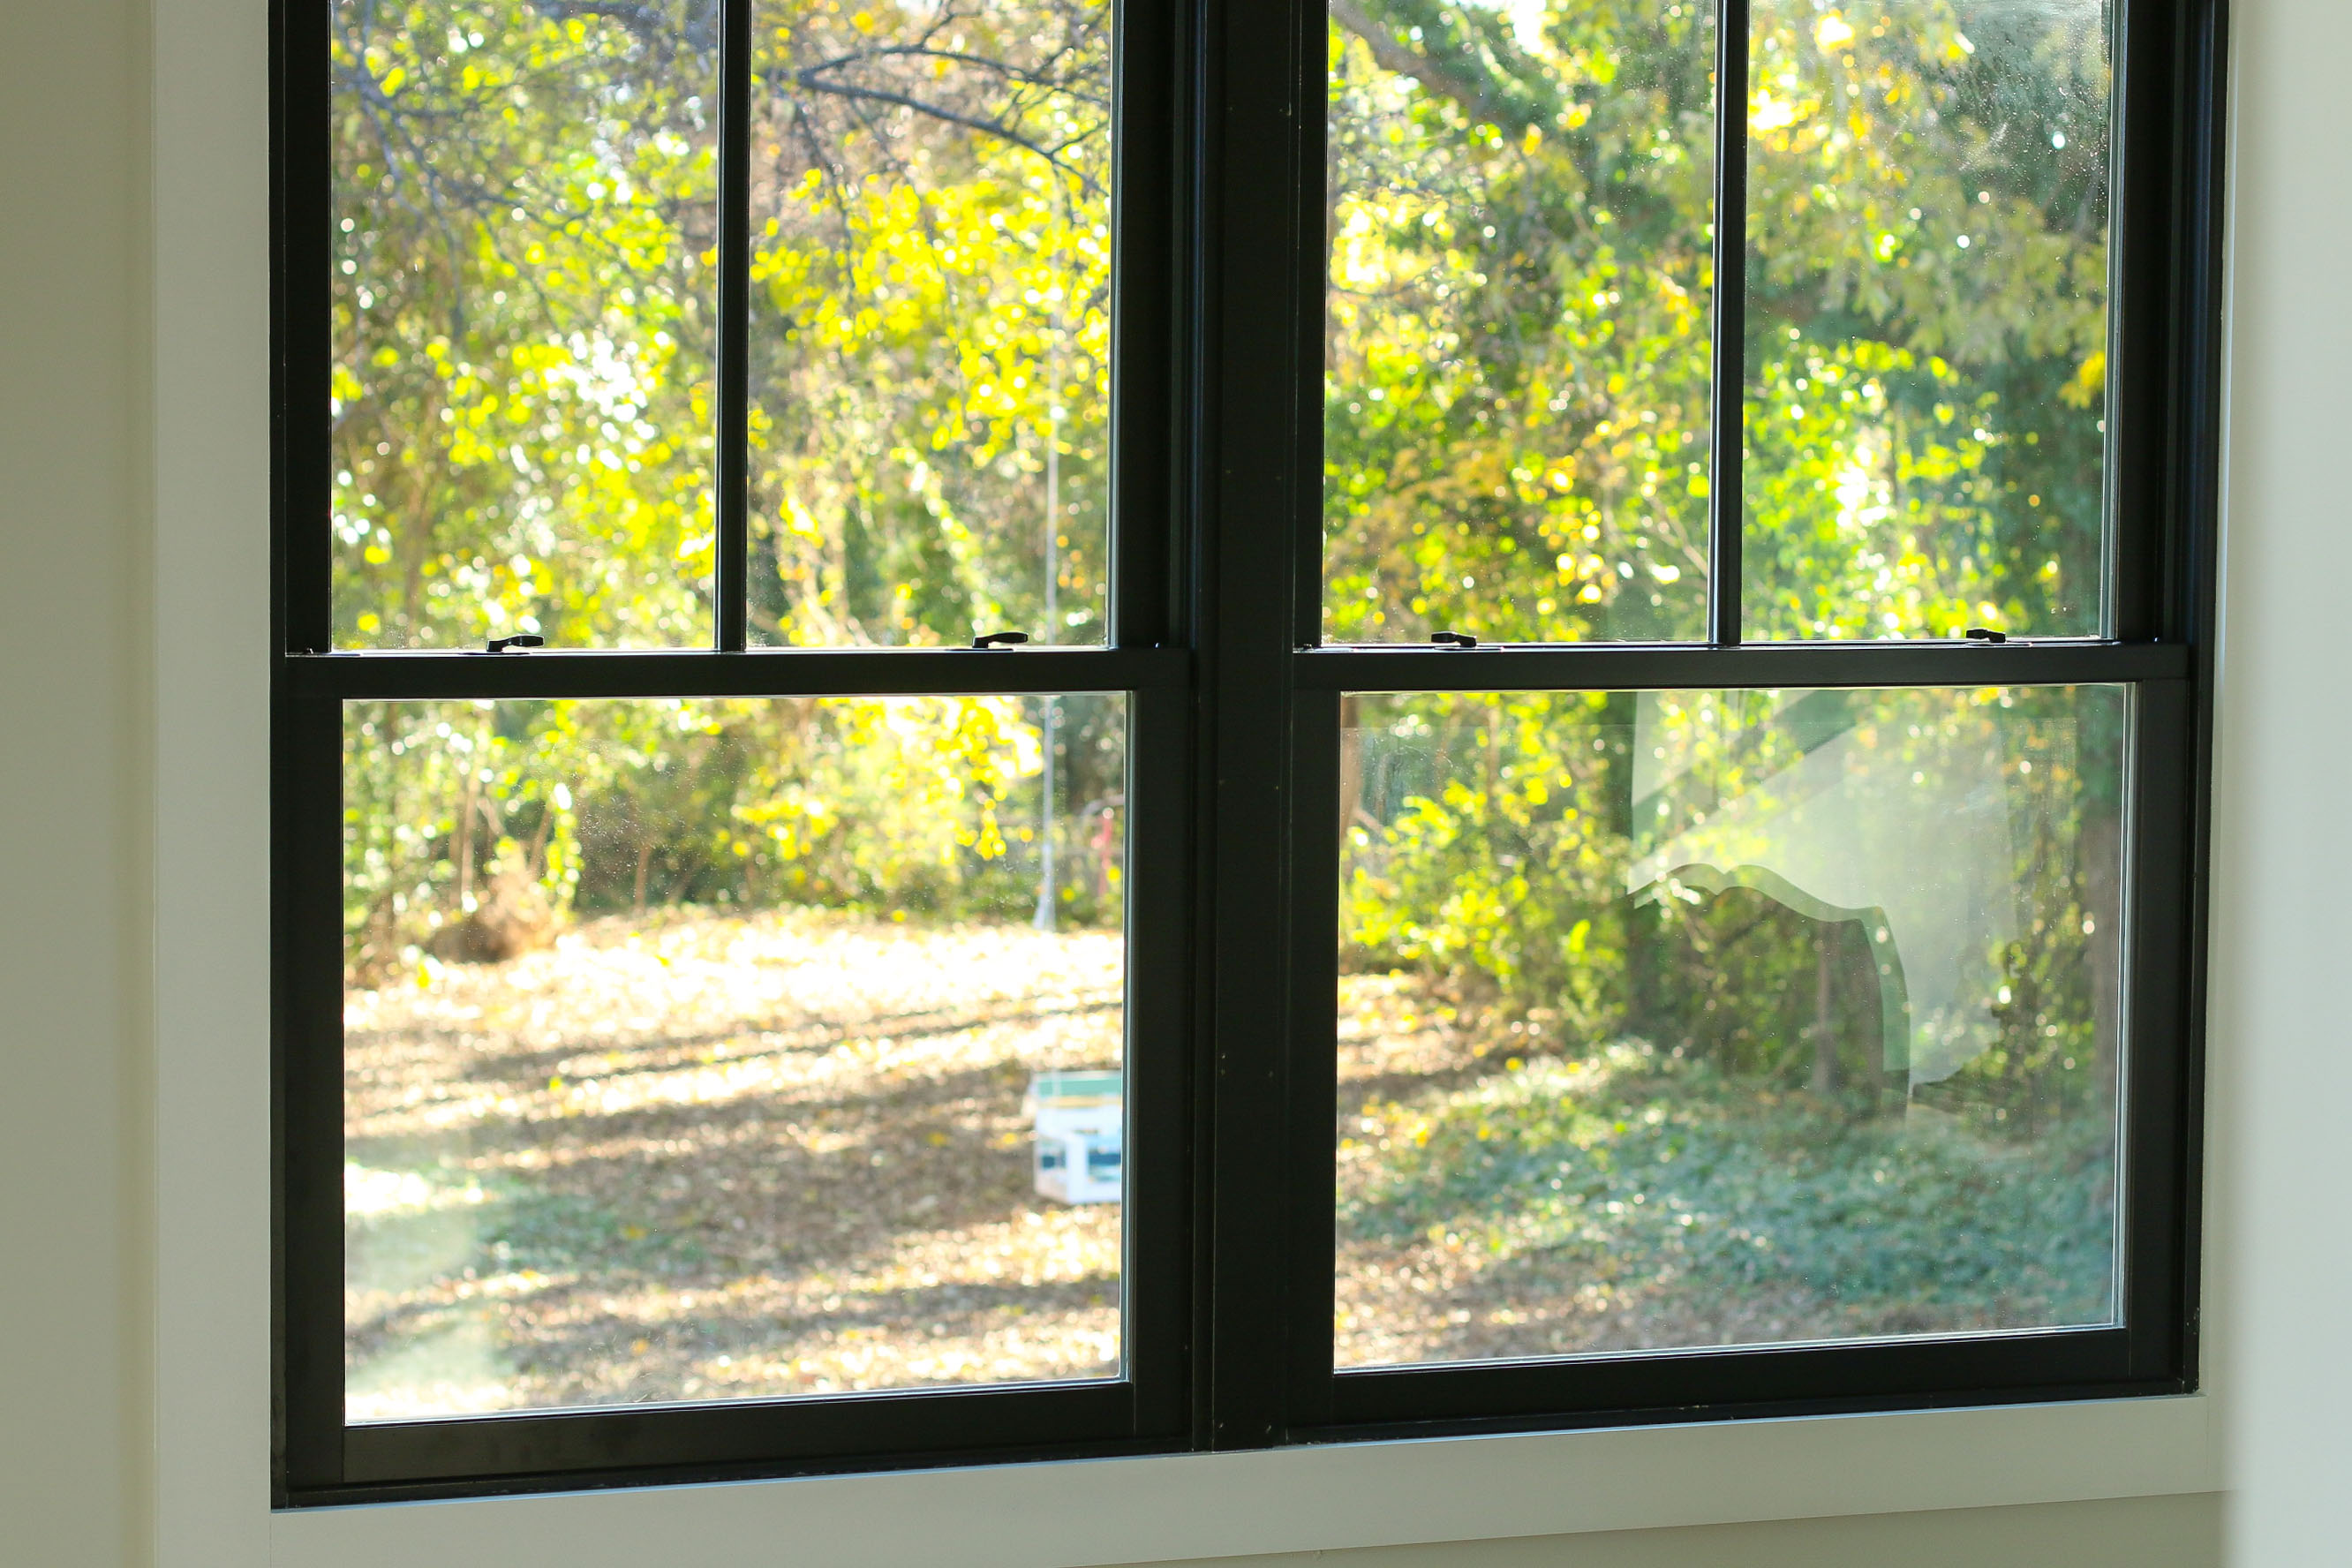
The upstairs bedroom is through the open room. It’s a quiet private retreat with an amazing view!
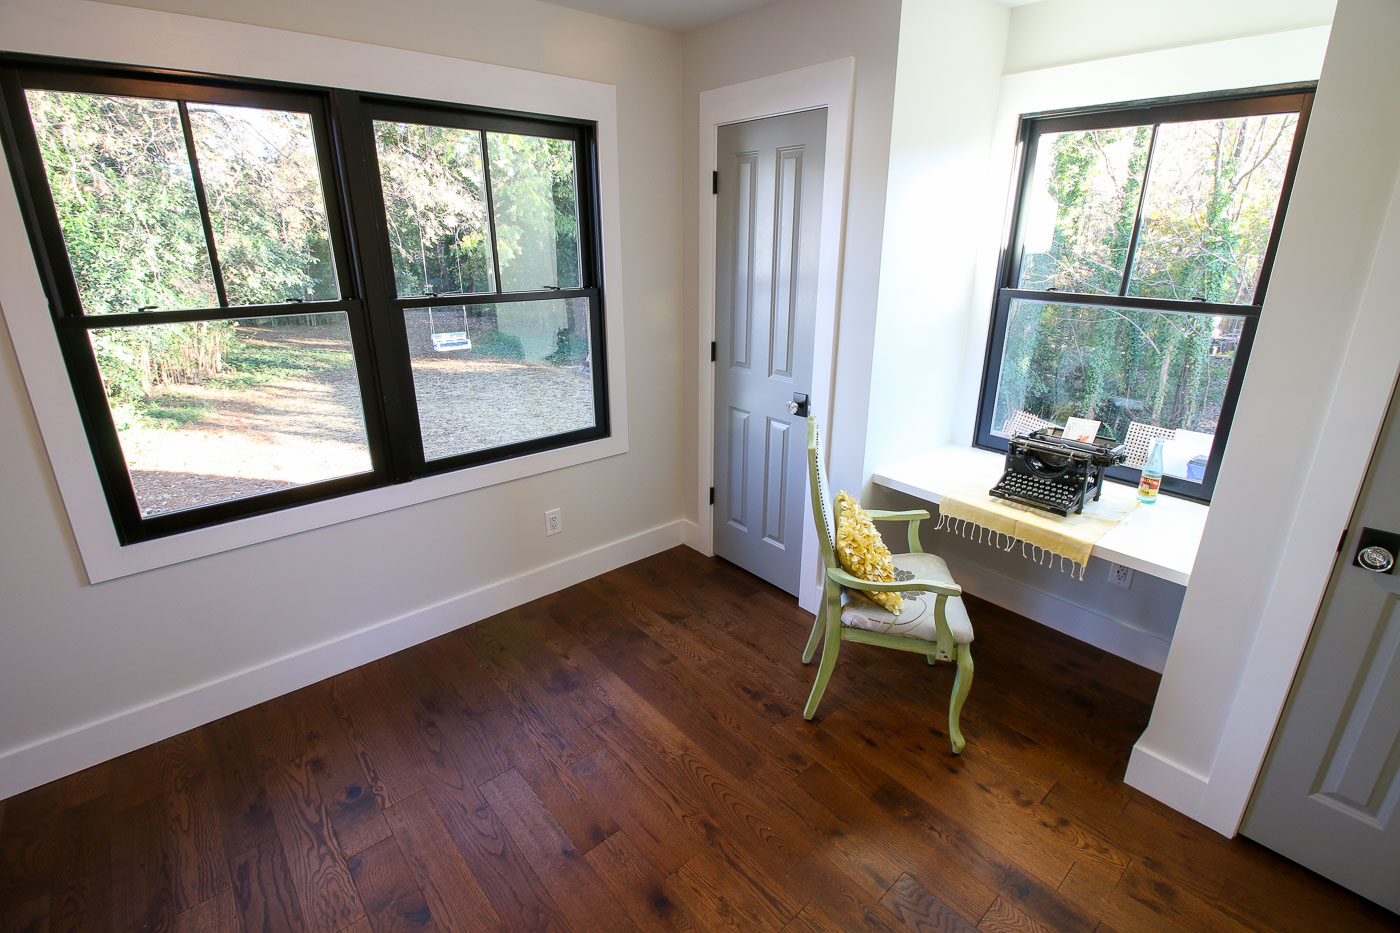
I spent lots of time looking out these Plygem Mira windows admiring the view. This was the perspective I saw from atop the leaking roof. It’s amazing to see your vision come to life.
In the bedroom, we added two small closets. The closet doors were painted Cupola by Magnolia Home paint and the door handles are Hobson Glass Knobs from Schlage.
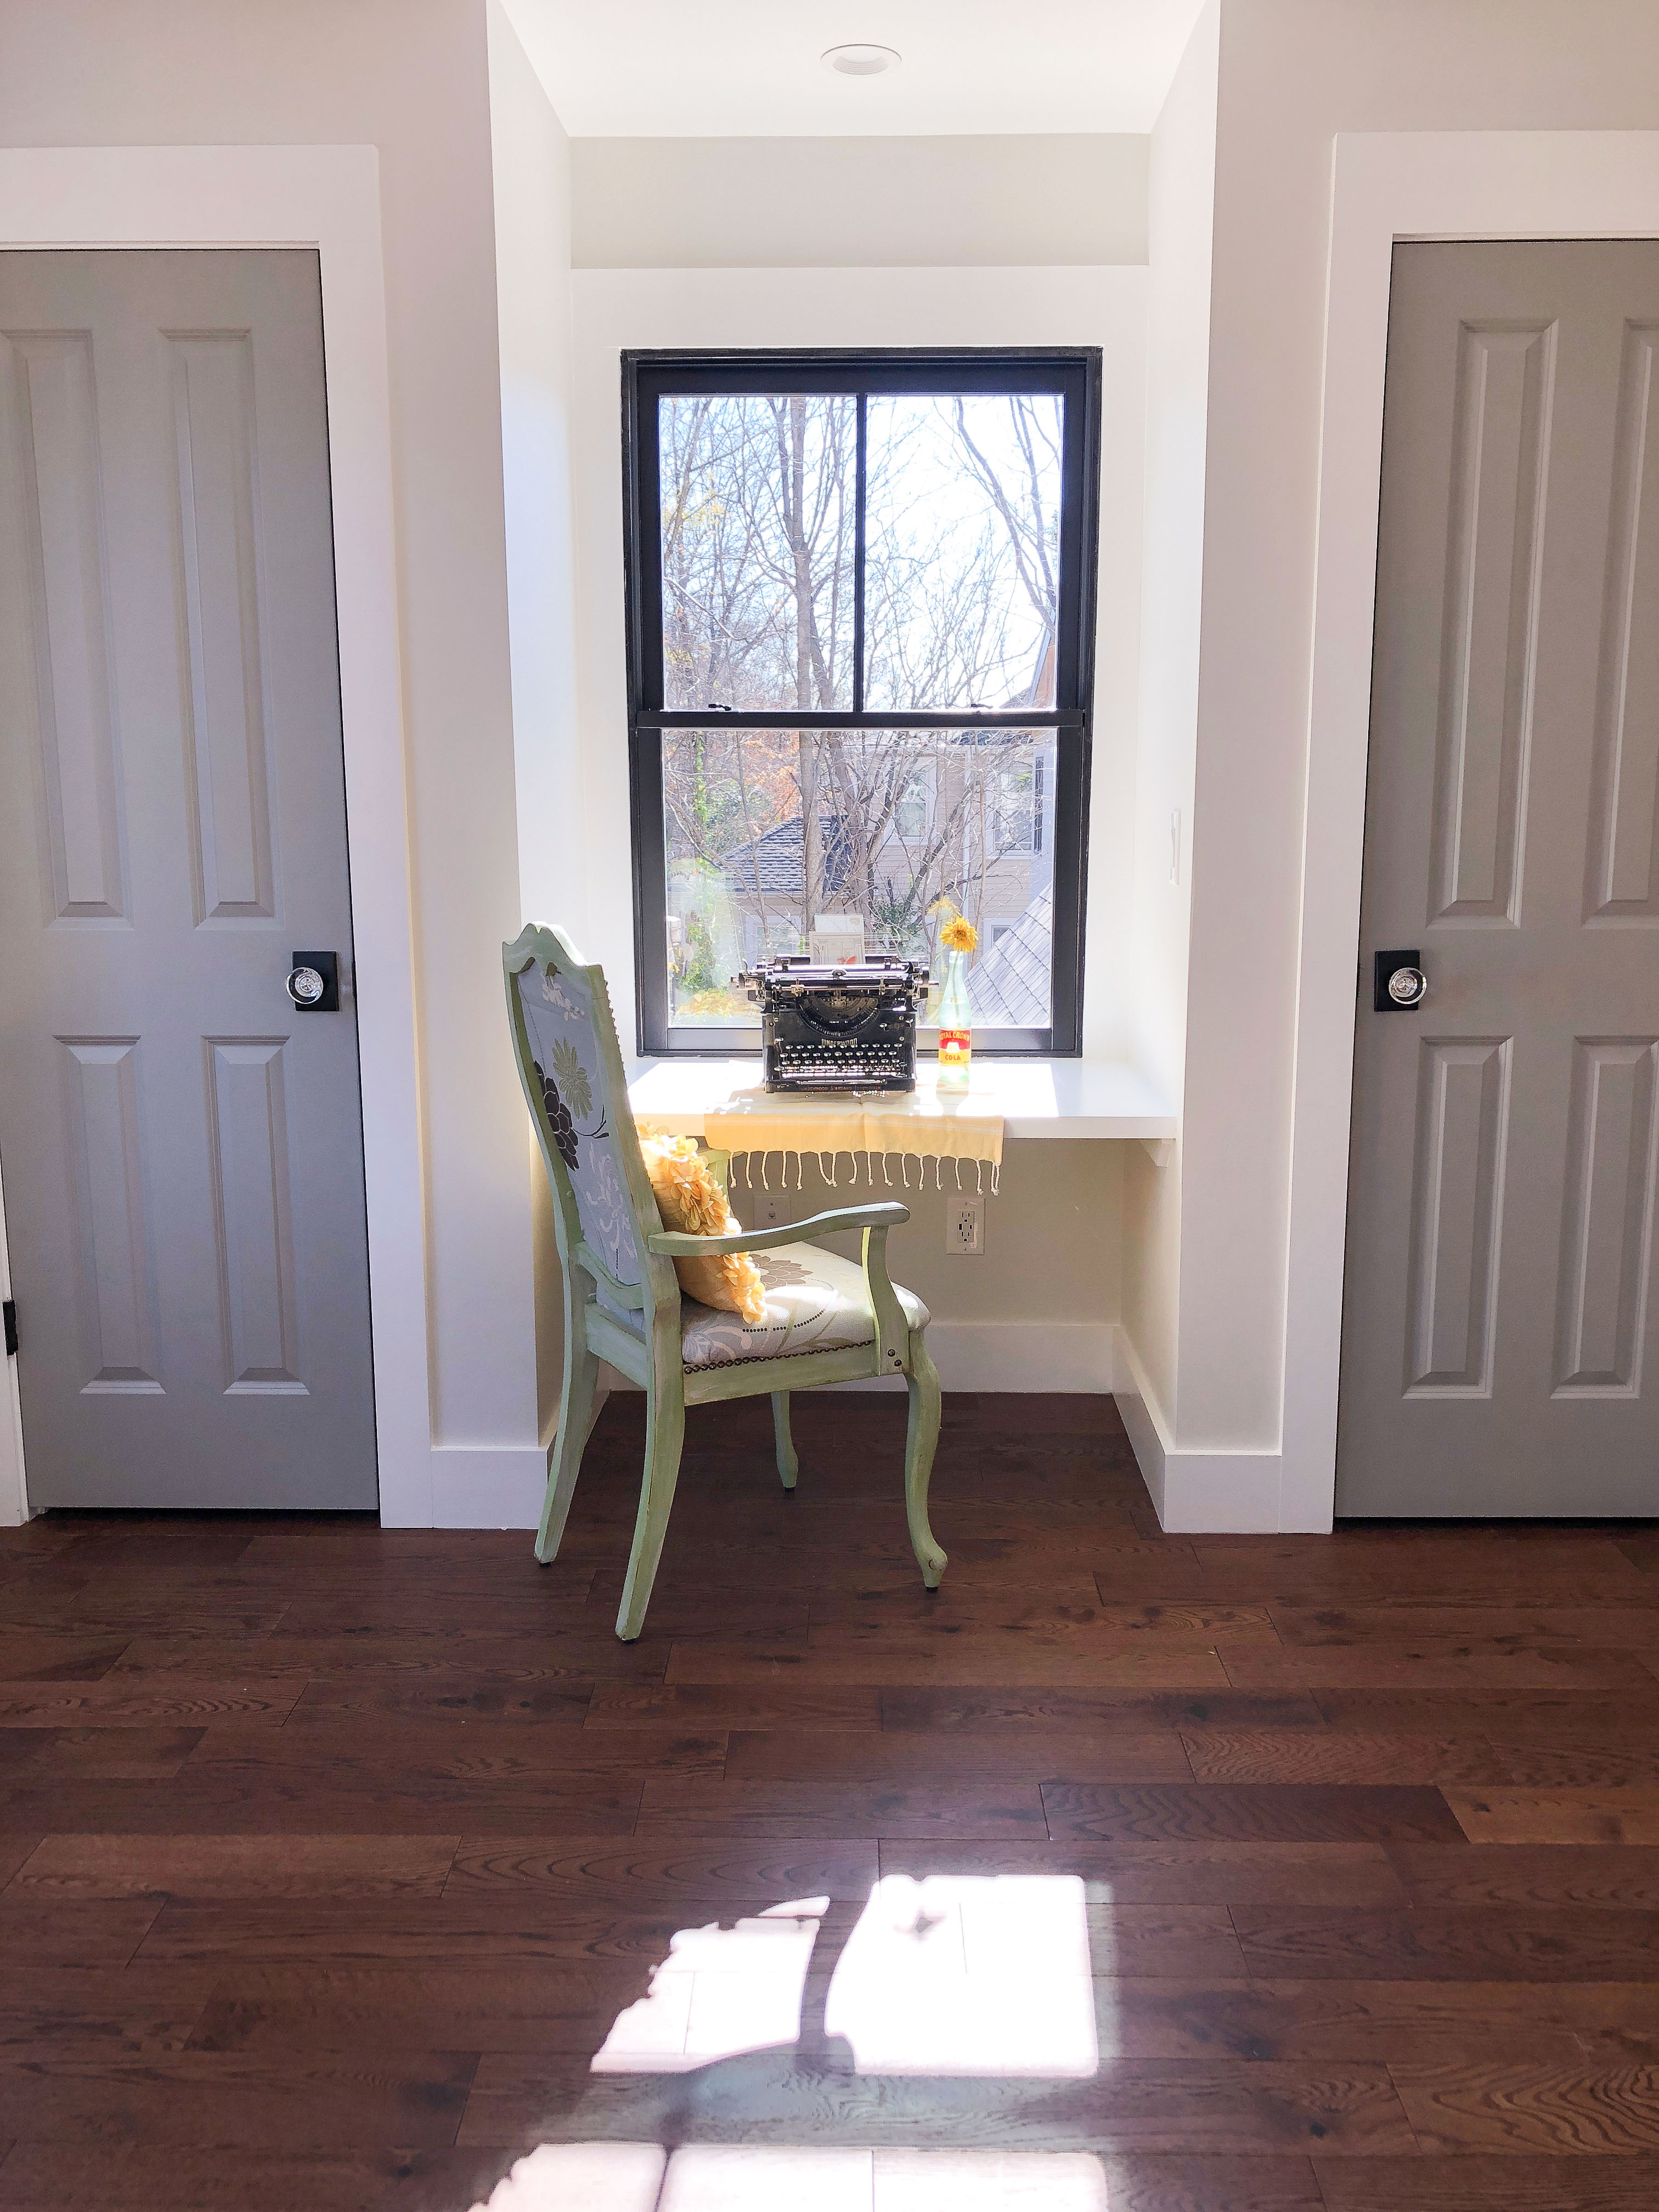
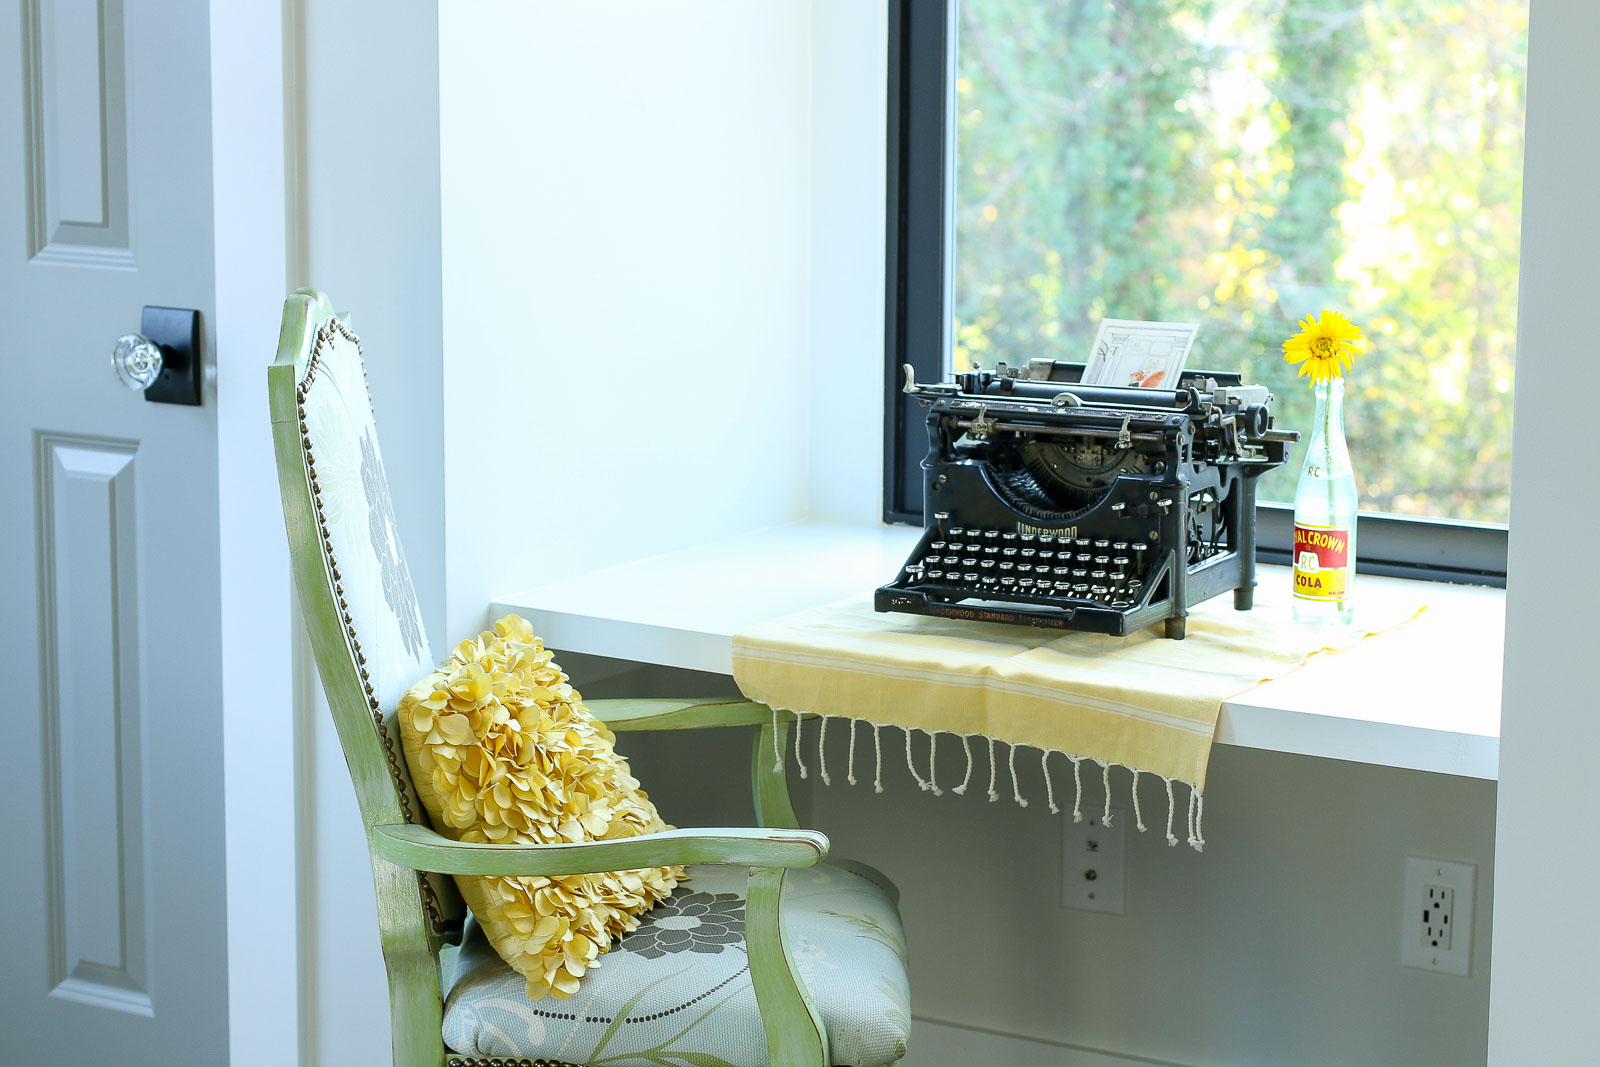
The architect suggested a bench seat between the closets. From past experience, benches just become a dumping ground, so I opted for a built-in desk.
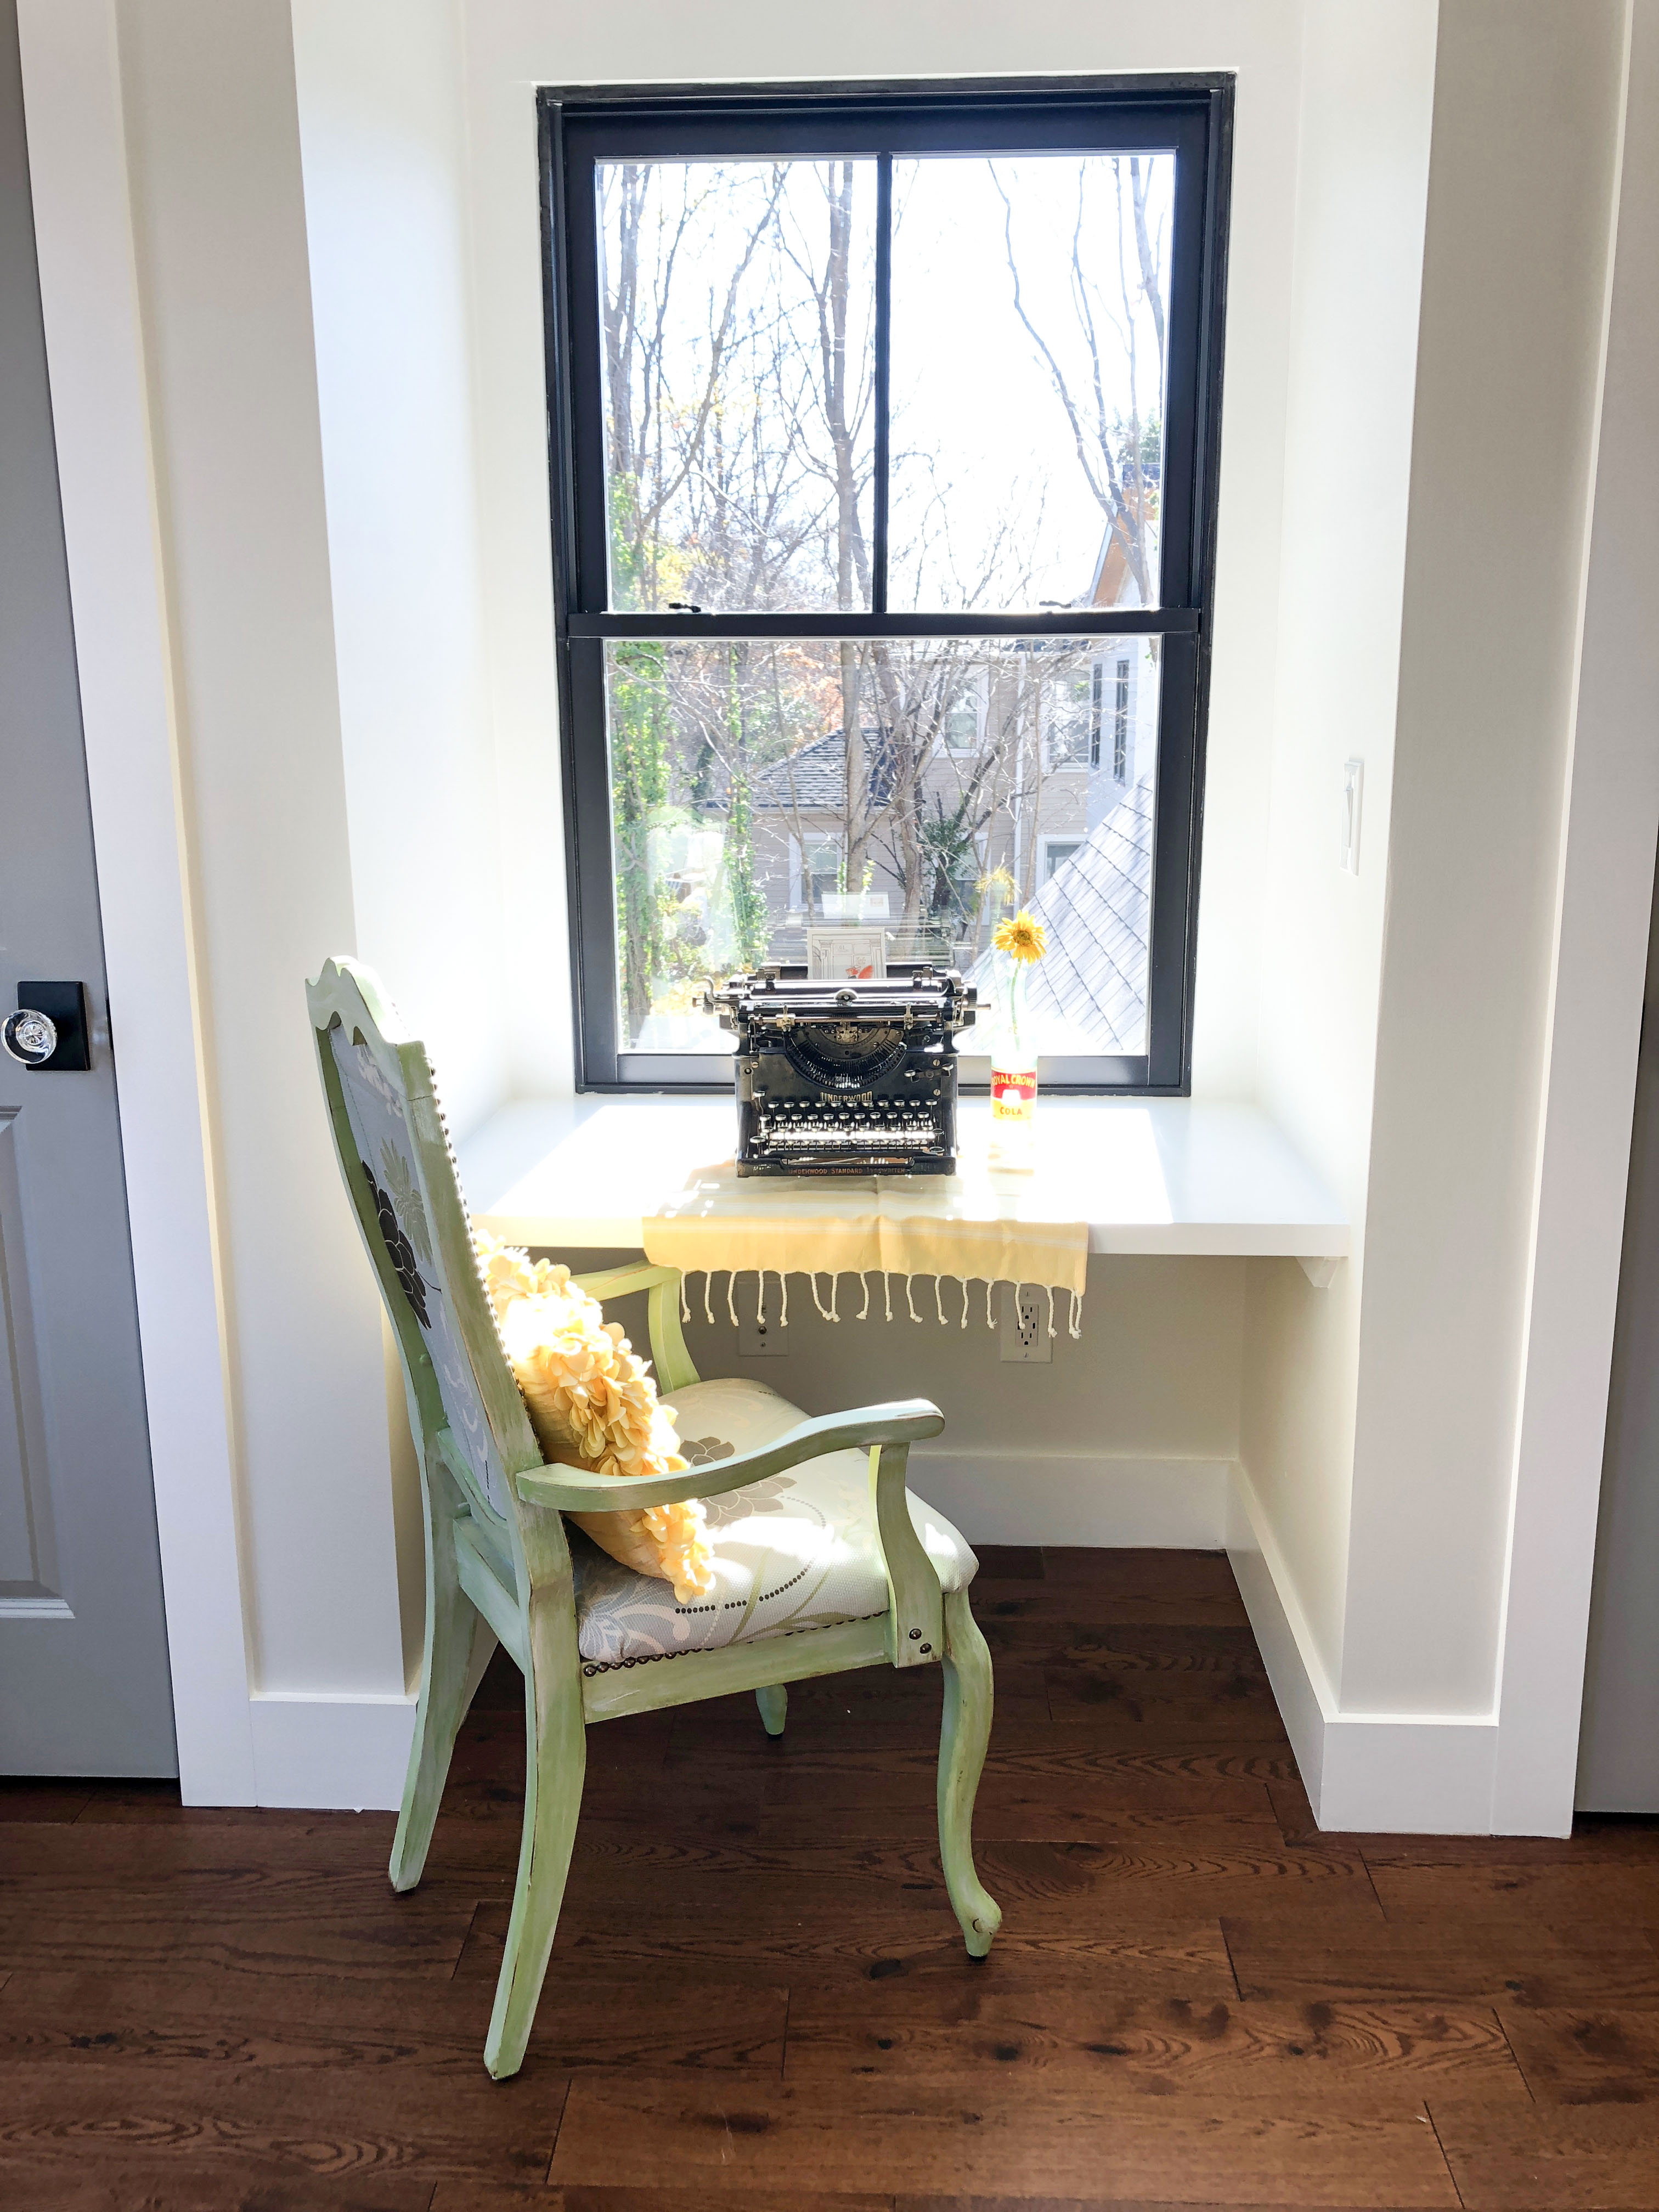
I could definitely sit here and work for hours. Especially because I can simultaneously charge two USB devices and use both outlets because of the Leviton USB Charging outlet under the desk. To the left of the outlet is a cable and ethernet jack. After seeing how sloppy post-construction cable, internet, and phone wire installation is, I had the house pre-wired during the rough in phase. This virtually eliminates holes and voids where bugs, rodents, and cold air can get it.
This concludes the Saving Etta reveal tour with the Saving Etta: Upstairs Room Reveals. If you’re finding yourself a little sad the journey is over, have no fear a new remodel journey is starting shortly. Be on the lookout for the grand announcement and be sure to follow me on Instagram and Facebook to see up-to-date glimpses into Millie’s Remodel!
I’d love to hear what you thought of the Saving Etta project. Did you enjoy the updates? Were there too many, too few? Would you like to see more video or more photos? Would you like more DIY tutorials? More informational articles?
I’m all ears, let me know in the comments so I can try to accommodate your desires during the next project.


Beautiful! What paint color did you use on the walls?
Shiplap by Magnolia Home Paint
I’d say you did a good job with Etta, I enjoyed the story that you did along with working on her! the cliff-hangers at the end? Reminded me of reading Uncle Wiggly stories.
Never heard of Uncle Wiggly!
Brittany, there are never too many updates! As I’ve said before, I could’ve walked right in and lived in this house right away! I love it. What an incredible transformation! I can’t wait to journey with you on your next project.
Thanks Marty!
I loved being able to follow along step by step- Can’t wait for the next one!
I live in Raleigh and read all your updates. I plan to buy a ranch in the next 2-3 years and love seeing the transformation. I’d like to have a better understanding of the costs involved.
Is Millie in the Raleigh area, as well?
Yes. It’s not too far from downtown Raleigh but in a quiet little neighborhood.