
When heard the word stencil, I used to involuntarily cringe slightly. I pictured those cutesy country stencils my mom used to use with geese, apples, and hearts on them. (Sorry Mom.) But, that all changed last week when Cutting Edge Stencils sent me a beautiful Georgian Ceiling Medallion Stencil!

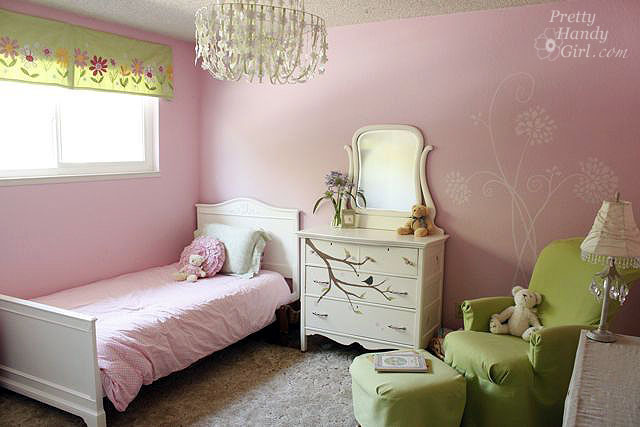
Isn’t that stunning? I can picture it at the top of a grande foyer. Sadly our ceilings are only 8′ tall and our rooms are small. But, that didn’t matter, because I was able to alter the stencil for our ceilings:

First I watched one of their tutorial videos online and I thought to myself. Oh yes, I can do that, it looks super easy! And it was, kind of….
…at this point I need to caution anyone who has never used a stencil before. You might want to try your first stencil project on a wall or a flat work surface. NOT on a ceiling. Standing on a table and trying to hold the stencil, tape and keep the stencil in place is not for a newbie. It definitely helps to have a helper (one at least 5 feet tall. Little children won’t work for helpers on this one.) I managed by myself using my noggin’!

I definitely have to credit Cutting Edge Stencils with their high quality stencil and foam paint roller. Without them, this would have ended up as a HUGE craft fail! Instead, despite a slightly buckling stencil (and working in Michaelangelo type conditions), the results were very professional and something I am proud of!
So, without further obscure references to great painters, here is my tutorial for creating a faux ceiling medallion with a stencil.
Materials:

(I’ve included affiliate links for your convenience. I earn a small percentage from a purchase using these links. There is no additional cost to you. You can read more about affiliate links here.)
- Stencil
- Painter’s tape
- Foam roller
- Spray mount
- Baby wipes (or wet rag)
- paint
- paper plate
- paper towels
- tape measure
- scissors
* And preferably an assistant!
Instructions:
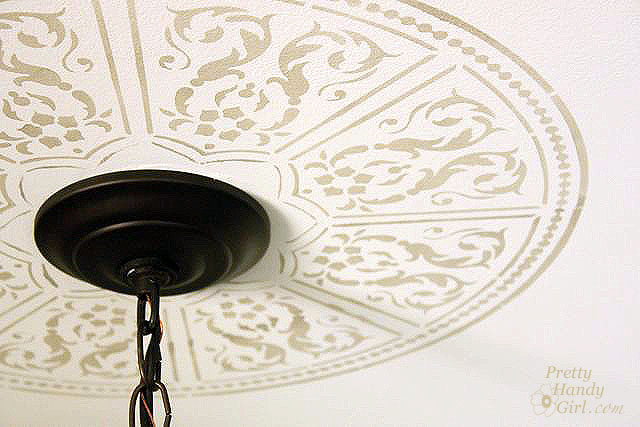
Measure the diameter of the canopy (round plate that sits flush against the ceiling and hides the electrical junction box) for your light fixture.

Then remove the canopy by unscrewing the nut in the middle.

Let the canopy hang down on your chain.

Determine how much stencil will overlap the canopy.

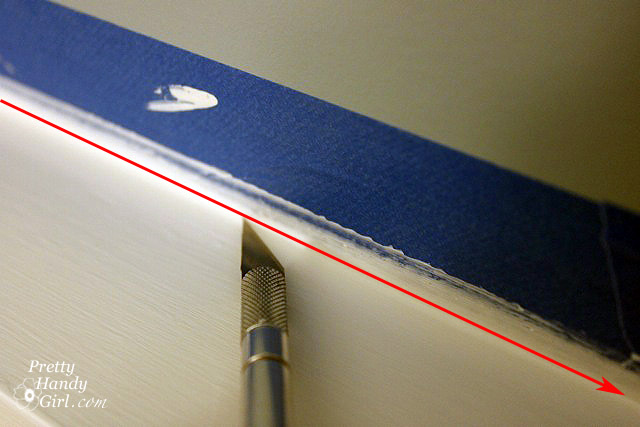
Cut the center section out of the stencil. (The only way around cutting the stencil if if you remove your light fixture and push the wires into the wiring box. But, I was too lazy to do that, so I cut instead.)

Save the cut out stencil so you can re-attach it later with tape or use the stencil on another project.

Tape off any sections of the stencil you don’t want to use. I chose to use the inner circle portion of the Georgian Ceiling Medallion Stencil.

Spray the back of the stencil with spray mount. This will help hold the stencil to the ceiling.

Go grab an assistant to help you position your stencil on the ceiling. Center it on the middle of your light fixture box. It may help to draw “cross hairs” coming out of your fixture box with a pencil. Personally I just eyeballed it.
Tape the edges of your stencil with painter’s tape. The tape that was masking off the rest of the design actually came in handy as it held the stencil up midway from the edges.

Mix up your paint onto a pallet or paper plate. I chose a very light grayish cream color to mimic the shadow colors in my dining room. The color I tried to match it to is Glidden Carolina Strand #A1786.

Layout a bunch of paper towels folded up that you can roll your roller on until it is almost dry. Roll your roller into the paint, then “dry” it off on the paper towels. Roll your paint roller carefully over stencil. Don’t push too hard or the paint may seep under the stencil. Continue rolling until your entire stencil has been filled in.

Gently remove your stencil and wipe any paint overage with a baby wipe or rag.

Reposition your stencil on the opposite side. Take your time lining up the stencil with already painted side.

Repeat the same steps above to paint the second half of your medallion.
If you missed any spots, you can touch them up with a small artist’s paint brush.

13. Replace your light fixture’s ceiling plate and admire your new ceiling medallion!
I’m so happy with how the design turned out, and I will never cringe at the word stencil again!
It definitely adds some interest to an otherwise plain Jane ceiling.

Do you like it? You really have to see some of the amazing stencils that Cutting Edge Stencils has to offer. Some of my favorites are this adorable silverware set:

And this stencil creates a great alternative to wallpaper (the bane of my existence!):

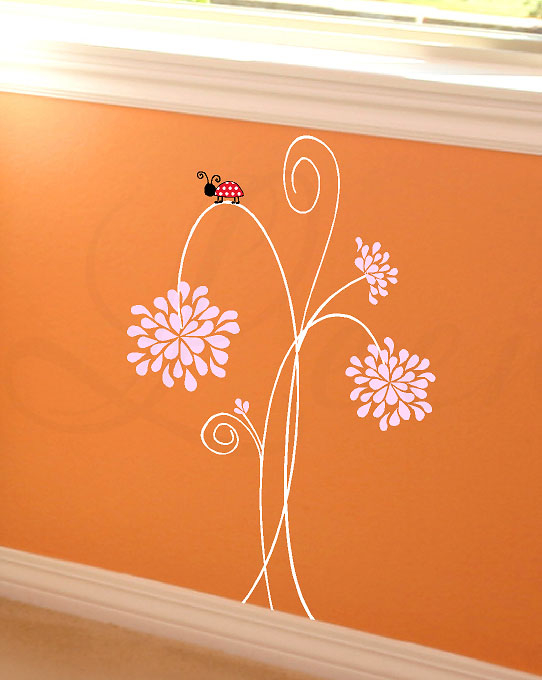
And if only there were more girls in our boy-filled house, I’d buy this:

So you see, wall stencils can be a beautiful thing ;-).
![]()
![]()
Hey, I wanted to let you know that this crafty blogger, Kristina, interviewed me the other day. You can read a little more about my addictions and my favorite blogging moment on her blog, Pearl Gateway. And give her a little comment love if you have a moment. She’s getting ready to make a major move to Tennessee! She could probably use a few uplifting words.
See ya later alligator!