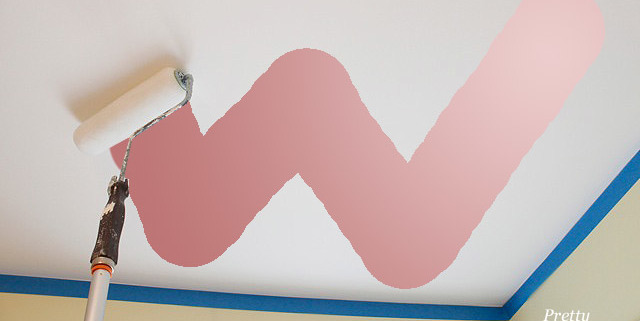
No truer words have ever been spoken. I LOVE PAINT! I will always profess my undying love to this amazing mood changer! In the course of over three years (the time we’ve owned our house), we have repainted almost every room in our home. Each room must convey a single emotion when we enter.
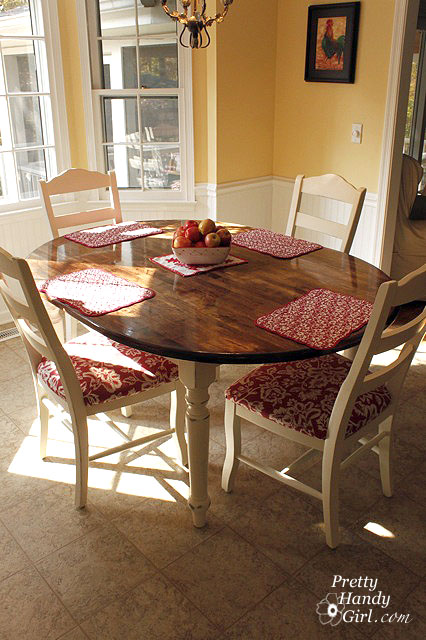
Kitchen = Sunny
Living Room = Cozy
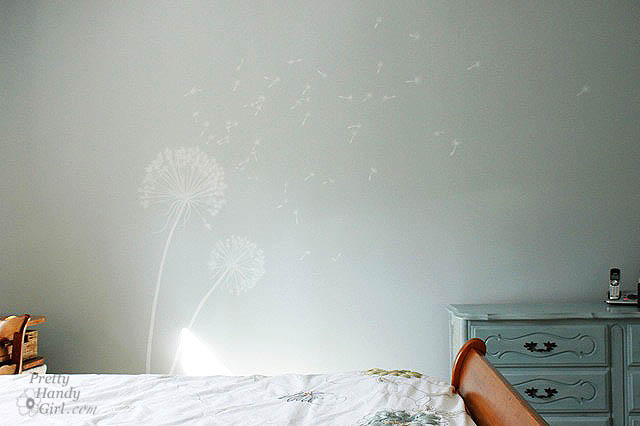
Our Bedroom = Relaxing
Office = Calm
Mudroom = Inviting
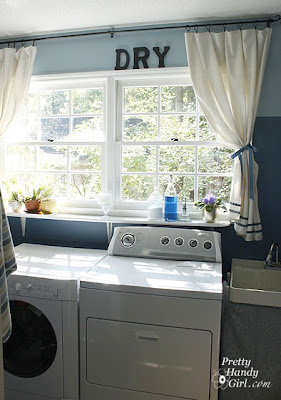
Laundry Room = Fresh

Being an artist makes me a bit of a perfectionist when it comes to color.

I’d love to share some of my tips for picking out the perfect paint colors. Hopefully this will protect you from making a bad decision. But, rest assured that if you really don’t LOVE the color after you have painted one wall, you can take your paint back to the store and ask the “paint guy” to tweak the color for you. Or worst case scenario, you have to buy a new gallon. (Well, okay, that can get expensive.)

But, if you find a color you truly “LOVE”, it will translate into loving your home. So worth it in my book!


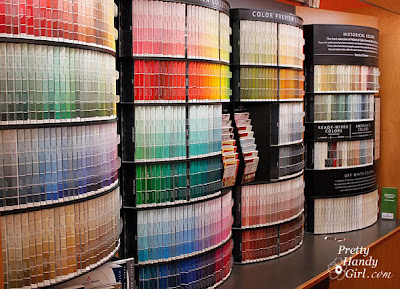
Before I paint any room, I go to several paint departments and gather several color chips that appeal to me. The colors that I REALLY think I’m going to like, I will grab a few extra chips of (shhhh, don’t rat me out for stealing paint chips.)

When I get home, I tuck the chips behind the switch plate cover, in the molding, or tape them on several different walls in the room. It is important to place the chips next to your trim moulding so you can see if the color will work well next to it.

After looking at the chips for at least a week during different times of day and different lighting (sunny or cloudy days) I am usually able to narrow down my choices to 2 or 3 choices.

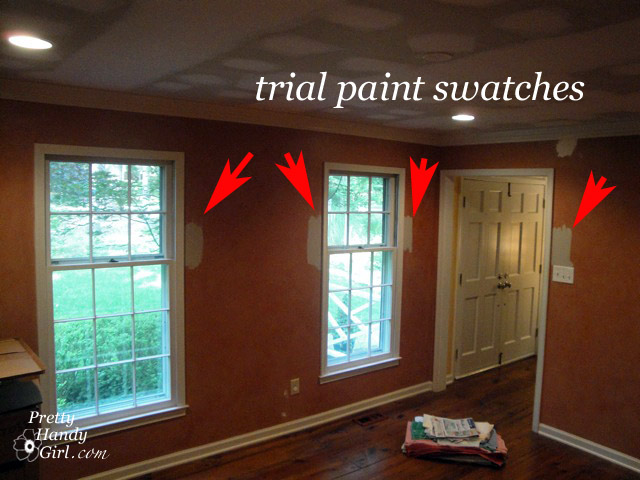
Next I run back to the paint department and buy or have samples mixed up of the colors I like. Because I am a “work until I get it done” type person, I go ahead and paint big swatches on the wall next to the moulding on all four walls.  This is important because a color that looks good on your sunny wall may not look so good on a shady wall. And you need to see the colors and how they coordinate with the wall color in an adjoining room. If you aren’t quite ready to commit to painting your wall, go ahead and buy some poster boards and paint the swatches on the poster board and hang or prop them up in your room.

A few things to keep in mind while you are looking at a color. Just be aware that the color may change as the seasons change. Winter yields brighter and cooler colored light in our home because the trees are bare. In the summer, our light changes to a greener cast and less harsh lighting as the trees fill out with leaves. I can tell you right now, that I wait for summer to roll around before choosing any colors in the green or yellow family. I need to make sure they look good with the light reflecting off the leaves and into the room.

If you are still having trouble choosing a color, invite a friend over who will give you their HONEST opinion.

If you STILL can’t decide, never fear – Pretty Handy Girl is here! “Here I come to save your color dilemma!”

Introducing Paint Preview:

Some of us are visual people, we REALLY need to see the room painted before we know what a color is going to look like up on all four walls. A special thanks to Emily at Decor Chick for testing my new venture last week. I’m calling it Paint Preview. Thanks to the wonder of technology, I can now virtually paint any room in your home or the exterior of your home! Save yourself time and money by previewing your painting project before the first drop cloth is laid.

Emily’s Living Room Before – SW Baguette
Emily’s Living Room Paint Previewed – SW Anew Gray

Want more information about Paint Preview? CLICK HERE TO LEARN MORE.

Until then, I’m thinking about repainting our garage doors and adding grills to them. What do you think?

Our Home Before
Our Garage Paint Previewed


Purple_Honor_front_doors

Sprucing up your entryway. If your home is like ours, we have two entrances. The front door,

and the door near our driveway. The latter is used about 95% of the time by us and our friends.

Creating an inviting entrance for yourself is so important for falling in love with your home. Start sprucing up your entryway!

Think about it this way: How many times do you go in and out of your home through that one doorway? How many times do guests go in and out of that doorway? Do you follow me? So, it is you who should be welcomed home to your lovely home first and foremost!

This is what our family entrance looked like a few months ago:

How I lived with that ugly brown aluminum door for 3 years, I will never know. And let’s not even talk about that little red CPI security sticker!

Lucky for us, a neighbor sold us her full view storm door when they added a garage onto their home. Had they not, I probably would still be scouring the Habitat ReStore. Or at least I would have painted the old door to match the house or use a more inviting color than doo-doo brown.

After I installed the storm door, I made sure to repaint the threshold as well. What?! You can’t see behind “Doo Doo Brown” above, is this?

Niiiiiice. Gold threshold with silver metal showing through. Not exactly my favorite rustic look. The easiest way to repaint it would have been to remove the threshold and spray paint it in the yard on a tarp. But, those screws weren’t going to budge for me. So, I masked off the entire doorway…

…storm door, floor, and…

…the mudroom to spray paint  one piece of threshold brushed nickel. Okay, call me crazy, but I was on a mission to make my entryway more inviting for myself. And I wasn’t about to get brushed nickel on any other surfaces.

Much better, don’t you think? And I can honestly say that after using automotive primer and then the Rustoleum Brushed Nickel metallic paint, the threshold still looks like new!

But, I didn’t stop there. I added a kick plate in matching brushed nickel. And replaced the door sweep as well. And splurged on a new door mat. {Love my new mat!}

Finally, looking beyond the doorstep, I add some pumpkin topiaries, plants, wreath or other decorations (depending on the season) to greet you – errr, I mean me.

My good friend has this adorable planter near her side entrance (that she uses about 95% of the time, too.) It is the perfect place to switch out plants, or other decorations depending on the season.

So, that takes care of the exterior, but don’t neglect the inside! I added a new coat of paint to the inside of the door (that my sweet departed maniacal dog had left claw marks all over it.) I was so anxious to freshen it up, I didn’t even tape off the windows.

After the paint dried, I used a razor blade to score…

…and then scrape off the paint.

And as a final, welcome home, I hung my message center just inside the door.

I’m so happy to be home! And you should too so start by sprucing up your entryway.

So, what do you think? How does your home greet you? Does it welcome you with open arms or is it more of just a brief, “hi?”

Welcome back. Many of you may participate or read a weekly WIWW (What I Wear Wednesday). Those women in blogland, they really know how to put an outfit together. I am seriously jealous because sometimes I feel wardrobe challenged. Maybe you can help me. Here is what I wore Wednesday:

Ladies, if you want to copy my looks, here is the breakdown:
1. Hooded Knit T-shirt Top bought 15 yrs. ago at Gap
2. Gap Jeans bought about 5 yrs. ago. Those are authentic knee rips!
3. Dansko Clogs with the heels worn down to a hollow core.
4. Latex gloves (the better to paint with.)

This Pretty Handy Girl can’t wear her good duds on a painting day (although I’ve been known to do that occasionally.)

Painting is a nice segue into the first secret for “Falling in Love with Your Home”. Our home started out dark and dreary on the inside. Most of the rooms had dark wall colors, but the biggest problem was the dingy white popcorn ceilings. Those suckers are light sponges! They absorb the natural light and keep it all to themselves.

Here is a good example of the light difference between a smooth ceiling and a textured ceiling:

Both pictures were taken minutes apart in adjoining rooms that have the same south facing windows. The rooms are identical in size. The room on the left (master bedroom) has popcorn ceilings and light blue walls. If you look closely, you can see how each pock has a shadow. The texture effectively stops the light from being reflected. Meanwhile the ceiling on the right is smooth but the walls are a dark blue (son’s room). Despite the darker walls, the ceiling appears lighter because the light is reflected due to the lack of texture.

As you can see, we are able to lighten our rooms about 10 – 15% by scraping and painting just the ceilings! (Imagine what painting the walls a lighter color will do!)

Two more benefits of a smooth ceiling:

  • A smooth ceiling will visually raise the ceiling, while the textured ceiling draws your focus to the texture and makes the ceiling feel lower. You’ll have to trust me on this one.
  • And, a smooth ceiling will not collect as much dust. I don’t have to tell you how important that is for allergy sufferers (ahhh- choo! I’m allergic to dust mites.)

In summary, why do you want a bright and smooth ceiling? Because, it will reflect more light and natural light is a mood booster.  And during the seemingly never-ending winter months, we all need more sunlight to avoid mild depression or gloom. Translated: Better mood = Loving Your Room!

This is how we do it:

We have the popcorn (textured) ceilings scraped. Notice how I said, “Have” them scraped. I am handy – as you know – but there are certain tasks that I won’t do. I successfully scraped the ceiling in our pantry, but my neck was in pain for a week afterwards. I vowed never again. It is also a good idea to pay a professional if you live in an older home. Textured ceilings may contain asbestos. (Thank goodness ours didn’t.)

Now, even if you don’t have textured ceilings, you likely can still benefit from adding a fresh coat of paint. Ceilings are usually neglected for years. They are often painted with a builder’s grade white paint. The builder’s white is a dingy off white color compared to an Ultra Bright Flat White. It also doesn’t age as well and will tend to yellow or dull over the years. Here is an approximation of how a builder’s white might look next to an ultra bright white color:

AND, let’s say you really don’t want to mess with those texture ceilings, if you buy a thick nap roller and repaint the ceiling with an Ultra Bright White, you will still notice a big difference. (One word of caution when painting textured ceilings. Paint over one spot and move on. If you go back over that spot while it is still wet it can pull the texture down.)

Tutorial for painting ceilings like a pro

Materials:

  • Valspar Flat Ultra Bright White Latex Paint
    (this is the brightest white we have found. Valspar is sold only at Lowe’s)
  • Latex Primer
  • Paint tray
  • Paint roller
  • Roller extension rod
  • Edger
  • ScotchBlue Painters tape
  • Tarp
  • Fine grit sanding block
  • Car Wash sized sponge and bucket
  • medium size flat artist’s brush

Begin by covering every bare inch of floor with plastic or thick canvas tarps. And cover any furniture left in the room (although you should try to remove everything from a room when you paint, it is just easier that way, trust me.)

Remove blades on a ceiling fan, simply unscrew the arms from the motor:

Then cover your light fixture with a plastic bag and painter’s tape.

Next, apply painter’s tape around the top of the walls of your room. If you are going to re-paint your walls after the ceilings, you can skip this step.

Start with the primer (a must for newly scraped ceilings, but not necessary for previously painted smooth ceilings).

1. Use your edger around the perimeter of your room. I like this handy-dandy edger that has a hole for the extension pole (especially helpful if you have high ceilings or neck issues.)

2. After the perimeter of the ceiling is done, edge around any light fixtures or vents.

3. Reach for your roller. I like to work in 5′ sections. Start by rolling out a letter “W”. Then roll back and forth, up and down and in random directions until you have that section of ceiling covered.

This will insure that you don’t have racing stripes on your ceiling.

4. Continue working next to the section you just finished. Try to work into the previous section while the paint is still wet. Otherwise, let that section dry before trying to roll into tacky half-dry paint.

5. Allow the primer to dry, then lightly sand your ceiling to remove any specks that got into the paint. Wipe the ceiling with a damp sponge.

Now repeat steps 1-5 using the ultra bright white paint.

Let your ceiling dry and then add a second coat of the ultra bright white (yes, definitely use two coats to leave your ceiling looking like it was painted by a pro! Don’t skimp.)

When you are done, remove the painter’s tape and pull out a small flat artists brush.

Pour some wall color paint into a small cup (I like to keep spare paint for each room in small jelly containers or jars. That way if one of my boys (adult and child alike) should happen to mar a wall, I can fix it in a jiffy.) Use the flat brush to create a smooth line at the top of your wall. Then finish by touching up any ceiling spots that were missed.

Take a look at the difference in our office! The top picture shows the room right after the ceiling was scraped. During the day!

And this next picture was taken of the same windows (different angle) at night!

Wow, brighten my world! View more pictures of this room HERE.

Okay, so I really like the ultra bright smooth white ceilings, but I did come across this gorgeous ceiling over at Not Just a Housewife, that would also make you swoon over your room if you were to try it. Check out Stacy’s tutorial HERE.

P.s. If you are renting, please don’t despair. I will have some tips that don’t involve painting your home.

I leave you with a glimpse of hope for those of you snowed in this week:

Daffodils Popping Through the Ground
Daphne Buds Getting Ready to Sprout

I just took those pictures yesterday, February 2nd! I live in Raleigh, NC, so thankfully spring is on its way. (Don’t hate me.)


5-Piece Nonstick Coated Paint Tray Set

00500 - Premium Paint Edger 00500 – Premium Paint Edger[635870] UPC: 022384005006 10L x 7.63W x 9.5H 0.2 LB 0.42 Cubes


Faux Chippy Painted Metal Pail with Liner

I was strolling through our local Goodwill last week looking for goodies donated by people trying to claim a last-minute tax write-off. I came across a bucket with a $1 price on it and knew I could transform it into a beautiful aged painted pail.

DIY Aged Painted Metal Pail Tutorial

Aged Painted Pail Tutorial

Recently I found myself browsing our local thrift shop looking for a last-minute gift idea for a friend. I spotted a dated pail for only $1 and quickly grabbed it and ran to the register.

little red buffalo check painted pail

The pail had the original $9 price tag still on it, so I prayed the cashier wouldn’t scrutinize the major markdown to one dollar!

$1 markdown on pail with $9 original sticker

I knew exactly what I wanted to do with it. Miss Mustard Seed’s aged painted pails have been stored in my memory banks since I first saw them in August. (And that is saying a lot, considering I can’t remember what I ate for lunch today!) Marion used crackle medium, but I remember seeing a tutorial for crackle medium using regular Elmer’s glue mixed with a little water instead. Me being the frugal DIYer I am, I decided to give it a go. Are you curious to see if it worked? Me too.

How to Create a Faux Aged Paint Technique on Metal:

hand painted "A" monogrammed pail

Let’s gather a few supplies and get to work creating a beautiful bin for storage or a gift basket.

Materials:

(I’ve included affiliate links for your convenience. I earn a small percentage from a purchase using these links. There is no additional cost to you. You can read more about affiliate links here.)

Instructions:

adding elmer's glue to empty jar

I only used enough H20 to water down the glue so it would be easier to paint on.

mixing glue with water

I brushed it all over the outside of the pail (bottom too!) And let it dry.

painting watered down glue onto pail

Next I pulled out leftover flat white paint that we use on our ceilings and painted one coat on the pail. I had to work quick, because the paint got gooey quick and you don’t want to keep brushing over the paint when it starts to dry (trust me on this one.)

closer up painted chipping pail

After the white paint dried, I took out some acrylic paints and painted some stripes, flowers, and a monogram.

hand painted "A" monogrammed pail

To protect the paint from chipping off, I added a coating of matte mod podge. I have to admit, I’m still amazed a little Elmer’s glue and water worked to create a chippy crackle finish!

Isn’t it cute? Much better than the original.

Faux Chippy Painted Metal Pail with Liner
Purple print pants hanging on a hanger.
Can you believe it? That cute liner used to be a pair of second-hand pants.
pants leng hanging out of painted pail
The liner was super easy to make, tutorial HERE.
Spa-themed gift bucket on hand-painted chippy pail
This Aged Painted Pail can be filled with anything, but I chose a spa-theme for this gift basket. What would you put in this vintage painted pail?
Want more ideas for gift baskets? Here are 31 Last Minute Gift Basket Ideas!
31 last minute gift basket ideas social media images
BedWallView

I’m back from a wonderful weekend getaway with three of my fellow mom friends. We enjoyed laughter (with a few snorts), good conversations (with no interruptions), cake (without a care about calories) and a few glasses of wine (with no whine from children!) It was heaven. As promised, I finally have the tutorial for painting this dandelion wall graphic.

MePainting Read more