Build a Temporary Pergola with Trellises | Pretty Handy Girl

Build a Temporary Pergola with Trellises | Pretty Handy Girl

This tutorial to build a temporary pergola is perfect for a wedding, photo shoot, for some shade, or for your garden if you are okay with it not lasting forever.

My sister and I constructed it for our Thompson’s WaterSeal Bali Dream Deck to provide some romance and shade from the hot Bali sun.

Bali Dream Deck for Thompsons Water Seal | Pretty Handy Girl

Materials:

Build a Temporary Pergola with Trellises | Pretty Handy Girl

  • 2 Trellises (with double vertical construction)
  • 1 Trellis
  • 4 – 2 1/2″ wood screws
  • Drill bit
  • Drill
  • Clamps

Optional:

Instructions: 

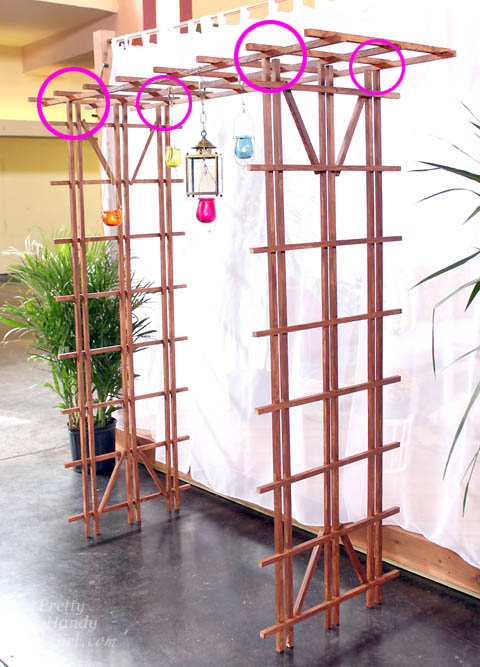
Dry fit your trellis pieces together to create the pergola shape. Make note of where the top trellis intersects with the two side pieces.

Build a Temporary Pergola with Trellises | Pretty Handy Girl

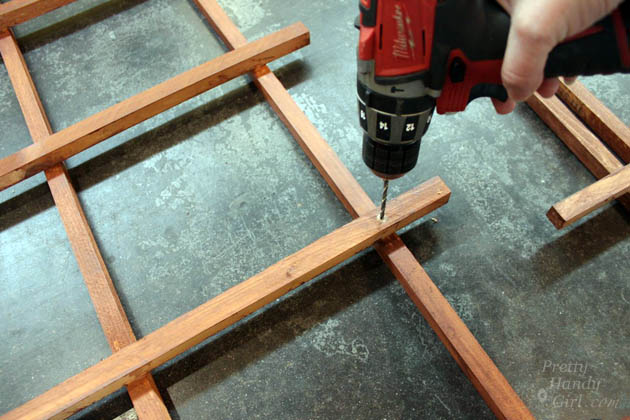
Pre-drill holes through the top trellis piece at the four intersecting points.

Build a Temporary Pergola with Trellises | Pretty Handy Girl

Pre-drill holes into the top outer pieces of the vertical side trellises (where they meet the top trellis.) Read more

Heart Shaped Topiary | Pretty Handy Girl

Heart Shaped Topiary | Pretty Handy Girl

The season of love is upon us. Have you embraced it? Or are you struggling to find something cute but not cutesy. Or something non-red or pink? Today I have a tutorial to show  you how easy it is to create a heart shaped topiary. Keep it for yourself or give it to the one you love. As the vine continues to grow, the heart will be embraced by the leaves and fill out.

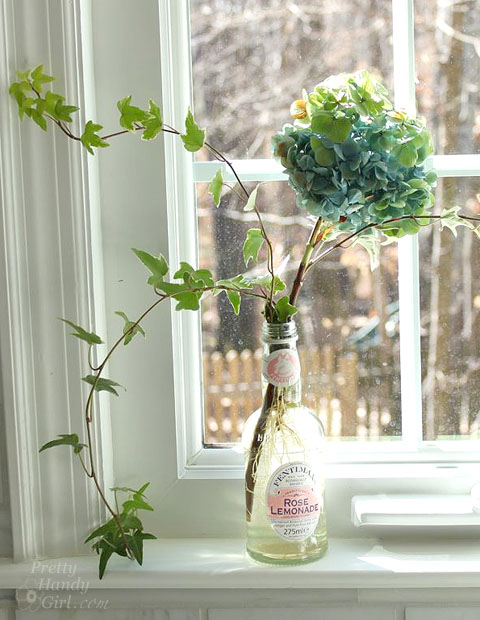
In late Autumn, we had a final blue bloom on our hydrangea bush. I clipped it and brought it inside before the impending cold snap arrived. To keep the hydrangea company, I put a few snips of variegated ivy into the vase too.

Heart Shaped Topiary | Pretty Handy Girl

Over the winter, the ivy grew a healthy root system. Ivy is an easy plant to root. Simply put some clippings in water and keep it watered. After the ivy has rooted, you can create a beautiful topiary plant for a kitchen window sill.

Heart Shaped Topiary | Pretty Handy Girl

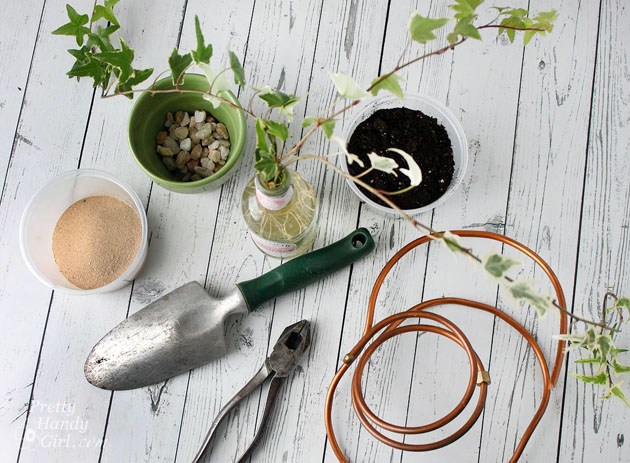
Begin by collecting your materials.

Materials:

Heart Shaped Topiary | Pretty Handy Girl

  • Ivy with roots
  • Copper water line or thick wire
  • Wire cutters
  • Pot
  • Rocks
  • Sand
  • Potting Soil
  • Trowel
  • Water

Optional: string, floral wire or a twisty tie

Instructions:  Read more

WORX JawSaw Review | PrettyHandyGirl

WORX JawSaw Review | PrettyHandyGirlWORX JawSaw Review | PrettyHandyGirl

A few months ago WORX sent me their WORX Lithium Cordless Chainsaw with Extension Pole for a product review. Our property is very wooded and we have so many trees that I’ve lost count. I do know that they need pruning and maintaining on a regular basis (at least every six months.) I knew our yard was a good test environment that would put the JawSaw through a rigorous test on our hardwoods and ornamental trees.

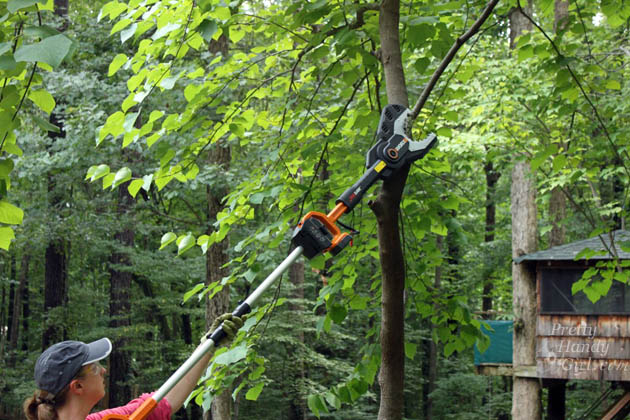
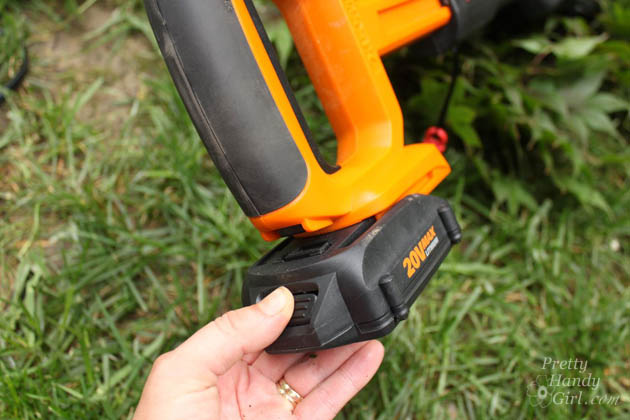
Recently one of our smaller trees died and needed to be removed. I charged up the JawSaw battery and snapped it in place after it was fully charged.
WORX JawSaw Review | PrettyHandyGirl

As is always the case, as I got closer, that little tree didn’t look so small. I honestly doubted I’d be able to use the JawSaw for this task. But, I was pleasantly surprised when the jaws fit around the trunk.

To work the JawSaw, you have to push the button with your thumb and pull the trigger at the same time. To start the saw moving, you push the handle in towards the shaft.
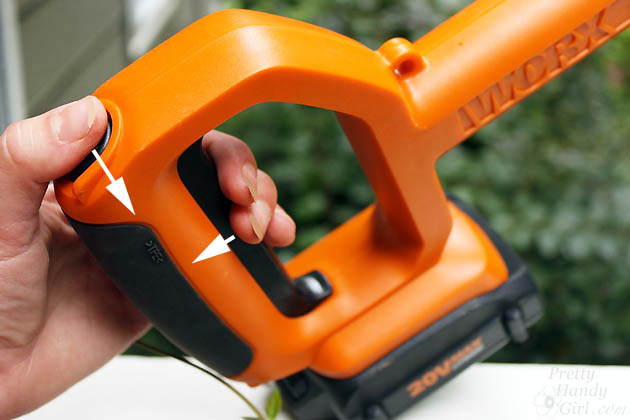
WORX JawSaw Review | PrettyHandyGirl

The blade easily cut through the tree trunk. And within about fifteen minutes I was able to cut the tree down and cut it into manageable pieces.
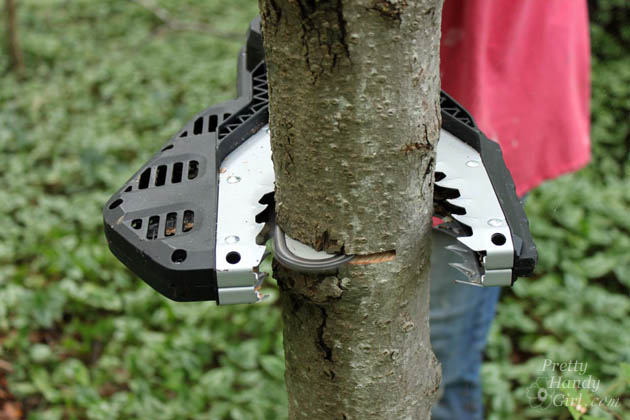
WORX JawSaw Review | PrettyHandyGirl

Next I added the pole attachment to trim branches up to 12 feet high. The pole slides into the slot near the black handle. The handle snaps into the handle clamp on the pole. The JawSaw handle needs to be pressed into the shaft and the red bar is inserted into the bottom to lock it in place.  The power pack slides into the battery slot on the JawSaw. The battery pack is then inserted below the handle on the extension pole.
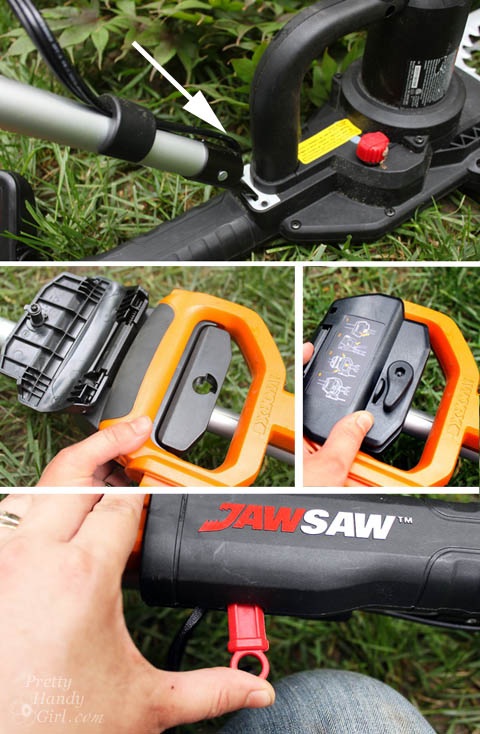
WORX JawSaw Review | PrettyHandyGirl

The pole extension has a 12 foot reach, but you will need to position one hand on the black shaft to operate the JawSaw.
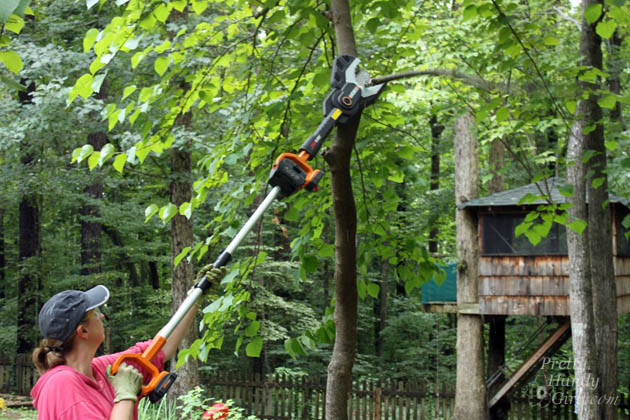
WORX JawSaw Review | PrettyHandyGirl

After positioning the JawSaw “jaws” around the branch…
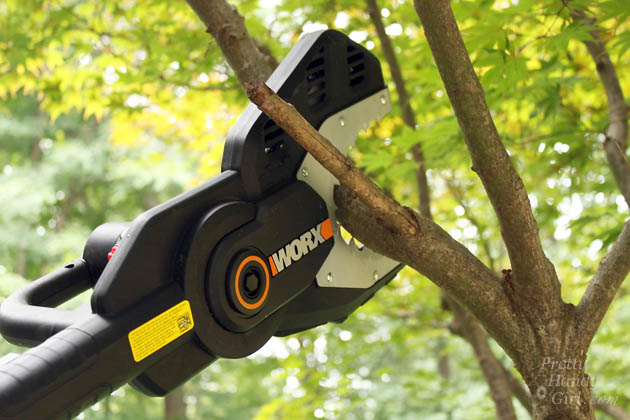
WORX JawSaw Review | PrettyHandyGirl

…pull back on the black shaft to set the blade in motion.
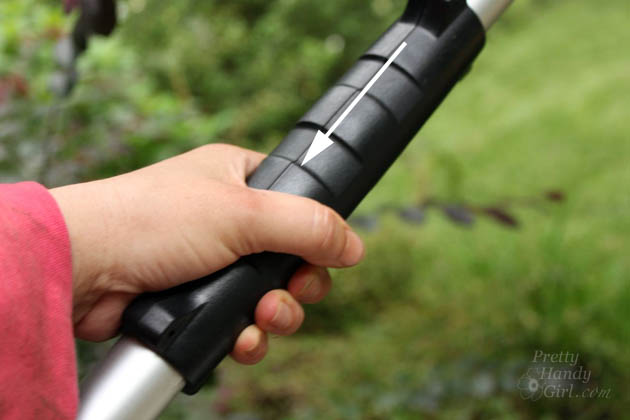
WORX JawSaw Review | PrettyHandyGirl

The JawSaw does all the work for you while you remain safely on the ground. I also like the JawSaw because it gives the user a safe distance from the blade. With a regular chainsaw kickback is always a concern.

Logs and branches can be cut directly on the ground because the “jaws” blade guard holds the blade just above the ground. You can’t do that safely with a regular chainsaw.
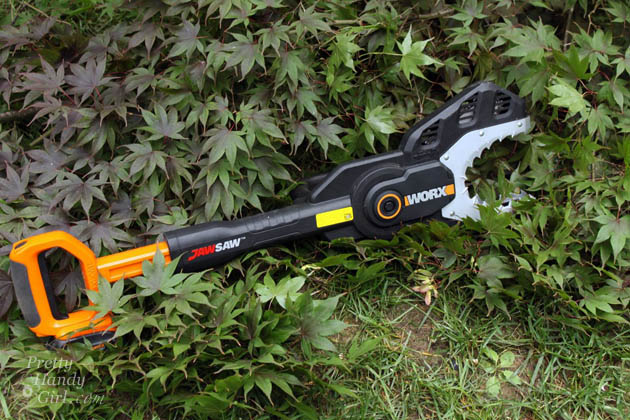
WORX JawSaw Review | PrettyHandyGirl

The only negatives about the JawSaw is that you will need to have a battery charged ahead of time (but I much prefer the cordless vs. a corded yard tool.) And you are limited to a 4 inch cutting diameter.

Using the JawSaw on the extension pole is a bit awkward, but I don’t have the strongest arm strength. However, once the jaws are around the branch you don’t have to support the saw the entire time.

WORX JawSaw Review | PrettyHandyGirl

Overall, this is one yard tool that I’m happy to have in our tool shed. It is invaluable for safely removing limbs and cutting up small trees. I highly recommend the WORX Lithium Cordless Chainsaw with Extension Pole for tree trimming and small tree removal over a chainsaw.

PHGFancySign


Disclosure: This is a product review for the WORX JawSaw Cordless Chainsaw. I was provided with the tool at not cost to me. However, I was not swayed to write a positive review or write anything at all. This is NOT a sponsored post. As always I am very particular about the brands and products I choose to showcase on this blog.  
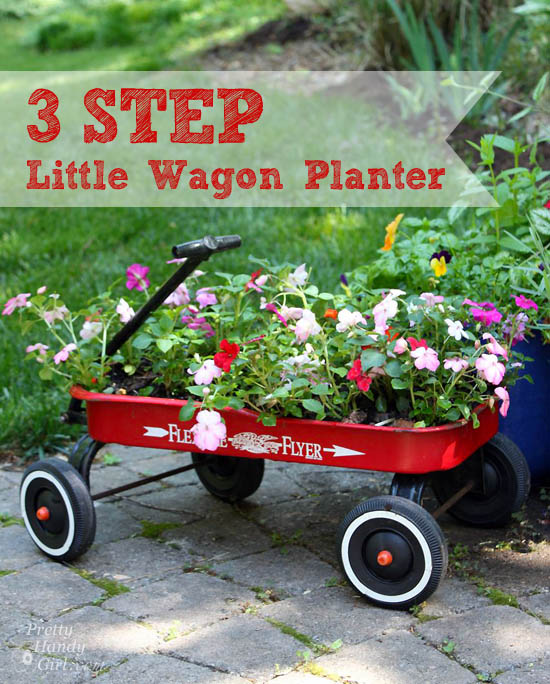
3 Step Wagon Planter Tutorial | Pretty Handy Girl

3 Step Wagon Planter Tutorial | Pretty Handy Girl

Container gardening is easy and great for instant color gratification. But, it’s especially fun to find “unconventional” objects to use as a planter. You may have noticed my little red wagon planter in the Landscaping 101 post. My 3 Step Little Red Wagon Planter is sure to bring color to your landscaping while also providing some fun and whimsy. Plus, it’s easily rolled to a new spot if you want to change your view. But, the best part is, you can make this planter in 3 steps!

Materials:

  • Drill
  • Large drill bit
  • Little wagon or other container
  • Rocks
  • Soil
  • Plants
  • Hand trowel

Instructions: Read more

watergarden

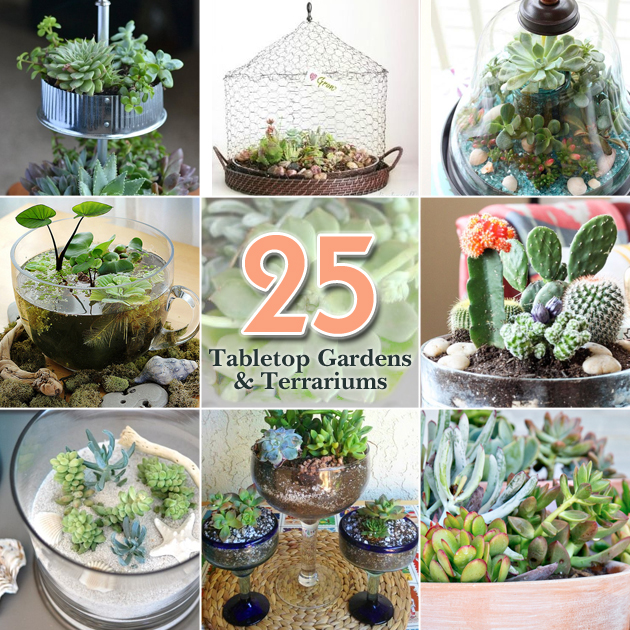
25_tabletop_garden_terrarium_ideas

As the weather changes and the flowers start to wane outside, it’s a great time to focus on bringing natural beauty indoors. I’ve gathered some beautiful and unique ideas for creating your own tabletop gardens. For those with less time to water, may I suggest trying one of the succulent or cacti gardens. Regardless of the plants you use, I love the wide variety of creative containers used for these mini-environments.

Tabletop Gardens and Terrariums Ideas

Let’s get started with some beautiful tutorials for planting a tabletop garden:

1. Easy Terrarium in Minutes! Read more